You can upload files to your server using the server side file upload tools available in Wappler.
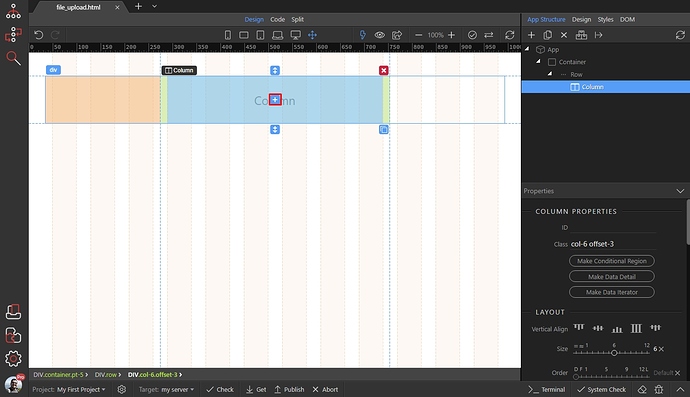
Let’s start with the upload form. We created a simple Bootstrap 4 Layout and it contains a column, so click the add inside button:
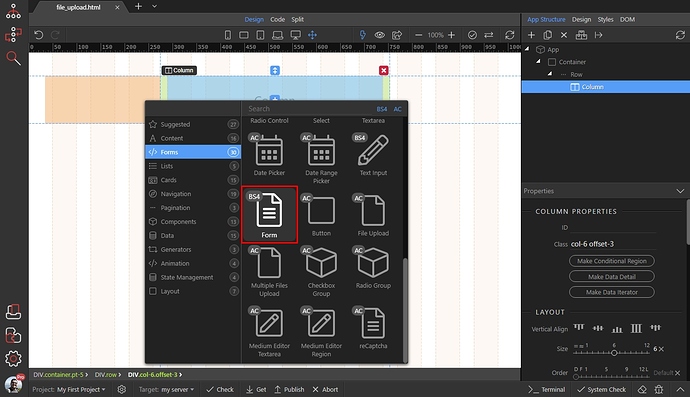
Open the forms category and add form:
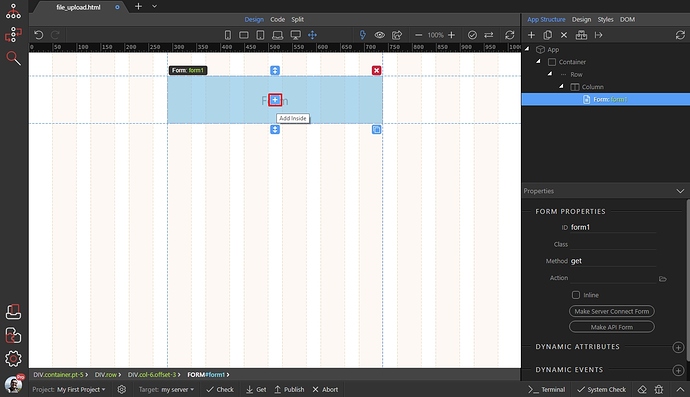
Then select the form and click the add inside button:
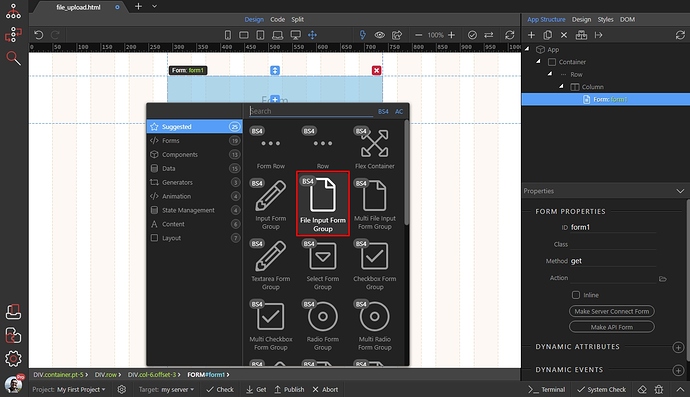
Select File Input Form Group:
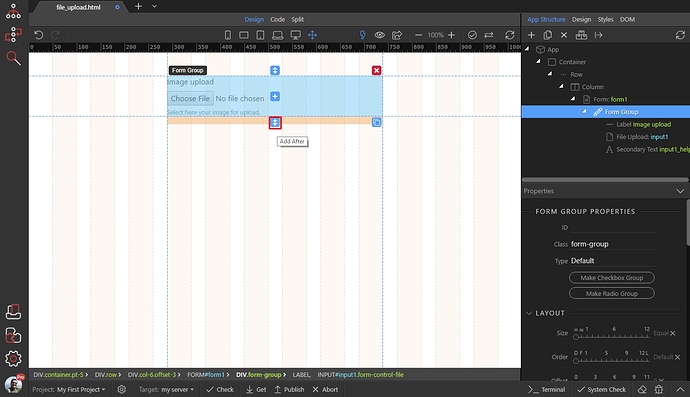
This adds a file field in the form. In order to submit the form, we need a submit button, so click the add after button:
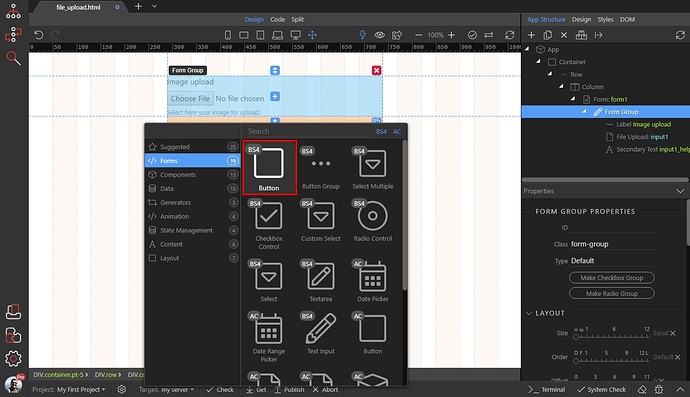
Open the forms category and add a button:
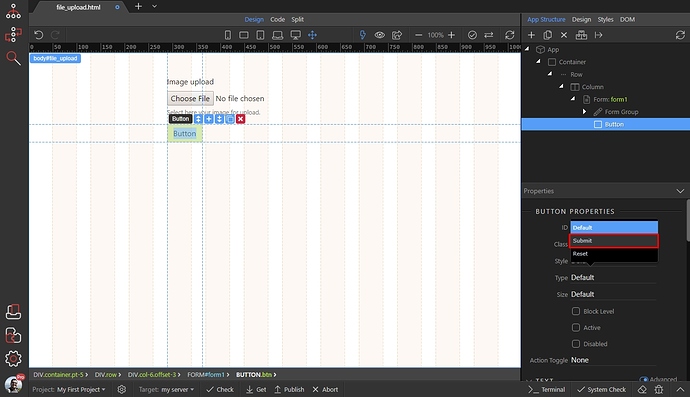
Set it’s type to SUBMIT in the properties panel:
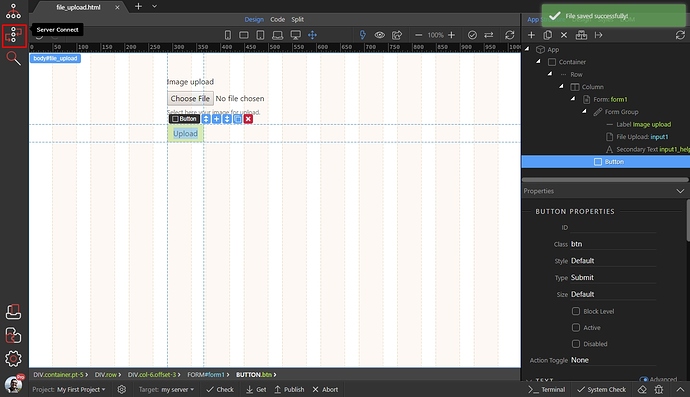
Save your page and then open the Server Connect panel:
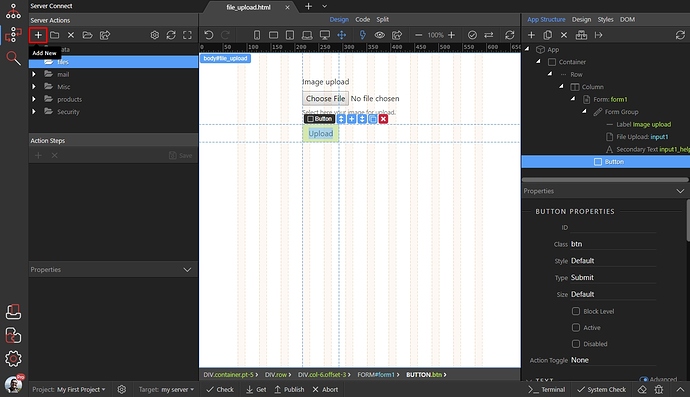
Create new server action:
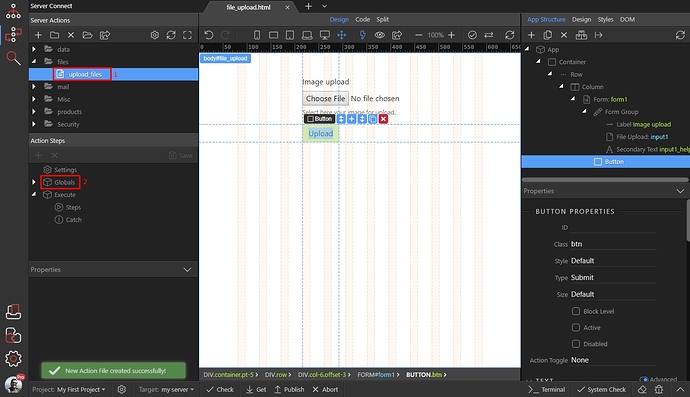
Add a name for your server action (1), select it and click Globals (2):
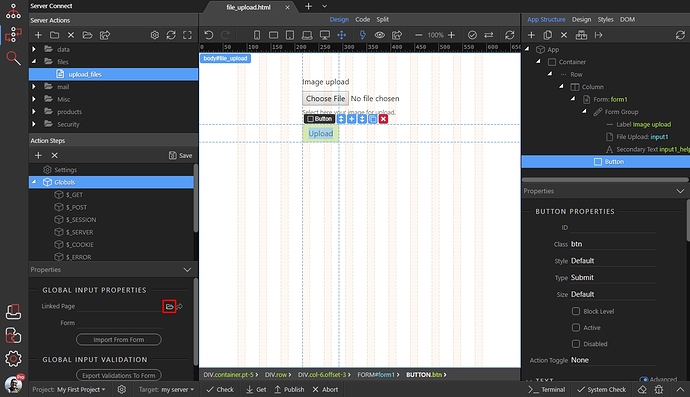
Under Global Input Properties select a linked page. Click the browse icon, and browse to your page where you created the upload form:
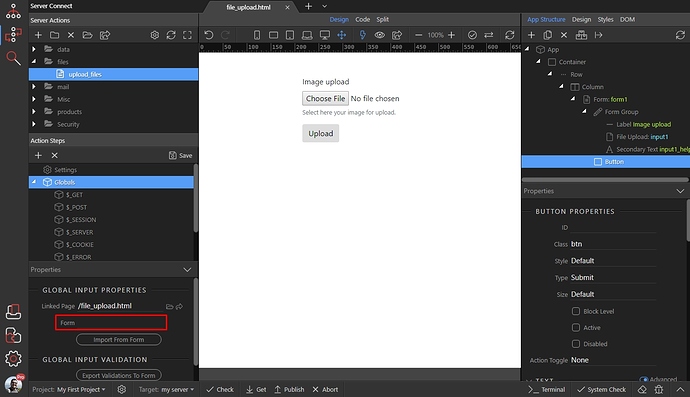
Then, from the Form menu select your Form name (it will be listed when you click the menu):
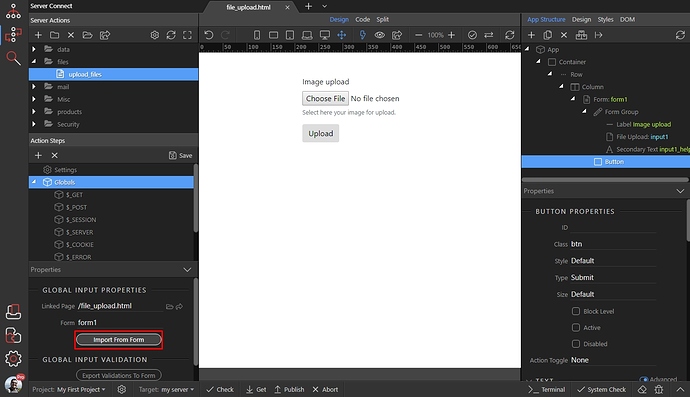
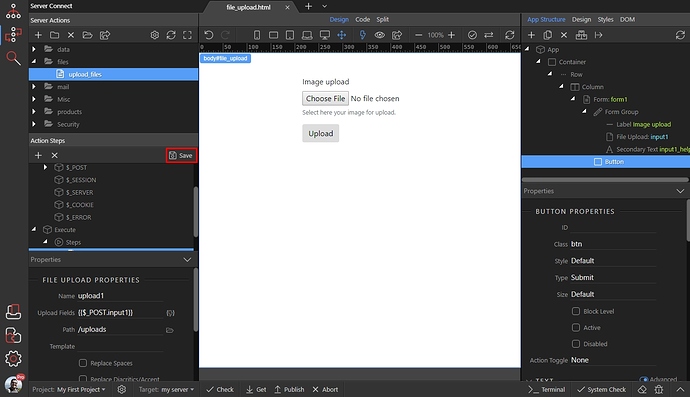
Click the import from form button. This will import your form fields to your server action, under $_POST:
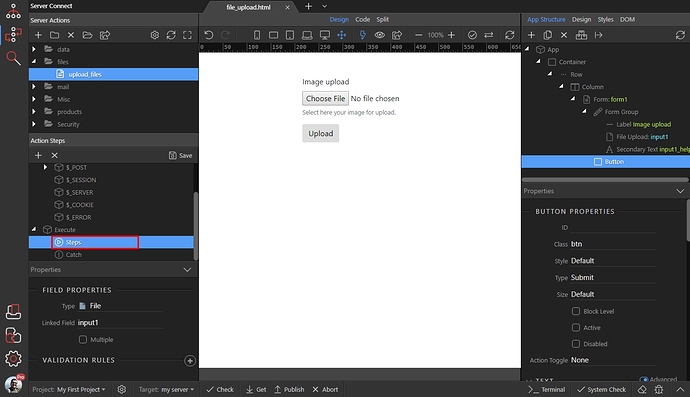
After you import the form fields, right click Steps:
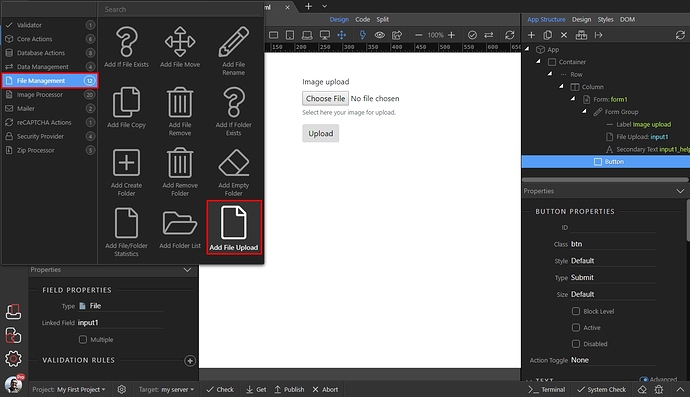
Open File Management category and Add File Upload:
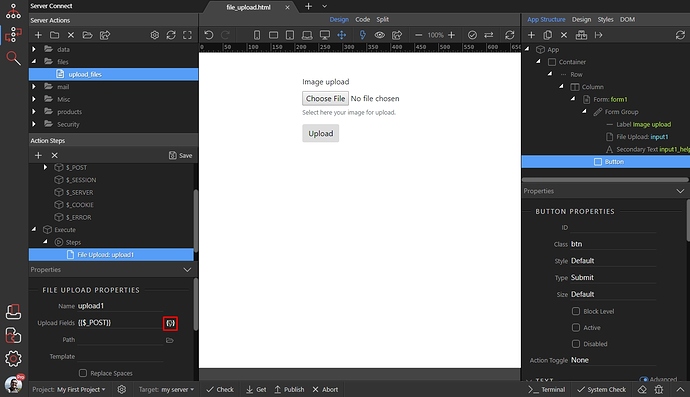
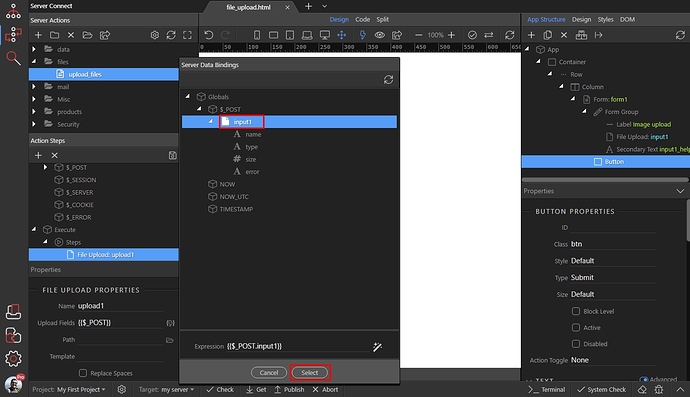
Select the expression for the Upload Field, by clicking the dynamic data picker icon:
Under the Globals > POST > select your file input:
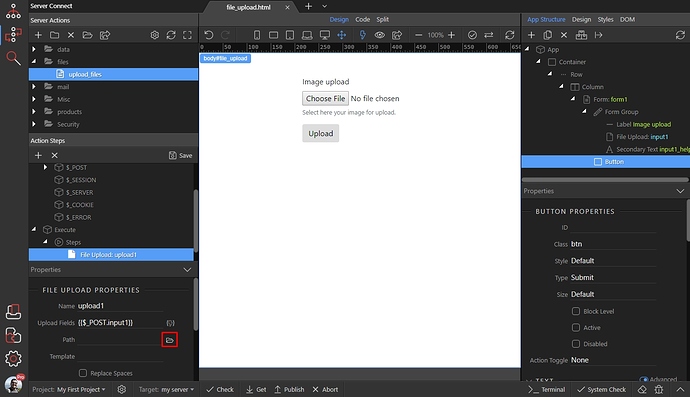
Then select an upload folder, browse to it by clicking the folder icon:
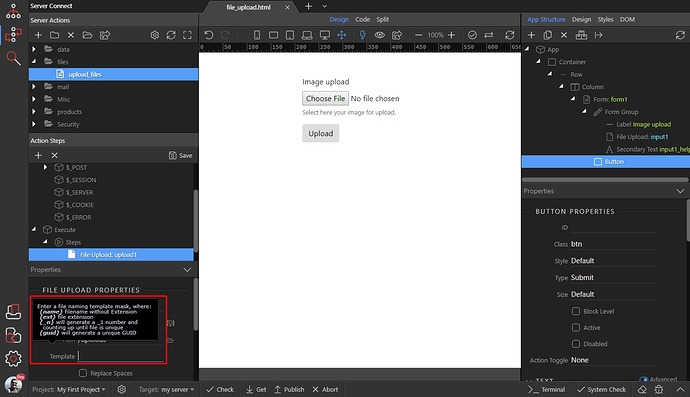
You can use a rename Template for the files you upload. You can find the available masks in the tooltip which appears. Leaving the field empty will use the original file name:
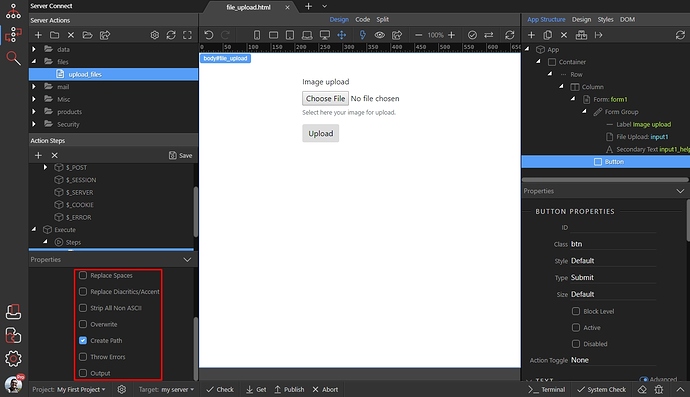
Then, you can setup the rest of the options. The only option we enable the Create Path - that means that the upload folder will be created, if it is not existing on the server.
Also, by default if a file with the same name is already uploaded, the new one will be made unique by using a suffix, like name_1.jpg so if you want to overwrite existing files, you should enable the overwrite option:
Save your server action:
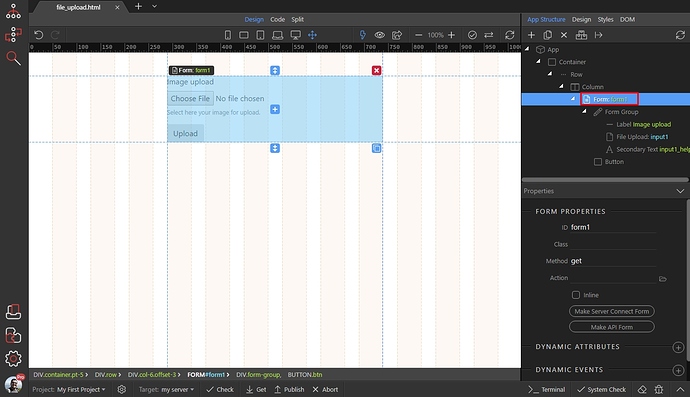
Close Server Connect, and select your form:
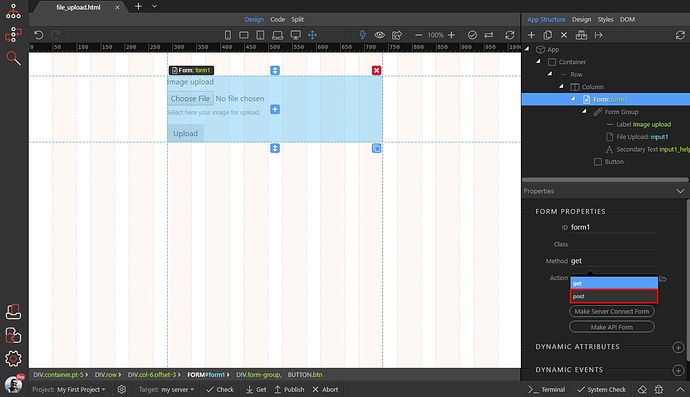
Set its method to POST in the properties panel:
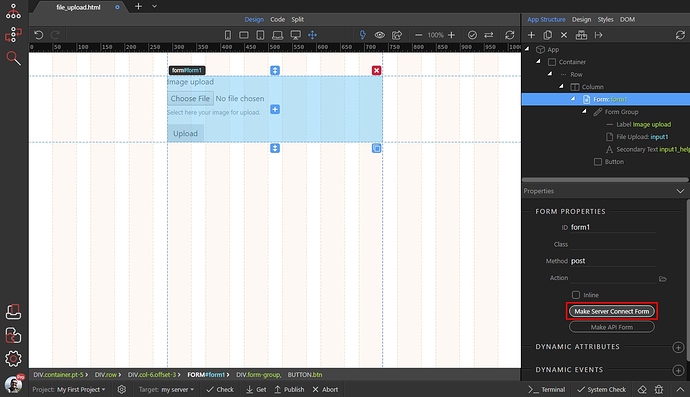
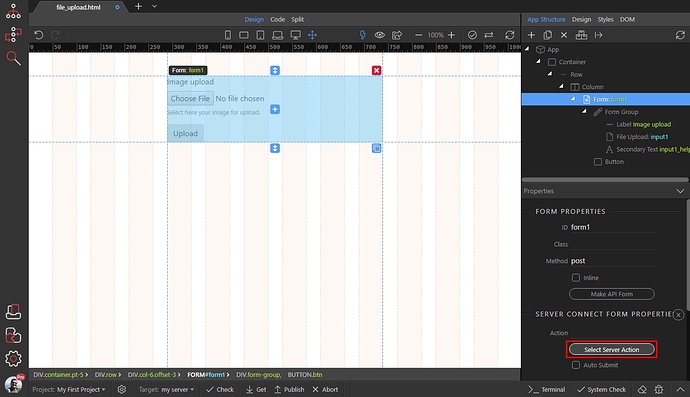
And make it a server connect form:
Then click the select server action button:
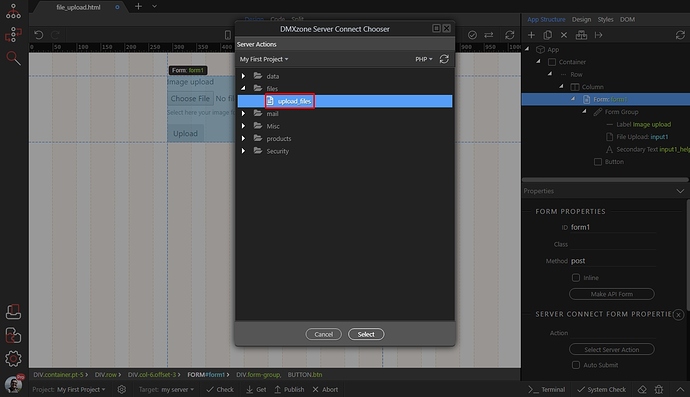
Select your upload server action and click the select button:
OPTIONAL - Show a notification and reset form after the upload:
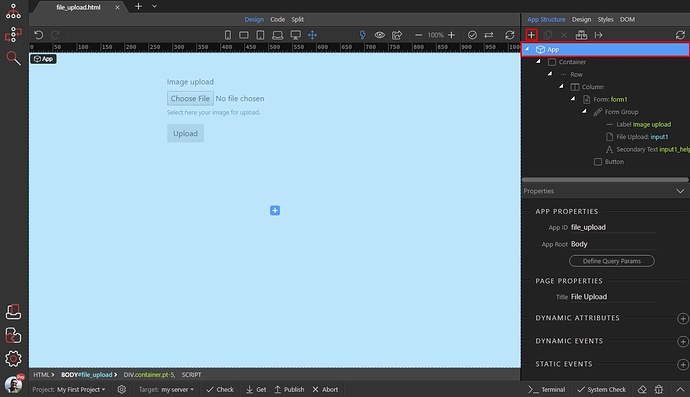
You can add a notification and reset the form fields, after the file is uploaded. Select App in the app structure tree, and click the add new component button:
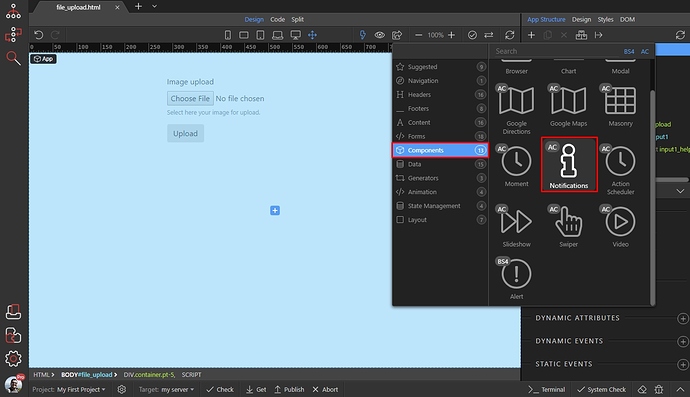
Open the components category and select Notifications component:
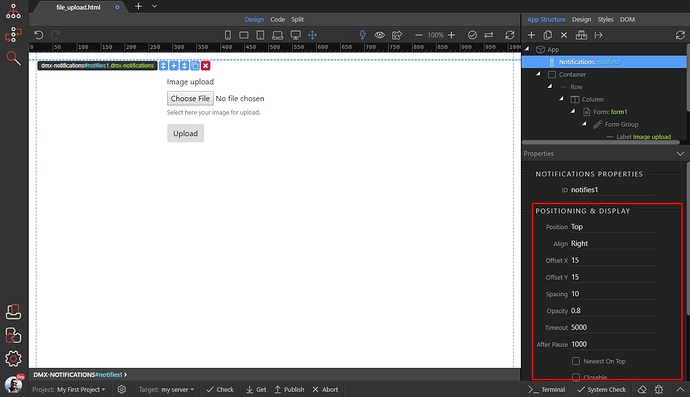
Setup the notification options, like position, align, offset etc. We will use the default options:
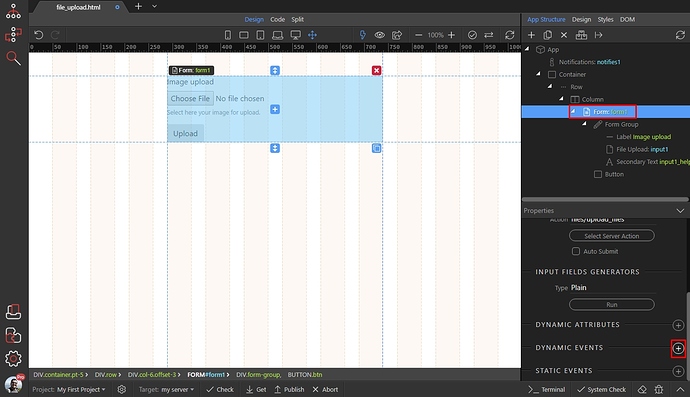
Select your form, and add new dynamic event:
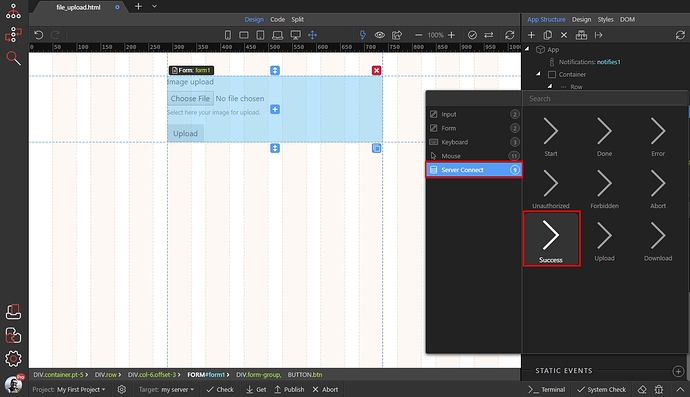
Select Server Connect and add on Success event:
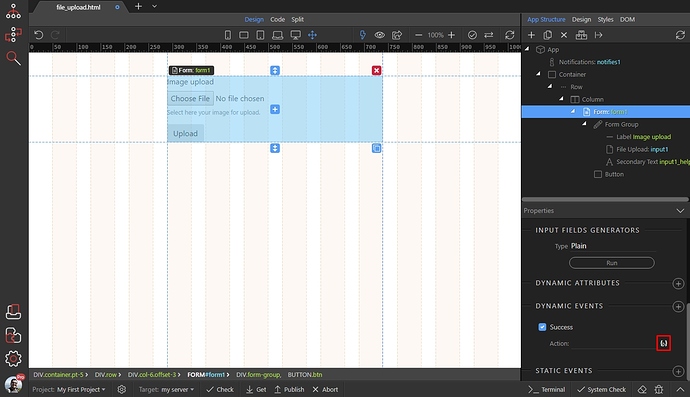
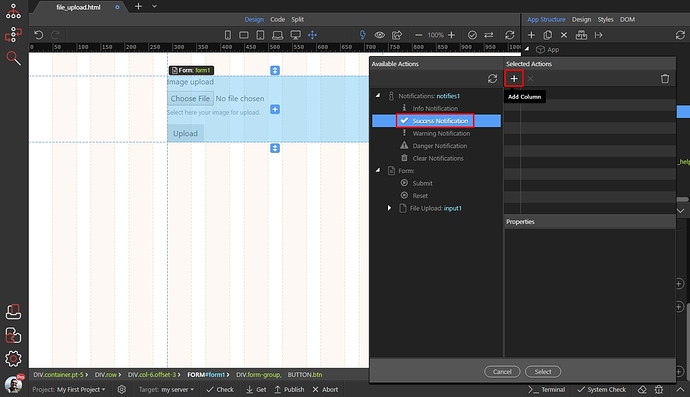
Click the dynamic action picker, to select what to happen on success:
We select the Success Notification and click the add button:
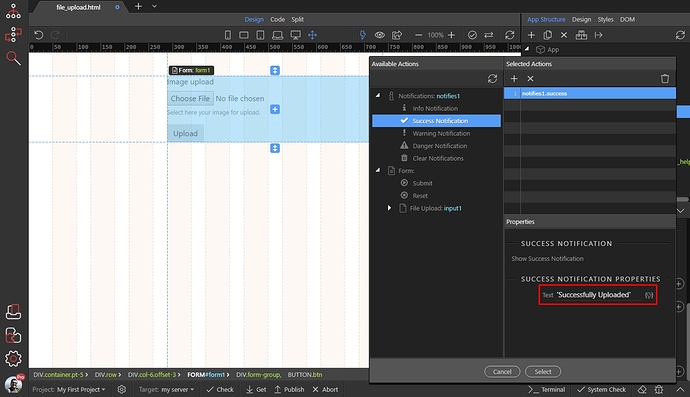
Enter the text, that you want to show inside the notification. Make sure to wrap it in single quotes 'my text':
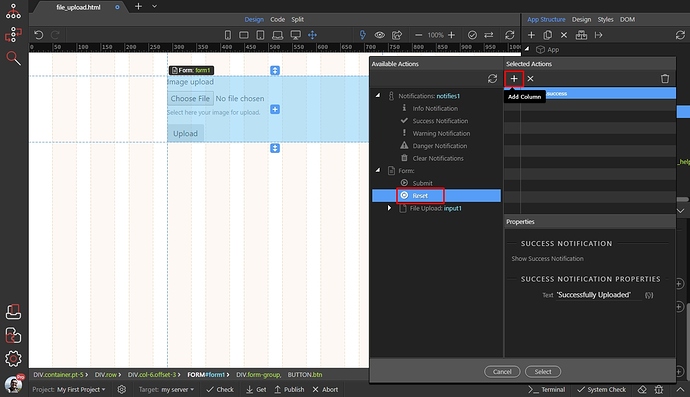
Then select the Form Reset action add it also:
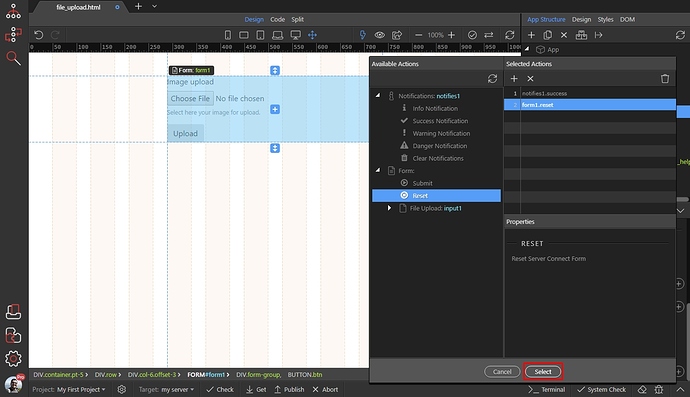
Click Select and you are done:
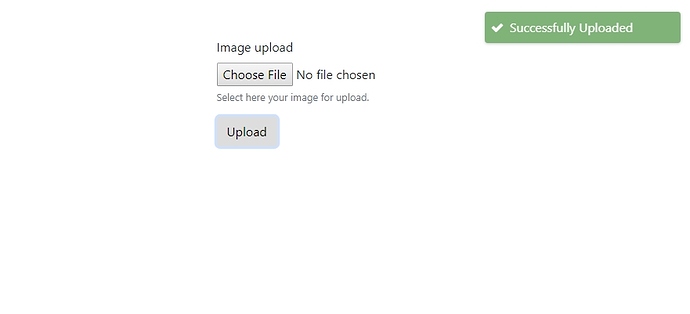
When the selected file is successfully uploaded, the form fields will be reset and the notification will appear:
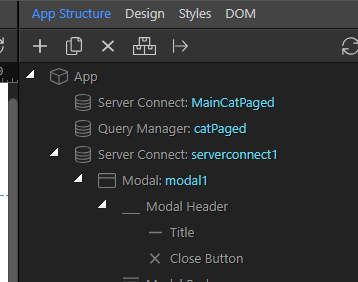 …how many can I have in the app structure
 , when I deleted the 2nd insert on the modal, the error goes away.