Part 1: Firebase project setup
→ Part 2: Mobile project and receiving notifications
Part 3: Server project and sending notifications
Extra: Navigation and parameters
Continuing the previous topic: Tutorial: Mobile push notifications with Capacitor and FCM 1/3
Mobile project:
15.- Create a new project, in my case I’ll use Framework7 (but you can use other) and select capacitor for runtime.
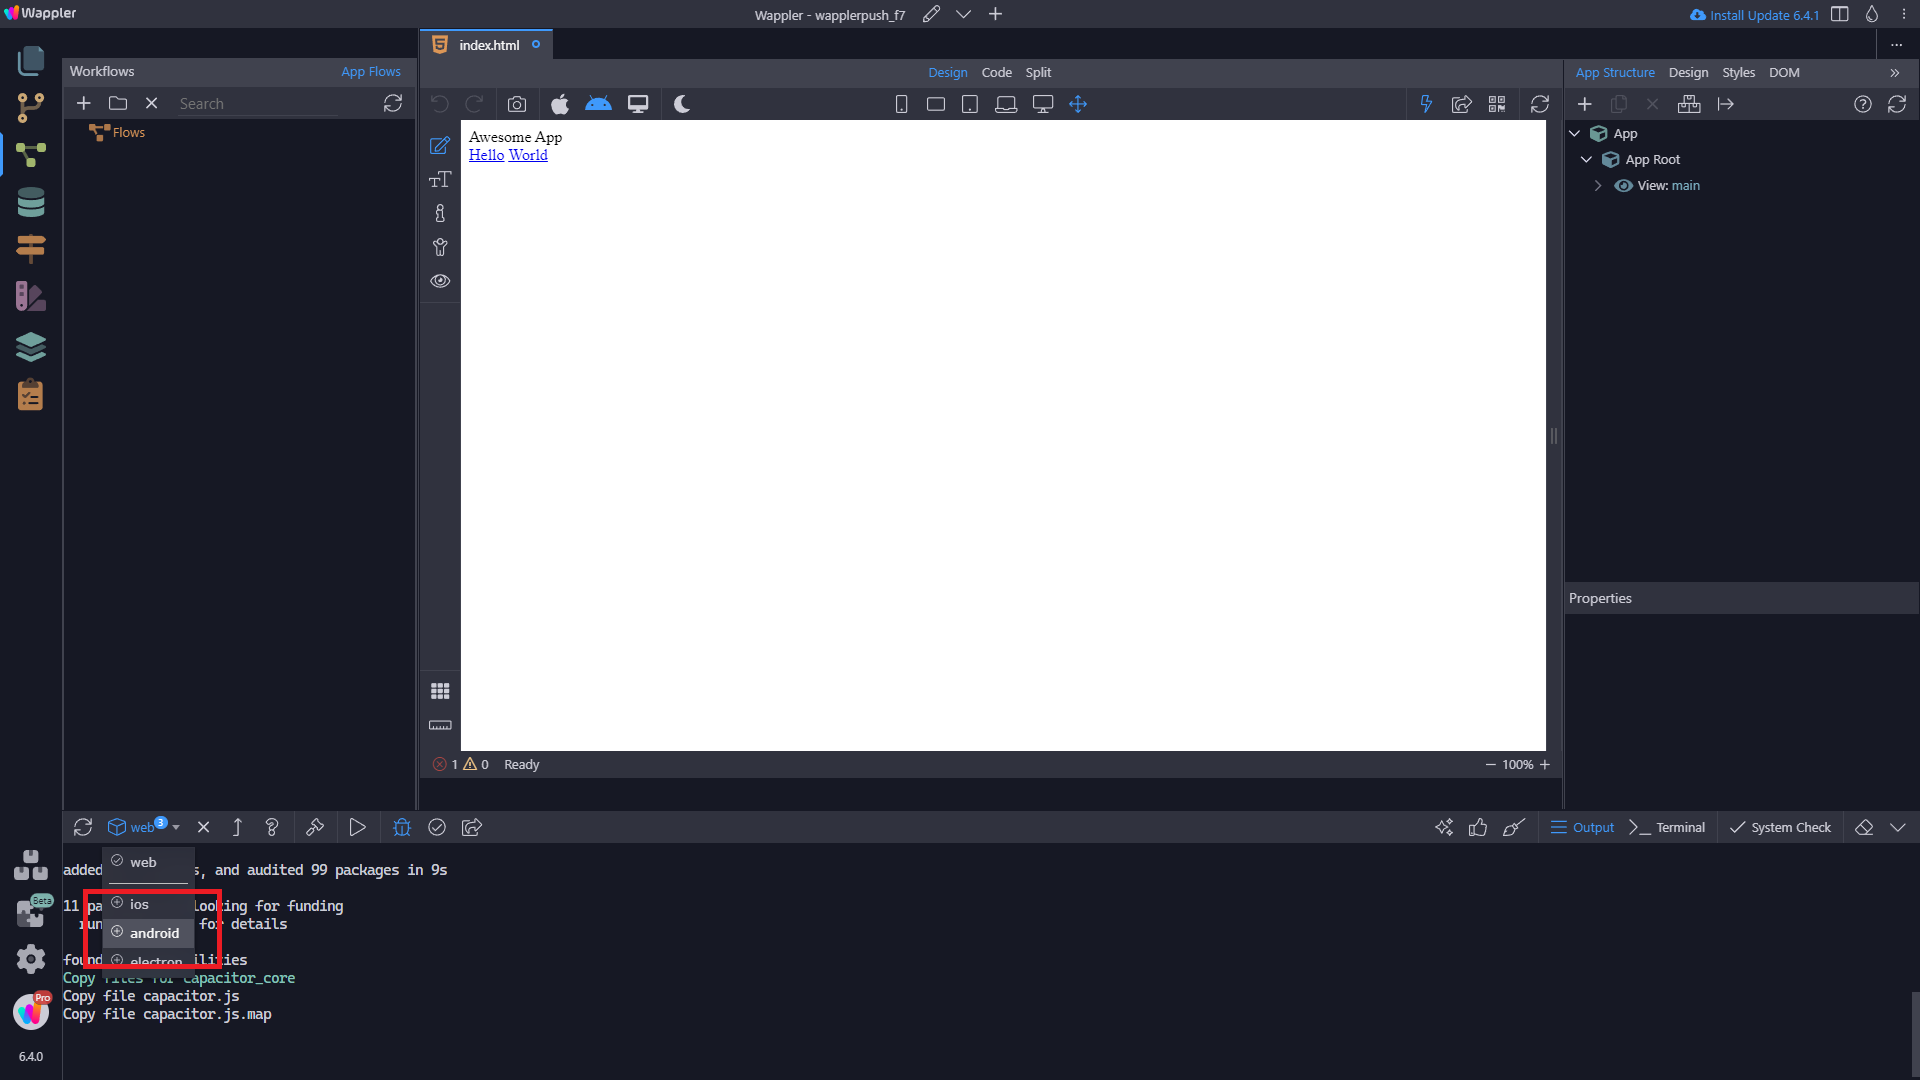
16.- Add a new platform, select Android and upgrade all the packages
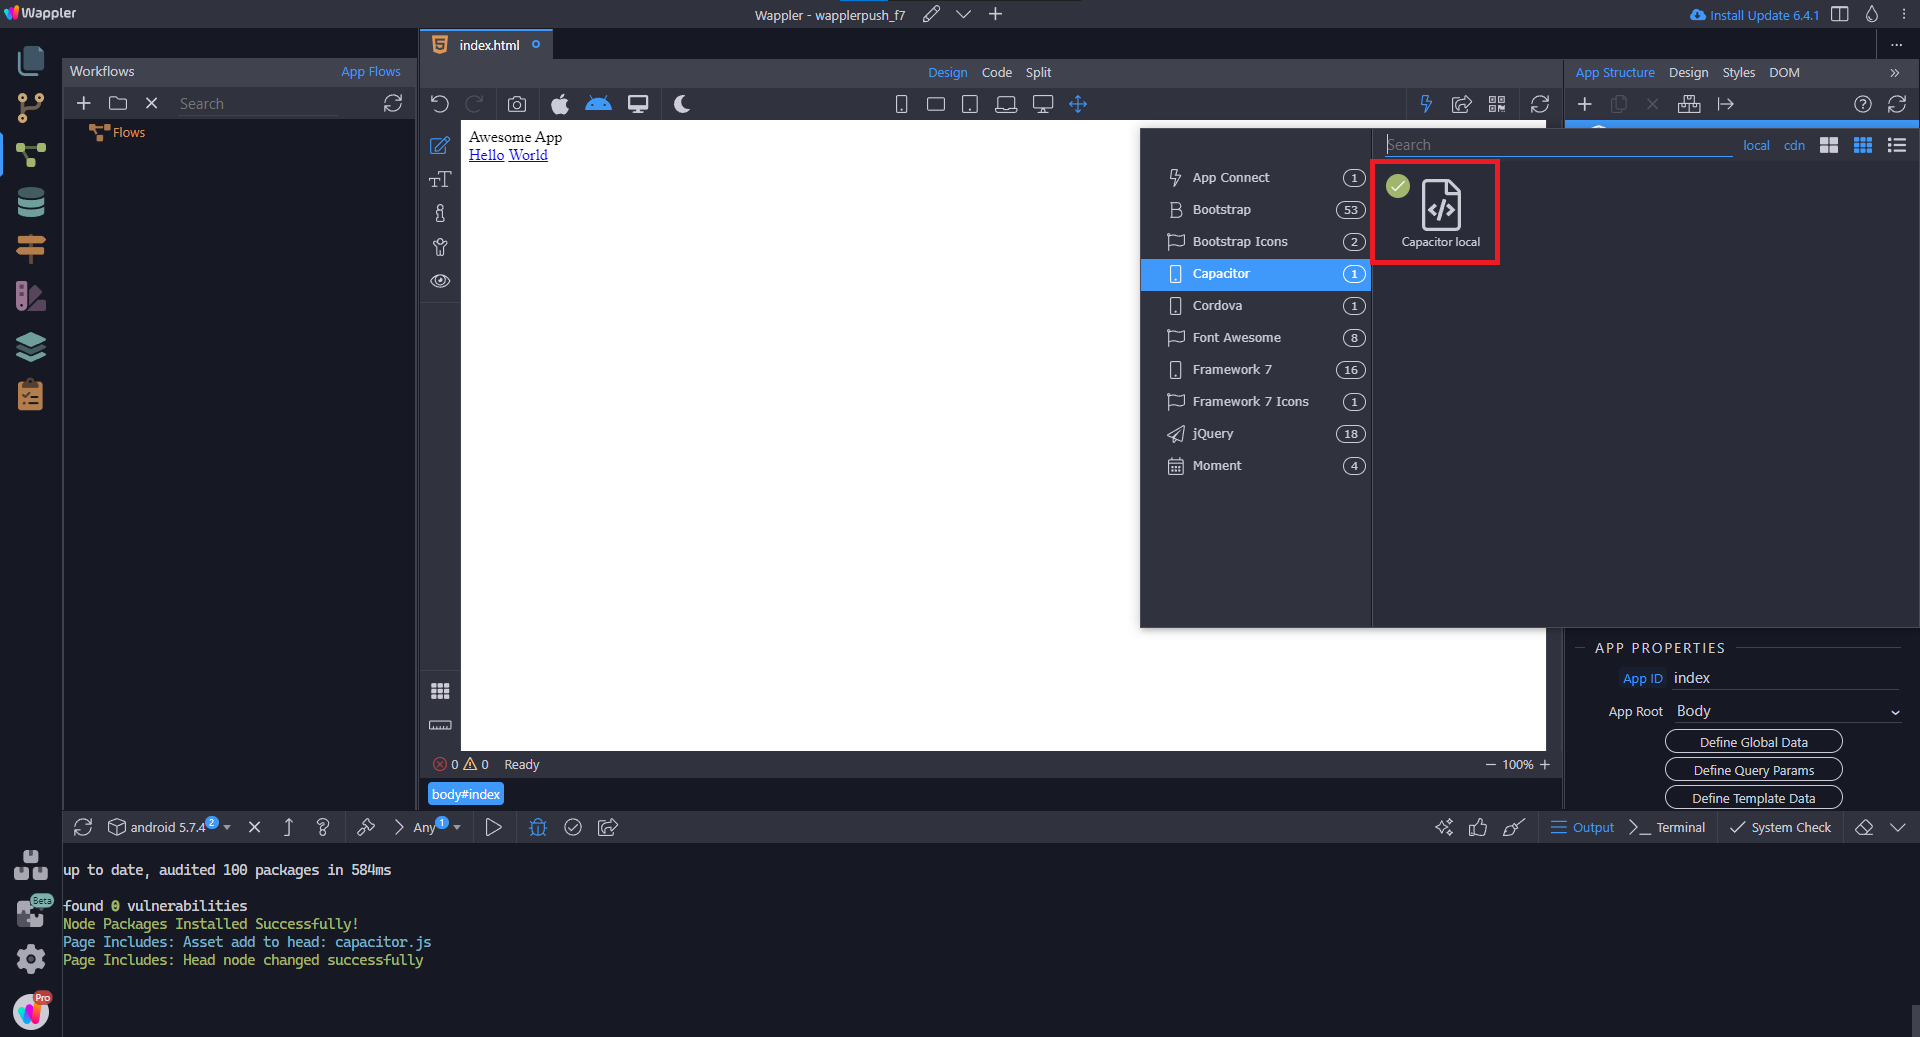
17.- Make sure capacitor is added
18.- In my case I’ll use Framework7 v8
19.- Save the index.html file, close it, and load it again.
We’re going to use Push notifications capacitor Plugin API:
20.- Go to the terminal and type: npm install @capacitor/push-notifications and hit enter. After that, npx cap sync and enter again.

21.- In order to use the plugin, I need to copy the plugin.js file, from the node folder to the public project folder
- Go to your project node folder, in my case:
C:\xampp\htdocs\wapplerpush_f7\node_modules - Navigate to the plugin folder, in my case:
C:\xampp\htdocs\wapplerpush_f7\node_modules\@capacitor\push-notifications\dist - And copy the
plugin.jsfile - Paste it anywhere you want. I will paste it on
js/plugins/pushand here we got it
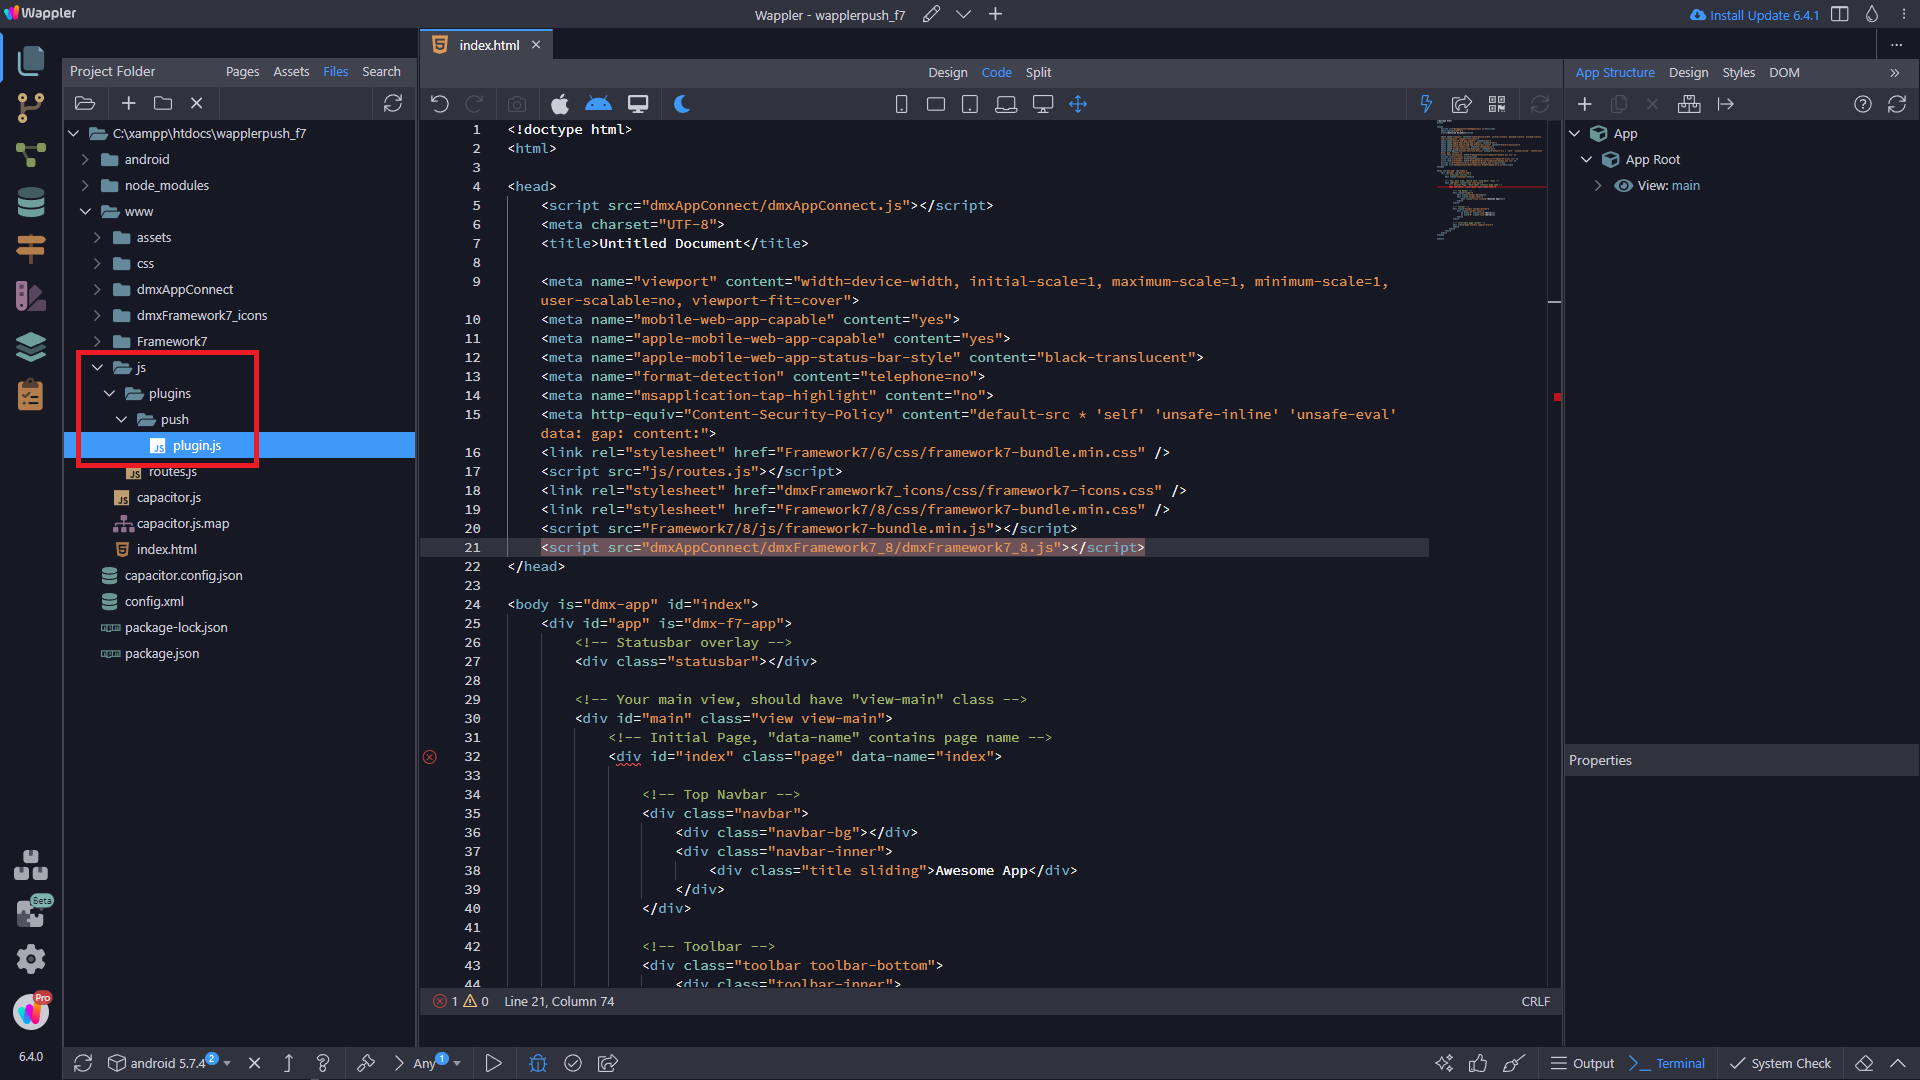
22.- Now we need to call it on the head of index.html like <script src="js/plugins/push/plugin.js"></script>
The capacitor code, where the magic start:
23.- I’ll try to not confuse anybody, but we are going to paste this code at the end of the body tag
	<script>

  async function requestPushNotificationPermission() {
    const result = await Capacitor.Plugins.PushNotifications.requestPermissions();
    if (result.receive === 'granted') {
      subscribeToPushNotifications();
    } else {
      console.log('Notifications denied by user.');
    }
  }

  async function subscribeToPushNotifications() {
    Capacitor.Plugins.PushNotifications.addListener('registration', function(token) {

      console.log('Token for push notifications:', token.value);
      dmx.app.set('FCMToken', token.value);
    });


    Capacitor.Plugins.PushNotifications.addListener('pushNotificationReceived', function(notification) {
      console.log('Push notification received:', notification);
    });

    Capacitor.Plugins.PushNotifications.addListener('pushNotificationActionPerformed', function(notification) {
      console.log('Open push notification:', notification);
	  //Here you can handle the "open" action
    });
  }

  async function initializeApp() {
    if (Capacitor.platform !== 'web') {
      await Capacitor.Plugins.PushNotifications.register();
      requestPushNotificationPermission();
    } else {
      console.warn('This is a website and push notification is not allowed.');
    }
  }

  initializeApp();

	</script>
24.- As you can see, there is dmx.app.set('FCMToken', token.value); around there.
This means that we can get the FCM token of the device.
We can do whatever we want with that token, like store it on a DB.
For testing, we are going to show that on the page, so we can use it to send notification.
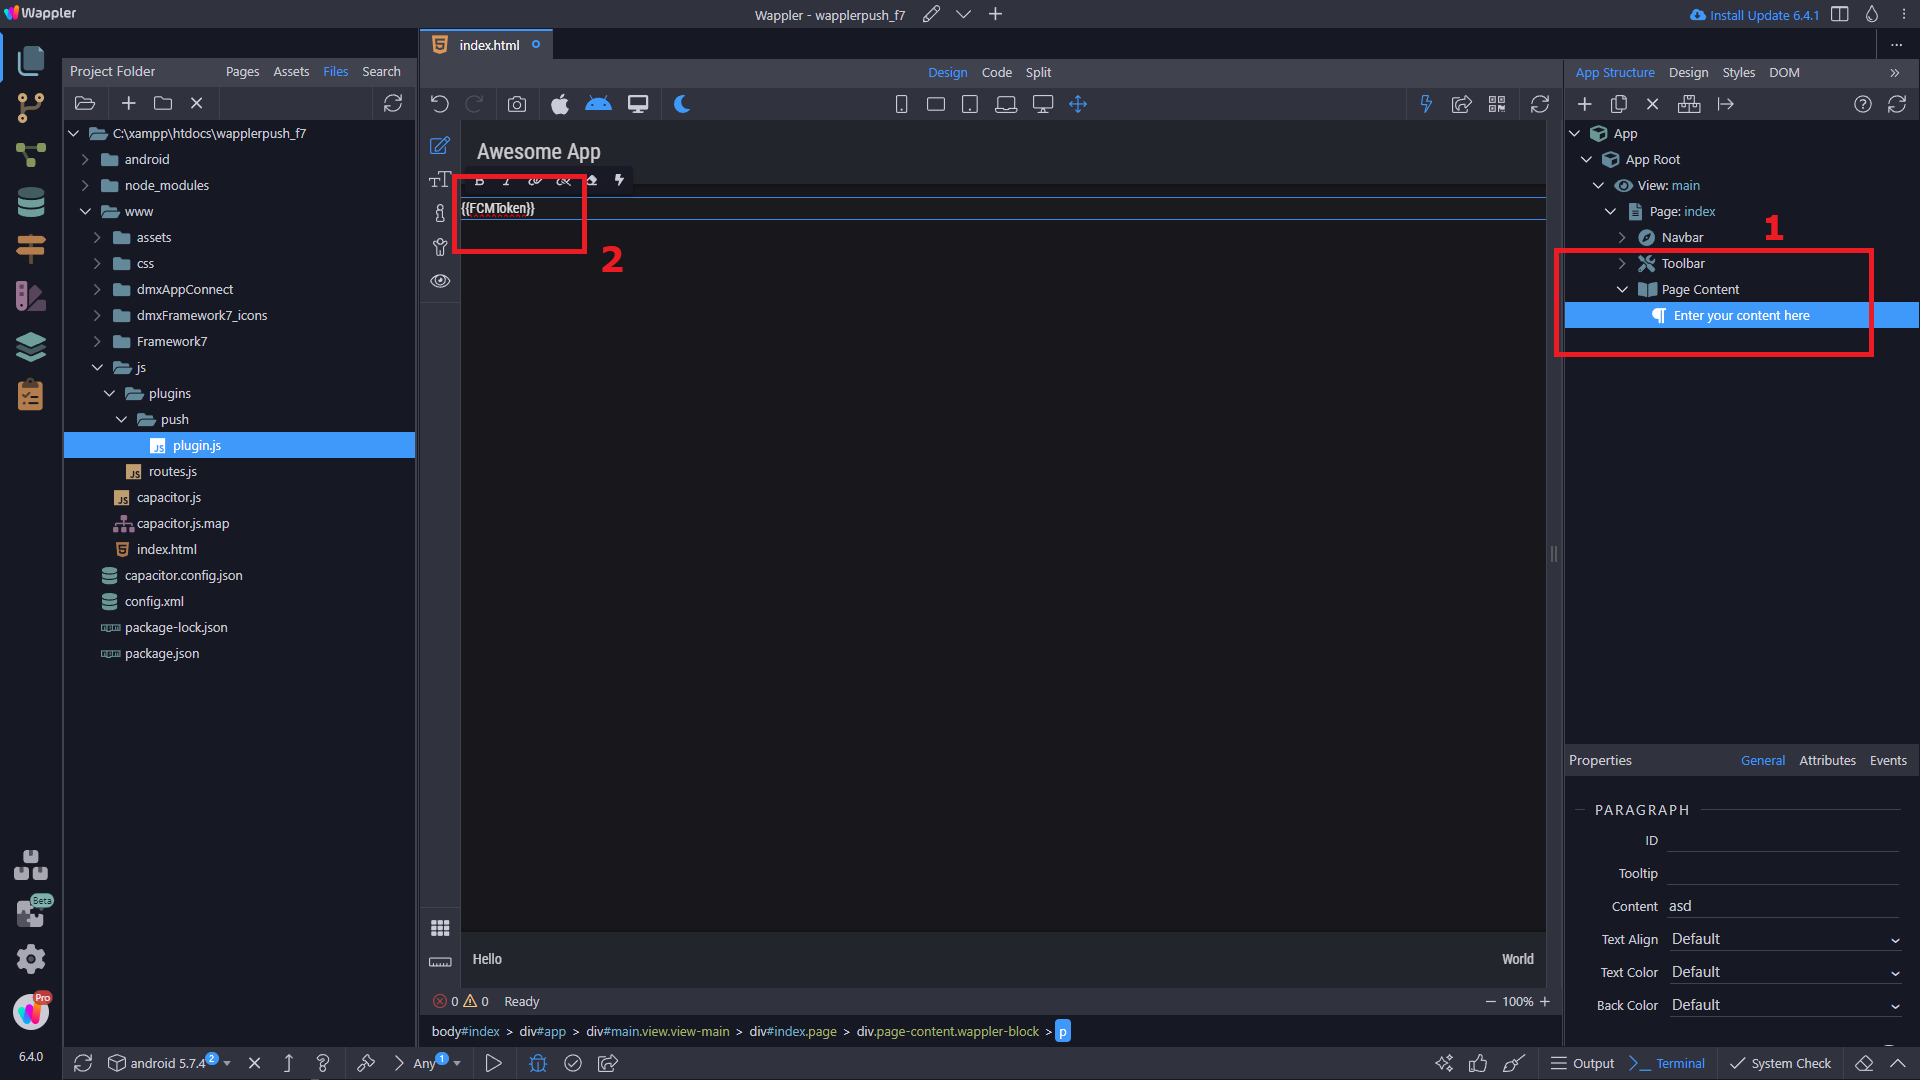
25.- We create a paragraph (1) and we enter {{FCMToken}} (2)
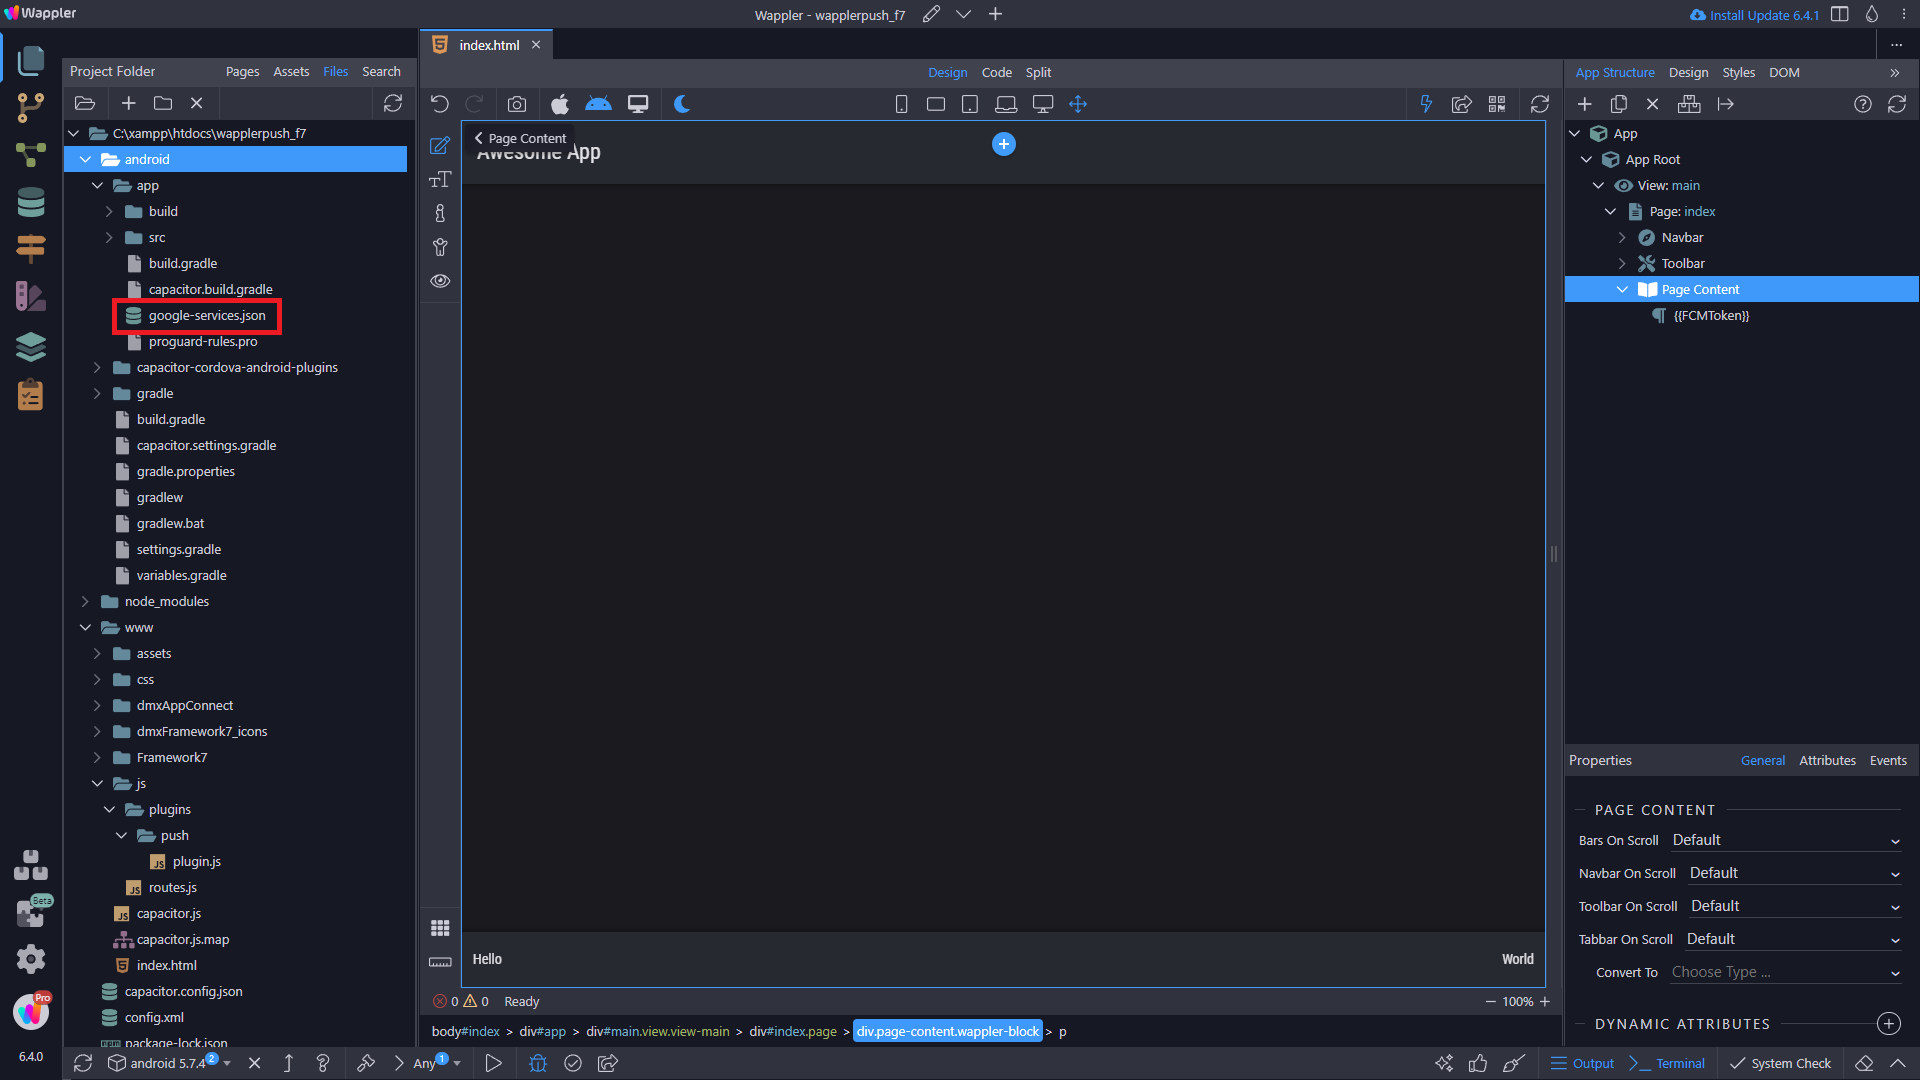
26.- Now, you remember the google-service.json from the Point Nº 5?
We need to paste it under the /android/app folder:
27.- Open capacitor.config.json and replace the appId to the one you choose on your firebase project. In my case: com.wapplerpush.app
Then add the plugin. Then all becomes:
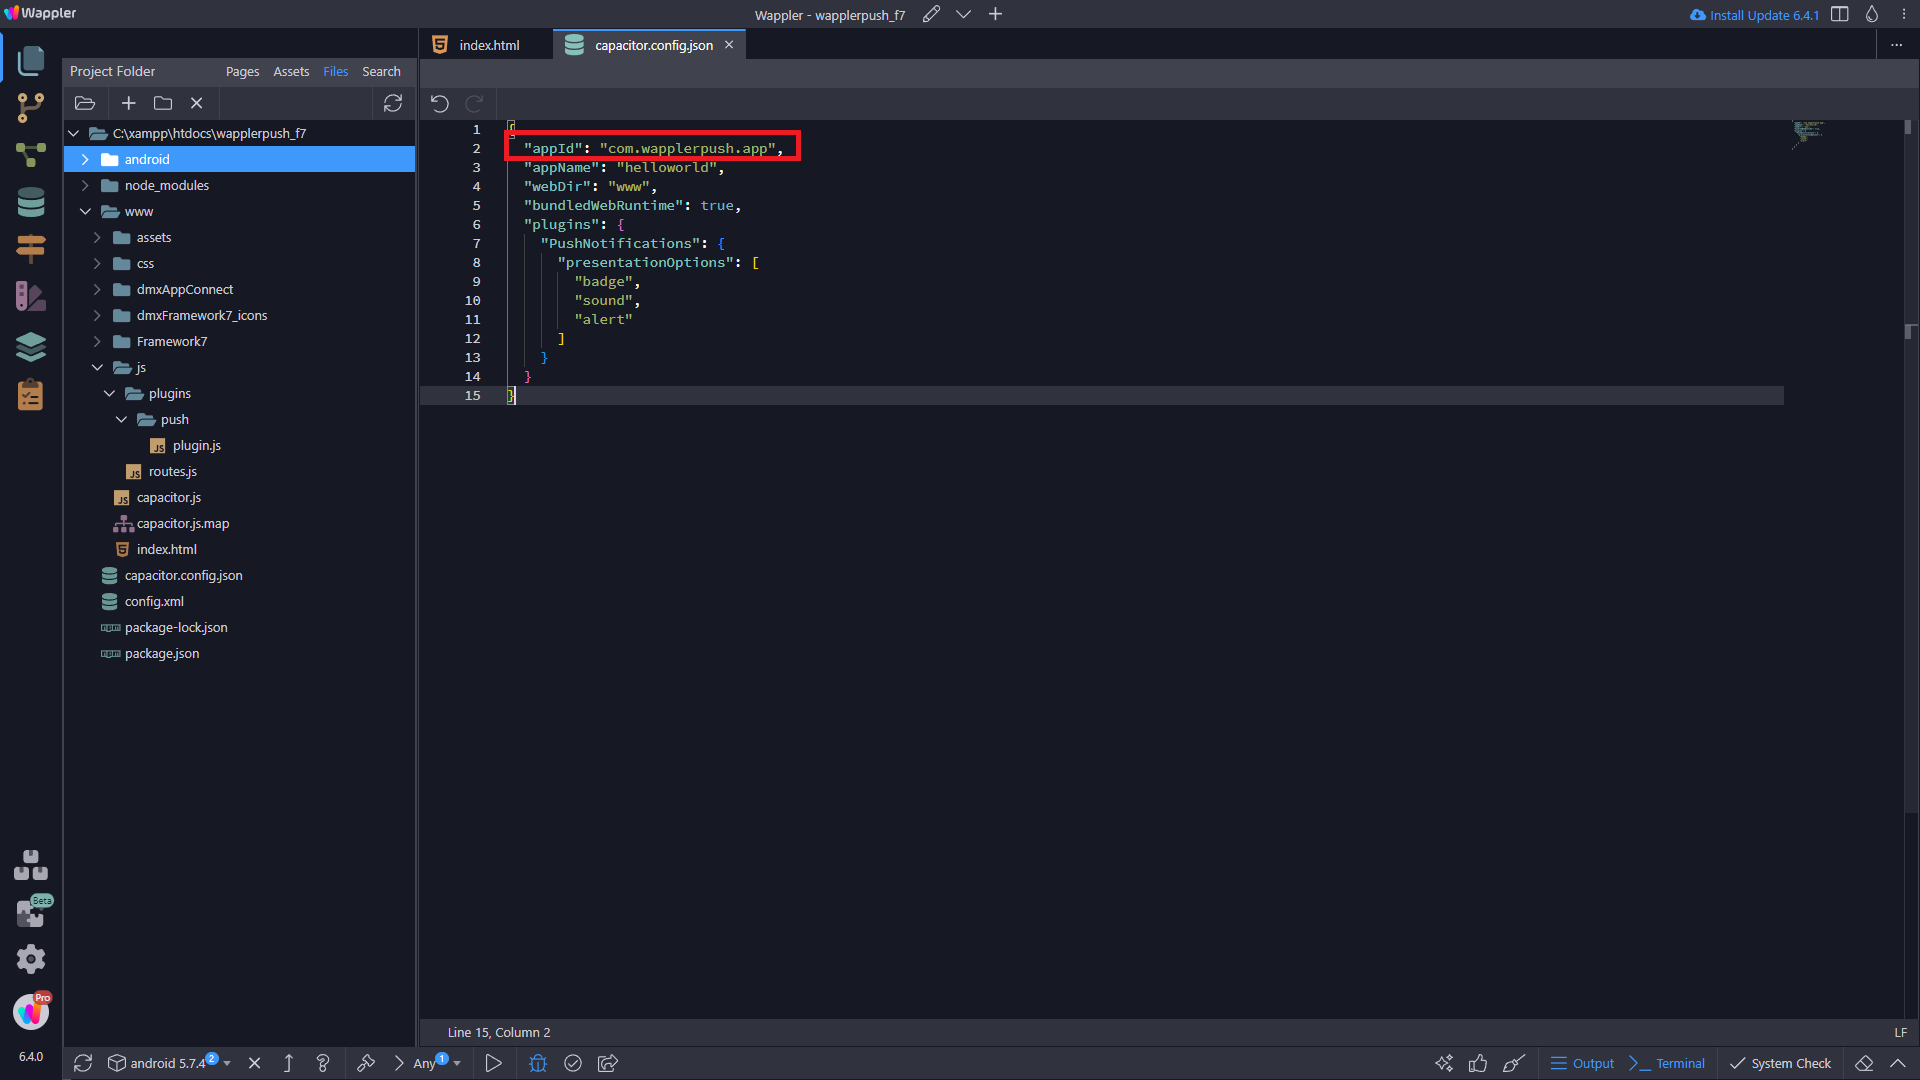
{
  "appId": "com.wapplerpush.app",
  "appName": "helloworld",
  "webDir": "www",
  "bundledWebRuntime": true,
  "plugins": {
    "PushNotifications": {
      "presentationOptions": [
        "badge",
        "sound",
        "alert"
      ]}}}
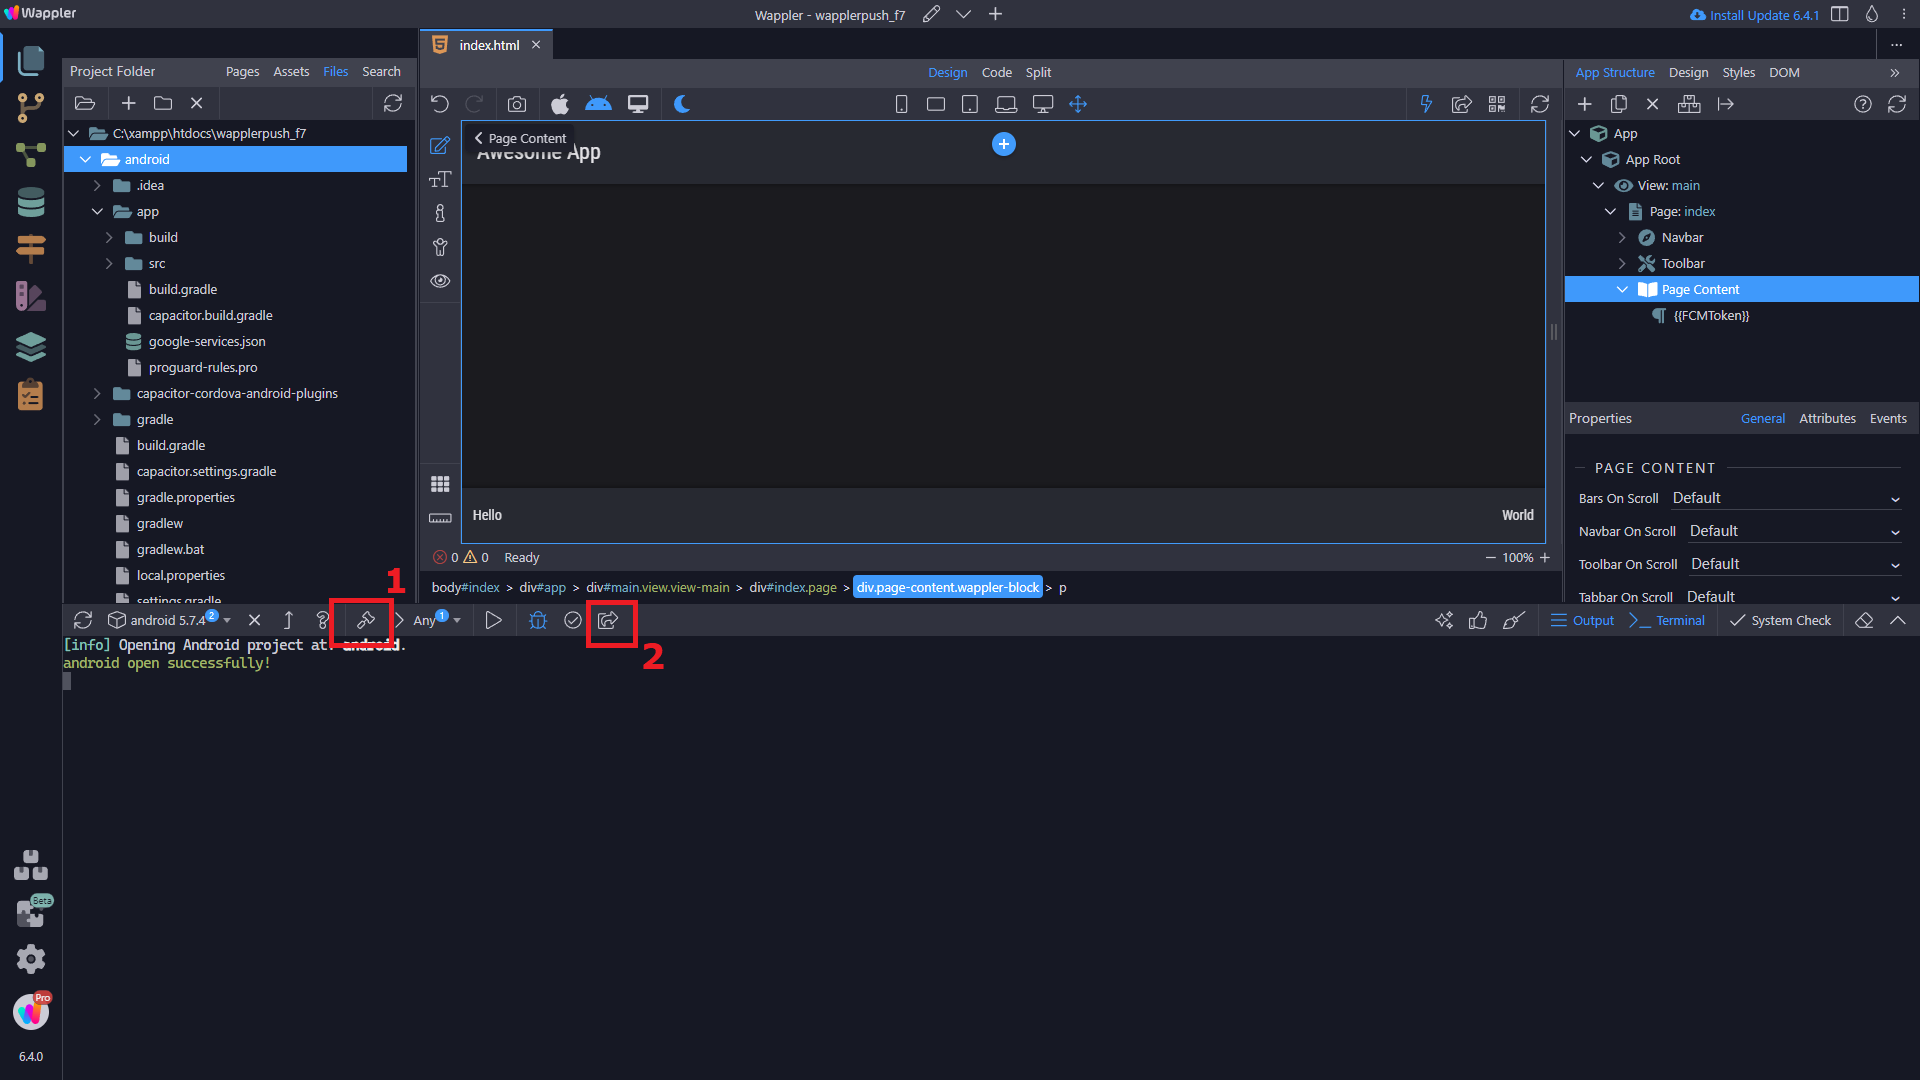
28.- After all that. Click on Build (1) and then open Android Studio (2)
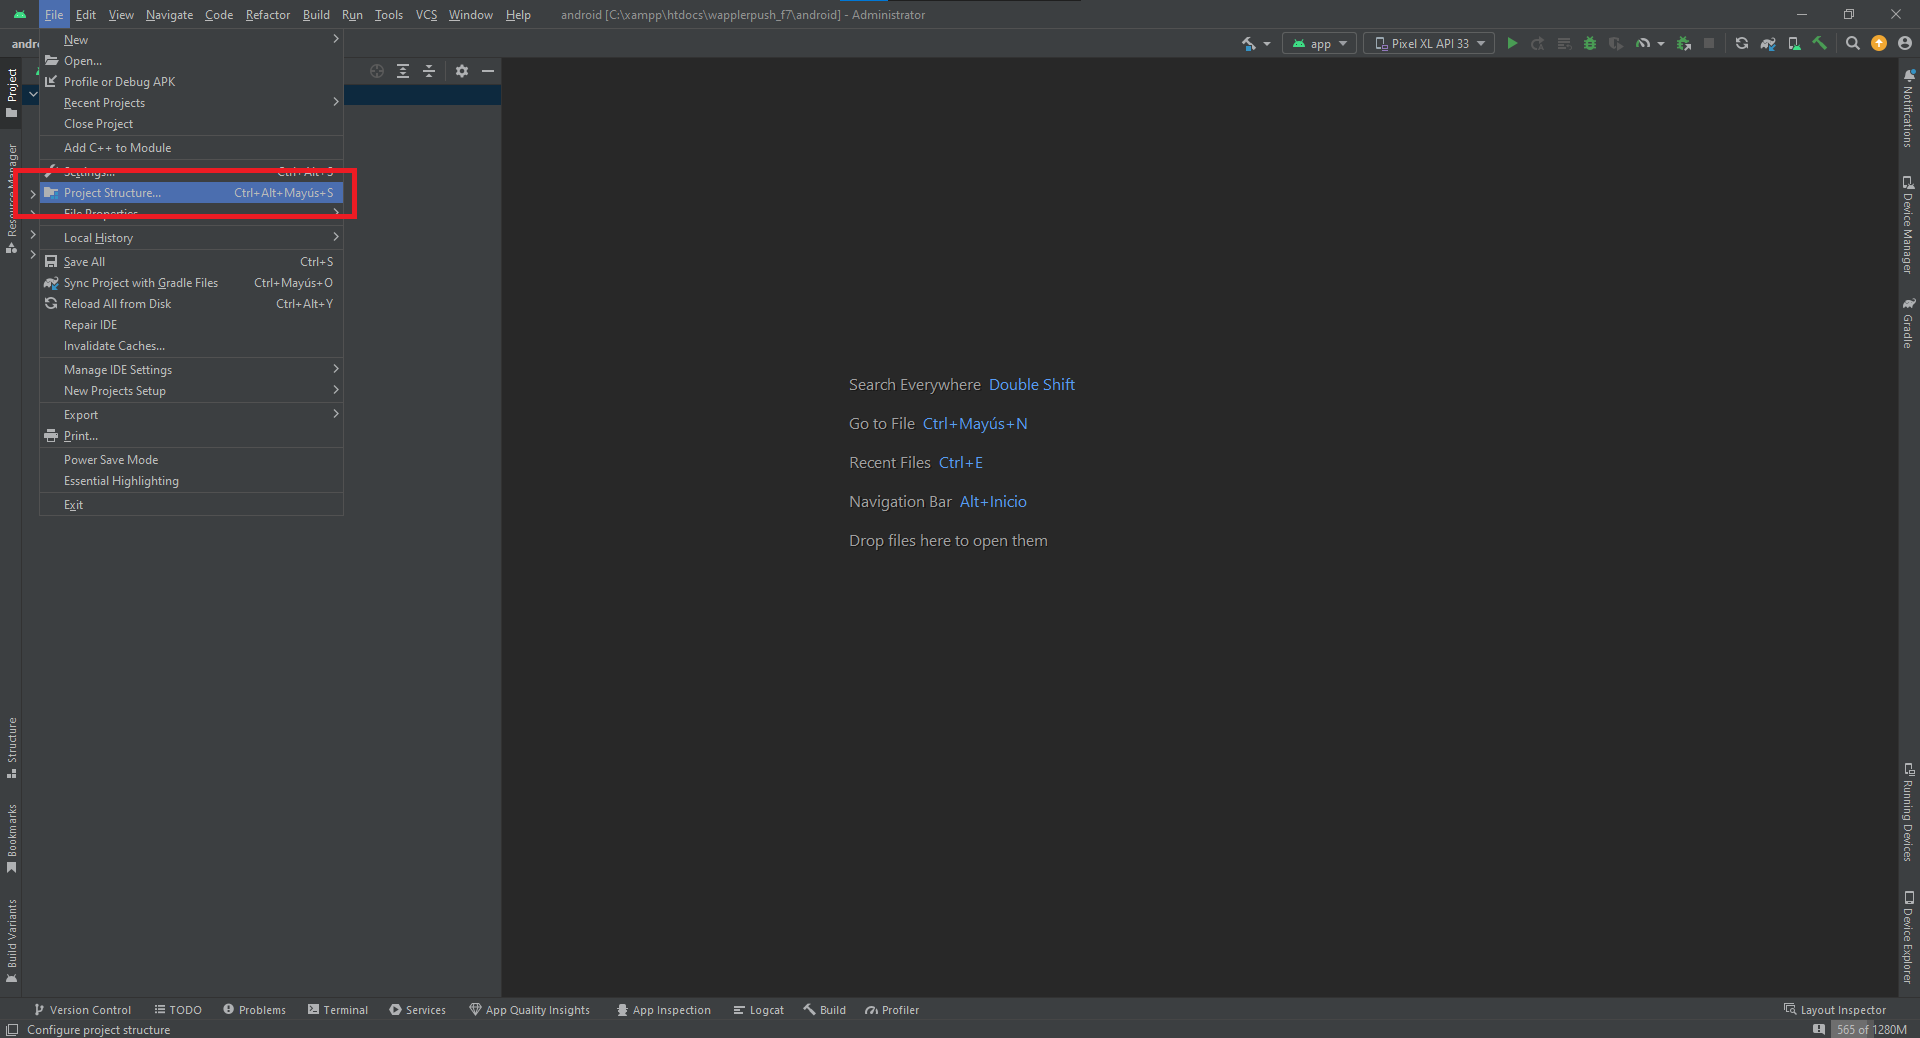
29.- Now, on Android Studio, select Project structure
30.- Select Modules (1), go to Default Config tab (2) and rename Application ID as same as the firebase project (Package name) and the capacitor.config.json (3)

31.- If you want, edit the AndroidManifest.xml and change both android:label, one is the name of the app, and the other is the title.
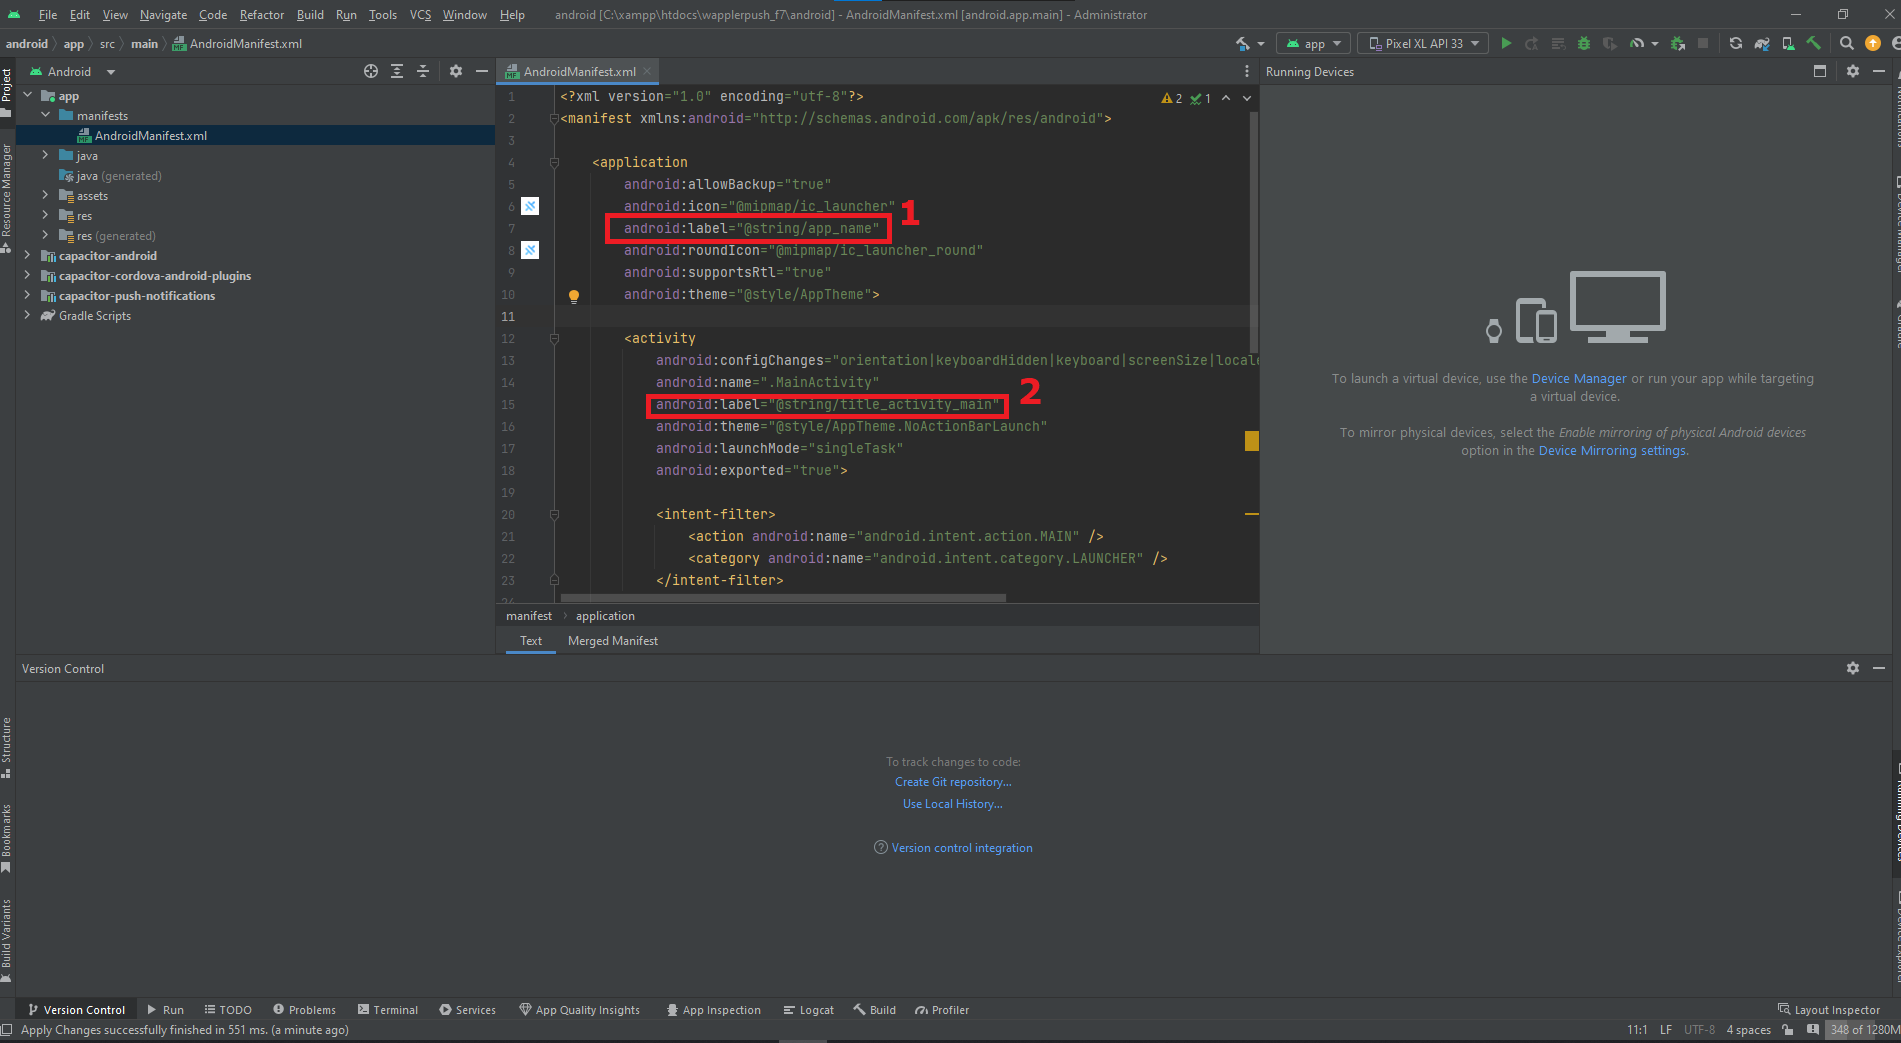
So I’ll call them both: “WapplerPush”
32.- Click on Reload all from disk and sync with gradle

33.- Lets see: We have the token printed on a paragraph (1) and also on the console.log (2)
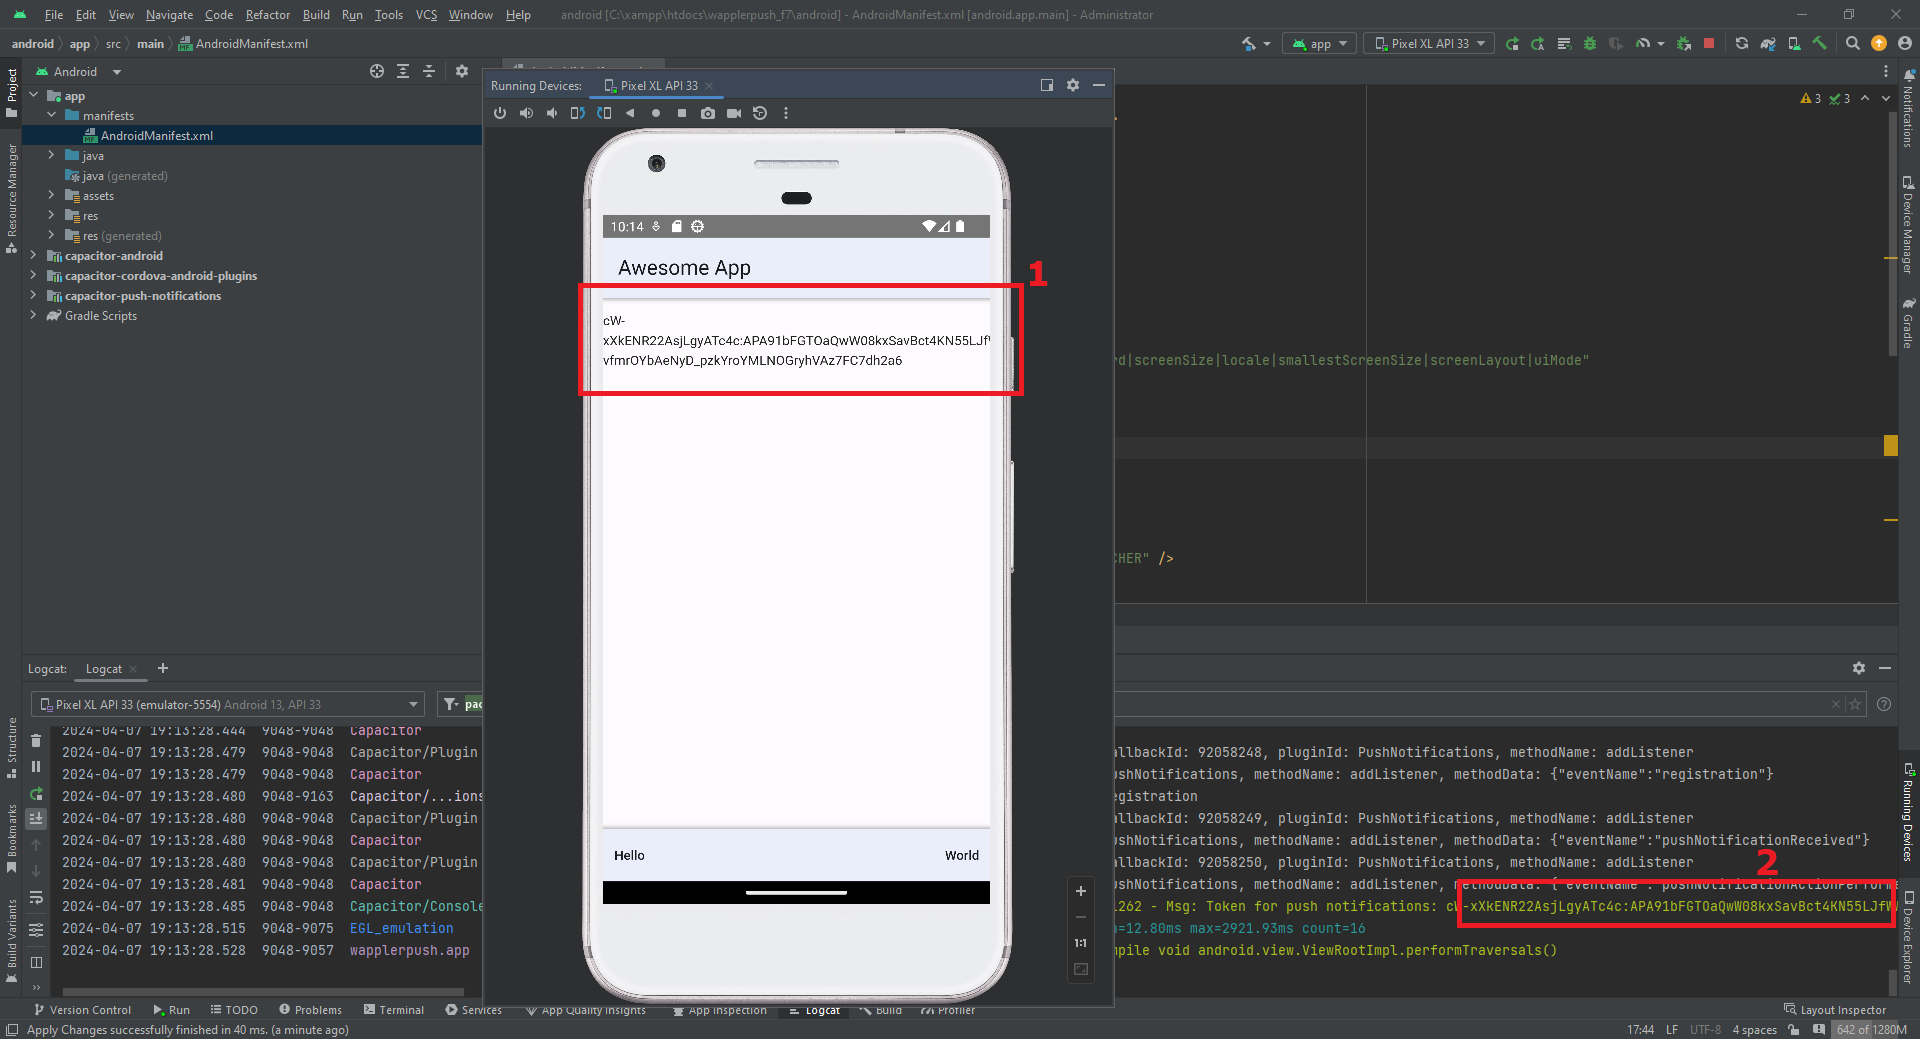
Well that’s nice ![]()
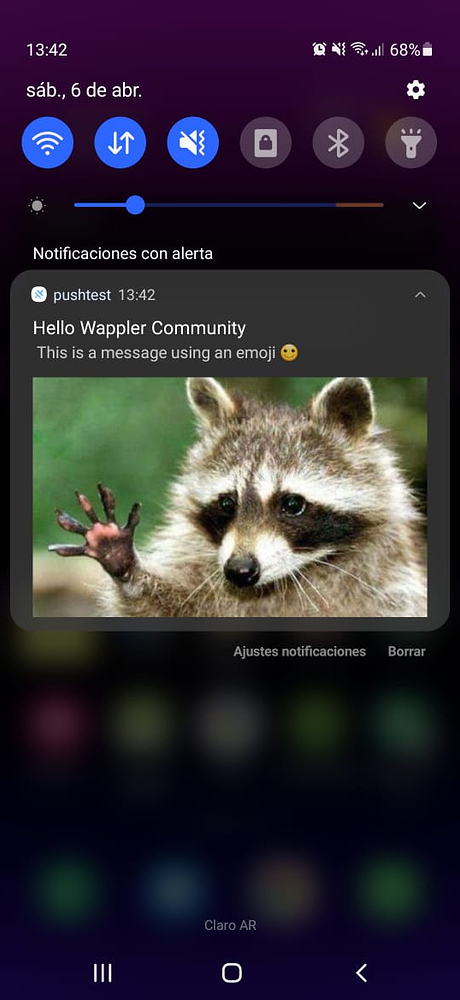
Receiving notifications:
First, lets try it, we have the token so we can send a message to that device.
34.- We can test FCM through the firebase console for an easy way or via API (Postman)
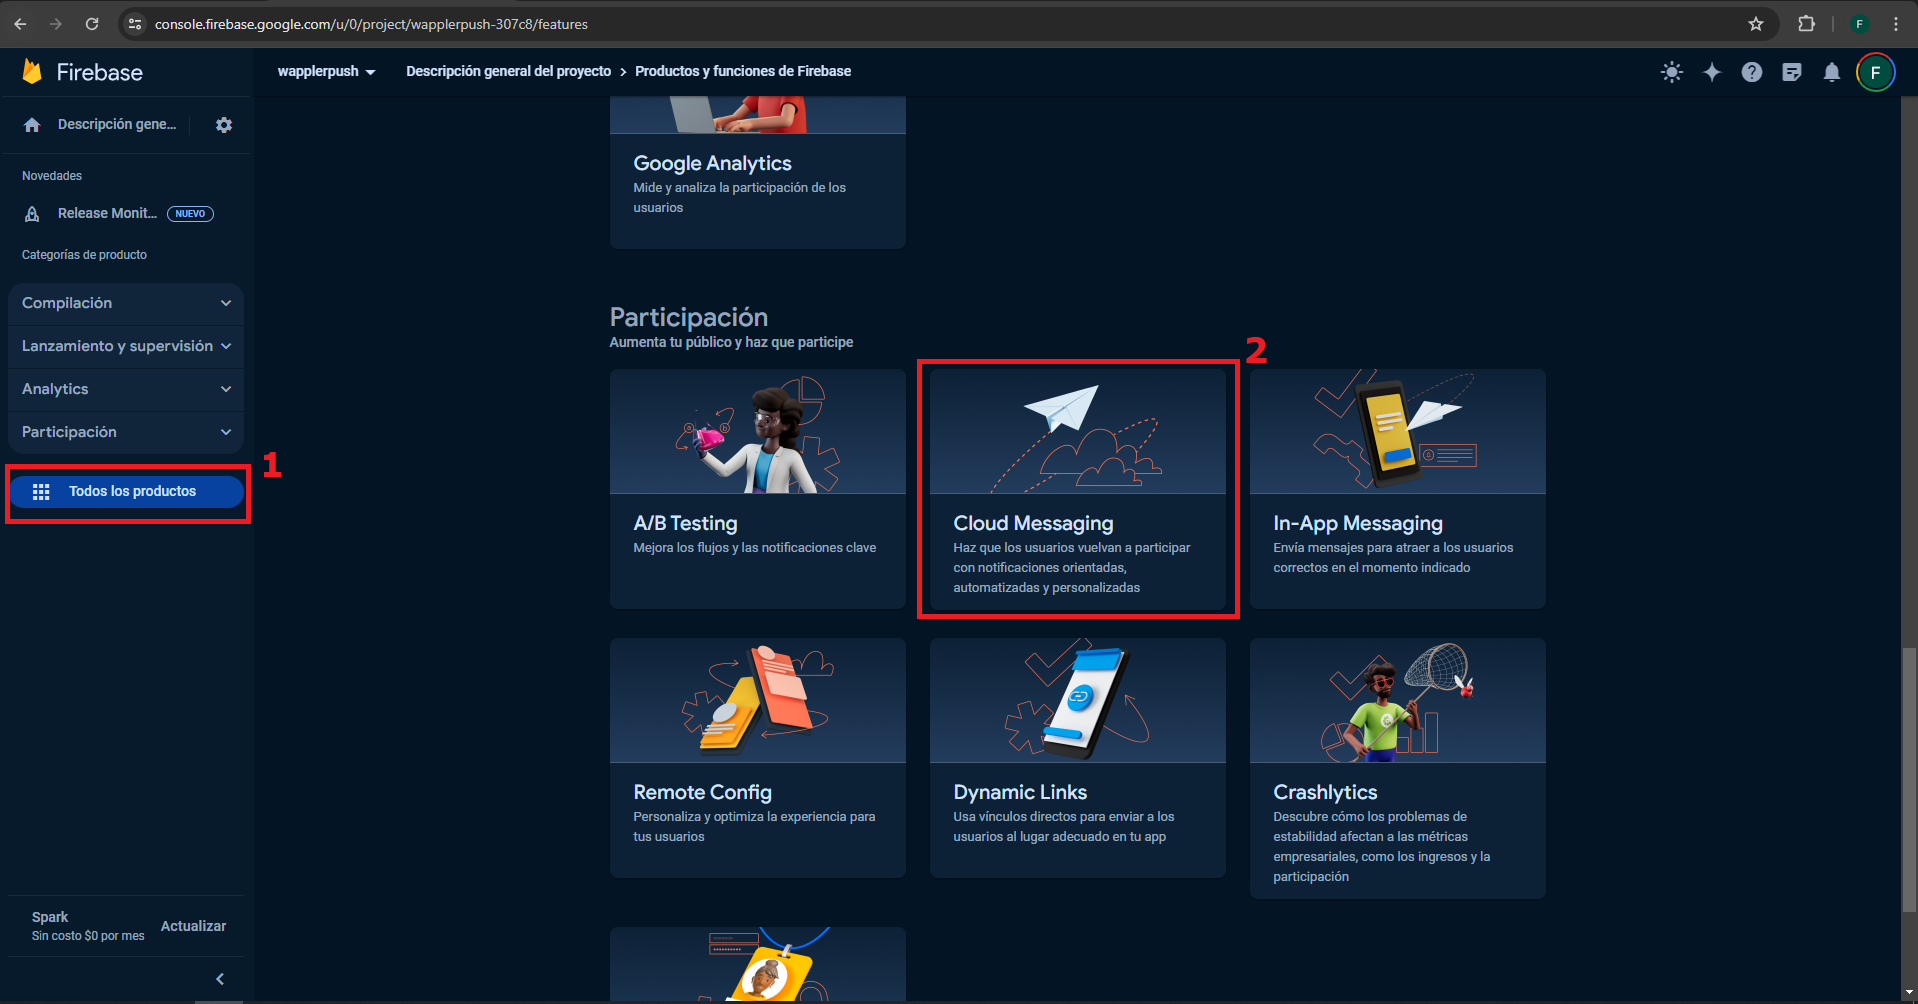
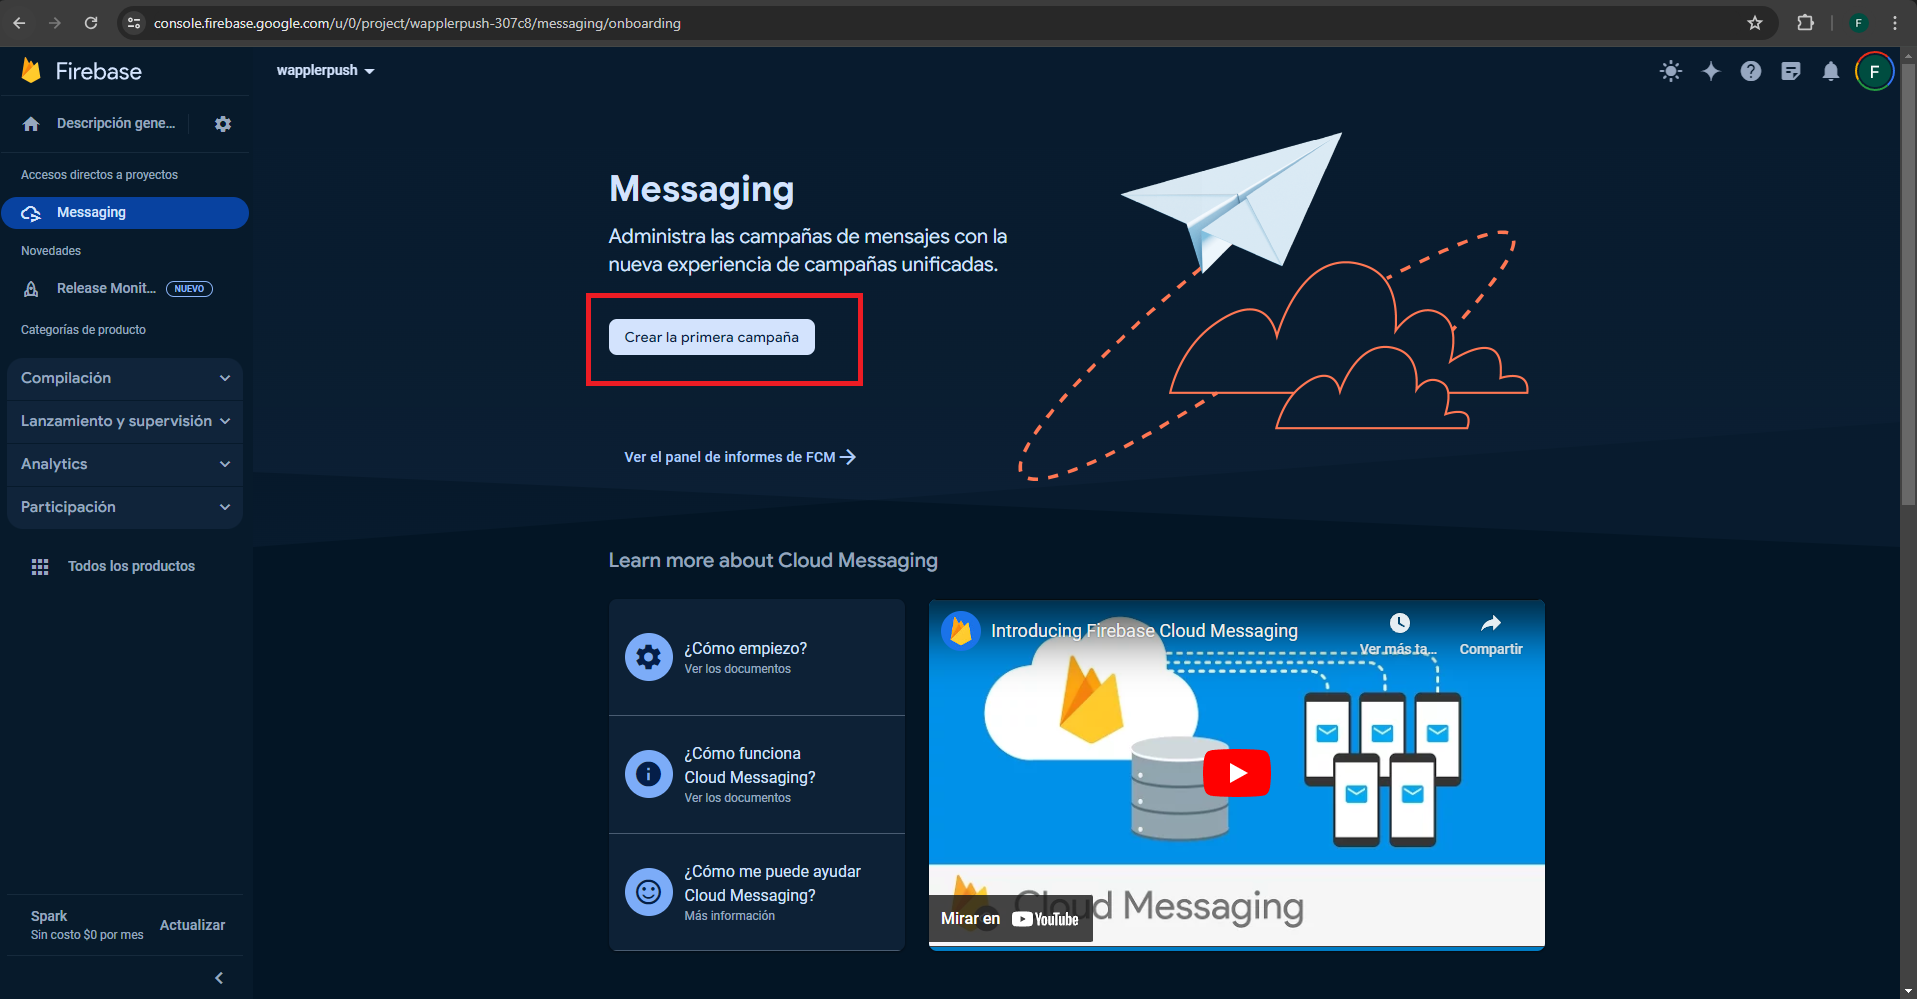
34.1.1: If you want to test using the firebase console select features (1) and then cloud messaging (2)
34.1.2: Create new campaign:
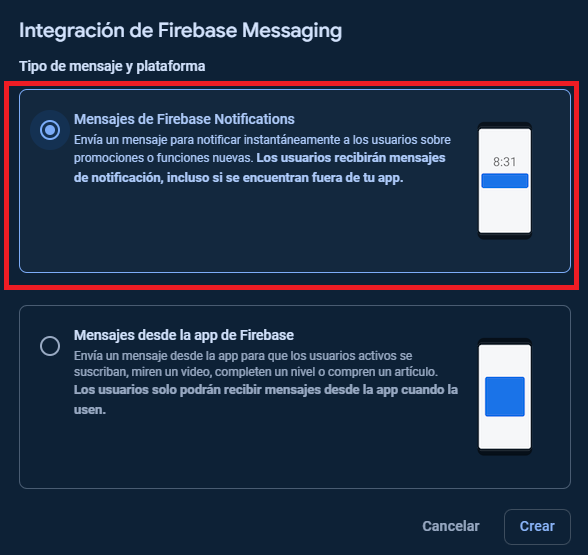
34.1.3: Send firebase notification:
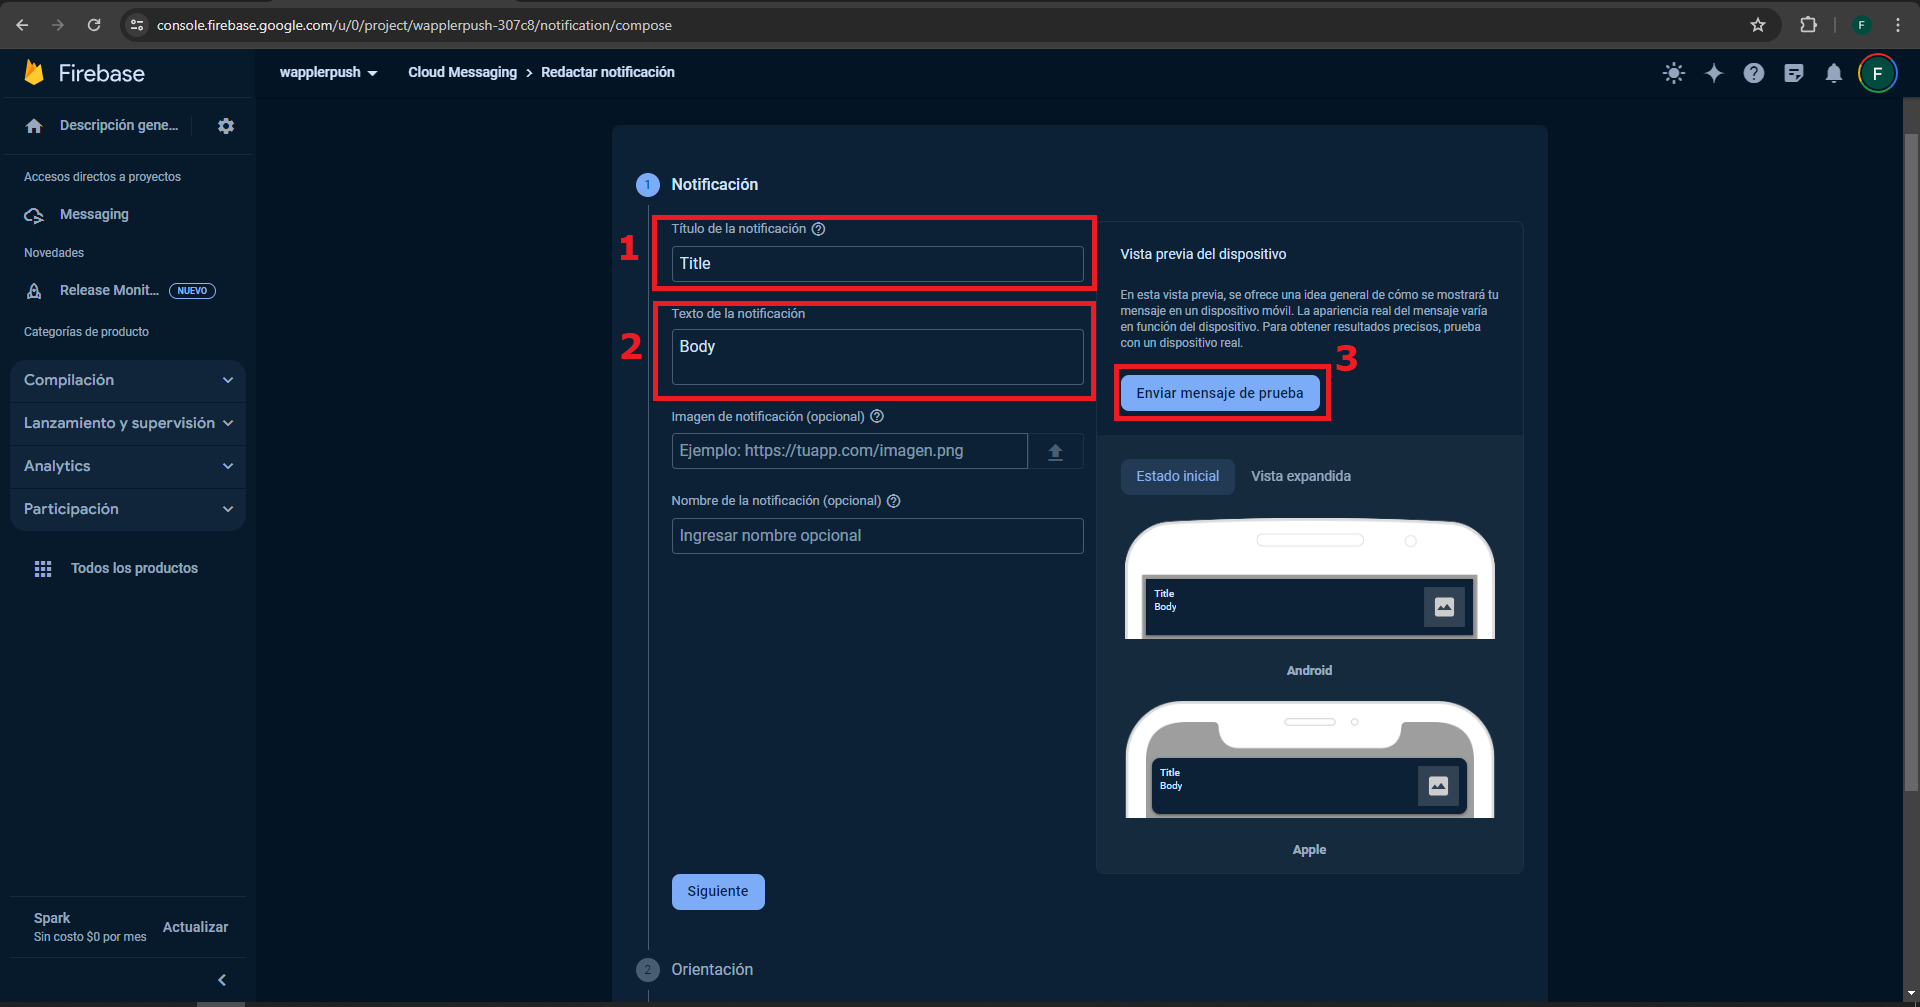
34.1.4: We insert a title (1), a body (2) and send a test message (3)
34.1.5: Then we can insert the FCM token:
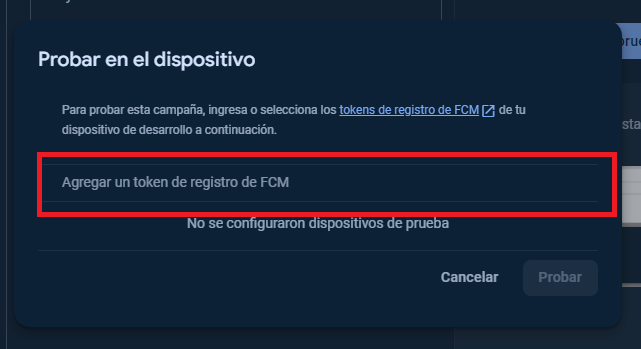
And you’ll see the notification on the device.
PLEASE NOTE
:
I’ts the same panel that you can use for a campaign (send a notification to all users) so make sure you’re under test mode.
Otherwise a campaign will start and all your registered users will receive a “test” notification.
34.2.1.- If you want to test it with postman, you need to create oAuth credentials, and validate redirection URI’s:
1 https://oauth.pstmn.io/v1/callback
2 https://oauth.pstmn.io/v1/browser-callback
3 https://developers.google.com/oauthplayground
Select & Authorize: Firebase Cloud Messaging API v1
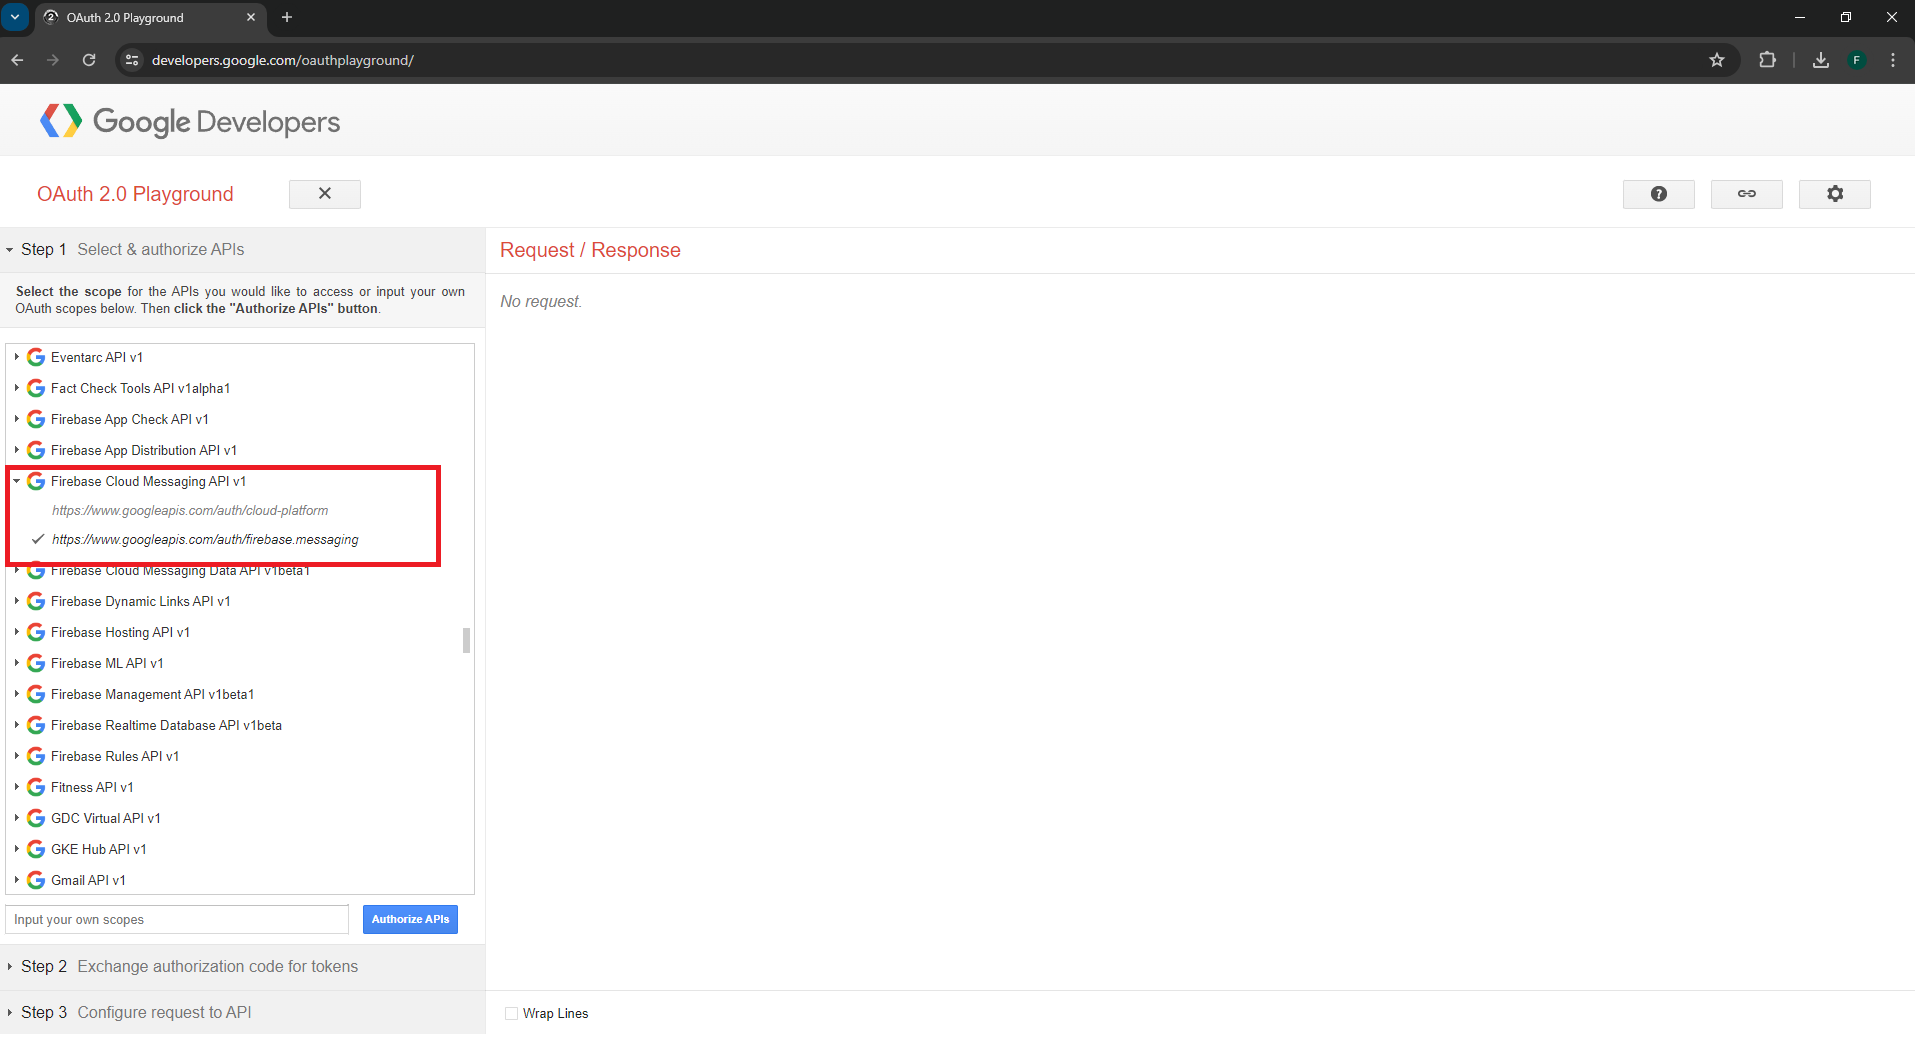
34.2.2.- Allow the use from your google account and then, copy the access_token (it start with ya29…)
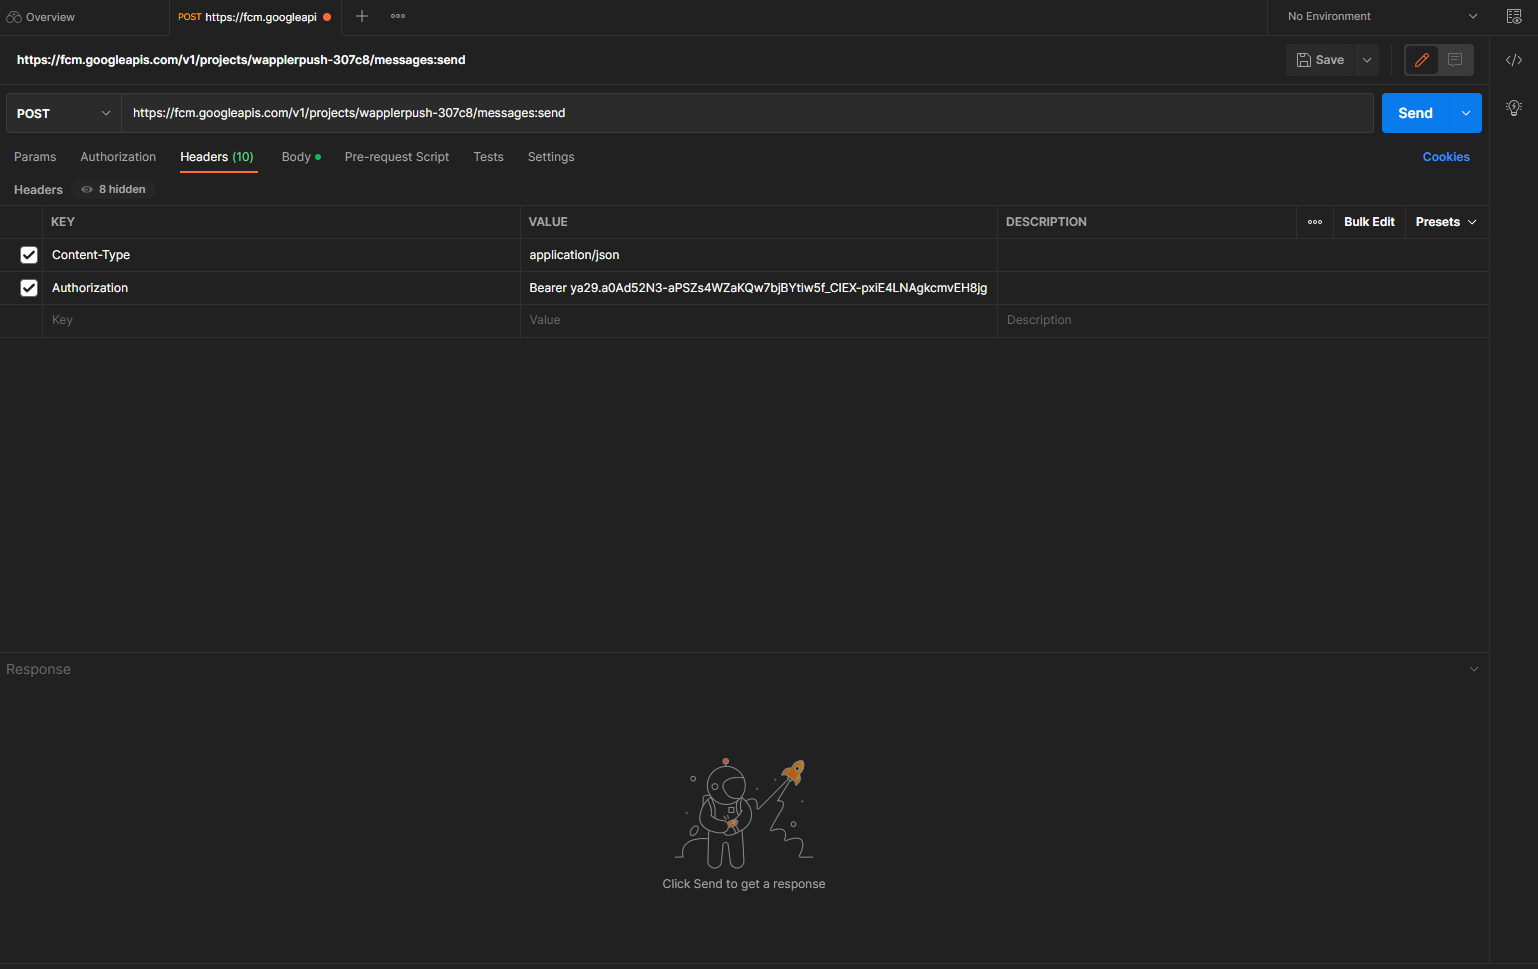
34.2.3.- We can use postman to send a notification.
The URL is https://fcm.googleapis.com/v1/projects/PROJECTID/messages:send
Where PROJECT ID, is the one you get on your Firebase console.
In this case (See Point Nº 6) our link we’ll be https://fcm.googleapis.com/v1/projects/wapplerpush-307c8/messages:send
We set the headers:
- Content-type: application/json
- Authorization: Bearer +
access_token
(Replace access_token to the one you get on the Point Nº 33)
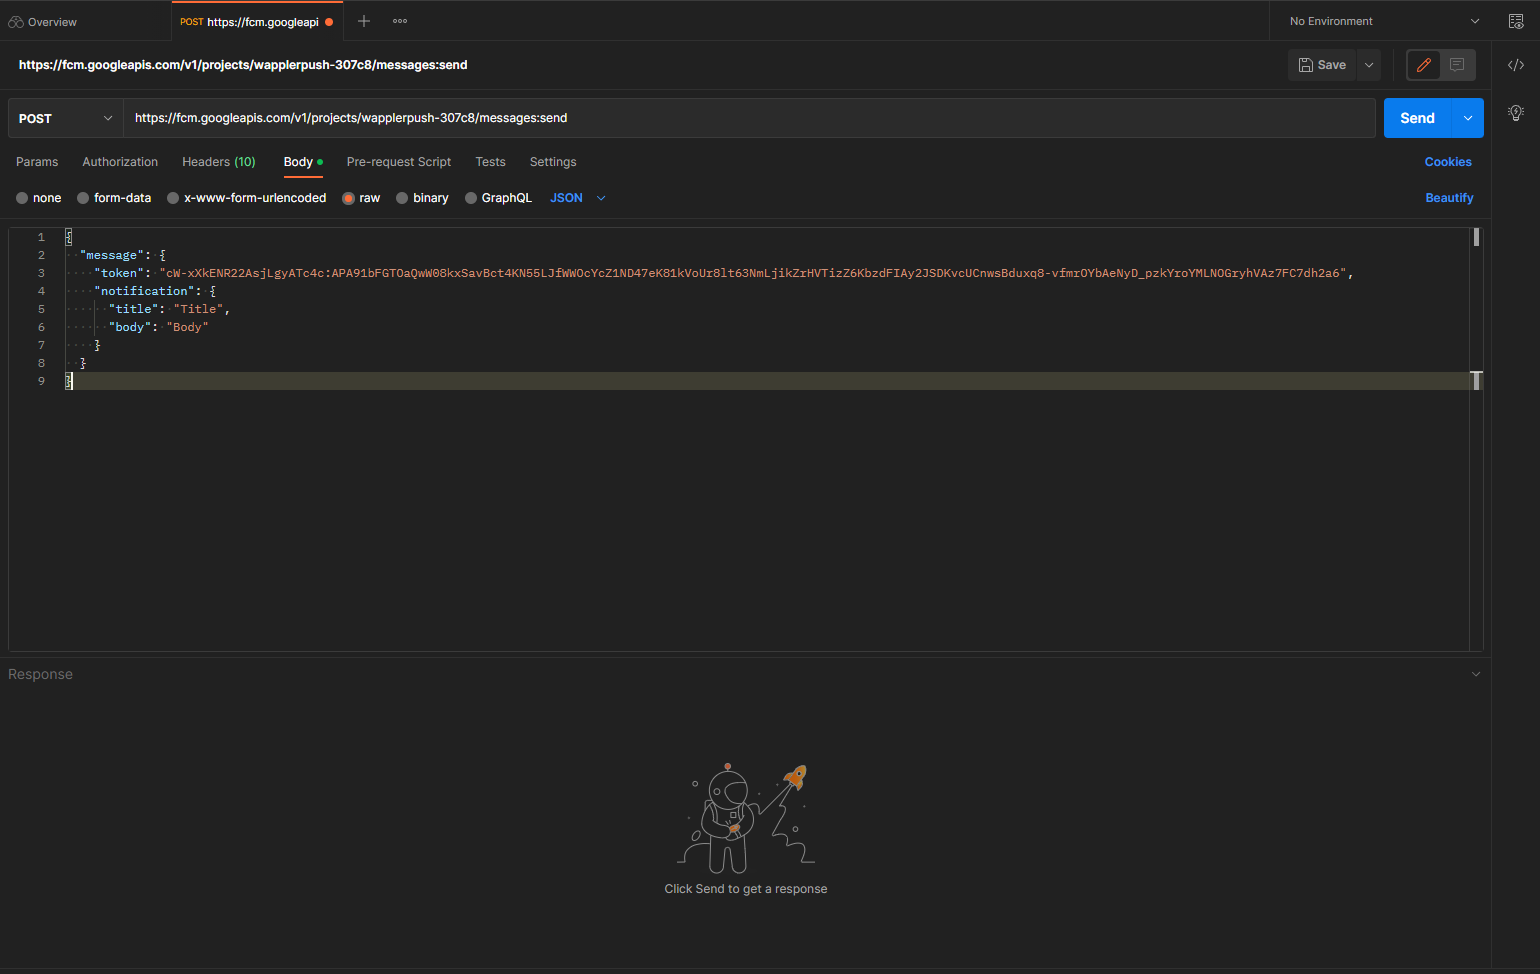
On body we can try:
{
  "message": {
    "token": "TOKEN",
    "notification": {
      "title": "Title",
      "body": "Body"
    }
  }
}
Where TOKEN is the one that we get on the app.
We can see the response below:
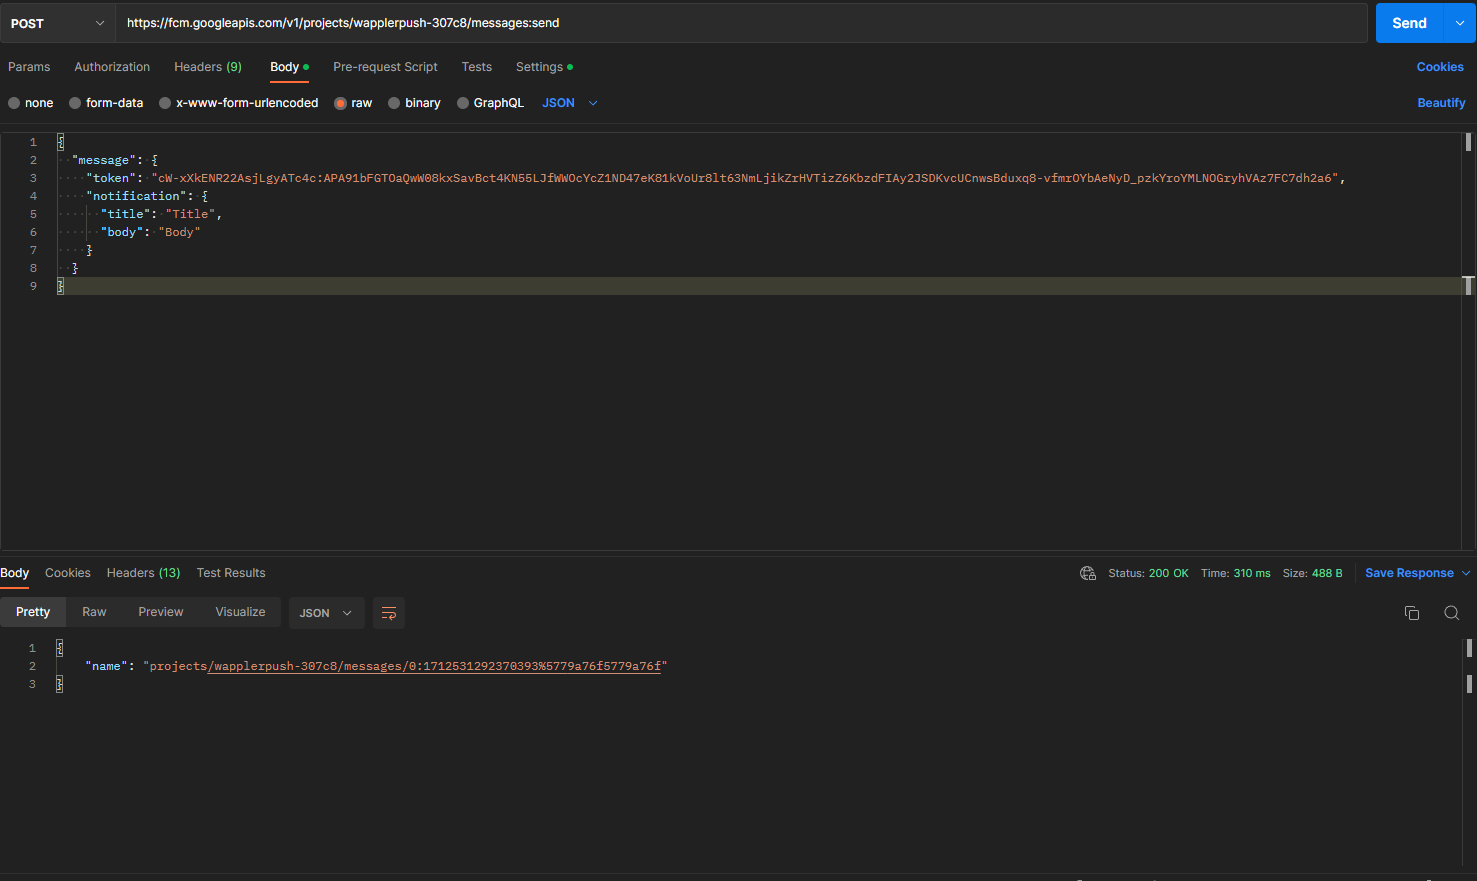
And it’s working:

You can also send images with
“image”: “imageurl”:
{
  "message": {
    "token": "TOKEN",
    "notification": {
      "title": "Title",
      "body": "Body",
      "image" "here_the_url_image"
    }
  }
}
And send emojis:
For that you need to convert unicode to hex
For example, on this list we get the “gift” icon ![]()
The unicode is U+1F381 so the hex code will be: 0x1F381
Next:
Thanks for reading!