→ Part 1: Firebase project setup
Part 2: Mobile project and receiving notifications
Part 3: Server project and sending notifications
Extra: Navigation and parameters
Introduction
So you want to easily integrate push notifications with Firebase Cloud Messaging on your mobile project?
The easy part, is not possible anymore:
Apps using the deprecated FCM legacy APIs for HTTP and XMPP should migrate to the HTTP v1 API at the earliest opportunity.
Sending messages (including upstream messages) with those APIs was deprecated on June 20, 2023, and will be removed in June 2024 .
Better security via access tokens The HTTP v1 API uses short-lived access tokens according to the OAuth2 security model.
So there’s a new way, and here we go:
You can check documentation and pricing
For now:
Firebase Cloud Messaging (FCM) is a cross-platform messaging solution that lets you reliably send messages at no cost.
Firebase project setup
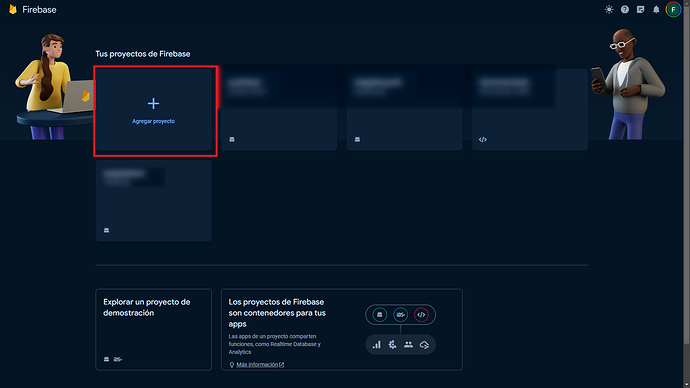
1.- First, we create a project, so enter this link https://console.firebase.google.com/
2.- Select new and give a name, in this case I choose wapplerpush:
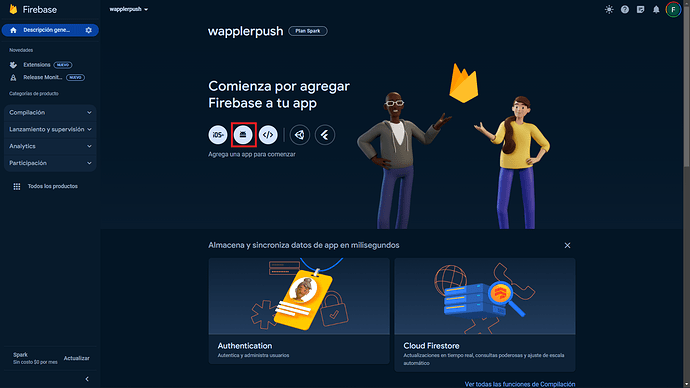
3.- Click on Android, as we are going to implement it there for now
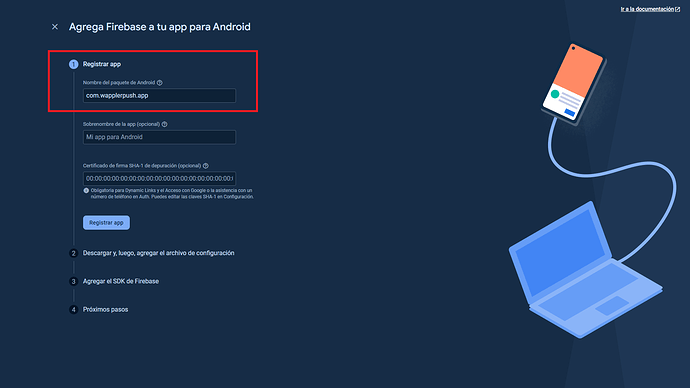
4.- Choose a package name, in this case com.wapplerpush.app
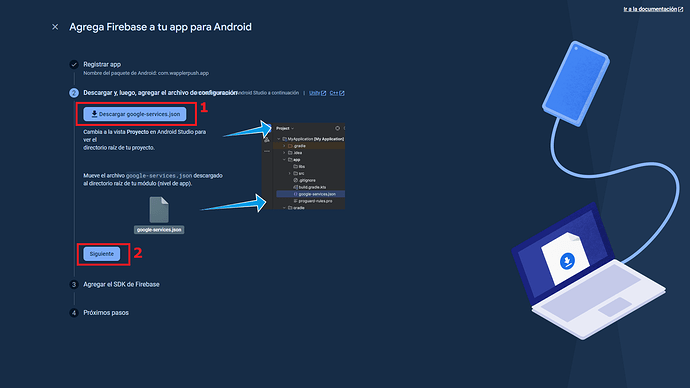
5.- We download
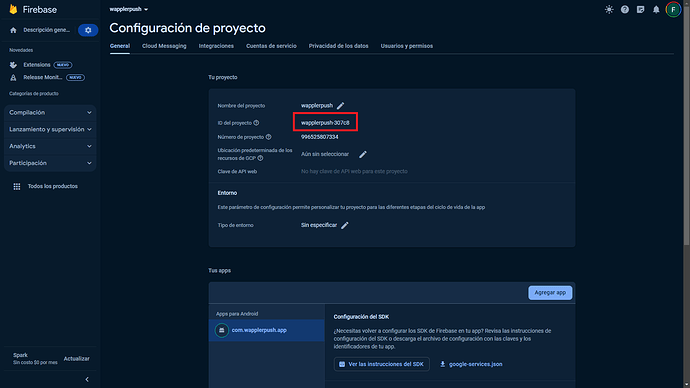
google-services.json (1) and we click next (2)6.- We can see the project id now, in this case: wapplerpush-307c8
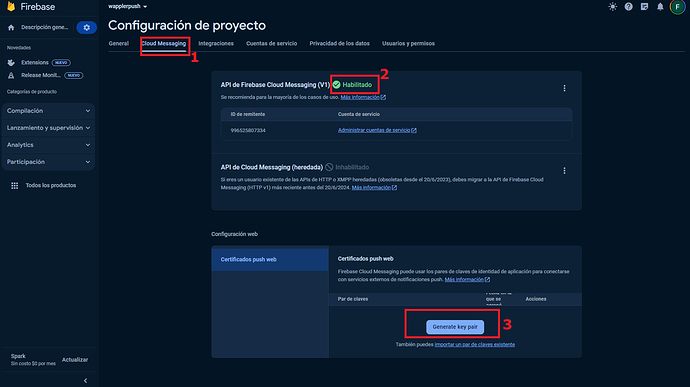
7.- Go to the Cloud messaging tab (1), check the status of the API (2) and click Generate key pair
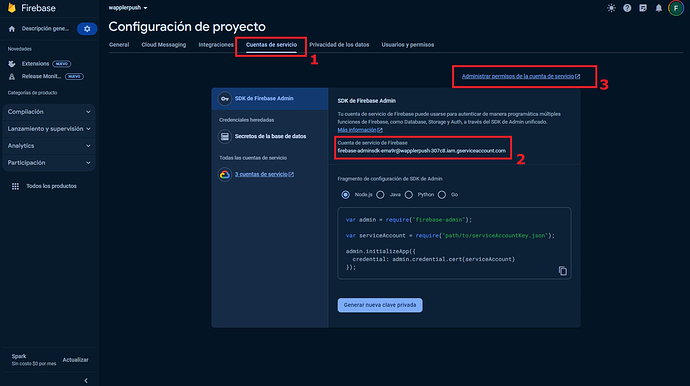
8.- Go to Services account tab (1) copy the Firebase account (2) and click on Manage service account permissions (3)
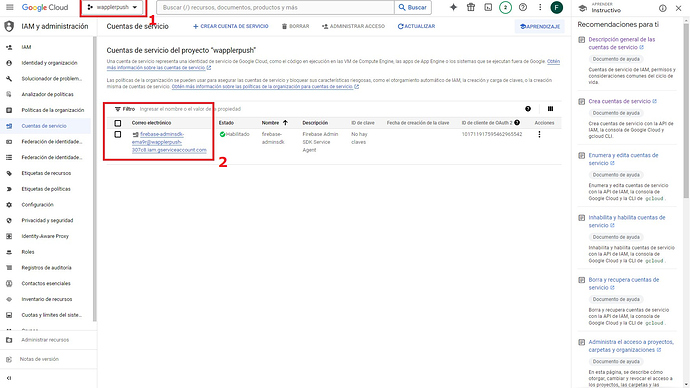
9.- On this screen, first we need to make sure that we are on the right project (1) and click on the firebase account (The same we copy on Point Nº 8) (2)
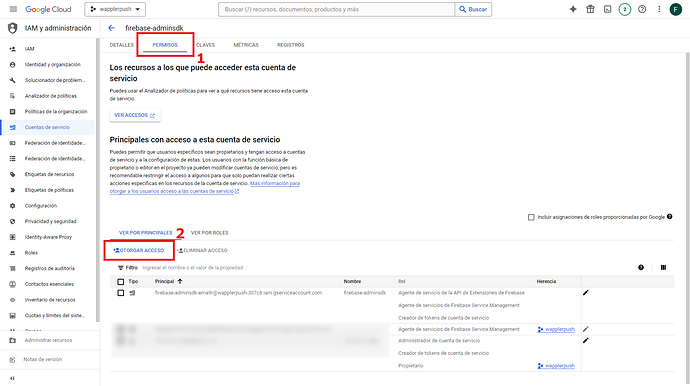
10.- We select the Permissions tab (1) and then we click on Grant access (2)
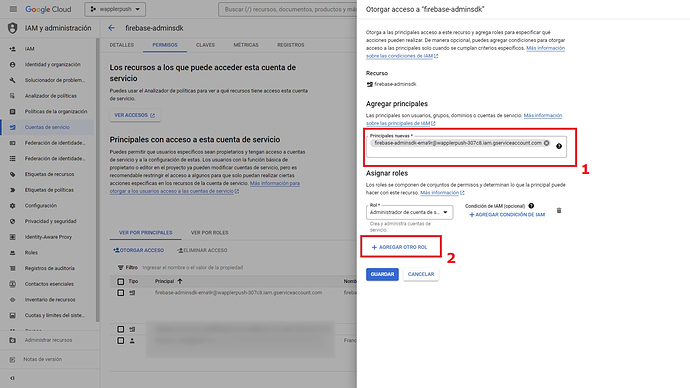
11.- There, we paste the firebase account (See Point Nº 8) (1) and we click on Add another role
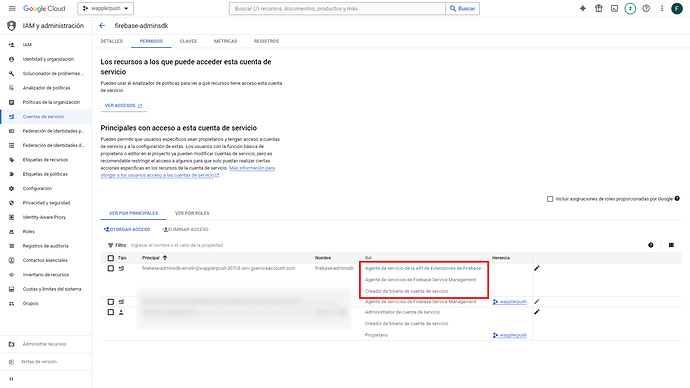
12.- These are the 3 roles that we need:
- Firebase Extensions API Service Agent
- Firebase Service Management Service Agent
- Service Account Token Creator
13.- Check if everything is ok
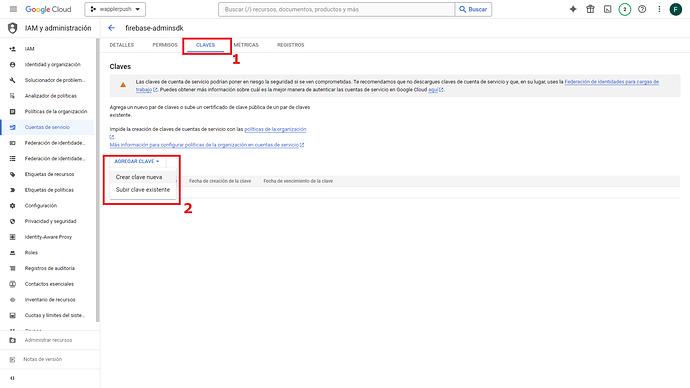
14.- Go to
Keys tab (1) and create a new one (2) select json and save on the hard drive the fileSo that’s all the process ![]()
Next:
Thanks for reading!
