-
Introduction:
Hey everybody, first of all I want to thank all the people who helped me on the way of installing and using plugins on a mobile project, especially Patrick, who has pointed me in the right direction.
What I’m going to explain here is how we can install and run not only capacitor plugins but also cordova plugins.
I’m going to focus this tutorial on some of them, because the way to implement it, it’s practically the same for all of them.
-
Plugins:
Some things are beyond the code we can handle, we can use plugins to: handle a back button to go back in history, share a link to another app, know the status of the internet and redirect to an offline page, get device info, push notifications, local notifications, etc
You can take a look to the list of Official Capacitor Plugins or Official Cordova Plugins (Note this: Incompatible cordova plugins)
Of course, you have a lot of community plugins, but for security reasons, I won’t share them (you can search and use them at your own risk).
-
Including capacitor.js on our page:
- If we don’t have the
capacitor.json our project, we need to include it, by copying thenode_modules/@capacitor/core/dist/capacitor.jsto our projectwwwfolder and calling it, so I add this to index.html:<script src="capacitor.js"></script>
-
Renaming capacitor plugins:
- The most important thing now is renaming the capacitor plugins from
plugintoCapacitor.Plugins.plugin.
For example, in the Network Plugin we renameNetworktoCapacitor.Plugins.Network
SoNetwork.addListeneris nowCapacitor.Plugins.Network.addListener
On Cordova plugins we don’t change anything.
Saying that:
-
Capacitor plugin: Network (Retrieving type, status, and listening events)
- On our Wappler terminal we run
npm install @capacitor/networkand thennpx cap sync - We go to the
node_modules folderand copy theplugin.jsfile from:
node_modules/@capacitor/network/distto our project. In my case:www/jsand renamed tonetwork.js - In our
index.htmlwe call the file as:<script type="module" src="js/network.js"></script> - Now we can use the plugin, for example
<script type="module">
Capacitor.Plugins.Network.getStatus().then(status => {
    console.log("Internet Status:", status.connected,"Internet Type:", status.connectionType);
  });
	</script>
Will return on console: Internet Status: true Internet Type: wifi
await Capacitor.Plugins.Network.addListener('networkStatusChange', status => {
  console.log('Network status changed', status);

});
Will listen to any change of the network, returning true/false the status of the connection.
-
Capacitor plugin: Share button (A wonderful share button)
- On our Wappler terminal we run
npm install @capacitor/shareand thennpx cap sync - We go to the
node_modulesfolder and copy theplugin.jsfile from:
node_modules/@capacitor/share/distto our project. In my case:www/jsand renamed toshare.js - In our
index.htmlwe call the file as:<script type="module" src="js/share.js"></script> - I created a new JS file called “sharing.js” that includes:
function sharing() {
    Capacitor.Plugins.Share.share({
        title: 'Share Title',
        text: 'Share text',
        url: 'Share url'
        dialogTitle: 'Share dialog',
    });
}
And it’s included on my index.html like <script src="js/share.js"></script>
And calling it by:
<button id="btn1" class="btn" onclick="sharing()">Share me</button>
-
Cordova plugin: Battery (Getting % and if it is charging)
- On our Wappler terminal we run
npm install cordova-plugin-battery-statusand thennpx cap sync - We go to the
node_modulesfolder and copy thebattery.jsfile from:
node_modules/cordova-plugin-battery-status/www/to our project. In my case:www/jsand renamed tobattery.js - In our index.html we call the file as:
<script type="module" src="js/battery.js"></script> - We can use the plugin like:
<script type="module">
window.addEventListener("batterystatus", onBatteryStatus, false);
function onBatteryStatus(status) {
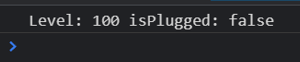
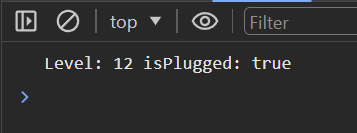
console.log("Level: " + status.level + " isPlugged: " + status.isPlugged);}
</script>
It will return the % of the battery and also a true or false depending if it’s charging or not.
My computer:
My own device:

-
Capacitor plugin: Device (Probably my favorite)
- On our Wappler terminal we run
npm install @capacitor/deviceand thennpx cap sync - We go to the
node_modulesfolder and copy theplugin.jsfile from:
node_modules/@capacitor/device/distto our project. In my case:www/jsand renamed todevice.js - In our
index.htmlwe call the file as:<script type="module" src="js/device.js"></script> - We can use it like:
<script type="module">
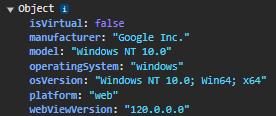
const info = await Capacitor.Plugins.Device.getInfo();
console.log(info);
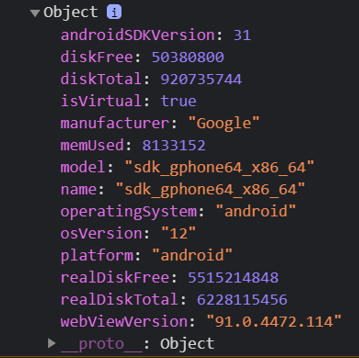
</script>
Will return something like this on a computer:
And something like this in Android:
Also, we can get a unique identifier of the device which I’m not going to share, but we can use with:
<script type="module">
const id = await Capacitor.Plugins.Device.getId();
console.log(id);
    </script>
-
Capacitor plugin: App (BackButton/Exit/Etc)
- On our Wappler terminal we run
npm install @capacitor/appand thennpx cap sync - We go to the
node_modulesfolder and copy theplugin.jsfile from:
node_modules/@capacitor/app/distto our project. In my case:www/jsand renamed toapp.js - In our
index.htmlwe call the file as:<script type="module" src="js/app.js"></script> - We can now use a lot of things from this plugin
Like some ways to handle the back button. I’m going to show two of them
-
Capacitor plugin: App (Going back on history or closing the app)
await Capacitor.Plugins.App.addListener('backButton', ({canGoBack}) => {
  if(!canGoBack){
    CapacitorApp.exitApp();
  } else {
    window.history.back();
  }
});
-
Capacitor plugin: App (Going to main or close the app)
await Capacitor.Plugins.App.addListener('backButton', () => {
    if (window.location.pathname === "/index.html") {
    CapacitorApp.exitApp();
    } else {
  window.location.href = 'index.html#!';
    }
});
-
Reminders and tips:
-
Make sure to copy the capacitor.js to your project folder and call it
-
Remember always click on build
 and then on preview
-
Console.log is one of your best friends, so when you’re previewing an app try to debug it and see the console, for example on Android, you need to go to:
chrome://inspect/#devices -
As Patrick said, we can use any information on any element as we want, for example, If I need to getStatus from the network plugin:
<script type="module">
  dmx.global.set('networkStatus', await Capacitor.Plugins.Network.getStatus());
</script>
Then I can use the interfaces, in this case, connected and connectionType using:
{{networkStatus.connectionType}} and {{networkStatus.connected}}
- Remember you can console each plugin by something like
Capacitor.Plugin.XXXX:
For example: Capacitor.Plugins.Device:

This is just a simple return to all the people who have helped me on this journey.
PS: Any adjustment will be very appreciated, I just shared something that works, but maybe there are better ways
PS2: By reading this you must know English’s not my first language, DM me if I can make it clear
PS3: I tested this tutorial on 3 different computers with many blanks Android projects but should be ok on ios as we tested the cookies plugin with @milo but anything you need, you can text me
I hope this can help someone in the future 
Fran
