Hello everybody!
Here Fran with another Mobile tutorial, in this case, I will show you how to store cookies on our device to keep the login even if we exit (completely) the app.
Intro
- First of all, as I always say, please let me know of any error, suggestion, or misunderstanding due to my lack of English.
We will be using Cookies and Http Capacitor plugins, so I recommend you first check this other tutorial. - The requirements are having AndroidStudio/Xcode and a site that runs with https protocol, as the communications are with credentials enabled, so your site will need an SSL certificate.
- This tutorial is also here thanks to @milo so please share with him your words of gratitude for all his dedication.
- Creating our backend for the mobile project
- We create a project with the security provider.
- We set our credentials
myuserfor username andpasswordfor you know… password.
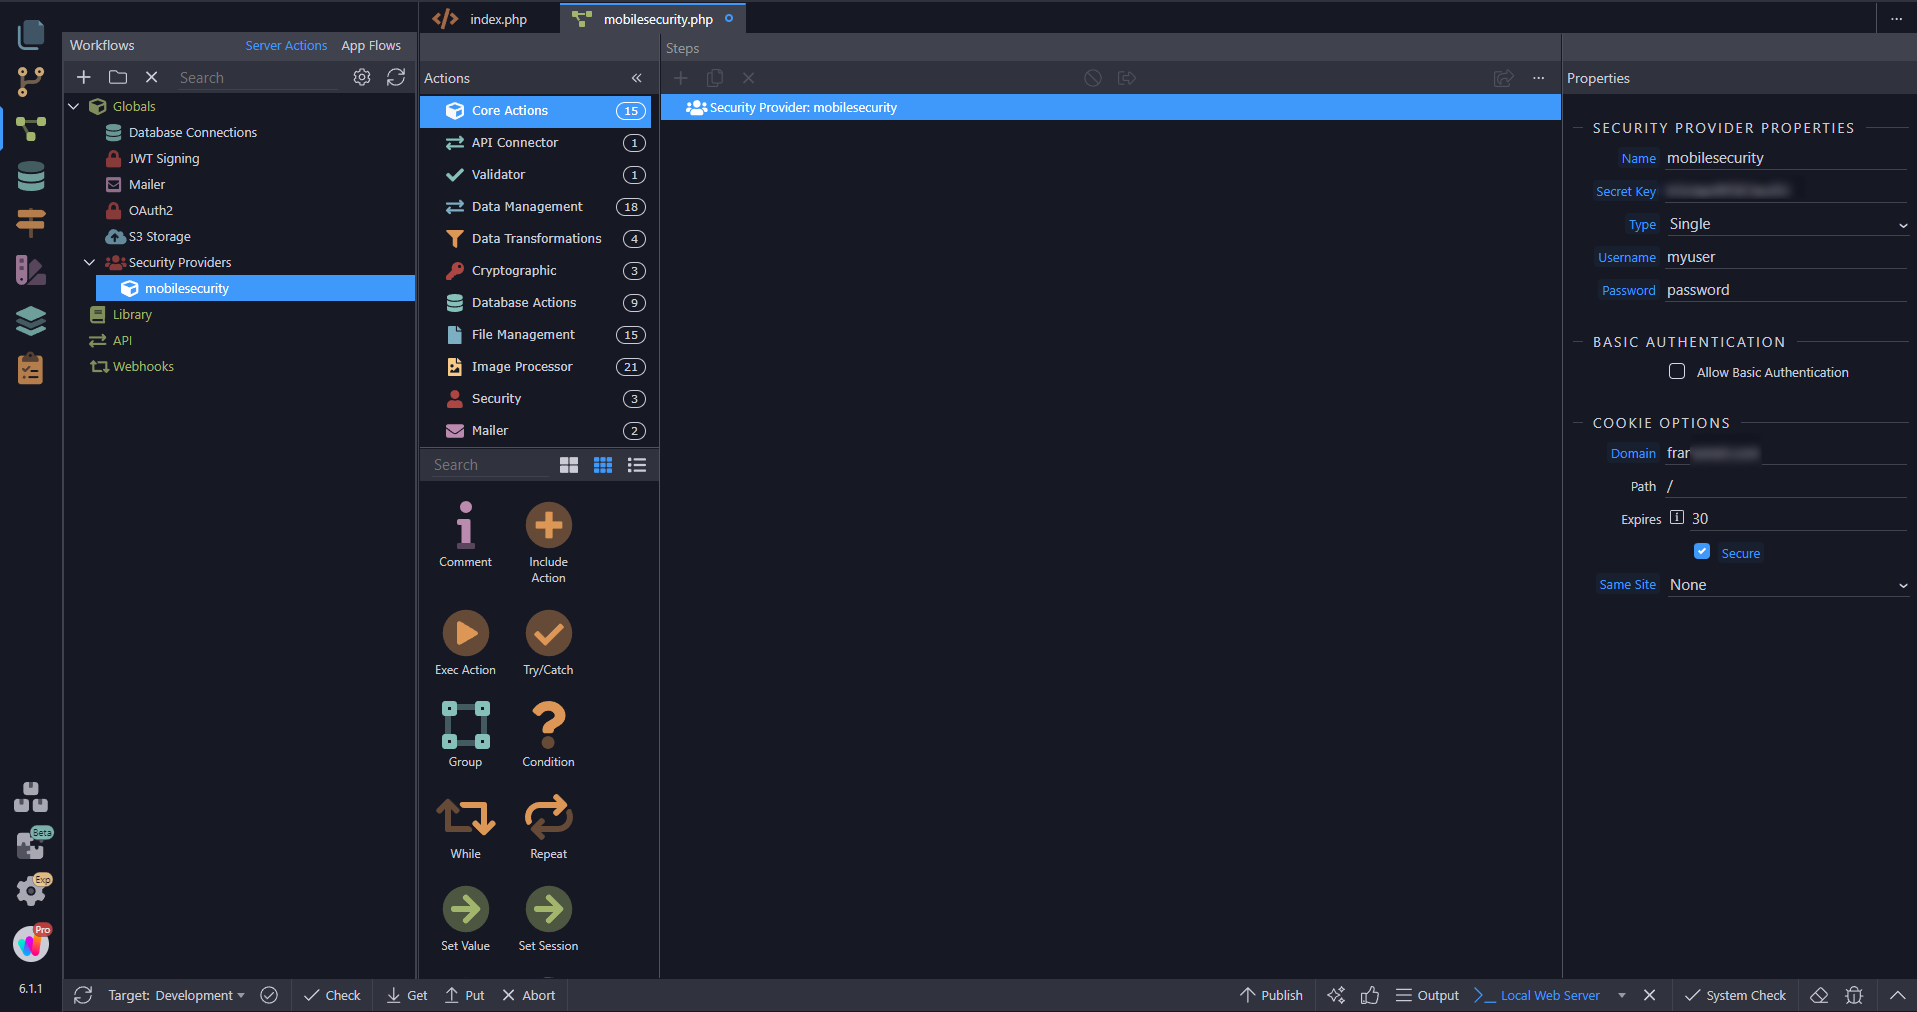
- Set the domain to your domain.
- Set path to /
- I want to expire in 10 years so I set on 3600.
- Same site: None.
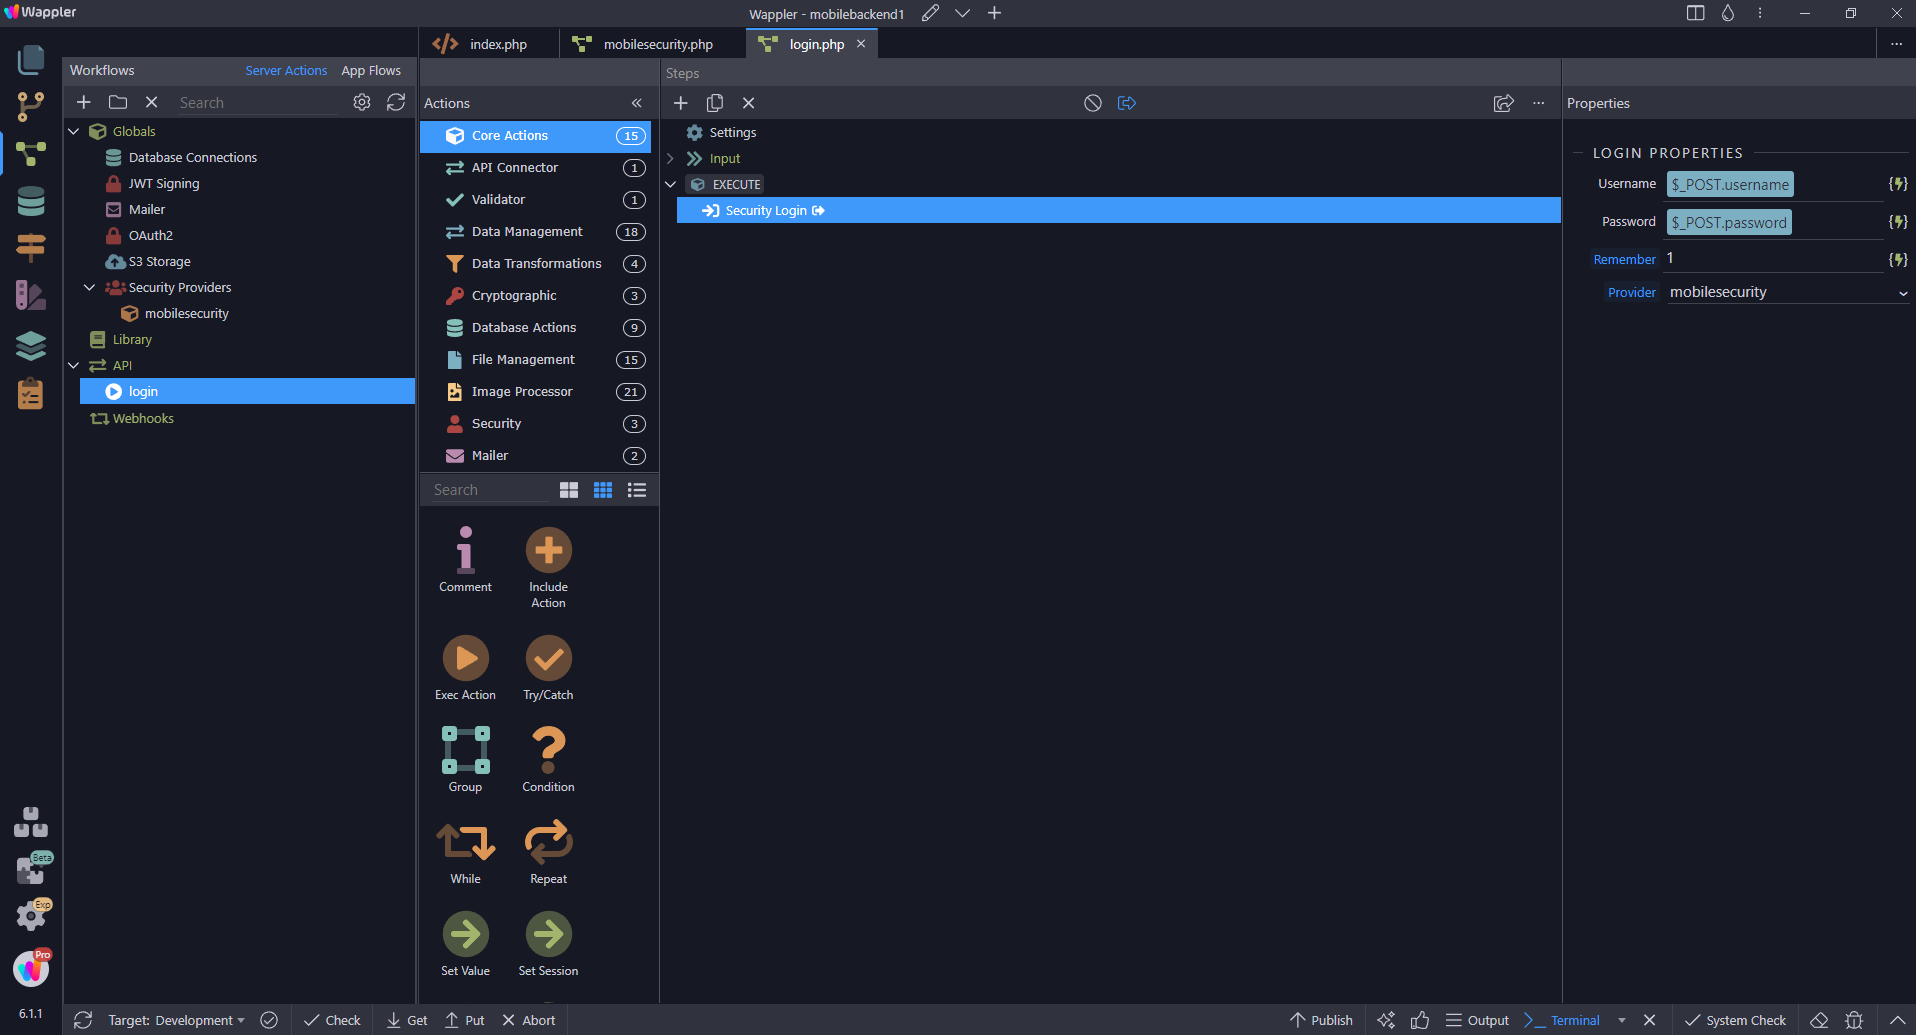
- We create the login.php which gives us access, we set remember to
1
- We have an API called “user_details” that will retrieve our username to check if we’re logged.
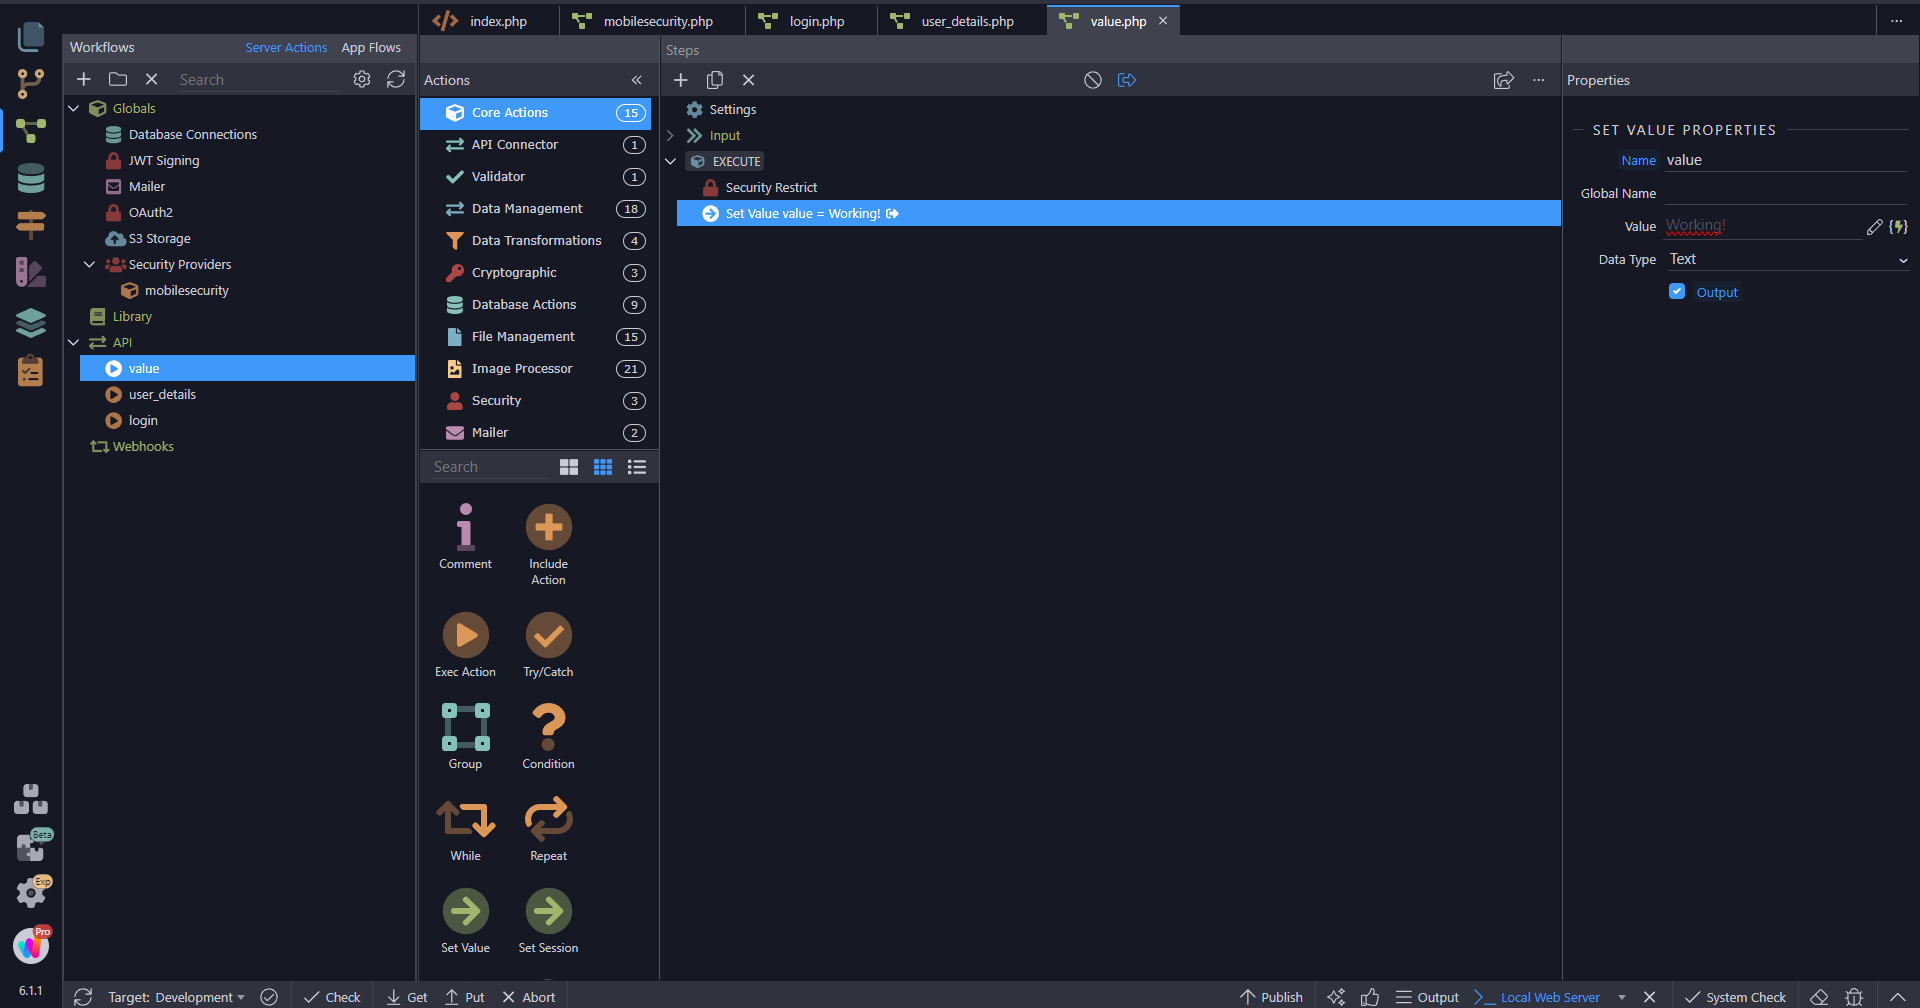
- A restricted API that has a set value on it.
(It could be a query or whatever you want)
We can see that is restricted:

- We enable cors and click on “Add Mobile” (don’t use *, wildcards are not allowed when we use credentials More info.)


That’s all for our backend setup.
- Creating our mobile project
- We create from scratch, in this case, I’m going to use Framework 7 v5.7.14 which is pretty stable.
- Remember to install and update all packages that we need.
- We need to install the needed Capacitor plugins (Cookies and Http).:
- We run
npm install capacitor-plugin-cookiesandnpx cap sync - We do the same with the HTTP plugin:
npm install @capacitor-community/httpandnpx cap sync - We grab those plugin.js and place them in our www folder (Remember the plugin tutorials that said at the beginning).
In my case, I placed both on the js folder and renamed to cookies-plugin.js and http-plugin.js. - After that, we need to go to our code view and add them on the index page with the
type="module":
	<script type="module" src="js/cookies-plugin.js"></script>
	<script type="module" src="js/http-plugin.js"></script>
- We need to configure our capacitor.config.json, so it would be something like this:
{
  "appId": "com.example.app",
  "appName": "helloworld",
  "webDir": "www",
  "bundledWebRuntime": true,
  "plugins": {
    "CapacitorCookies": {
      "enabled": true
    },
    "CapacitorHttp": {
      "enabled": true
    }
  },
  "server": {
    "androidScheme": "https",
    "hostname": "fran####.com"
  }
}
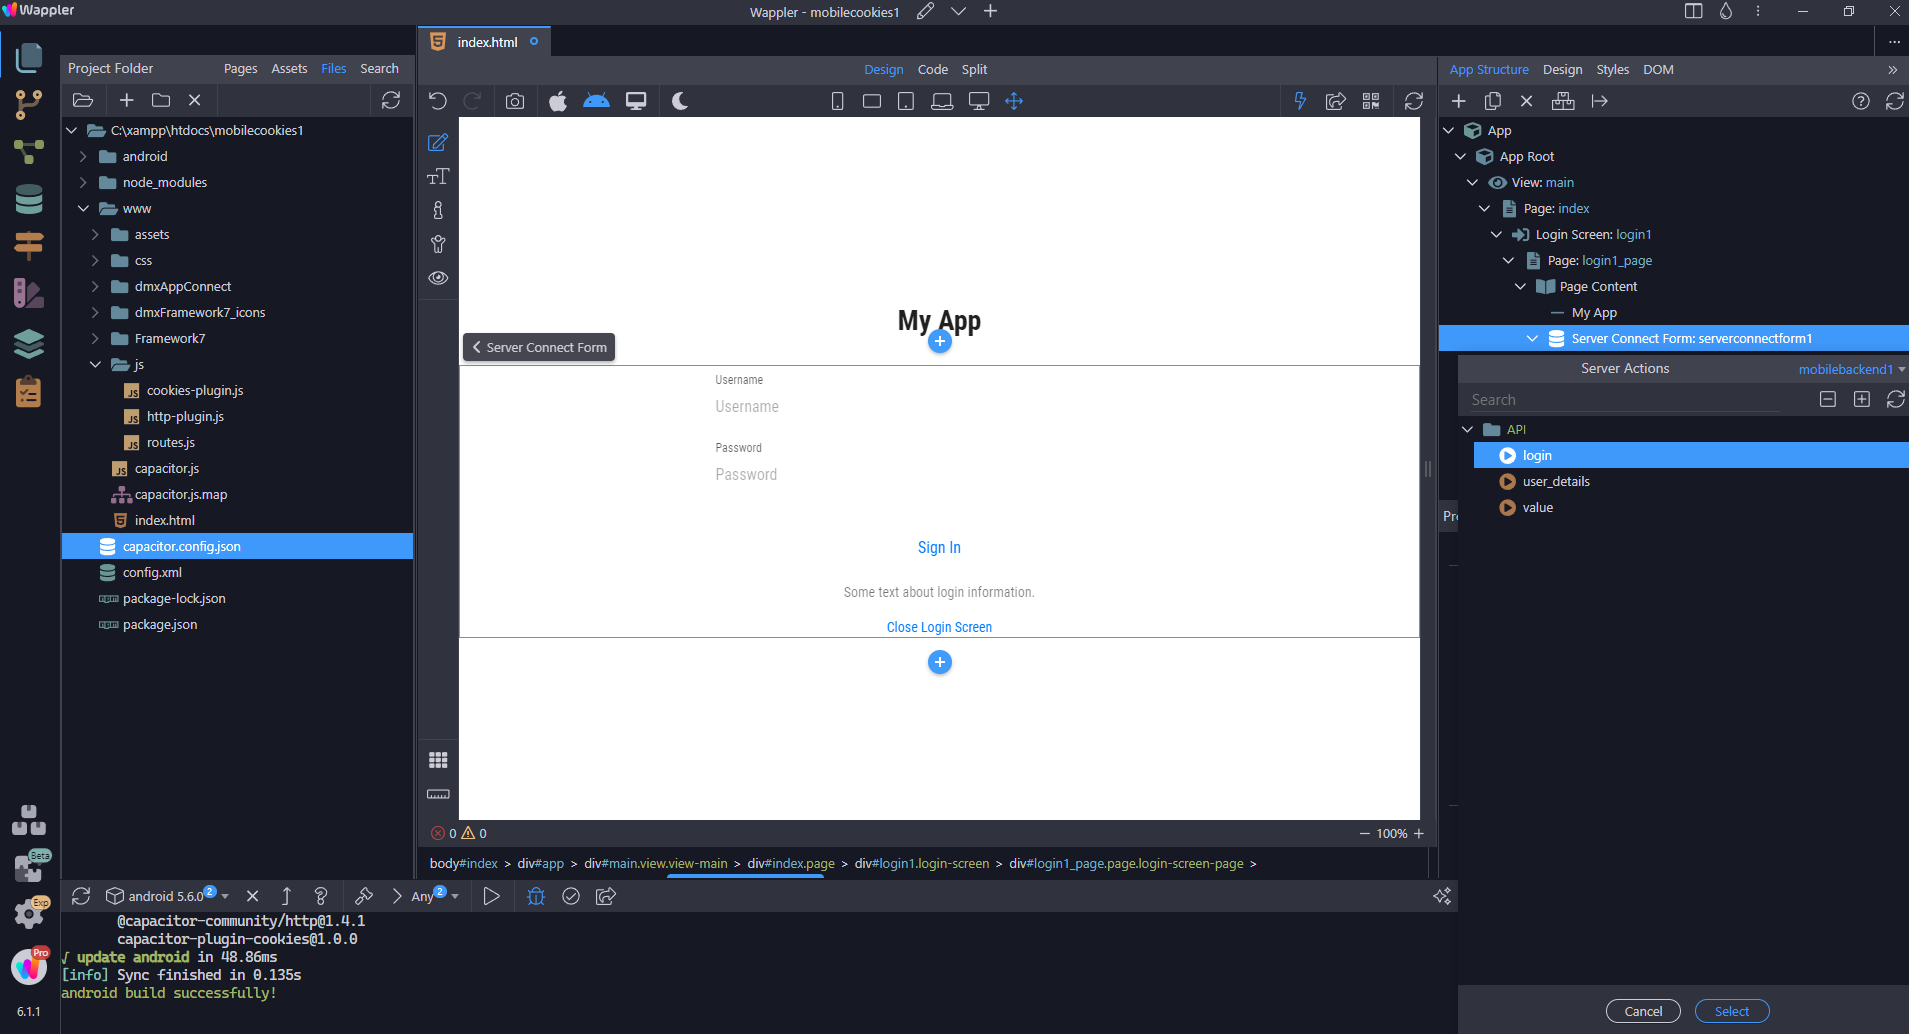
- We add a login screen and we link to our backend project.
- We check the credentials checkbox.
- Go to the code and be sure your page starts with
httpslike:
<form is="dmx-serverconnect-form" method="post" id="serverconnectform1"
action="https://fran#####.com/dmxConnect/api/login.php"
site="mobilebackend1" credentials="true" dmx-on:success="login1.close()">
I also set a successful dynamic event on the form to close the login screen.
- I created 2 server connect with no auto-load and credentials enabled, (please check the
httpsset again) and the successful dynamic event that will display an alert when they are done:
		<dmx-serverconnect id="serverconnect1" noload="true" credentials="true" url="https://fran####.com/dmxConnect/api/user_details.php" site="mobilebackend1" dmx-on:success="app.alert(serverconnect1.data.identity)"></dmx-serverconnect>
		<dmx-serverconnect id="serverconnect2" noload="true" credentials="true" url="https://fran####.com/dmxConnect/api/value.php" site="mobilebackend1" dmx-on:success="app.alert(serverconnect2.data.value)"></dmx-serverconnect>
Then two buttons: one will load the user, and the other will load the restricted value.
					<div class="block">
						<a href="#" class="button" dmx-on:click="serverconnect1.load({})">Whats my username</a>
						<a href="#" class="button" dmx-on:click="serverconnect2.load({})">Give me that value</a>
- Additional for Android:
- We go to our android folder and find
app/src/main/java/com/example/app/MainActivity.javaand we edit the code to something like:
package com.example.app;

import com.getcapacitor.BridgeActivity;

import android.webkit.CookieManager;

public class MainActivity extends BridgeActivity {

    @Override

    public void onPause() {

        super.onPause();

        CookieManager.getInstance().flush();

    }

}
- Additional for iOS:
- We go to ios/App/App/info.plist and we add the following code (change the domain under the string tags):
<key>WKAppBoundDomains</key>
<array>
  <string>fran####.com</string>
</array>
- Cors and preview:
- We need to communicate to our backend so we need to setup cors configuration.
But we have a problem, when we preview on Chrome, we do it under localhost, and the port changes every time we close the project and reopen it again.
So it’s difficult to set that port on the backend project because when we go to the mobile project, the port has already changed again.
The solution for me is to open it via FTP editor, so I go to the config.php located in dmxConnect folder and change the lines to:
<?php

$CONFIG_DEBUG = true;
$CONFIG_SECRET_KEY = 'YOURSECRETKEY';
$CONFIG_CORS_ORIGIN = 'https://fran####.com,capacitor://,capacitor://localhost,http://localhost,capacitor-electron://localhost,http://localhost:5545,capacitor://fran####.com,capacitor://localhost:5545,localhost';
$CONFIG_CORS_ALLOWED_HEADERS = 'accept,authorization,content-type,origin,referer';
Note that I have added my domain and also the localhost with the active port (5545) on my preview window:

I hope this extra step will be fixed in the future, please vote for the feature request about that.
- Finishing:
I’m going to show you how we end this, using a real device, so we’ll be using Android Studio only as I don’t have a Mac (so no xCode by now but the process is similar on both).
- We build our project:
- We go to Android Studio (Please check the properties to run it under administrator rule):
- We set the app to run under Gradle 8.0 which is pretty stable:
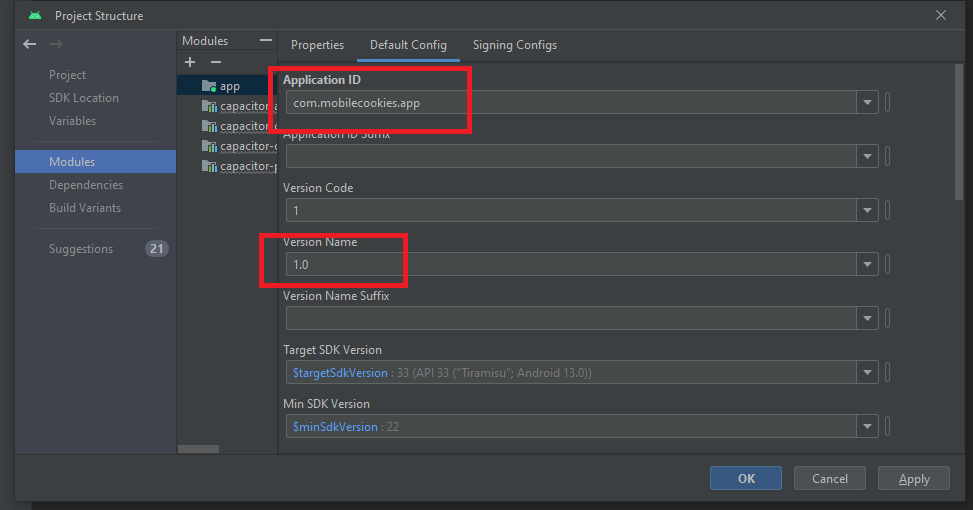
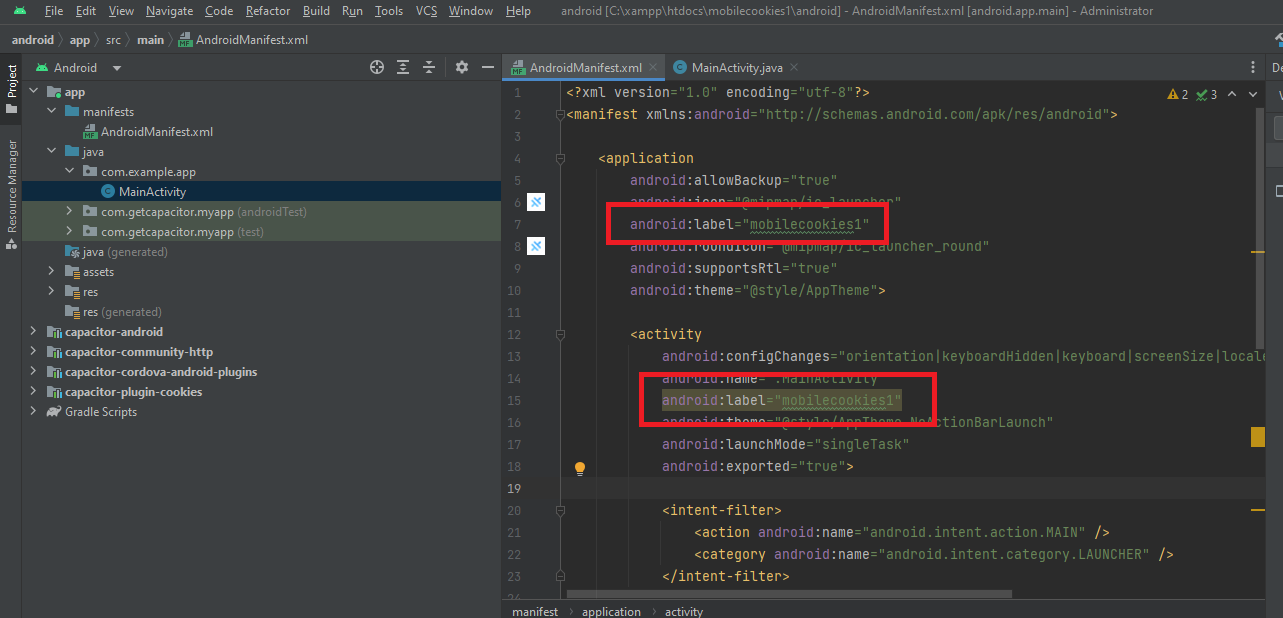
- We configure the project settings:
- We change the name of the app from android:label=“@string/app_name” and the title (What we see on the app box): “@string/title_activity_main” to mobilecookies1:
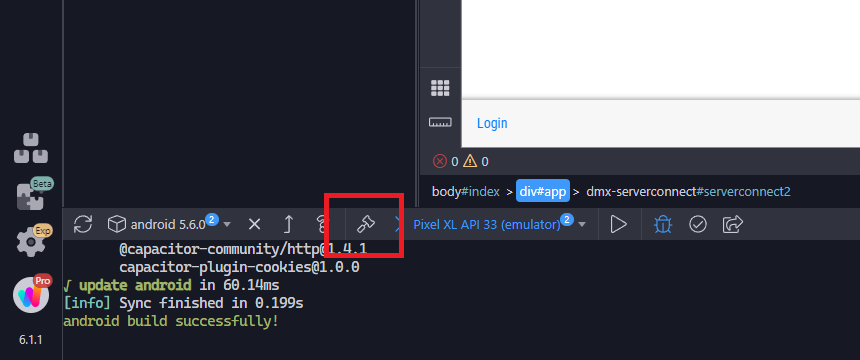
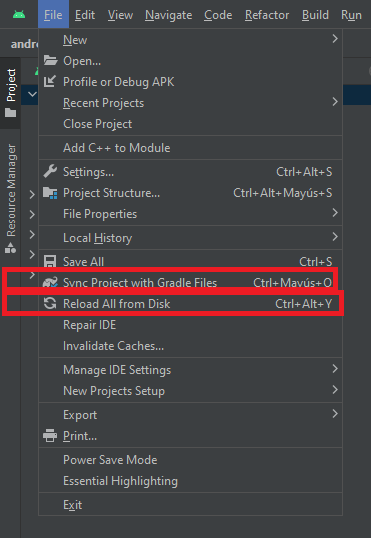
- We reload the files and sync the project with Gradle:
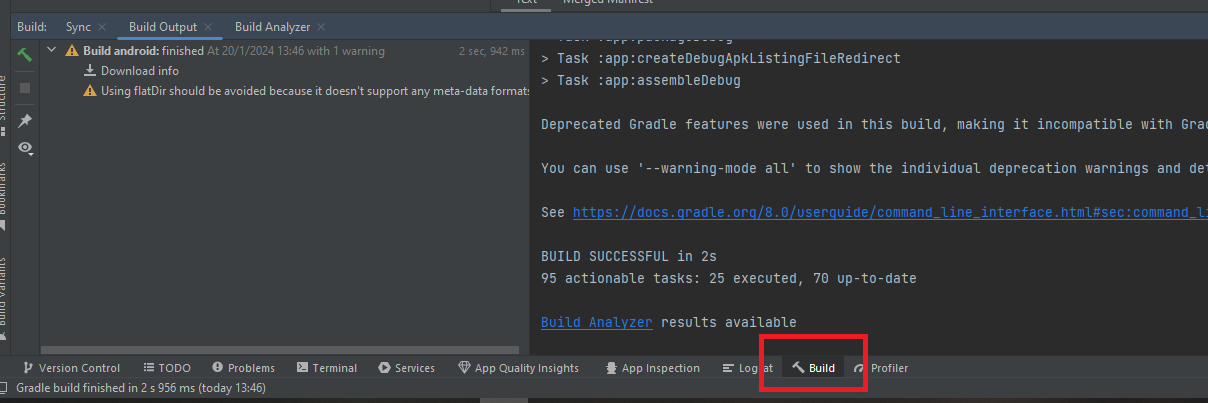
- We make a debug-apk and install it on our device (you can share it via WhatsApp to yourself):
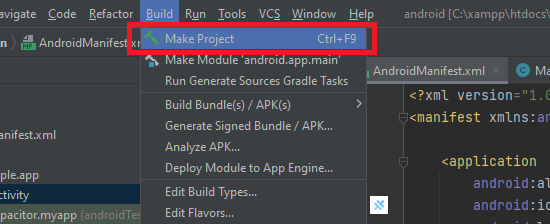
You can see the process on the bottom:
(I have a little warning but nothing to worry about now).
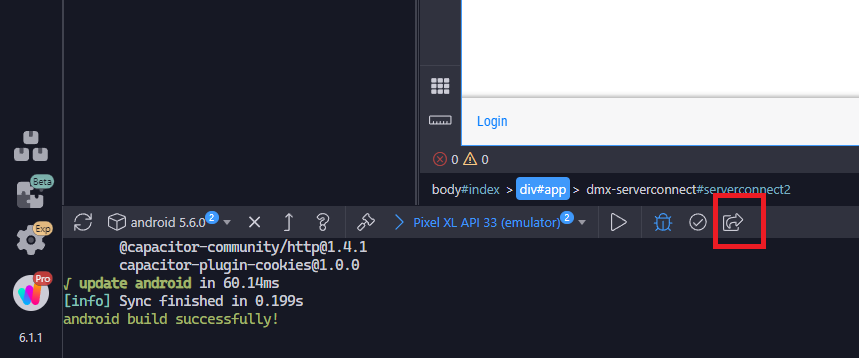

The apk is placed on /android/app/build/outputs/apk/debug/
- The result:
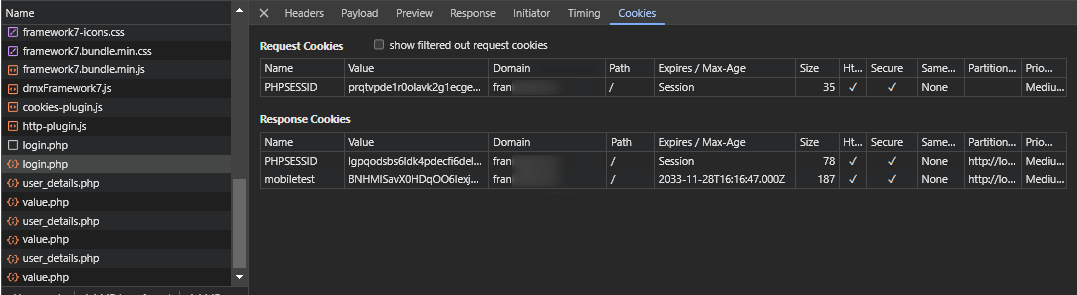
(Note that I swiped up the app, so it gets fully closed and not only minimized) also restarted but was unable to have a record of that:
If we inspect, we see the cookies are there, looks nice the 10-year expiration ![]()
Note 1: On Android, in some cases the Http plugin can enter in conflict with Gradle, the workaround is just changing the capacitor.config.json to:
{
  "appId": "com.example.app",
  "appName": "helloworld",
  "webDir": "www",
  "bundledWebRuntime": true,
  "plugins": {
    "CapacitorCookies": {
      "enabled": true
    },
    "CapacitorHttp": {
      "enabled": false
    }
  },
  "server": {
    "hostname": "localhost"
  }
}
But this won’t work on iOS, so have an eye on that.
Note 2: Remember you can inspect all your app running on the Emulator:
Run the app on Android Emulator and then, go to chrome://inspect/#devices on Chrome
For iOS go to Safari → develop and you’ll see the device.
Note 3: Don’t worry if you don’t see the Cookies on Chrome, the Capacitor Plugin will catch it anyway and that’s the way it has to be.
Note 4: Remember all of this is also possible thanks to @milo as we were working together for an entire month.
Please leave a message if you’re running on some issues.
Thanks for reading.
Fran.