Here we will bind values to 5 hidden text inputs (pid, product, price, qty and subtotal) so that we can update our Arrays and Session when the Add to Cart button is clicked. We will put these hidden fields in the footer of the card.
-
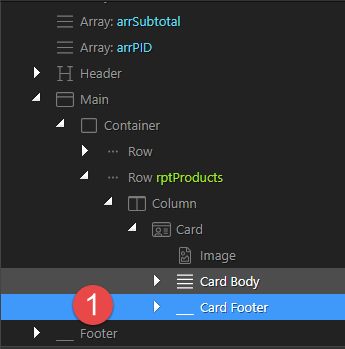
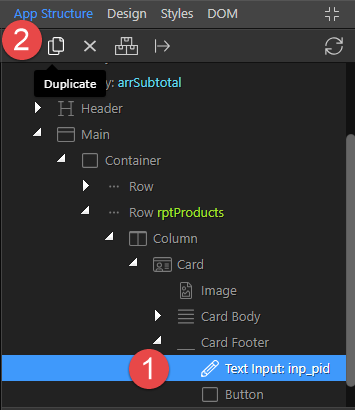
Right click Card Footer (1)
-
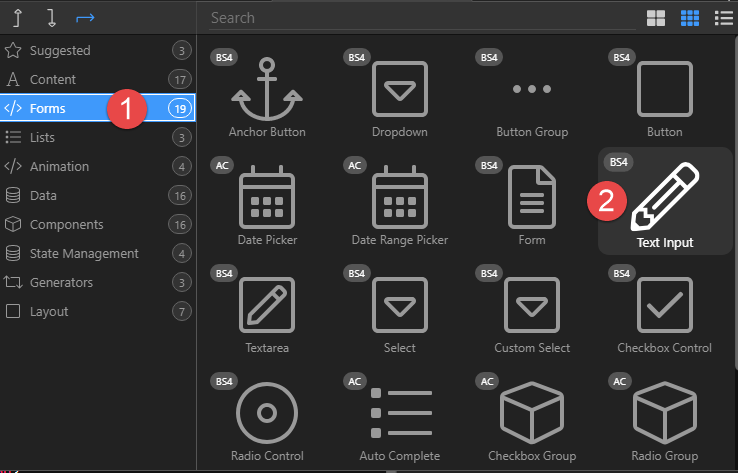
In the pop-up select Forms (1) and Text Input (2)
-
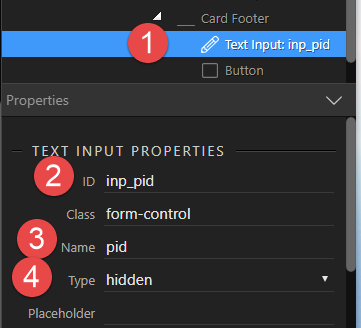
With the Text Input selected (1), enter an ID (2) and Name (3) and set the Type to hidden (4).
-
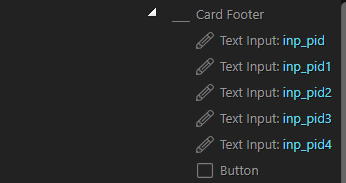
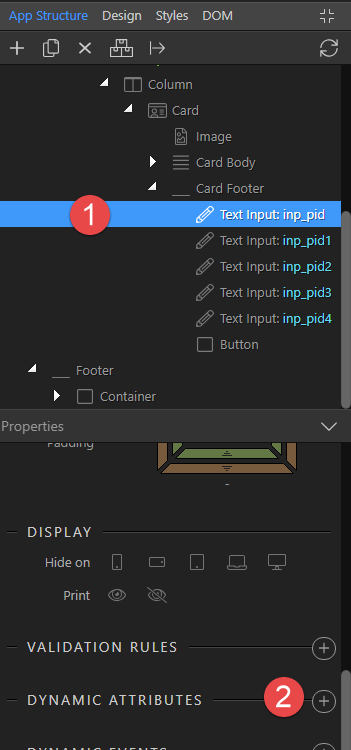
With the above Input still selected (1), copy it 4 times for product, price, qty and subtotal (2)
the result will look like
-
Bind the value of inp_pid. Select the first Text input (1), and click on Dynamic Attributes (2)
-
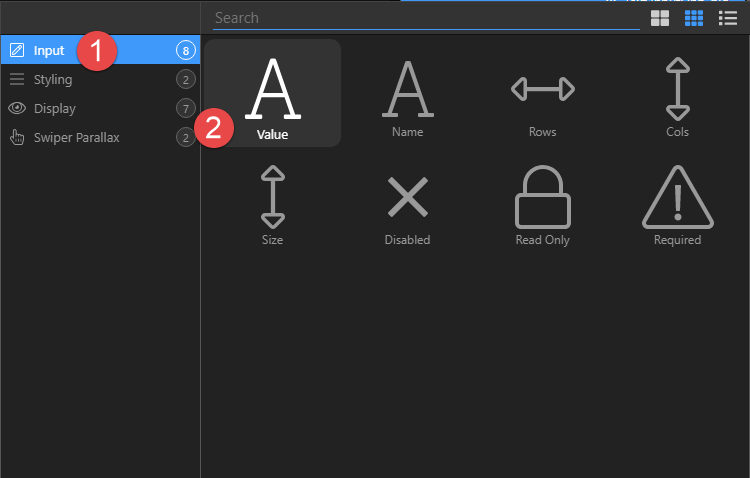
In the pop-up, choose Input (1) and Value (2)
-
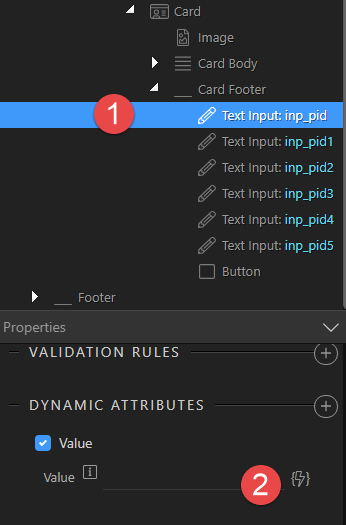
With the Text Input (1) still selected, click on the Value thunder bolt (2)
-
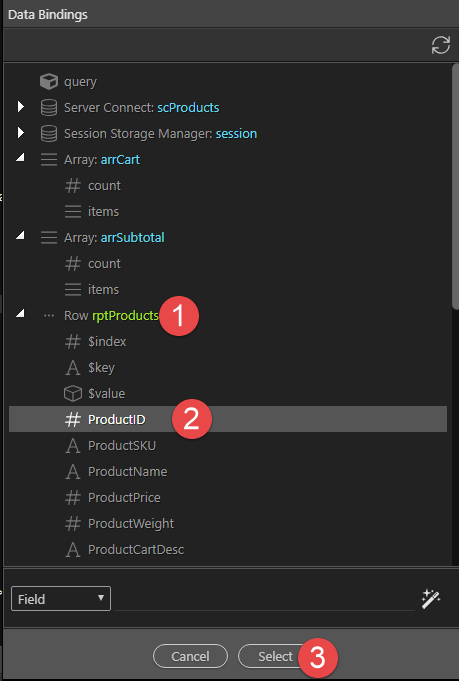
For the value choose ProductID (2) under the repeat row (1) and click Select to apply the binding (3)
-
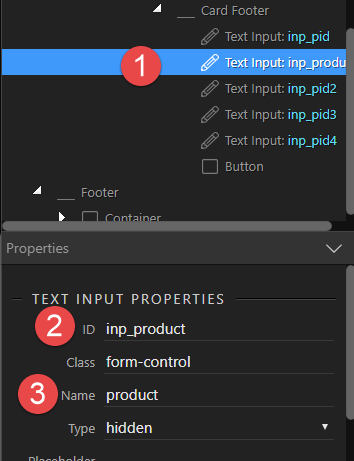
Select the next Input (1), change the ID (2) and Name (3)
-
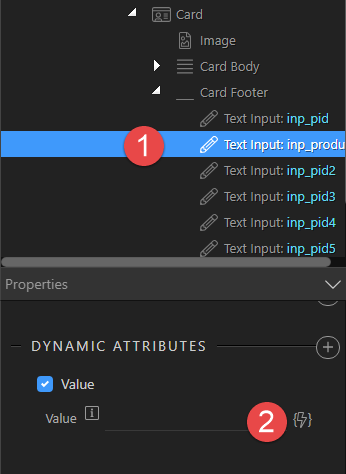
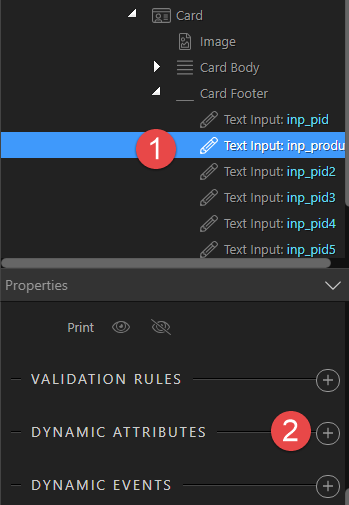
With inp_product (1) still selected, choose Dynamic Attributes (2)
-
In the pop-up, choose Input (1) and Value (2)
-
With the Text Input (1) still selected click the Value lightning bolt (2)
-
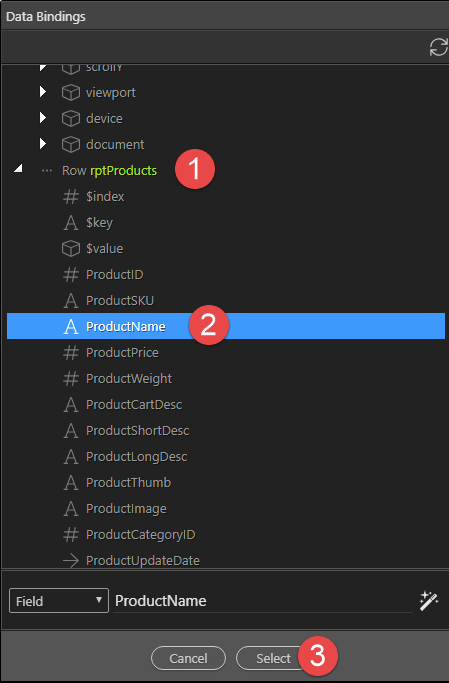
In the pop-up, make sure to go to the repeat Row (1), choose ProductName (2) and Select (3) to apply the binding.
-
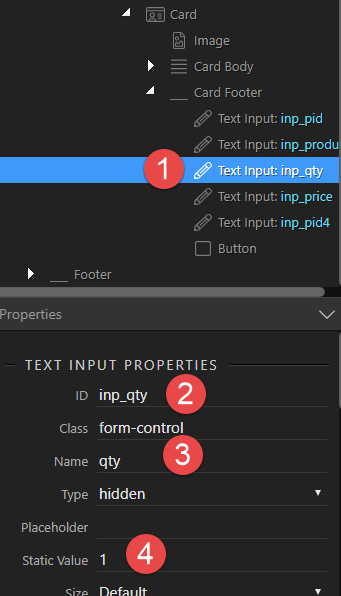
Select the next Input (1), change the ID (2) and Name (3). To keep things simple for this exercise, we’ll give the Input a Static Value of 1 (4). Later on we can show the input and allow the user to choose the quantity.
-
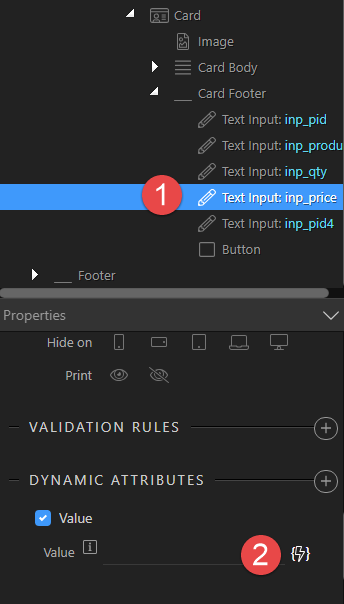
For the Price, select the 4th Text Input (1) and change the ID (2) and Name (3)
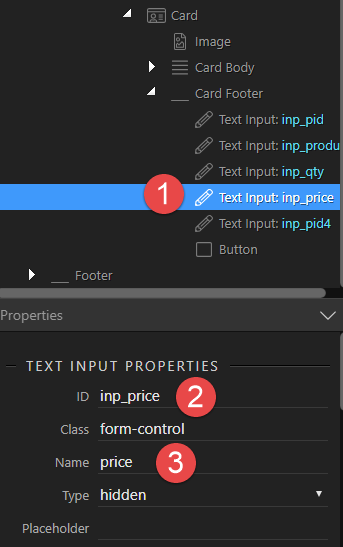
16 With the Text Input (1) still selected, click Dynamic Attributes (2)

-
In the pop-up, select Input (1) and Value(2)
-
With the Text Input (1) still selected, click the Value lightning bolt (2)
-
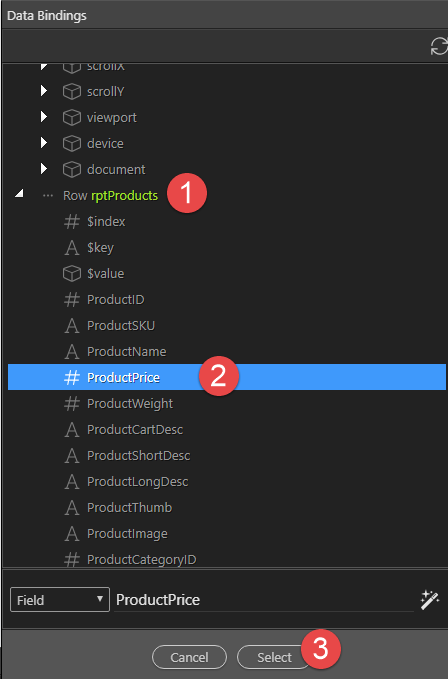
In the pop-up, under the repeat Row (1), choose ProductPrice (2) and Seelect (3) to apply the binding.
-
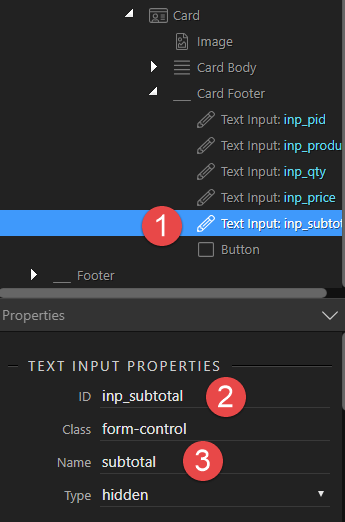
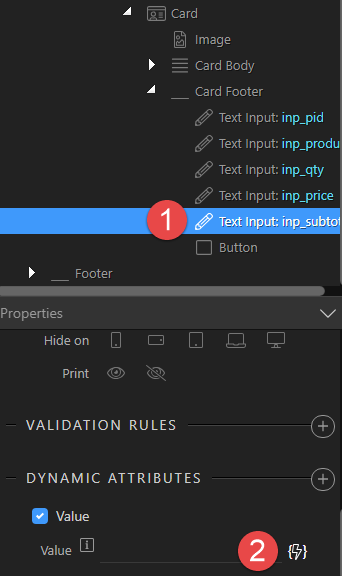
Select the last Text Input (1) and assign an ID (2) and Name (3)
-
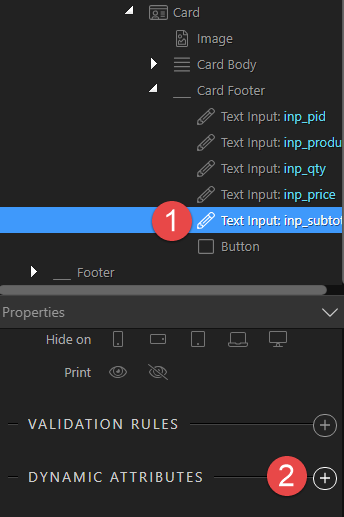
With the Text Input (1) still selected, click on Dynamic Attributes (2)
-
In the pop-up, select Input (1) and Value (2)
-
With the Text Input (1) still selected, click the Value thunder bolt (2)
-
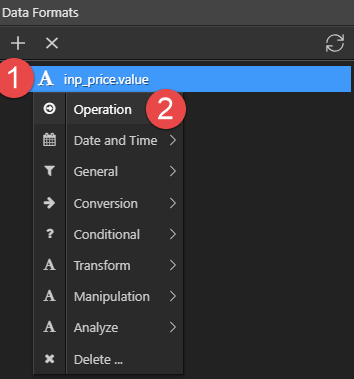
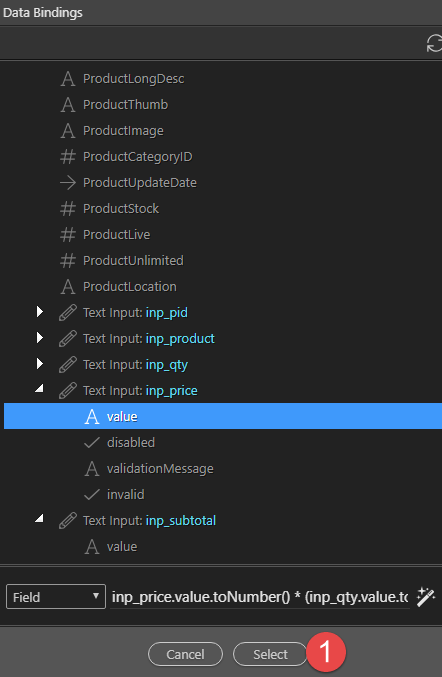
In the pop-up, select Text Input inp_price (1), value (2) and click the Formatting button (3)
-
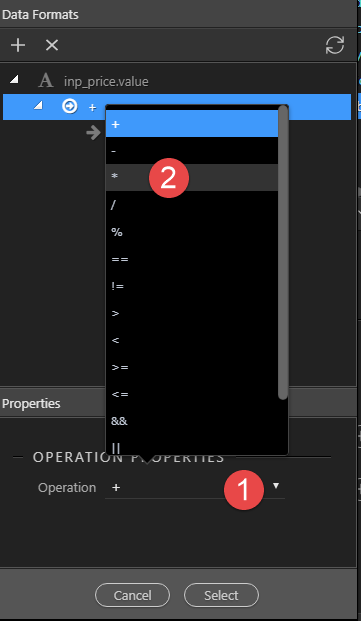
In the pop-up right click inp_price.value (1) and choose Operation (2)
-
Click the Operation operator (1) and choose the multiply (*) symbol (2)
-
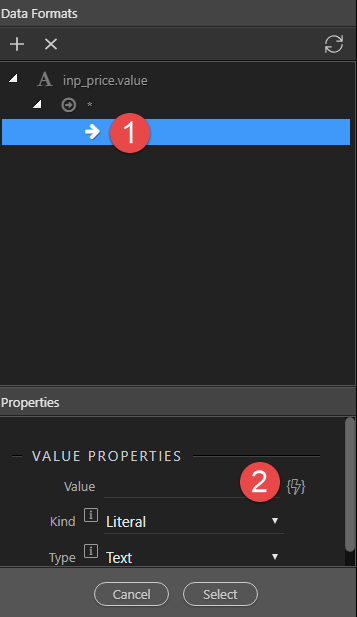
Choose the multiplier arrow (1) and click the Value thunder bolt (2)
-
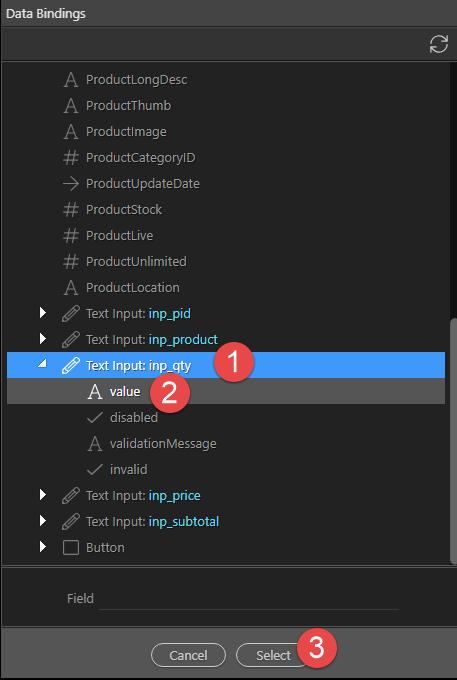
Choose the Input inp_qty (1), value (2) and Select (3) to apply the value
-
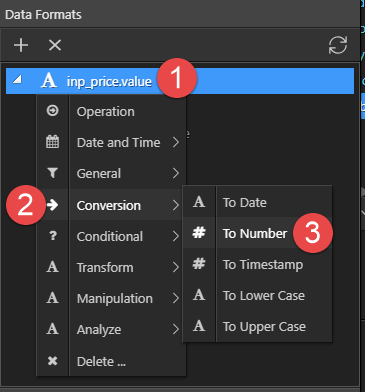
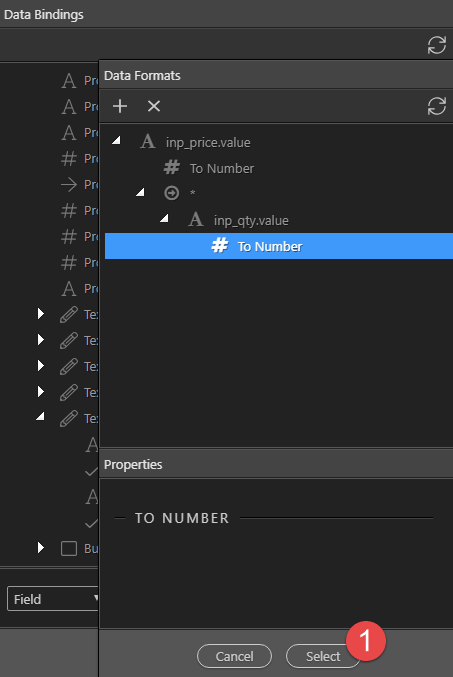
The problem is that these values not numeric values. We need to convert them into a number. Right click the multiplicand (1) and choose Conversion (2) To Number (3).
-
Repeat step 29. for the multiplier (inp_qry.value) so that the end result looks like. Click Select (1) to assign the value
-
Click Select to apply the binding.
-
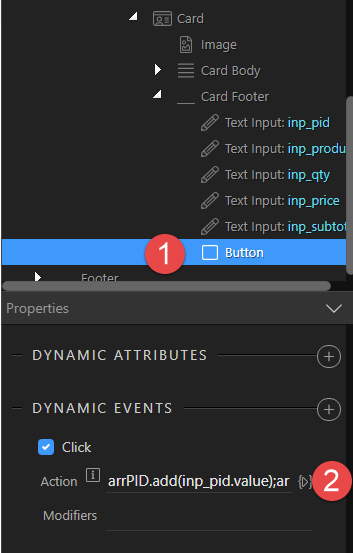
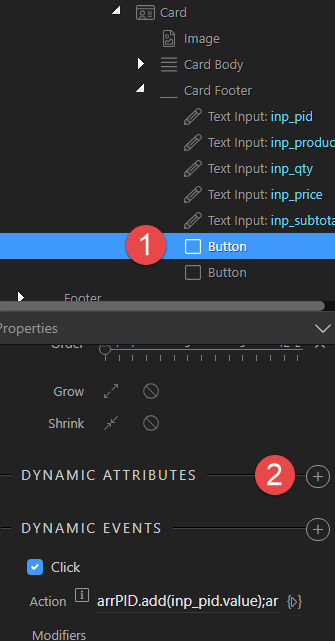
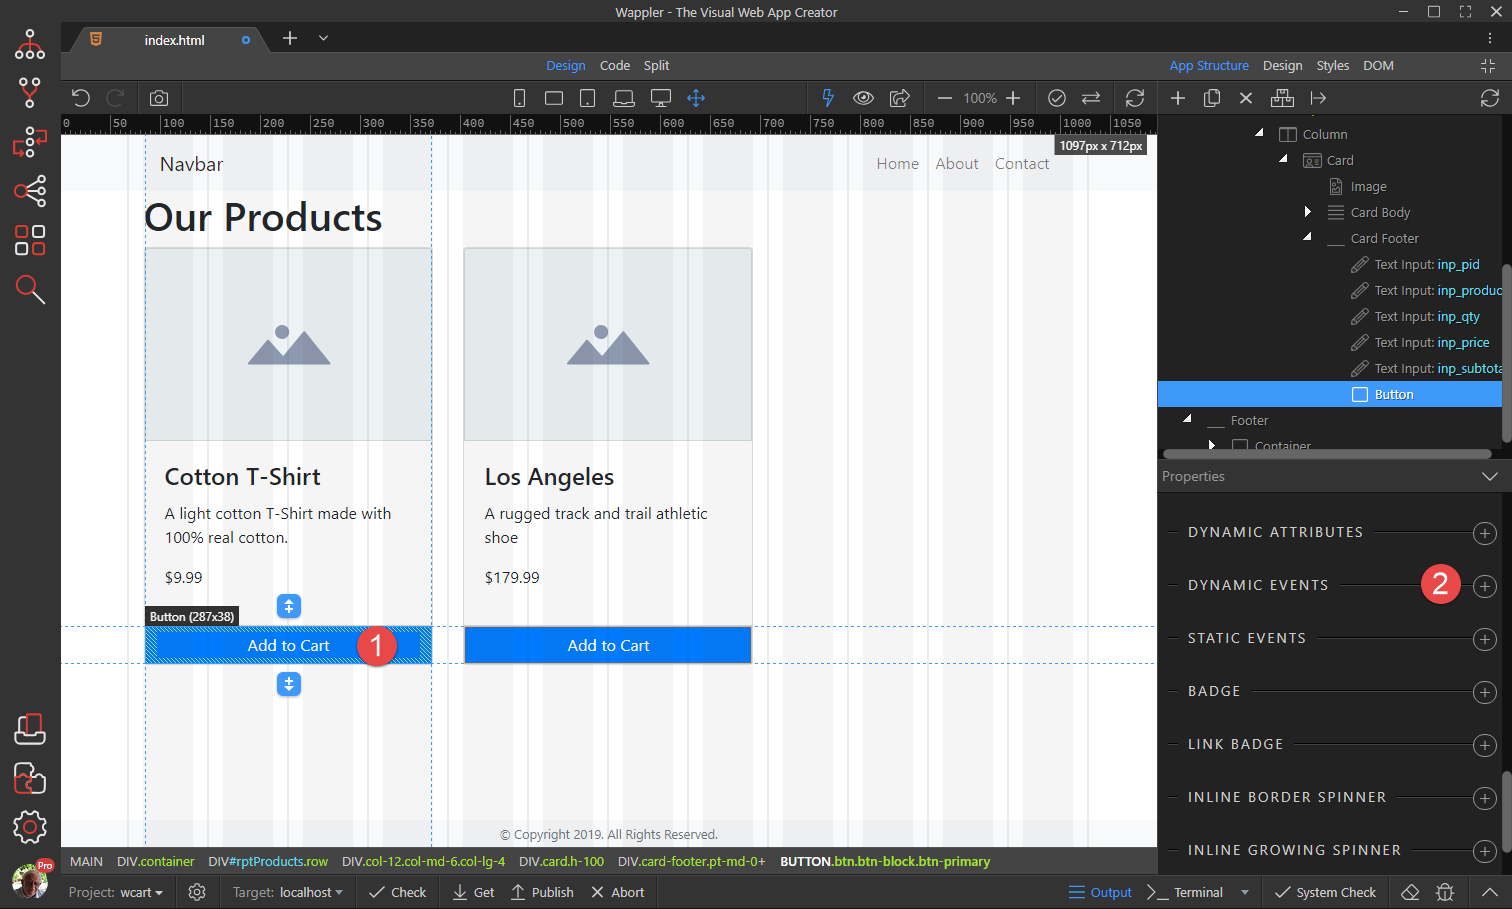
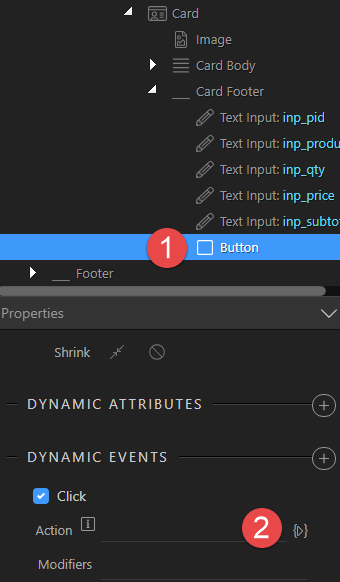
Select the Add to Cart Button (1) and choose Dynamic Events (2)
-
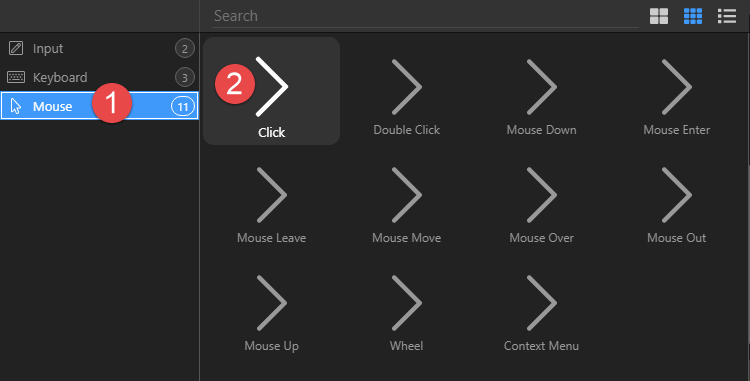
In the pop-up, choose Mouse (1) and Click (2)
-
With the Button (1) still selected, click the Action thunder bolt
-
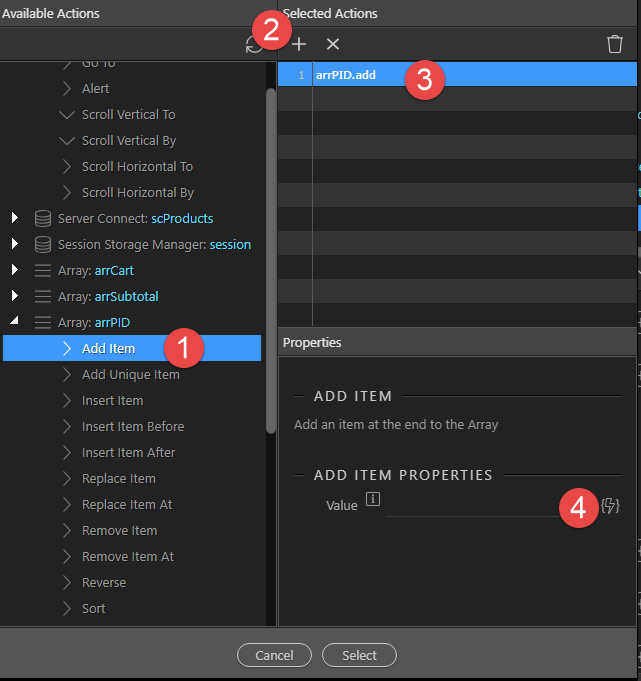
In the pop-up, select Add Item (1) under the arrPID, add this to our selection (2), select the action (3) and click the Value lightning bolt (4)
-
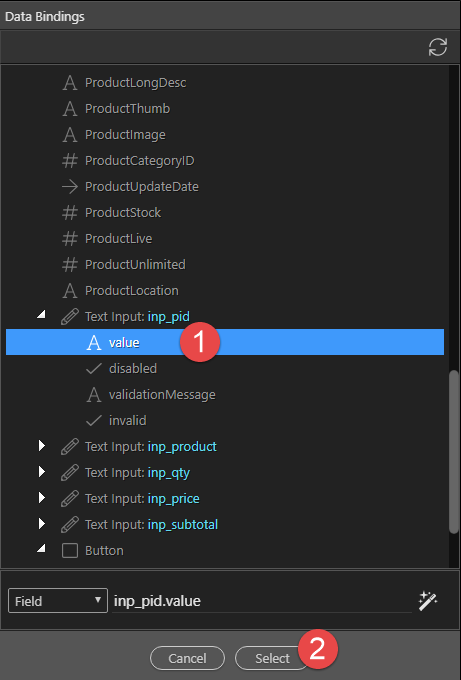
In the pop-up, select the value (1) of the text input for inp_pid and click Select (2)
-
For the subtotal, we select Add Item (1) under arrSubtotal, add to Selected Actions (2), select the action (3) and click the Value thunder bolt (4)
-
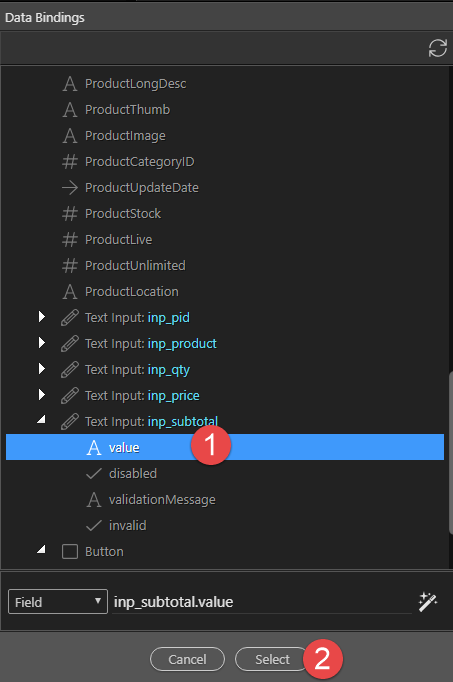
In the pop-up, select the value of the text input for inp_subtotal (1) and click Select (2)
-
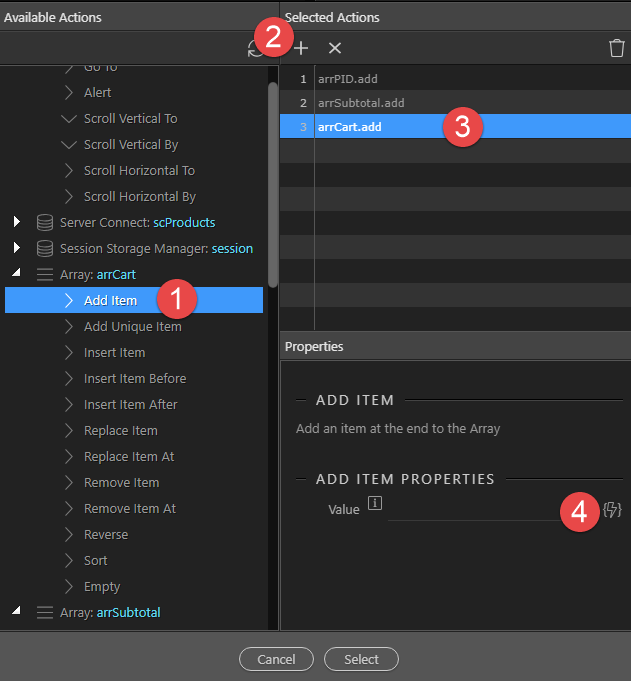
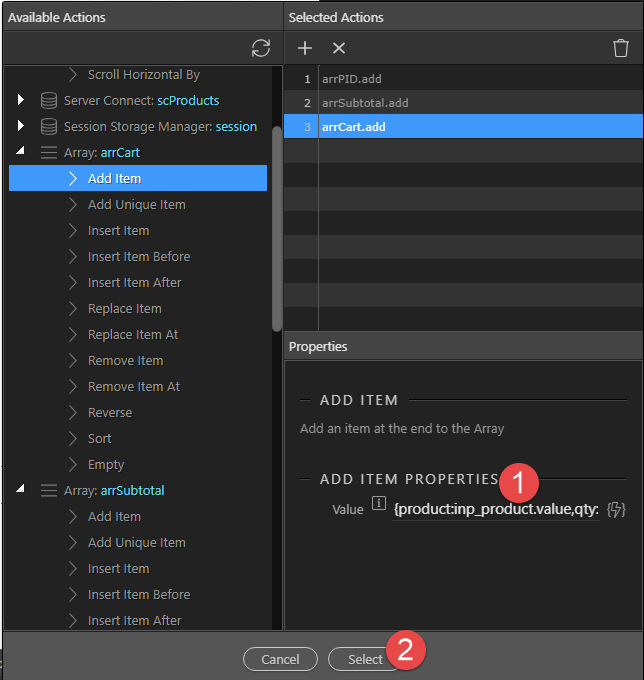
Lastly, a slightly more difficult one, we’ll add the contents of the cart. Select Add Item under the arrCart (1) and add it to our actions (2). Select the action (3) and click the thunderbolt for the Value (4).
-
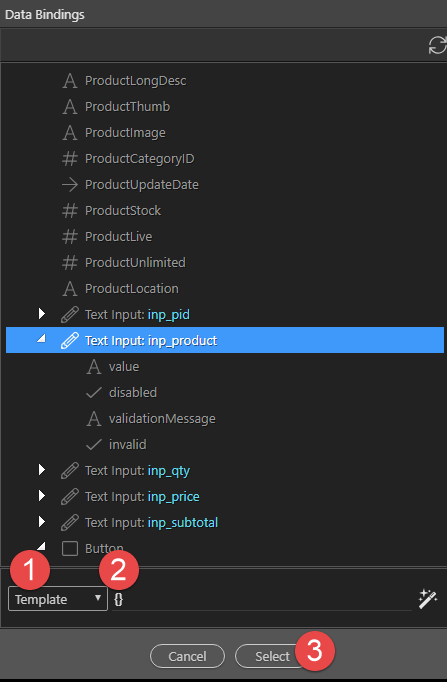
We have 3 items to add to the Cart object (product, qty and price). Change the value to a Template (1) and enter two curly brackets (opening and closing) to facilitate our keyed array (2). Click Select (3)
-
Add the following code within the curly brackets (1)
product:inp_product.value,qty:inp_qty.value,price:inp_price.value
and click Select (2) to add our actions


Optional Steps
If you are like me and want to see the result of your work, save the document and open it in a browser. I use Chrome, your browser may be different.
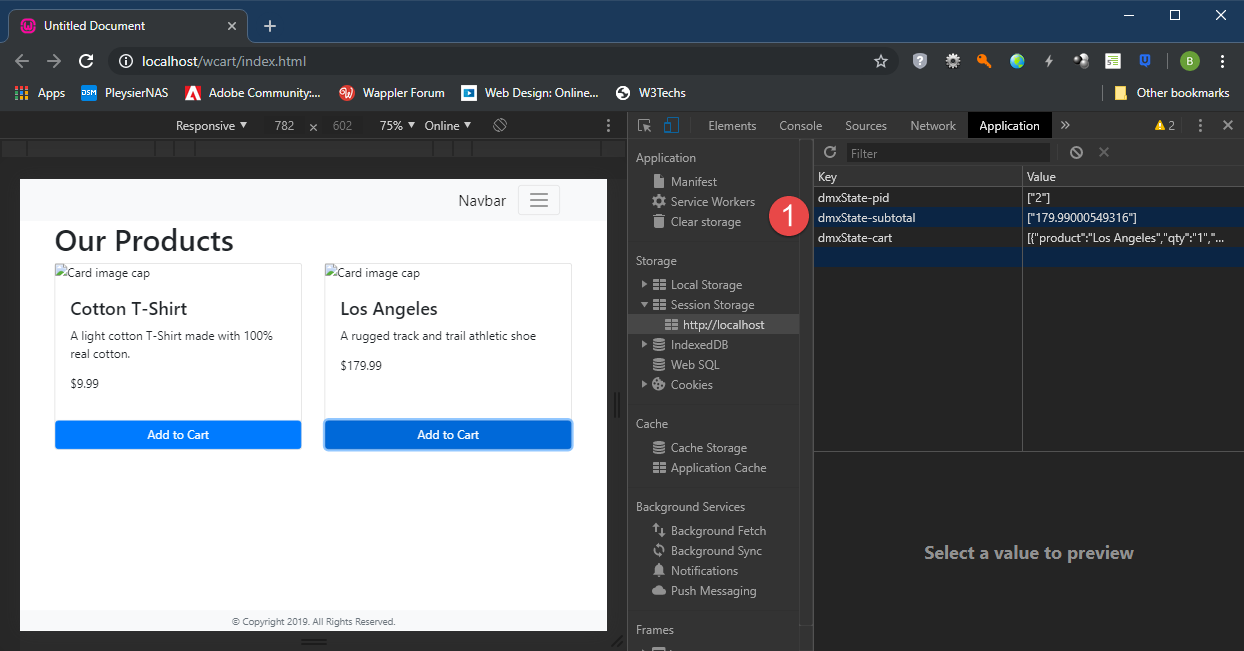
A1. Use F12 to open the developer window. Choose the Application tab (1), Session Storage (2) and your server (3).
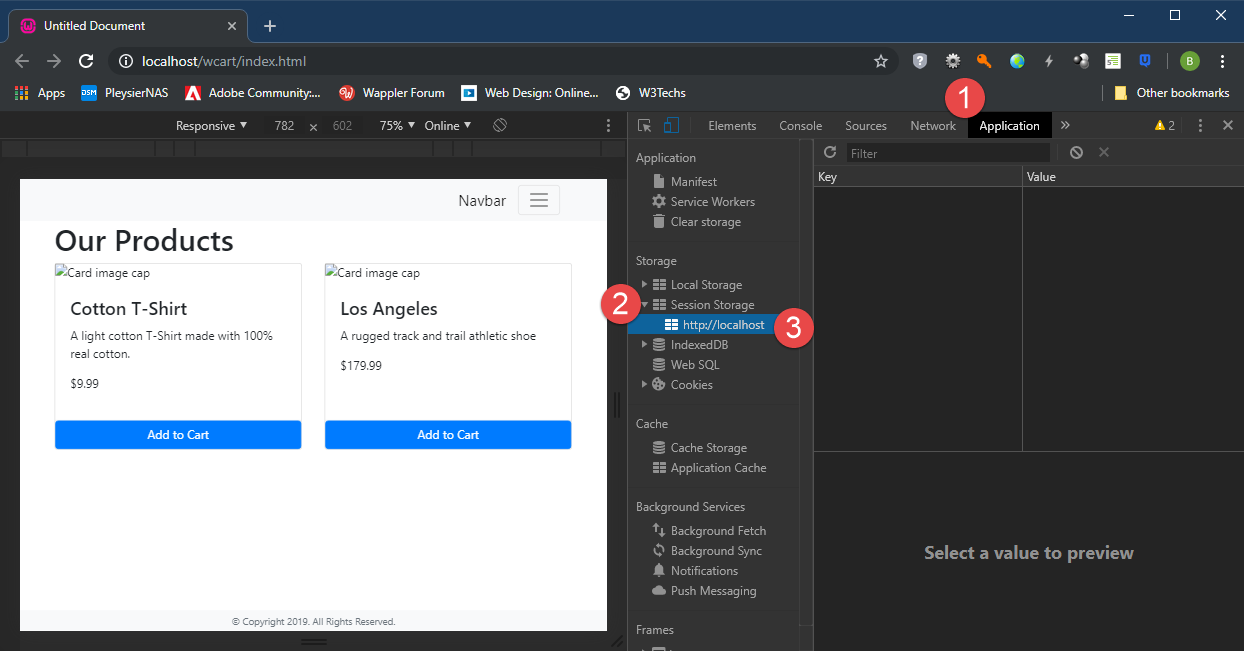
A2. Click an Add to Cart button and marvel at the result (1)
Back to our project. We still need to be directed to the Cart page when we click the Add to Cart button.
-
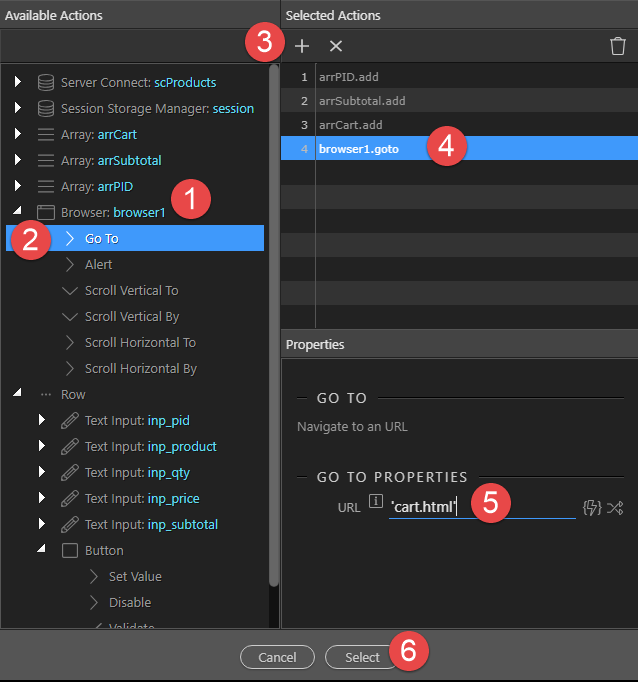
Select the Add to Cart button (1) and choose the Action button (2)
-
In the pop-up, select Browser (1), Go To (2), add to Selected Actions (3), select the browser entry (4) and add the URL for the Cart page ‘cart.html’ (5) (don’t forget the single quotes). Click Select to apply the action (6)
-
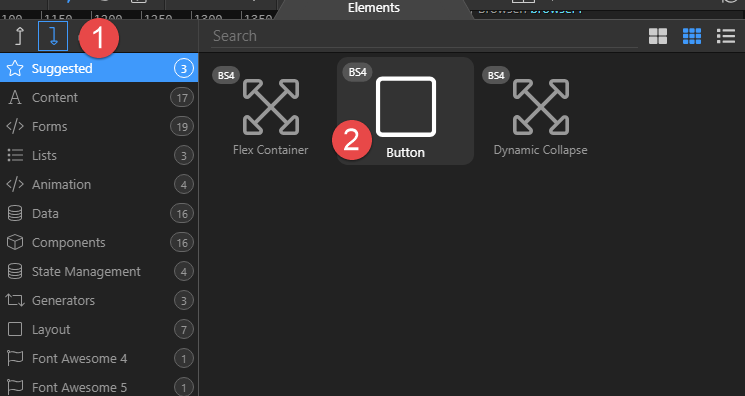
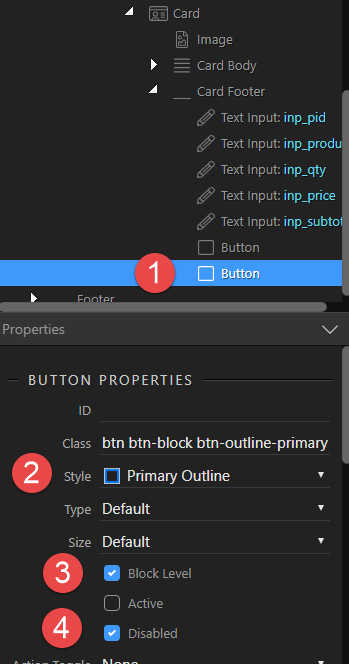
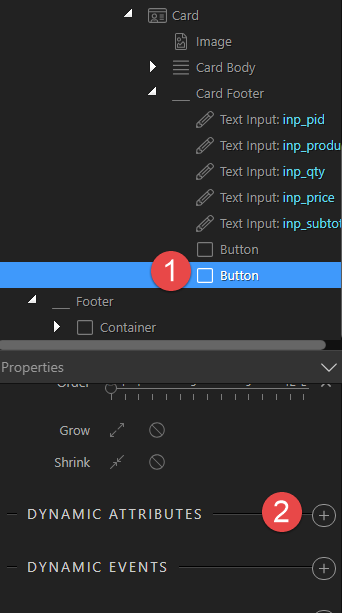
Right click the Button
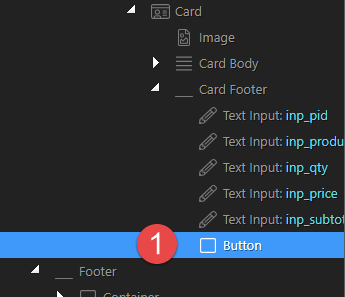
-
Select Insert After (1) and Button (2)
-
With the Button (1) still selected, give it a Style (2), make it a Block Level (3) and Disabled (4)
-
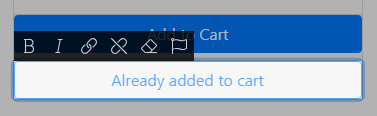
Double click the Button and change the text
-
With the Button (1) still selected, click Dynamic Attributes (2)
-
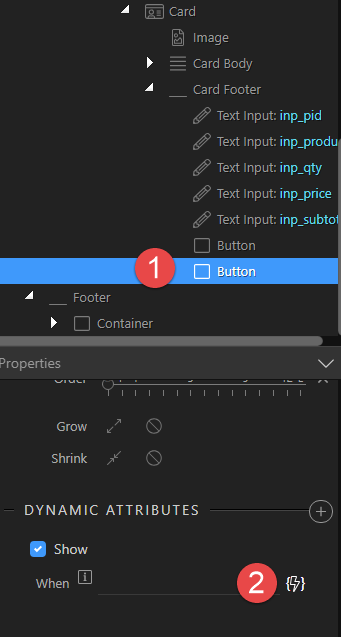
Choose Display (1) and Show (2)
-
With the Button (1) still selected, choose the When thunder bolt (2)
-
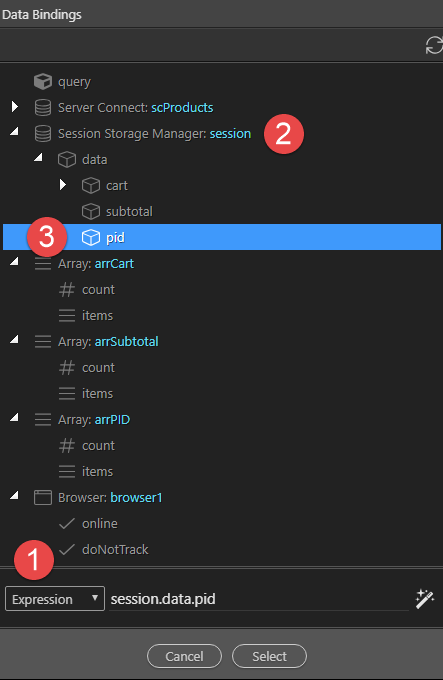
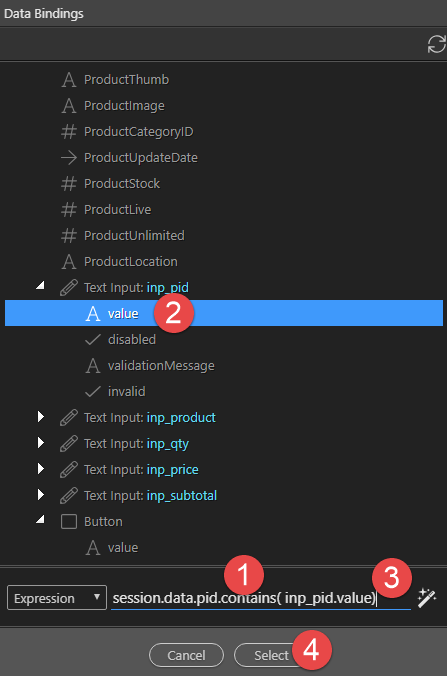
Change the field to an Expression (1) and under Session Storage (2) choose pid (3)
-
Add .contains( (1), click inp_pid value (2) and add a closing bracket (3). Click Select (4)
-
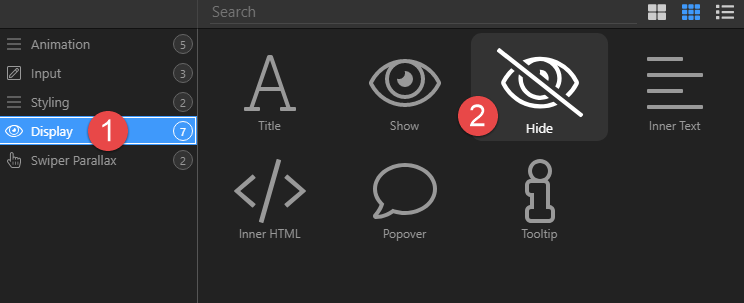
Select the Add to Cart Button (1) and click Dynamic Attributes (2)
-
Select Display (1) and Hide (2)
-
With the Button (1) still selected, choose the When thunder bolt (2)
-
Change the field to an Expression (1) and under Session Storage (2) choose pid (3)
-
Add .contains( (1), click inp_pid value (2) and add a closing bracket (3). Click Select (4)
-
Don’t forget to save your work.