Introduction
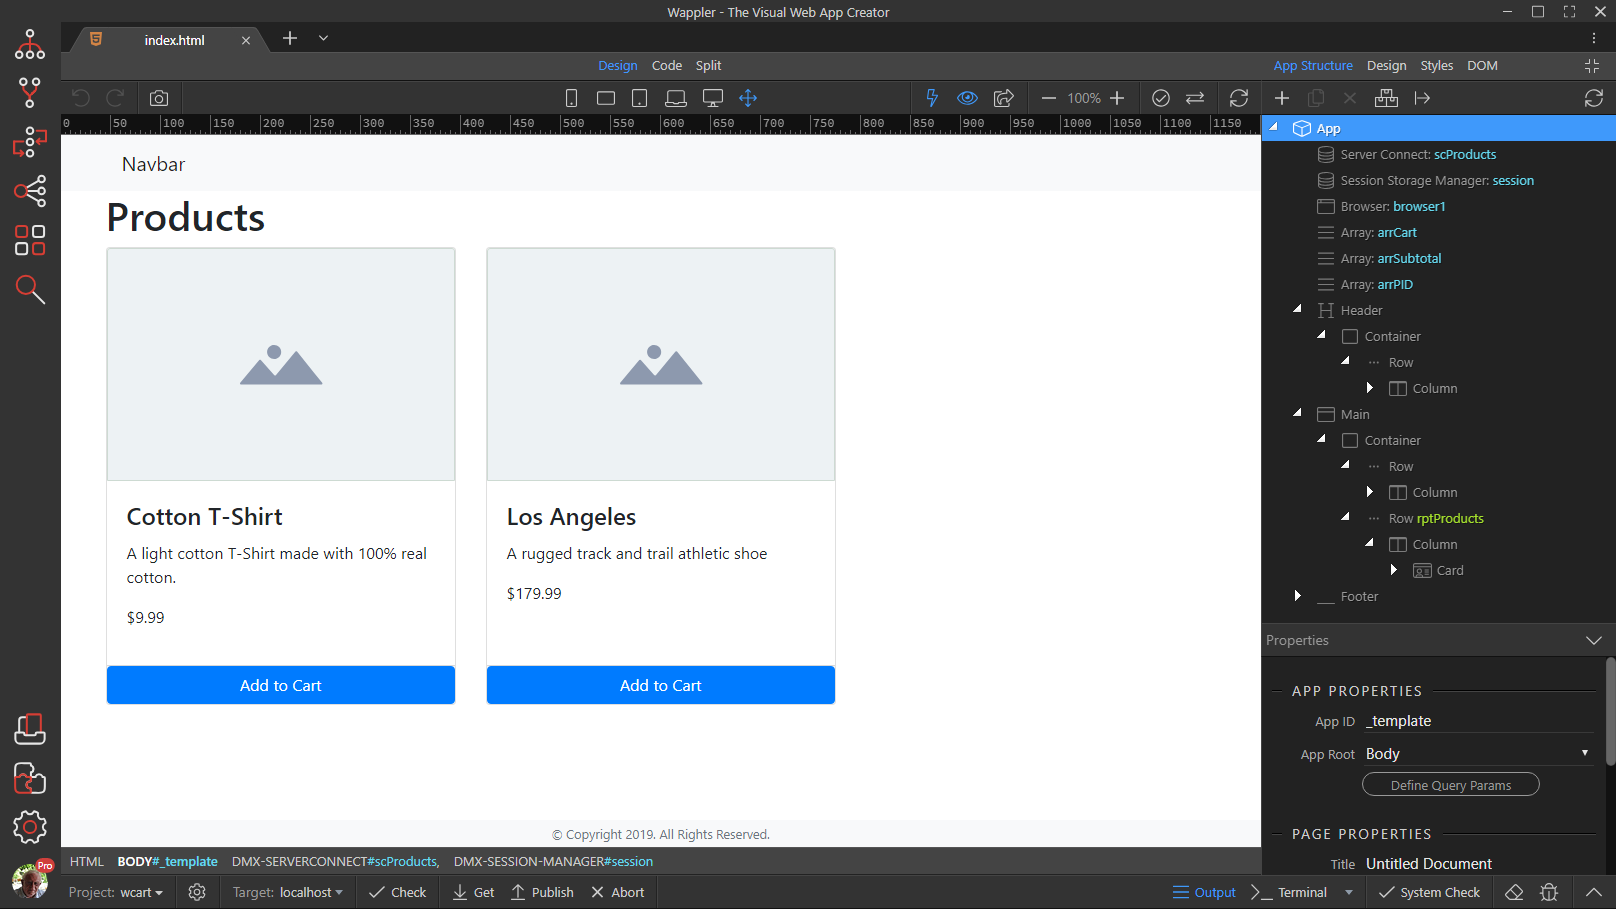
This is what the Products page will look like when finished.
Create Products page from the Template
-
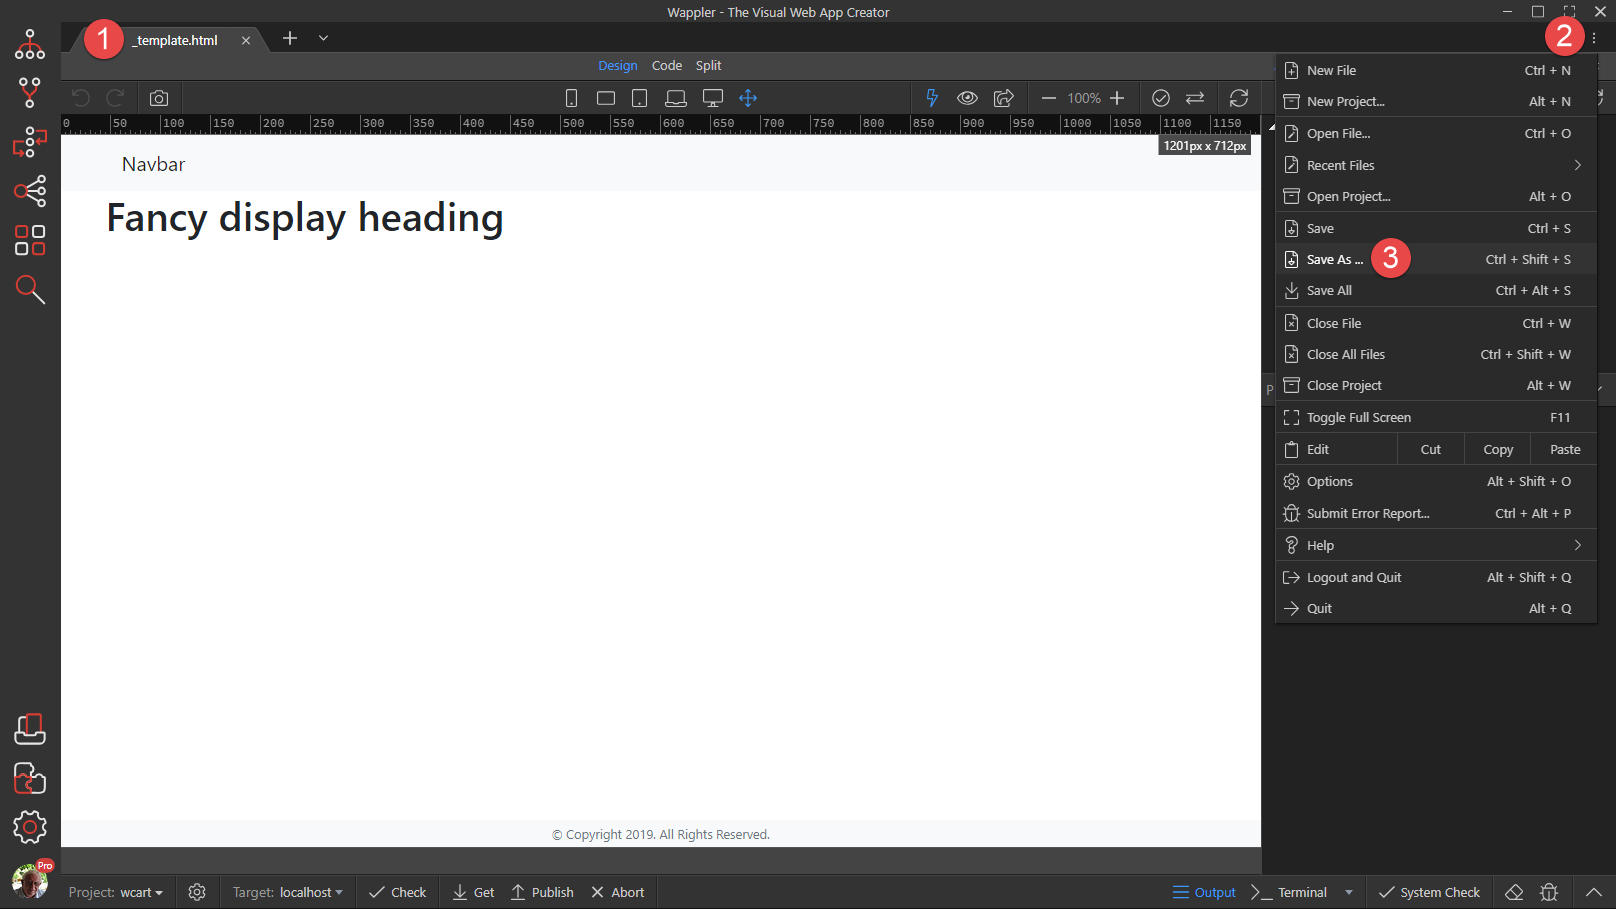
Load the _template.html page (1), click the Menu button (2) and select Save As (3)
-
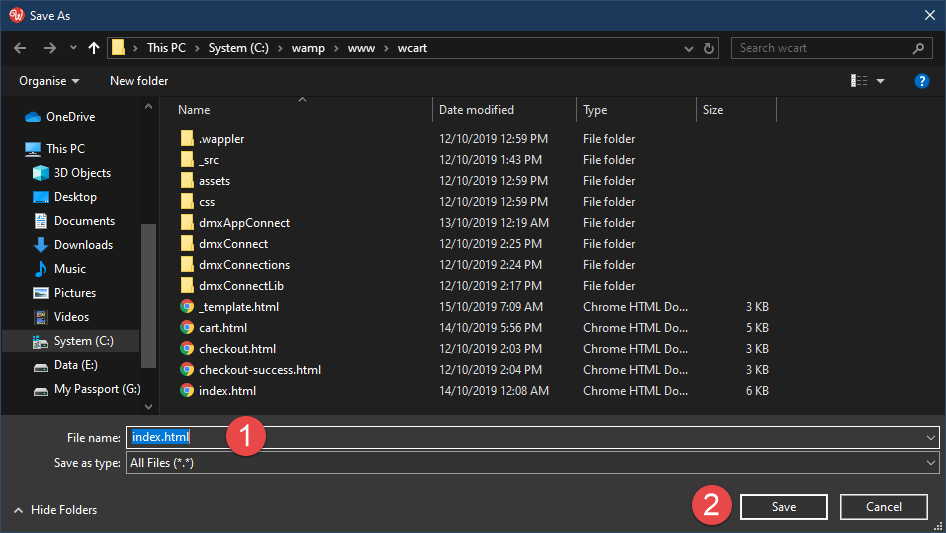
In the pop-up, give the new file a name (1), we have called it index.html, and click Save (2)
Add a Data Source to show the Products
-
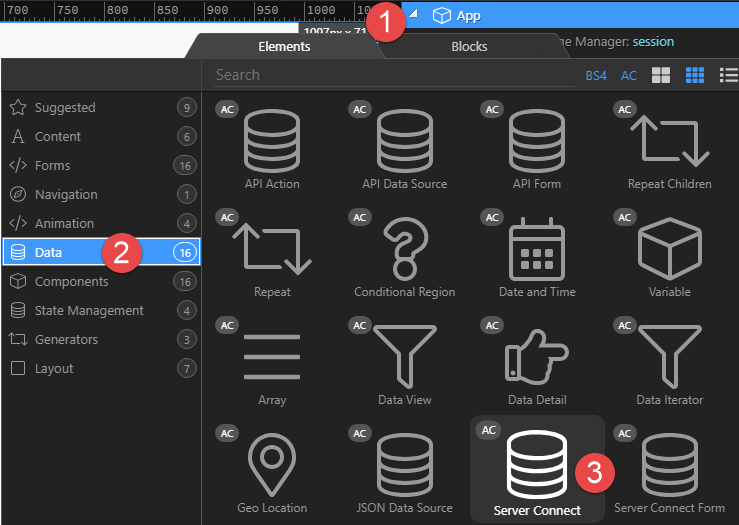
We need a data source to display our products. Right click App (1), choose Data (2) and click on Server Connect (3)
-
With Server Connect (1) still selected, give it an ID (2) and click on Select Server Action (3)
-
In the pop-up, choose Products (1), list (2) and select (3)


Construct the page to include a container (Card) for the Product
-
As you know, Bootstrap is structured mobile first, hence we will now go to the mobile view (1)
-
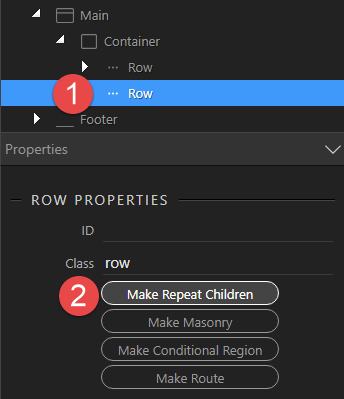
Right click Row (1) under Container, choose to add after (2) and click on Row
-
With the new Row (1) still selected, choose Make Repeat Children (2)
-
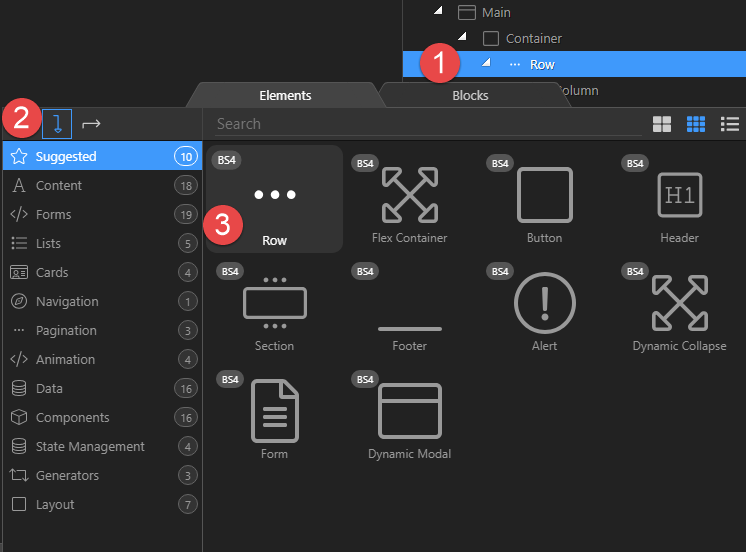
With the new Row (1) still selected, give it an ID and click the lightning bolt (3) for the Expression.
-
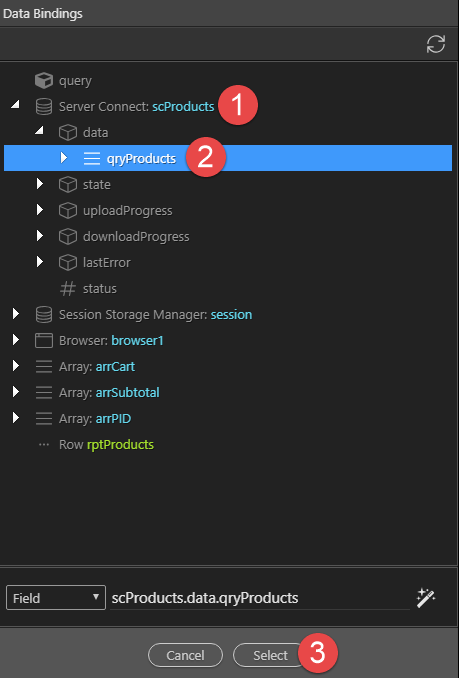
In the pop-up, choose Server Connect (1), qryProducts (2) and Select (3)
-
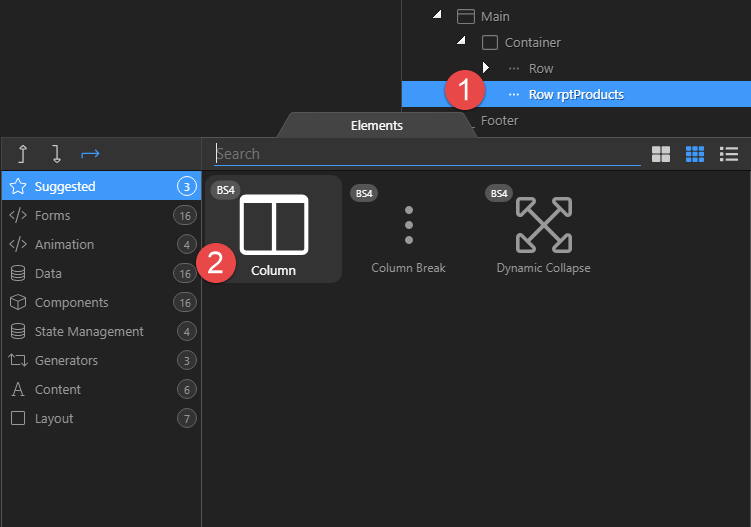
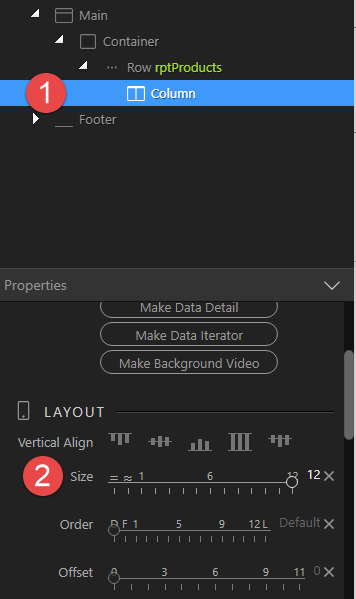
Right click Row (1) and click on Column (2)
-
With the Column (1) still selected, give the Column a size of 12
-
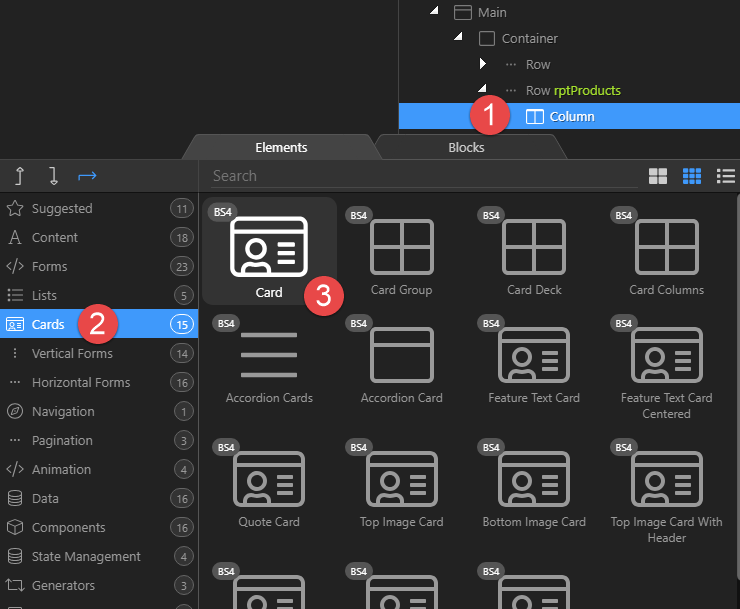
Right click on Column (1), choose Cards (2) and click on Card (3)


Bind the Data to show our Product
To keep this example simple, we will not concern ourselves with images, instead we will give the Card a title and description.
-
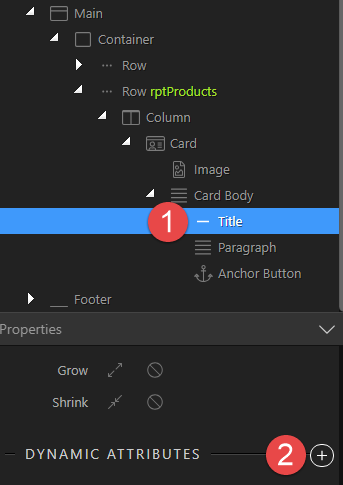
Under Card Body, click on Title (1) and Dynamic Attributes (2)
-
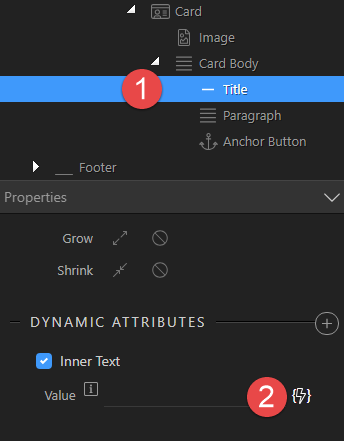
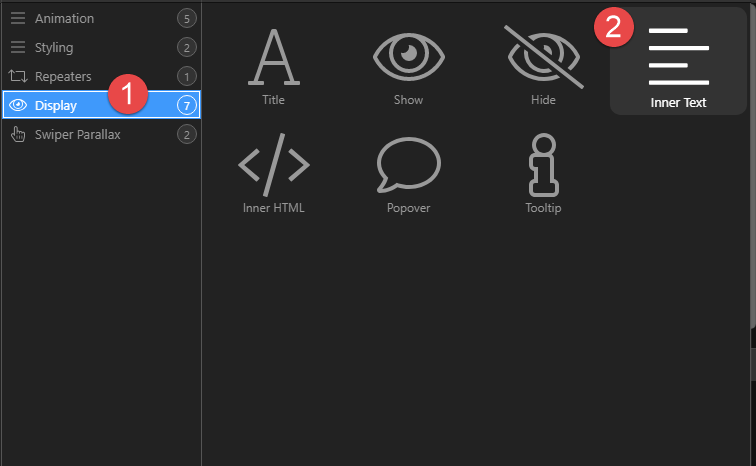
In the pop-up, choose Display (1) and Inner Text (2)
-
With Title (1) still selected, click the lightning bolt (2) for Value
-
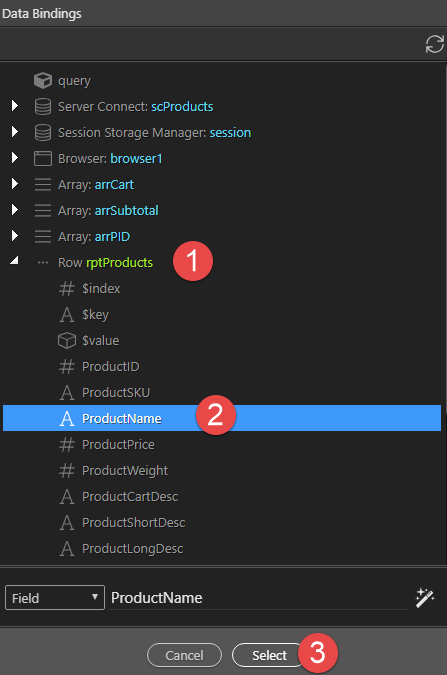
In the pop-up, select the Row (1) and click on ProductName (2) Click Select (3) to apply the binding
-
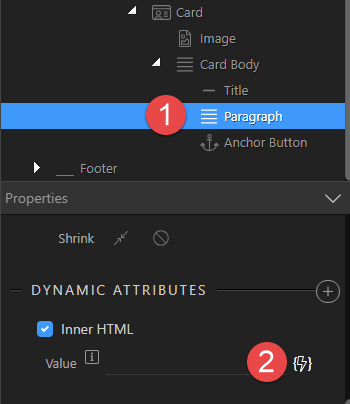
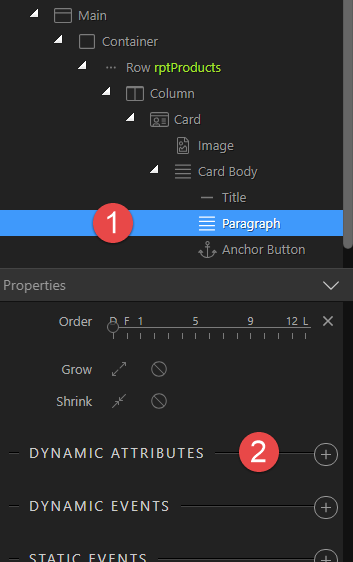
Select Paragraph (1) and Dynamic Attributes (2)
-
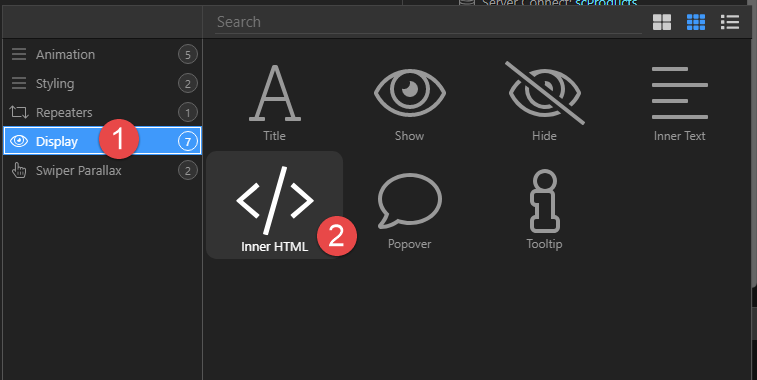
In the pop-up, choose Display (1) and Inner HTML (2) if the description is HTML coded (e.g. when the input has the Medium Editor enabled) otherwise choose Inner Text.
-
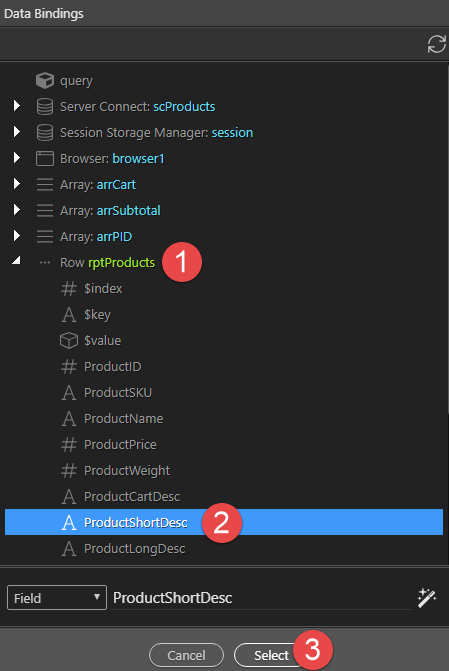
With Paragraph (1) still selected, click the lightning bolt (2) for the Value
-
In the pop-up, choose Row (1), ProductShortDesc (2) and Select to apply the binding
-
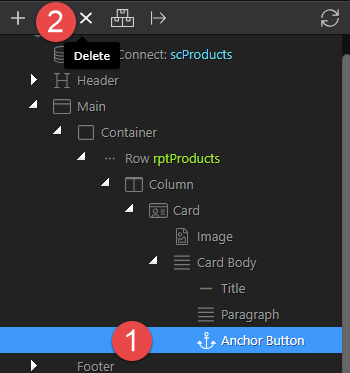
We do not need the button. Select the Anchor Button (1) and click the Delete button (2)
-
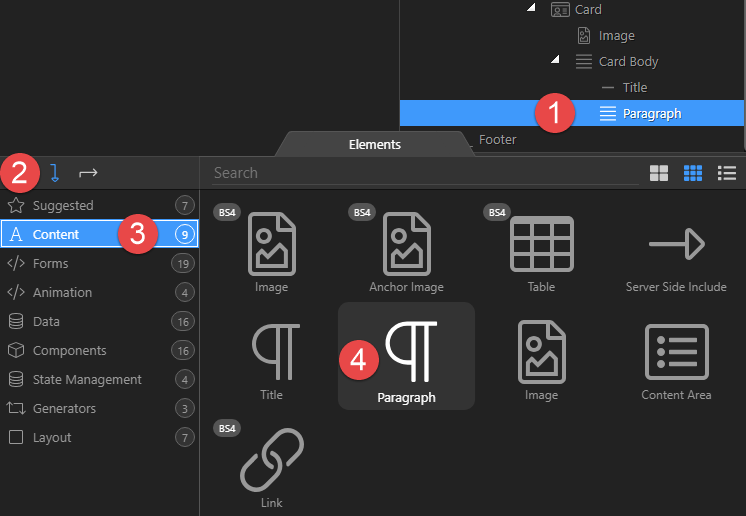
Right click Paragraph (1), add after (2), Content (3) and click on Paragraph (4)
-
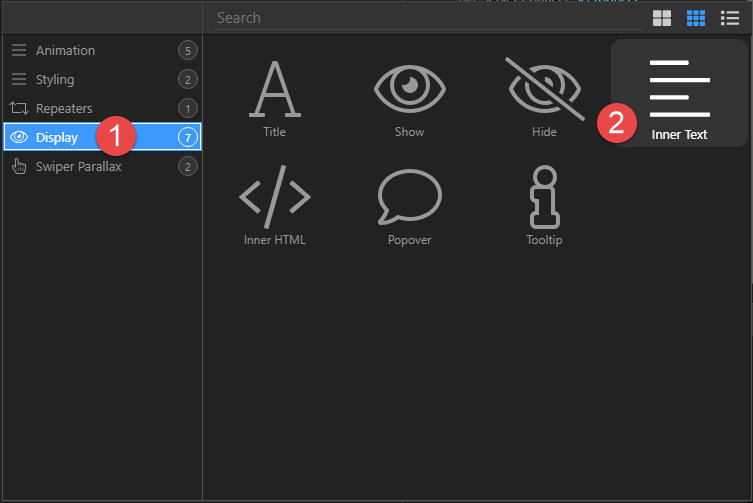
With Paragraph (1) still selected choose Dynamic Attributes (2)
-
In the pop-up, choose Display (1) and Inner Text (2)
-
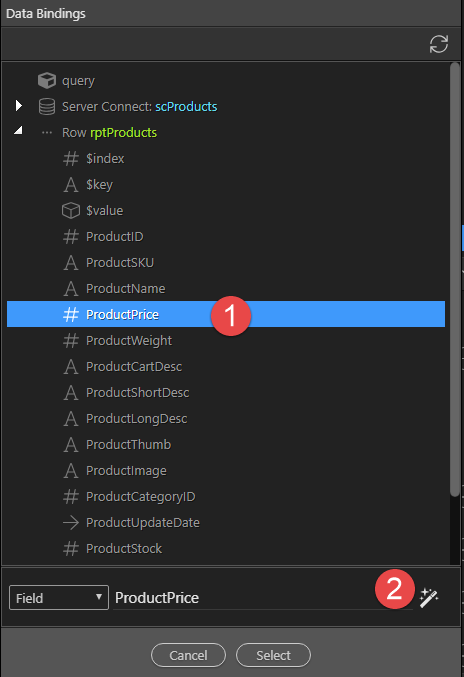
With Paragraph (1) still selected, click the lightning bolt (2) for the Value
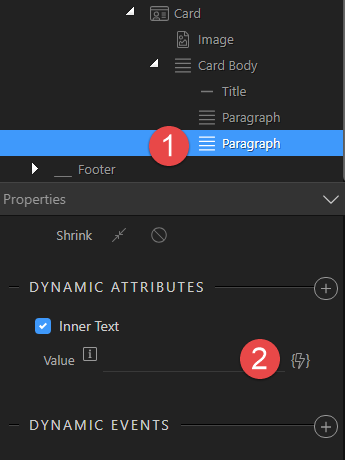
-
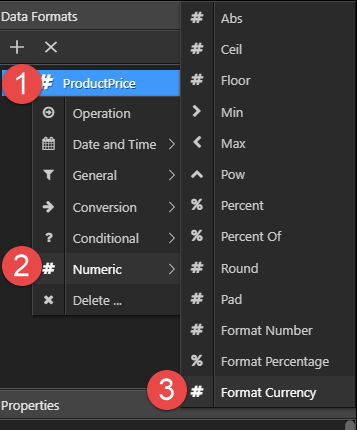
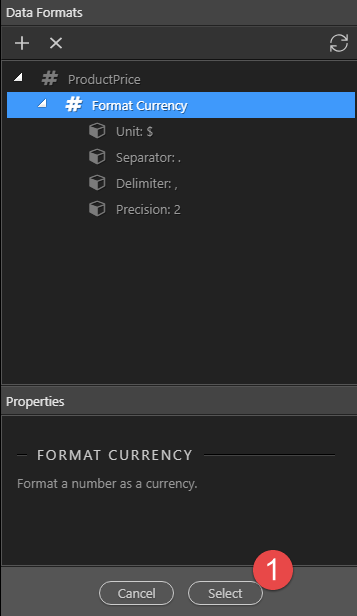
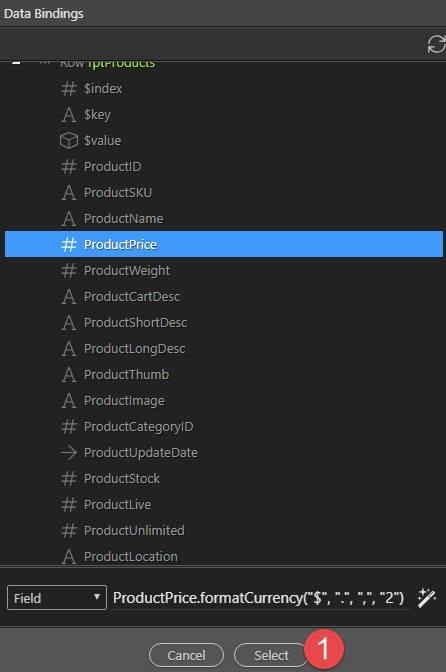
In the pop-up choose Product Price (1) and click on the Format button (2)
-
Right click ProductPrice (1), choose Numeric (2) and Format Currency (3)
-
Format the currency as required and choose Select (1)
-
Click Select (1) again to apply the binding
-
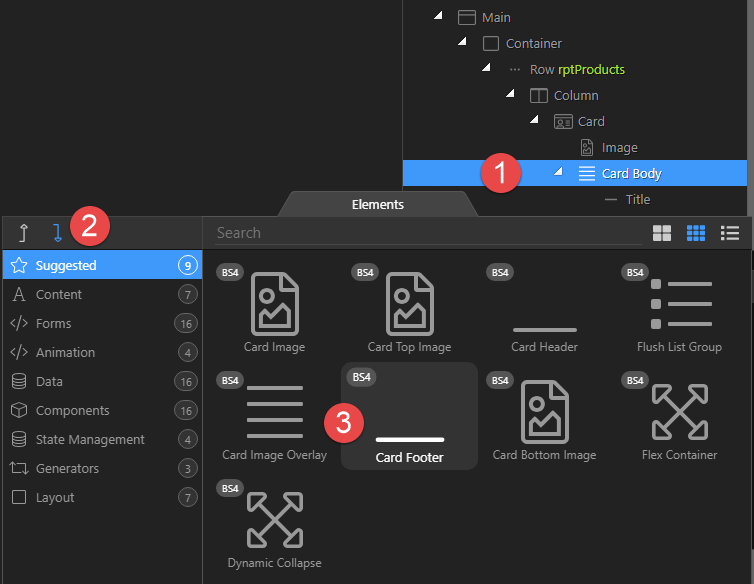
We will now create a Card Footer to house the Add to Cart button. Right click Card Body (1), click on Insert After (2) and Card Footer(3)
-
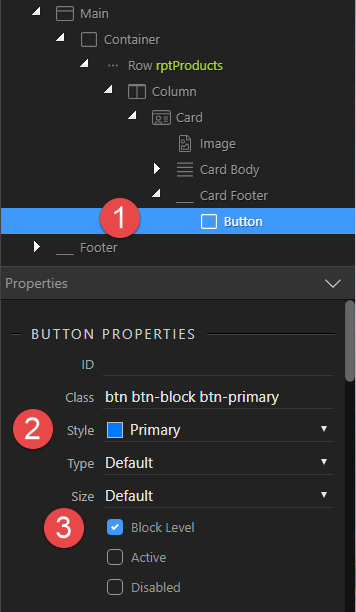
Right click Card Footer (1) and choose Button (2)
-
With the Button (1) still selected, give the Button a Style (2) and make it a Block Level element (3).
-
Double click the button in Design view and change the text to suit.


Adjust the layout for larger screens
-
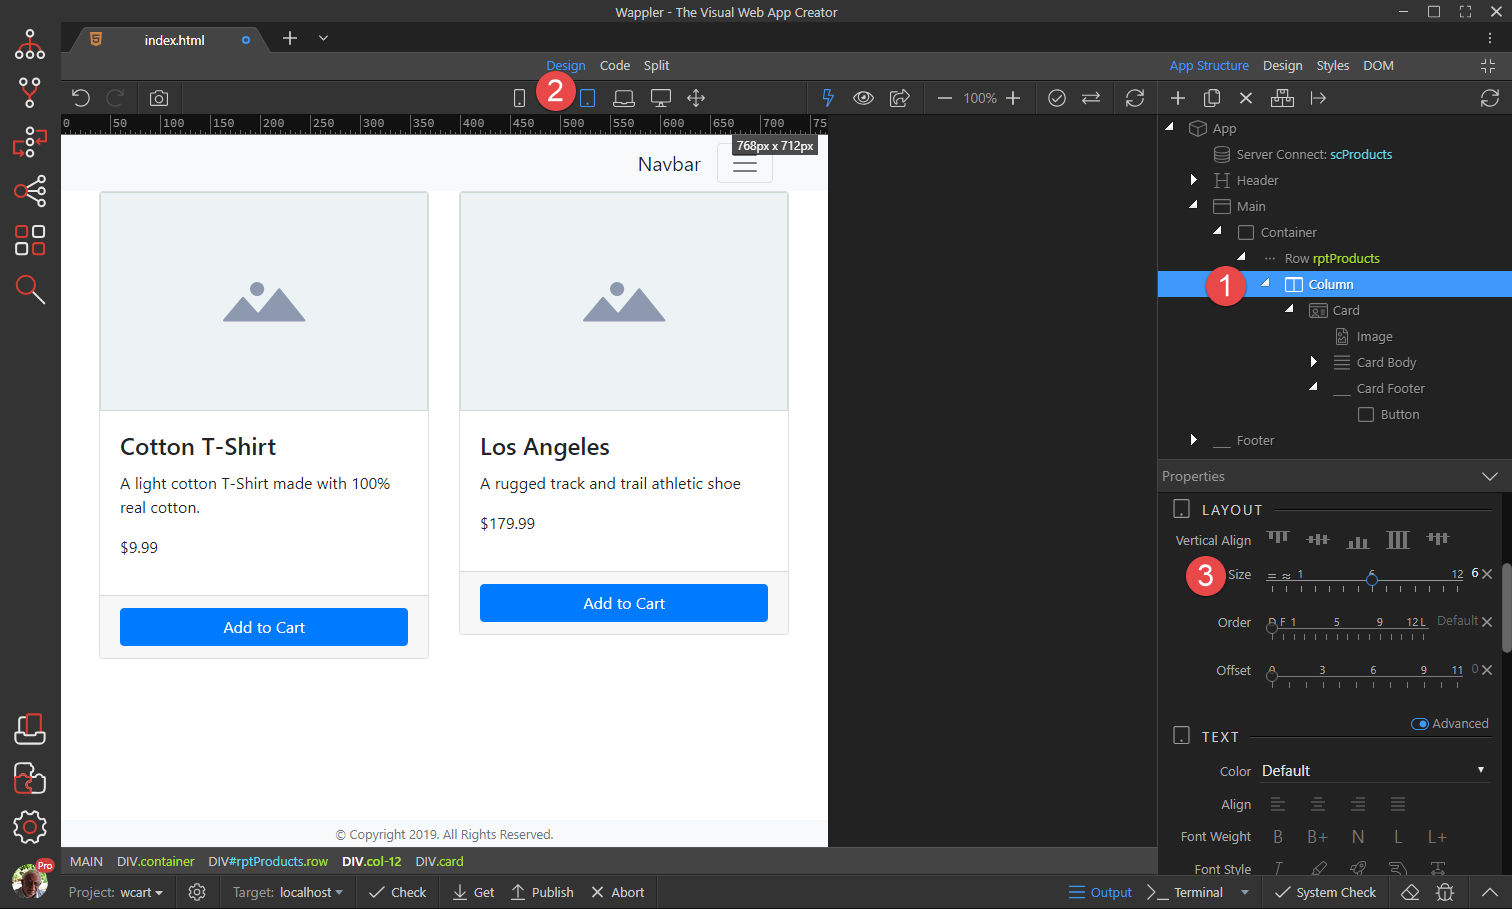
To change the layout for Tablet View, click Column (1) and choose Tablet view (2). Change the Column Size to 6 (3)
-
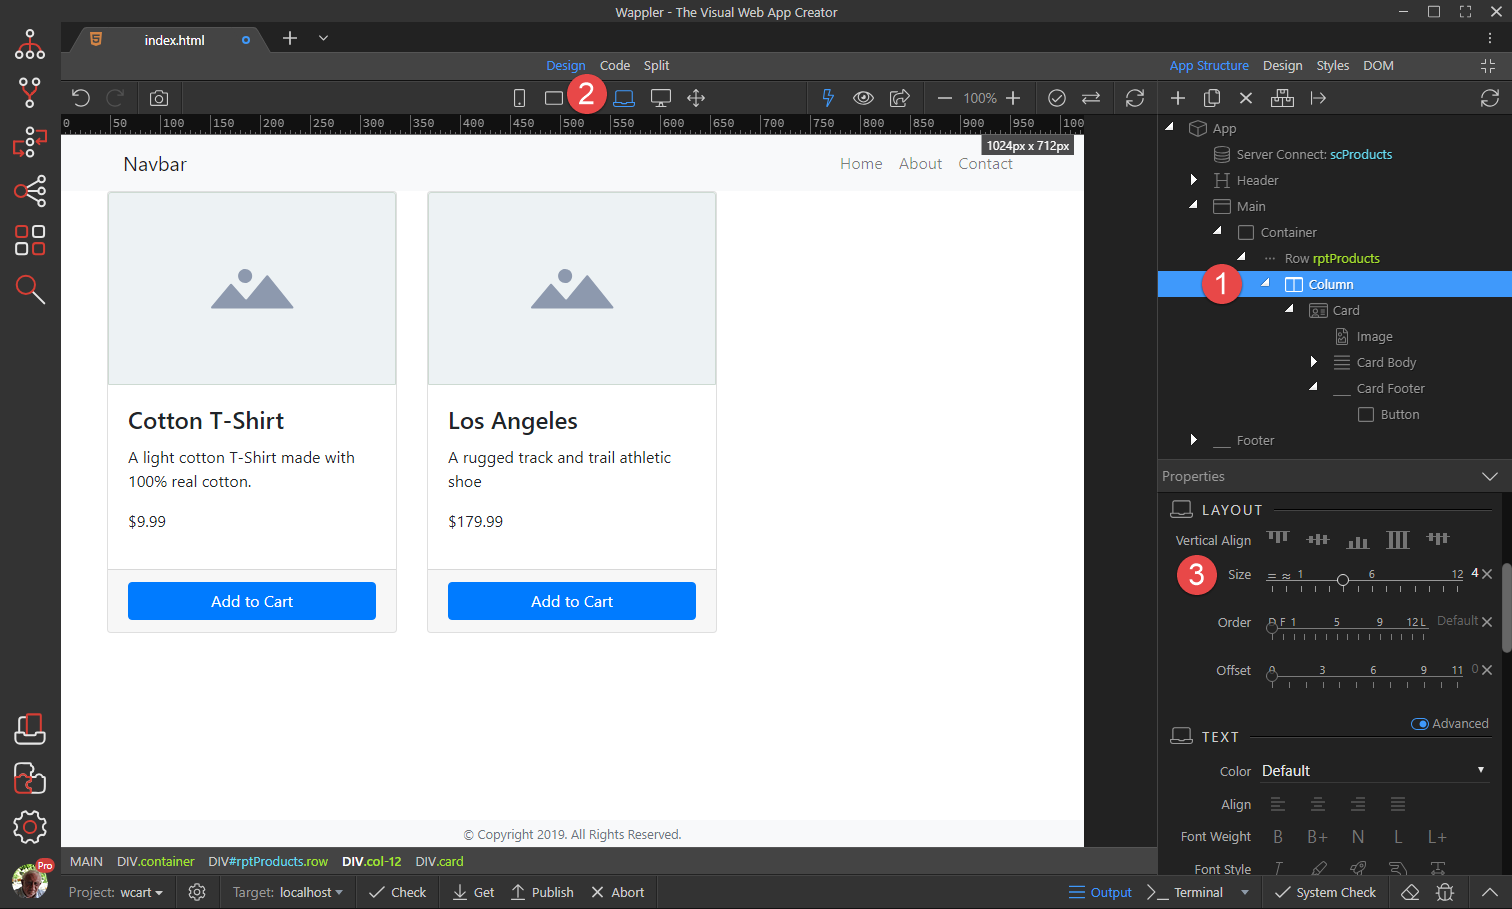
To change the layout for Laptop and larger (2), change the size to 4 (3)
-
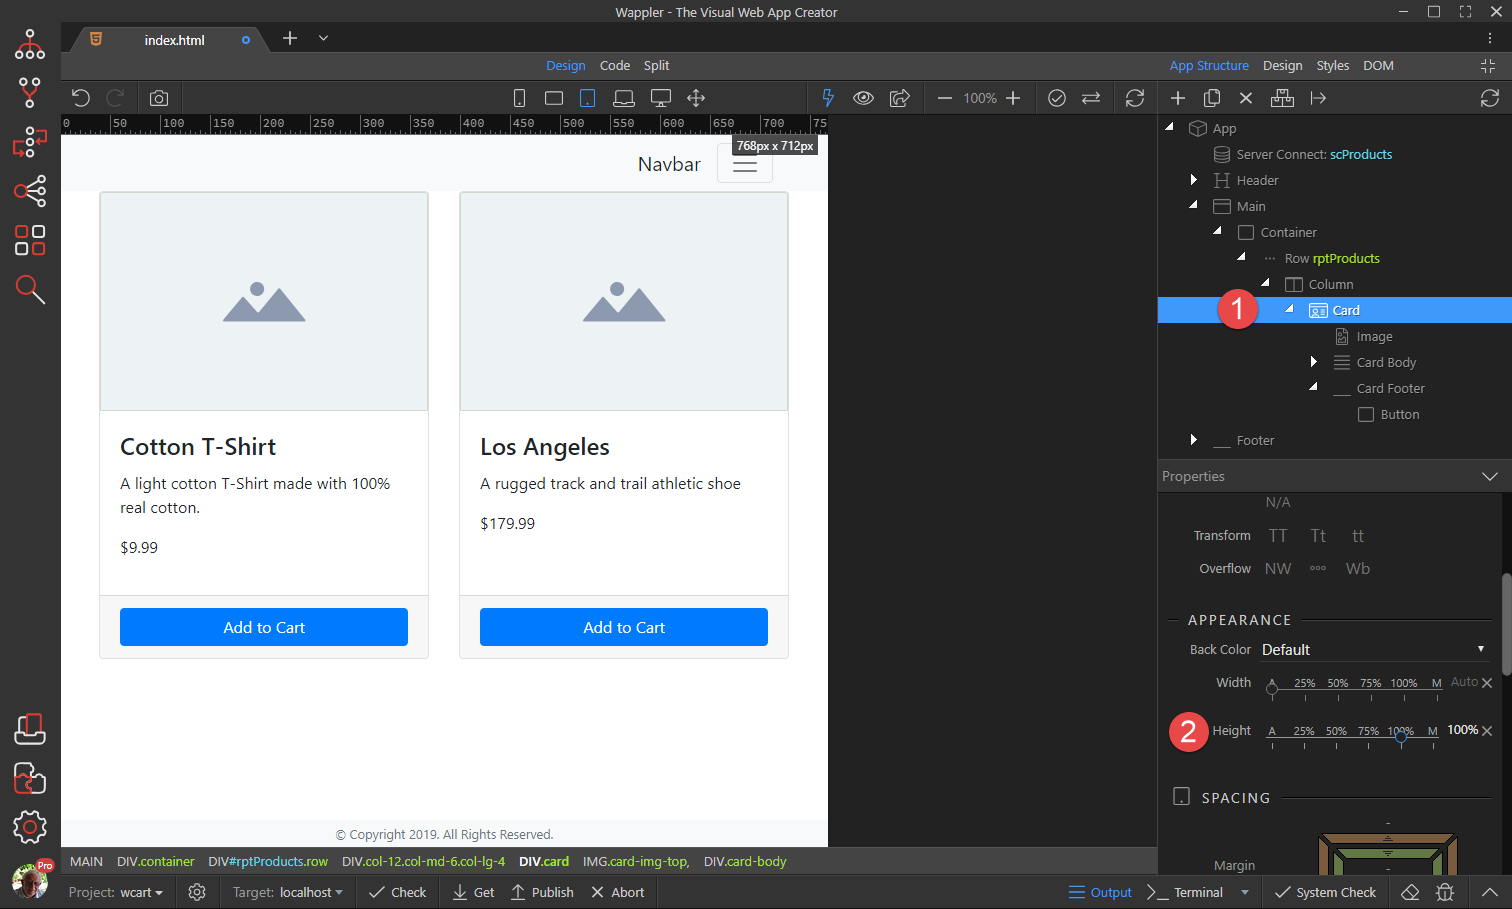
In Tablet view we notice a difference in height between the cards. To change that to equal height, click on Card (1) and change the height to 100% (2)
-
Double click the Title in Design view and change the text to suit.
-
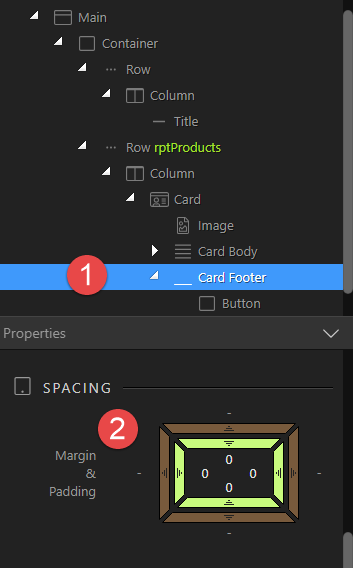
I see that the Add to Cart button does not fill the footer due to padding. Let’s fix that by removing the padding for the Card Footer (1). Set the padding to 0 (2).