Intro
You can easily create a login screen for your mobile app and log users in, using Framework 7 and its components.
As you know from our docs, in order to use dynamic data for your mobile apps you need to setup a separate data API project. This is the same for the Login and any other action requiring server-side workflows.
Login API Action
You need to setup your security provider and login action in the data API Project. It’s no different than a login action for a regular web site.
You need to setup a Security Provider and then an API Action with a Login Step:
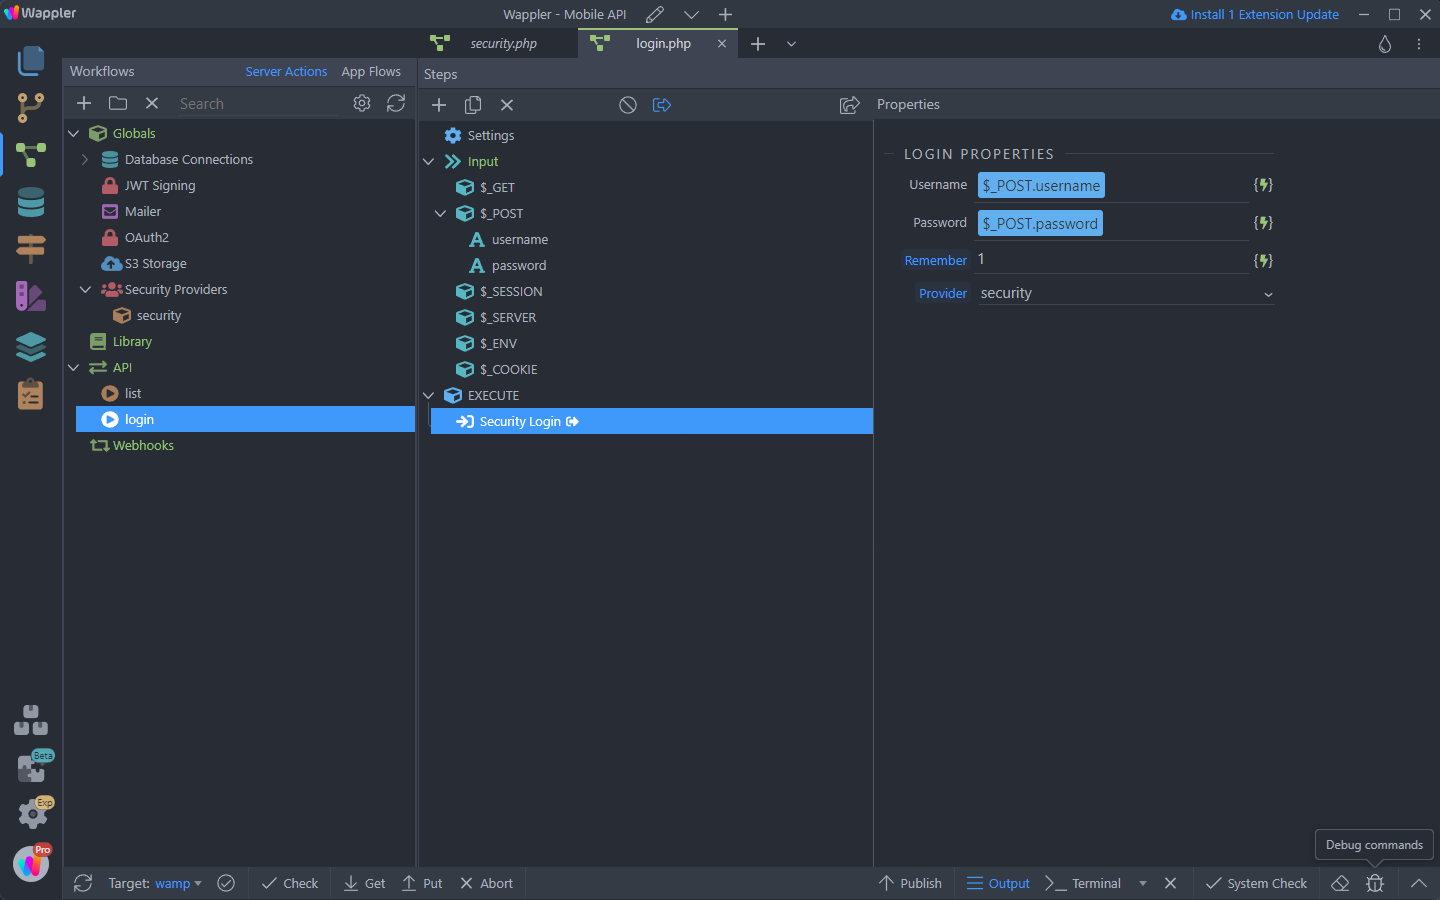
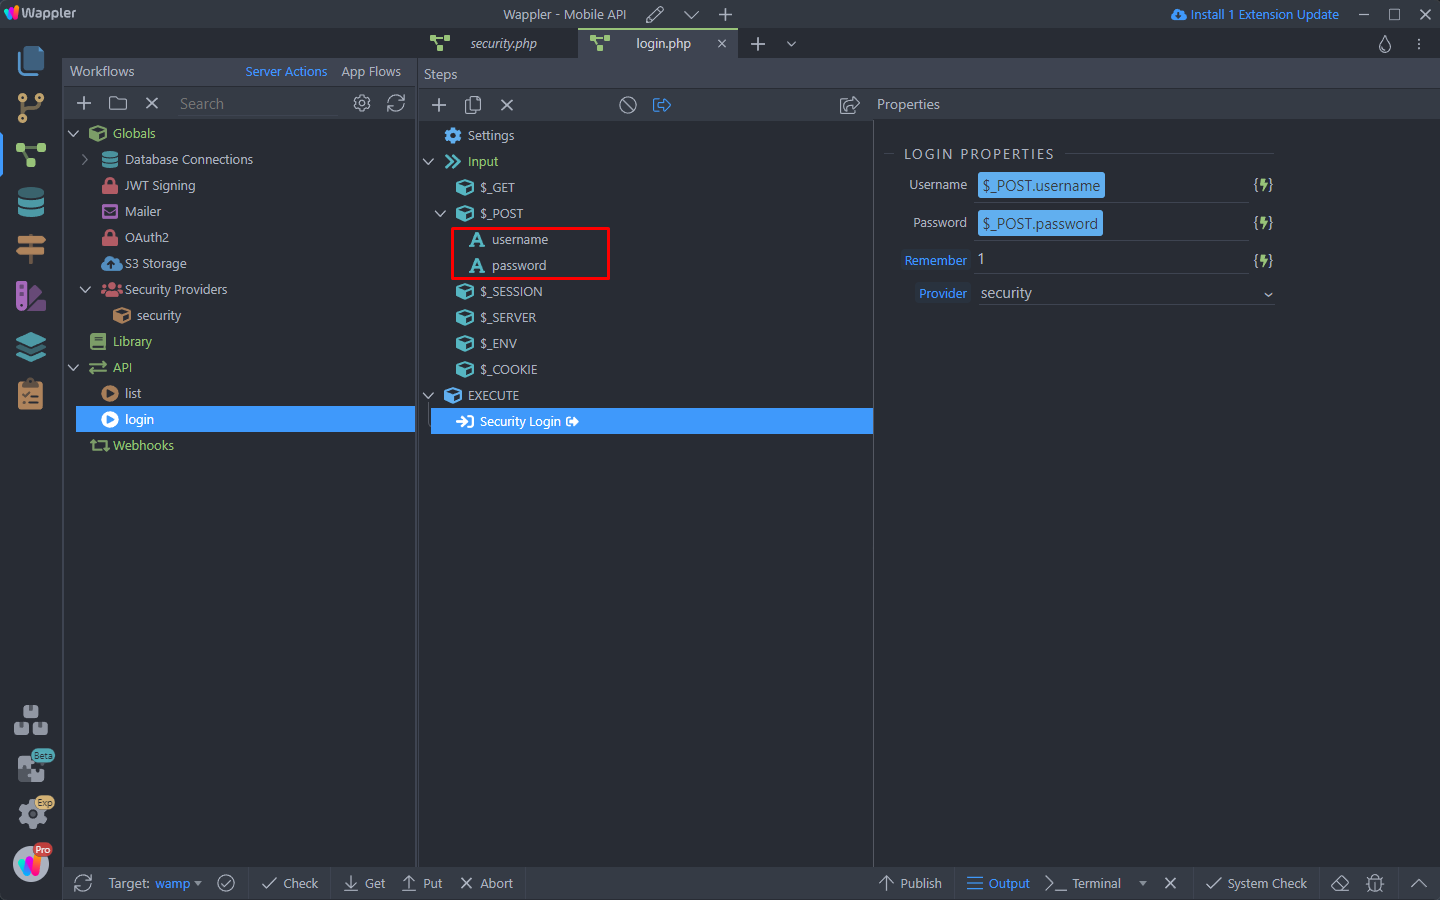
Add two POST variables named username and password:
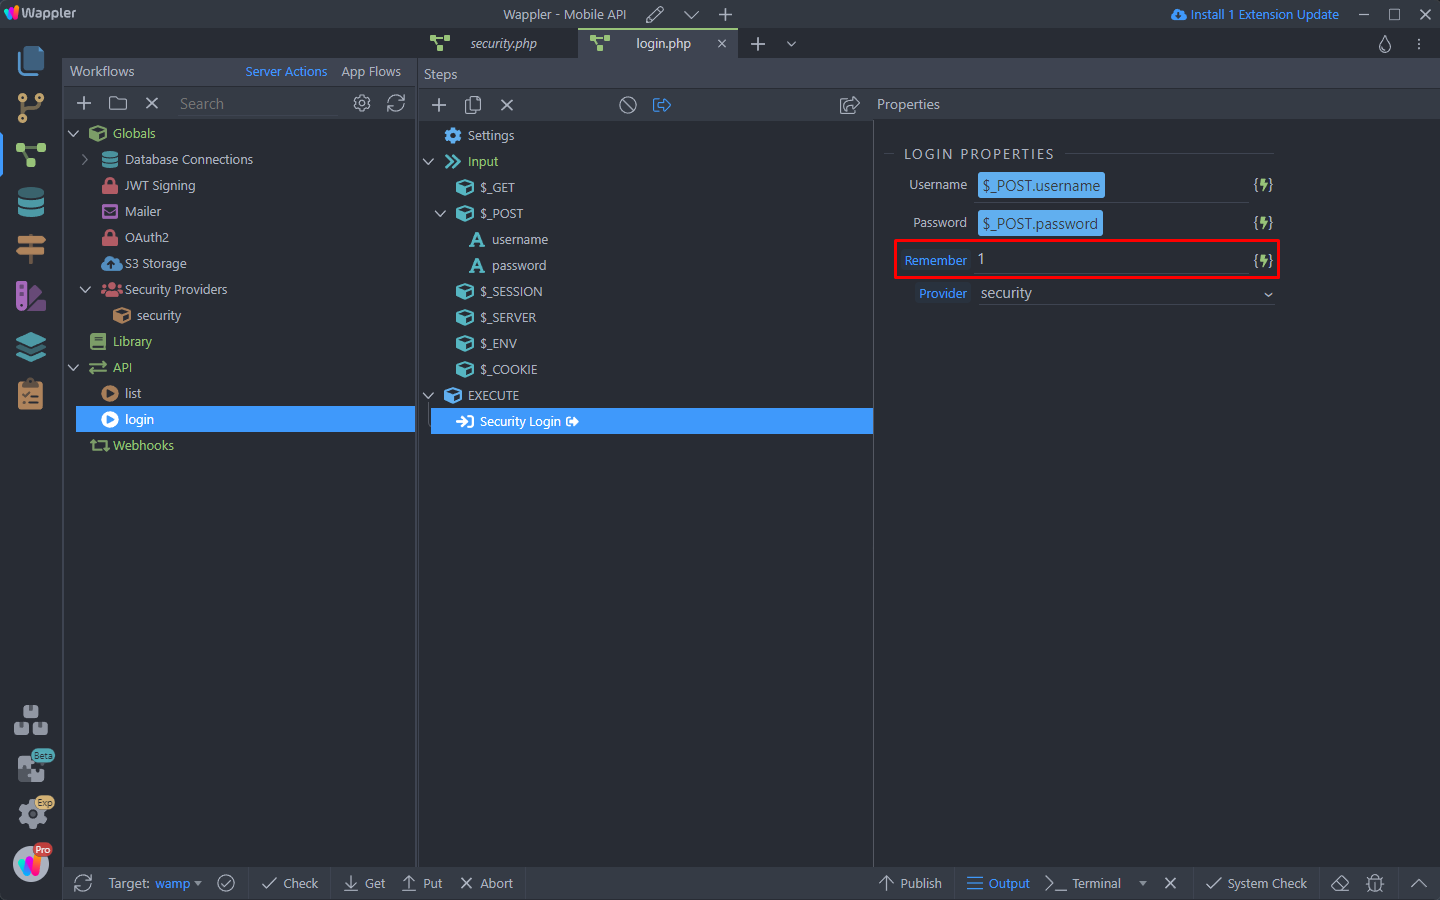
And for the Login step, make sure to set 1 as value for the Remember option. This is required so that the login cookie is created and your user stays logged in across your app pages:
So that’s pretty much everything you need for the login API Action.
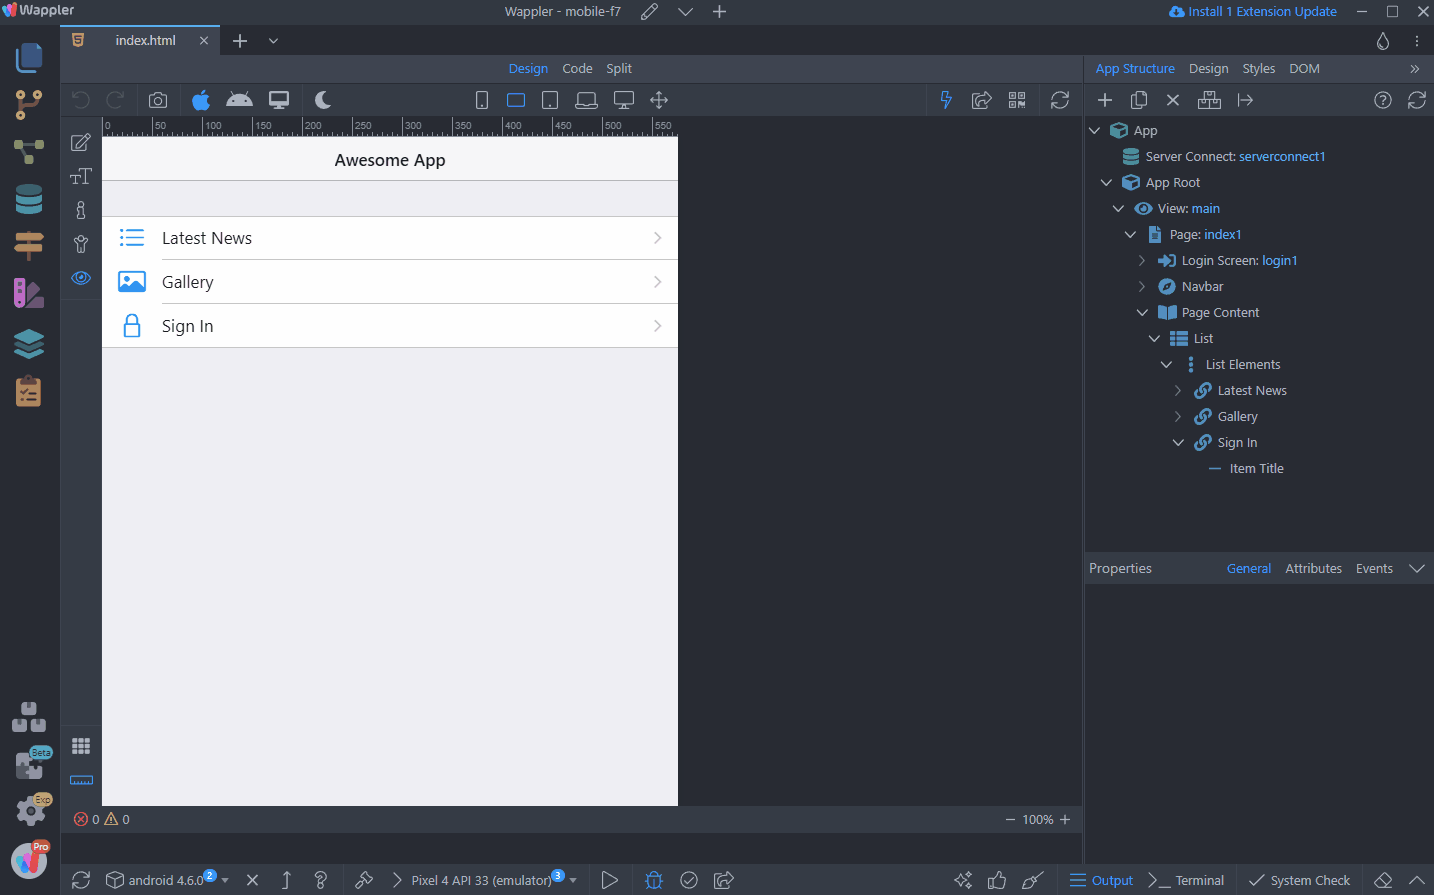
Login Page
Switch to your mobile project.
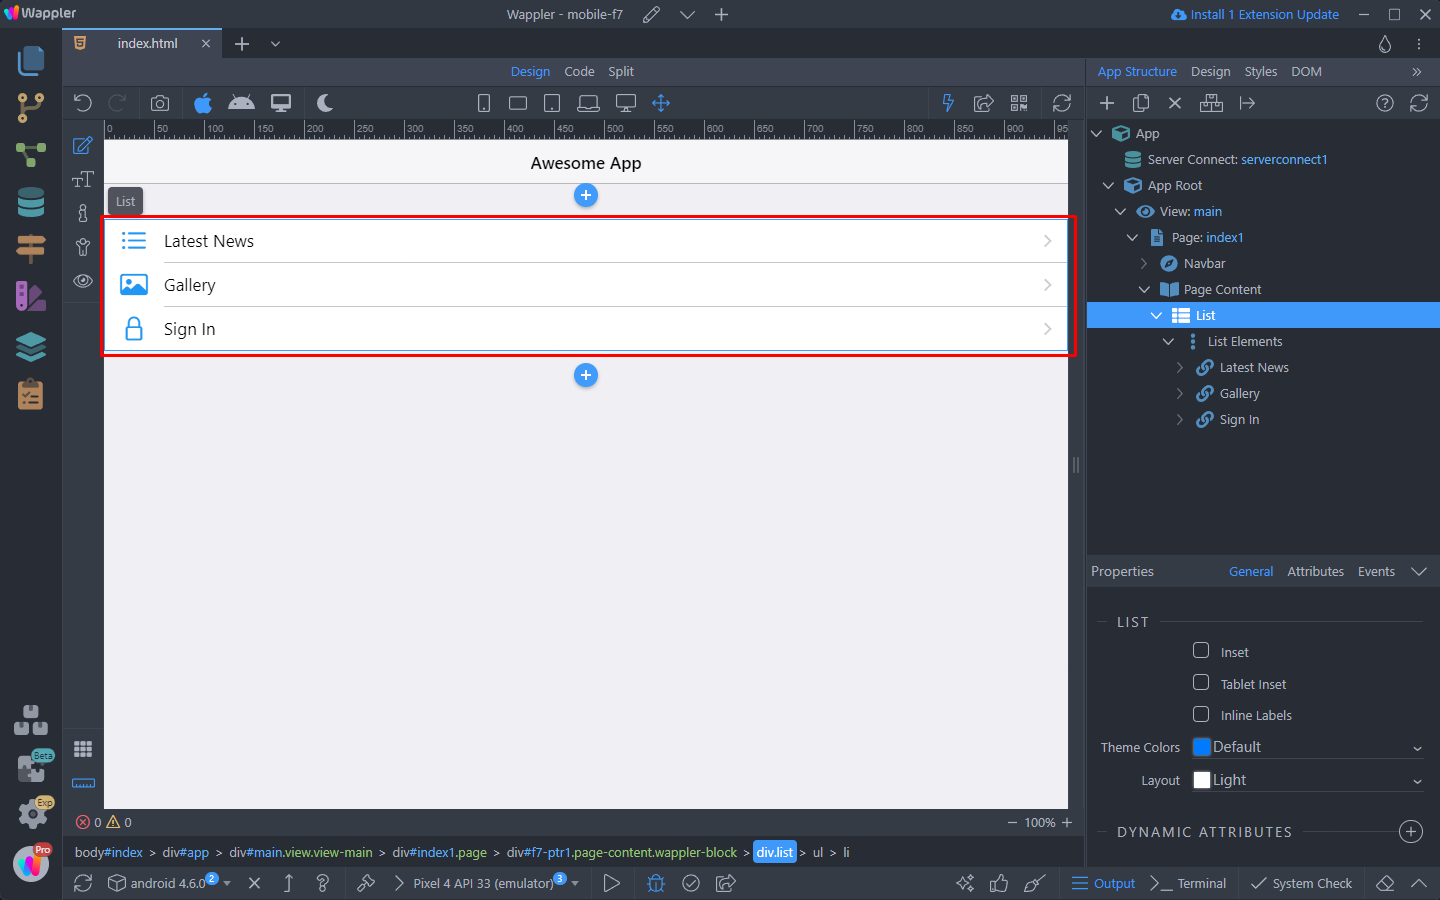
On our main page we have a links list, with several links in it. We will use the Sign In link, to open the login screen:
Let’s first create it.
Adding a Login Screen
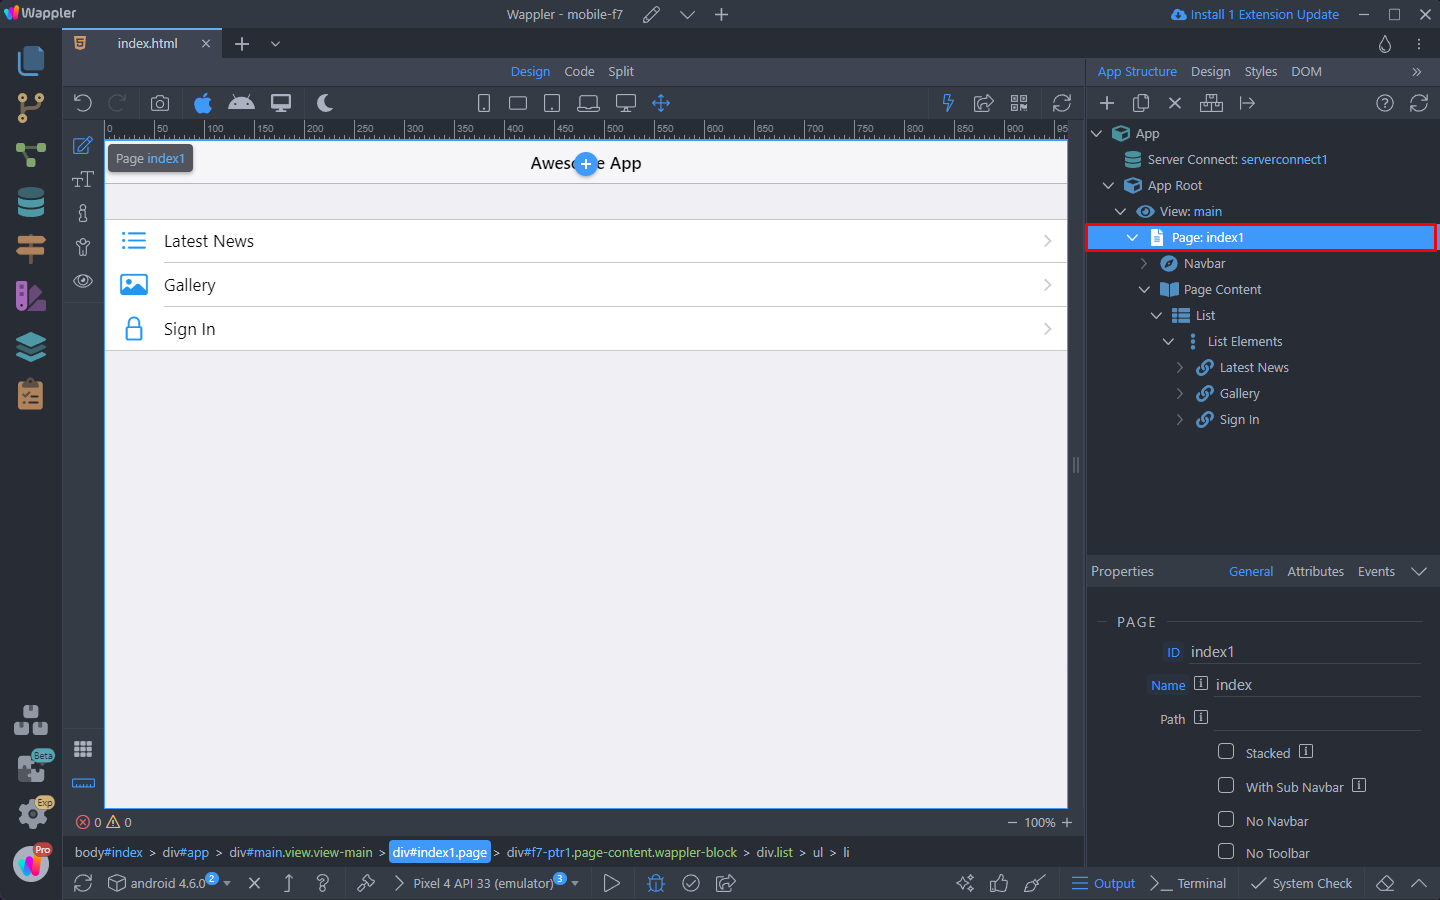
Right click the Page element:
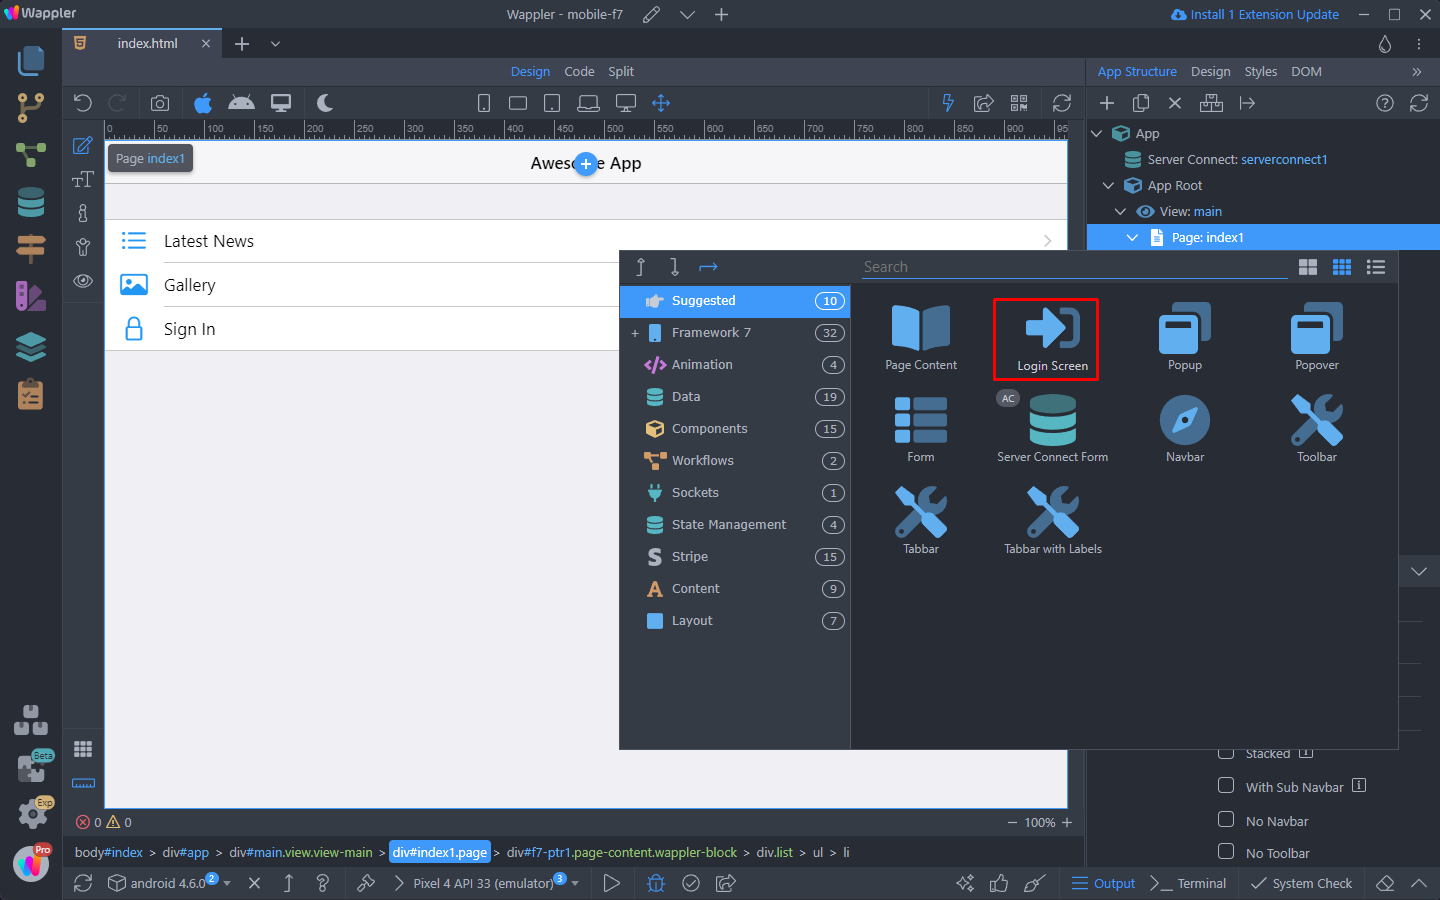
Select Login Screen:
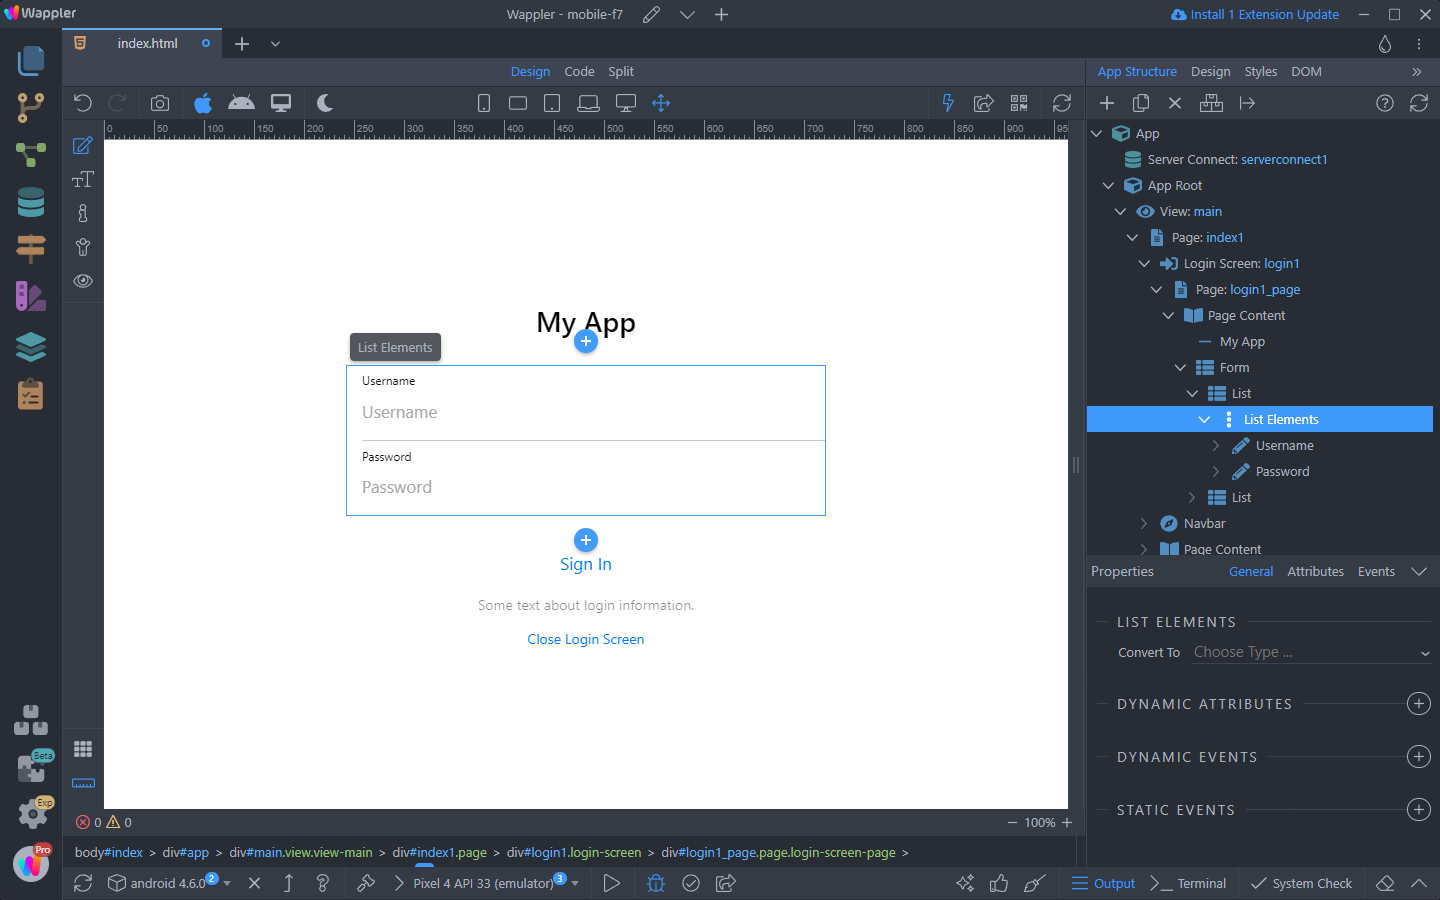
The Login Screen has been added to our page. You can customize it as you need, we will just use its default design in our example:
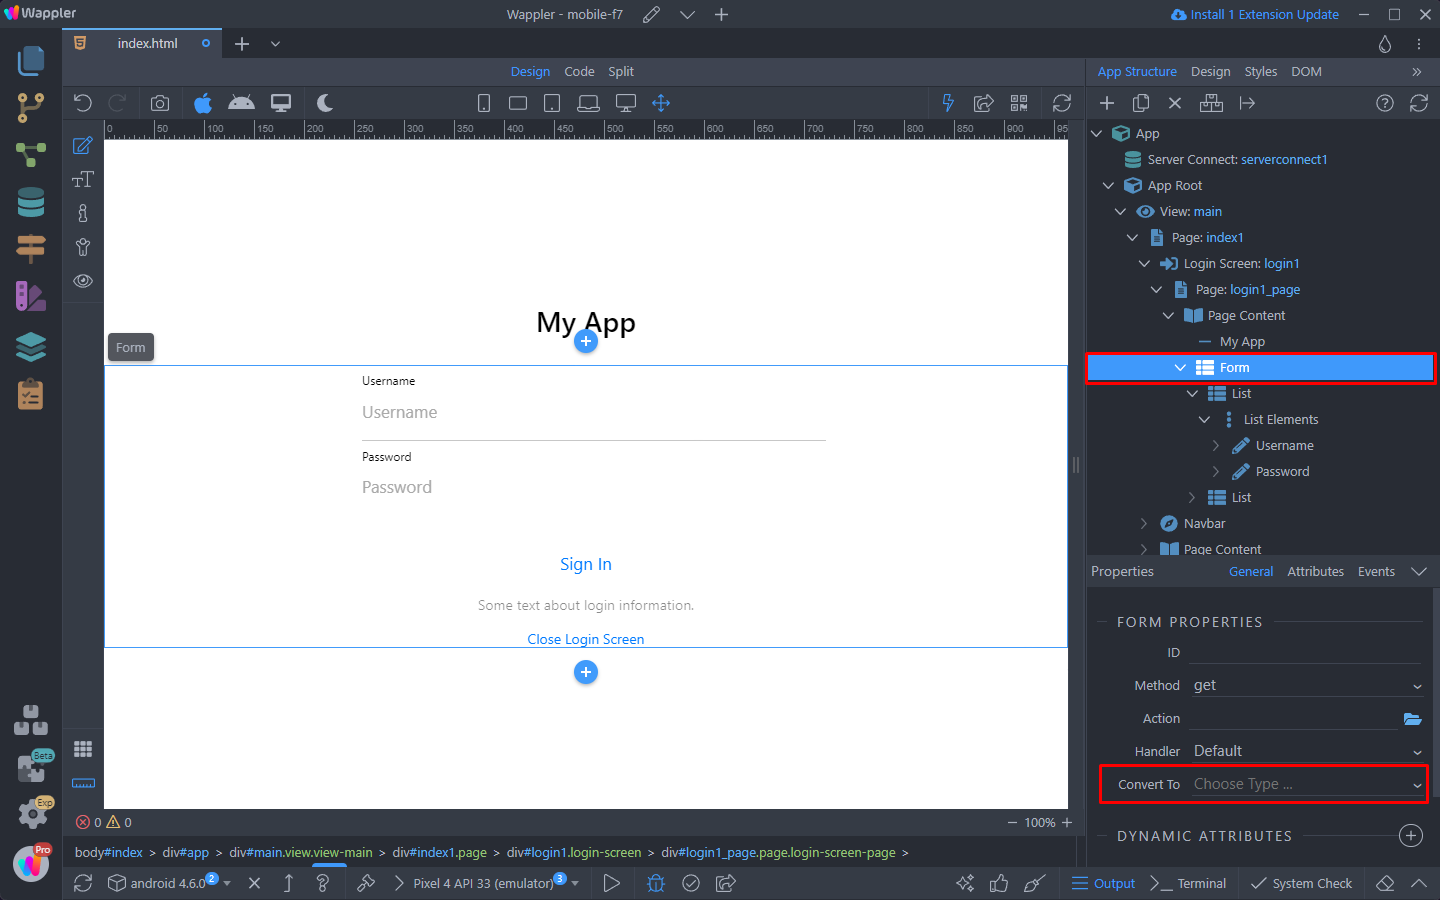
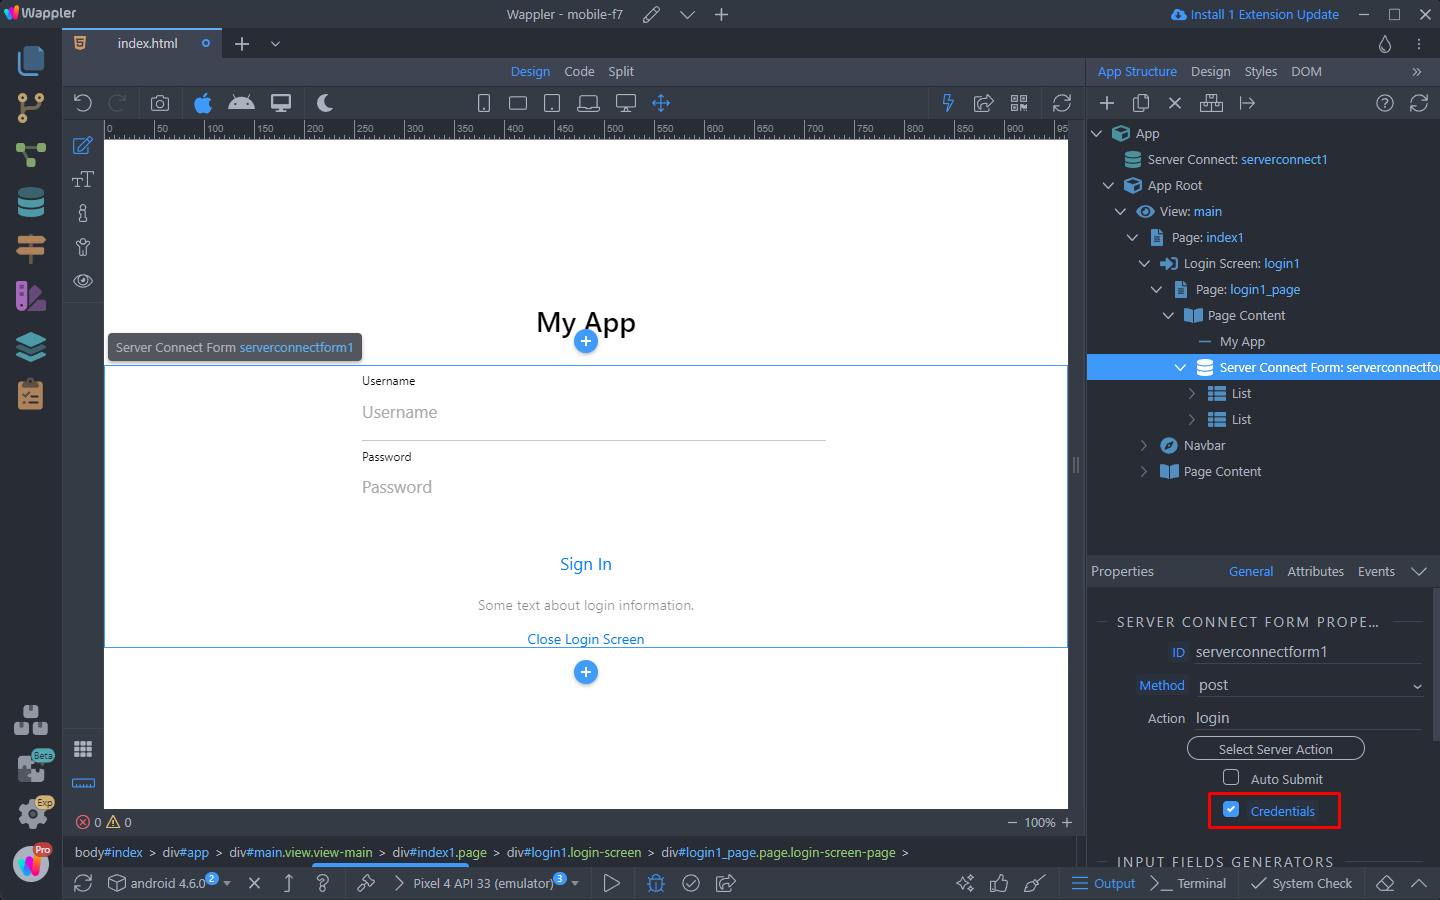
Setup Login Form
Select the form element inside the Login Screen and open the Convert To menu:
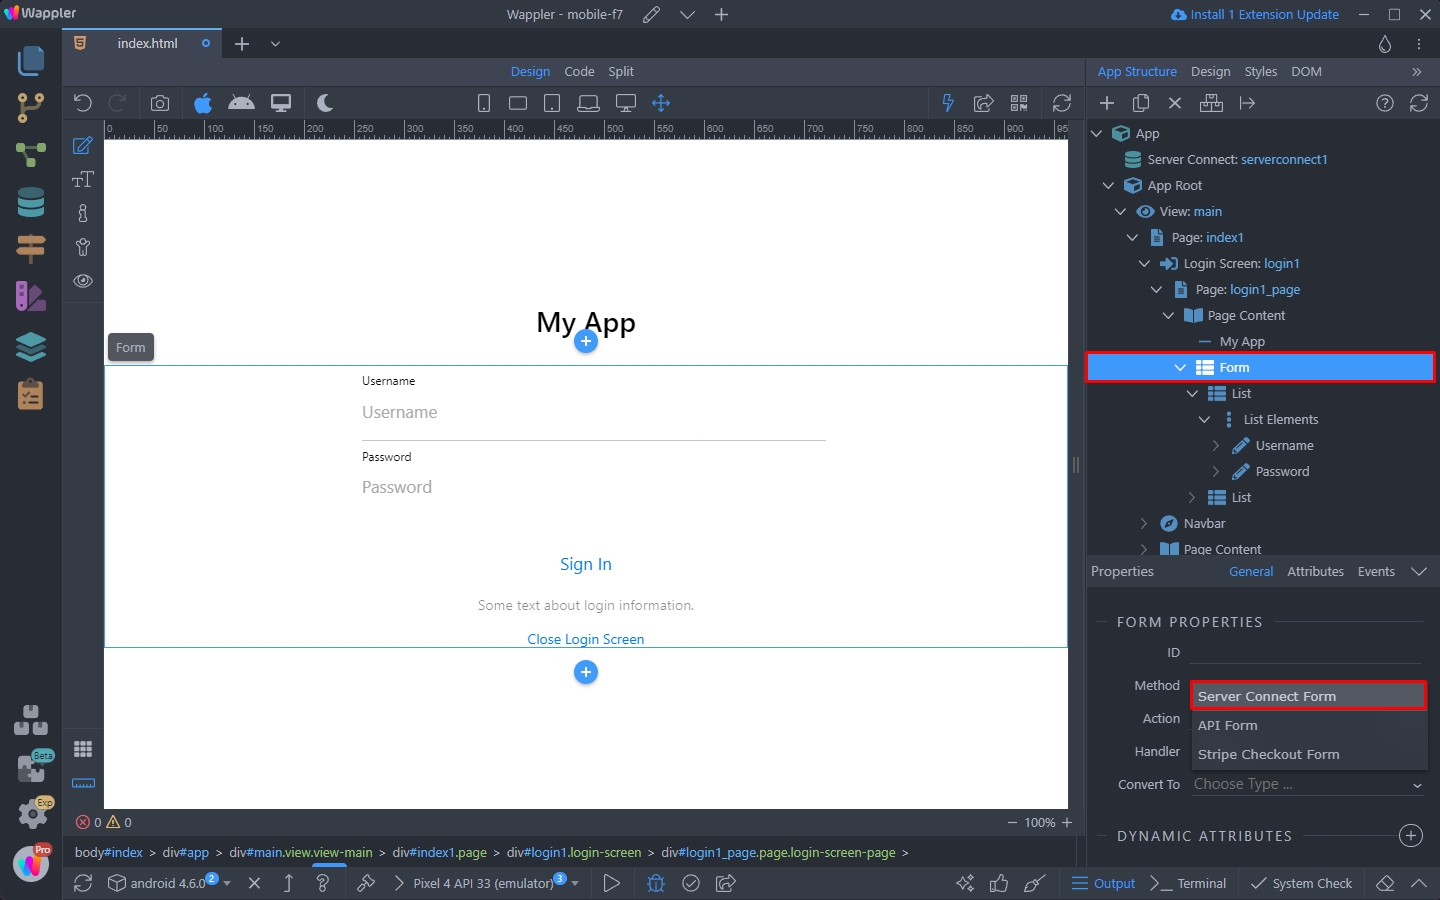
Select Server Connect Form:
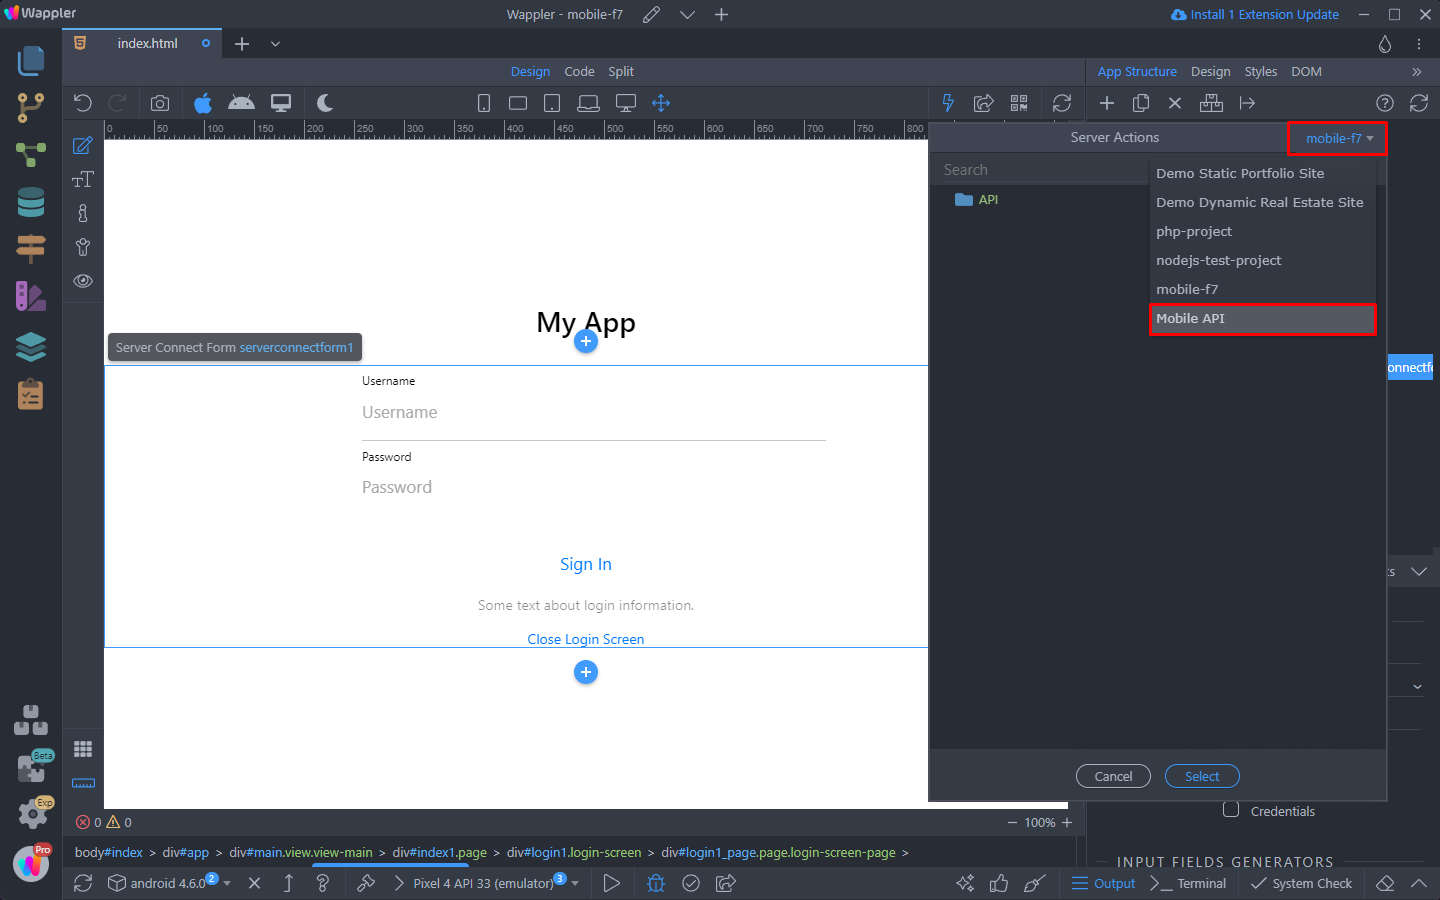
Then Select Server Action:

Select your data API project from the dropdown:
Then select the Login API Action from this project and click Select:
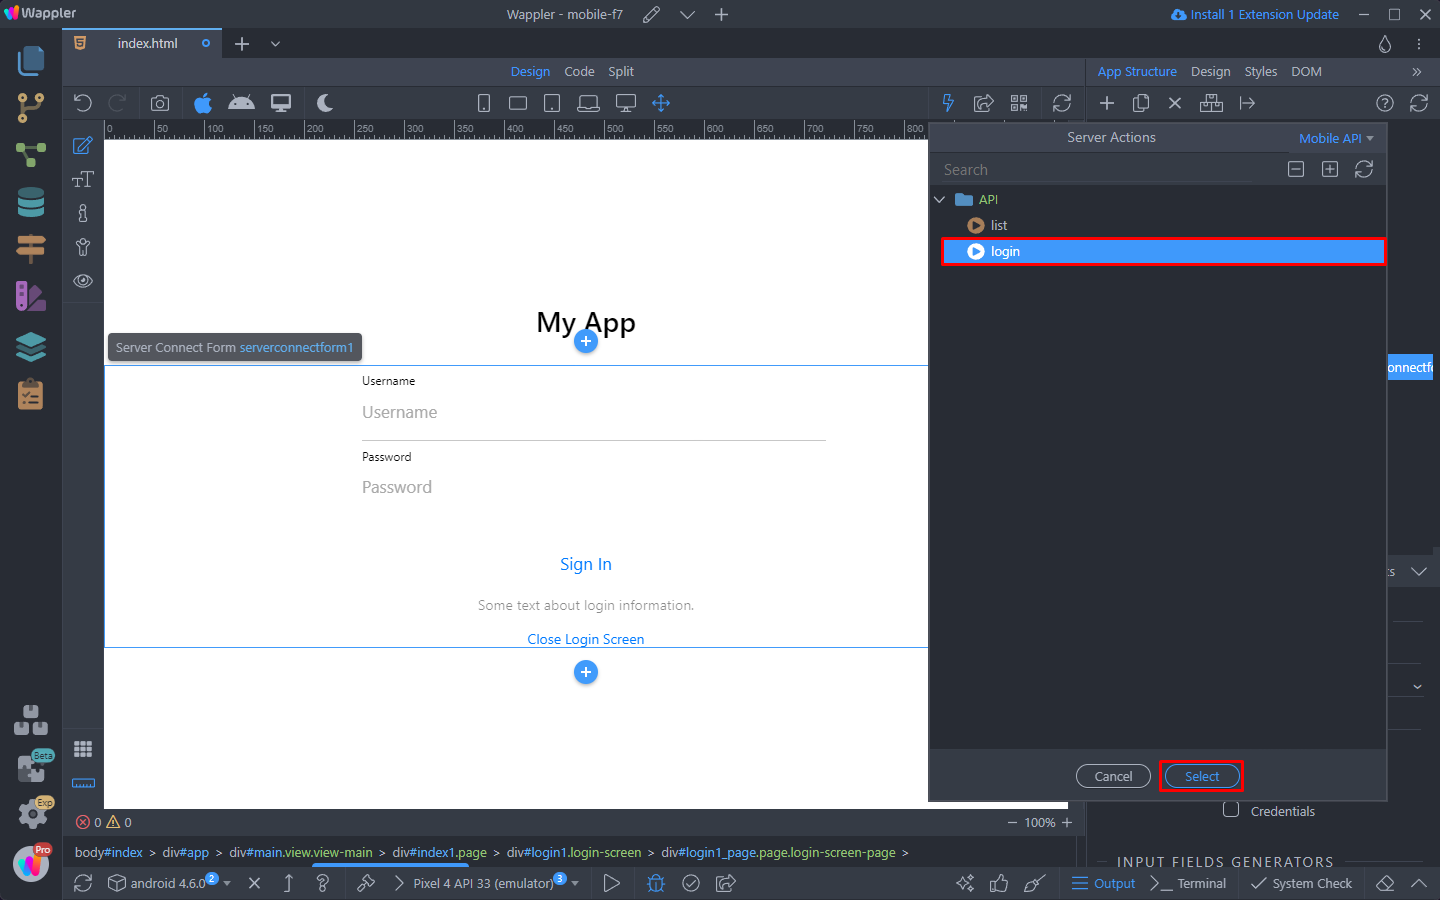
Make sure to enable the Credentials checkbox:
Then select the Sign In button:
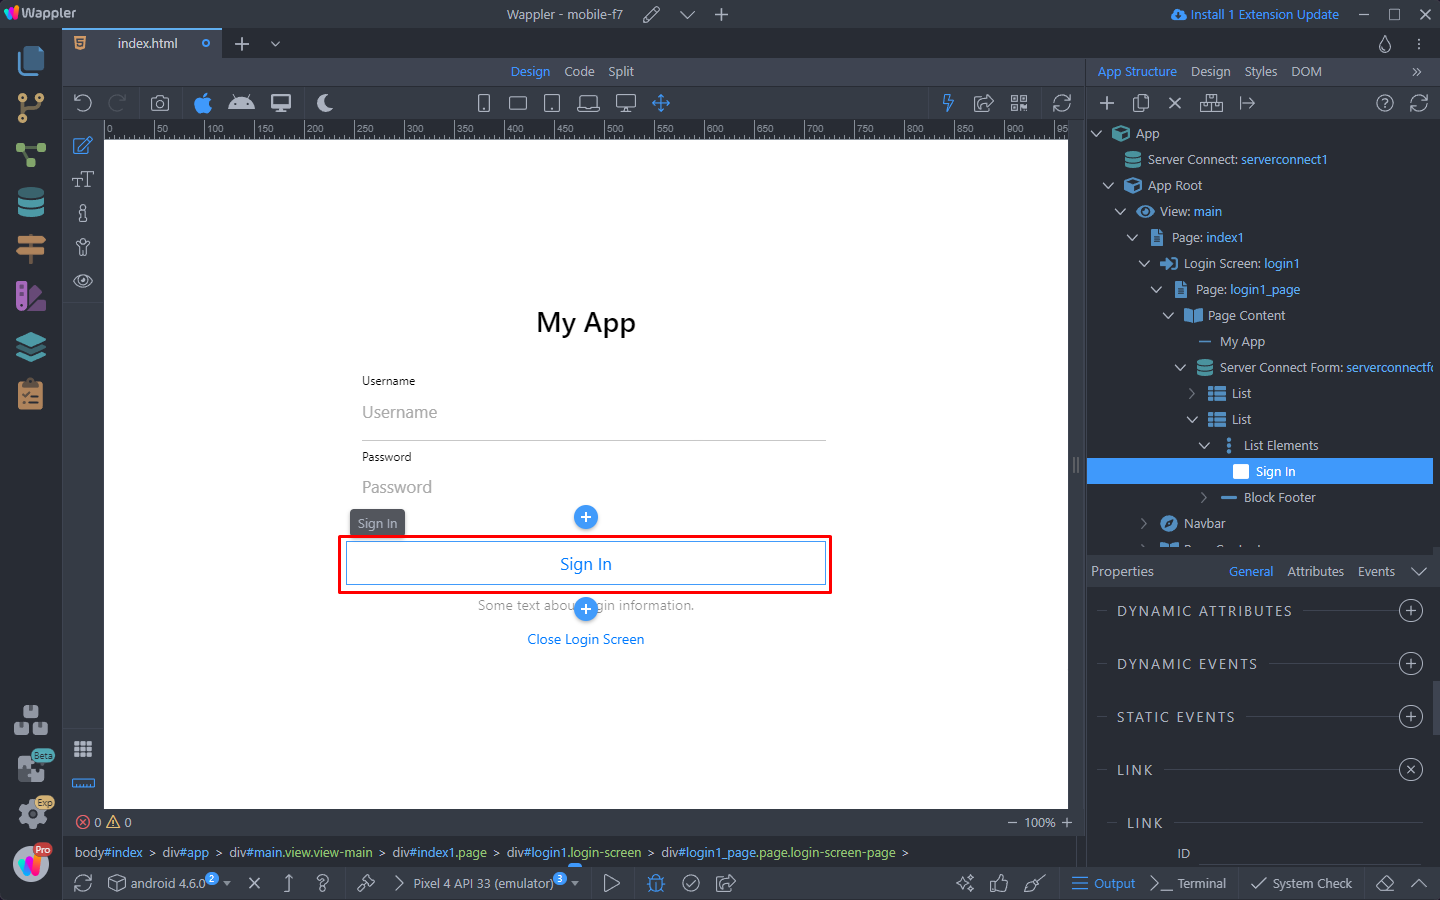
Add new Dynamic Event > Mouse > Click:
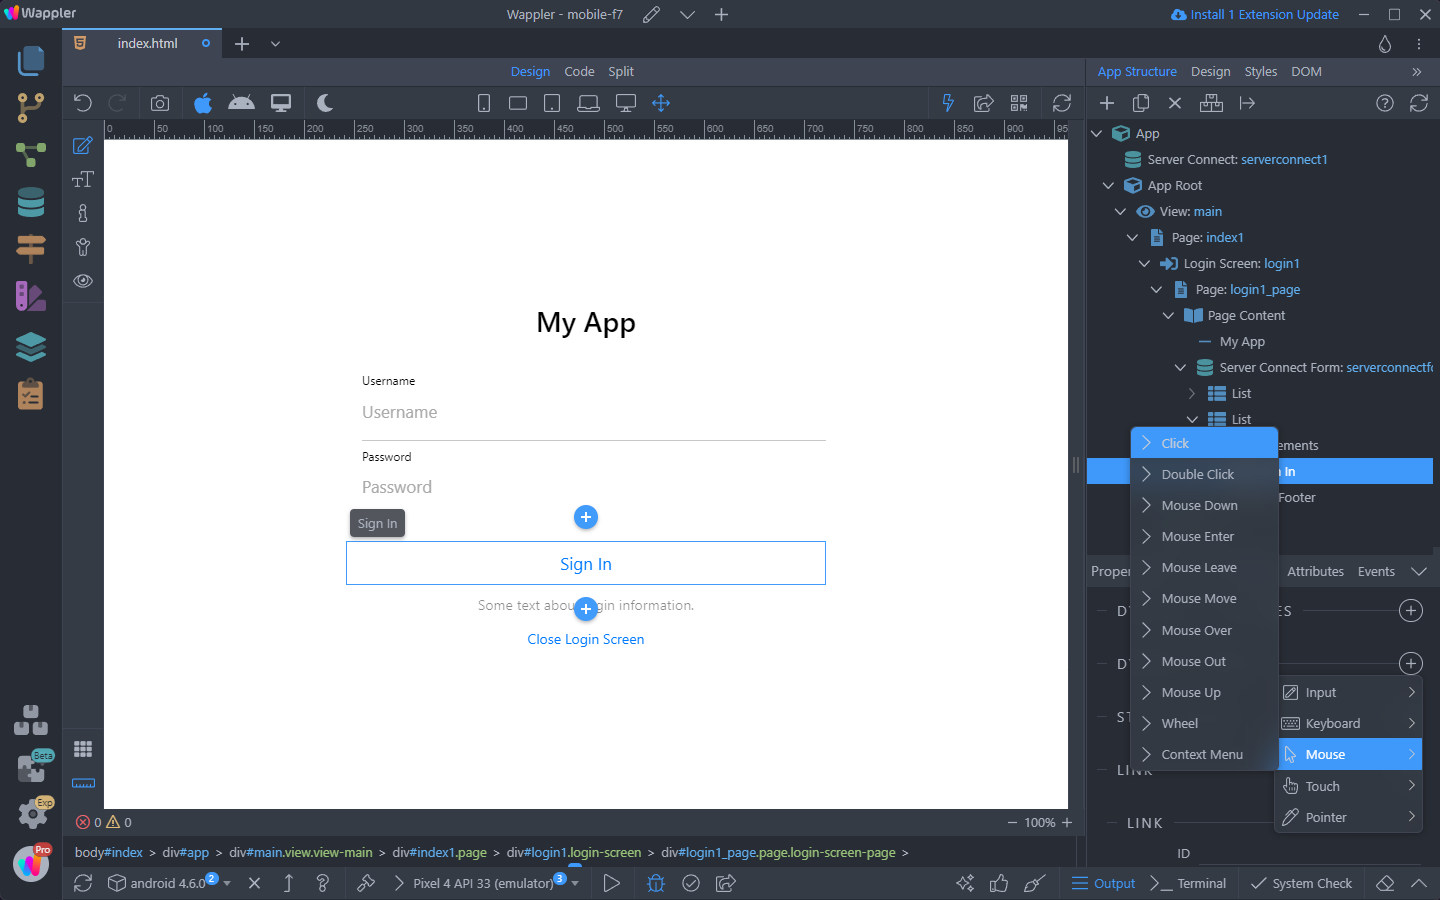
And select an action:
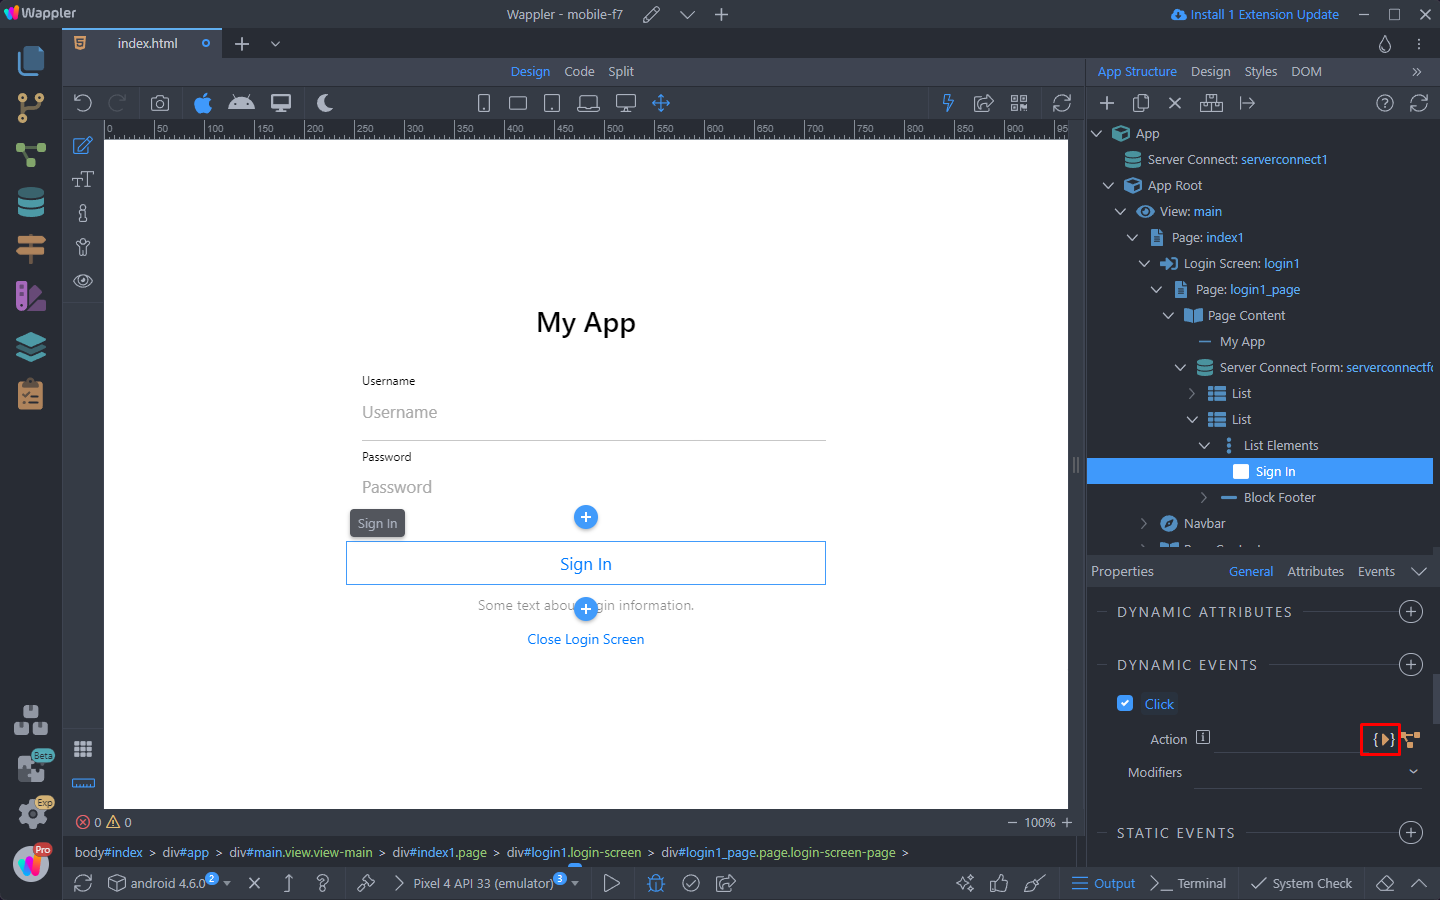
Under Server Connect Form, select Submit and add it:
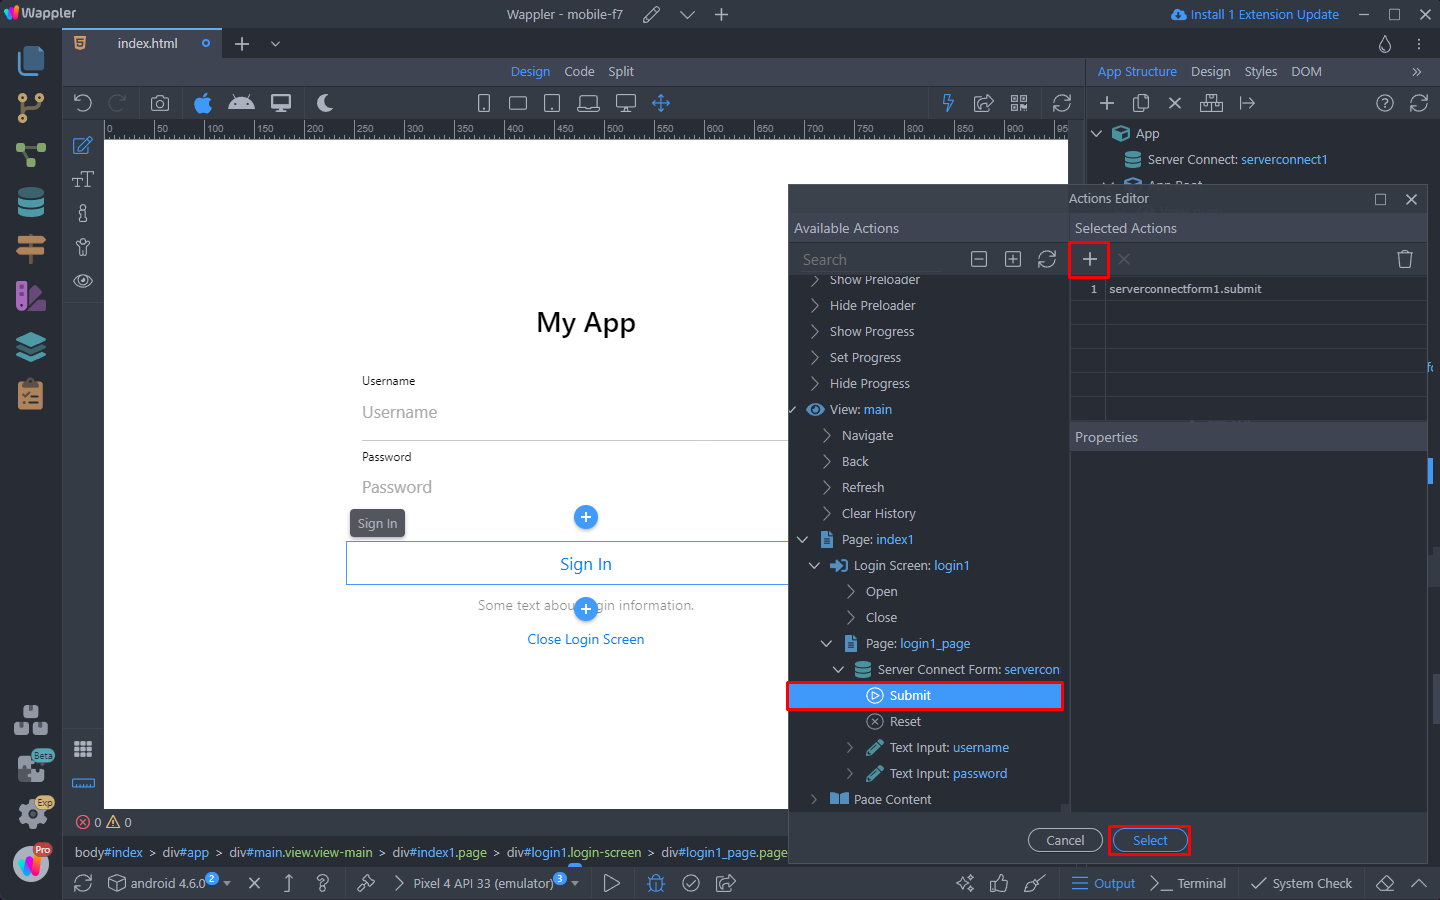
This will submit the form, when the sign in button is clicked. Now let’s setup what happens when the user enters wrong login details and what happens when the correct ones are entered.
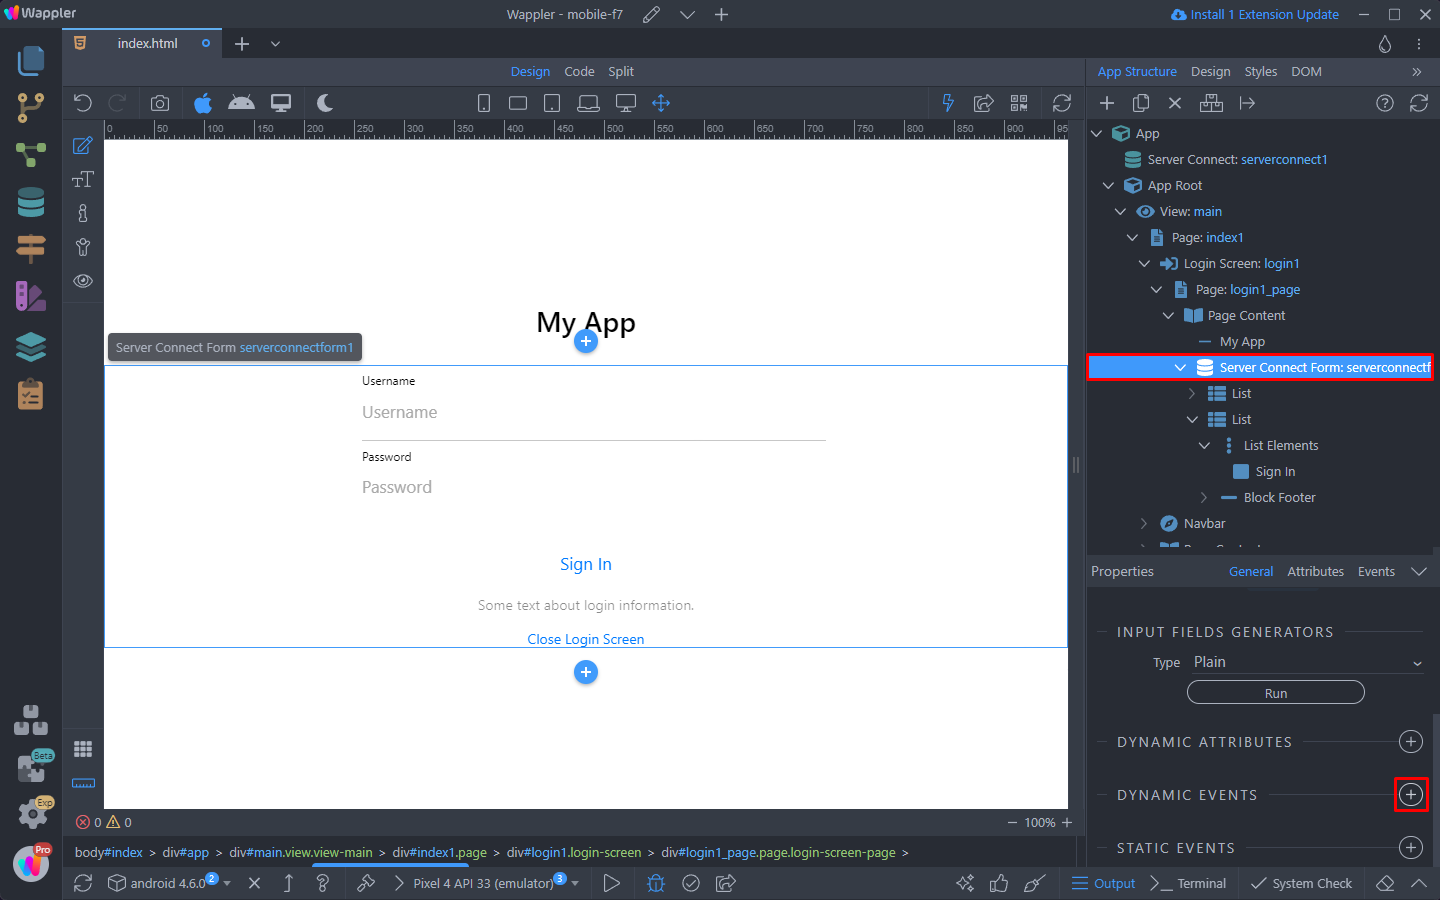
Select the form and add new Dynamic Event:
Select Server Connect > Unauthorized:
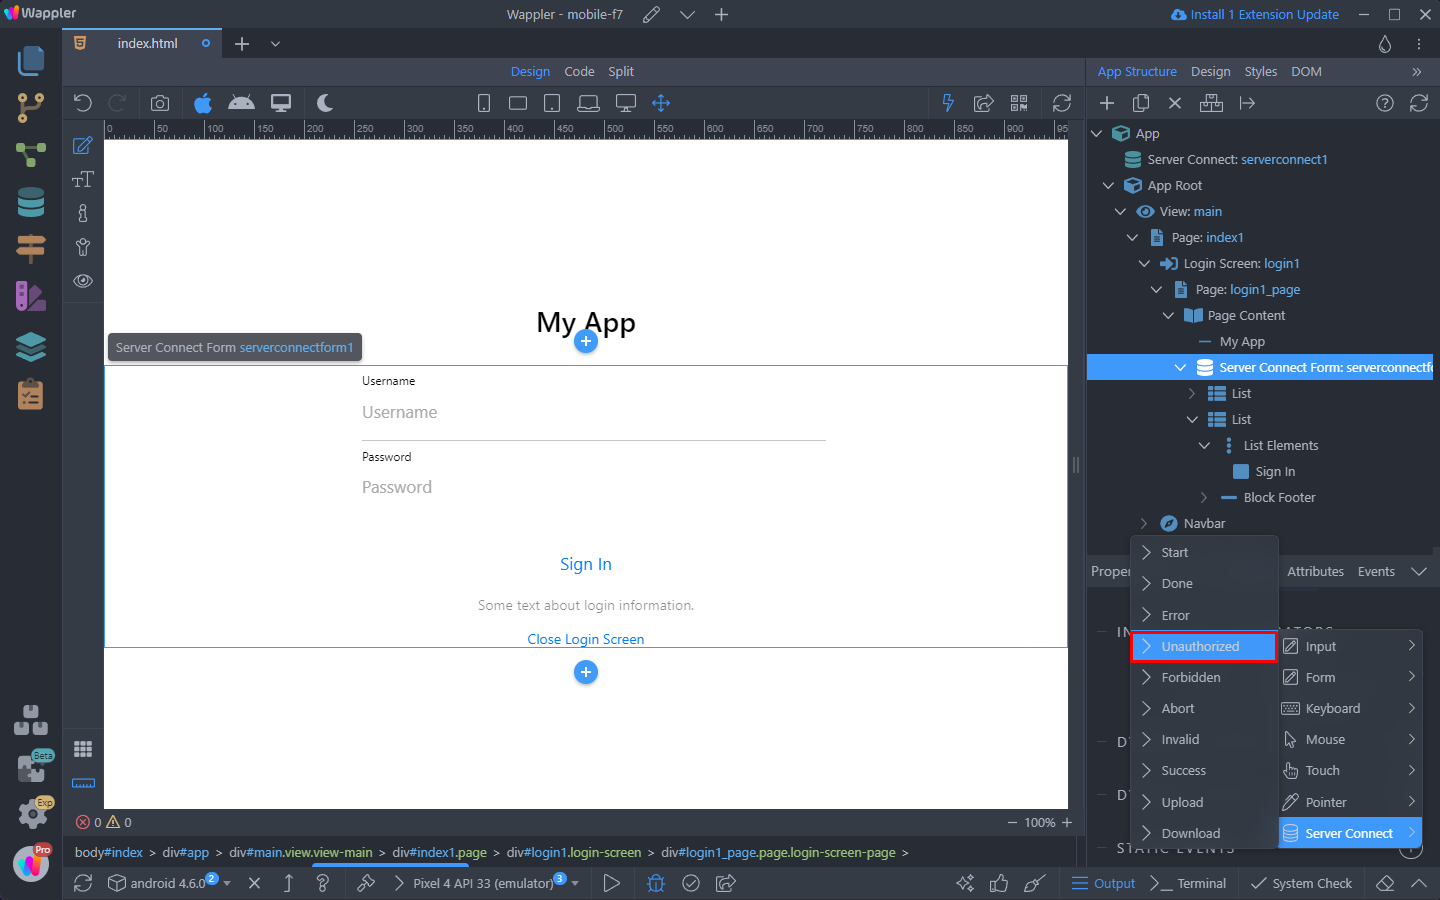
And select an action:

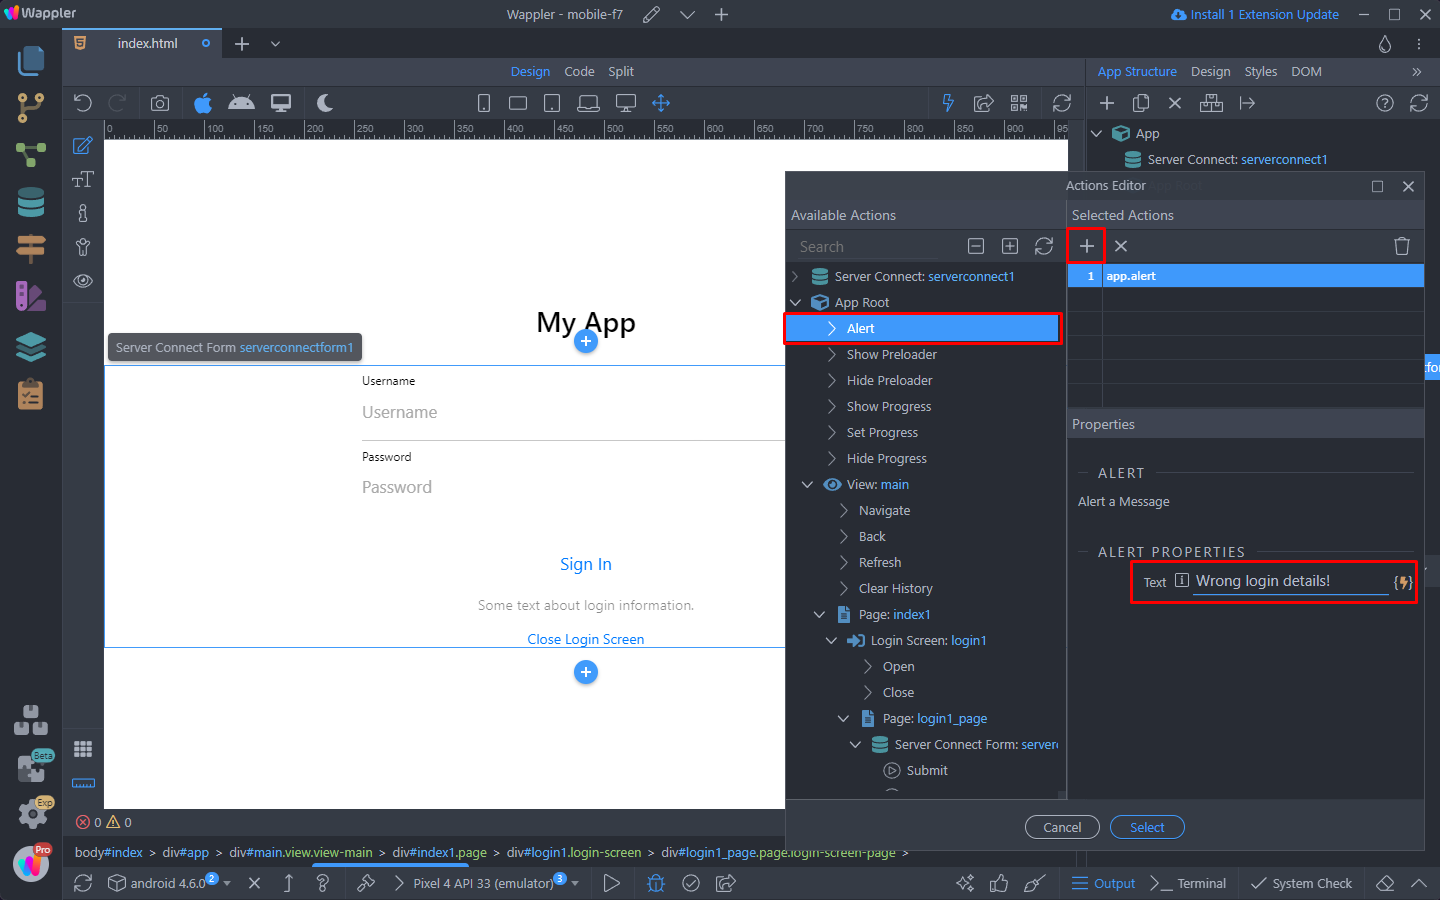
Select Alert, under App Root and enter the text that should be displayed inside the alert, then click Select:
Next step is to setup what happens when the user enters correct login details. Add a new Dynamic Event:

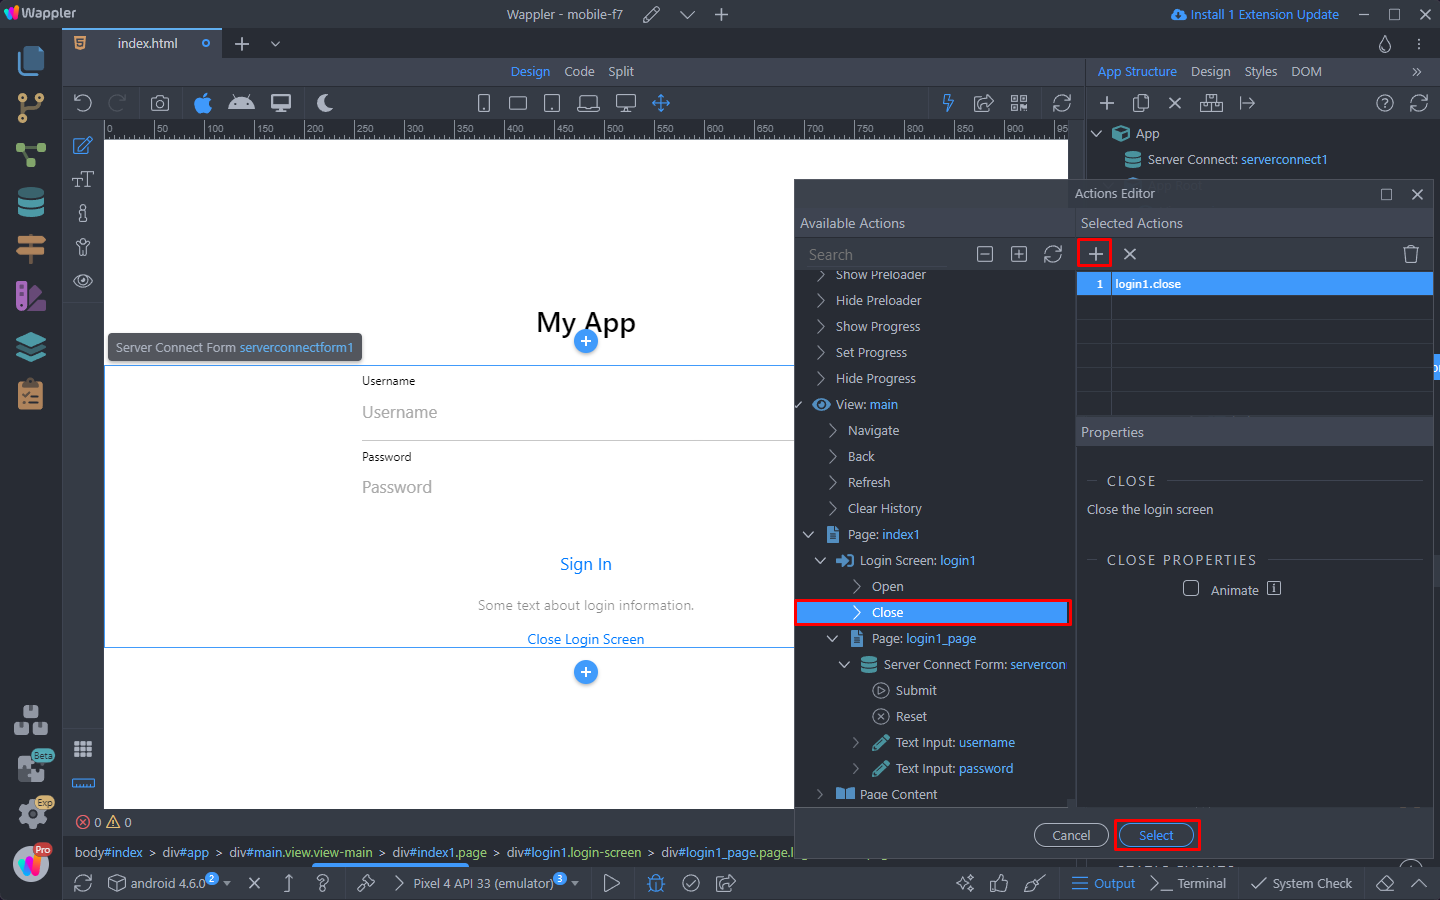
Select Server Connect > Success:
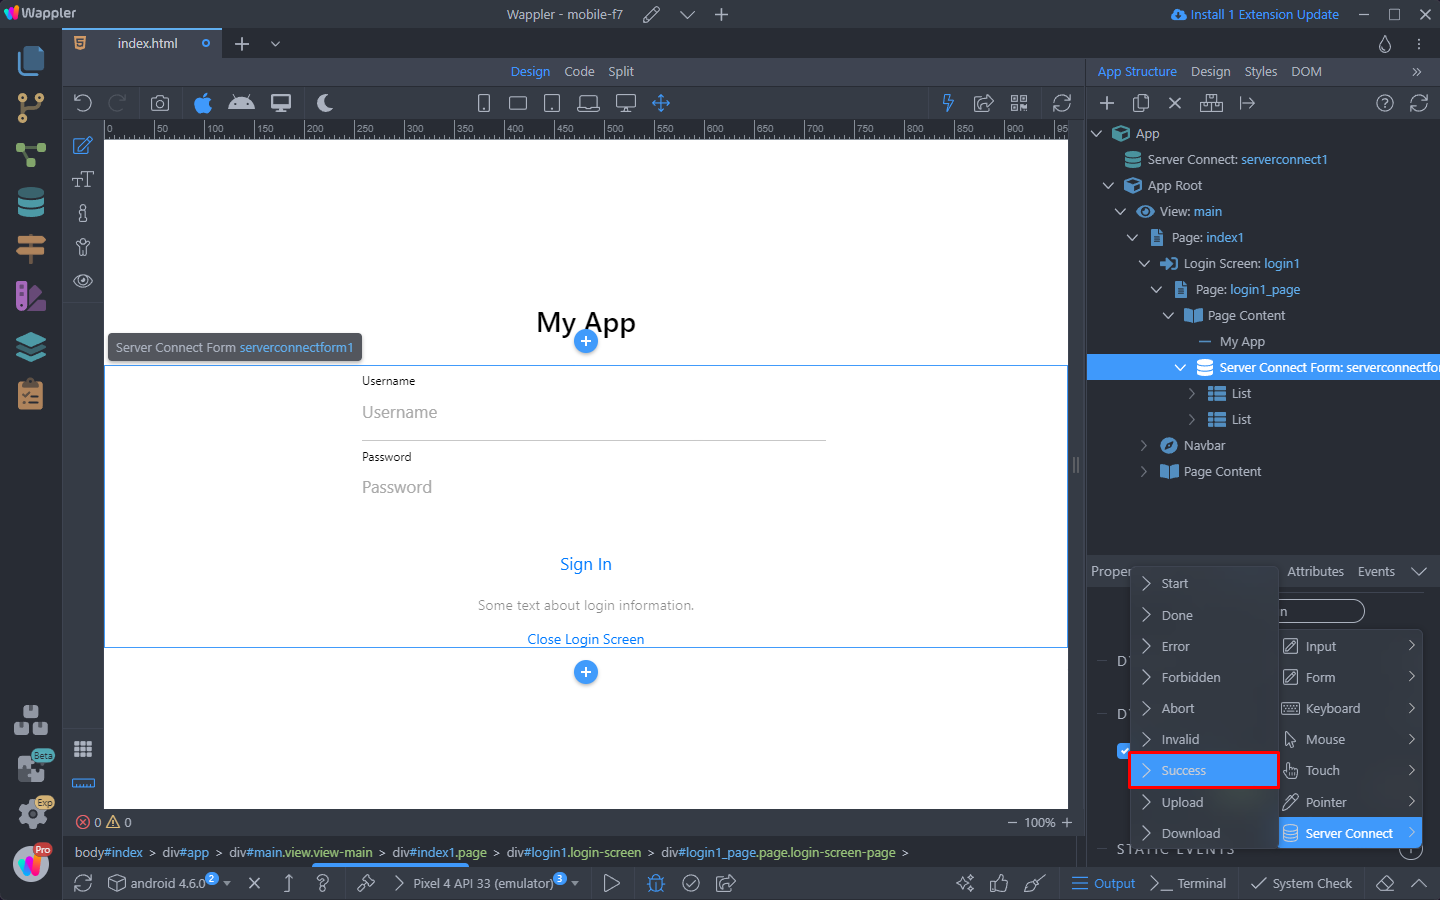
And select an action:
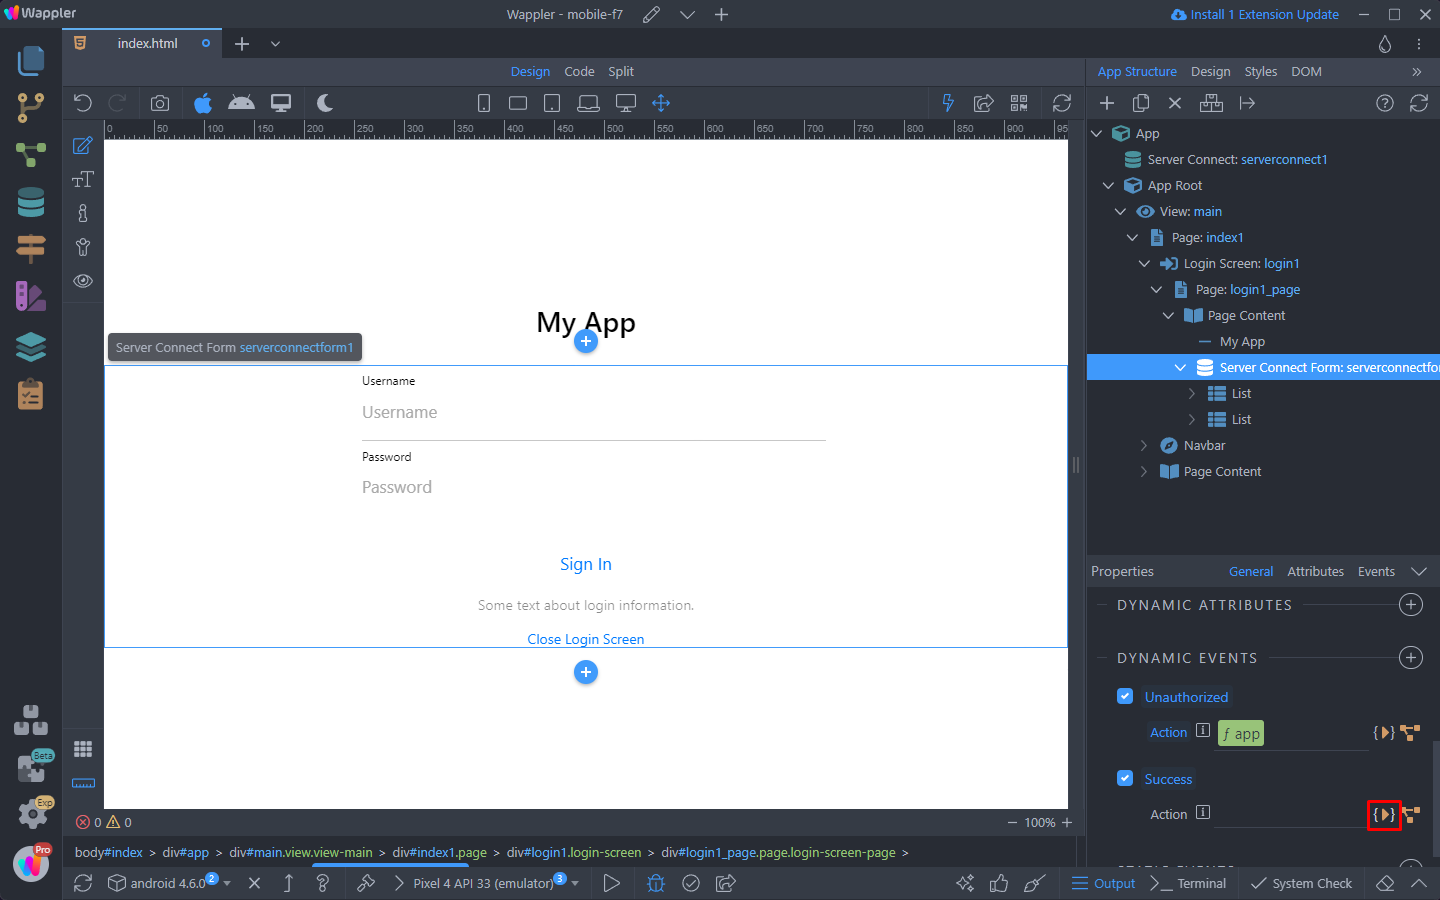
We want to hide the login screen, when the user logs in successfully. So we select Close under the Login Screen component. You can enable or disable animation on close.
Add any other dynamic events that need to run on success login - such as reload server actions or others.
Click Select when you are done:
Open Login Screen
You can open the Login Screen on click of a button. In your page content select the button/link which should open the Login Screen and open the Action menu:
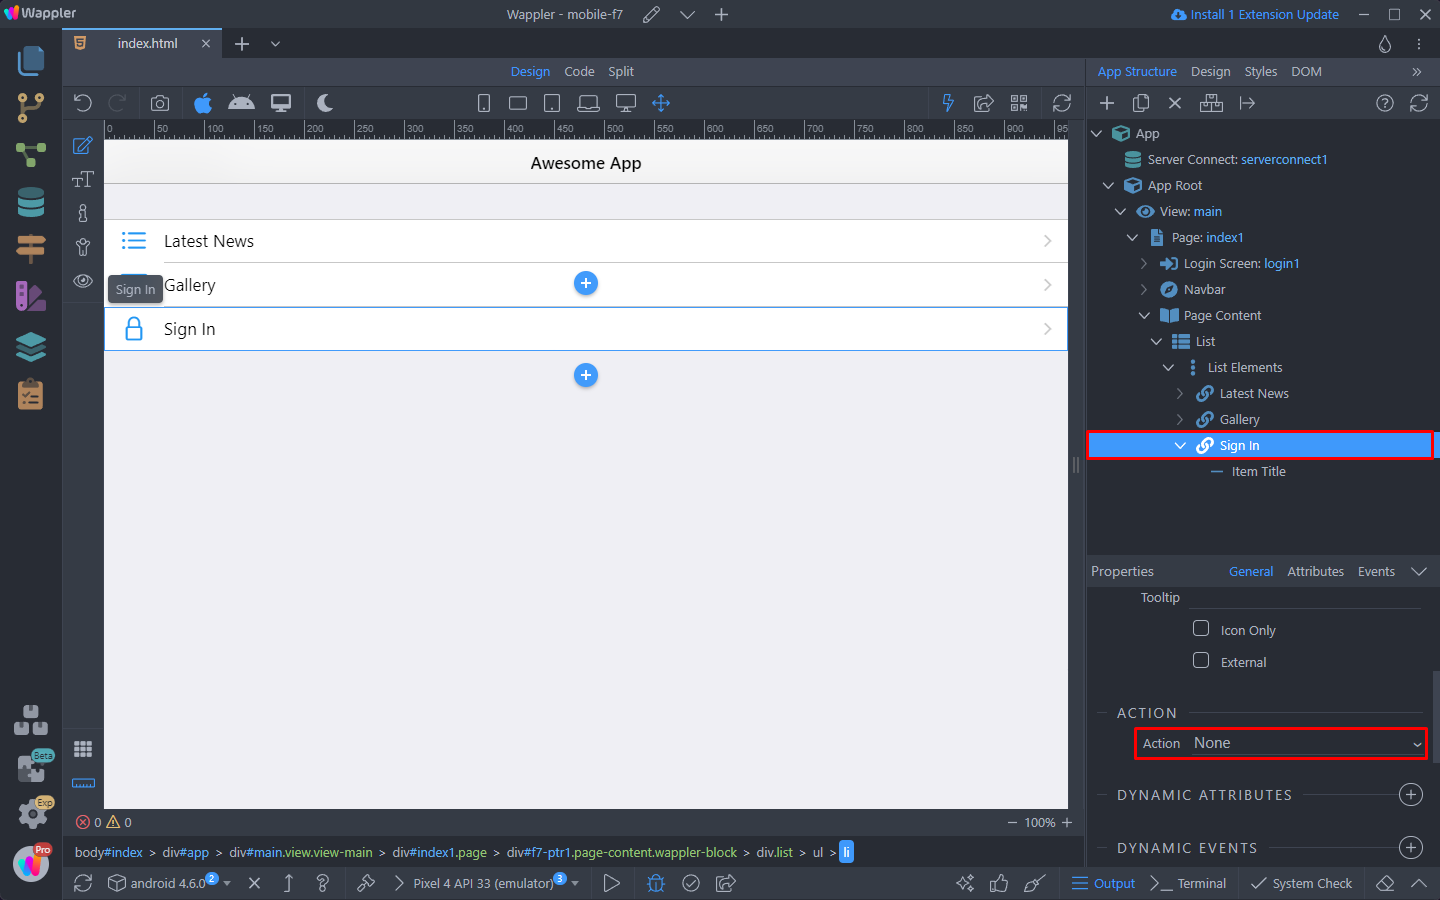
Select Open Login:
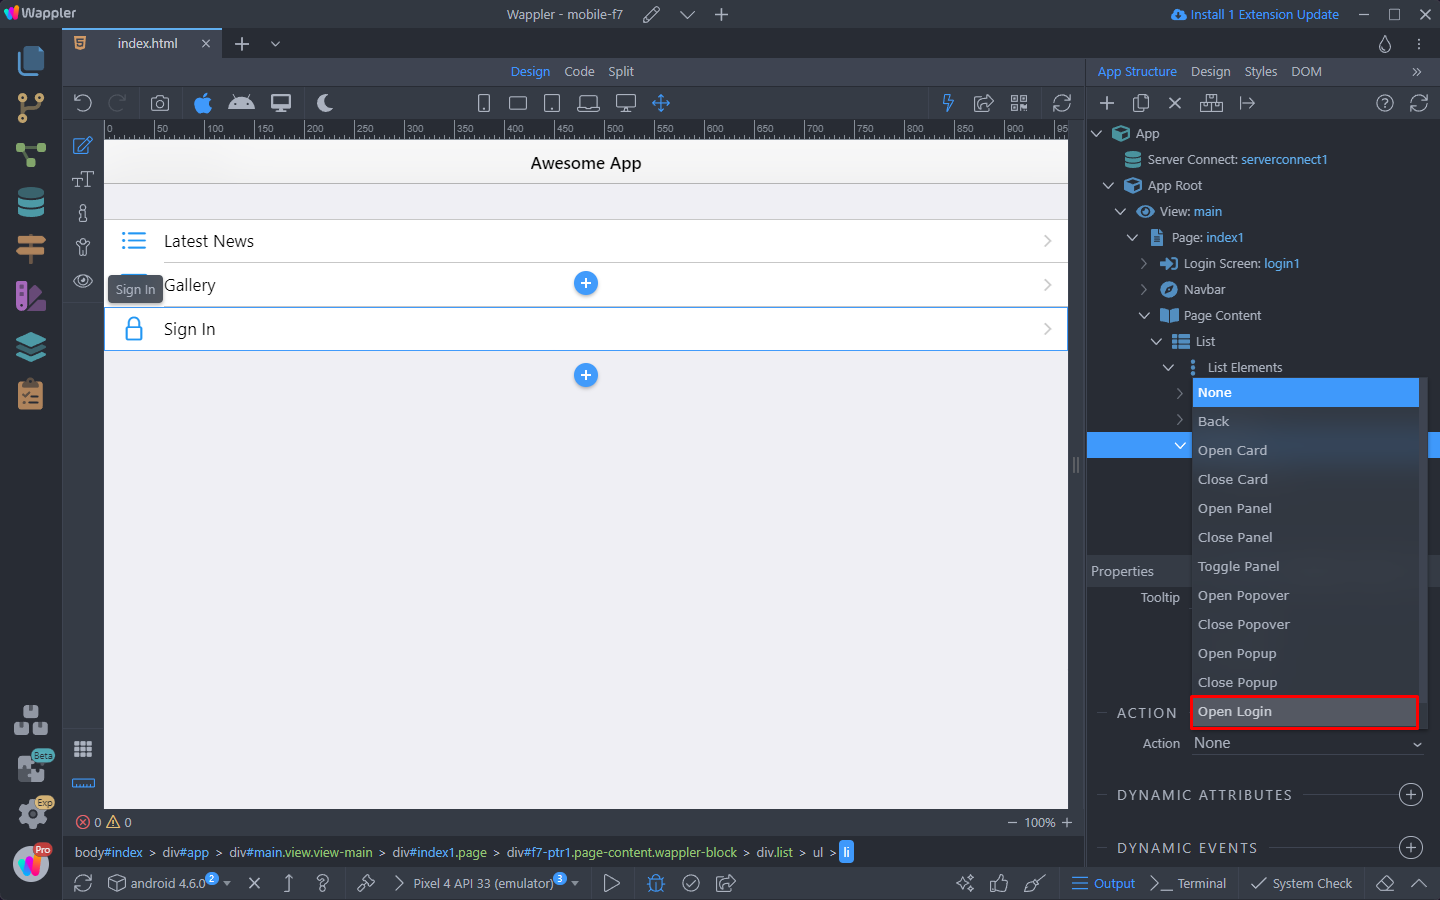
And select the Login Screen from the menu:

Save your page and you are done. After the login you can do what you need with the user identity - just as you do on regular web sites and web apps.
You can see the results: