Intro
Wappler 6 introduces the integration of CouchDB and PouchDB, two powerful document-based databases. In this article, we will show you how to setup and use CouchDB as a central database server and PouchDB as a client-side connector, providing offline access and seamless, realtime data synchronization.
We will show you how to create a very simple Notes App, which is synced across multiple devices and has offline capabilities. We’ll have a single collection to store all the notes, and each note will be represented as a separate document, having a Title and Content.
Setting Up CouchDB
Installing CouchDB on Your Server
CouchDB can be installed on your cloud server, just as any other service or database in the Resource Manager:
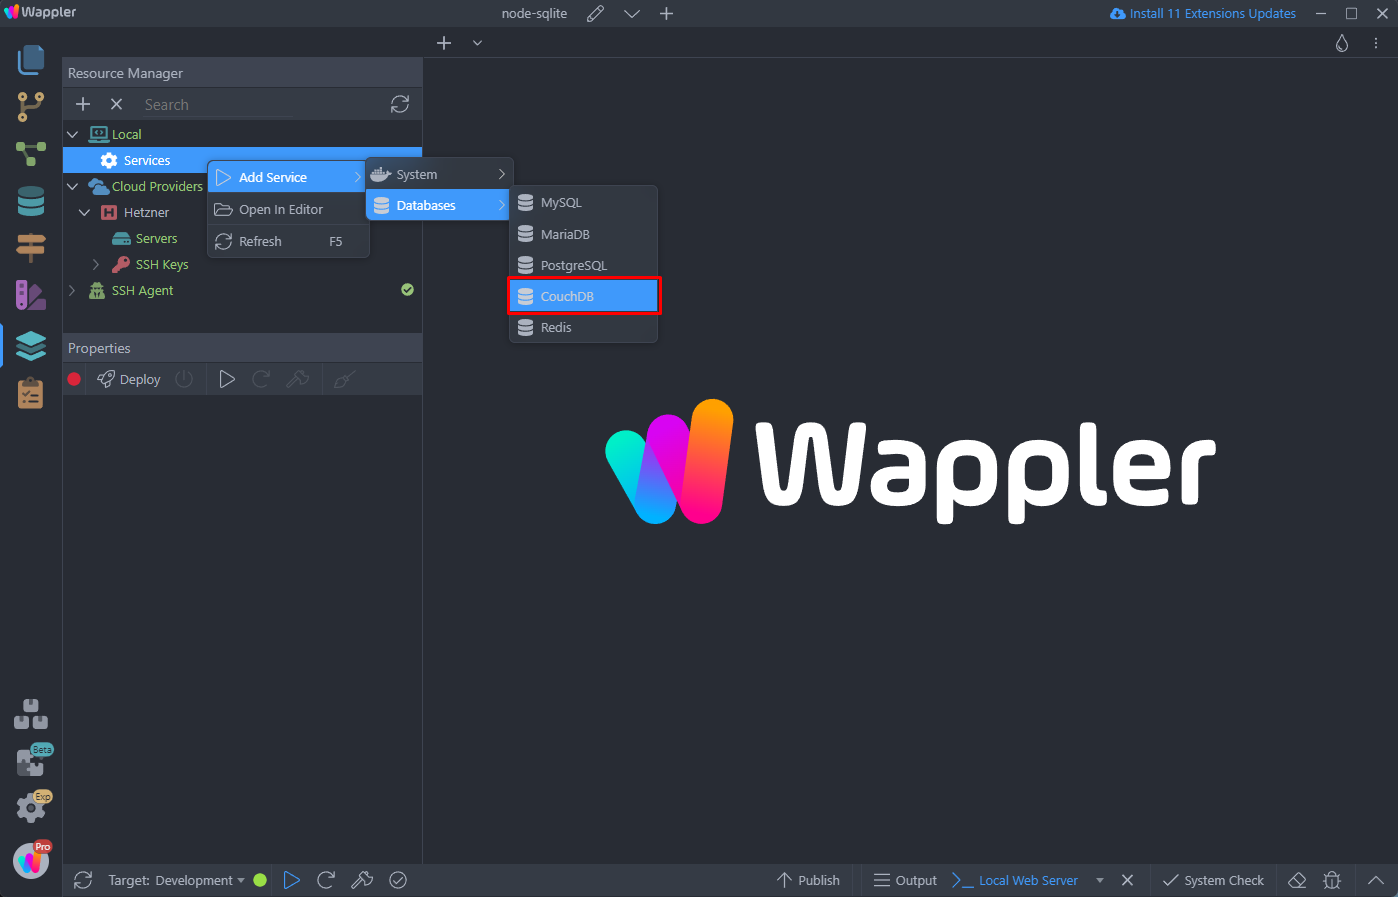
Just right click Services under your server in the Resource Manager, Select Add Service > Databases > CouchDB
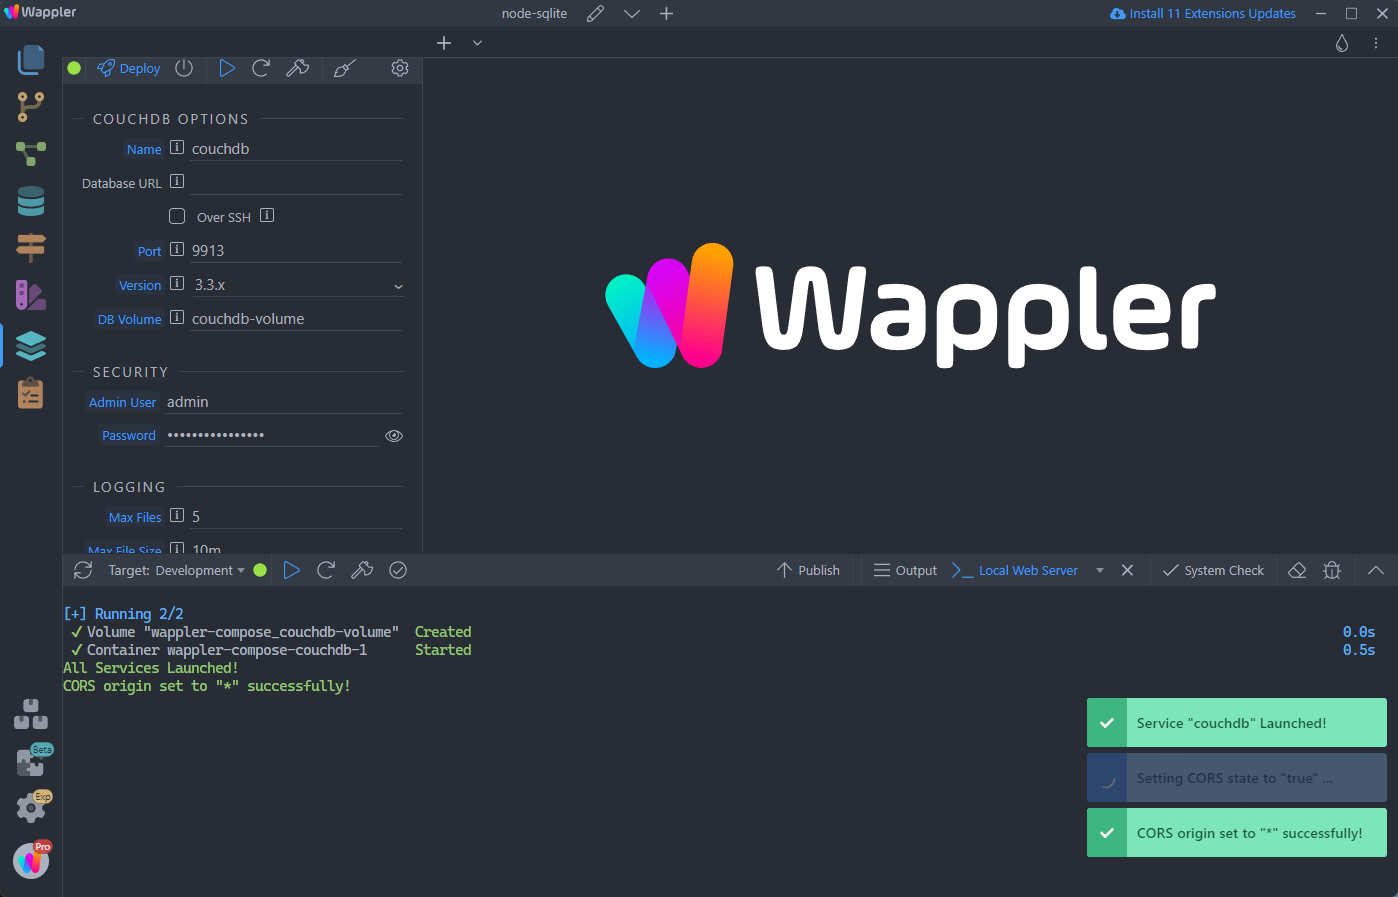
In this example we install the CouchDB for local development, so we add it under Local > Services. Don’t forget that Docker Desktop is required and it must be running in order to install this services for local development:
Add a name for the CouchDB server:
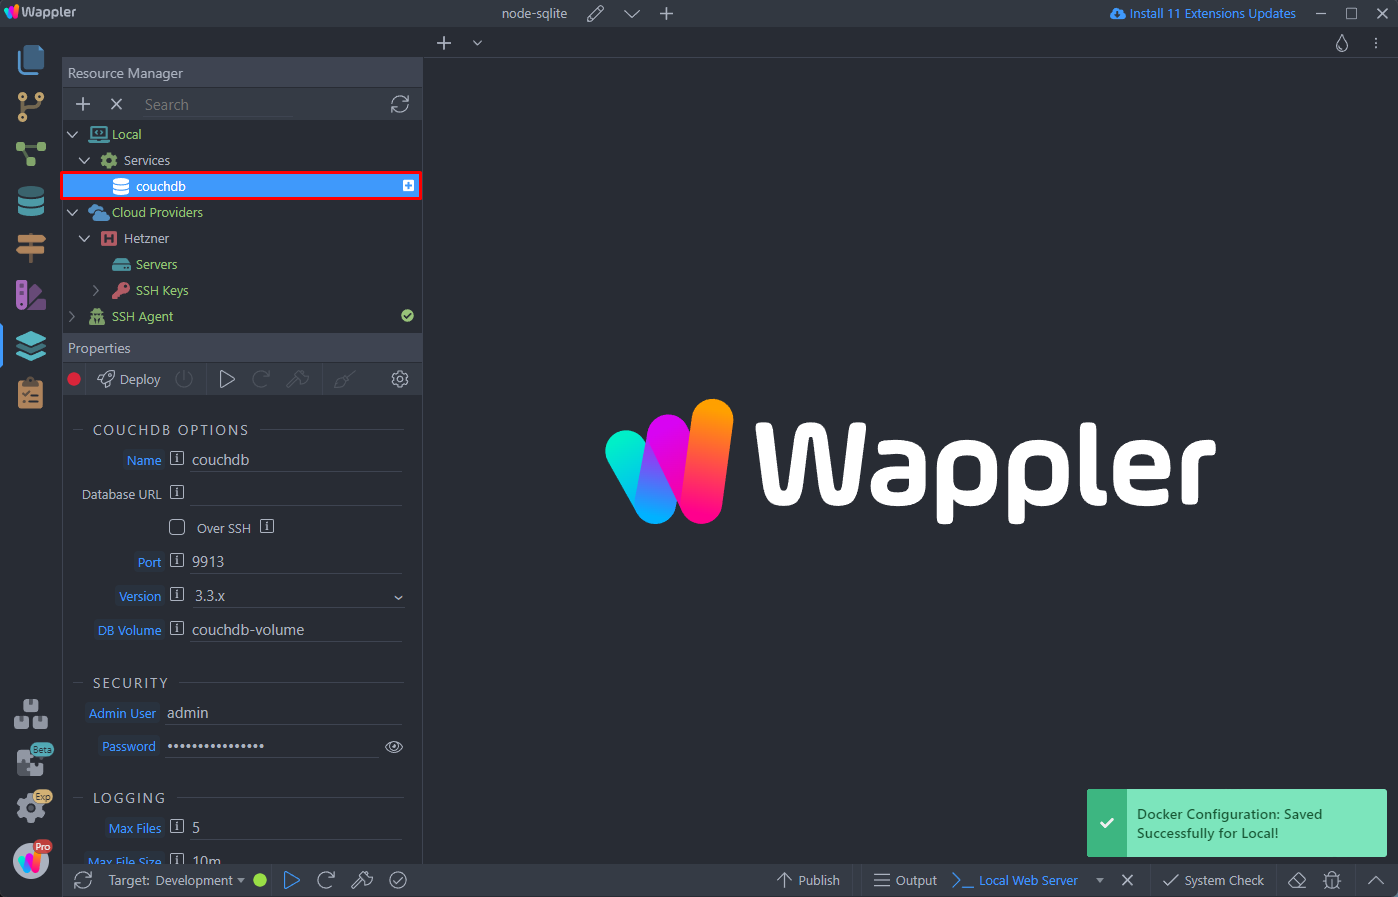
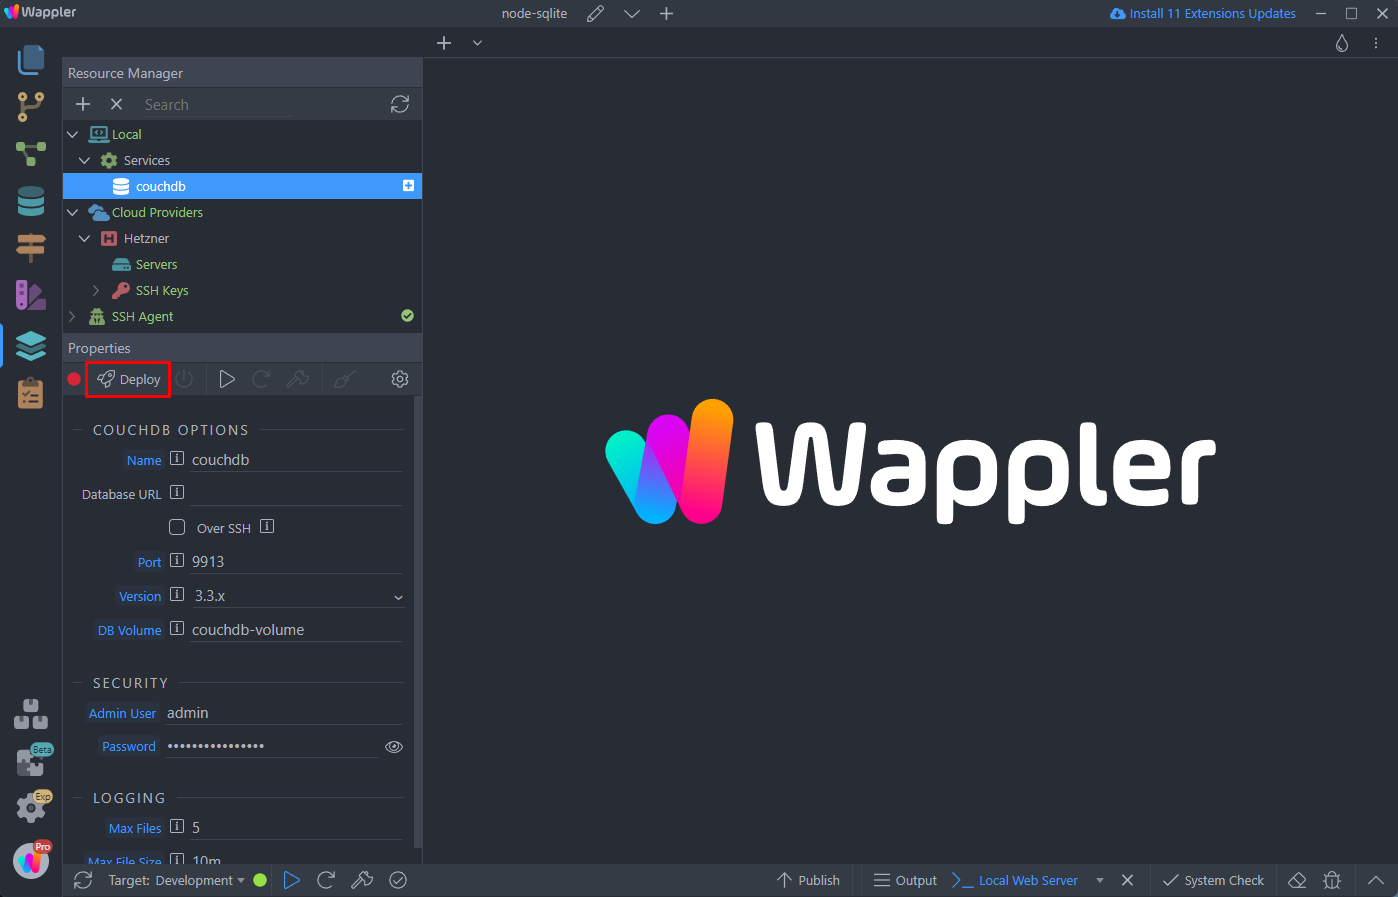
And hit the Deploy button to install it on your server:
You will see a success notification once the CouchDB is successfully installed on your server:
Setting Up Database
The next step is to setup the database and the database user.
Right click Databases and add new database:
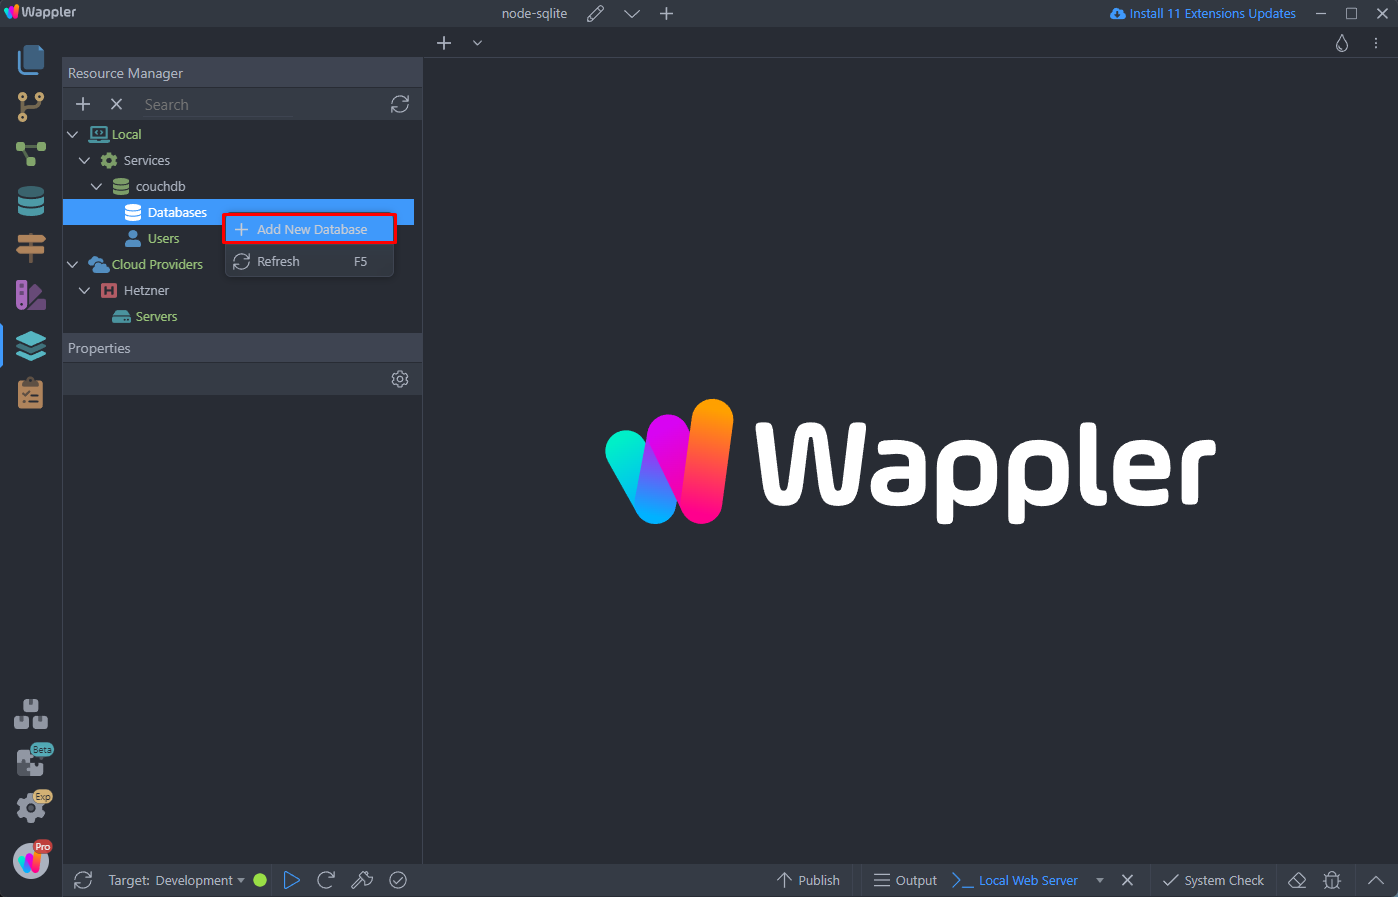
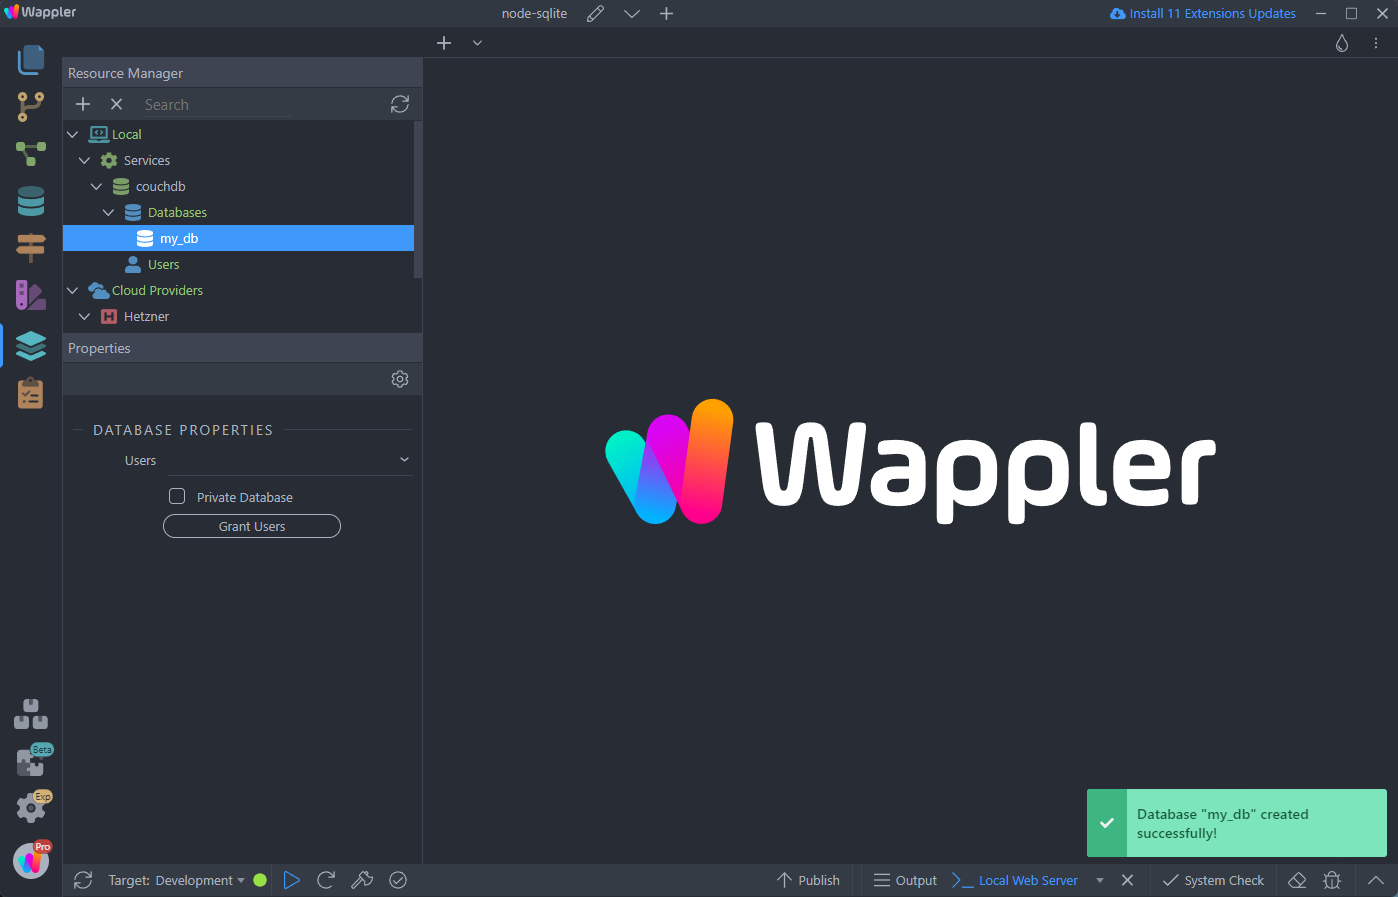
Add a name for it. We enter my_db:
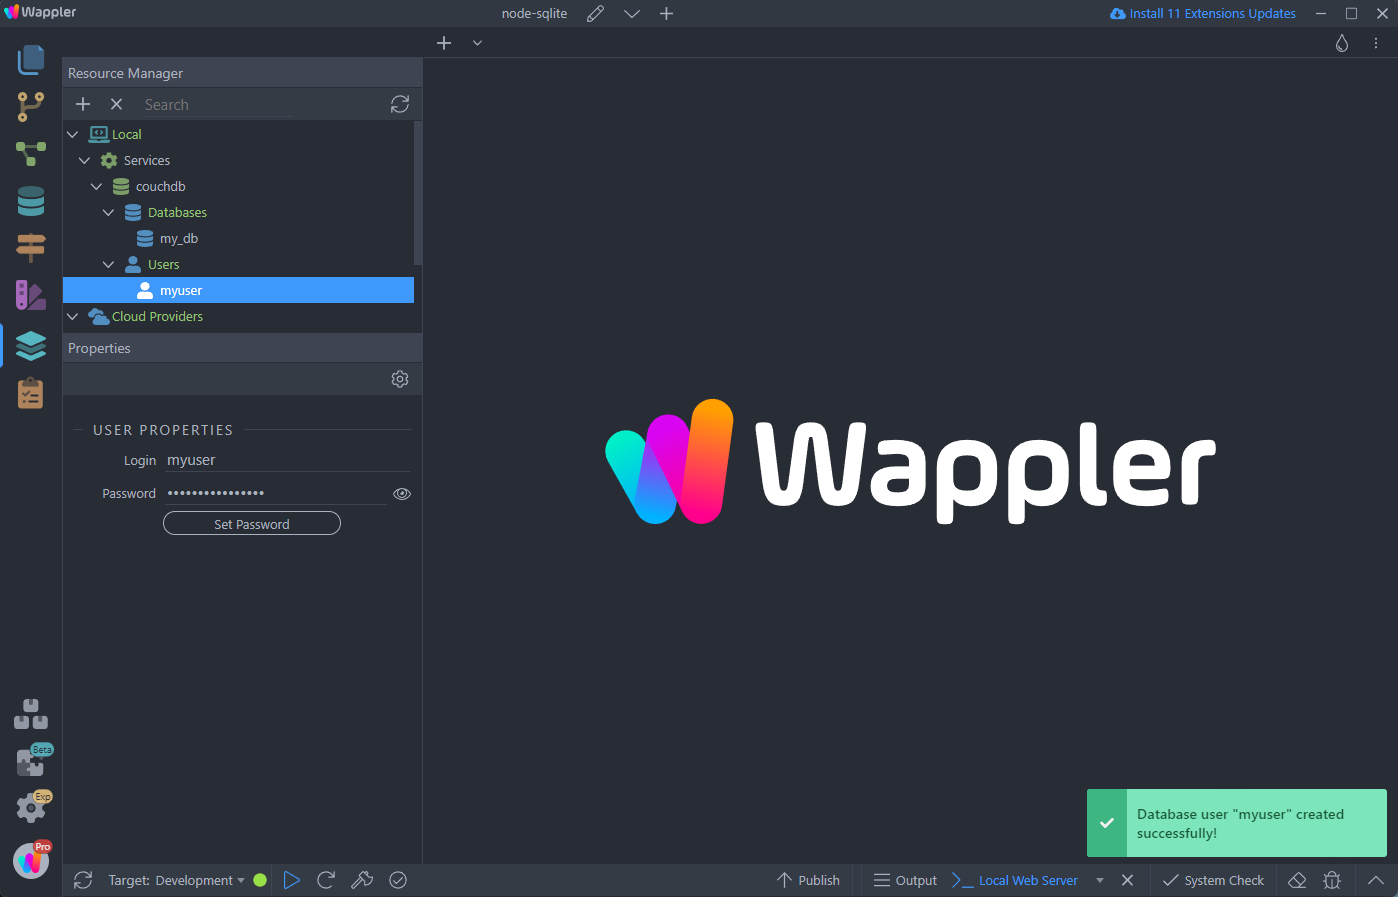
Then right click Users and add new user:
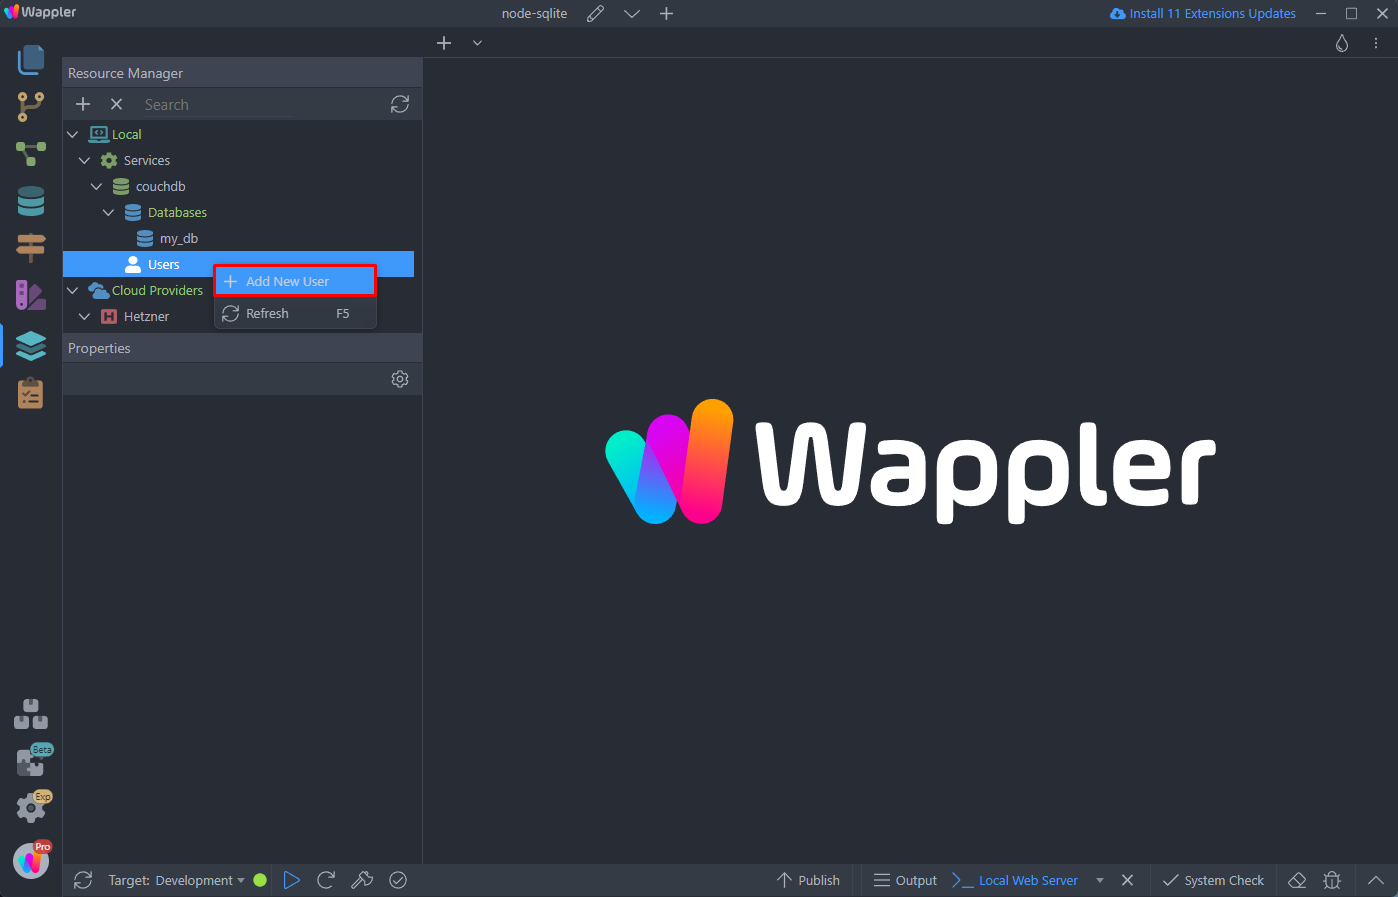
We call this user myuser:
Select the database which we created in the previous step and open the users menu. Select the user:
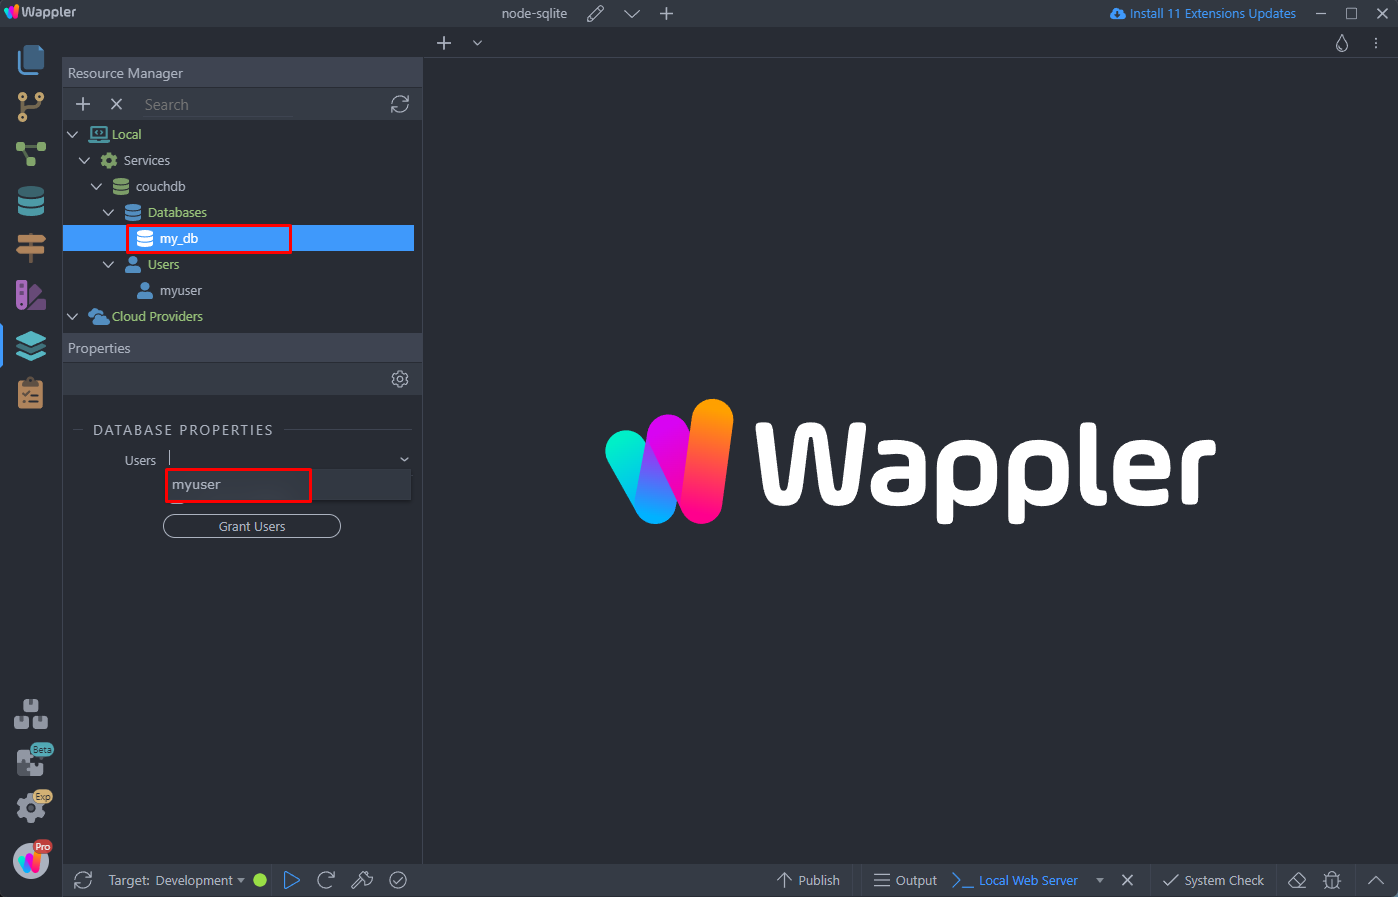
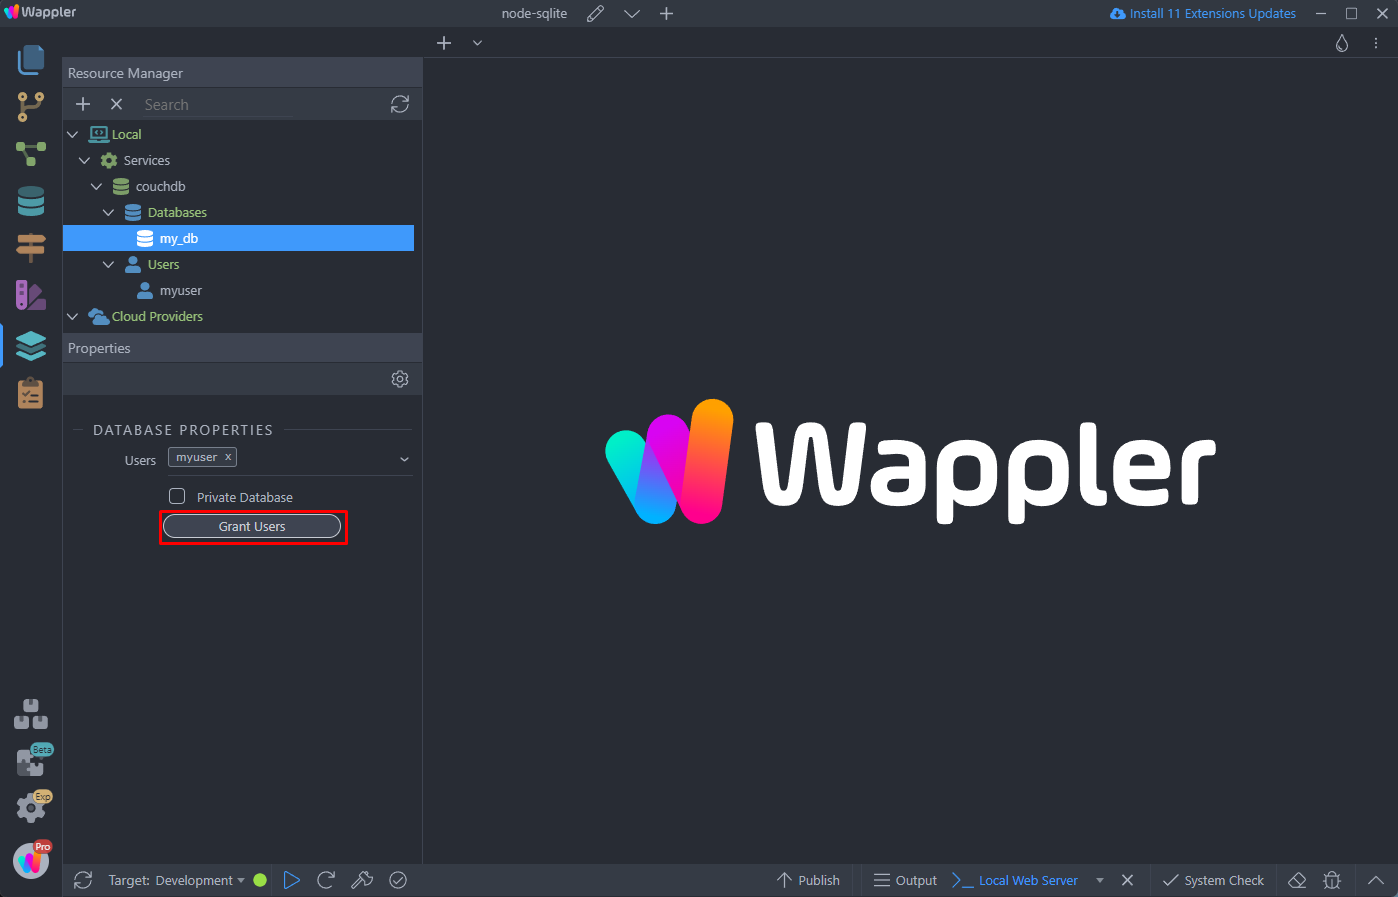
And click Grant User:
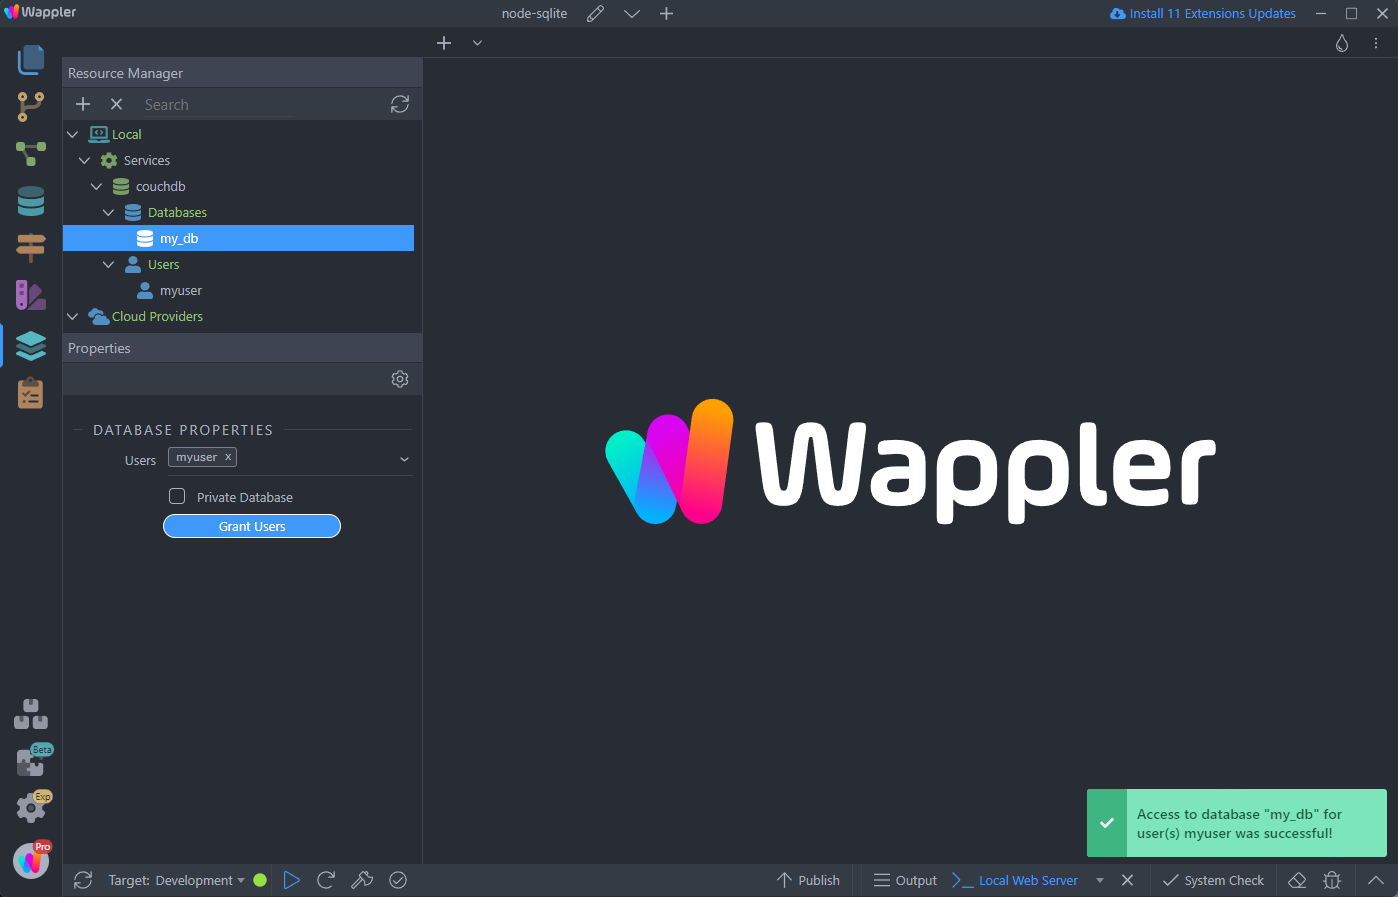
Our user has been granted access to the database:
Creating Database Connection
Collections in CouchDB and tables in MySQL serve similar purposes, which is to organize and store data. We’ll have a single collection to store all the notes, and each note will be represented as a separate document with the following fields:
_id : (string, required) The unique identifier for the note. CouchDB will automatically generate this when the note is created.
title : (string, required) The title of the note.
content : (string, required) The content or text of the note.
Database Connection
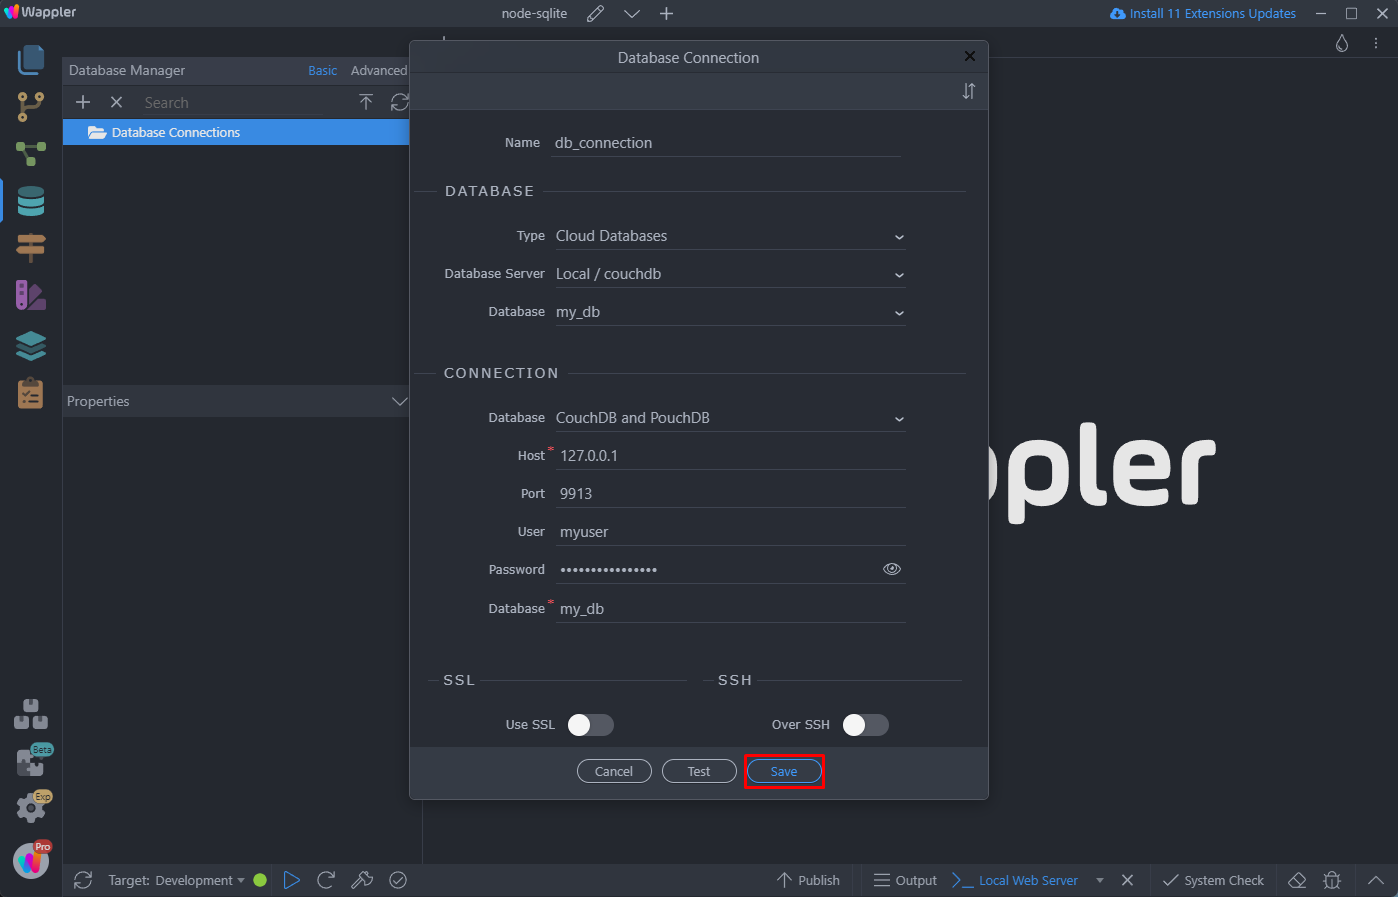
The first step is to create a database connection.
Open the Database Manager:
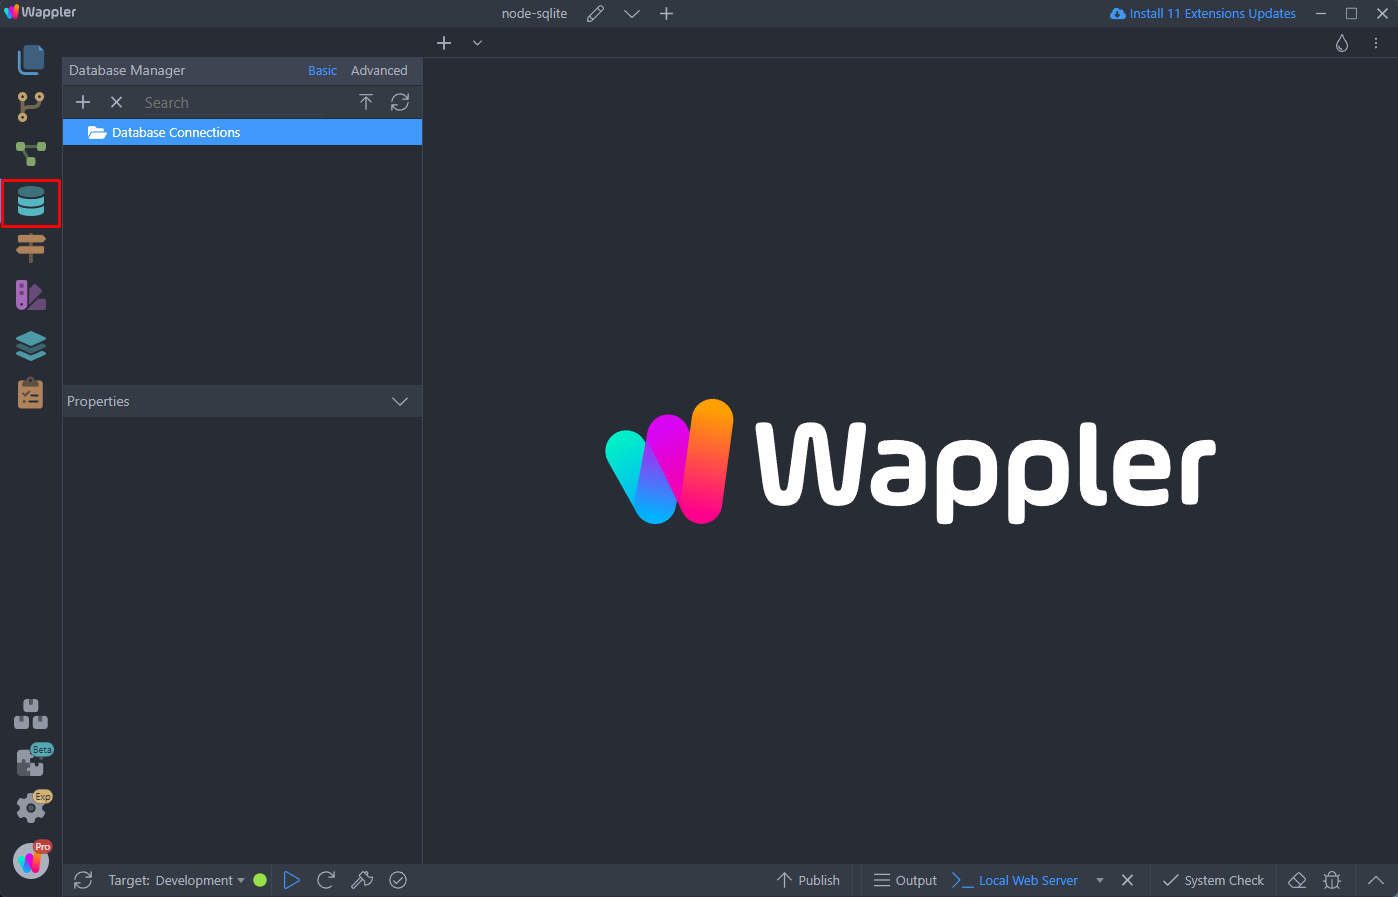
And add a new Database Connection:

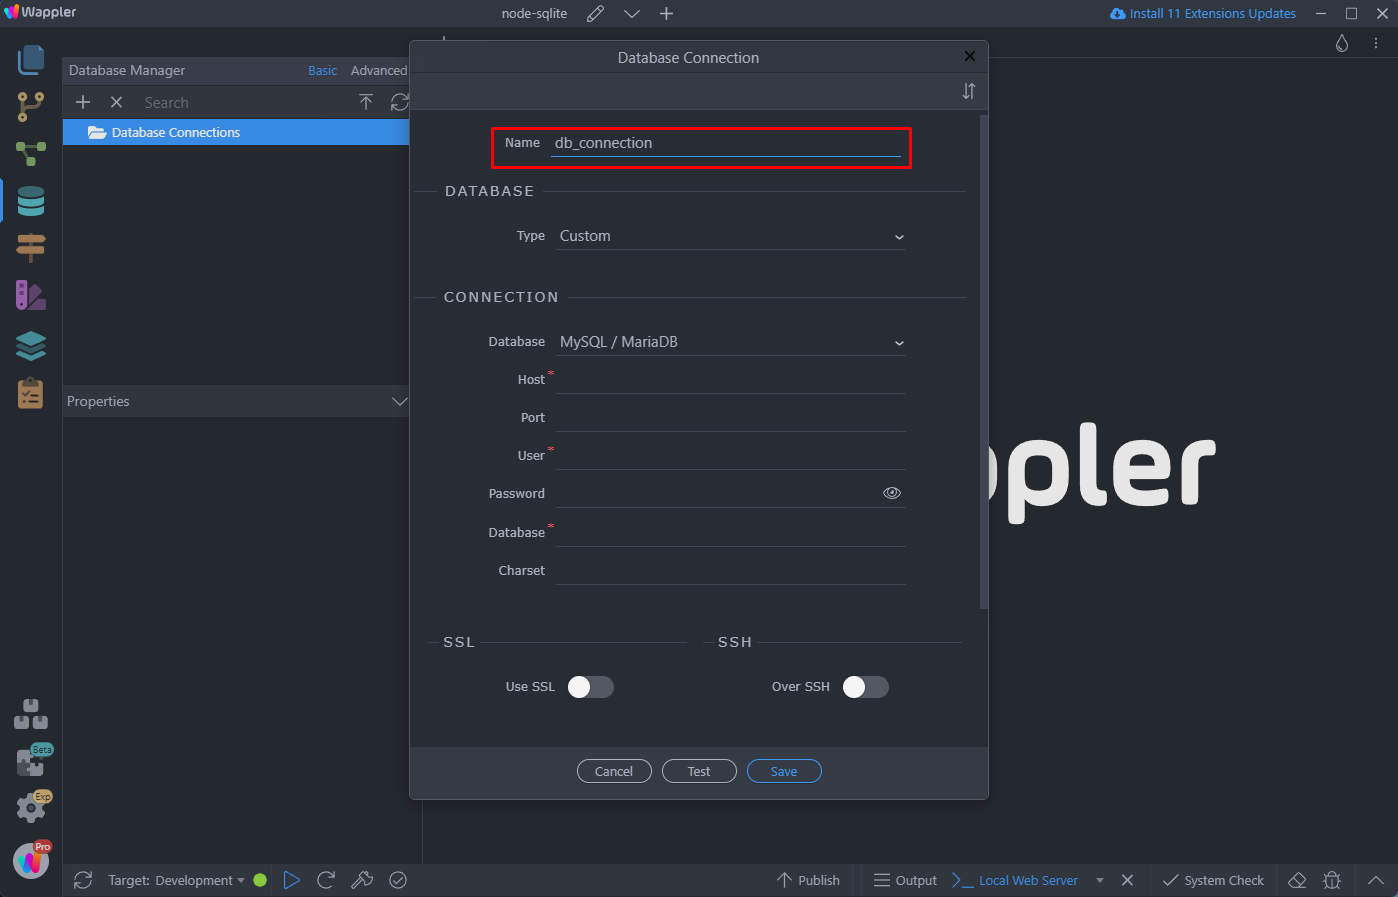
Add a name for the connection:
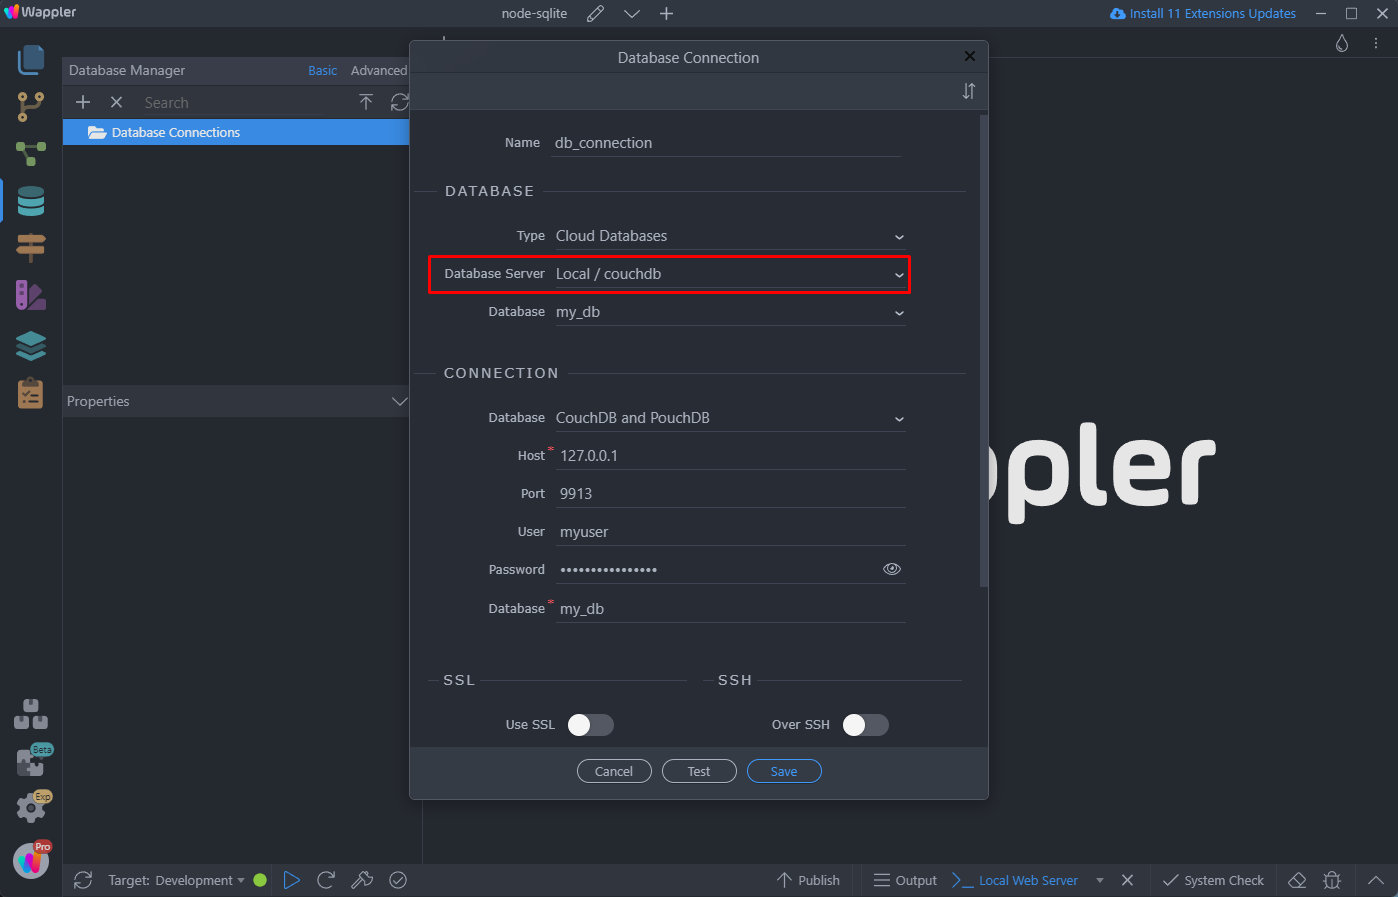
And select Cloud Database from the Database Server Dropdown:

Select your CouchDB database server, the one we created in the first part of this tutorial:
Select your Database and you will see the connection details below:
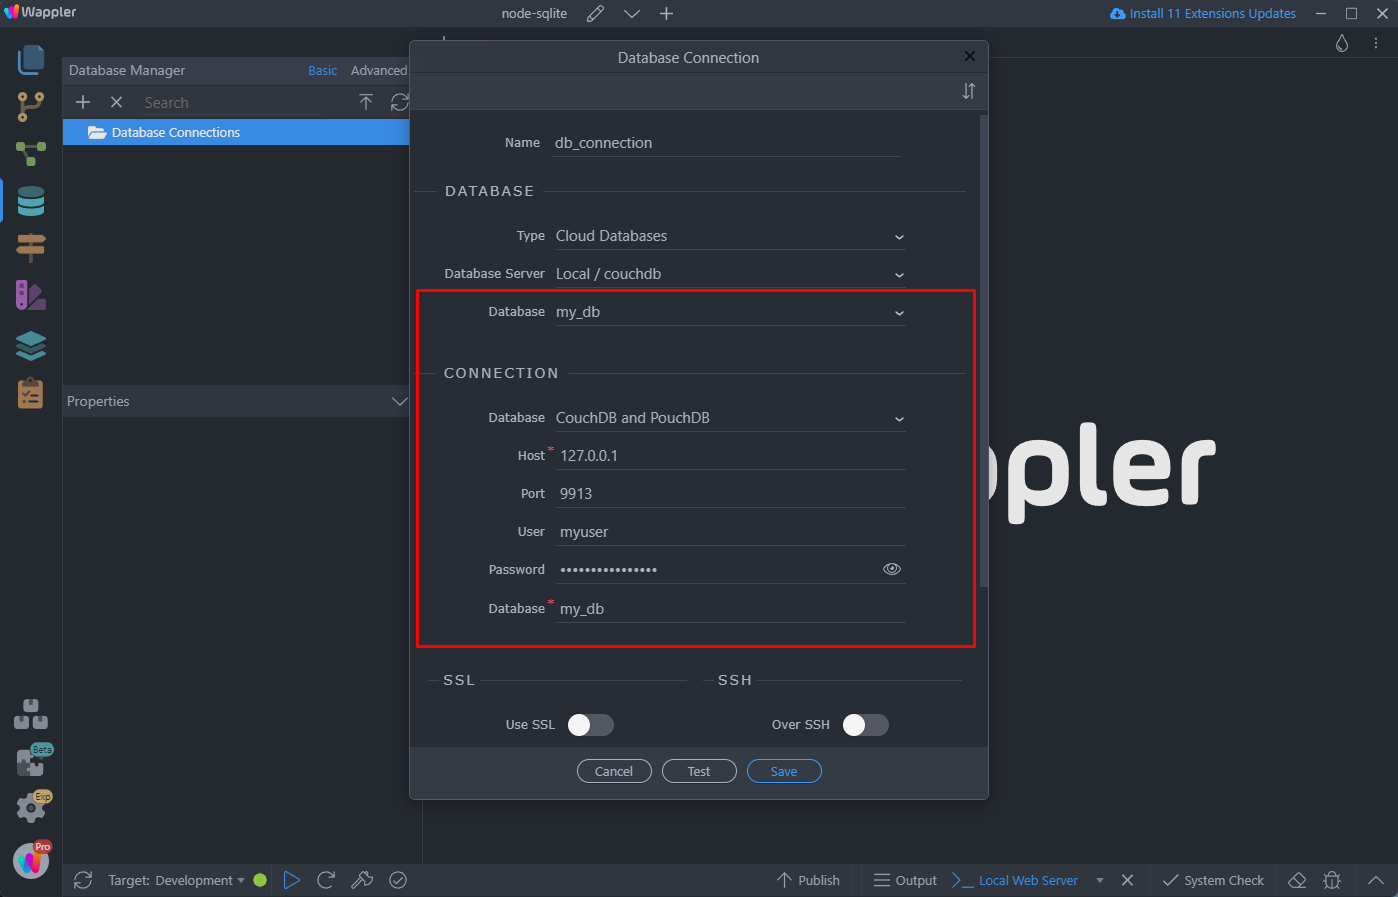
Click Save and you are done. Your database connection is ready to be used in your app:
Database Schema
The next step is to setup the database schema.
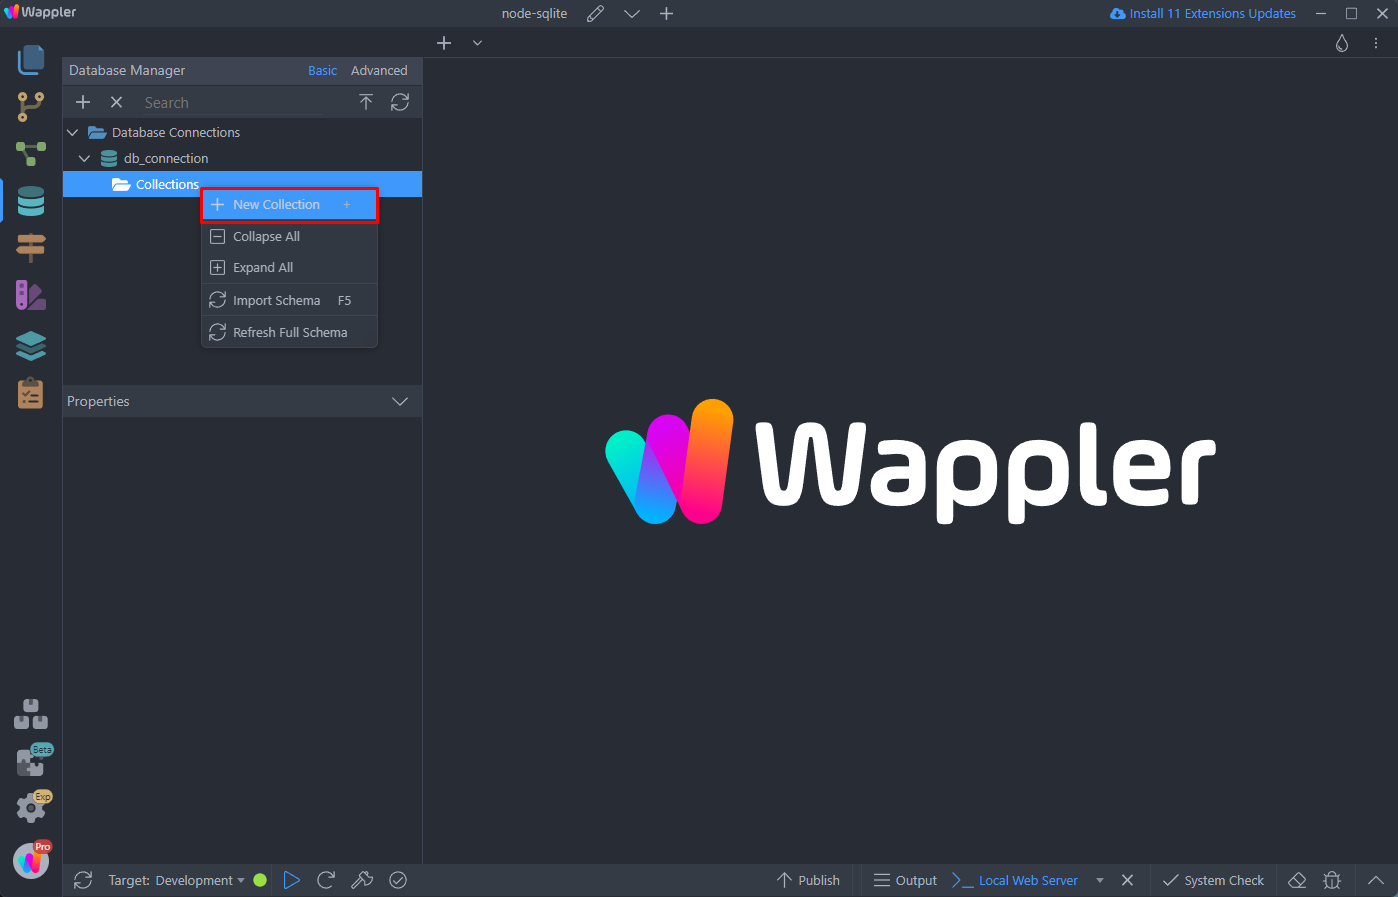
Right click Collections and add a new collection:
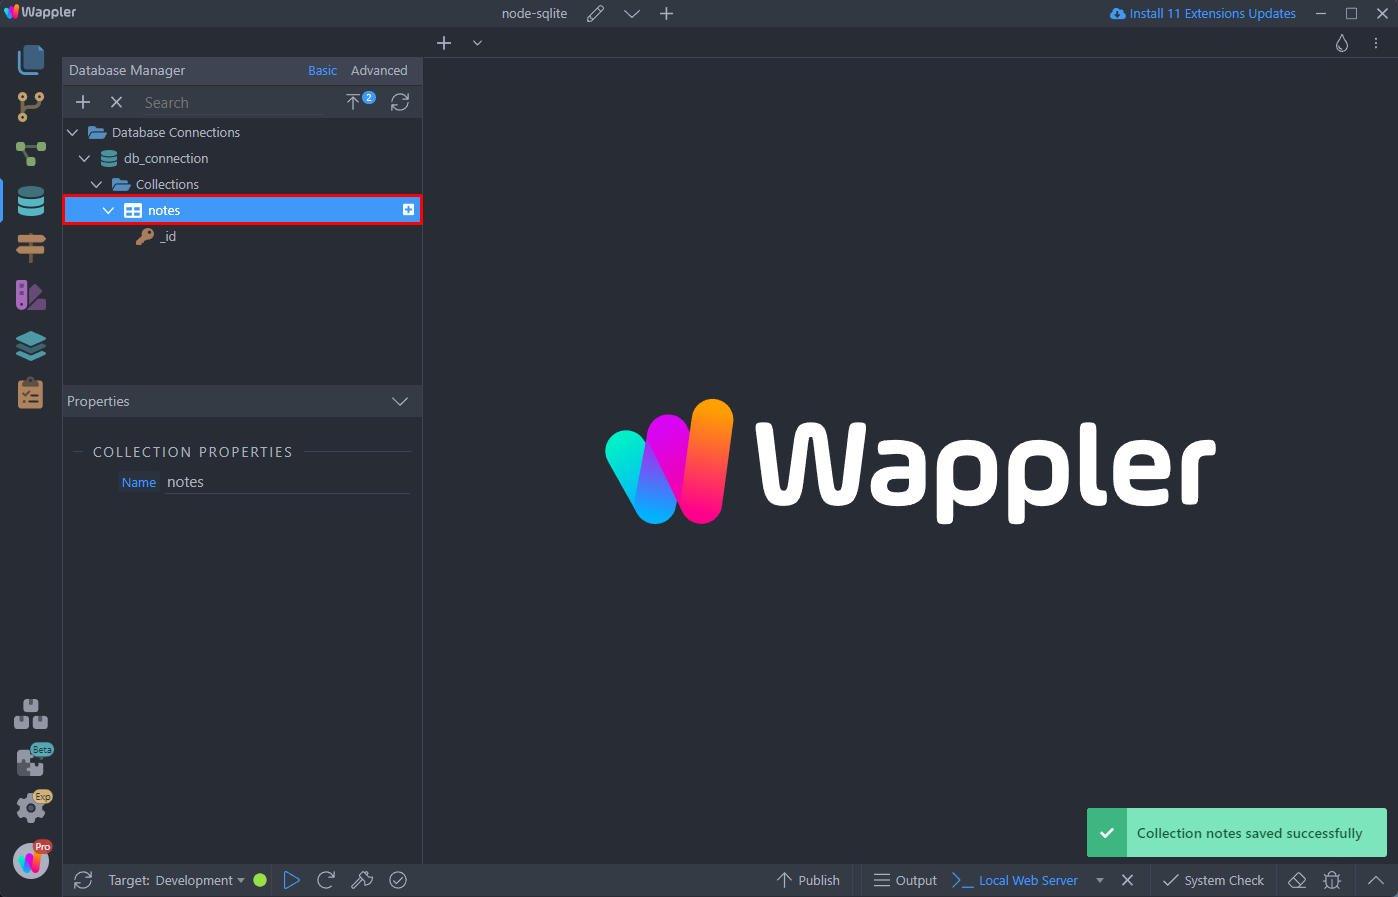
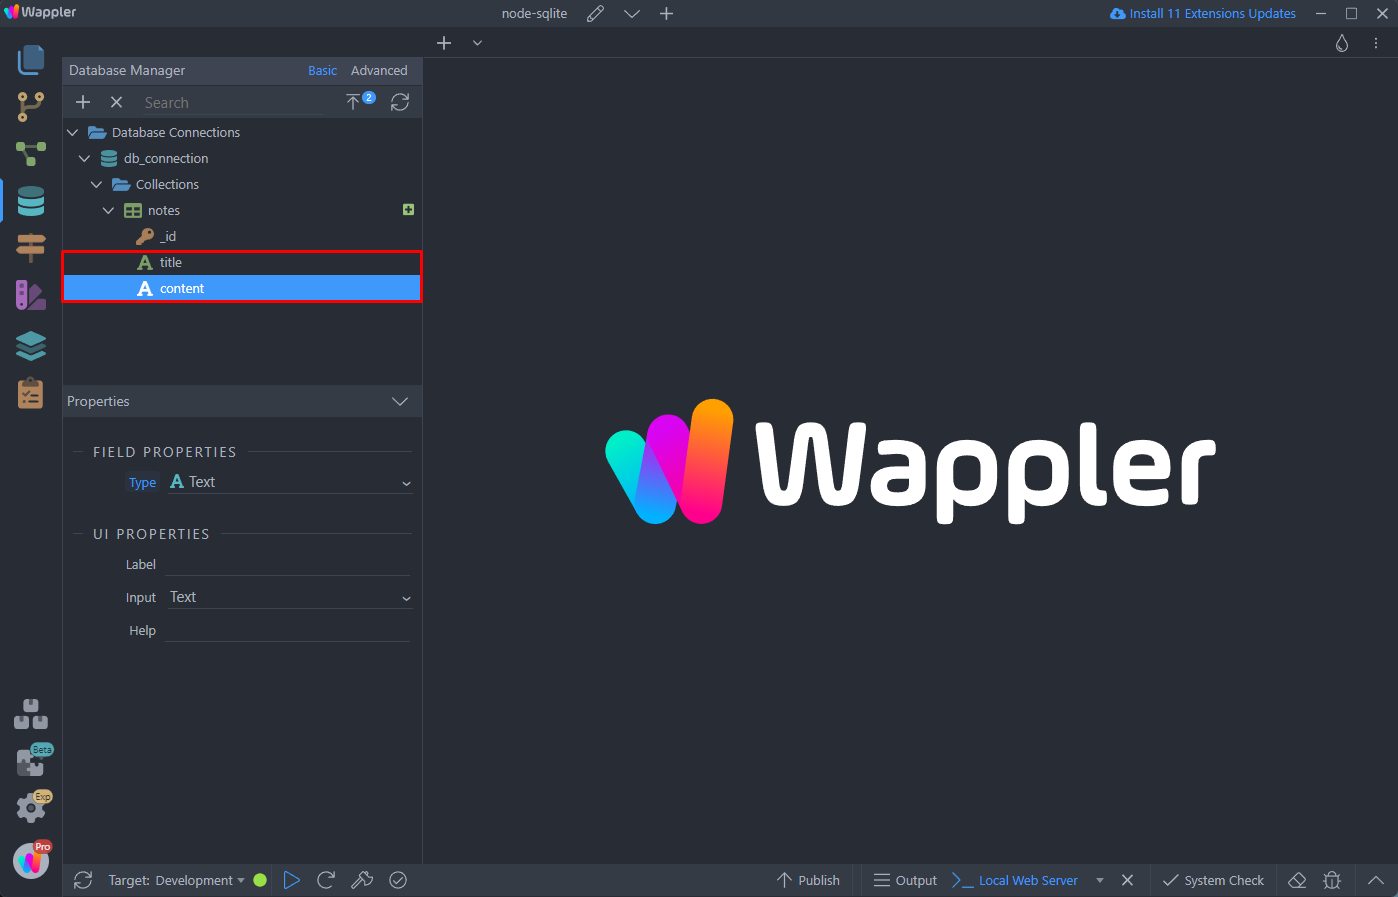
We call this collection notes. An _id field is has been added automatically by CouchDB.:
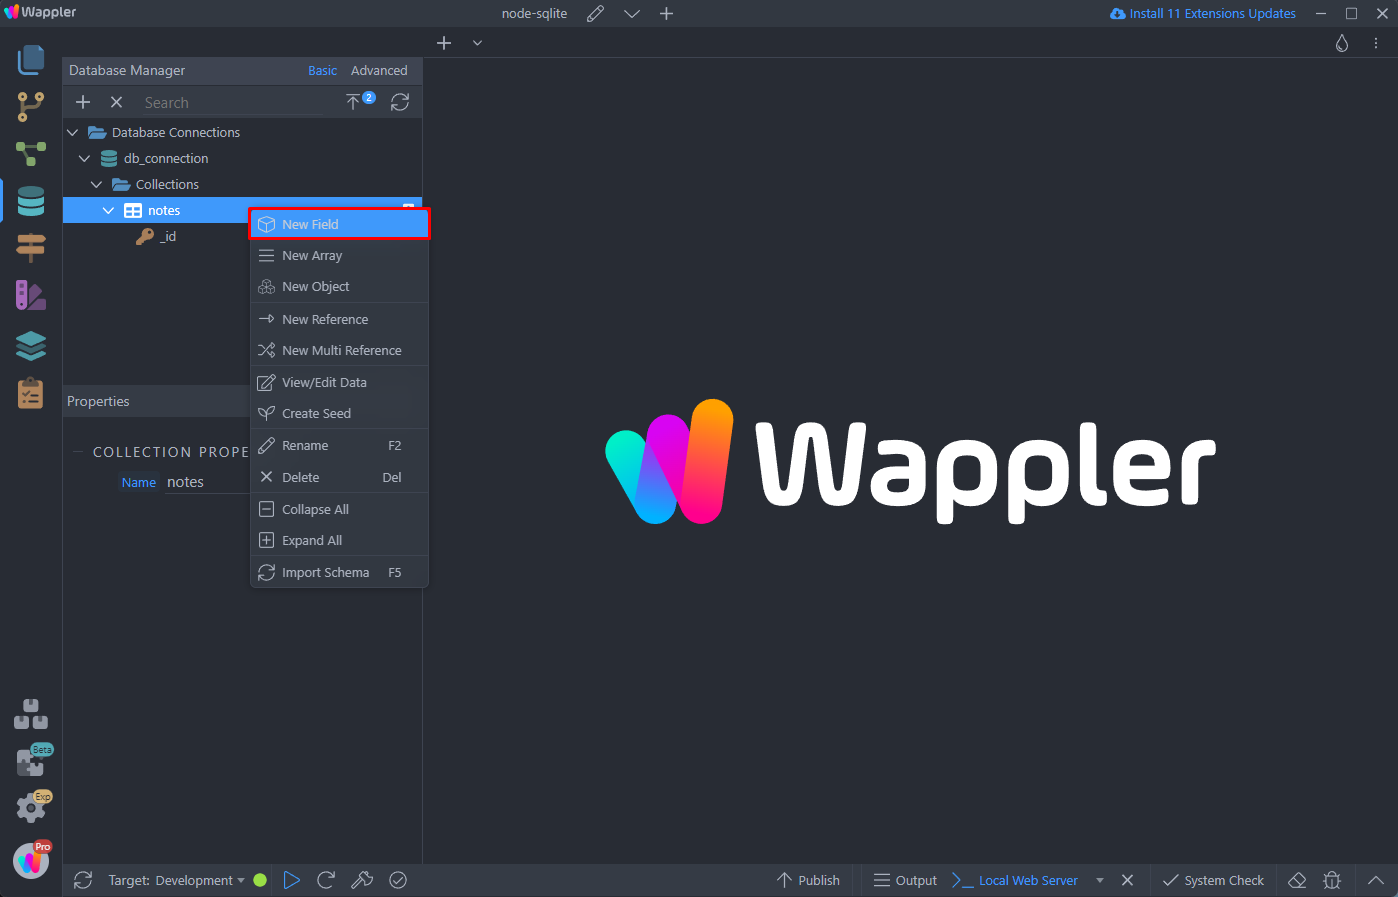
Right click the notes collection and add two text fields - title and content:
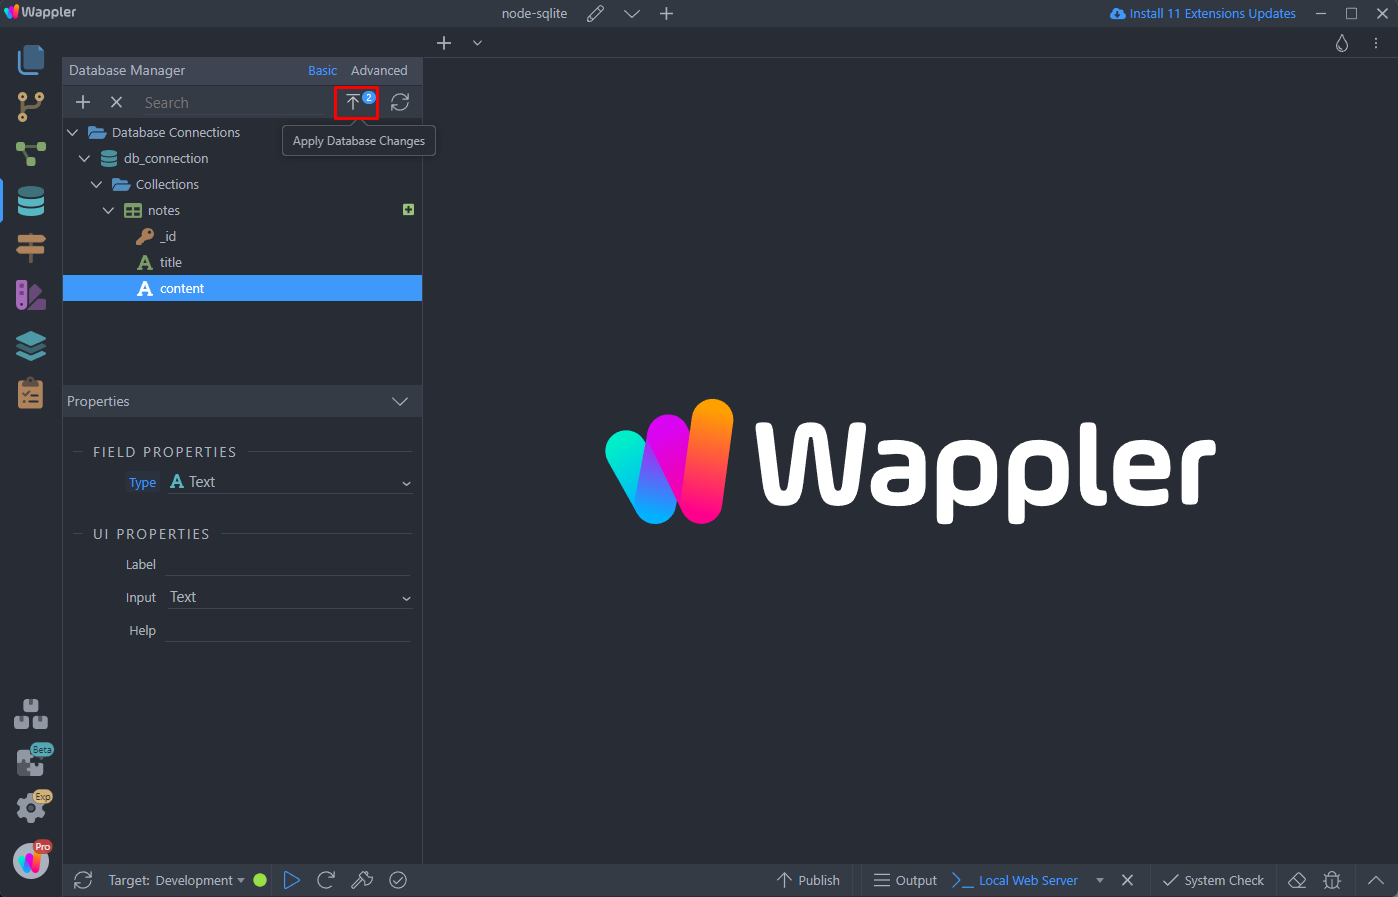
Our database schema is ready, so we can apply the changes:
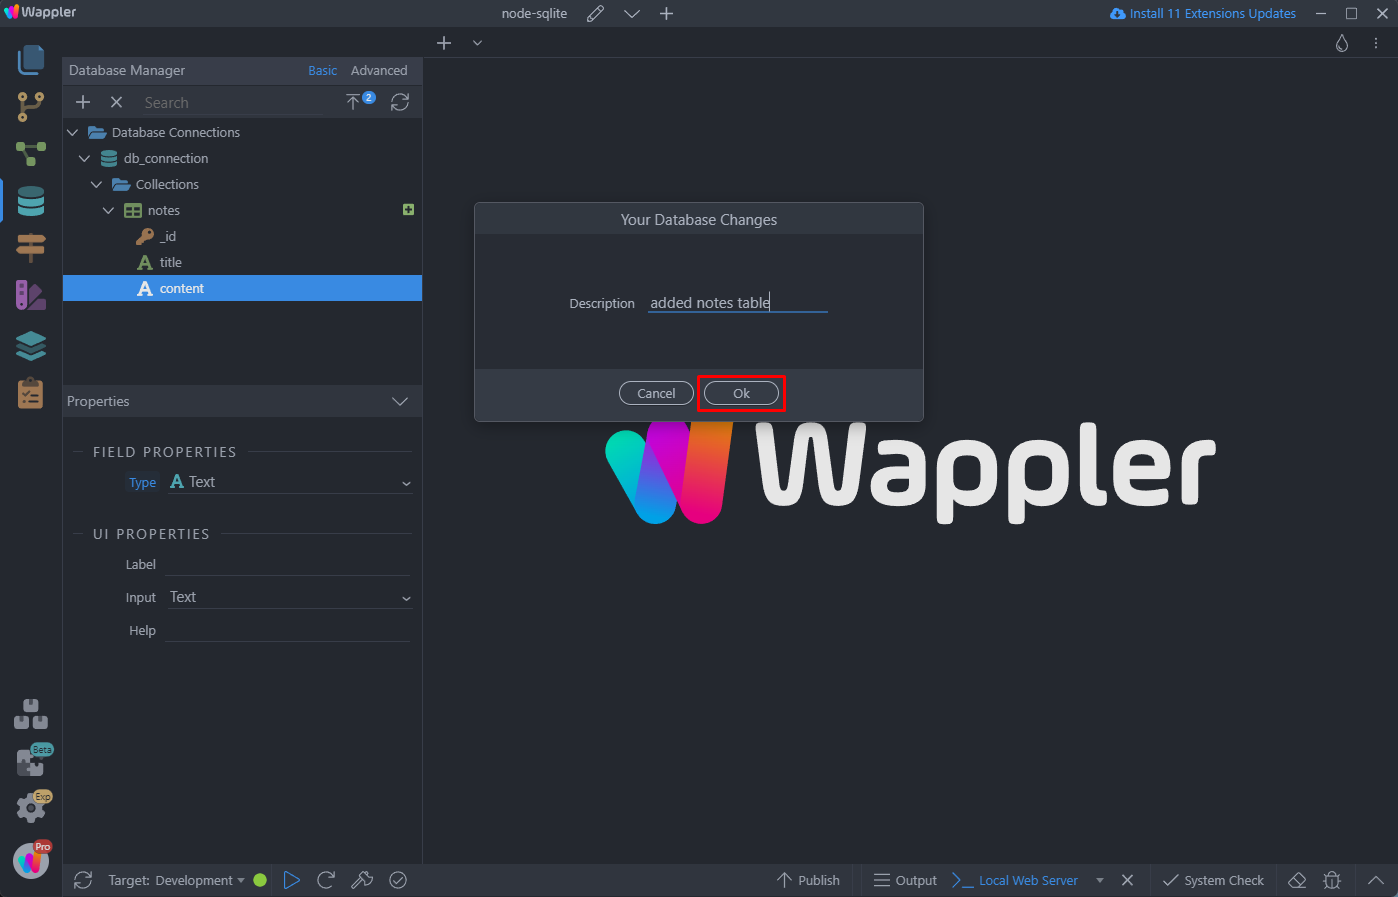
Add a description for the changes we are applying:
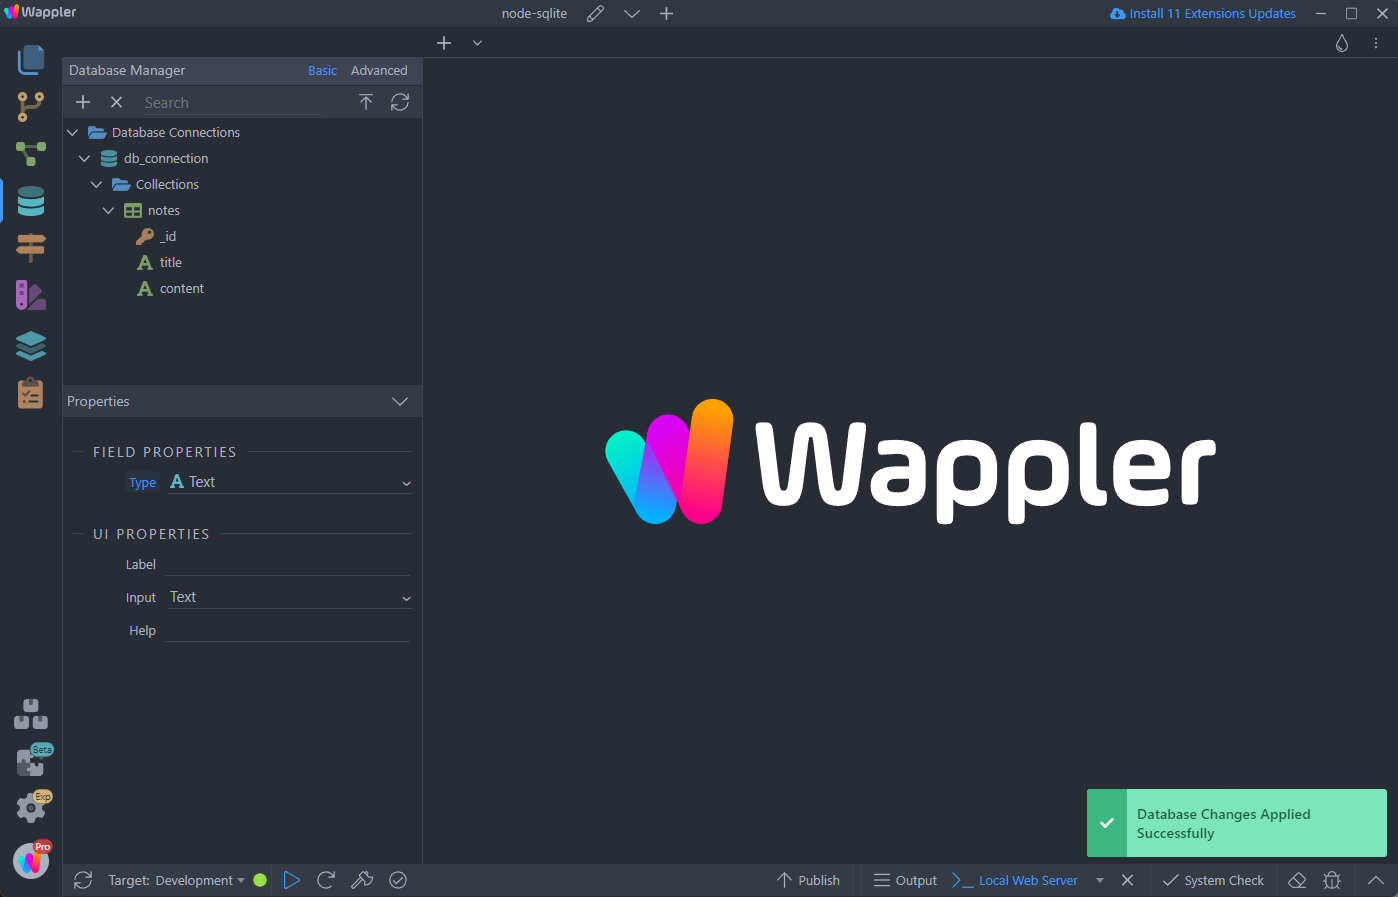
And we are done:
Setting Up PouchDB
Complementing CouchDB, PouchDB plays a vital role as the client-side connector, providing offline access and automatic data synchronization with the central CouchDB server. Some of the PouchDB useful features are:
-
Each client running PouchDB maintains a complete local copy of the database. Users can fully query and manipulate the data stored in this local database, independent of network connectivity. This local copy remains in sync with the central CouchDB database.
-
PouchDB allows users to access and manipulate data even when there is no internet connection.
-
Automatic Data Synchronization: When PouchDB clients reconnect to the internet, they automatically synchronize their local changes with the central CouchDB server. This bidirectional synchronization ensures that data across all clients and the central server remains consistent and up-to-date.
Page Setup
First, let’s create a page for our app. There we will list the notes from the database as well as we will be able to add new notes.
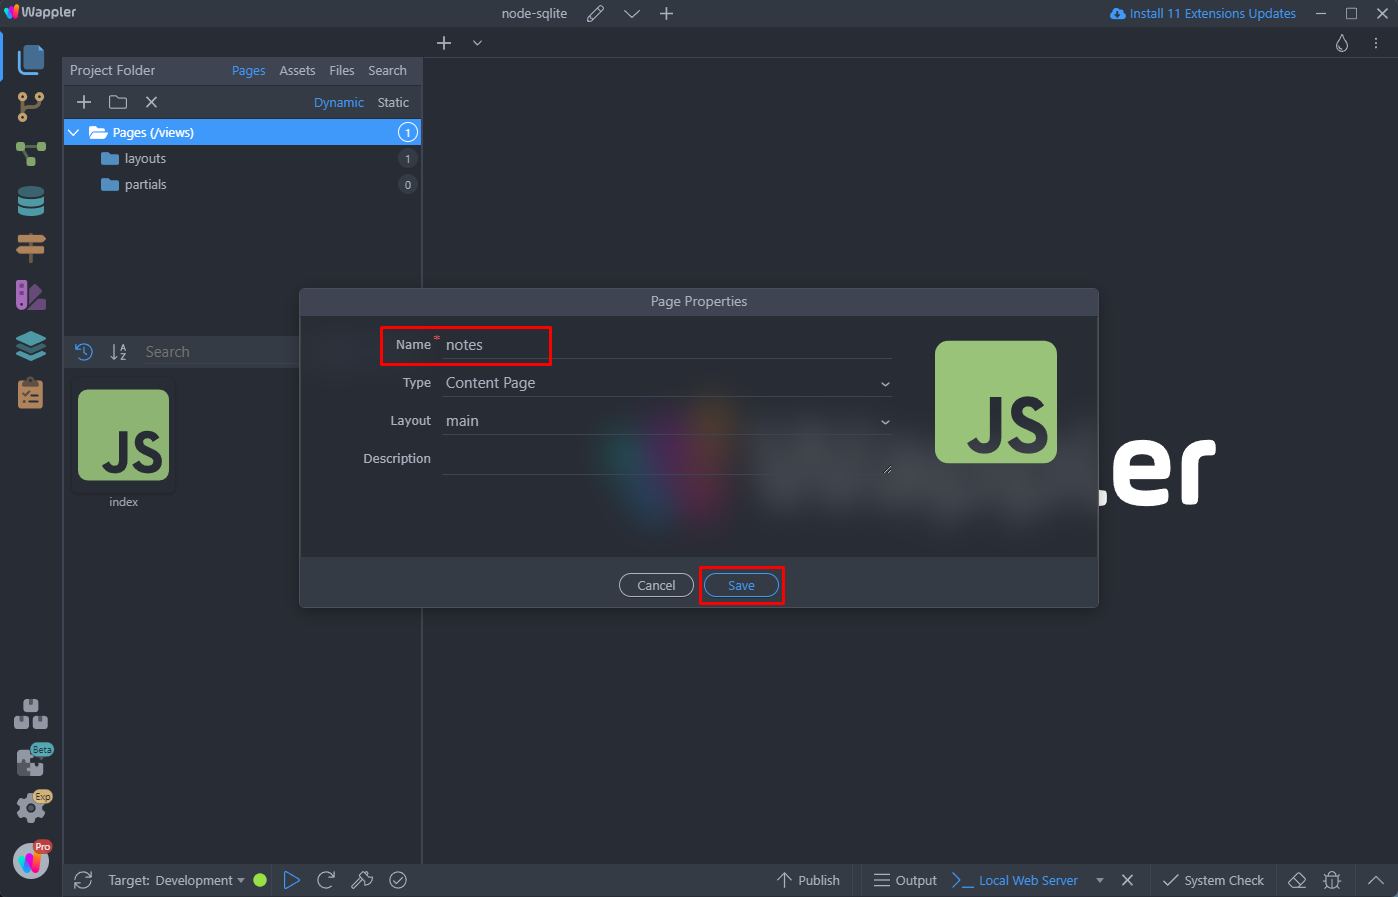
Open the Site Manager and add new page. We call it notes:
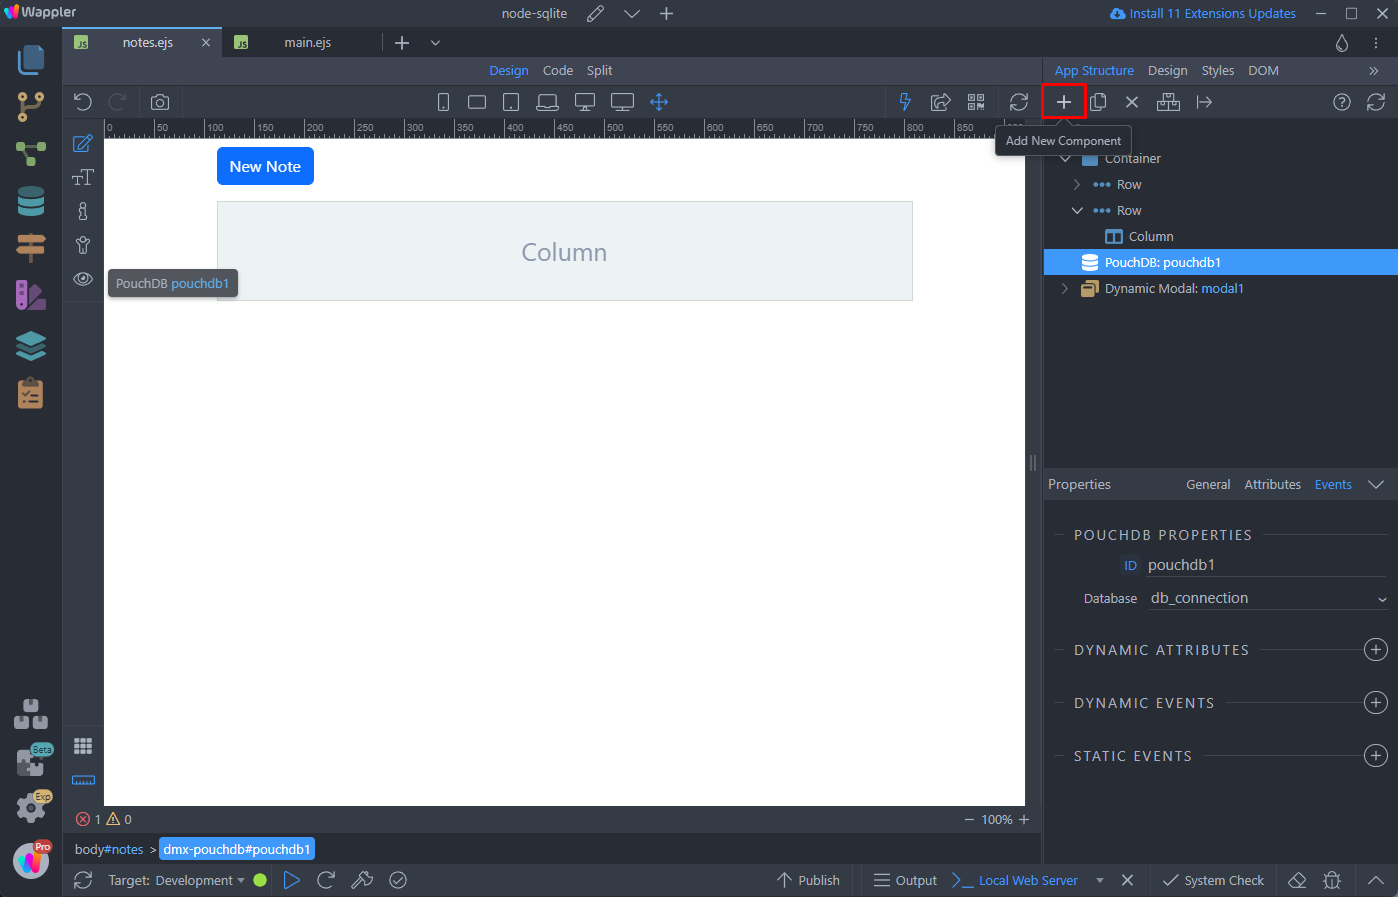
Close the Site Manager panel and add a new component on the page:
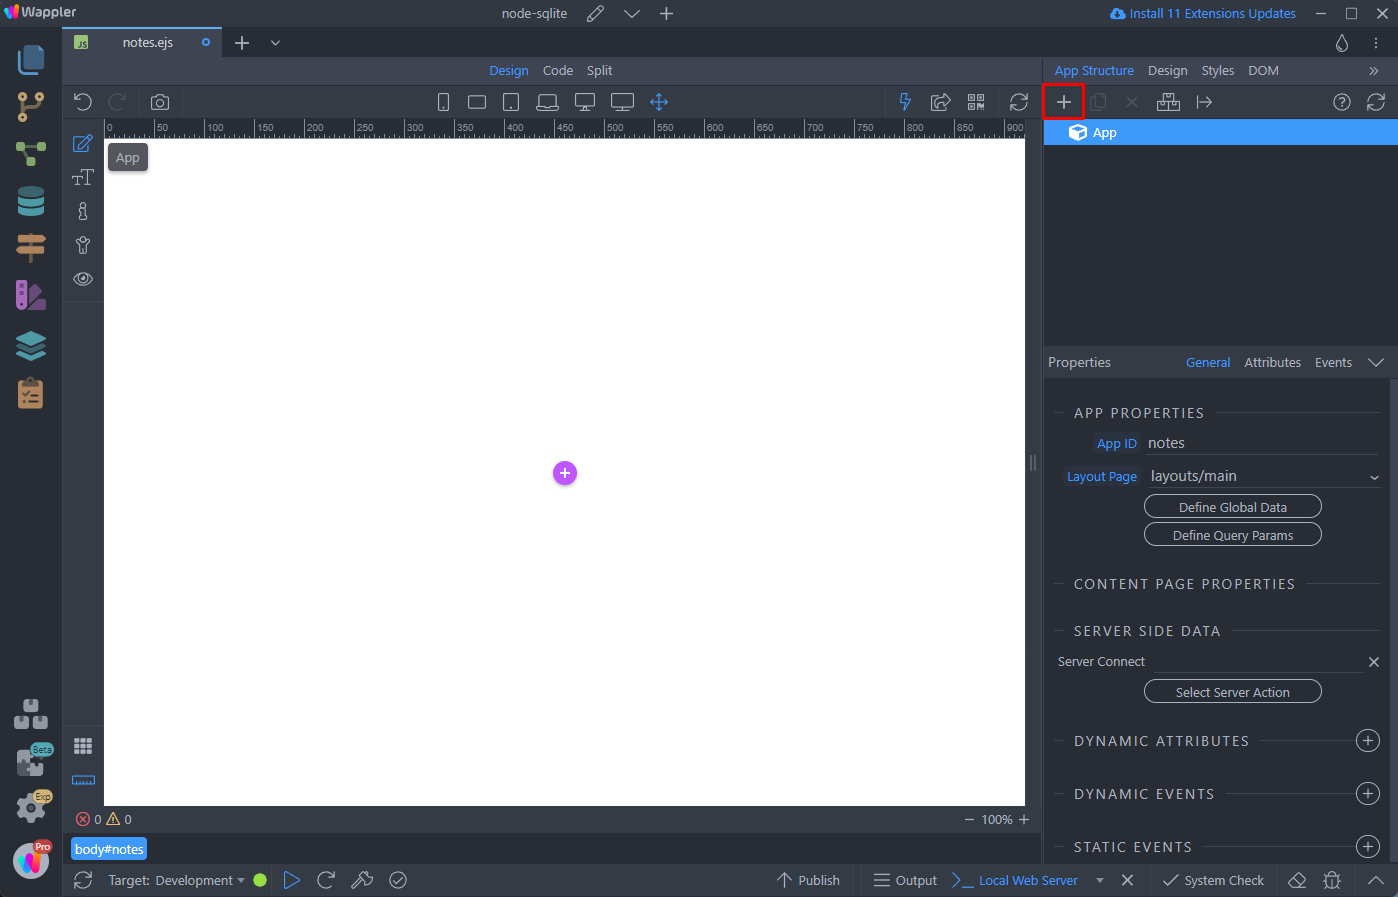
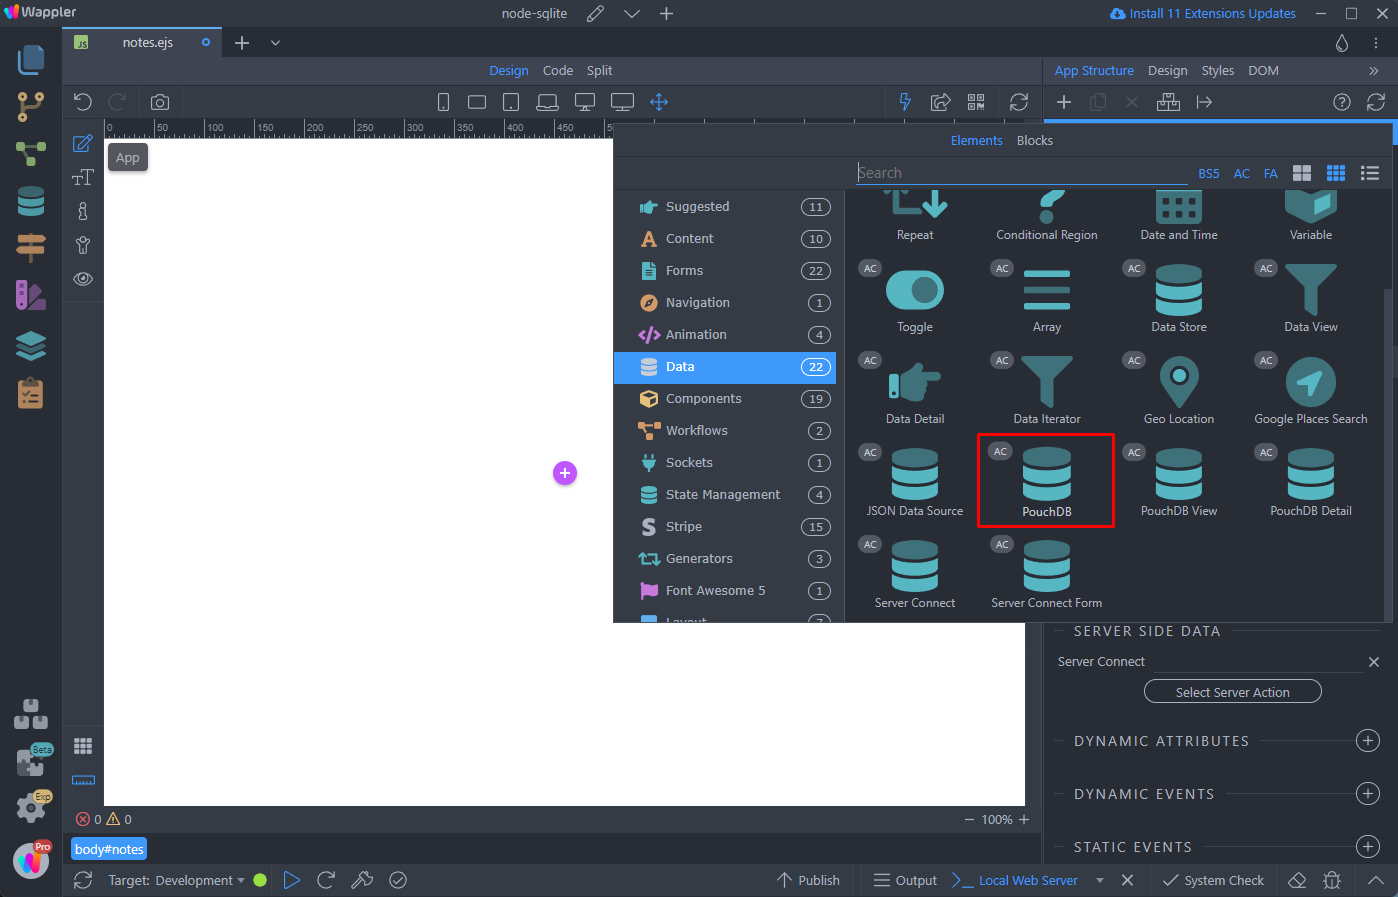
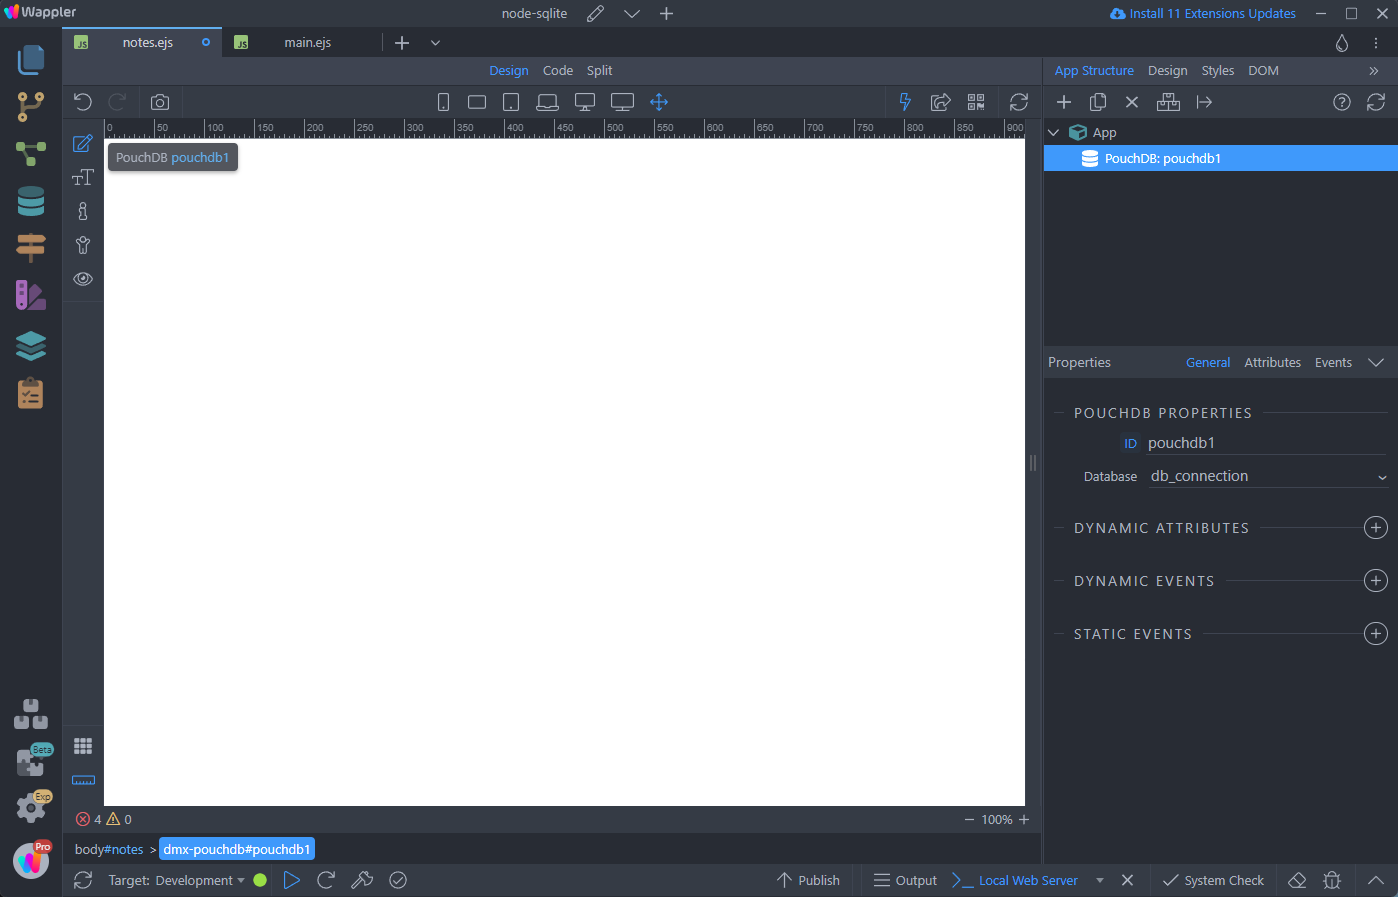
Under Data select PouchDB:
In the Database dropdown, select the CouchDB Database we created earlier:
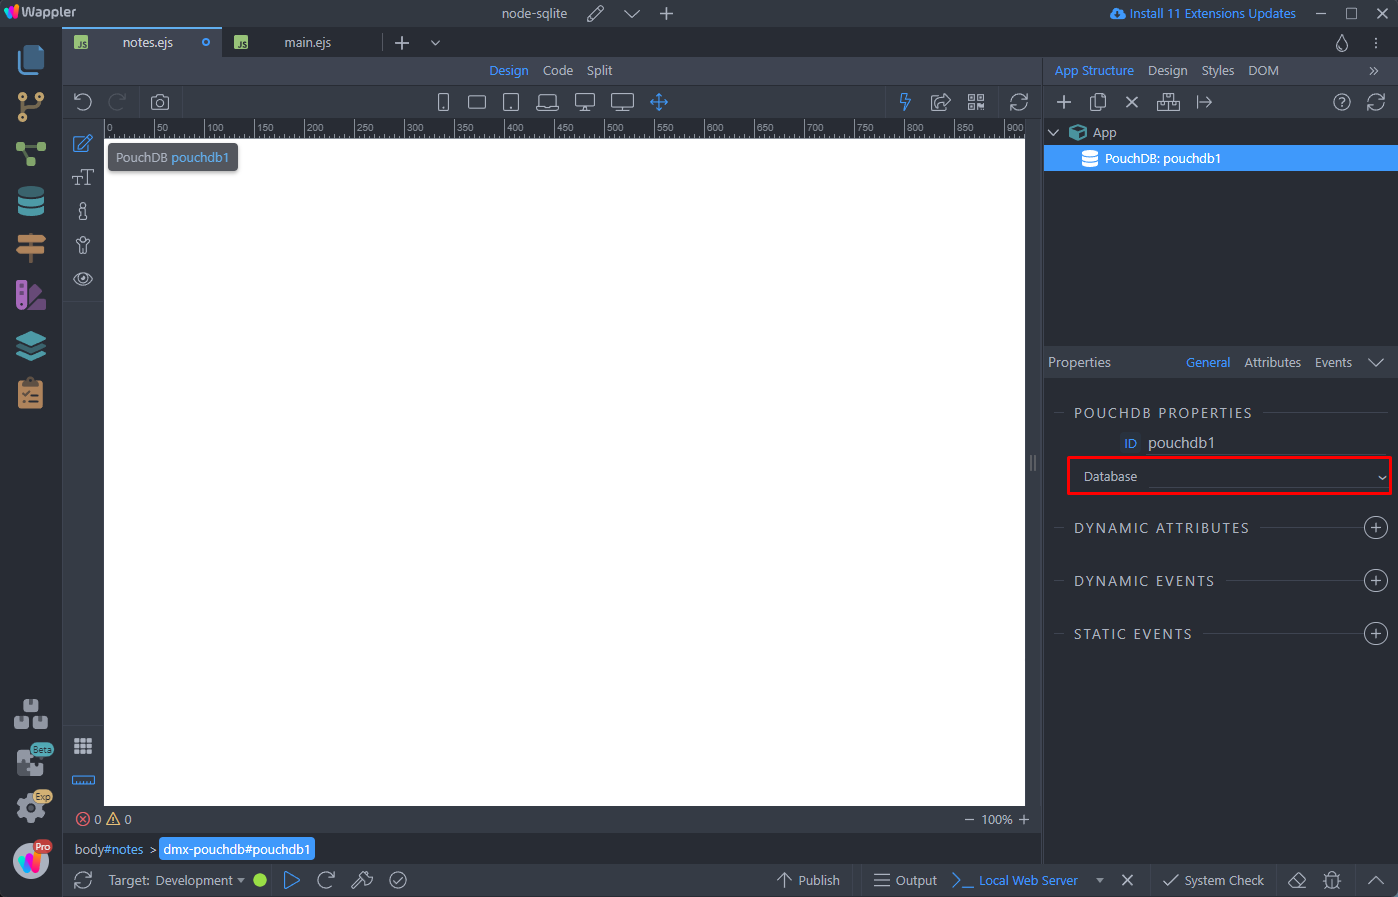
And then select the database connection, which we also created:
So these are the PouchDB basics on the page. Next we are going to setup the insert note and list note functionalities.
Inserting Data
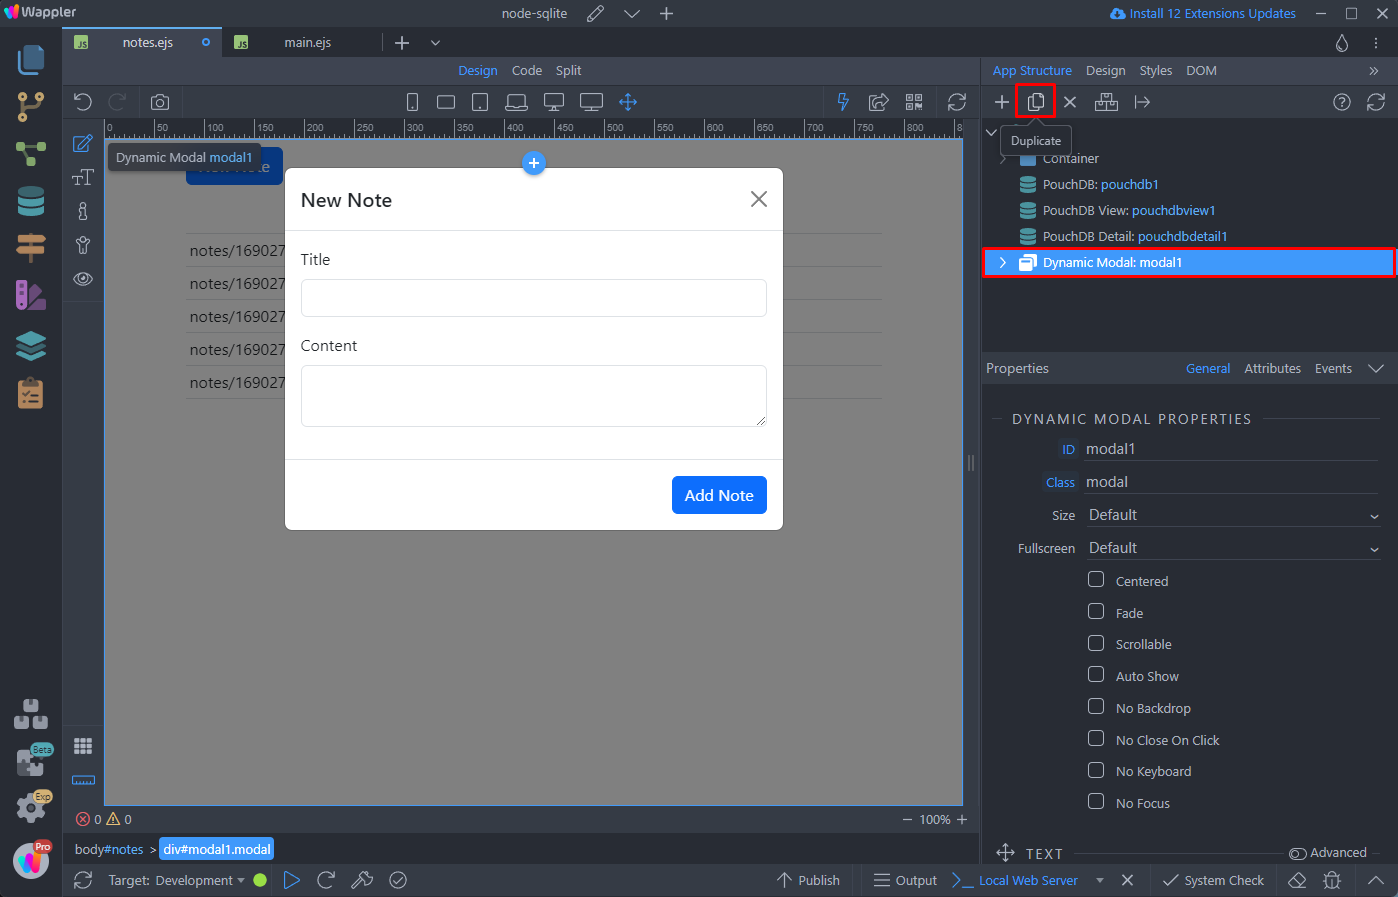
We’re going to use a modal in order to insert the notes into our database. Click add new component and add a modal:
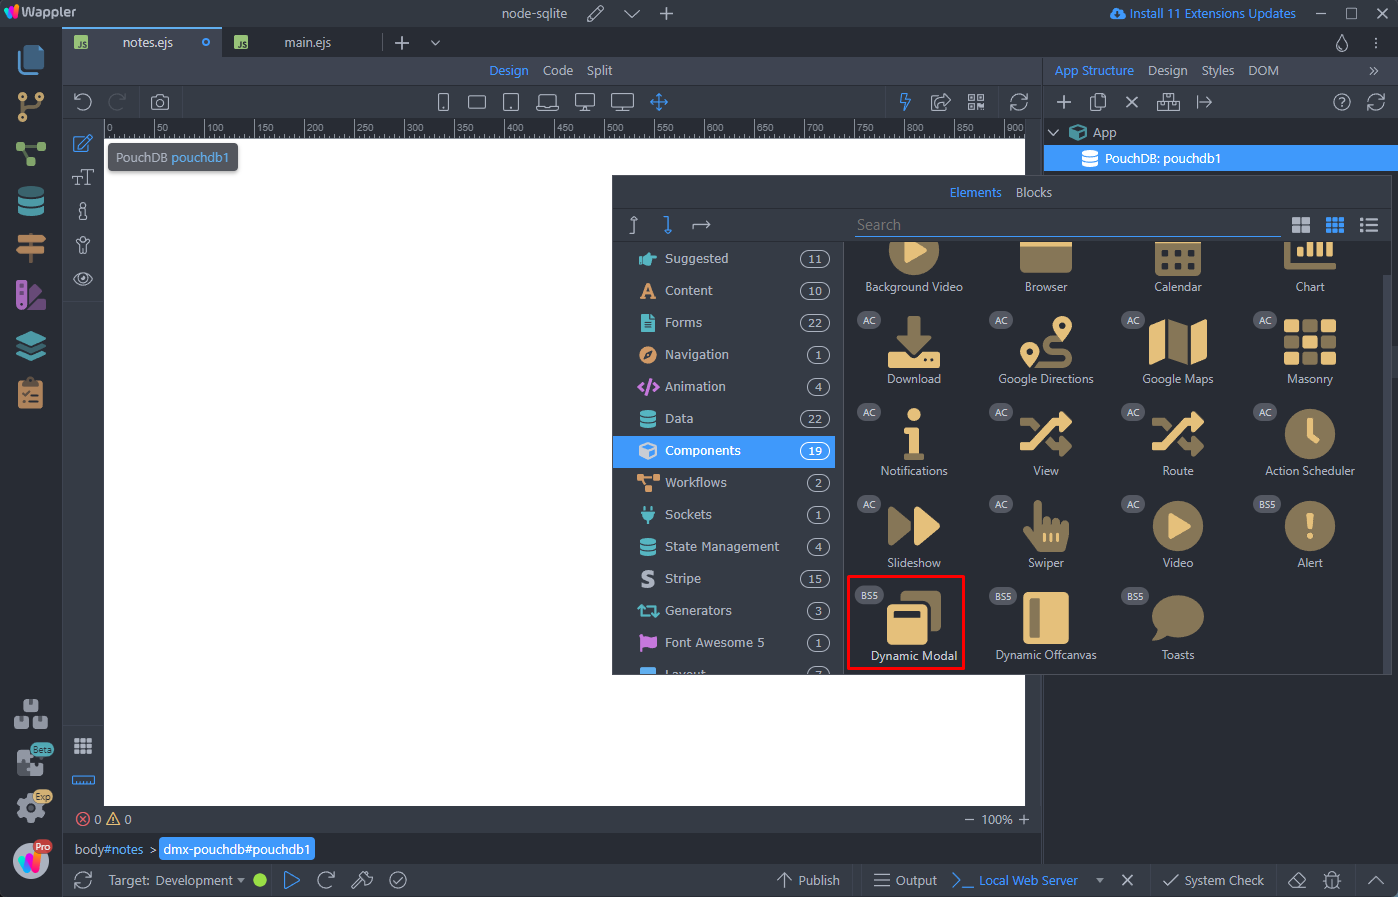
This adds a standard Bootstrap modal:
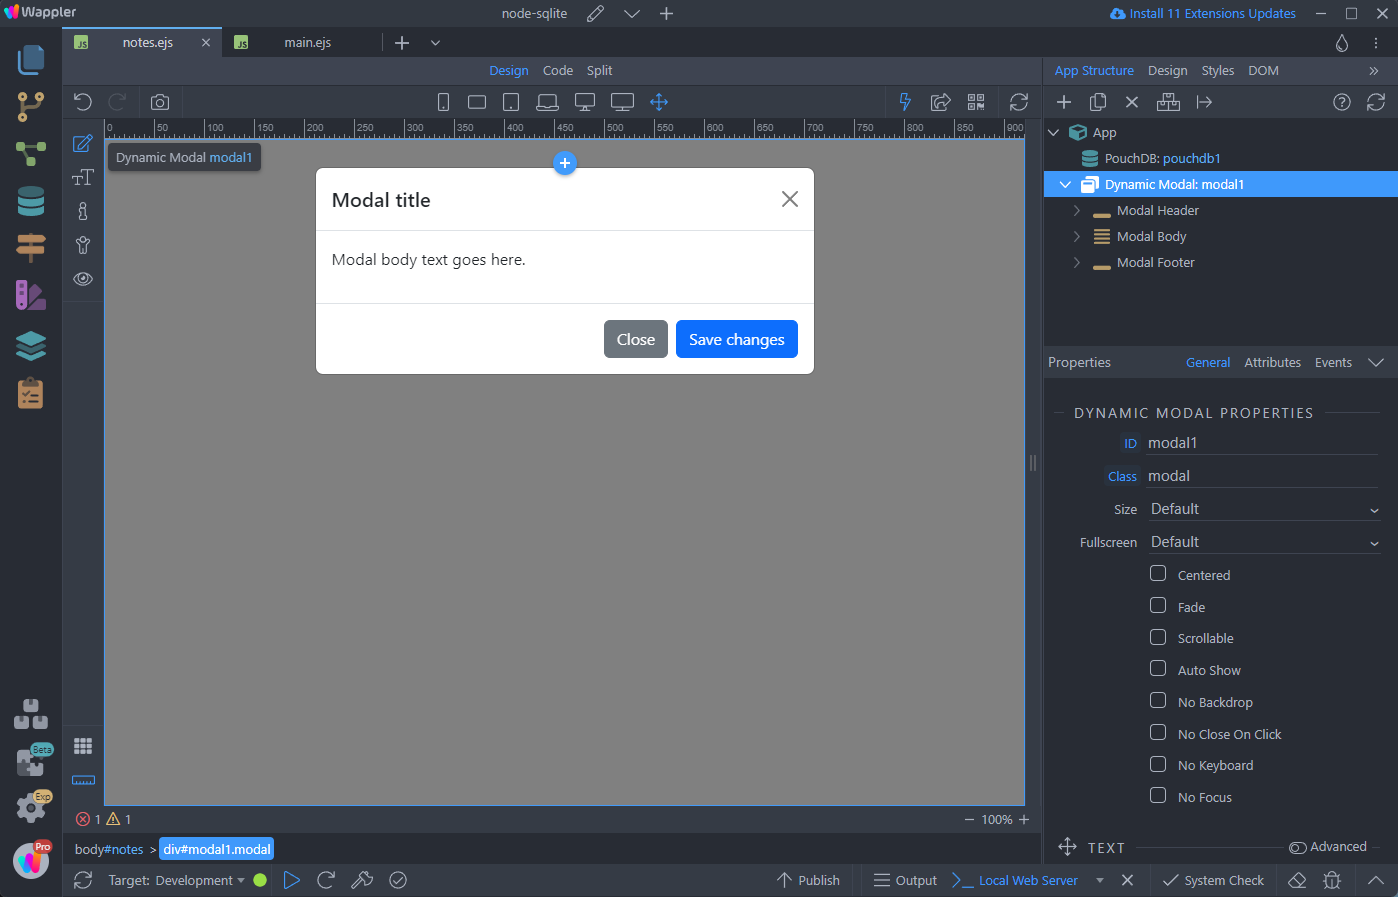
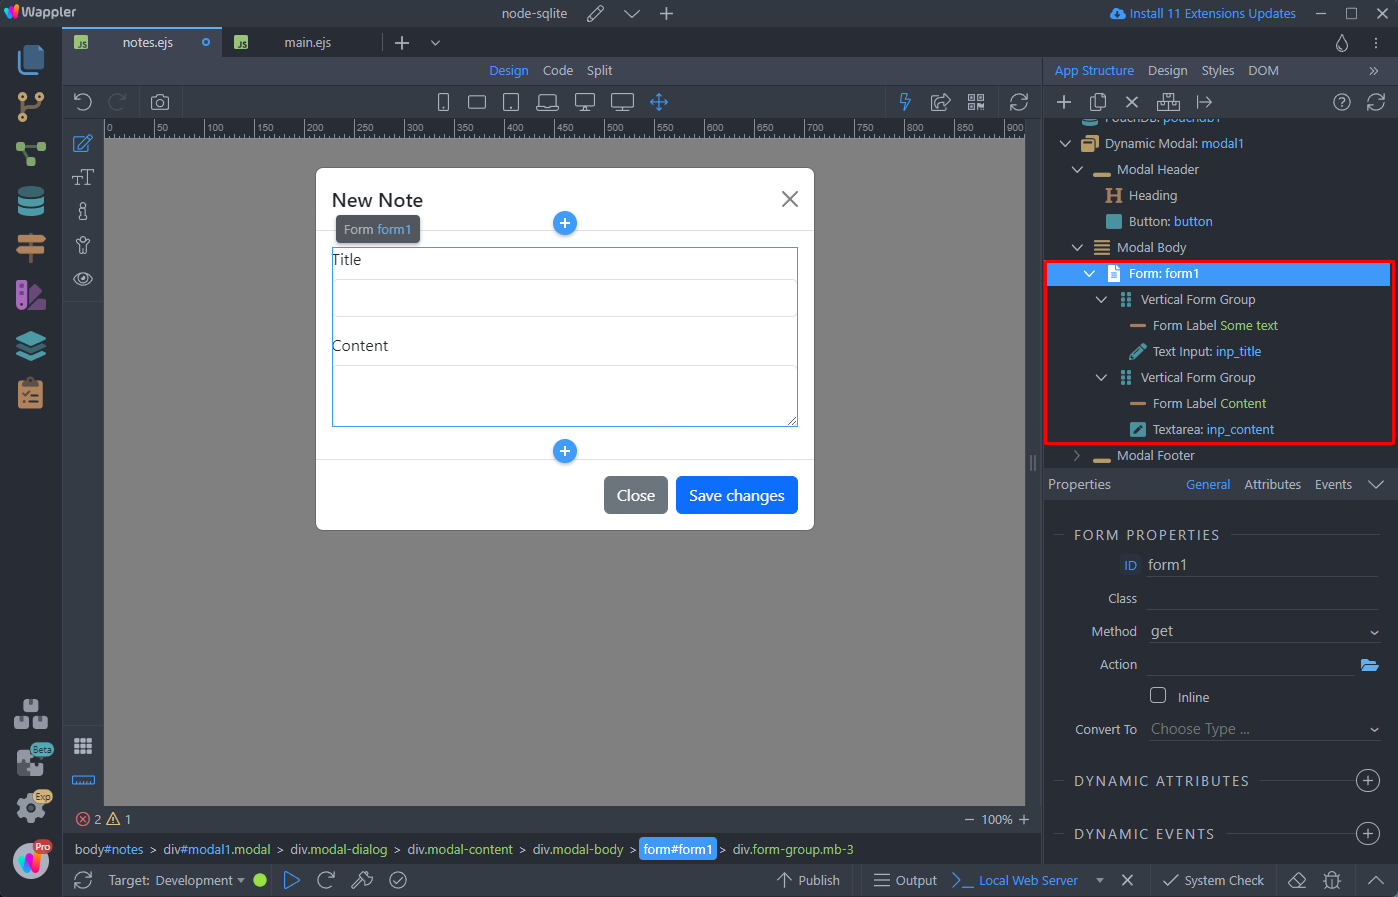
We replace the default body content with a form and two inputs inside it - title (text input) and content (text area).
Note - the form element is not required here and you can directly add the two inputs in the modal body, but it makes it easier to reset the inputs after insert:
We remove the close button as it won’t be needed for us. Of course you can leave it there, if it’s useful for your use case:
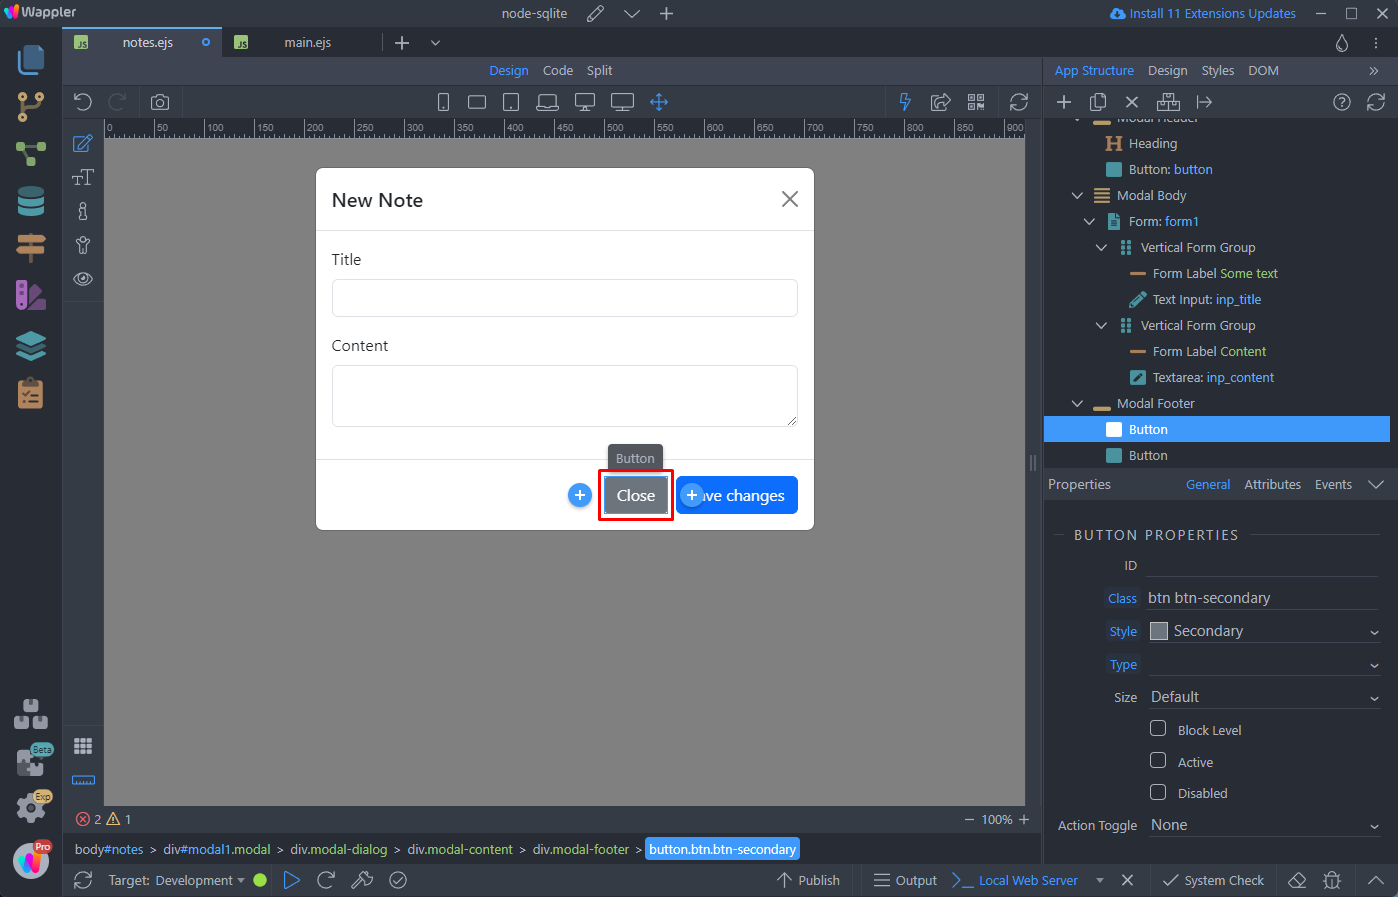
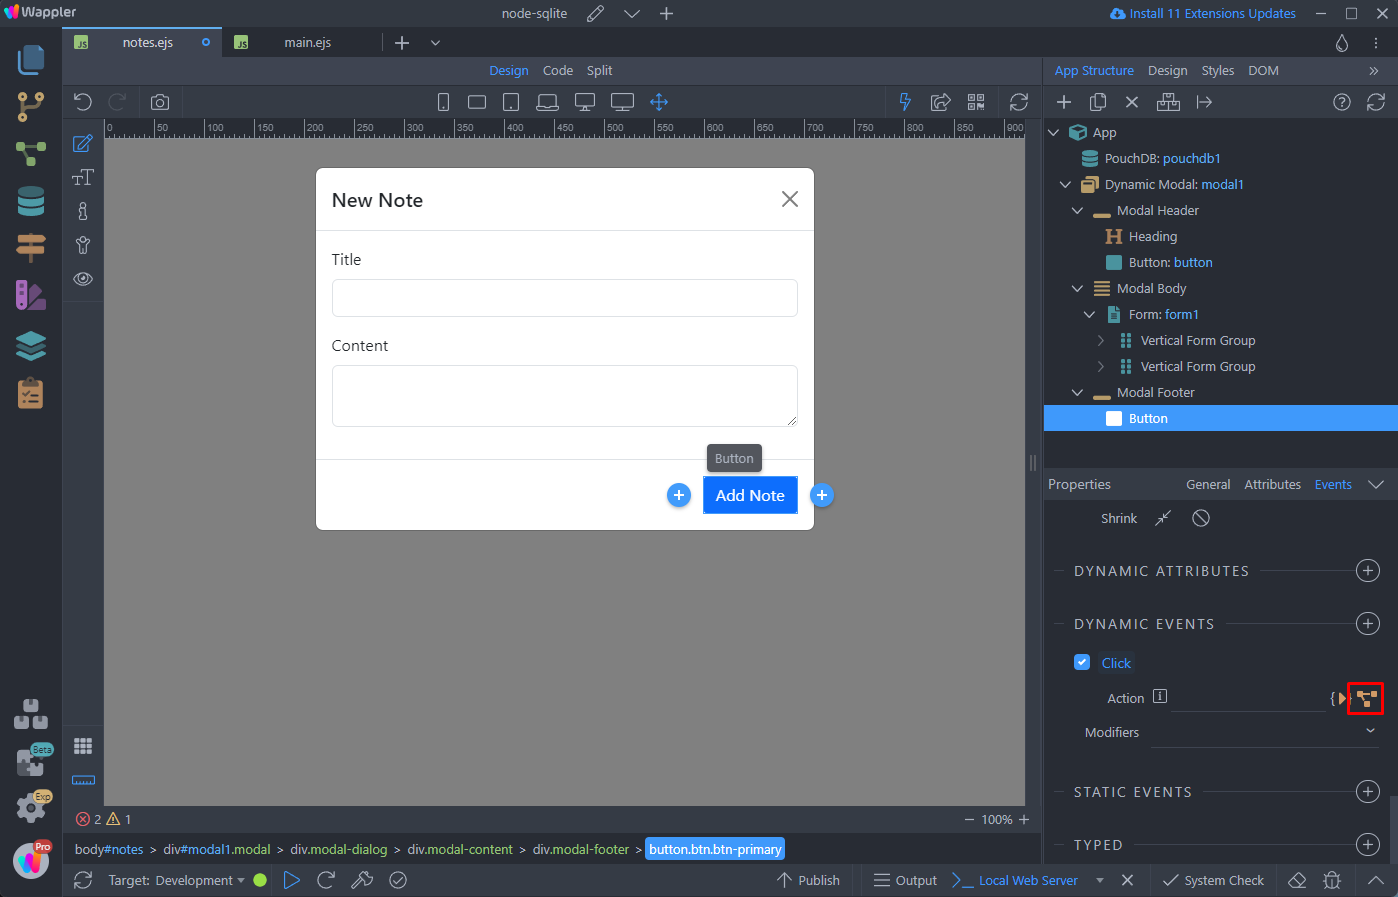
Change the name of the Save Changes button to something more meaningful - Add Note and then select the button:

Add a new dynamic event for the button:

Select Mouse > Click:

And click the Inline Flow button:
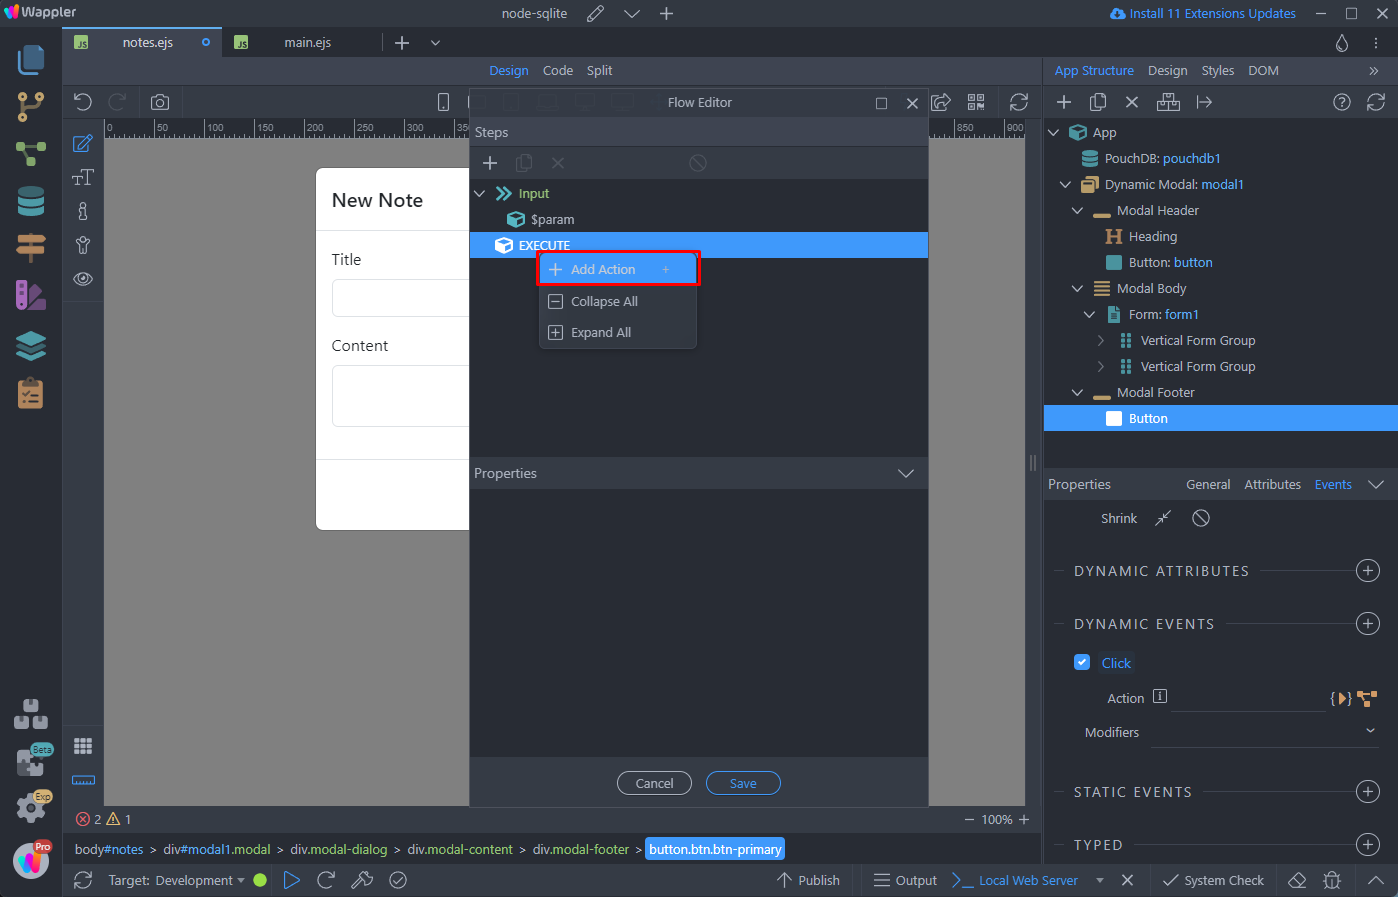
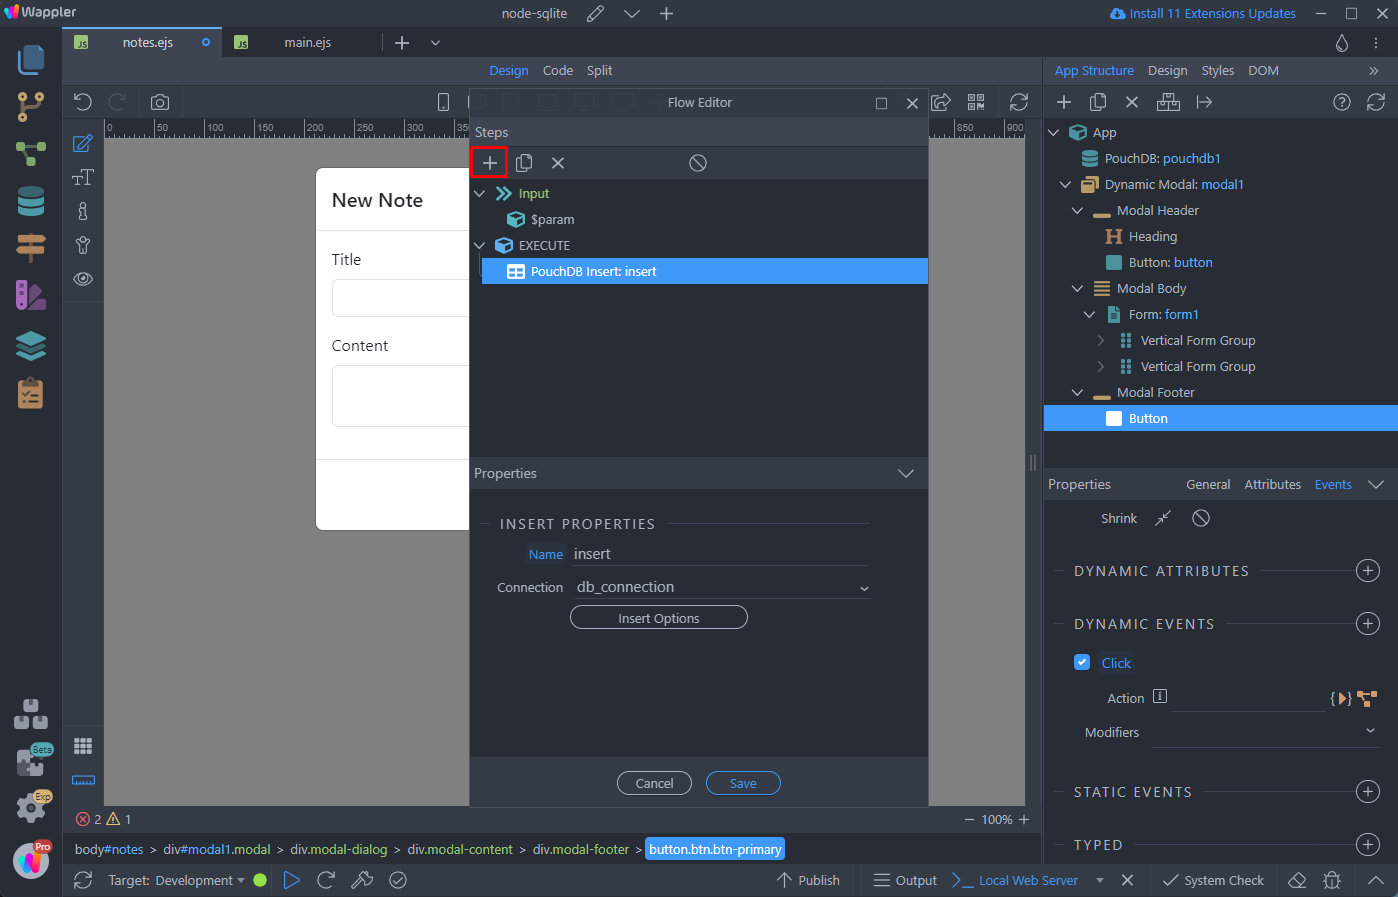
Add a new action in the Flows dialog:
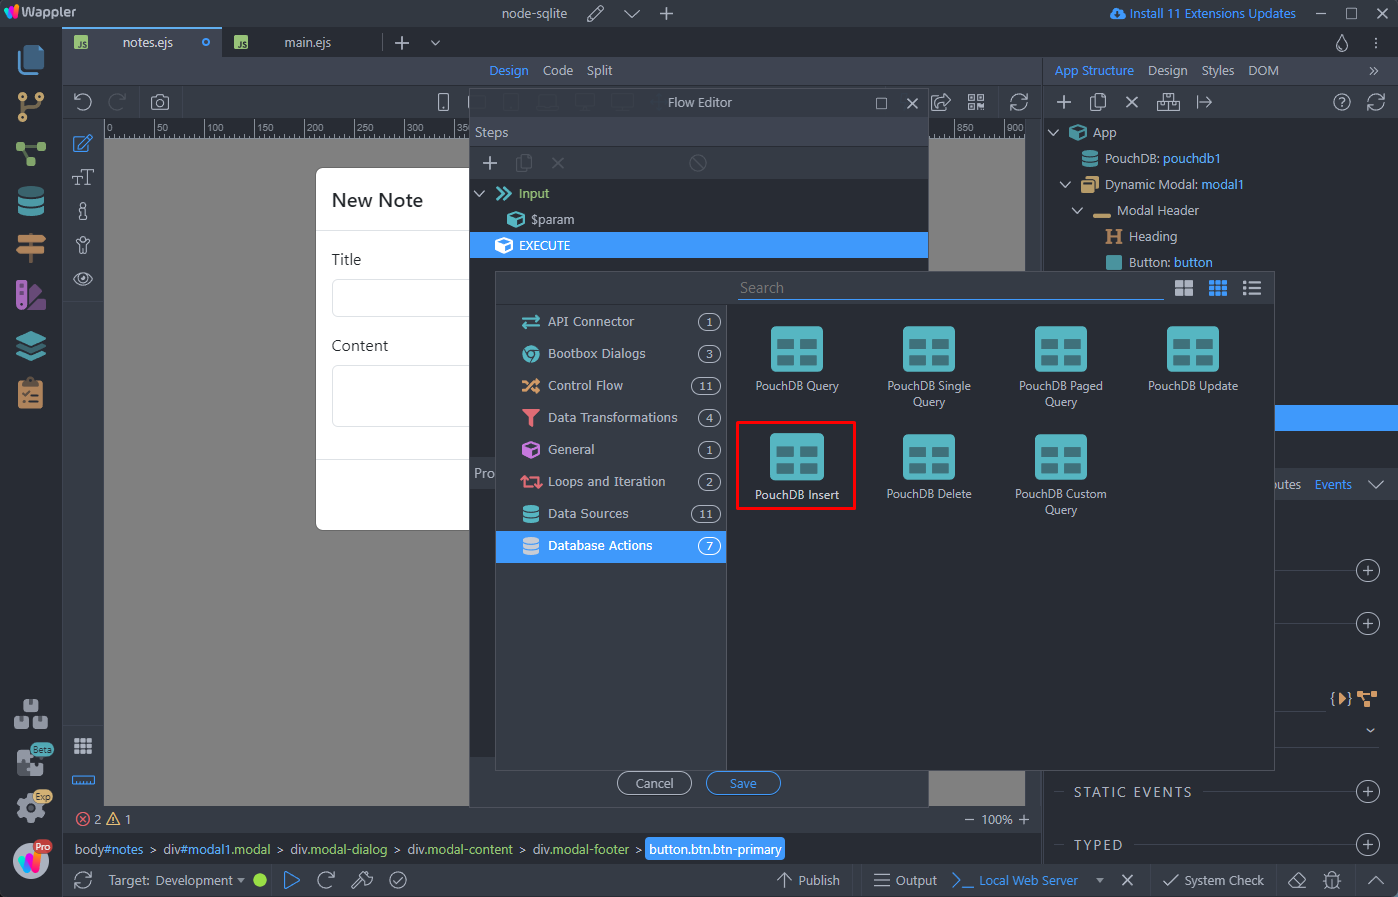
Open Database Actions and select PouchDB Insert:
Select the database connection in the dropdown:
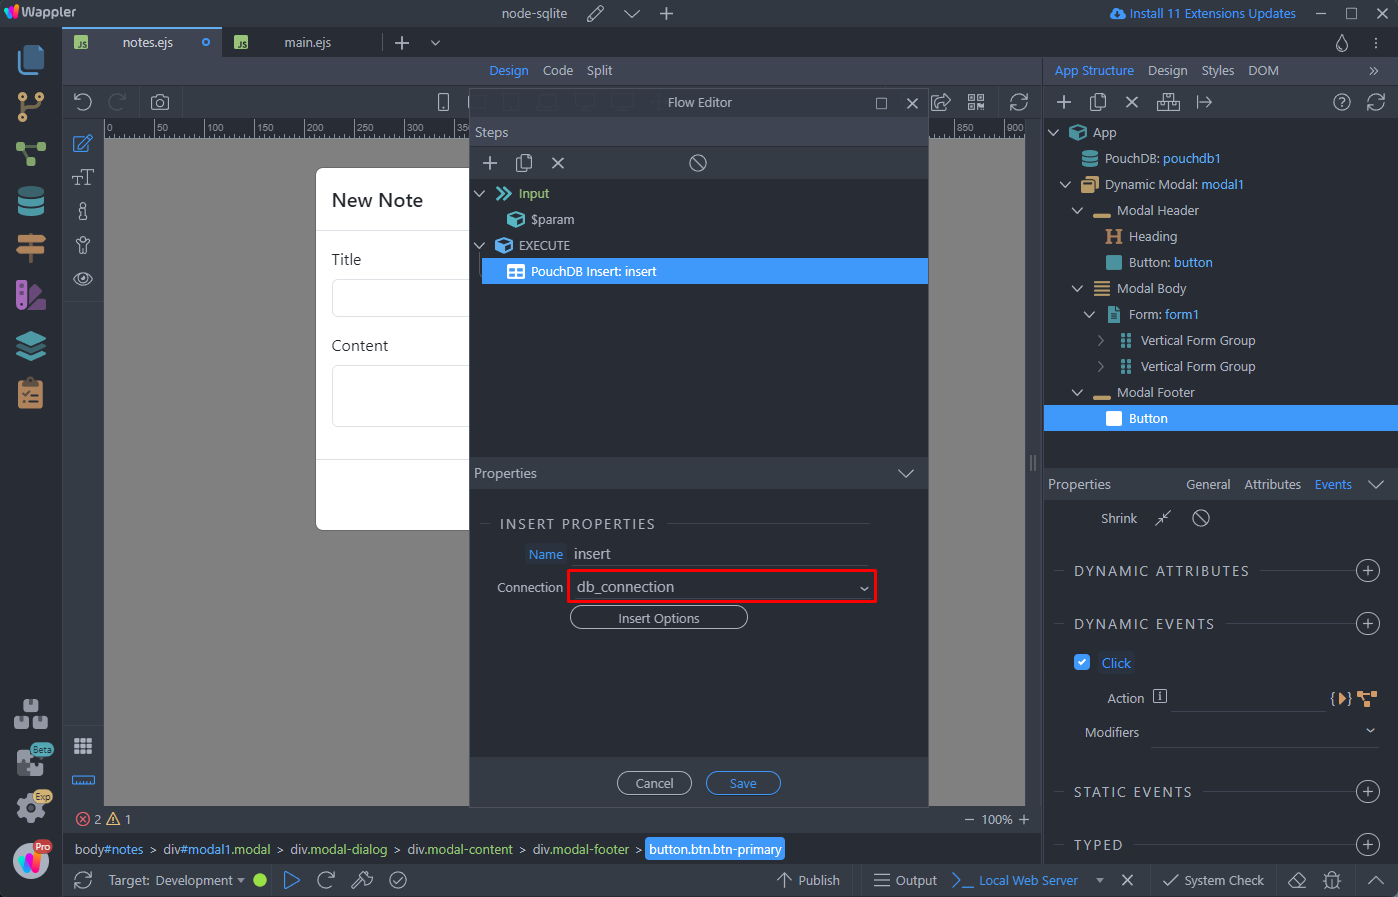
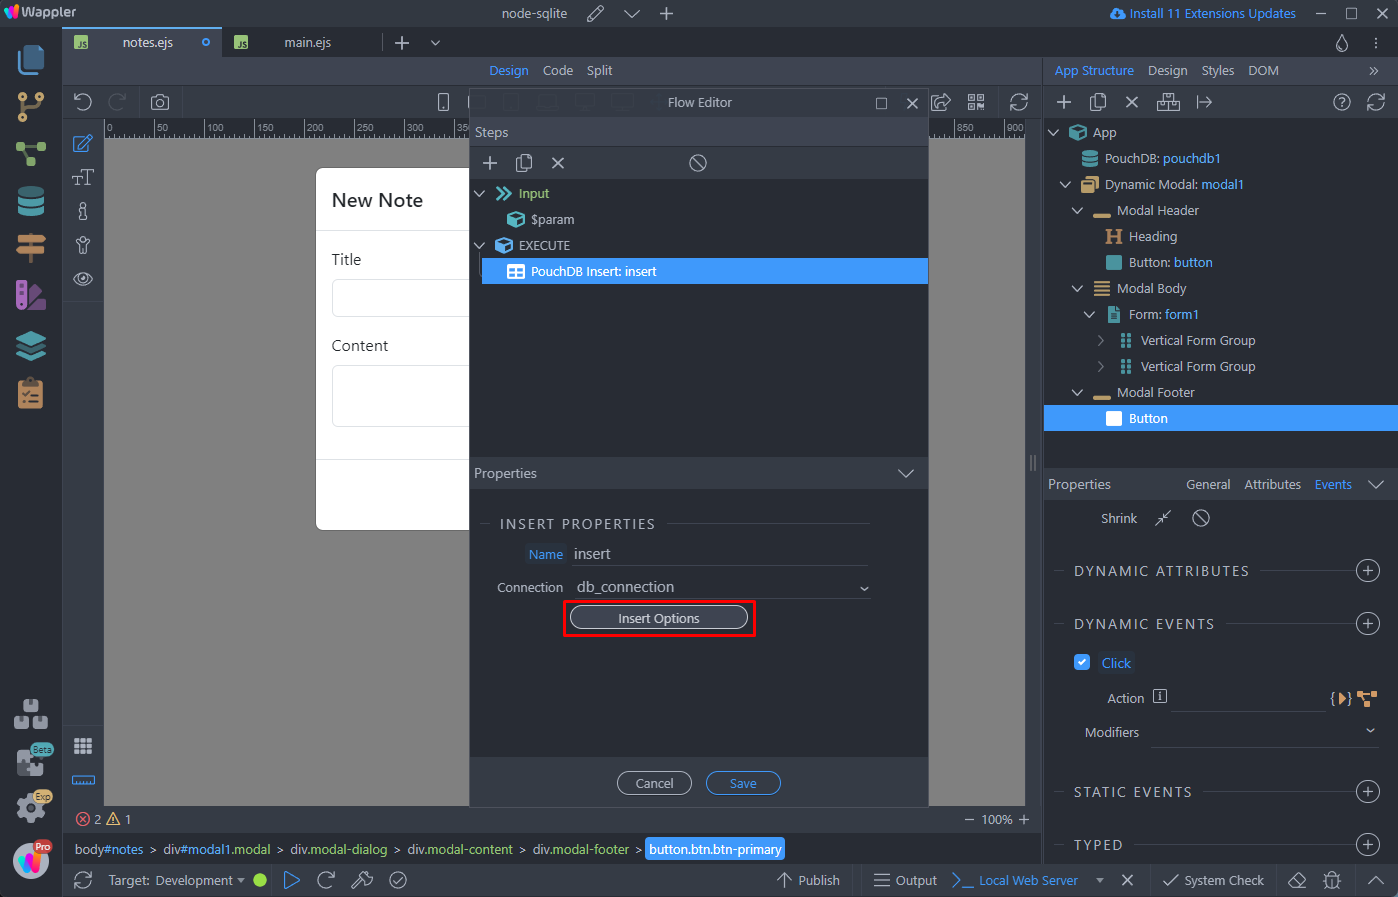
And click the Insert Options button:
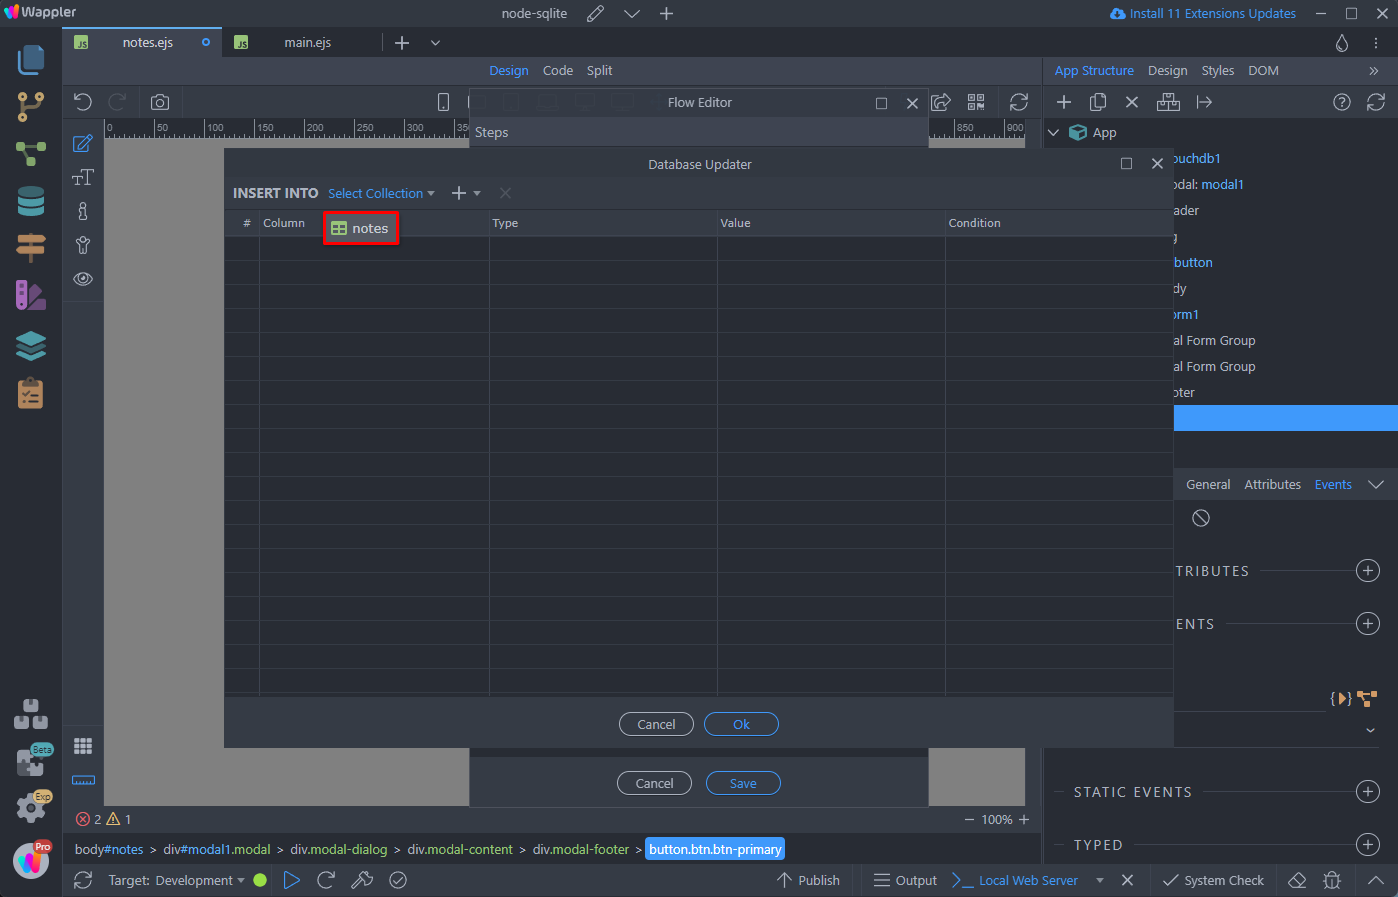
A familiar UI appears, the same you’ve seen many times in the Server Connect Database Insert action. Select the Collection you want to insert data into:
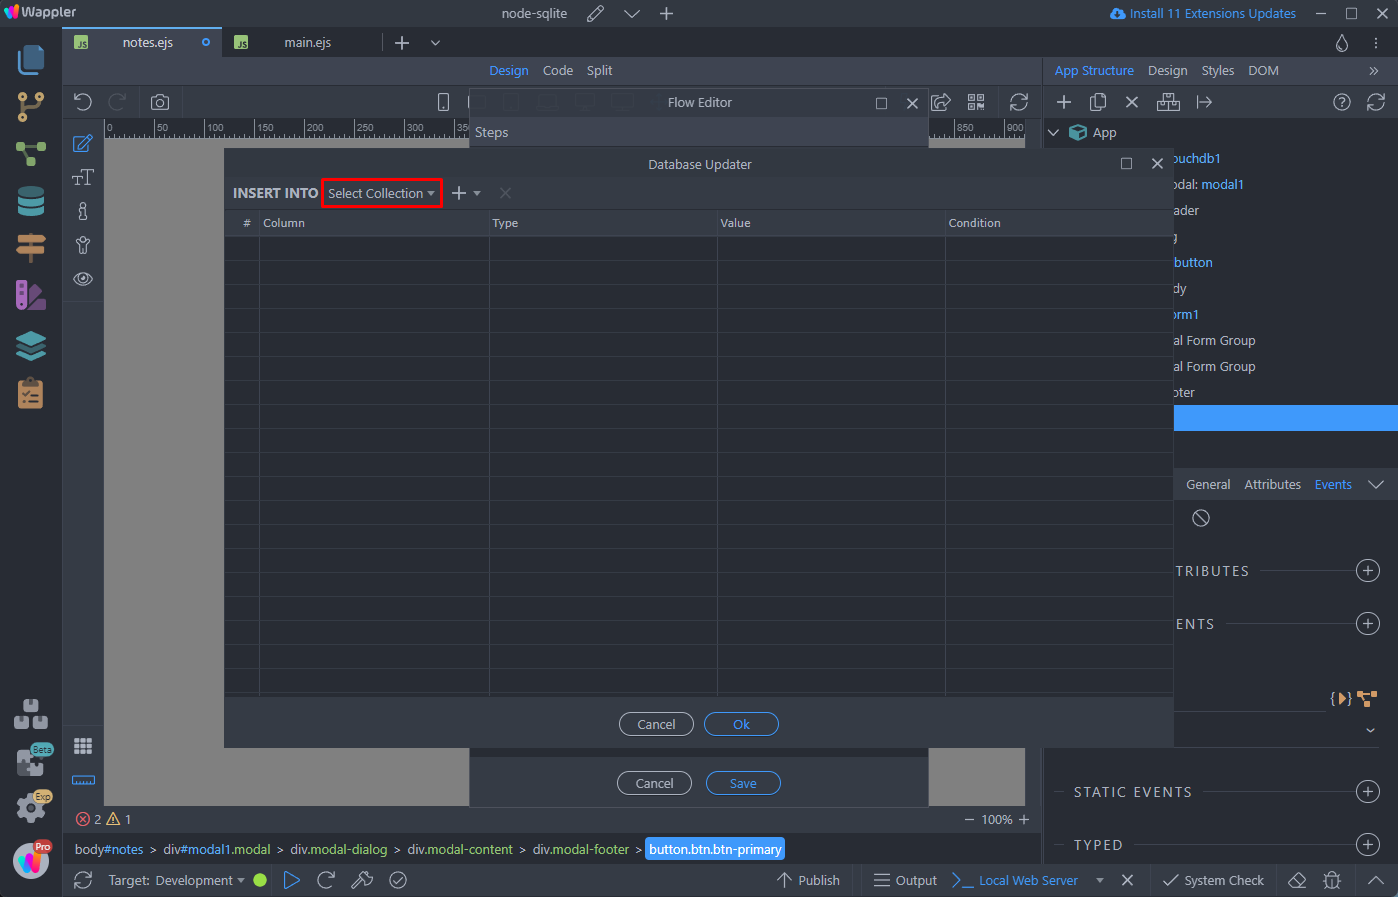
This is our notes collection:
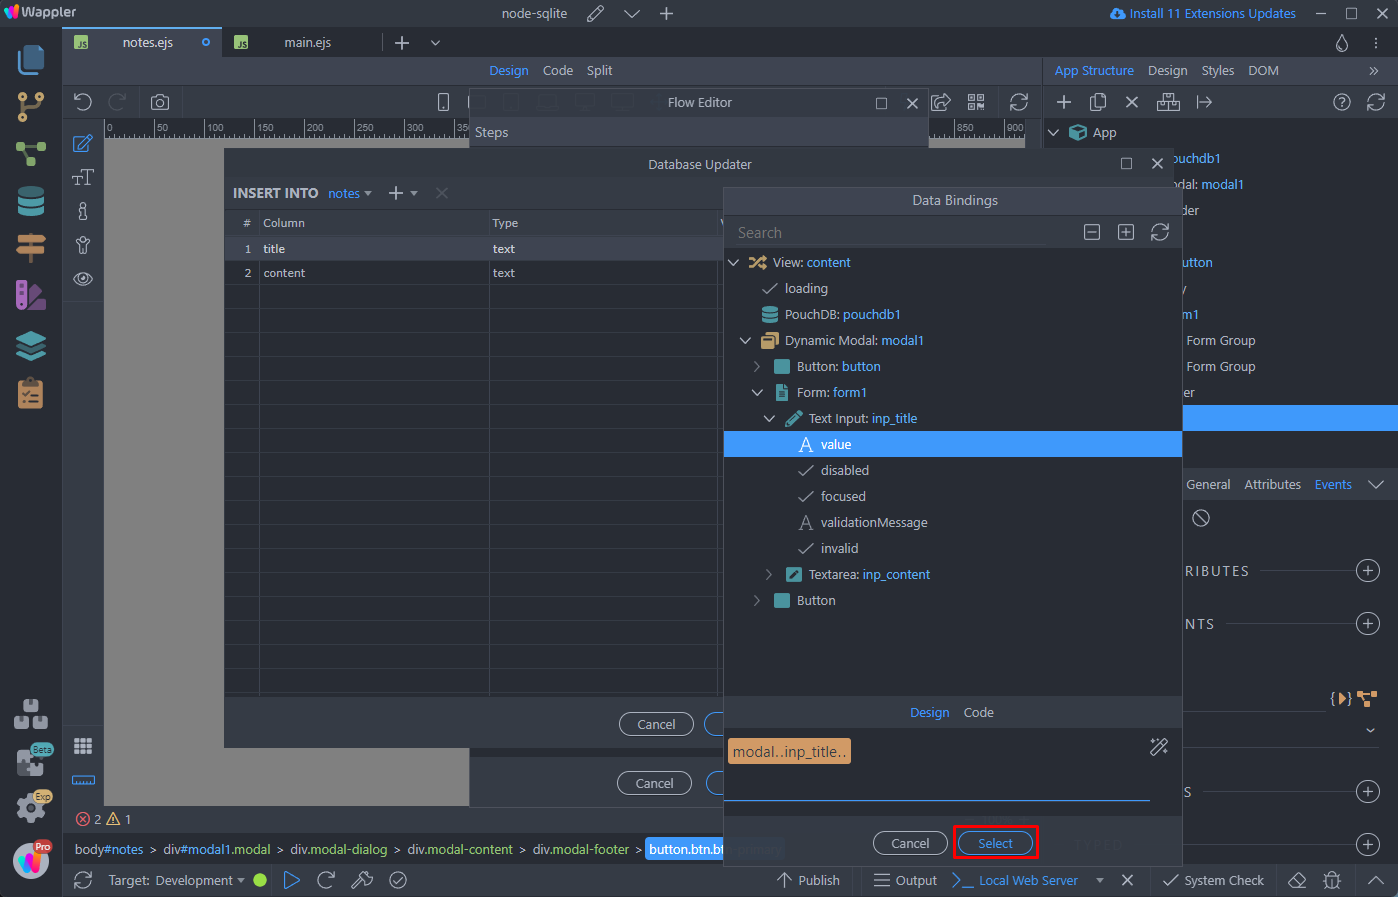
Select a dynamic data for the title value:
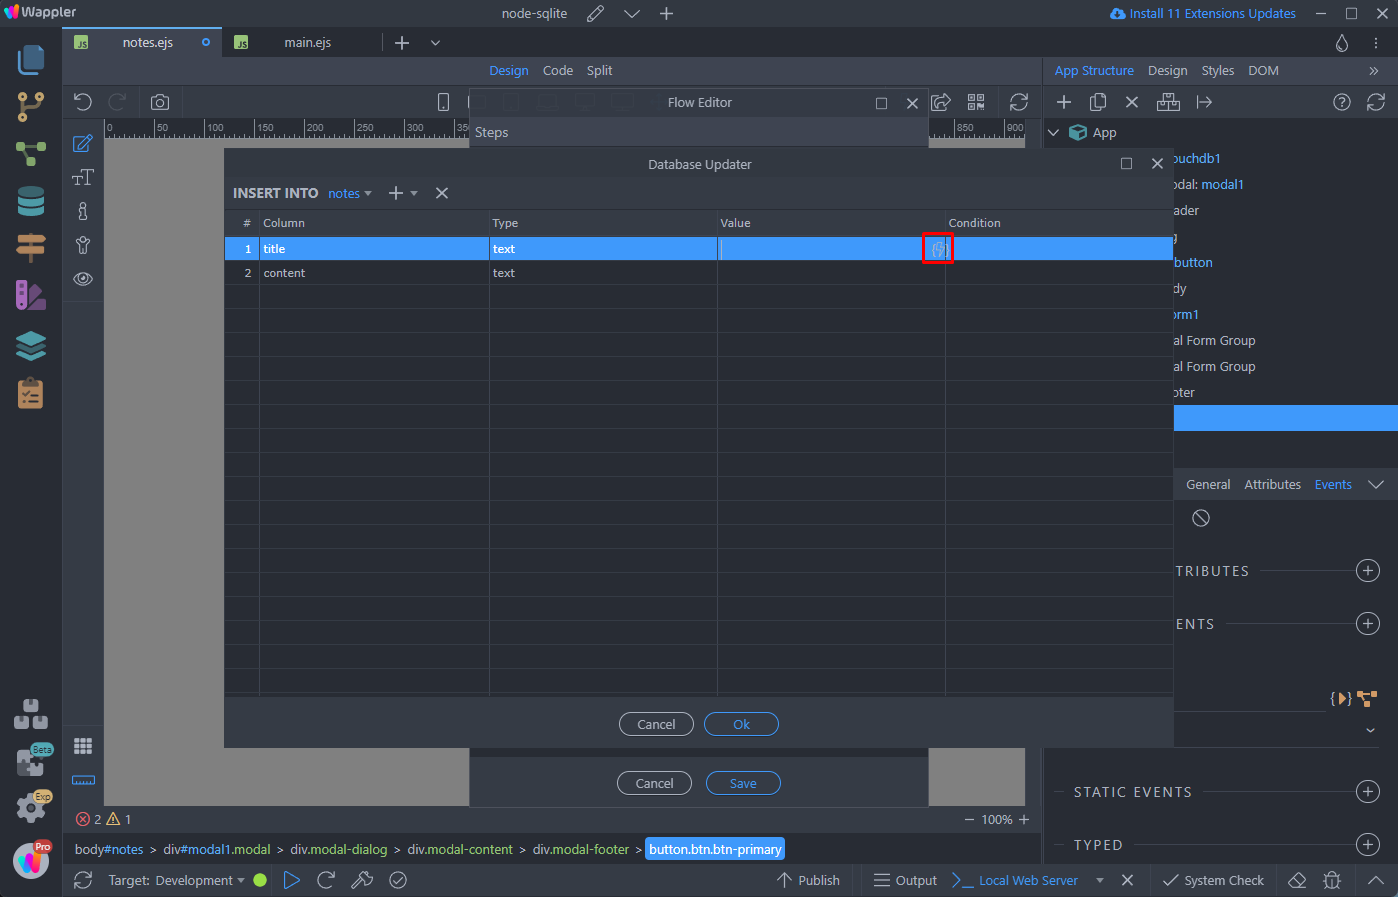
This is the value of the title text input in our modal:
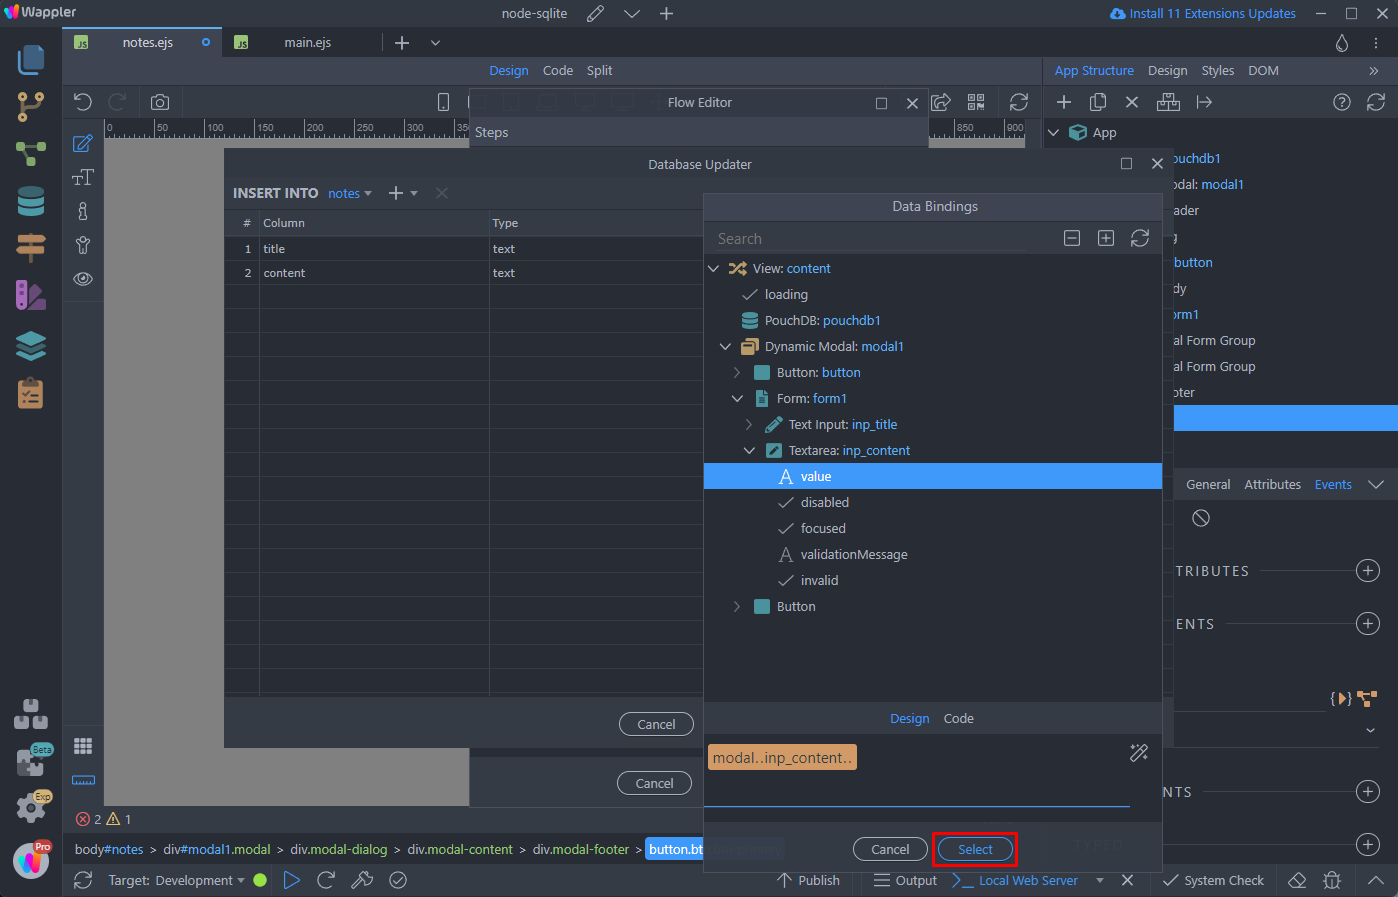
We do the same for the content value:
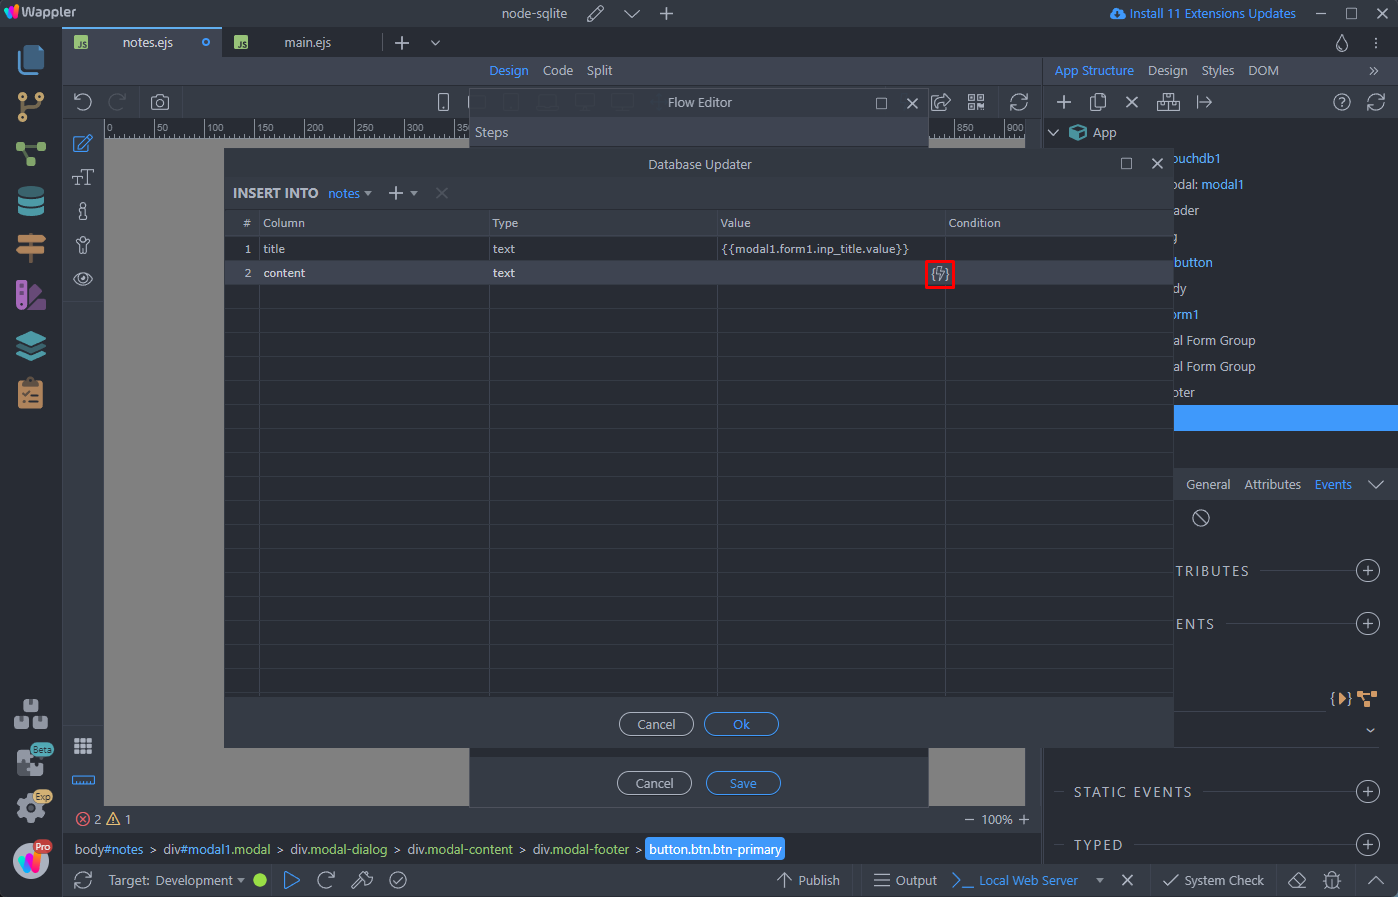
This is the value of the content text area in our modal:
Click ok when you are done:

This is all you need to insert data in PouchDB.
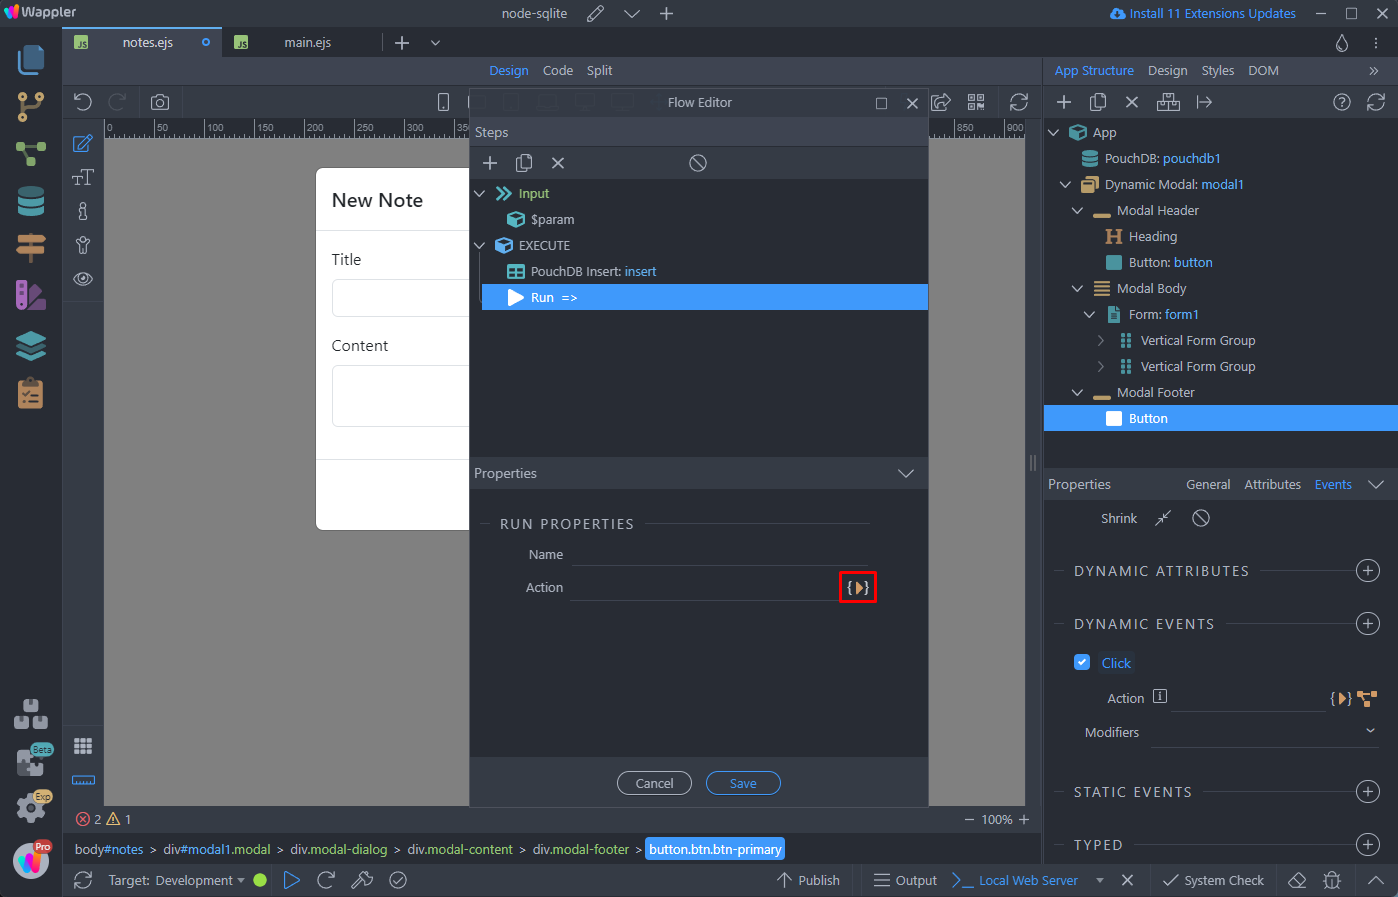
We will add two additional steps, after the insert - close modal and clear the form input fields.
So add a new action in the Flow dialog, after the insert action:
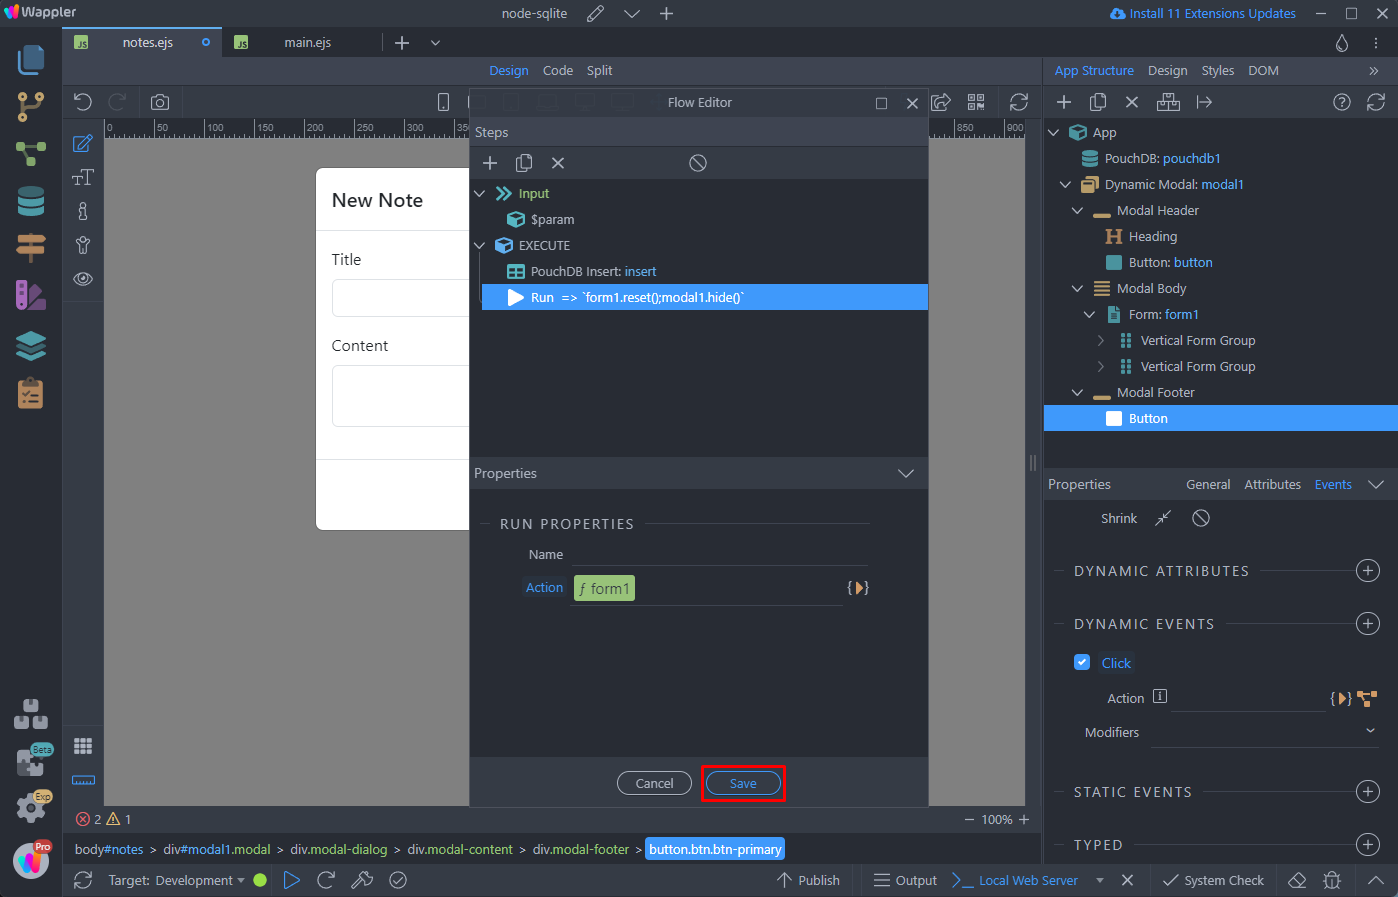
Open Control Flow and select Run:

Select the action to run:
The first one is Form > Reset:
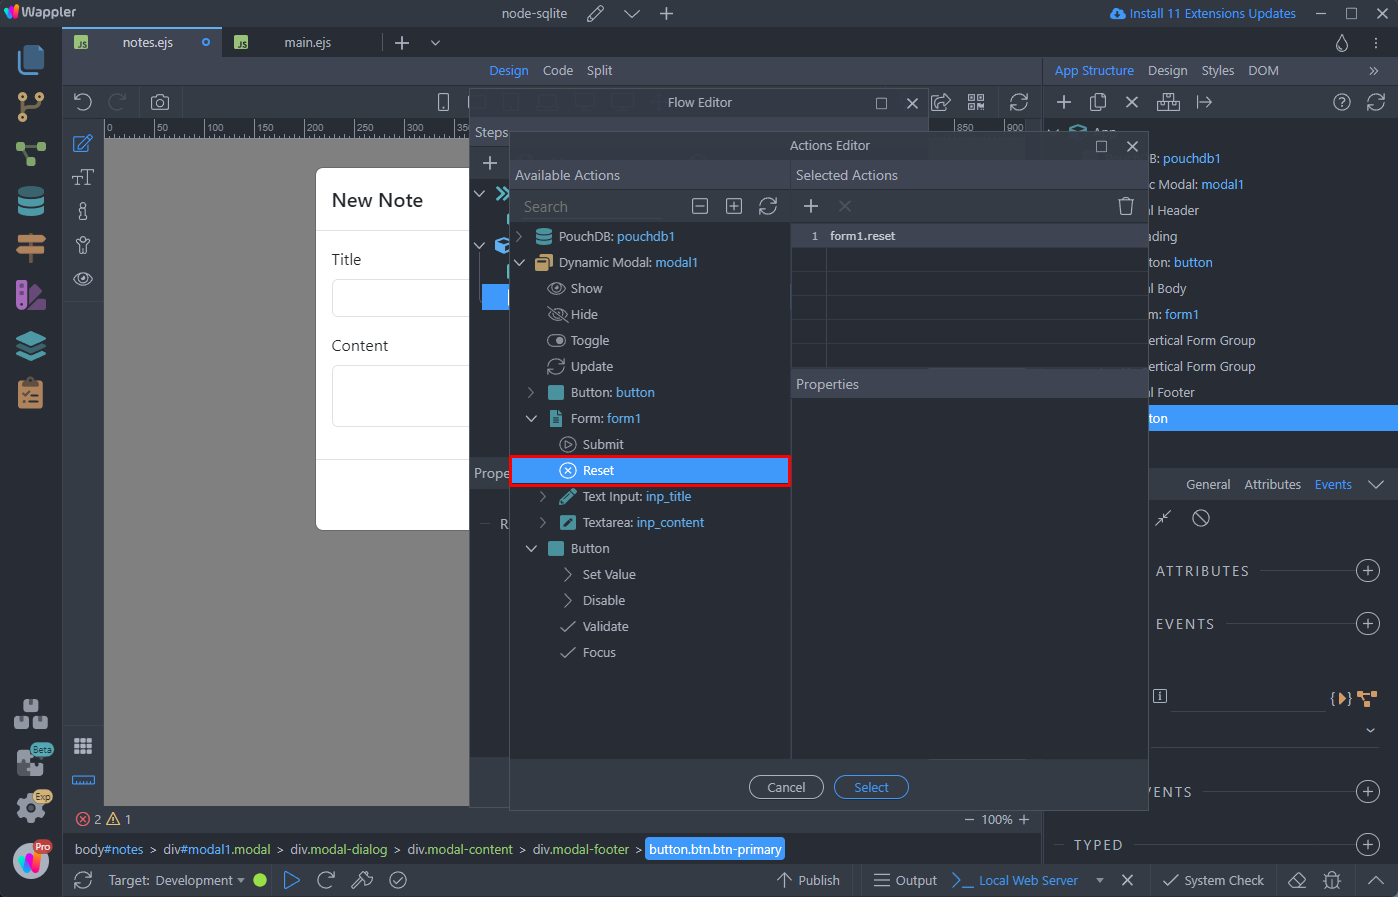
And the second one Modal > Hide:

Click Select:
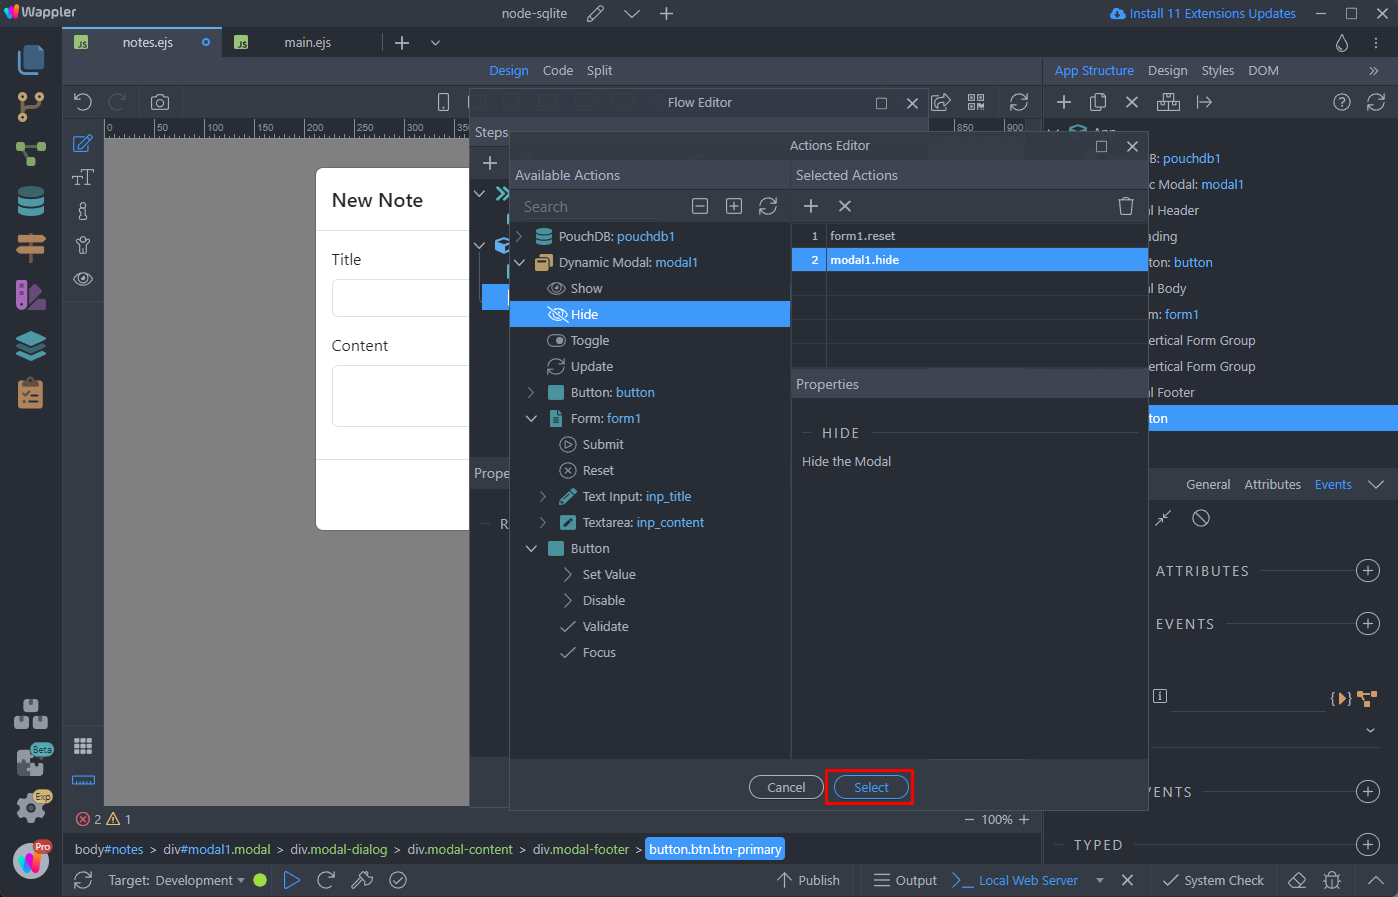
And then click Save:
We’re done with the insert functionality.
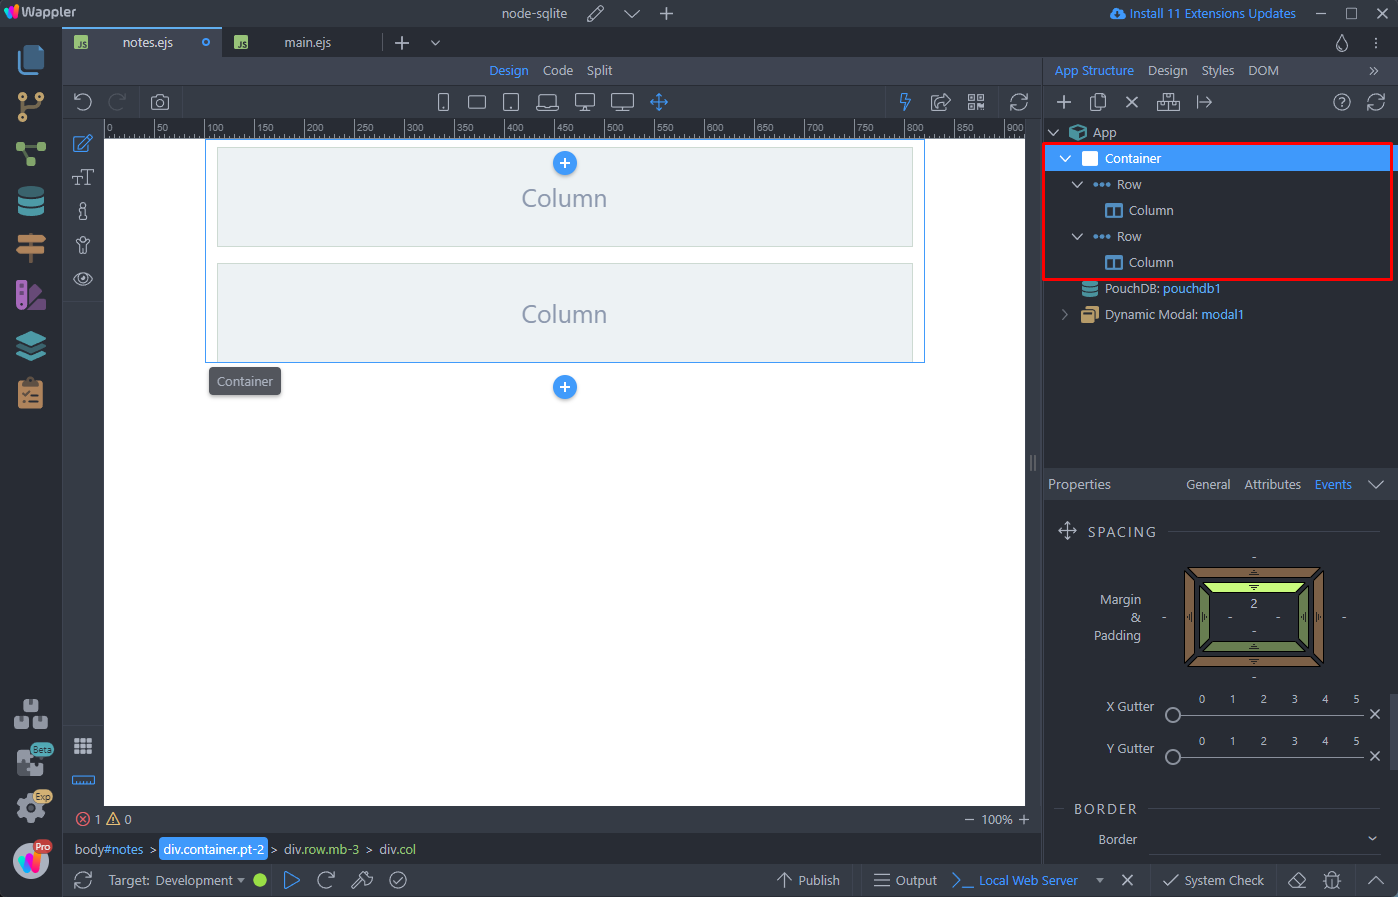
Now, let’s go back to the page and add a button, which will open the Insert Note modal.
Create a really simple page structure - a container with two rows and a column in each of them:
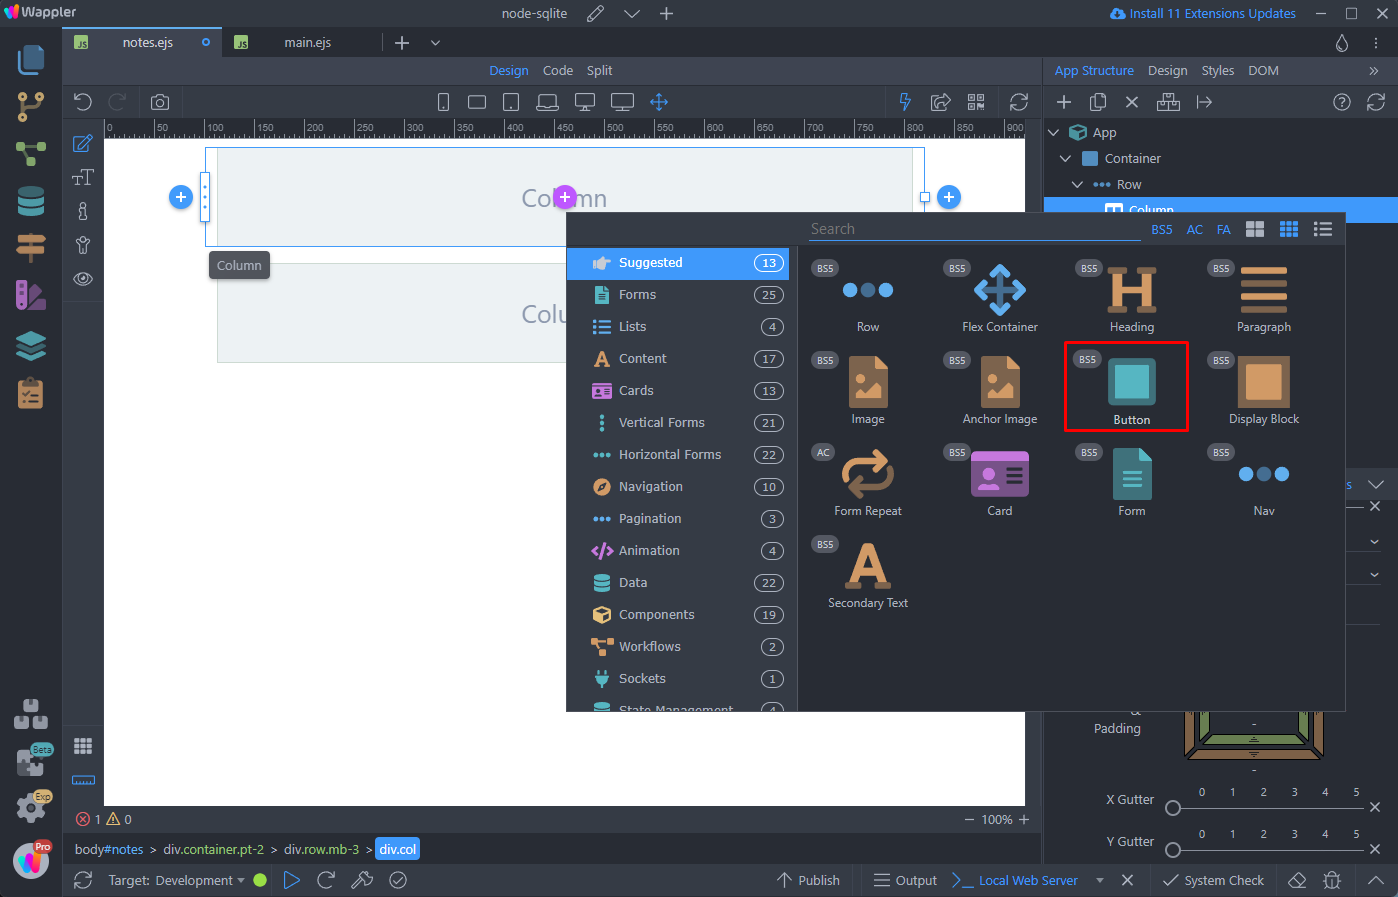
Add an element in the top row:
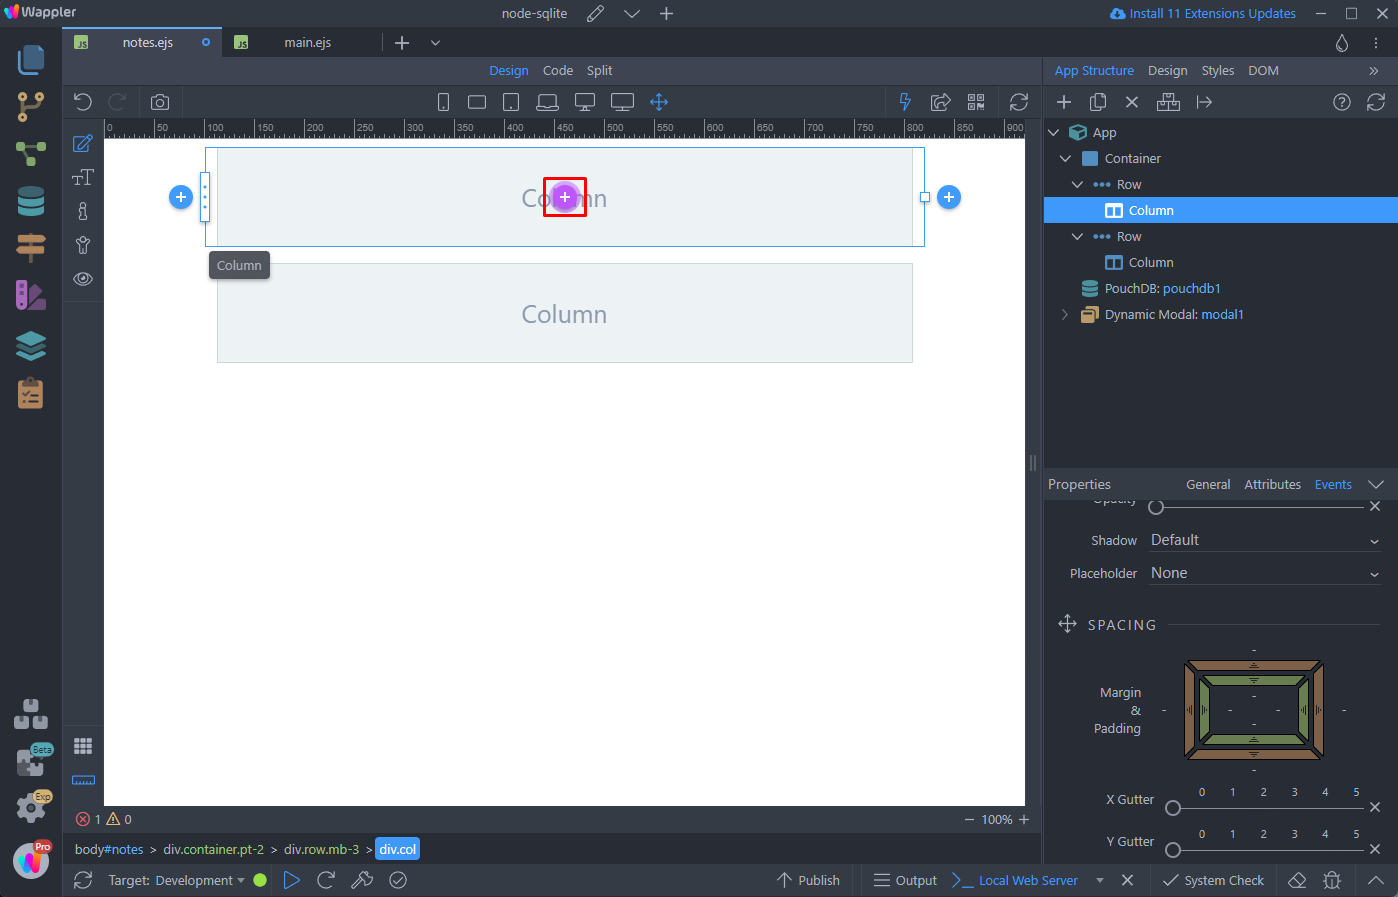
We select button:
Change the button text to New Note, as it will be used to call the insert note modal:
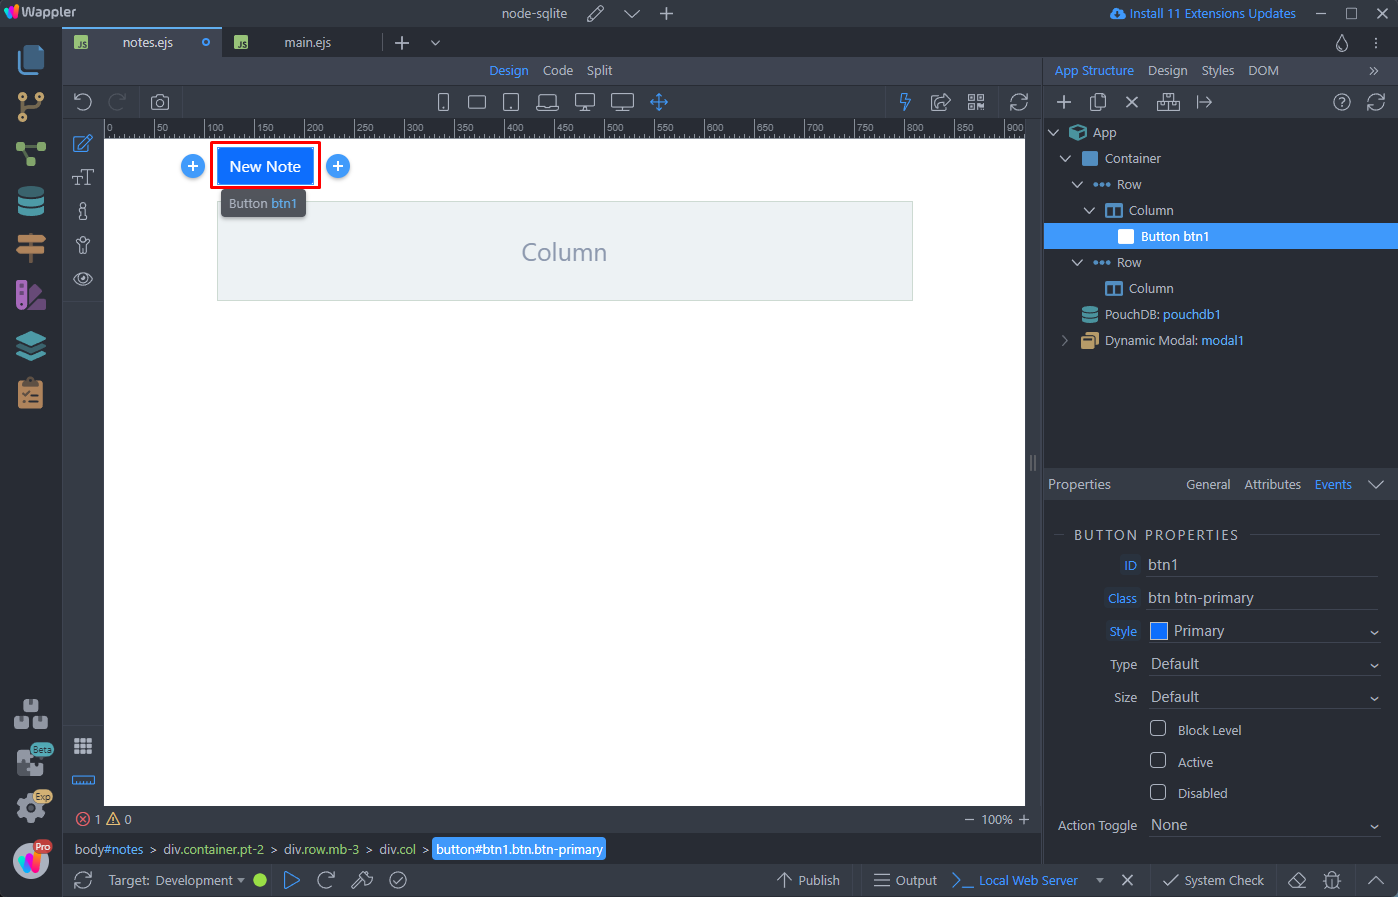
Then in the Properties panel, in the Action Toggle dropdown select Modal:
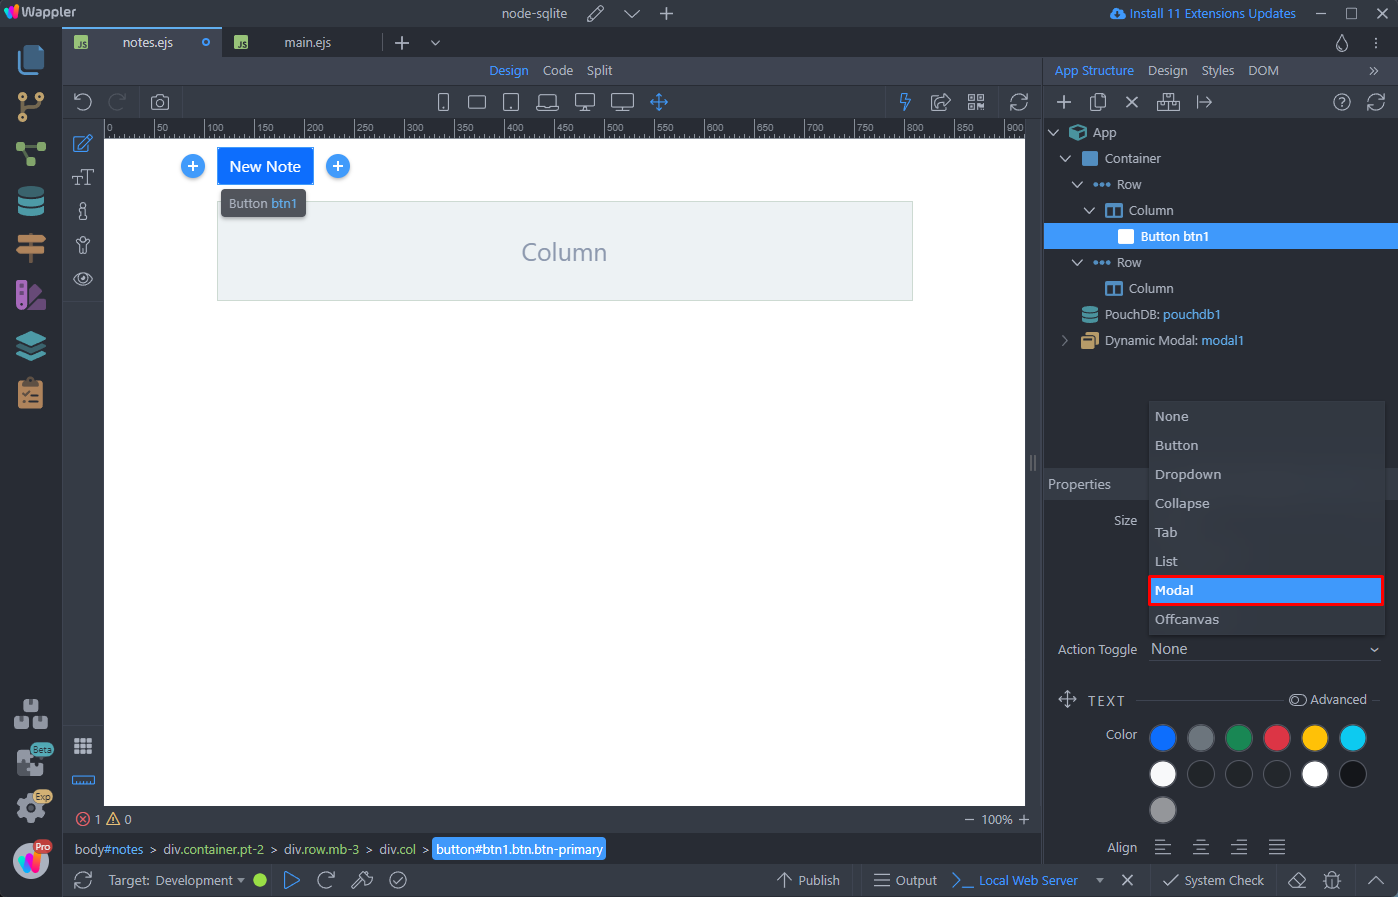
And select the insert note modal, in our case it’s called modal1:
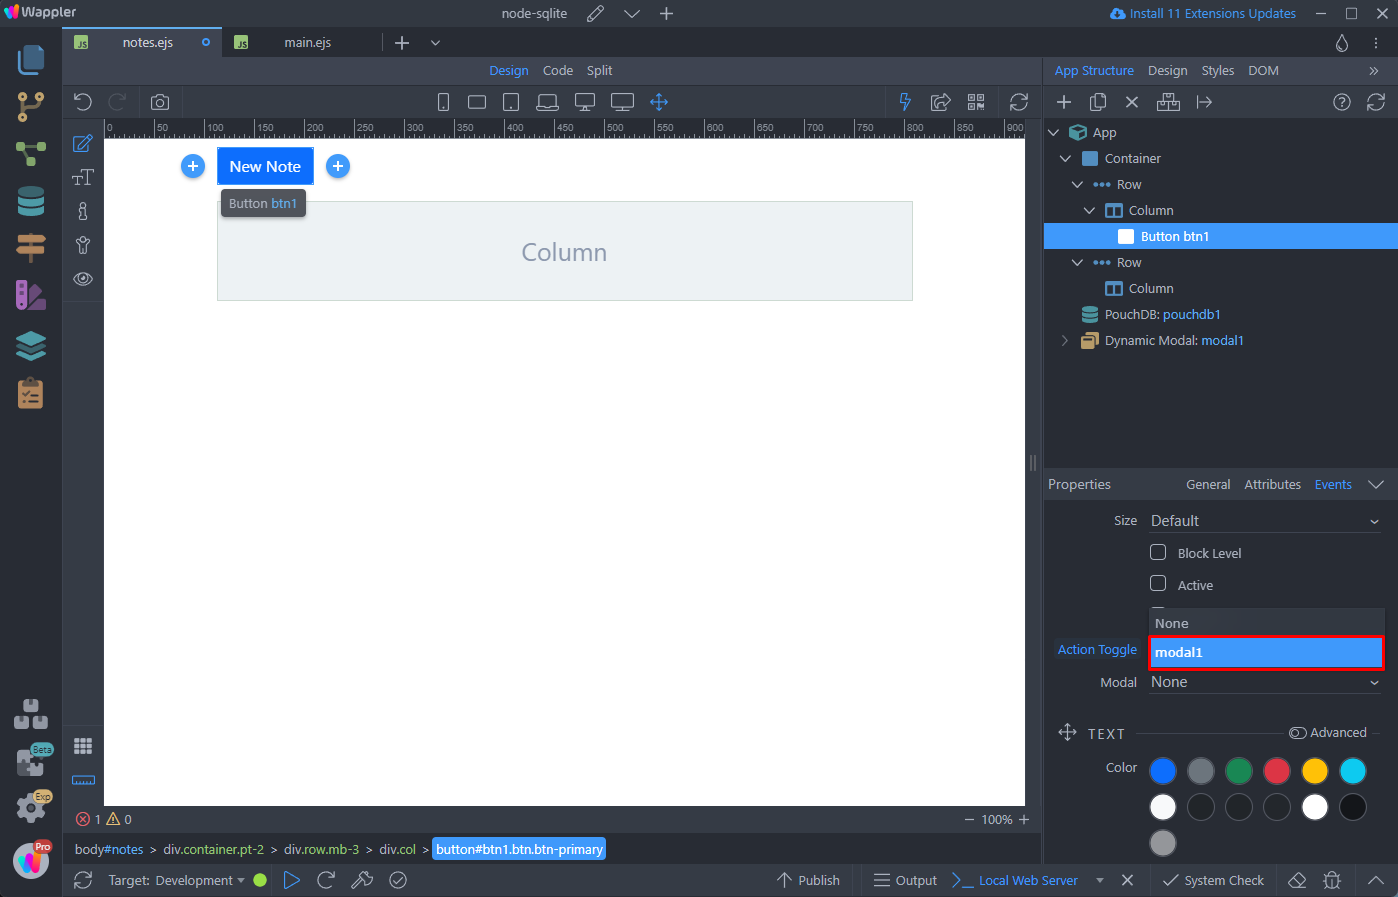
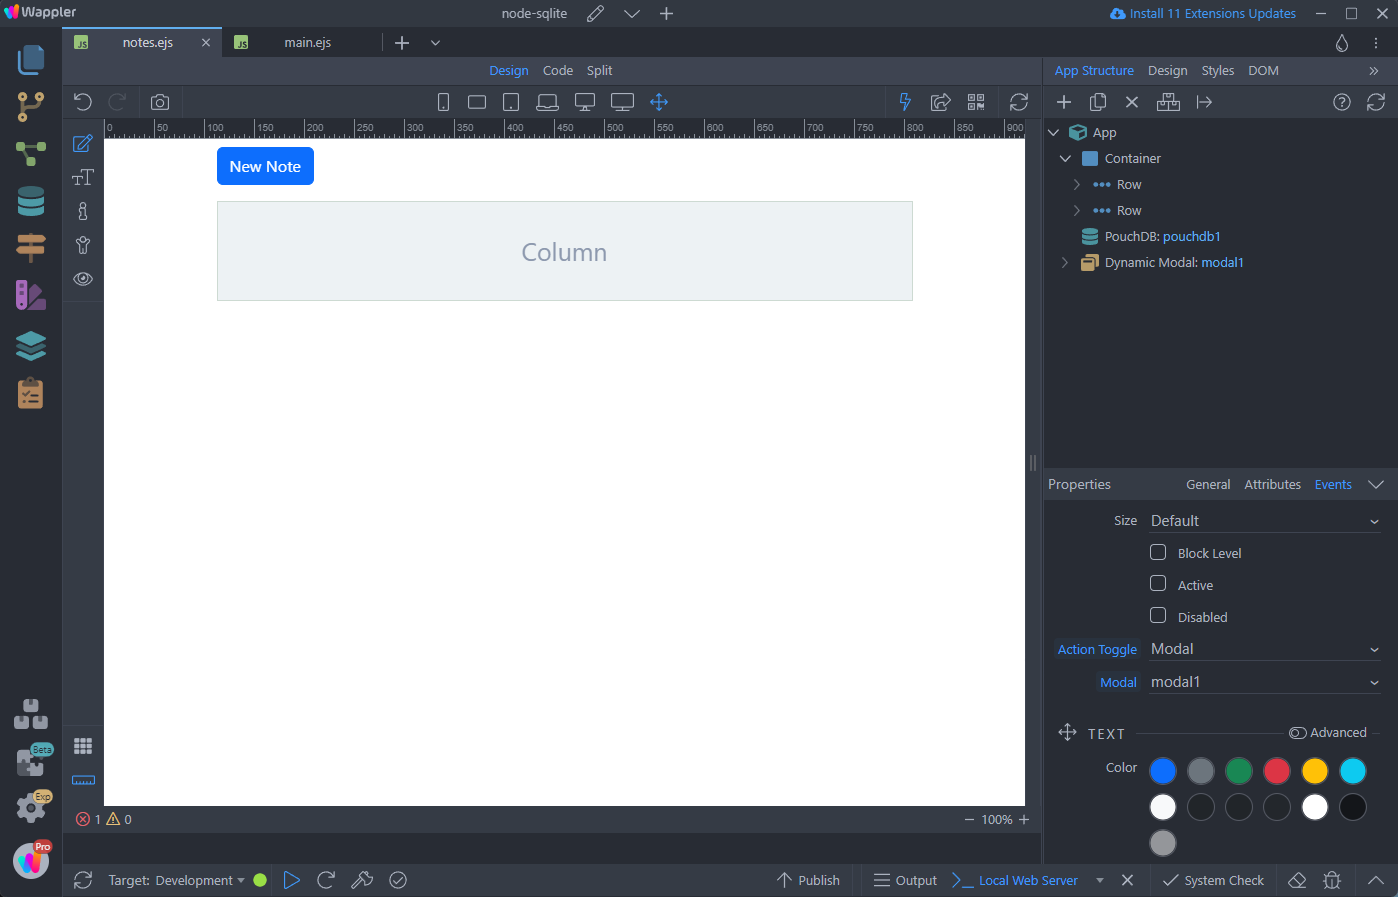
And you are done - the button will open a modal, where you can add notes:
Displaying Data on the Page
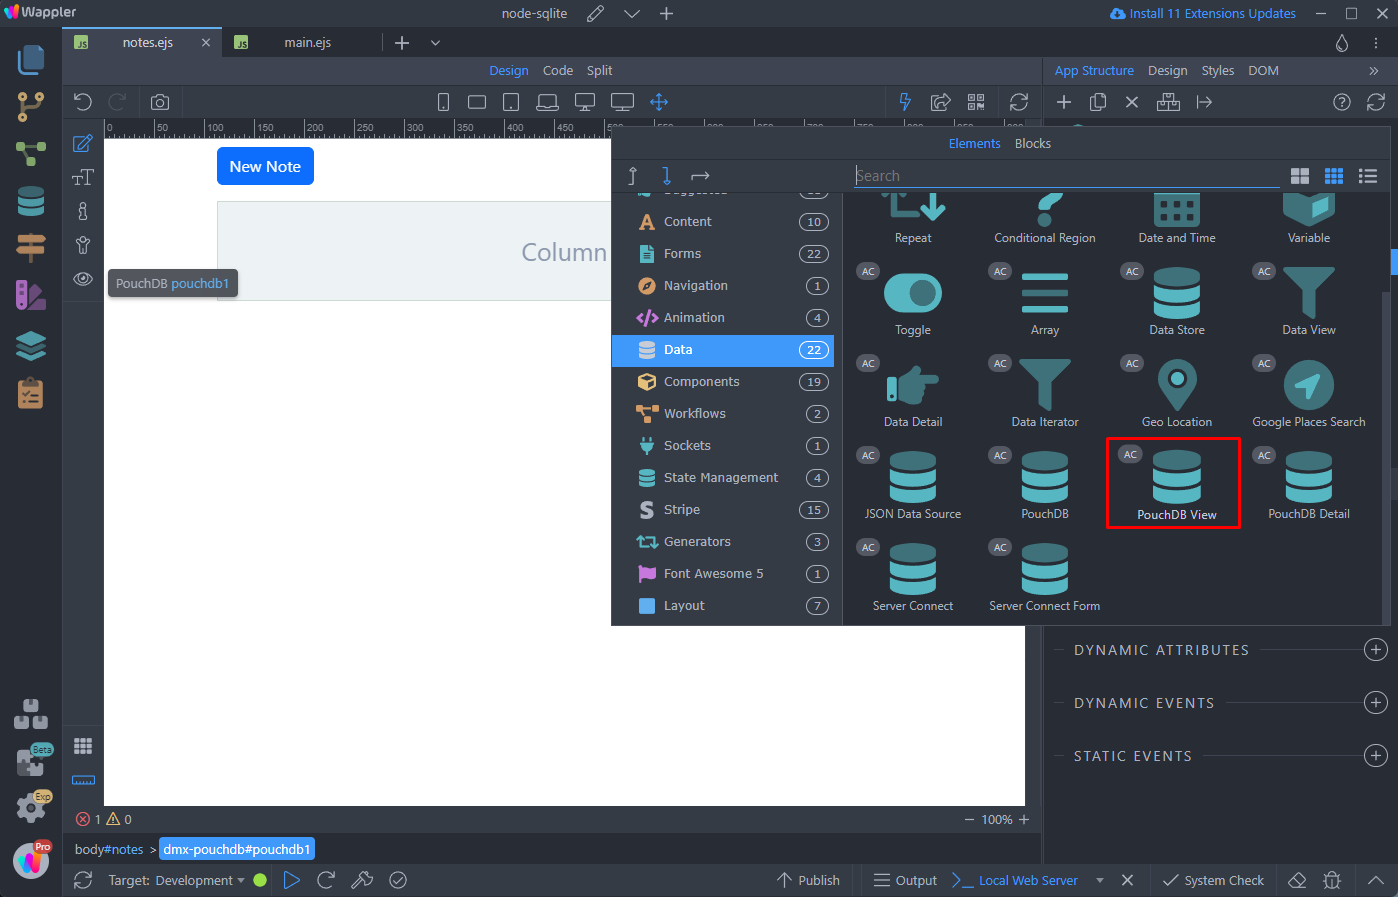
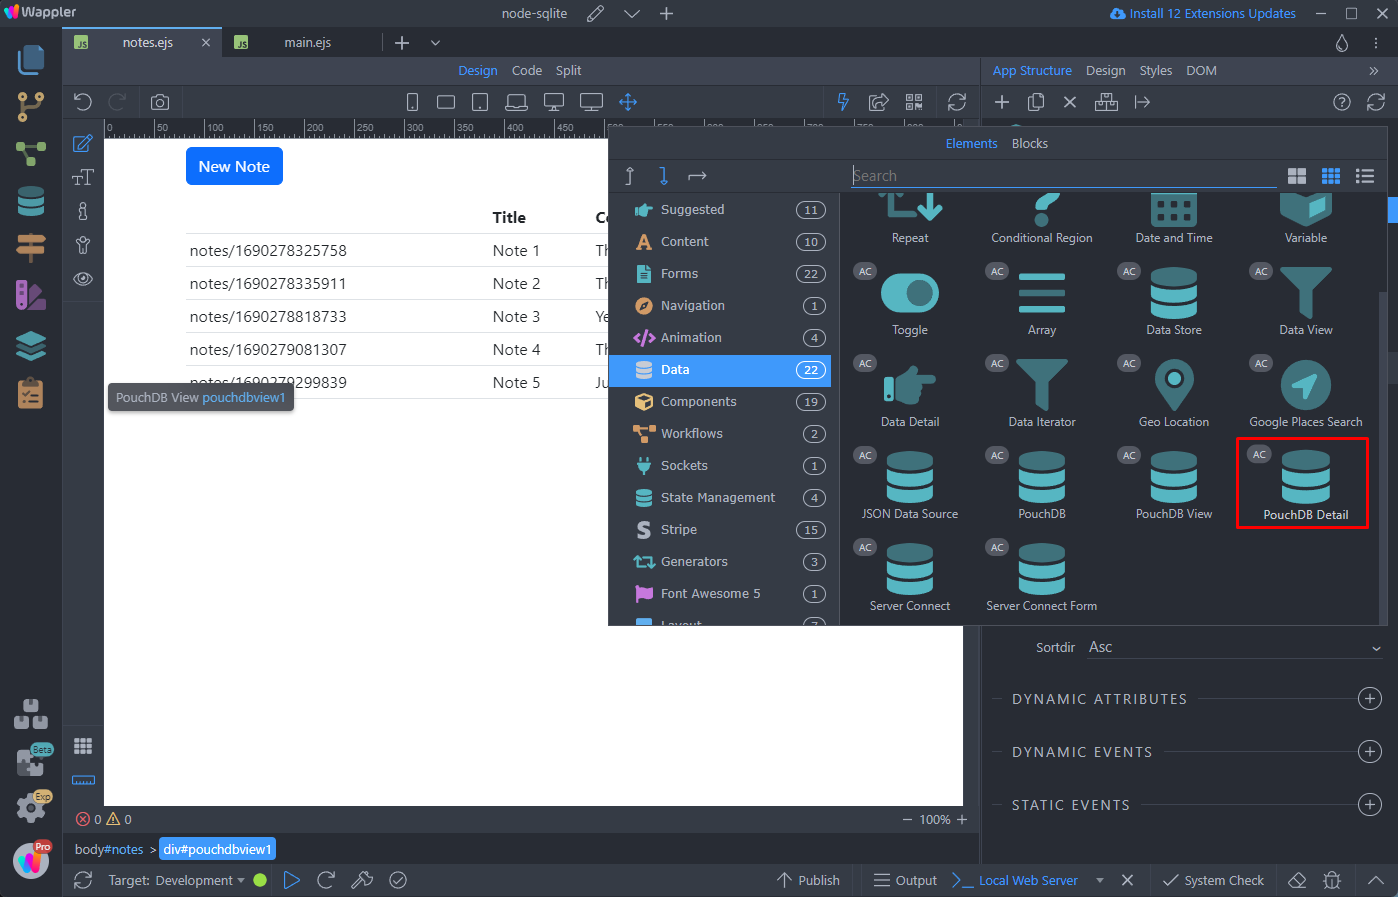
The next step is to list the notes from the database on the page. There is a special PouchDB component for this, so let’s add it. In the App Structure add a new component:
Open Data and select PouchDB View, this component is required on the page, where you want to list data from the PouchDB database:
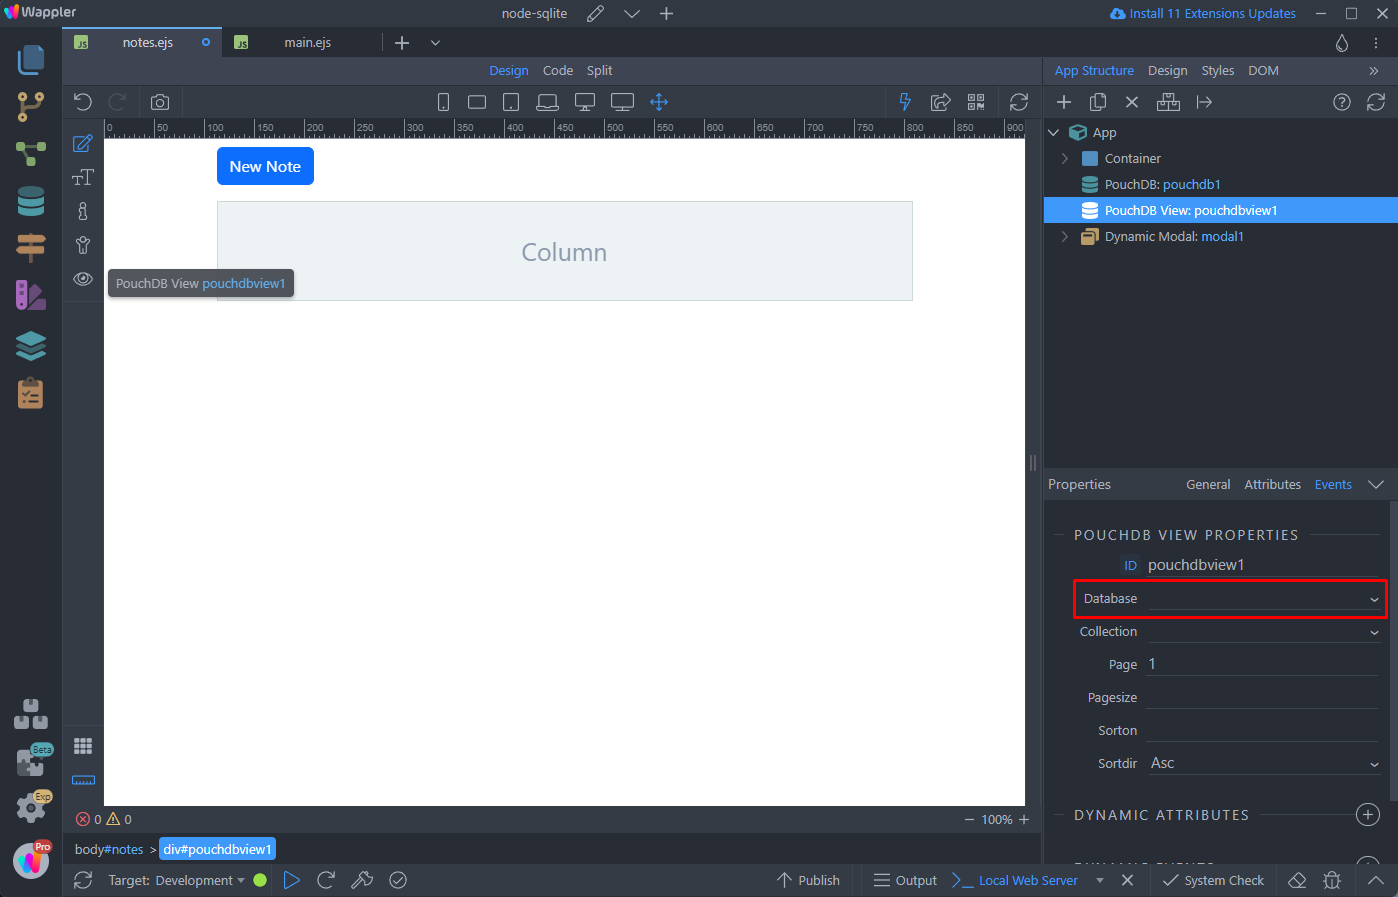
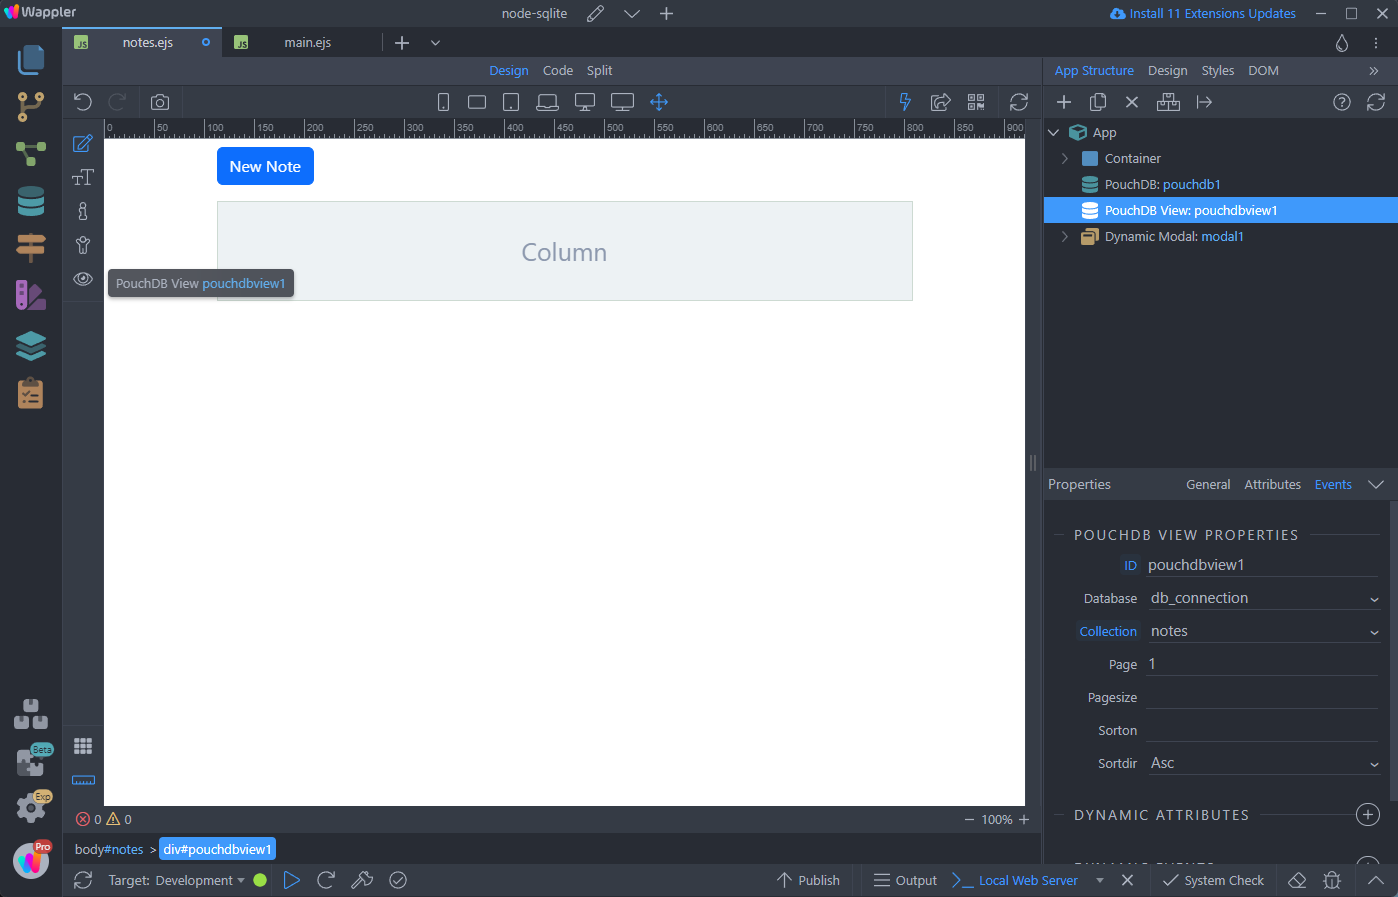
Select your database from the Dropdown:
And select the Collection which content you want to list:

Now you can use this component as a data source for repeat regions, dynamic tables or any other way to display dynamic data on the page - the same as the Server Connect or Data View components:
In this example we will use the dynamic table generator in order to list the notes on the page. Click add new component in the column on the page:
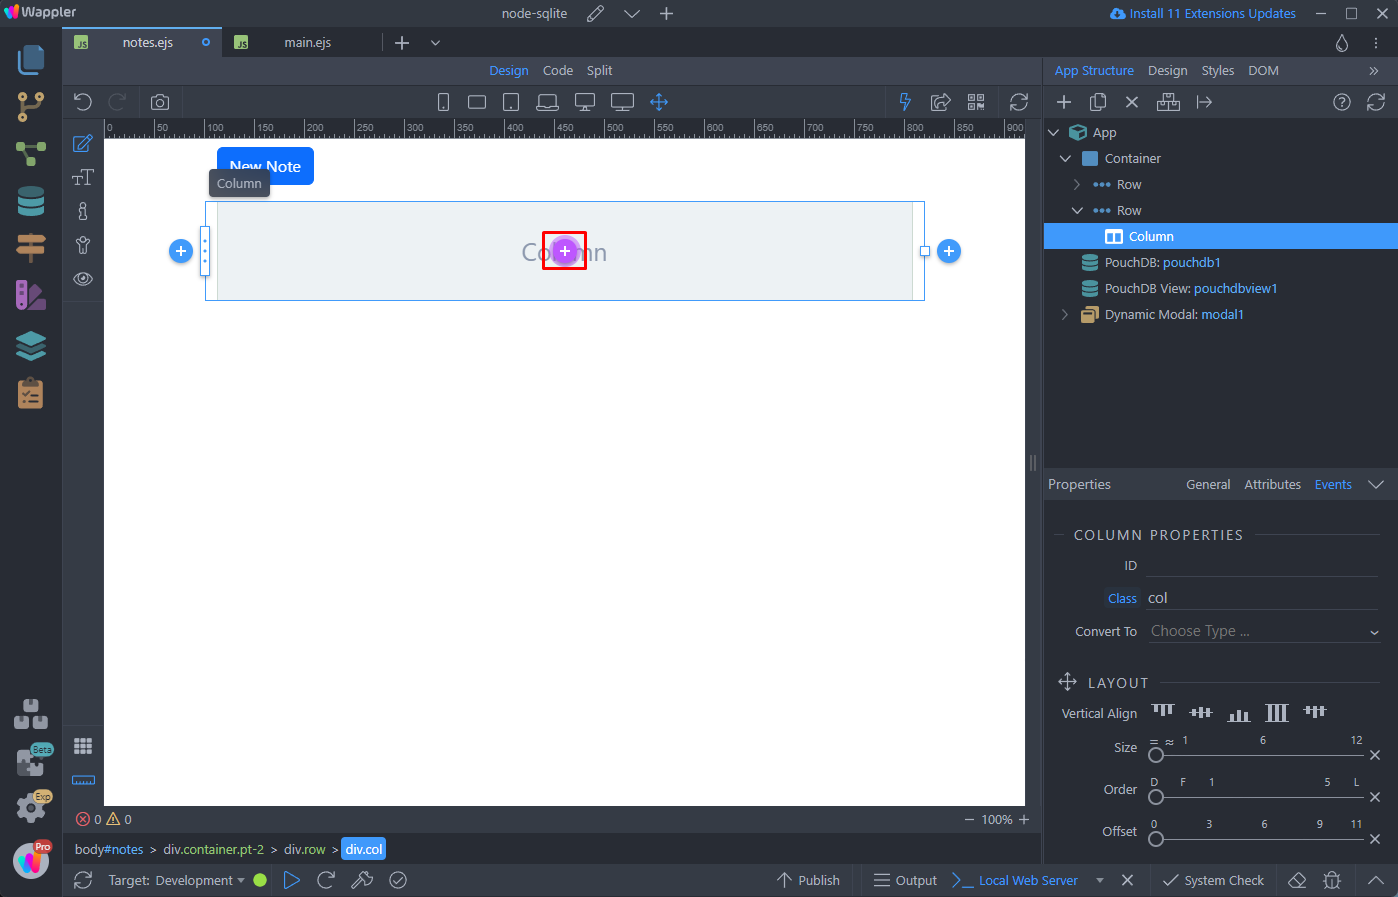
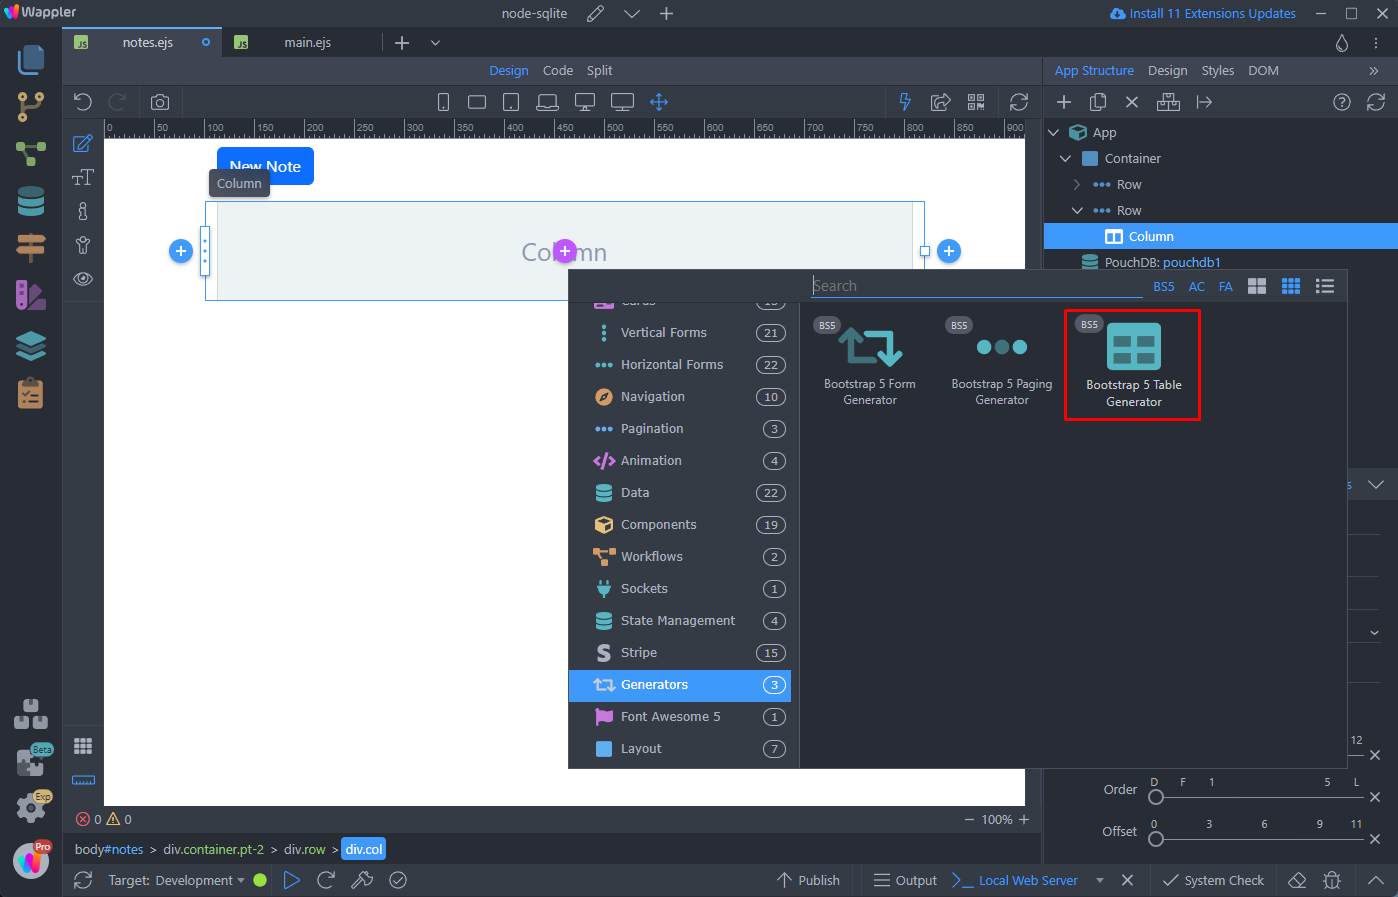
Open Generators and select Bootstrap Table Generator:
Select dynamic data for the table:
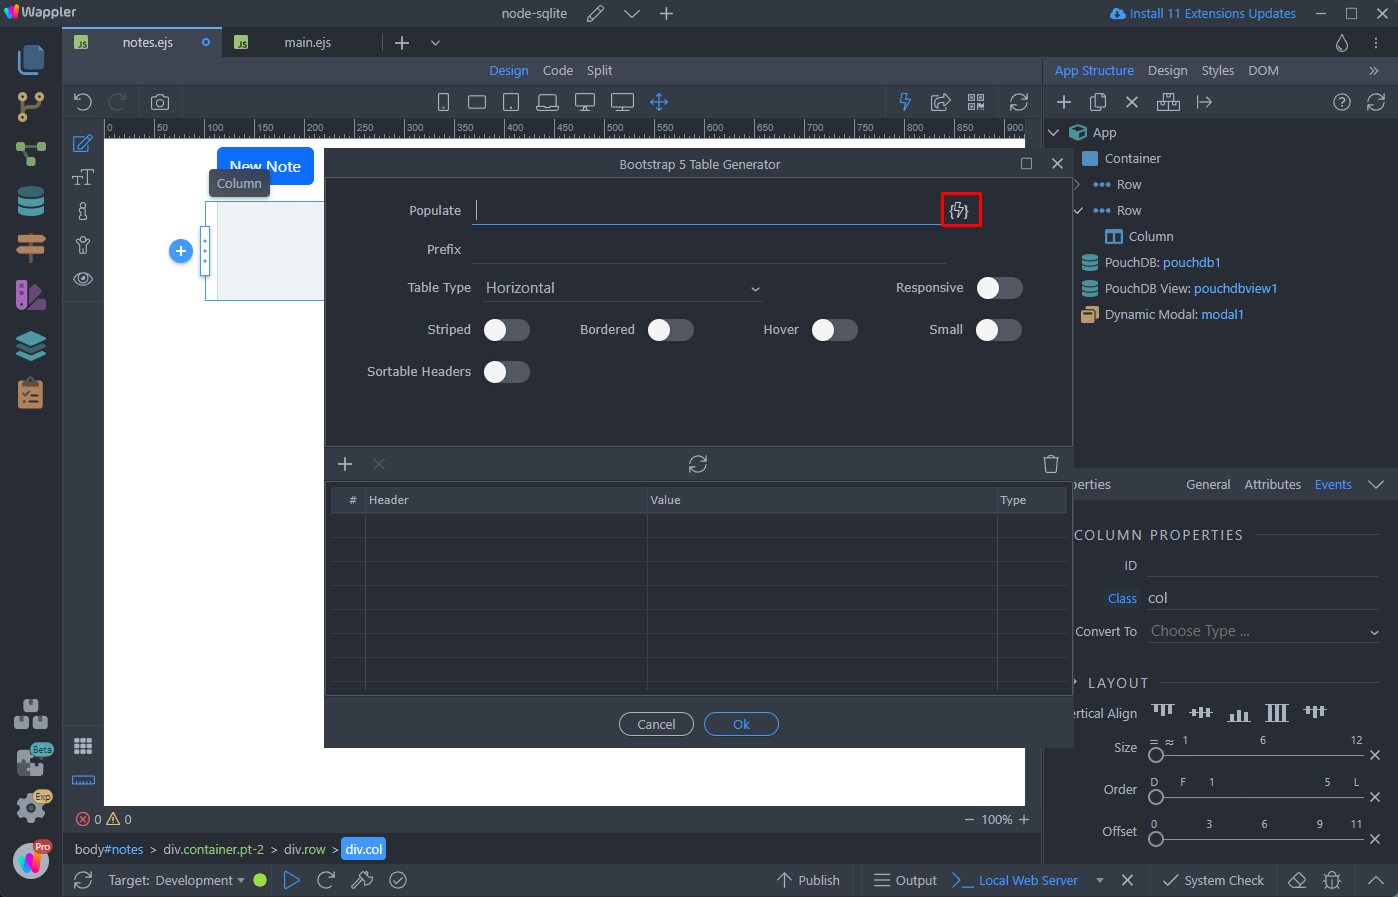
Here select the data element under PouchDB View component:
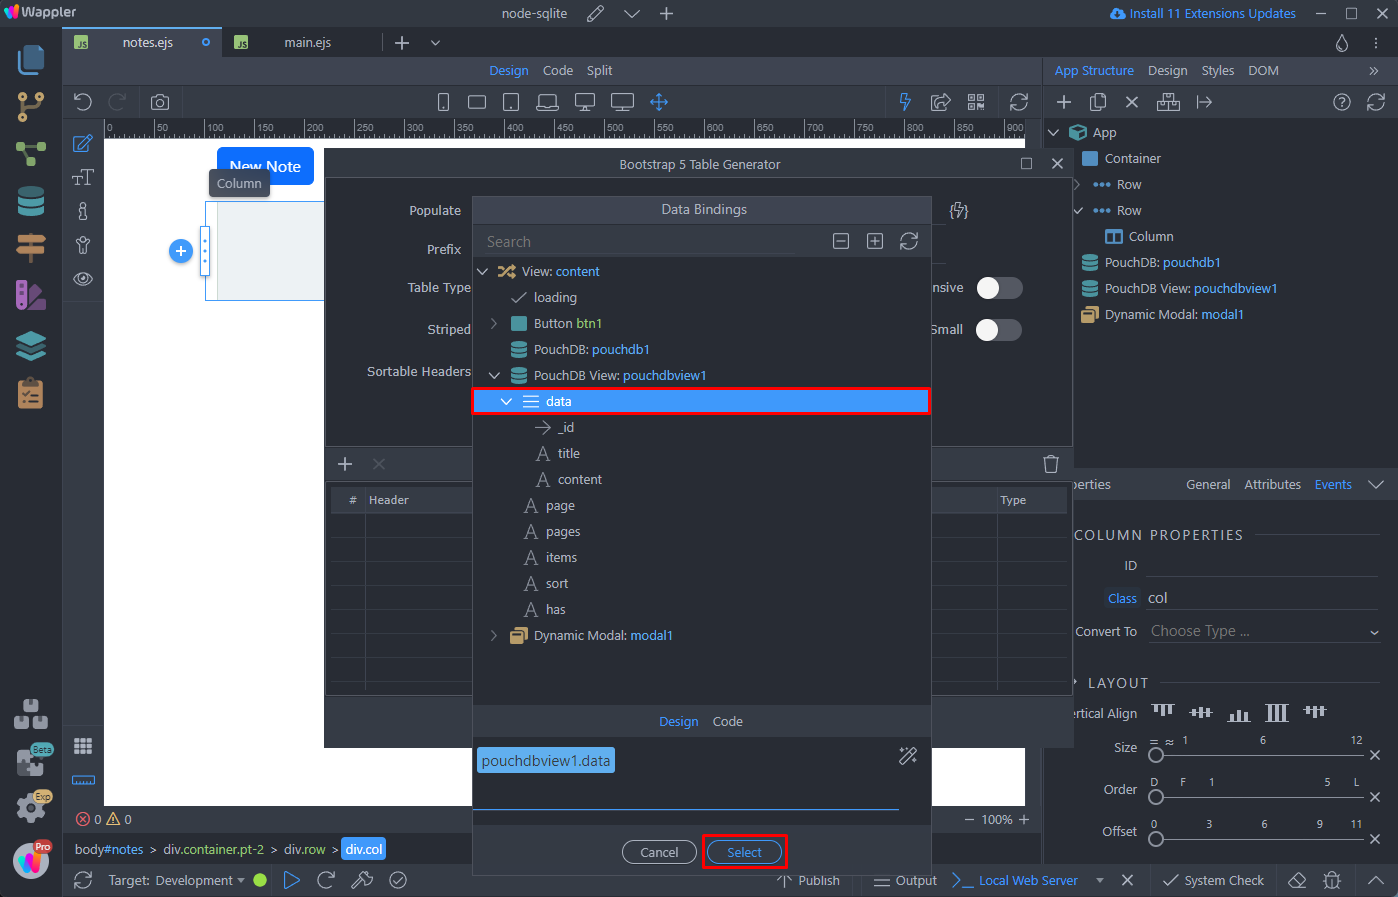
The table data will be populated. You can remove the ID column, as it’s not really needed. We will leave it there, just so you can see what’s generated in the ID column:
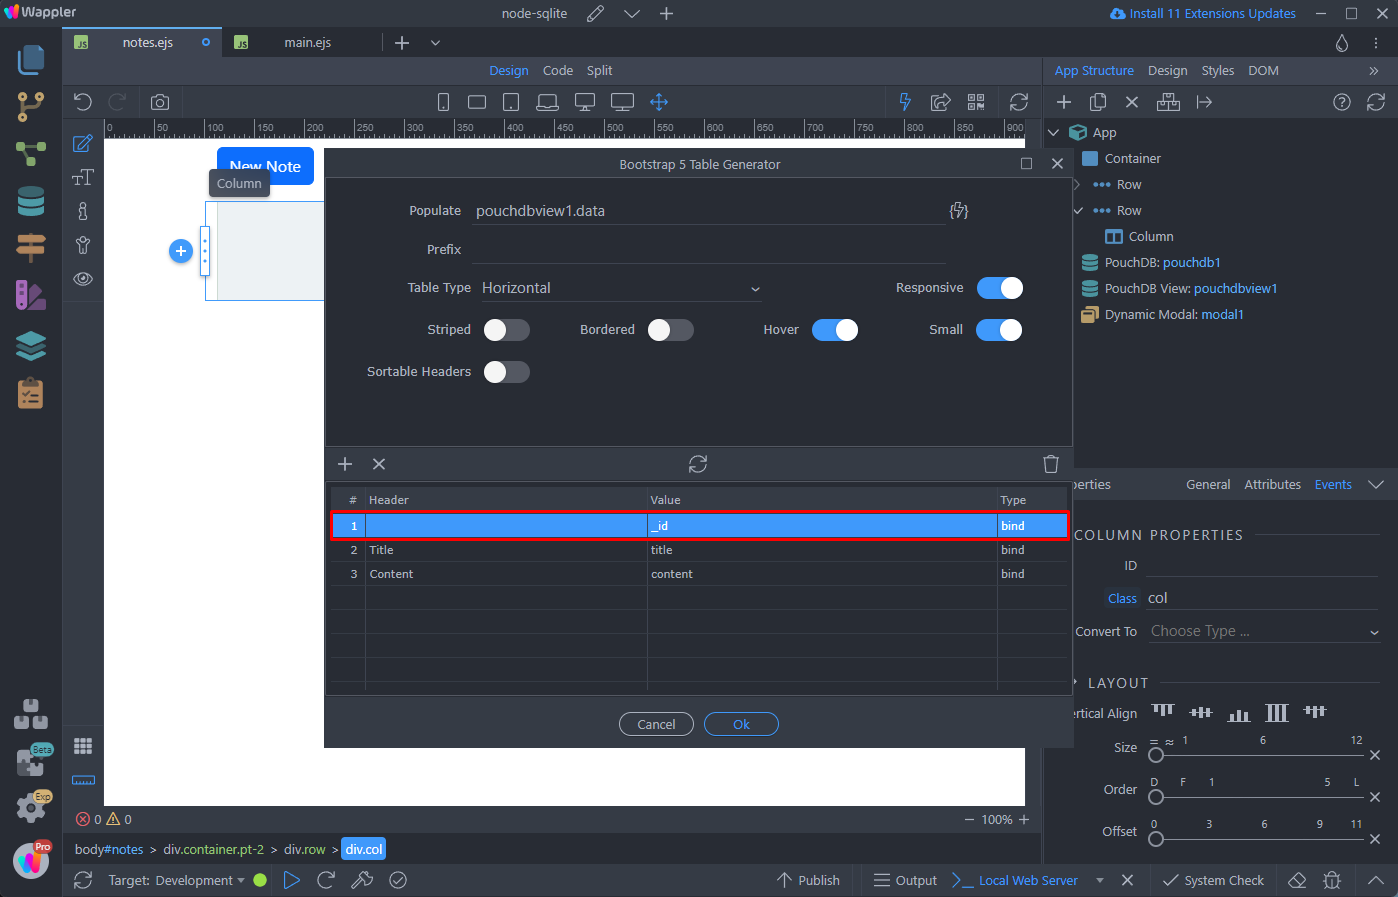
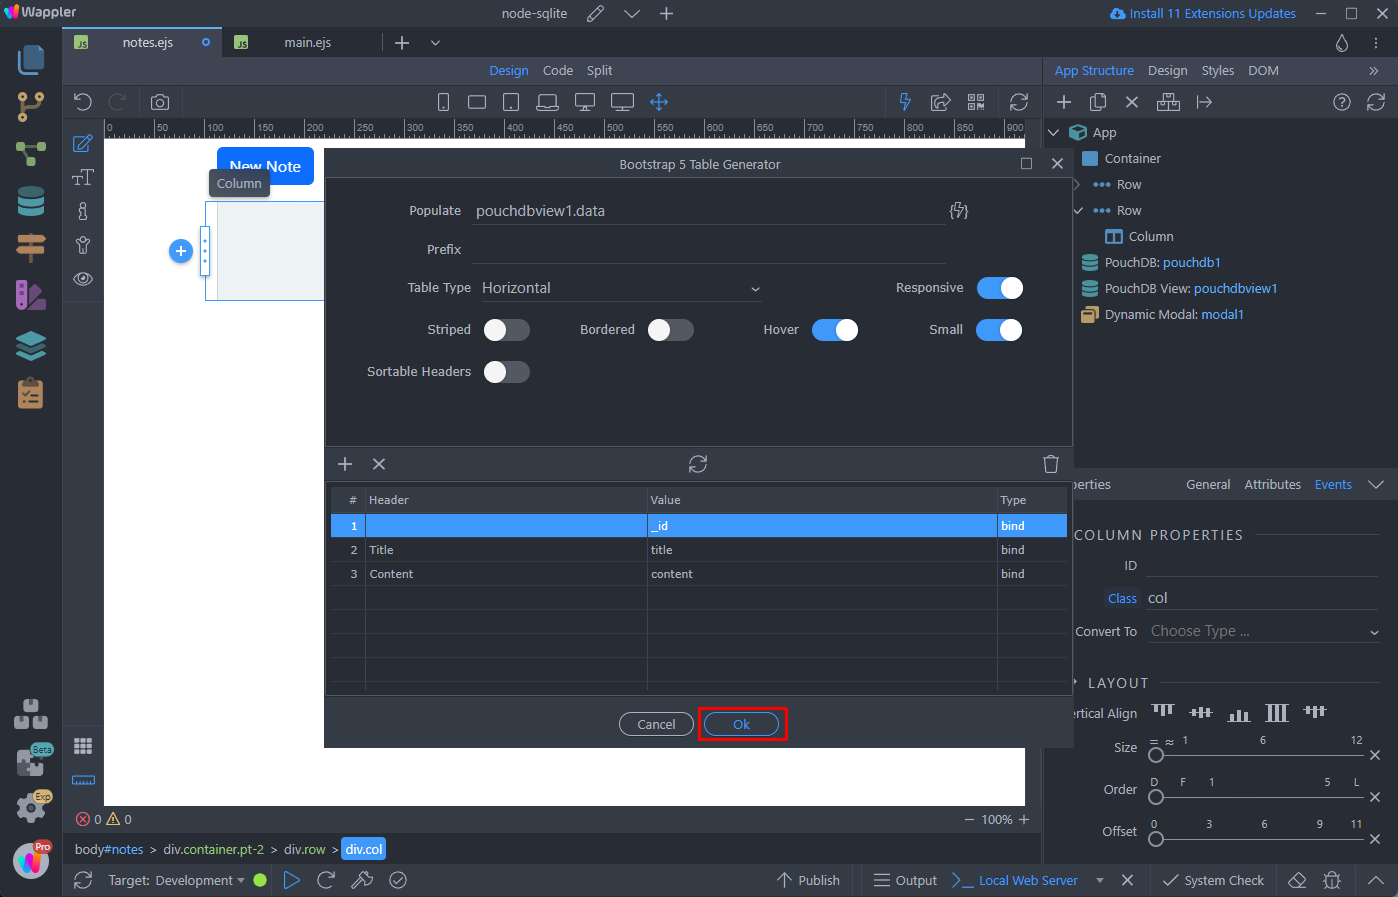
Click OK:
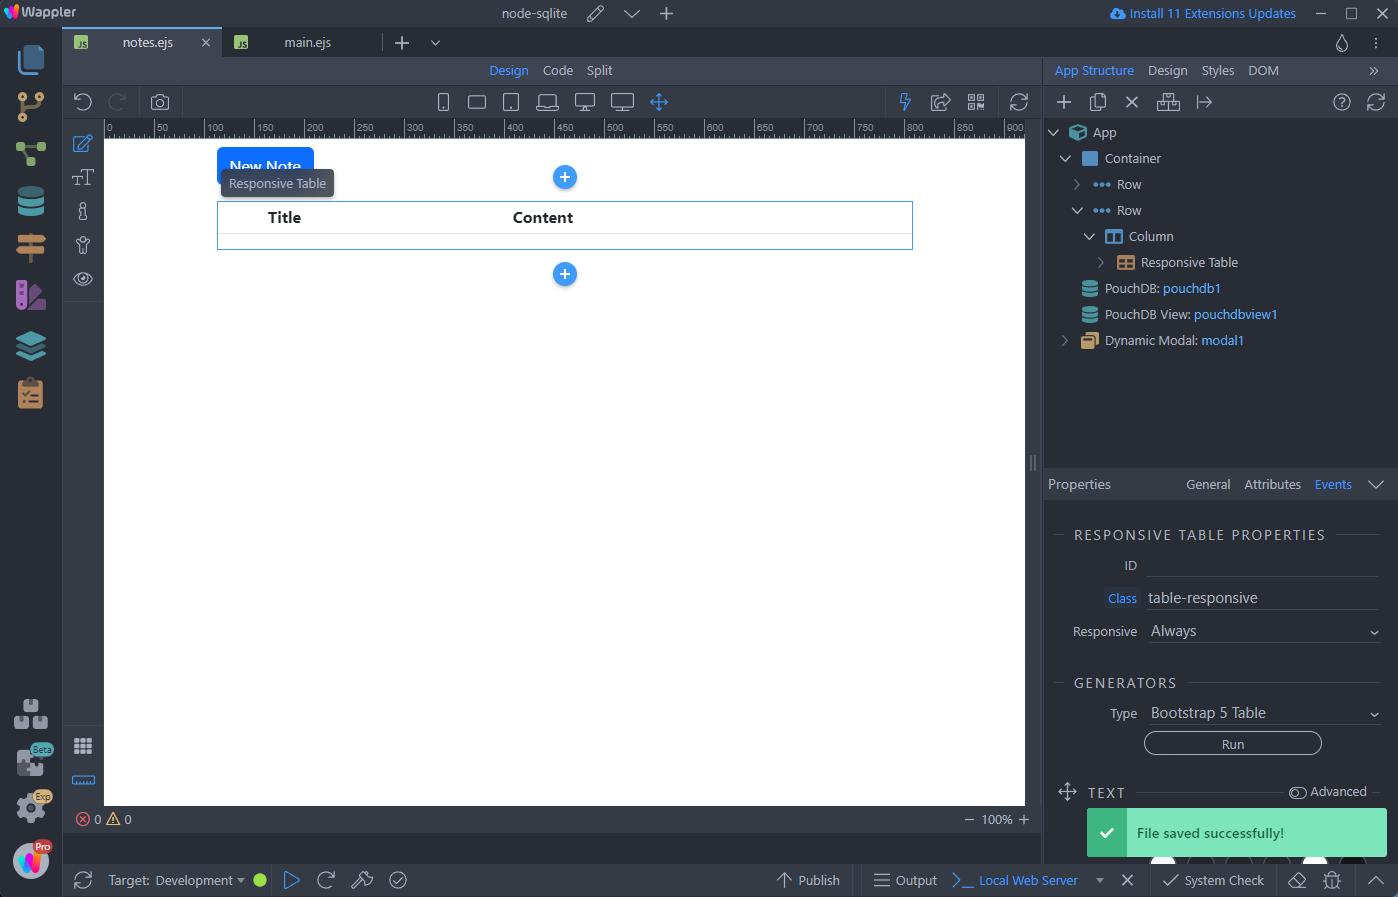
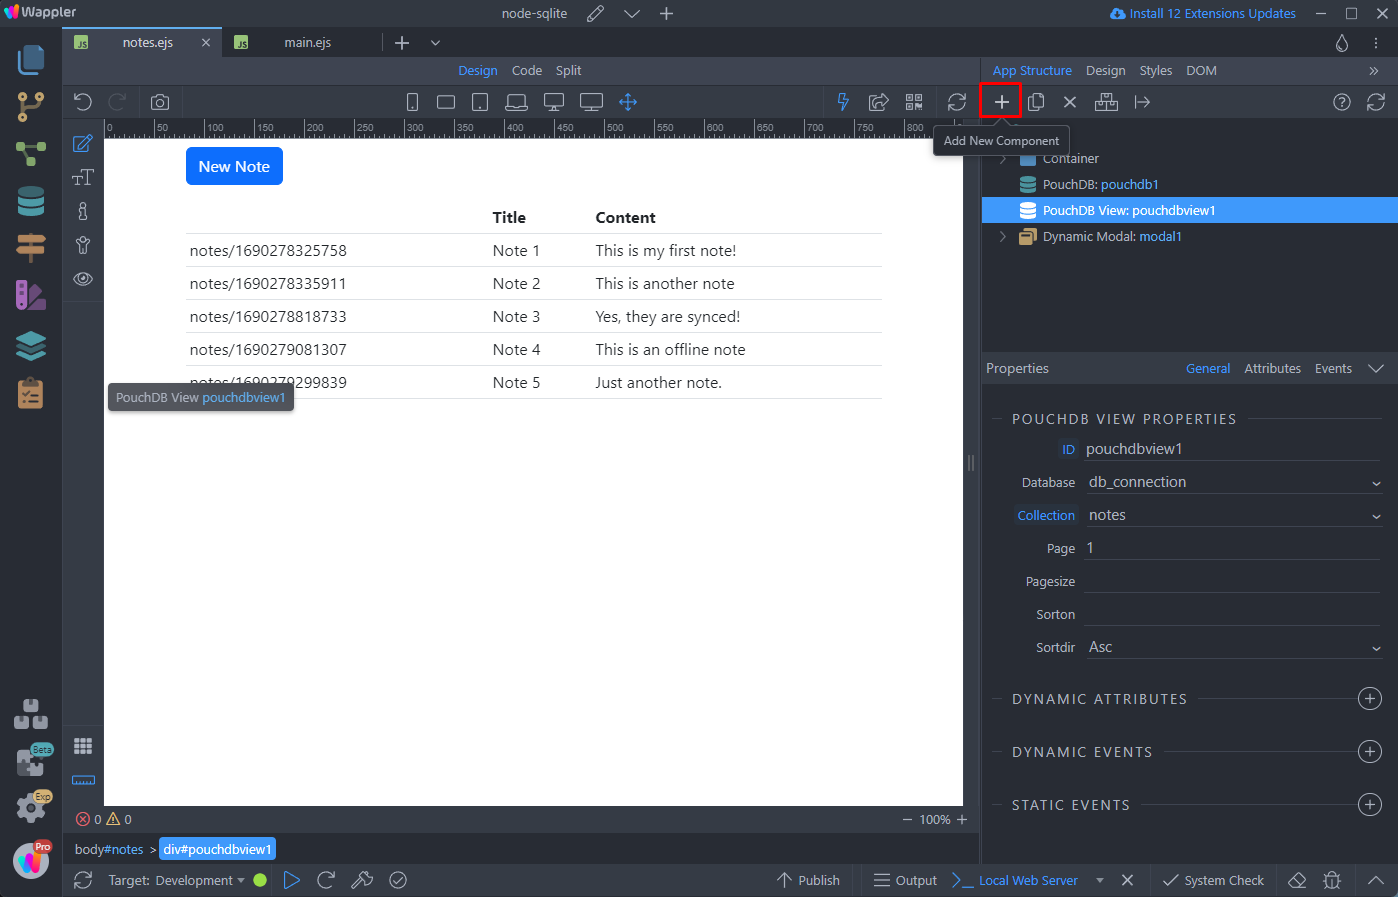
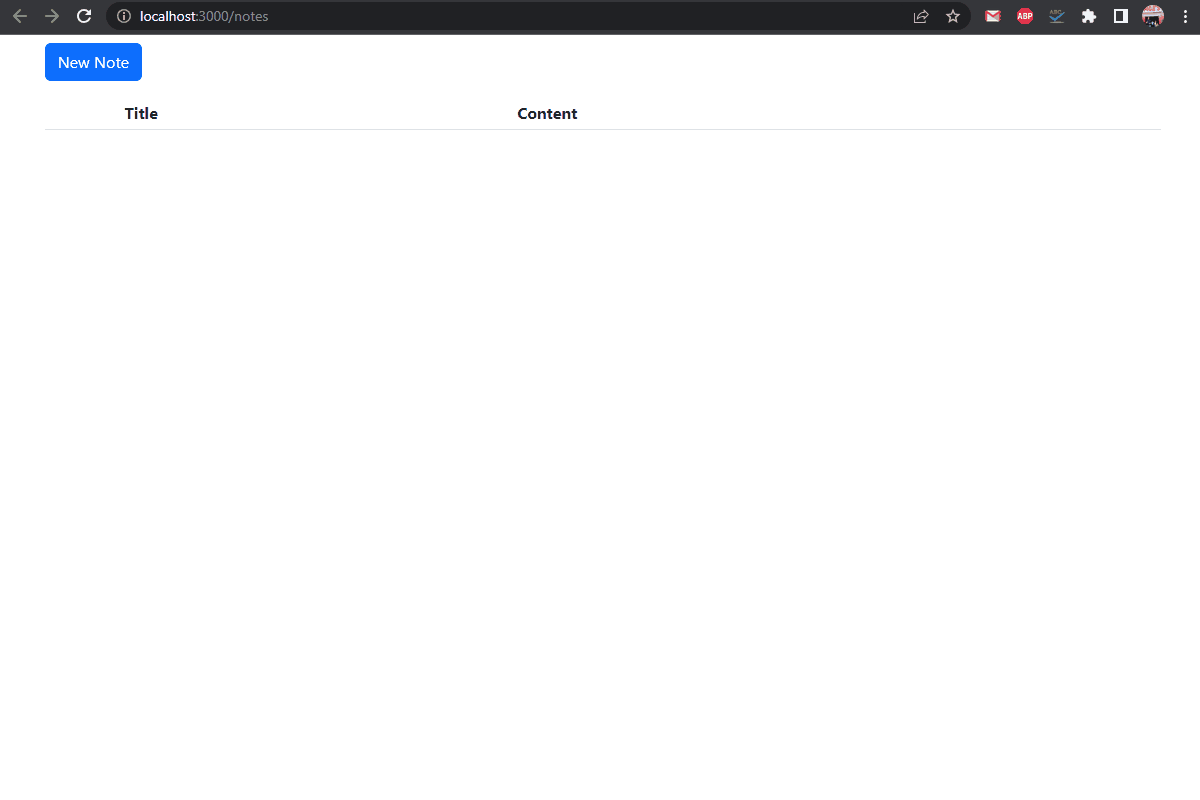
And you are done, the table will list the records, once we insert them in the database:
Updating Data
The next step is to add update functionality to our app. Updating the data is quite similar to inserting data. Below we will show you how to handle situations where two people are updating the same record (note) and there is a conflict.
In order to be able to update the notes in our app, we need to add a new component on the page:
Open Data and select PouchDB Detail. This component is used to retrieve the data for the record, which we want to update:
Select your database in the dropdown:

Then select the Collection:

The Auto Update option allows you to automatically reload the data for all devices, when an update is done. We won’t enable this now, but instead we will show you how to notify the users, that the data they are updating is outdated:

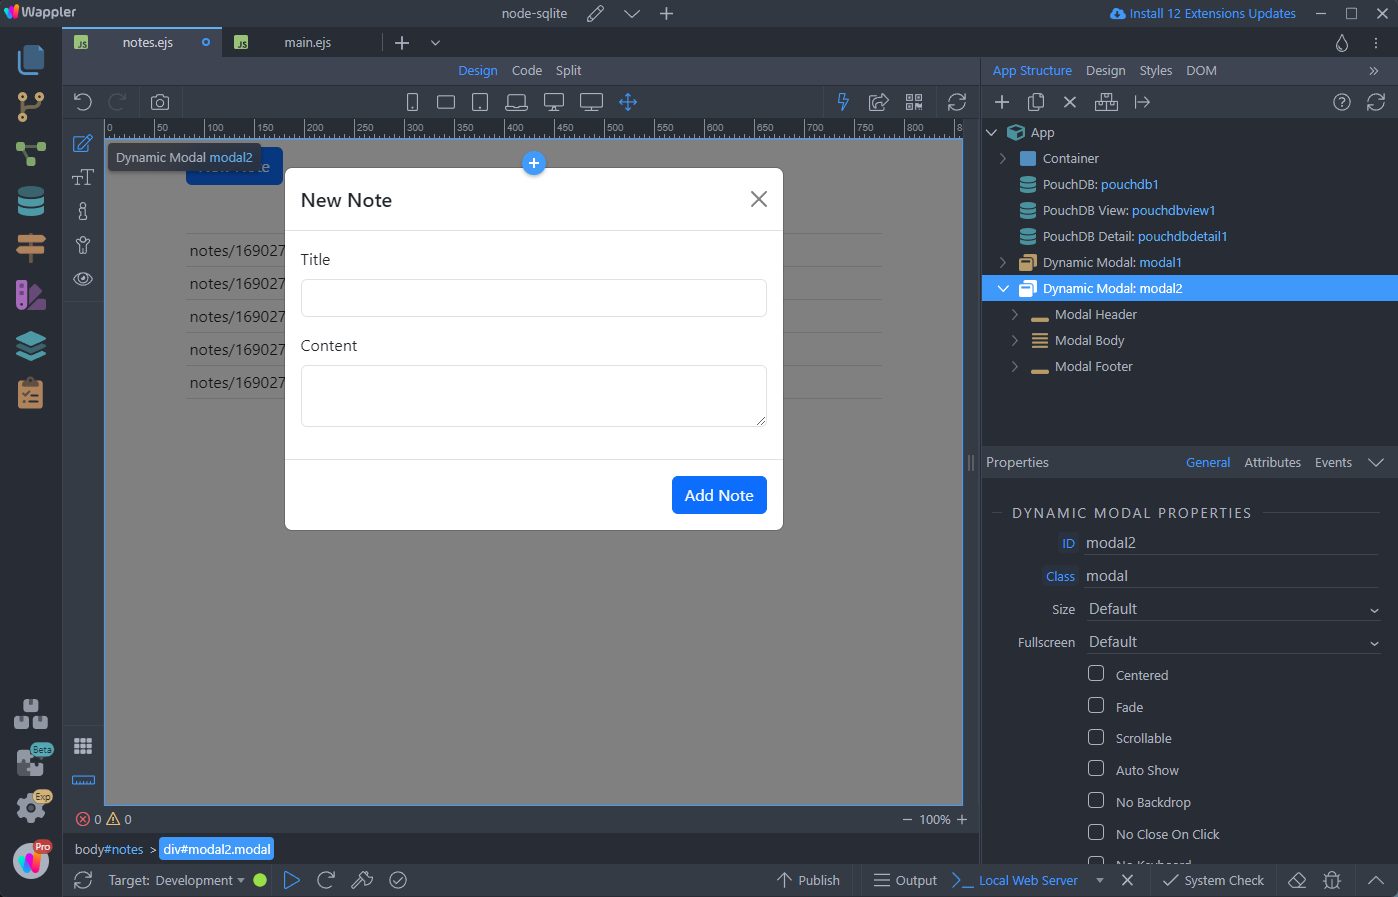
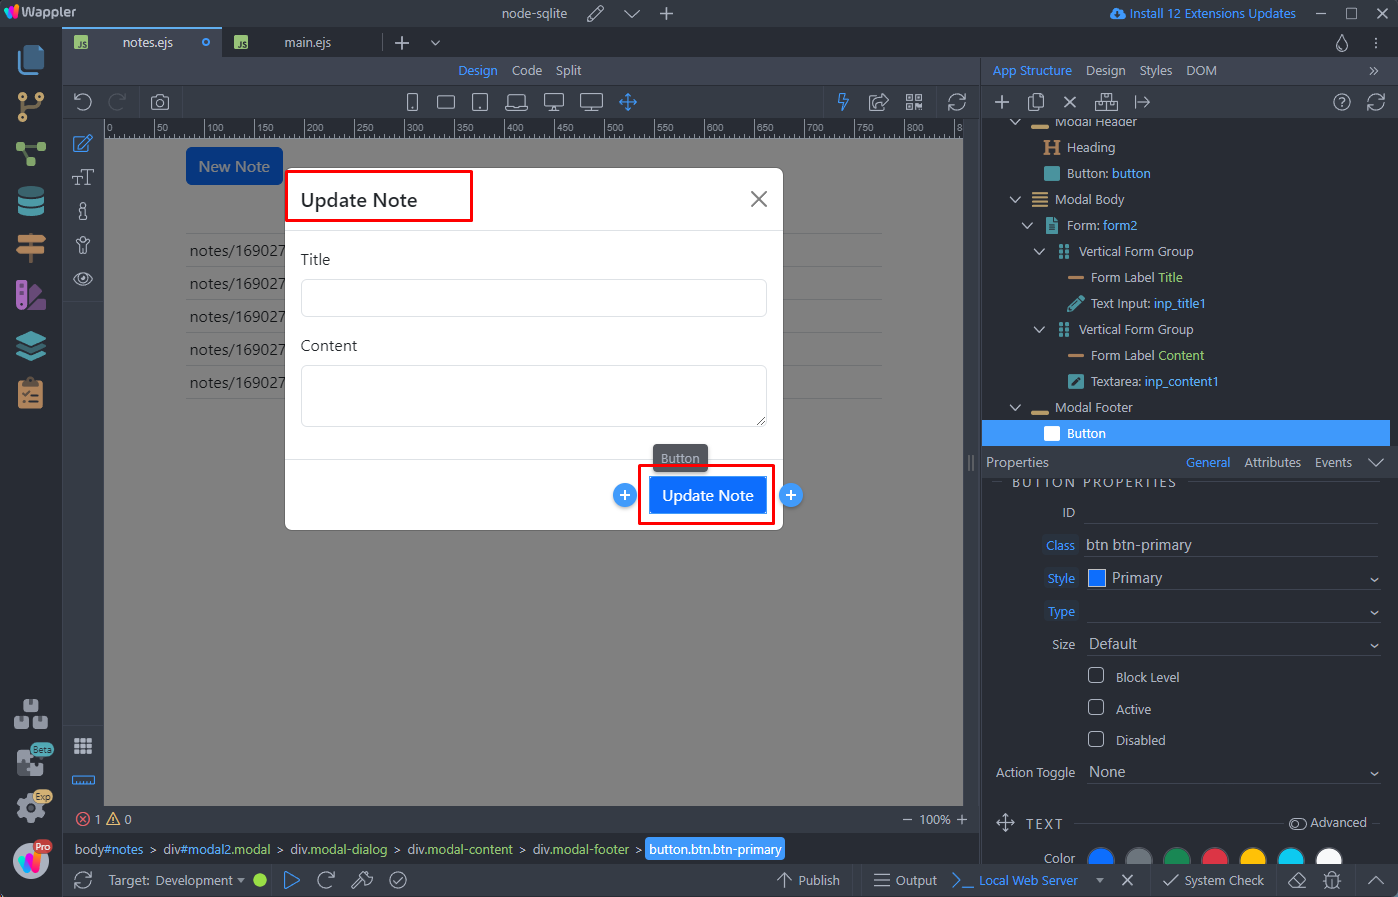
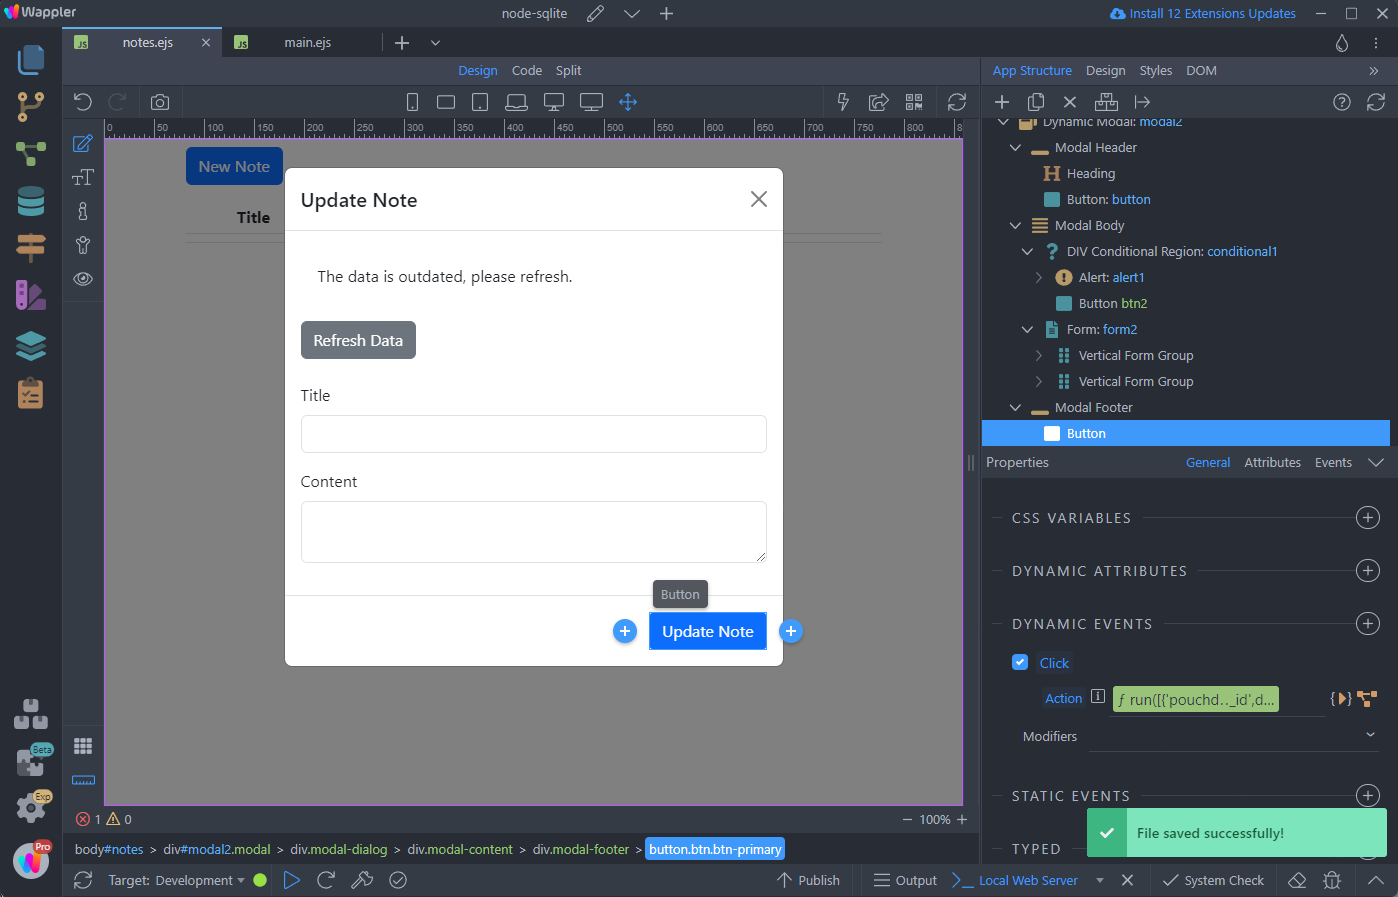
The Update Note interface is quite the same as the Insert Note, so we can just duplicate the Insert Note modal:
Open the new modal, that will be used for updating notes:
Here we need to assign the PouchDB Detail values to the input values, so that when we click a record and the modal opens, we see its details in the inputs. Select the title input, then add new Dynamic Attribute:

Select Input > Value:
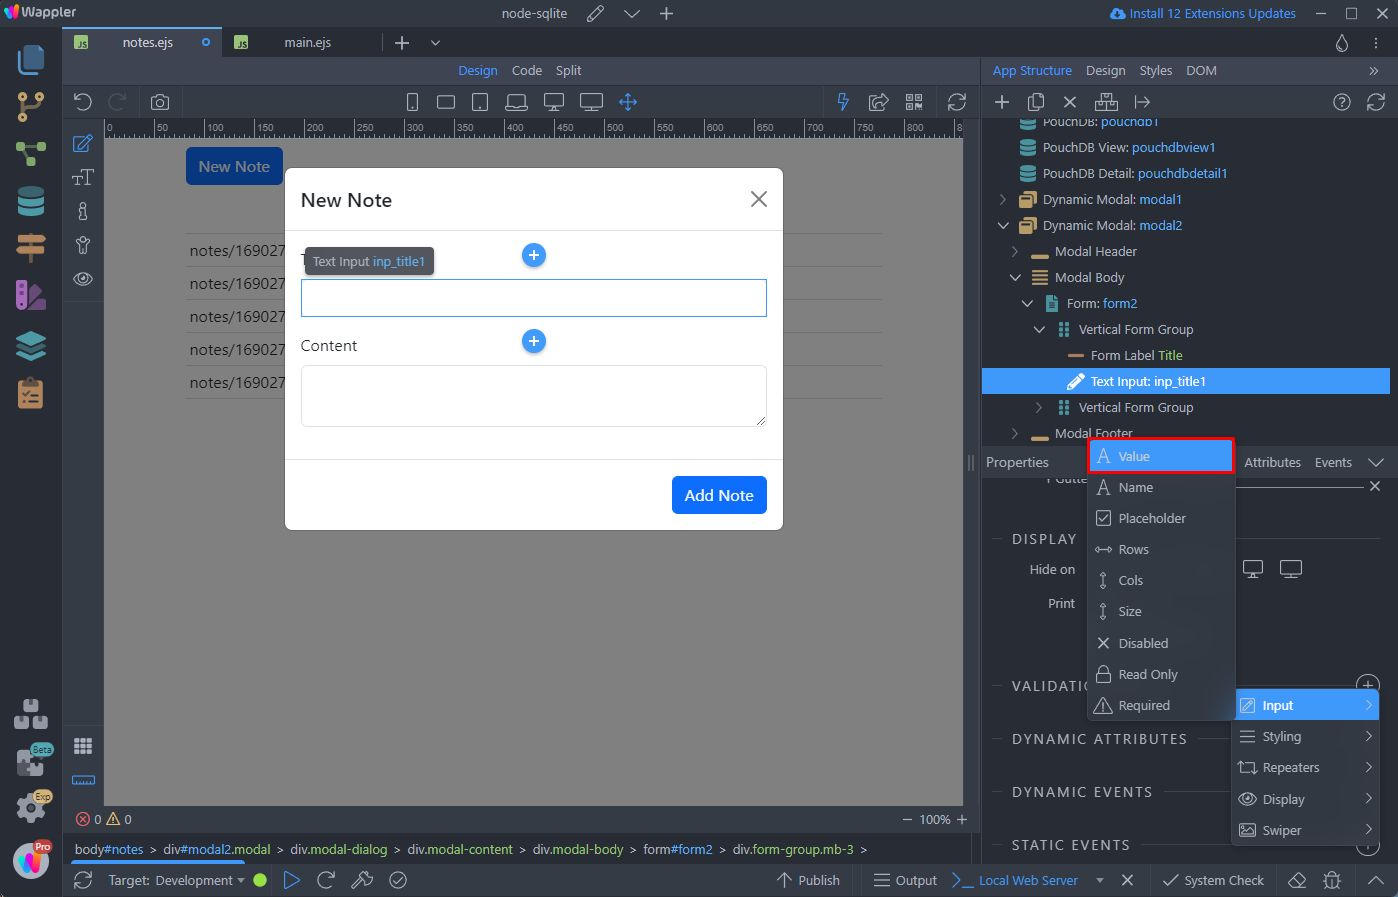
And click the dynamic data picker:
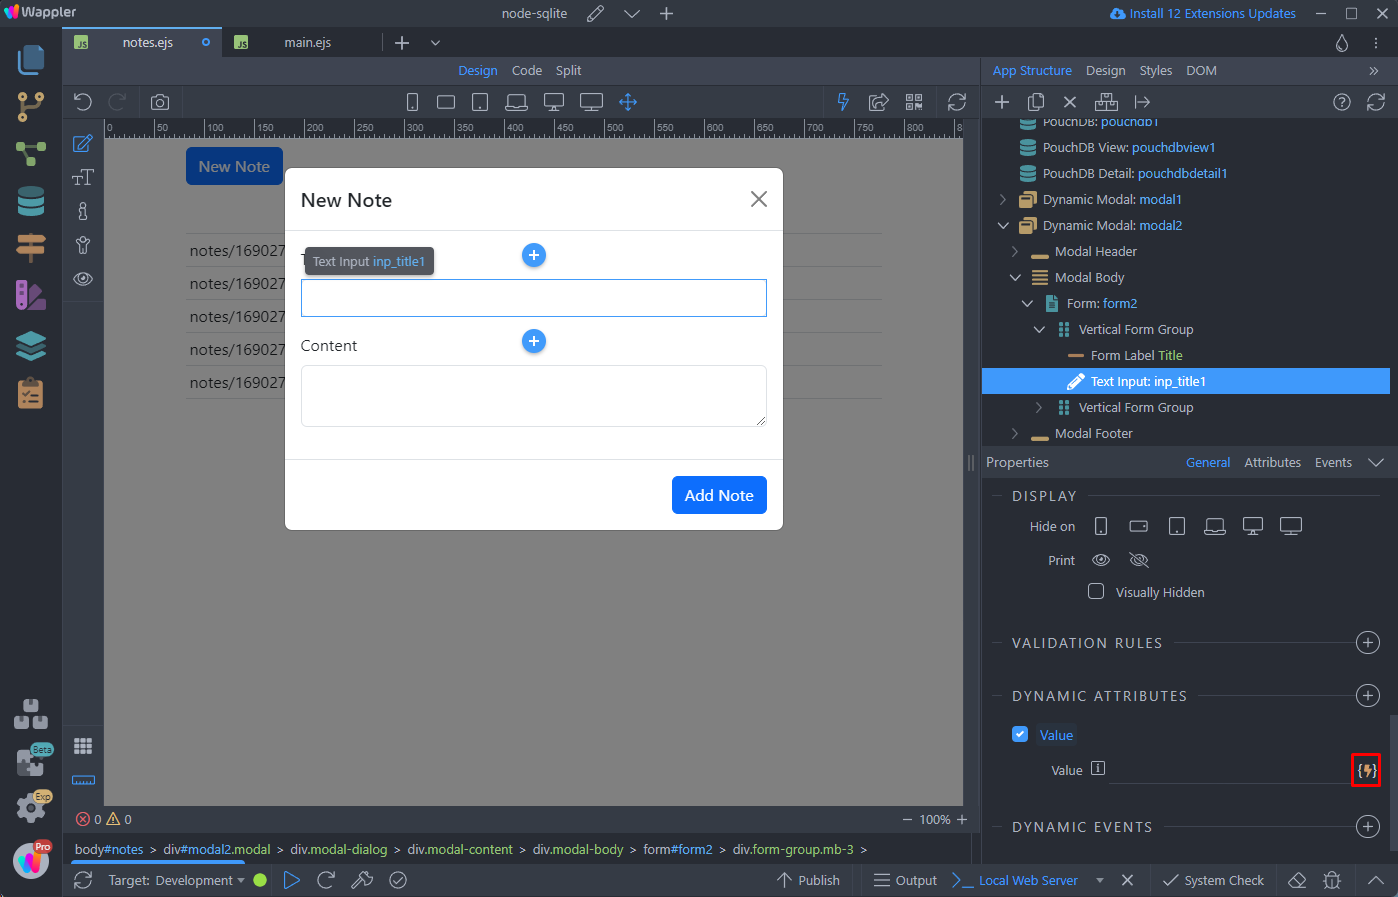
Expand the data element, under the PouchDB Detail component and pick the title value:
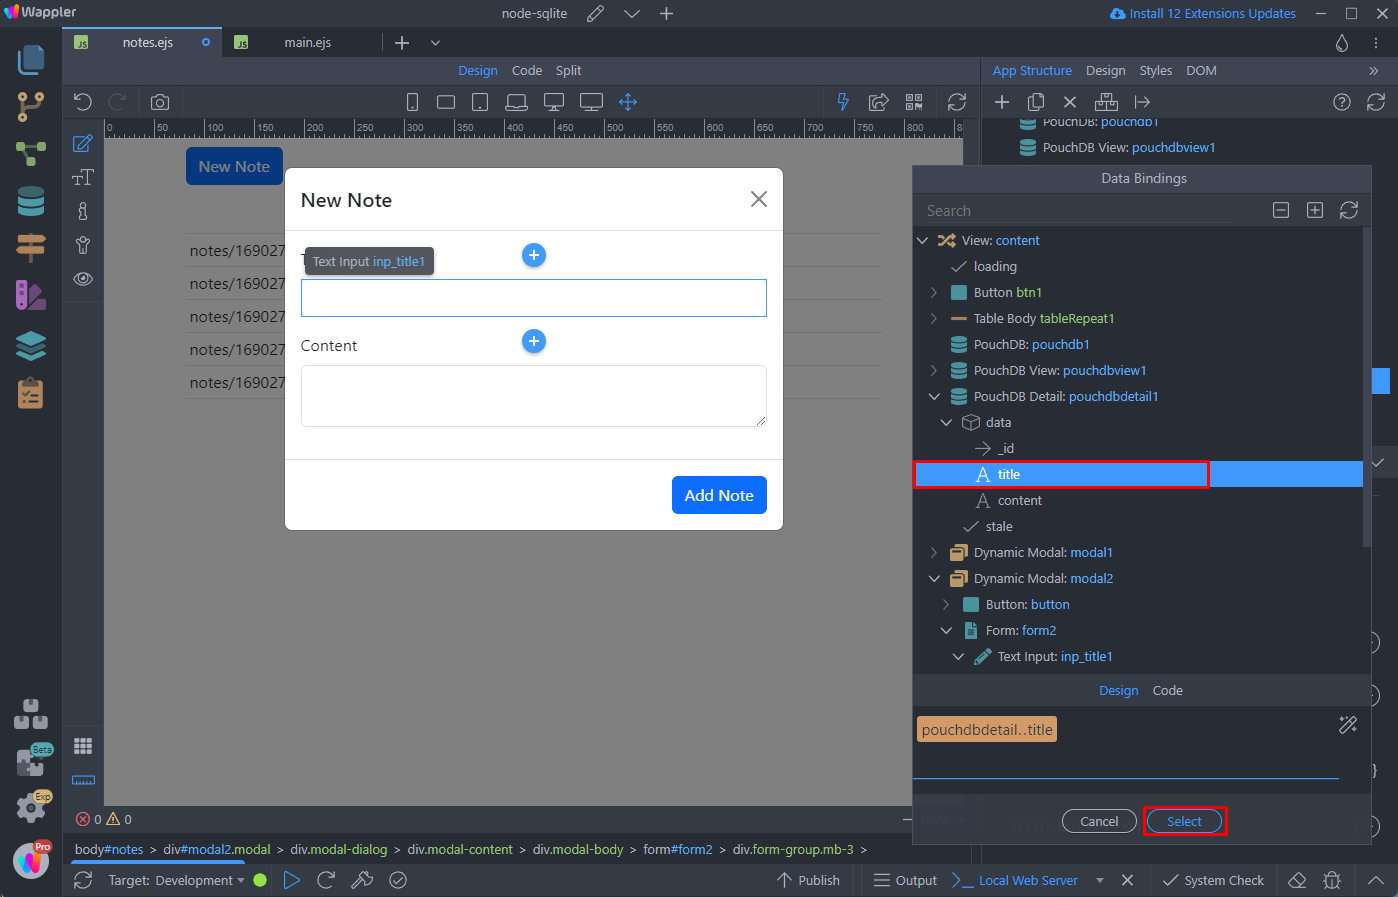
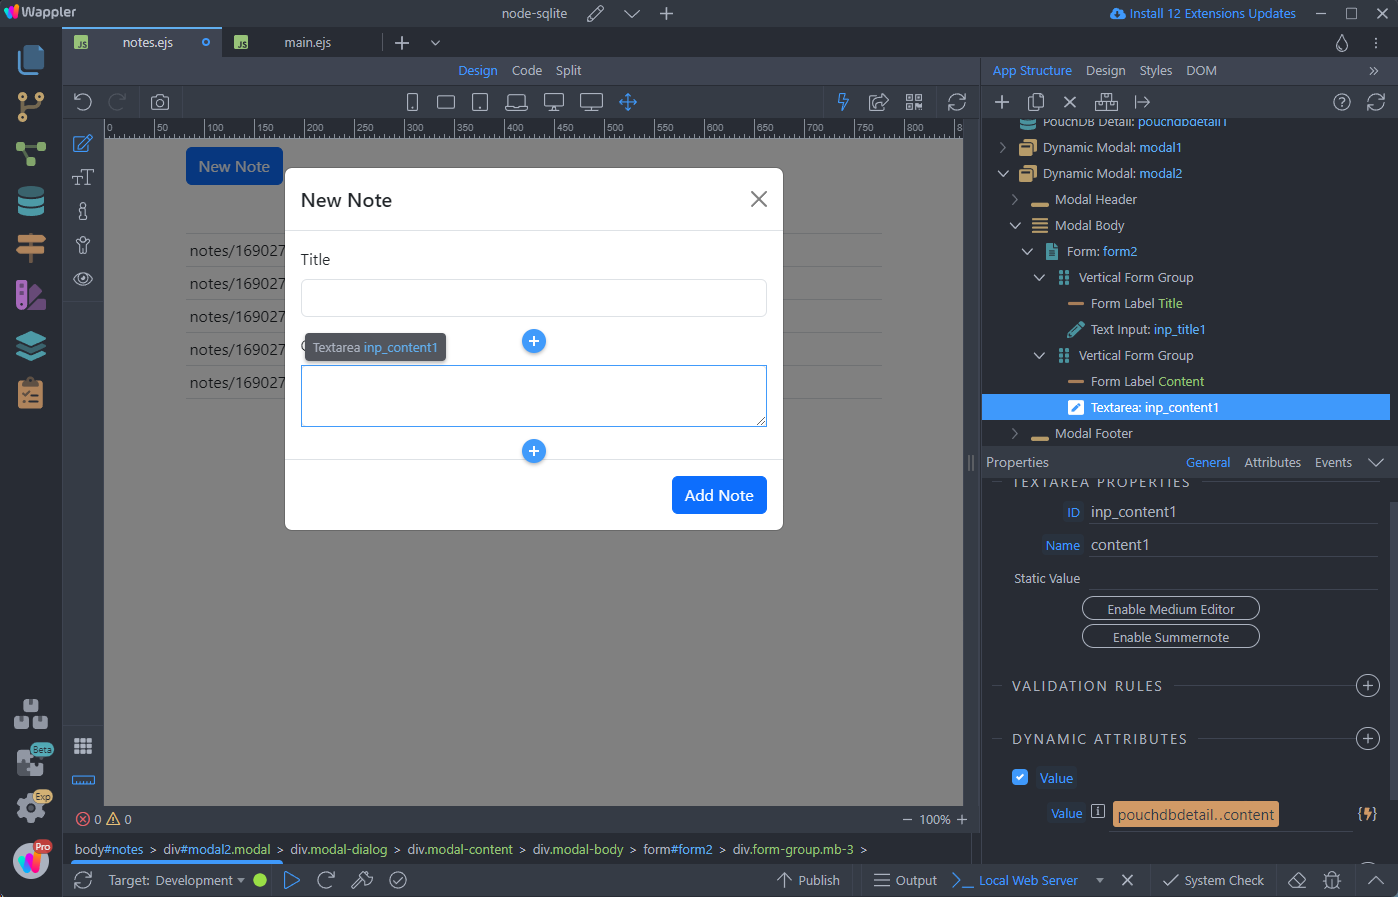
We do the same for the Content text area, picking the content value returned by the PouchDB Detail component:
We change the title and button texts so they say Update Note:
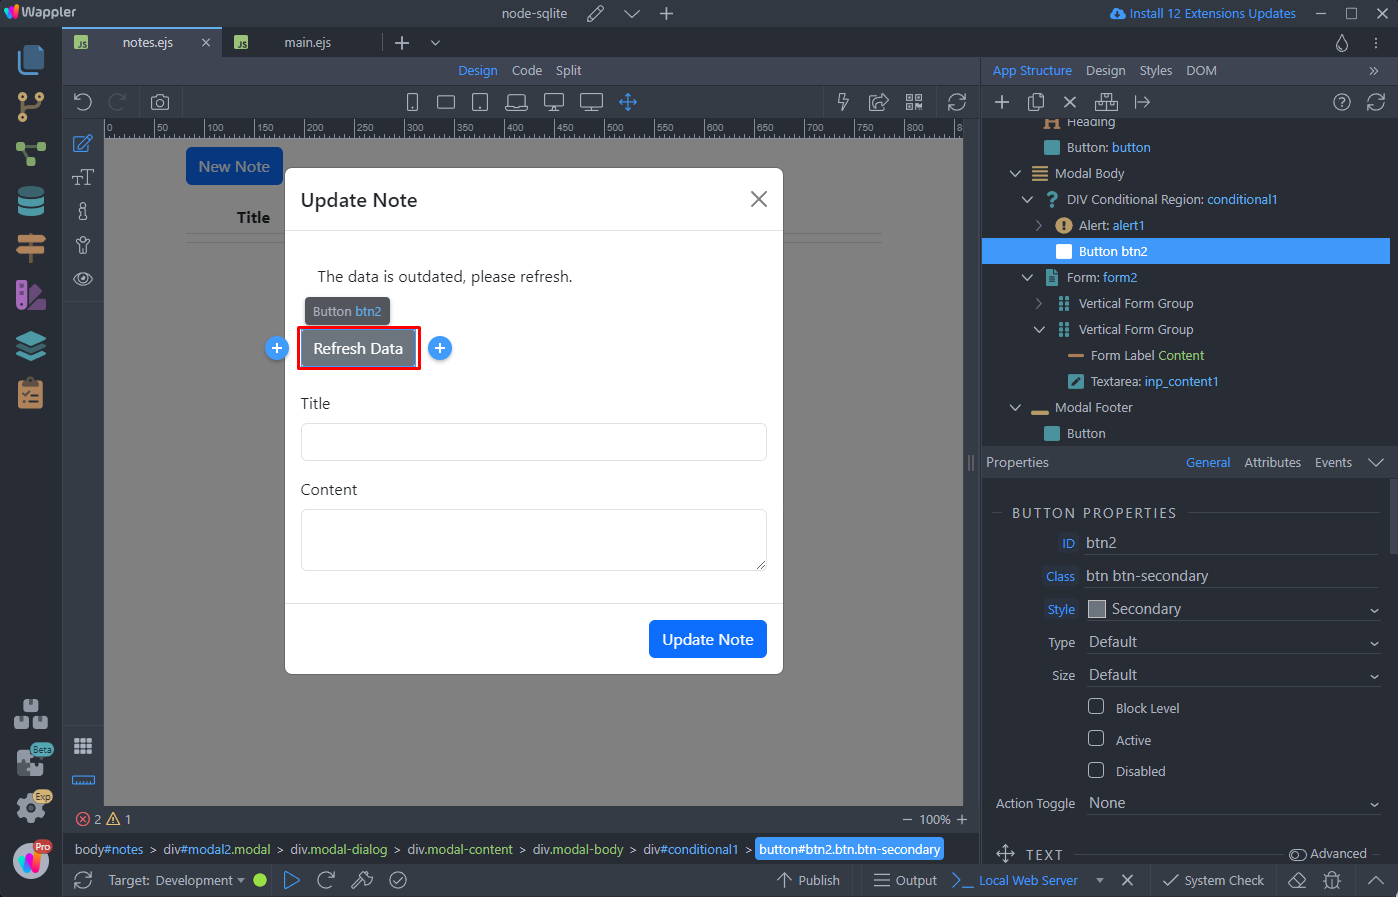
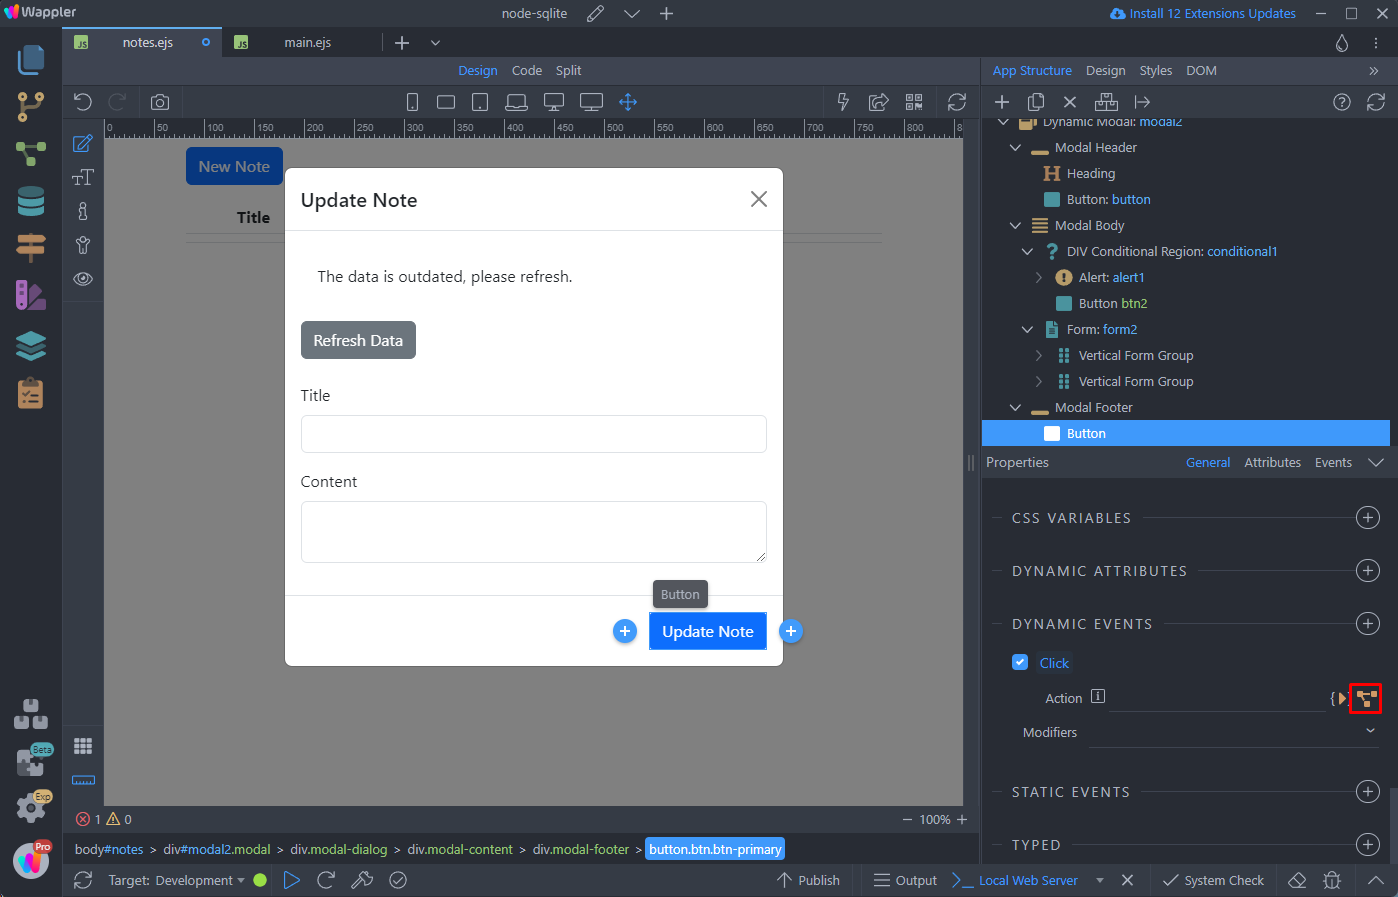
Next, let’s add a conditional region which will show some notification and a refresh data button, when the data users are editing is outdated and already updated by someone else. Click Modal Body and add new component inside:
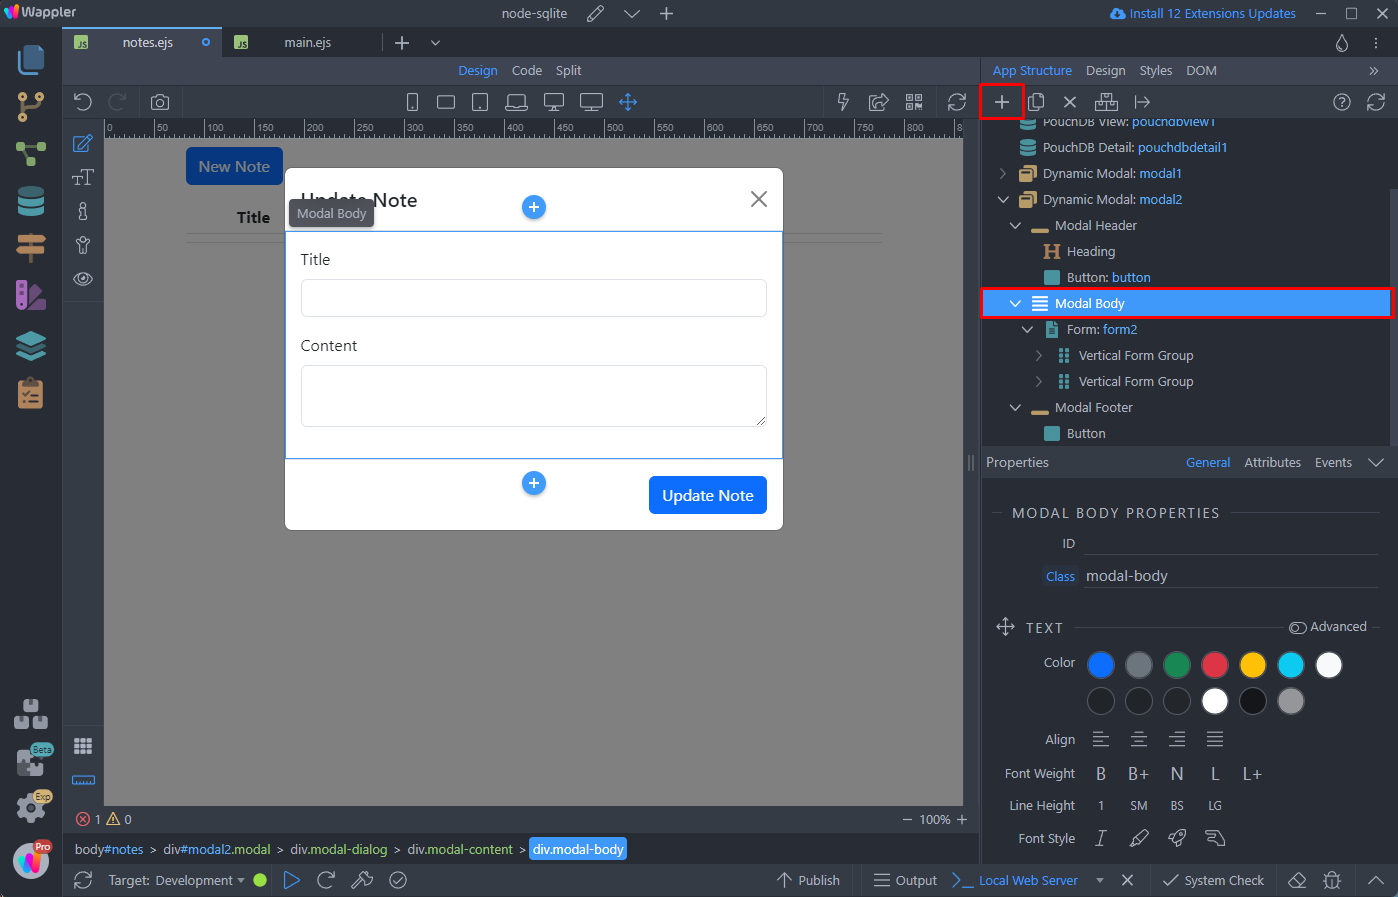
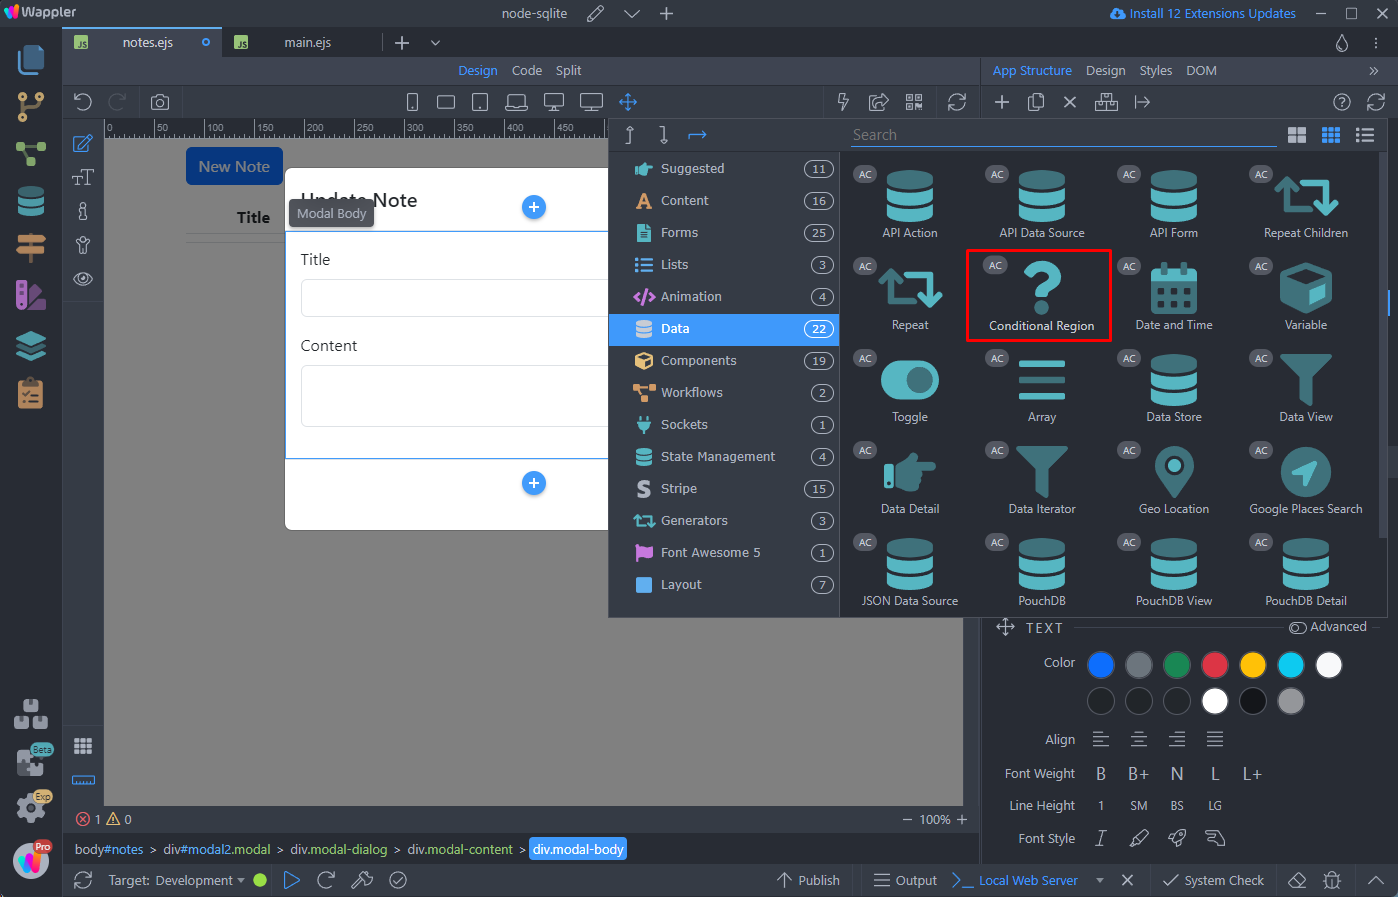
Add a Conditional Region:
Click the dynamic data picker in order to pick a condition:
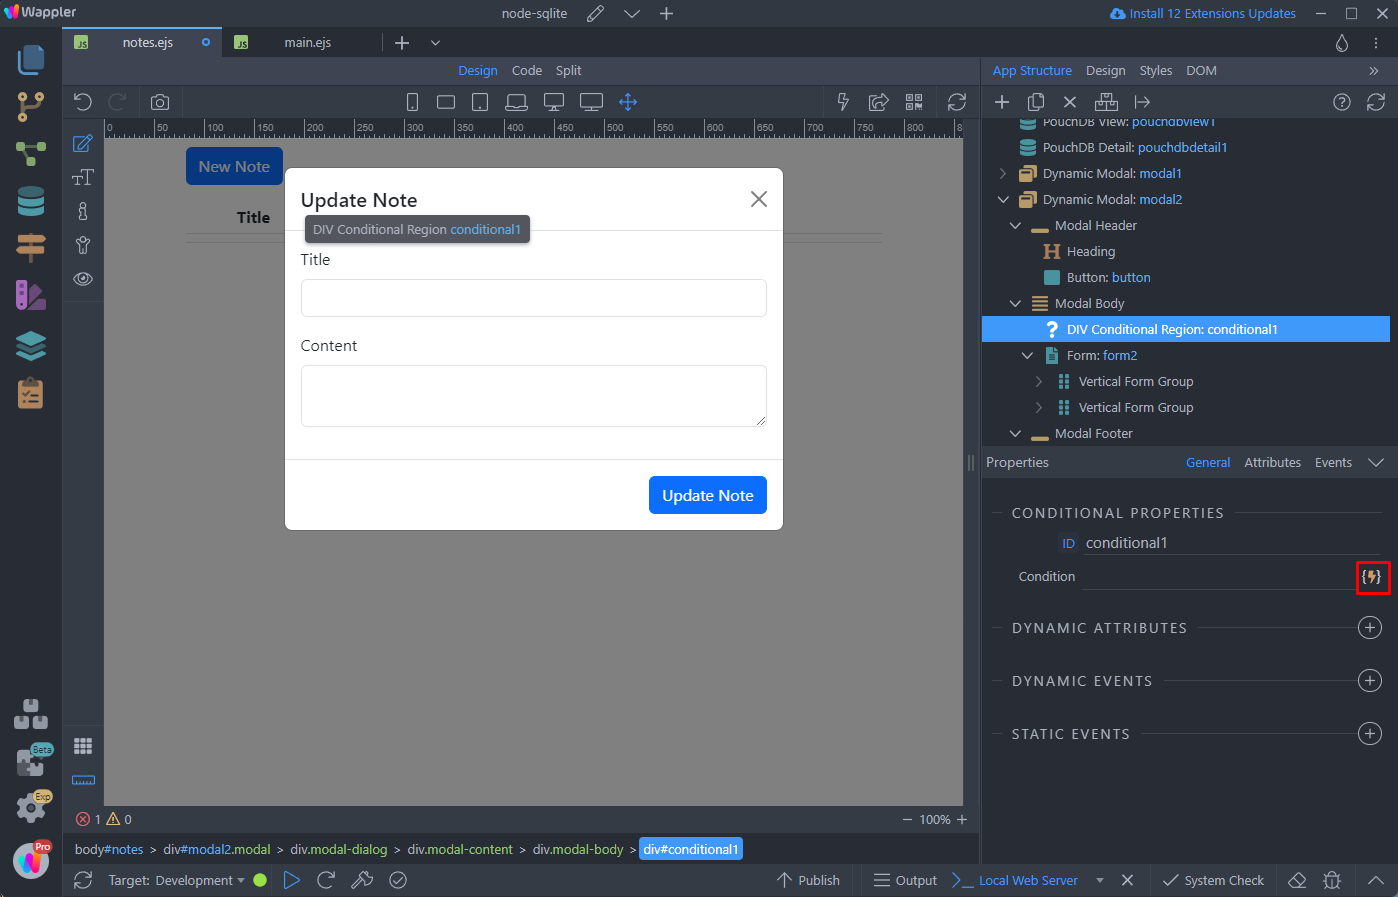
Under the PouchDB Detail component, select stale - this will be true, when the data is outdated:

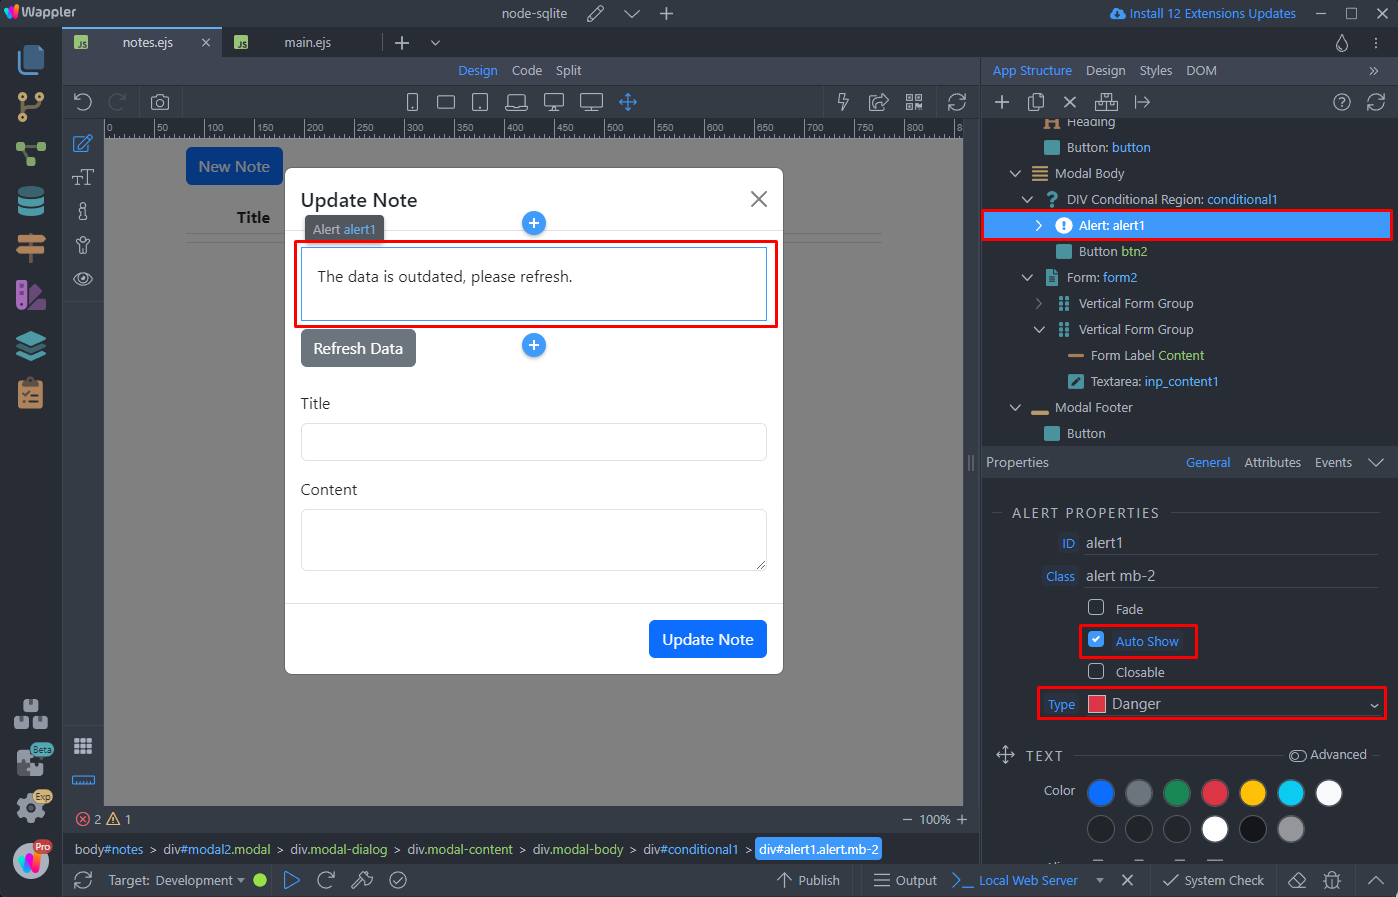
And inside the Conditional region we add an alert and a button.
Tip: turn the App Connect mode off, so you can see inside the conditional region.
Change the default alert text, to something that notifies the user that the data is outdated. Enable Auto Show and set its style to Danger:
We enter Refresh Data inside the button:
With the button selected, add new Dynamic Event:
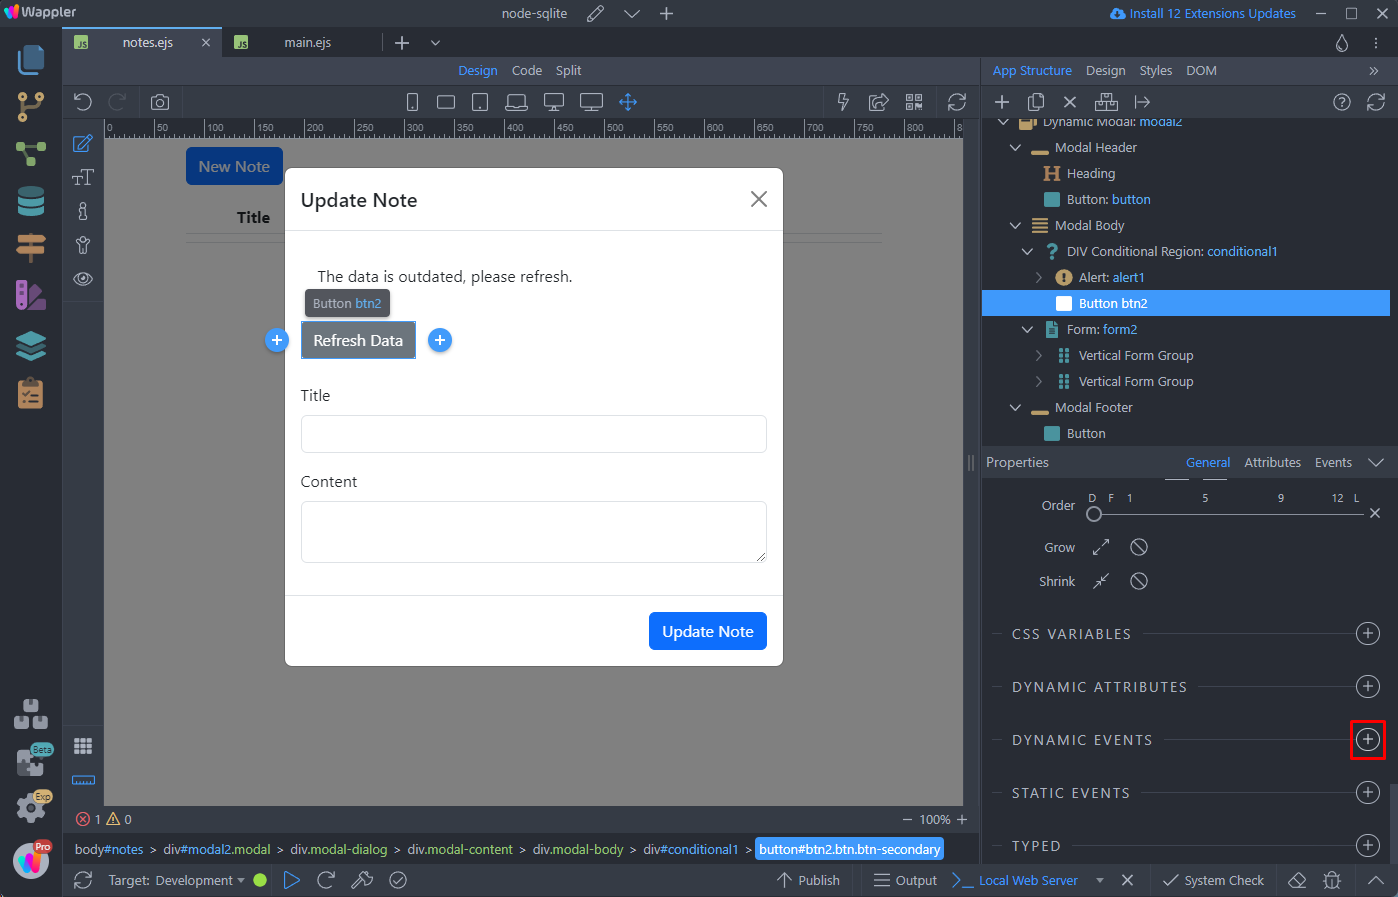
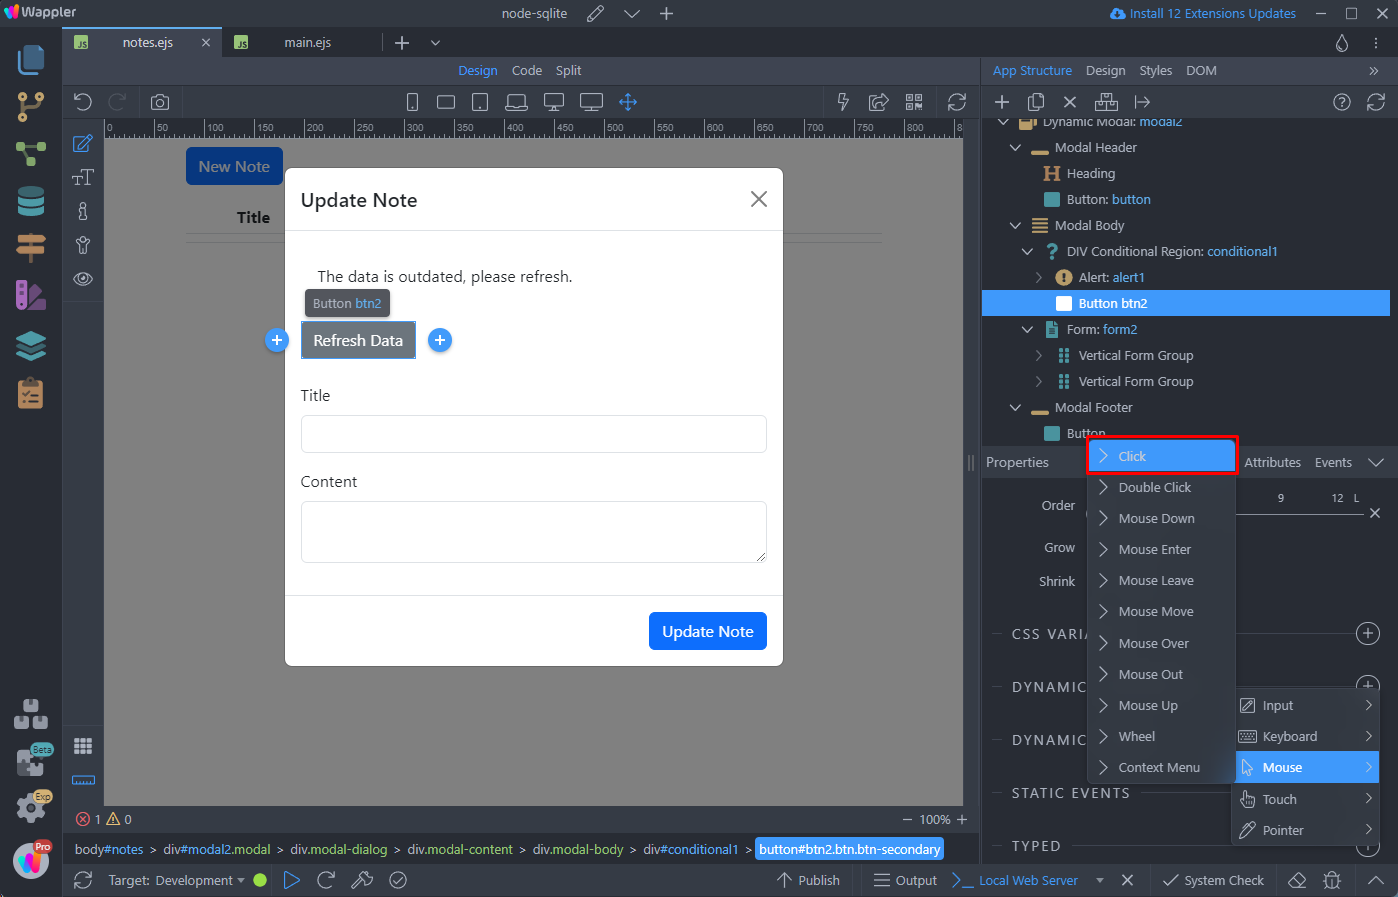
Select Mouse > Click:
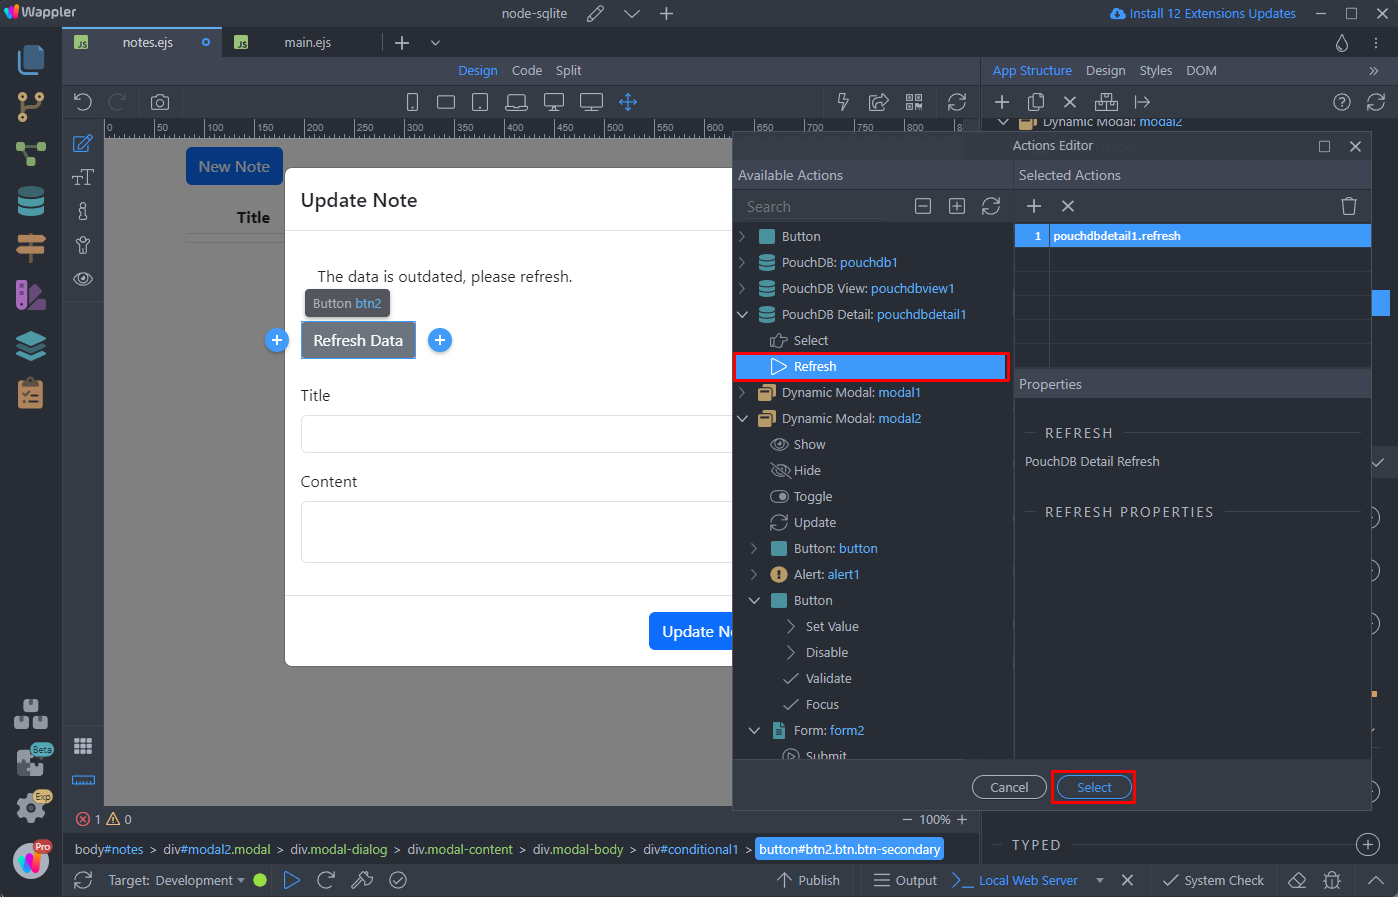
And click the dynamic action picker button:

We want to refresh the PouchDB Detail component and get the latest data. So under PouchDB Detail select and add Refresh:
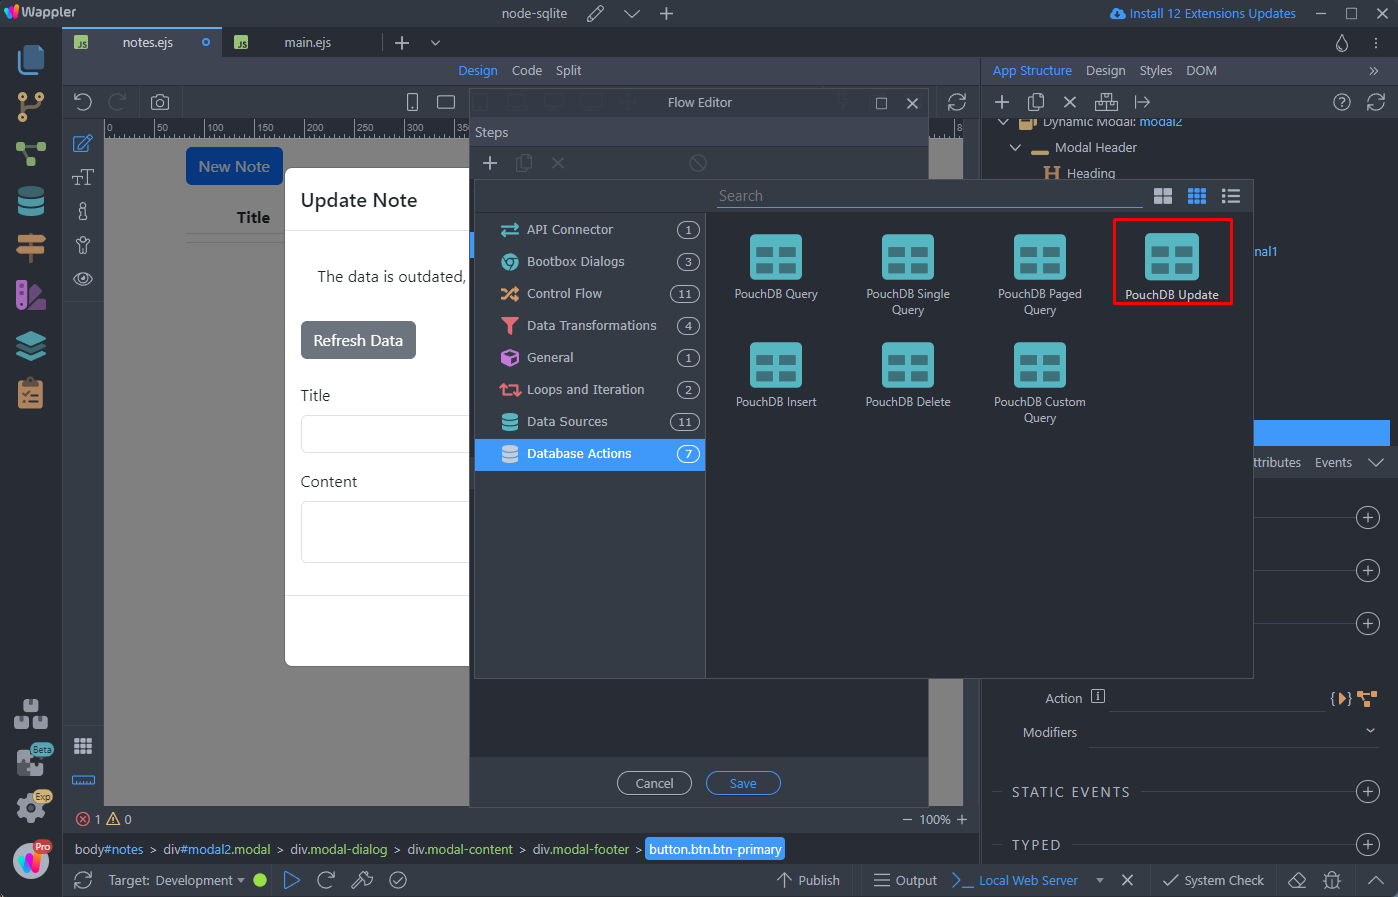
Now, select the Update Note button and remove the inline flow, which will be there, because we duplicated this modal:

Add a new inline flow:
Add new action in the flow dialog:

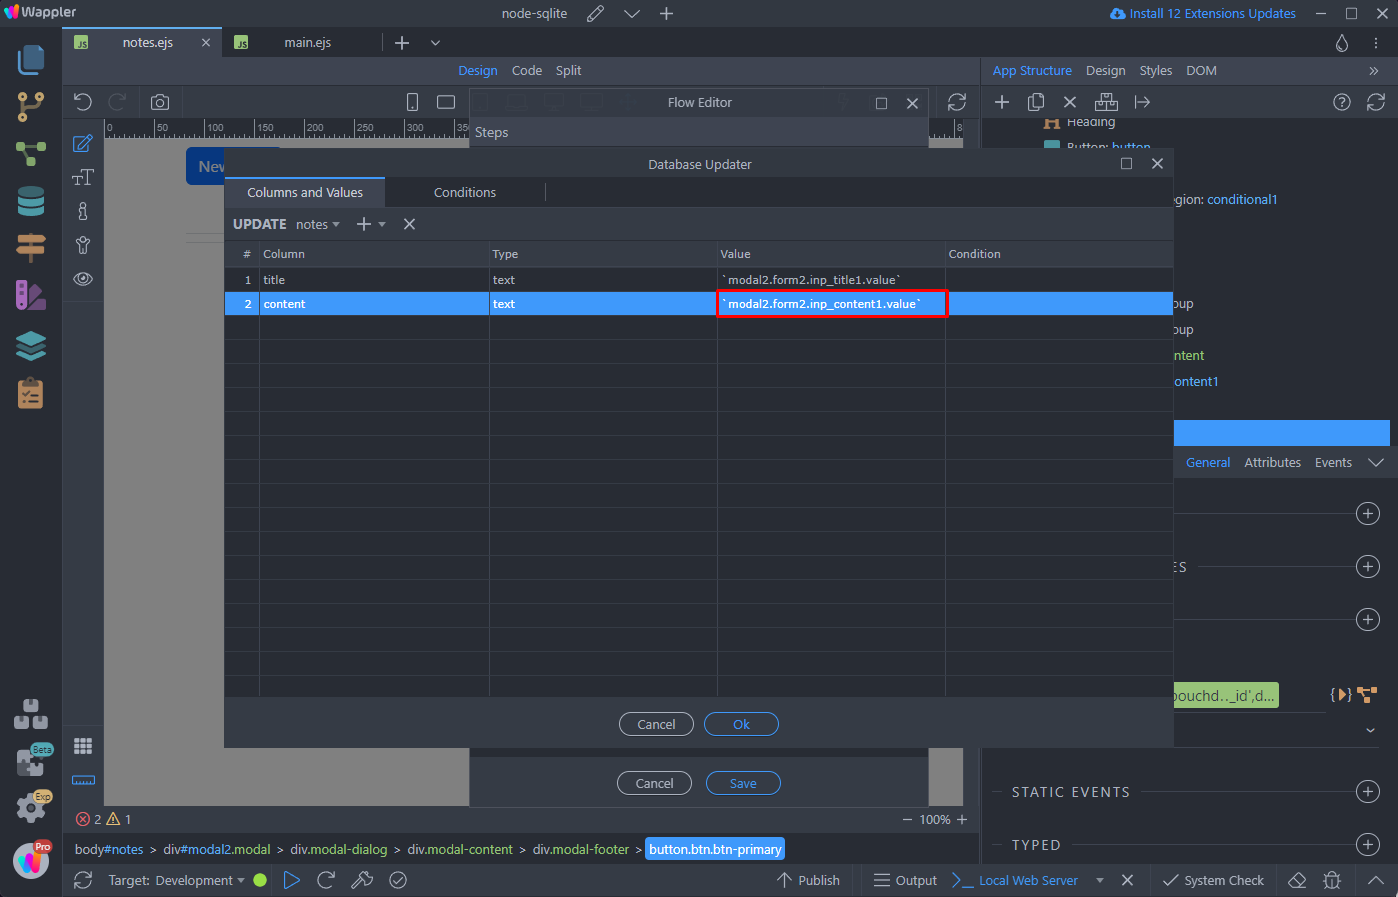
Open Database Actions and select PouchDB Update:
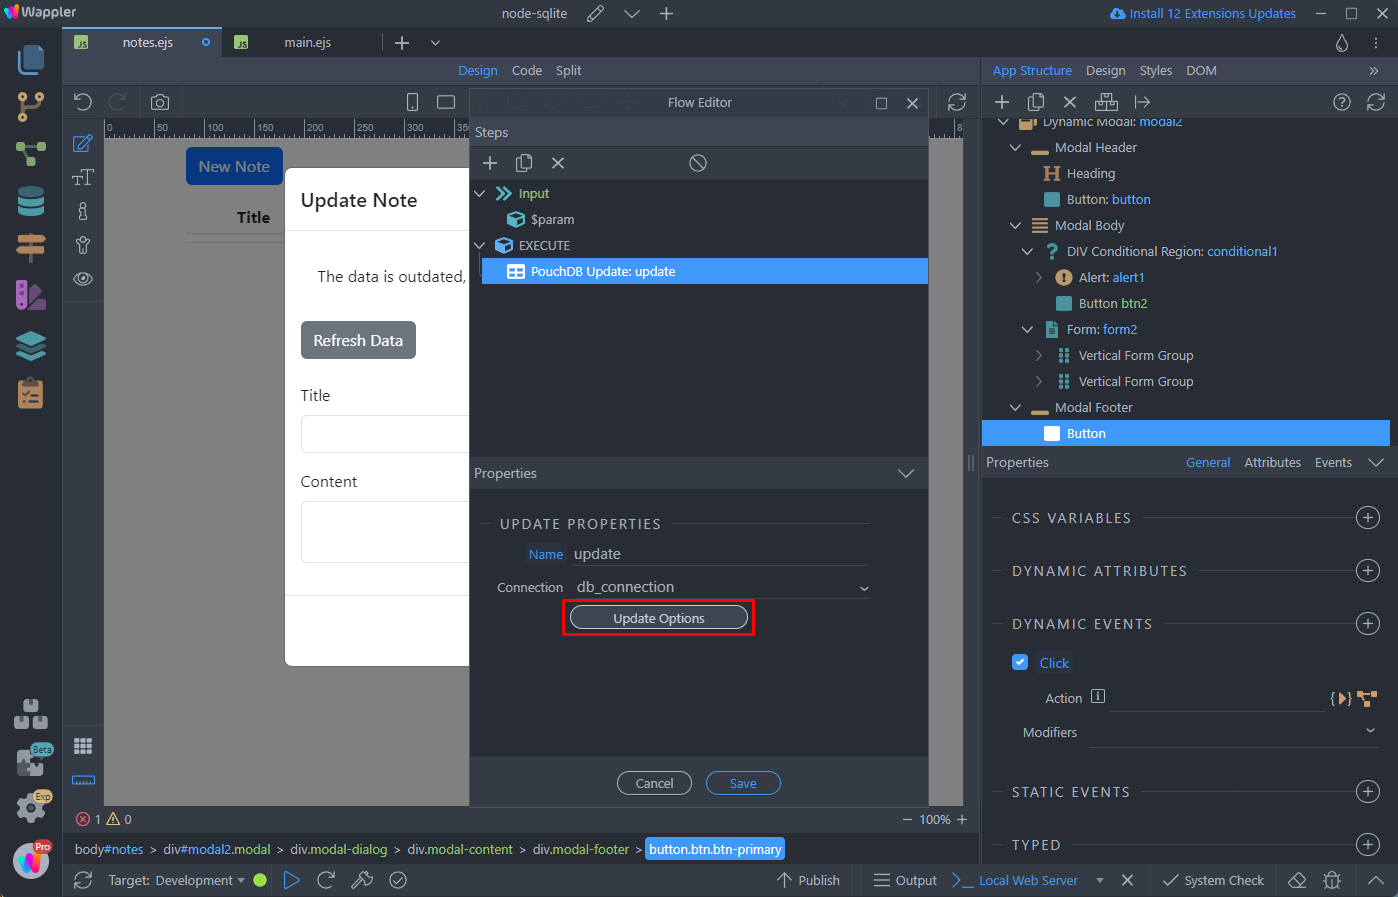
Select your database and click Update Options:
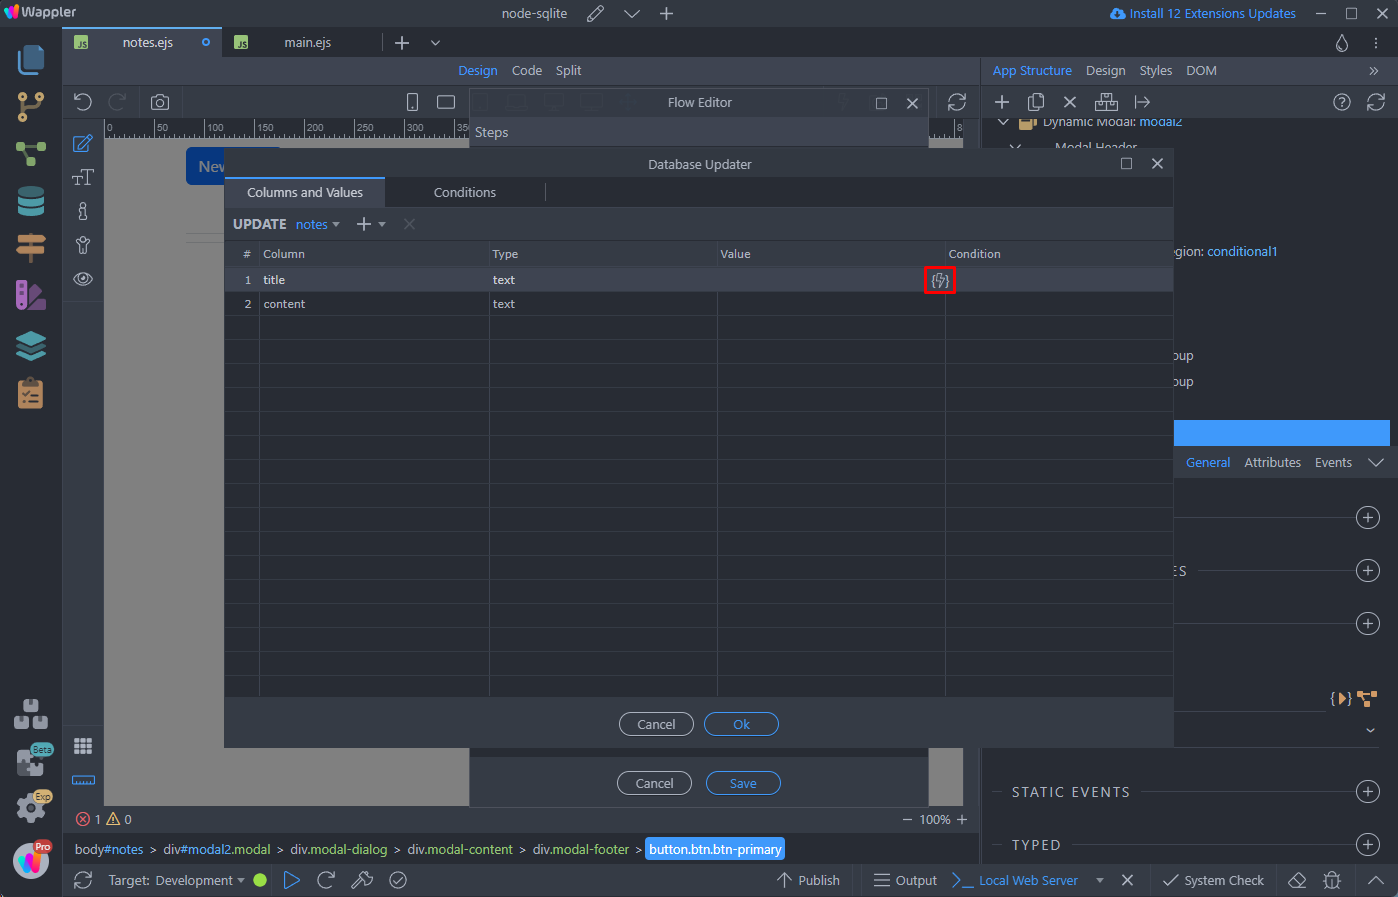
Select the notes collection:

And click the dynamic data picker for the title field:
Pick the title input value, from the update note modal:
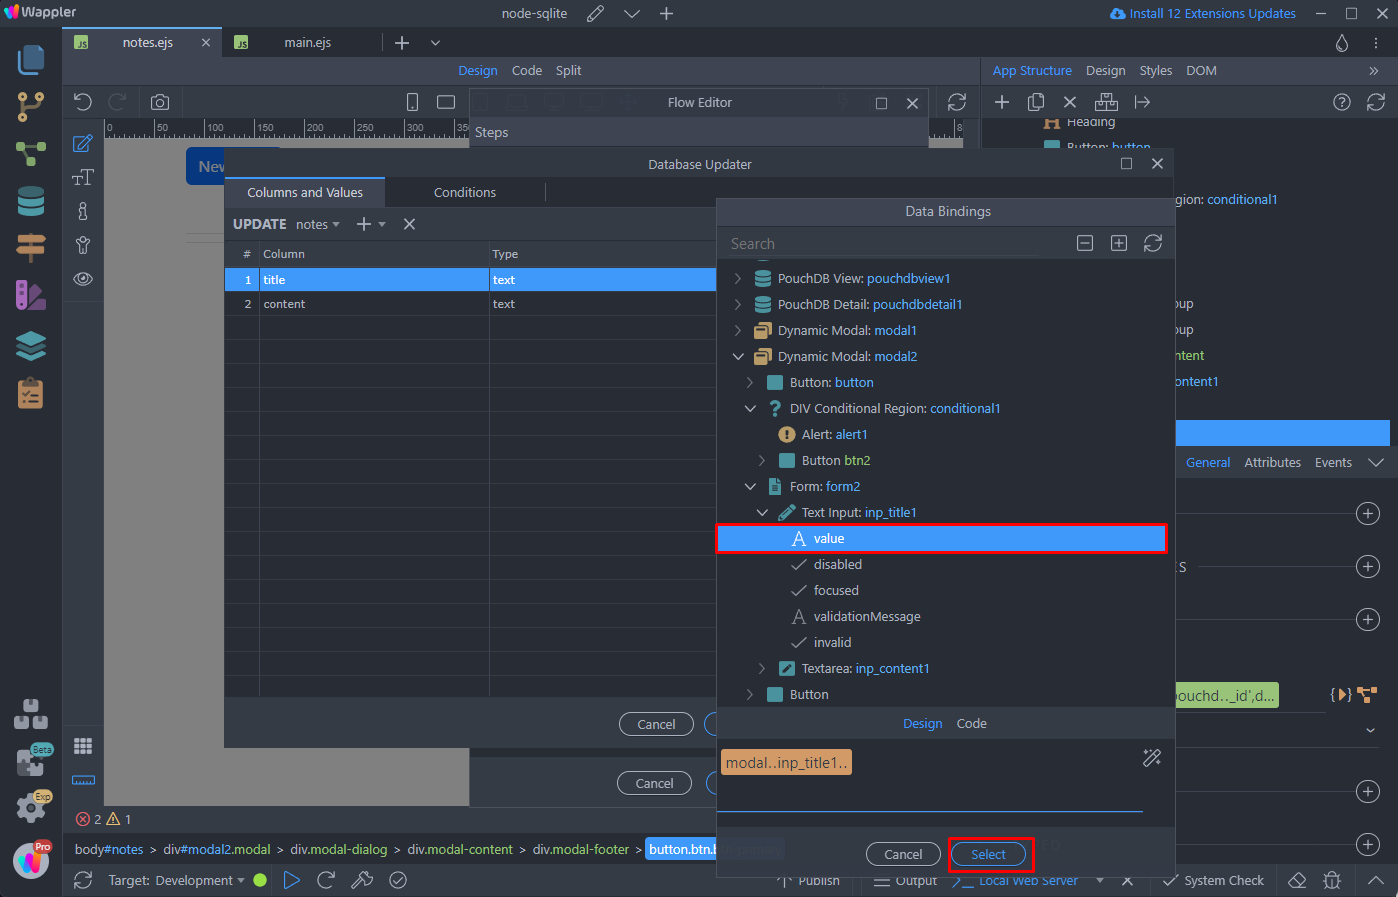
Do the same for the content field:
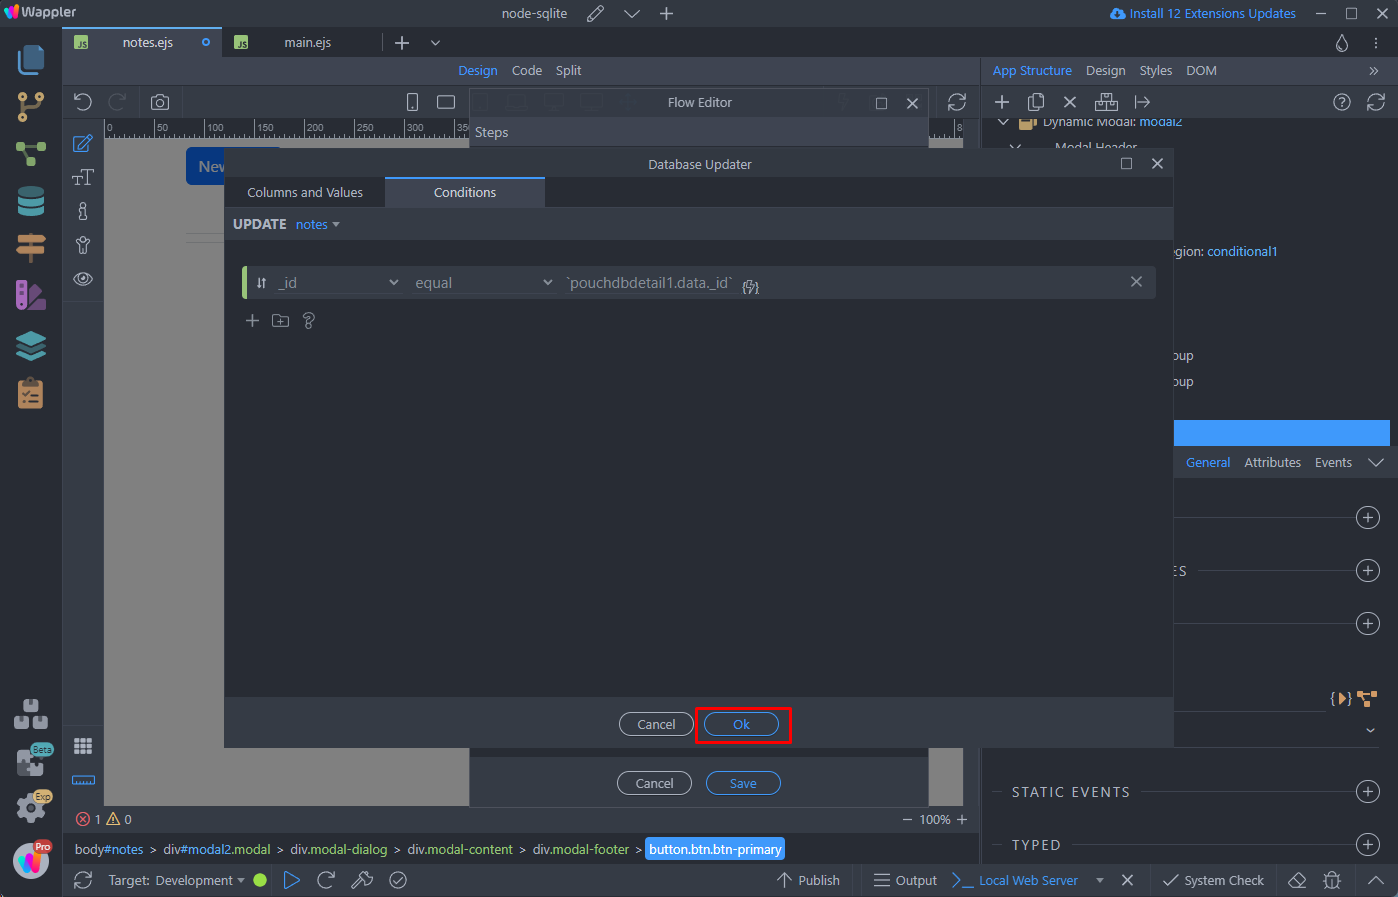
Open the Conditions tab:
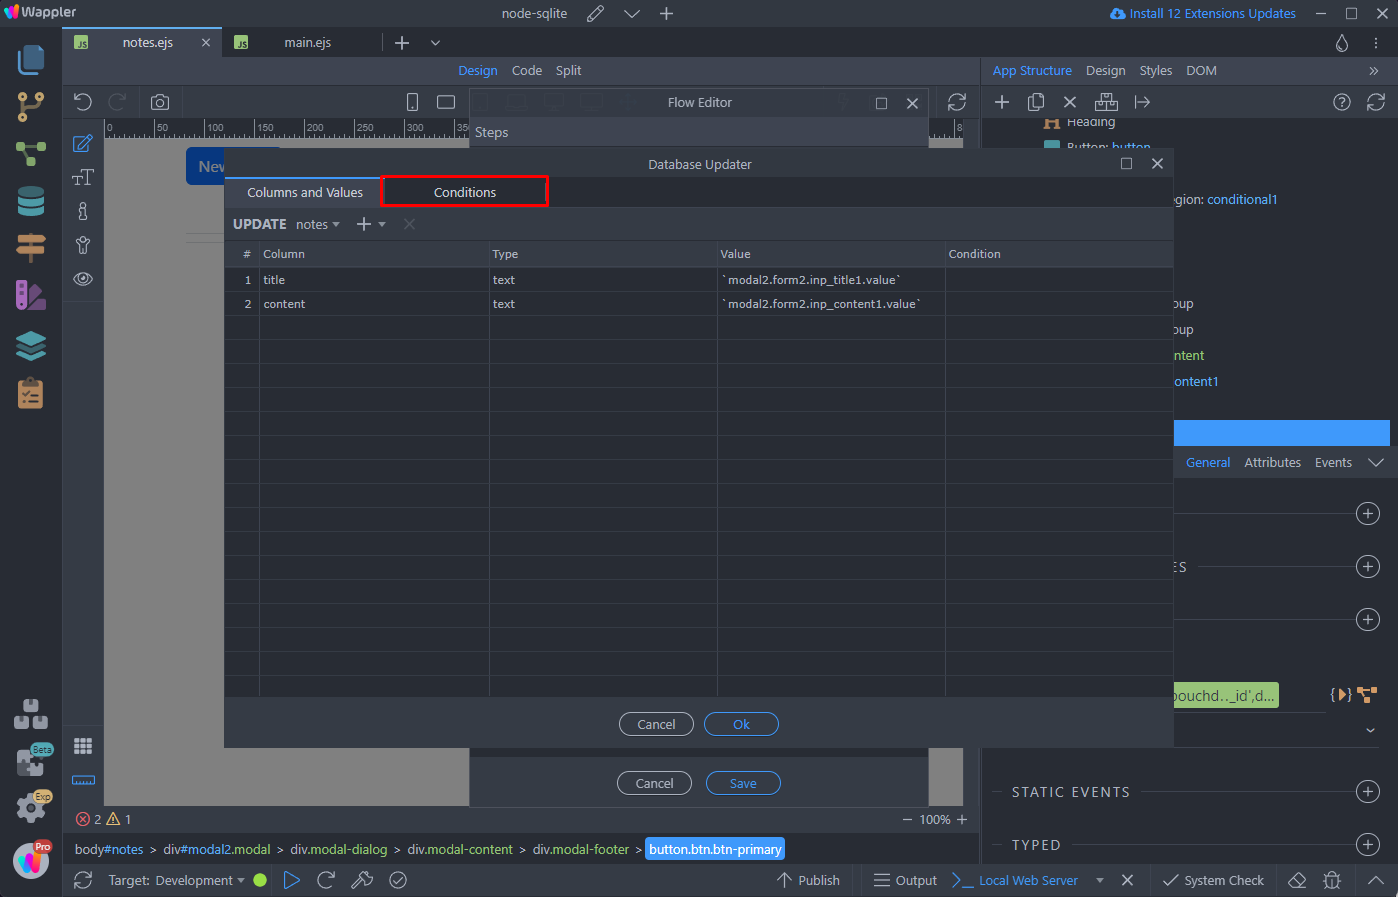
Here, we need to assign a value for the ID of the record being updated:
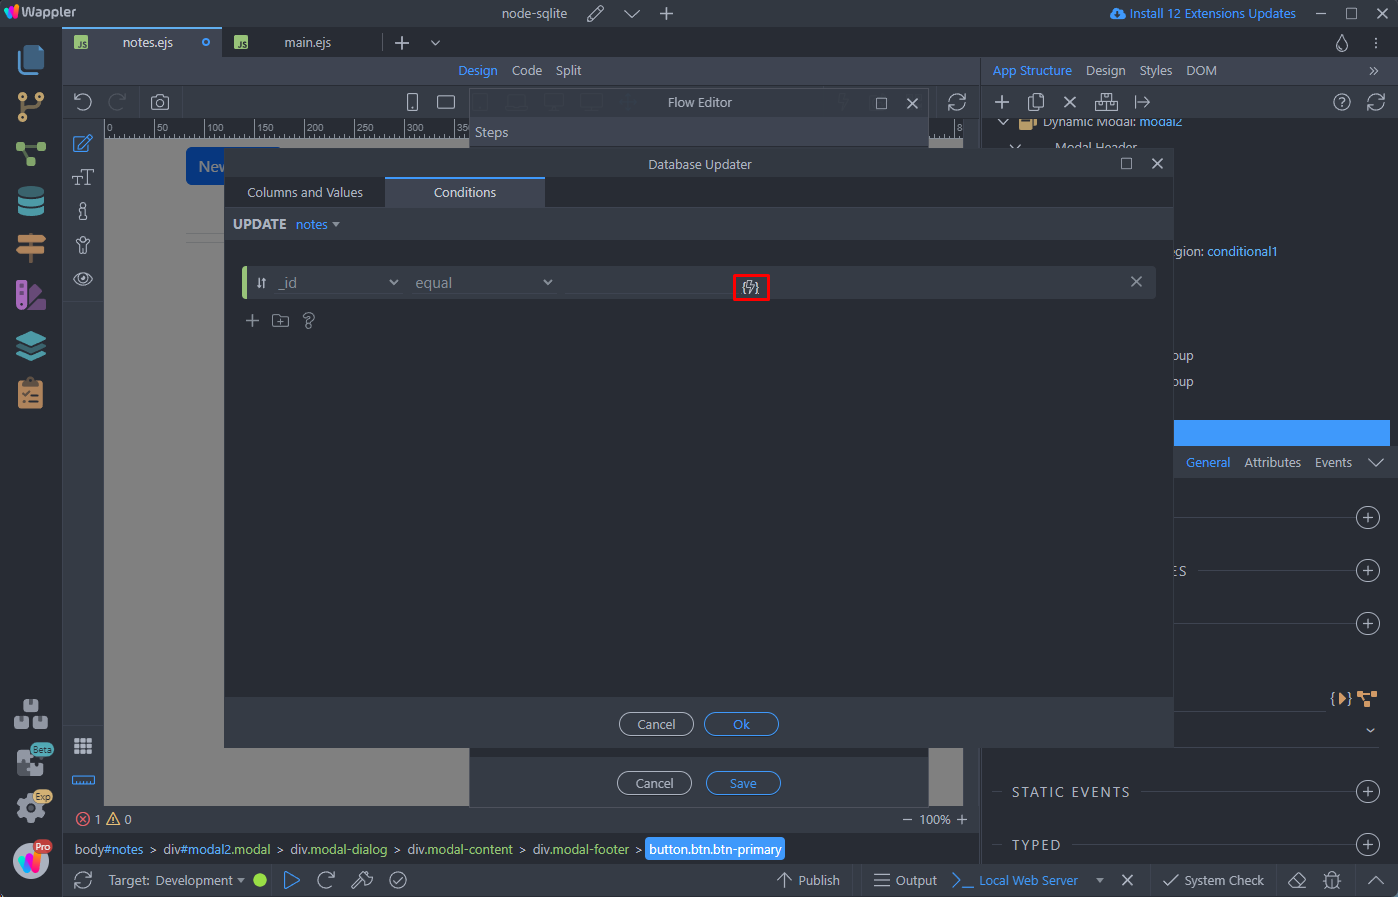
Select the _id returned from the PouchDB Detail component:
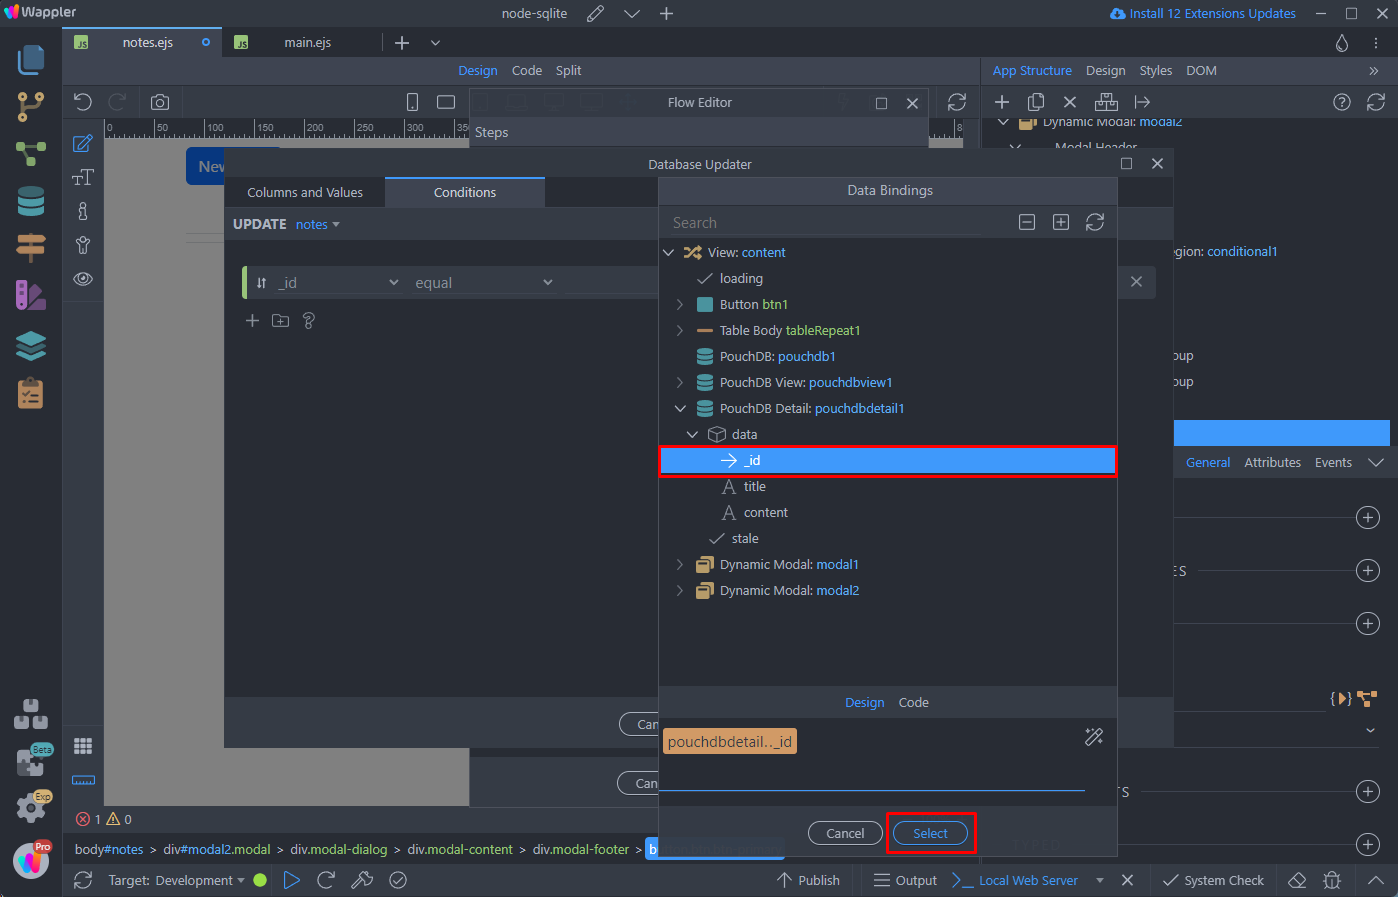
Click OK:
Next, we need to close the modal when the update is done. Add a new action:

Select Control Flow > Run:
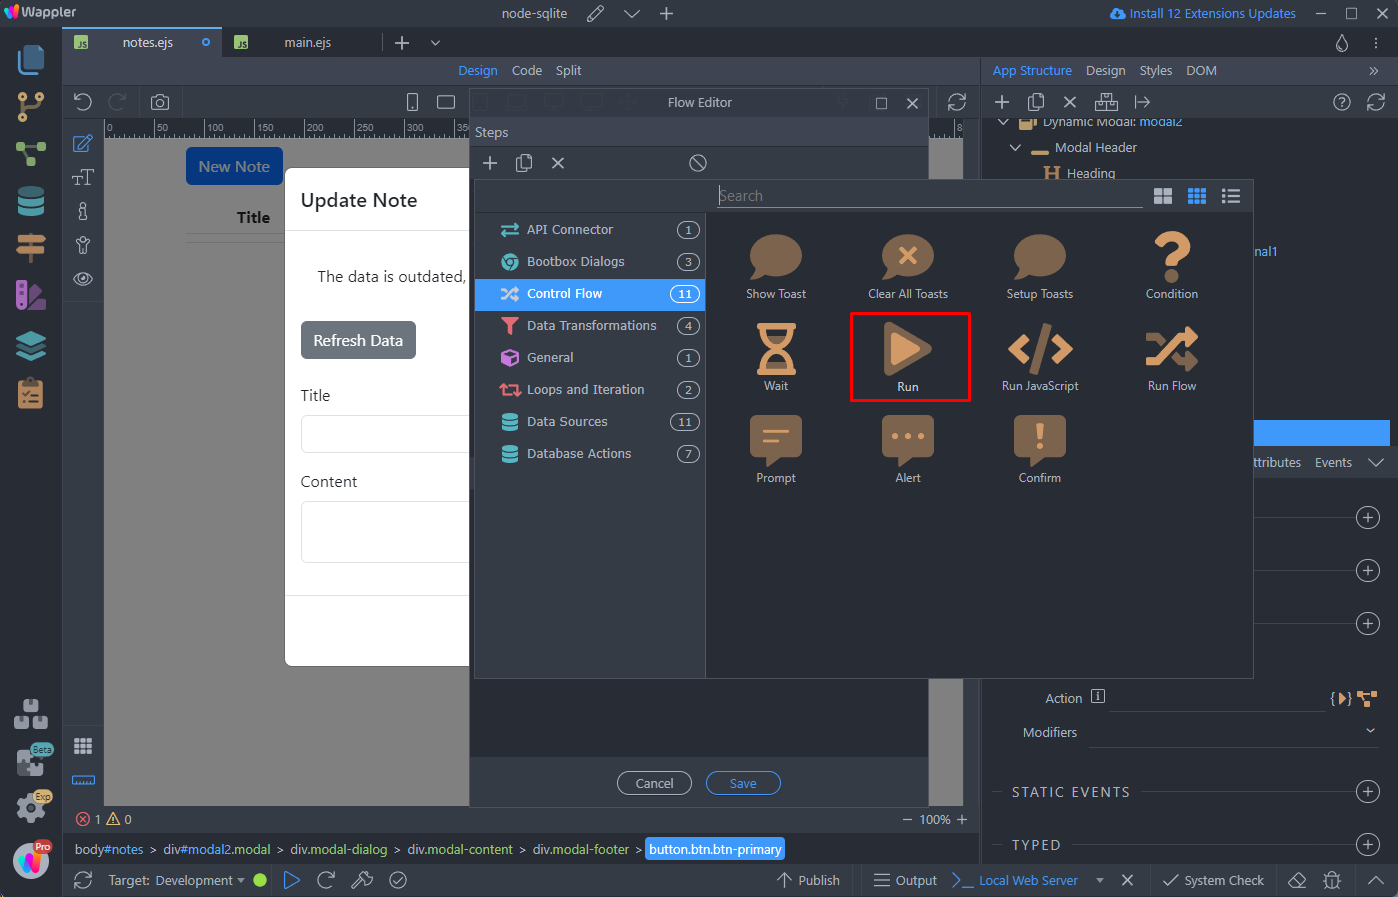
And select an action:
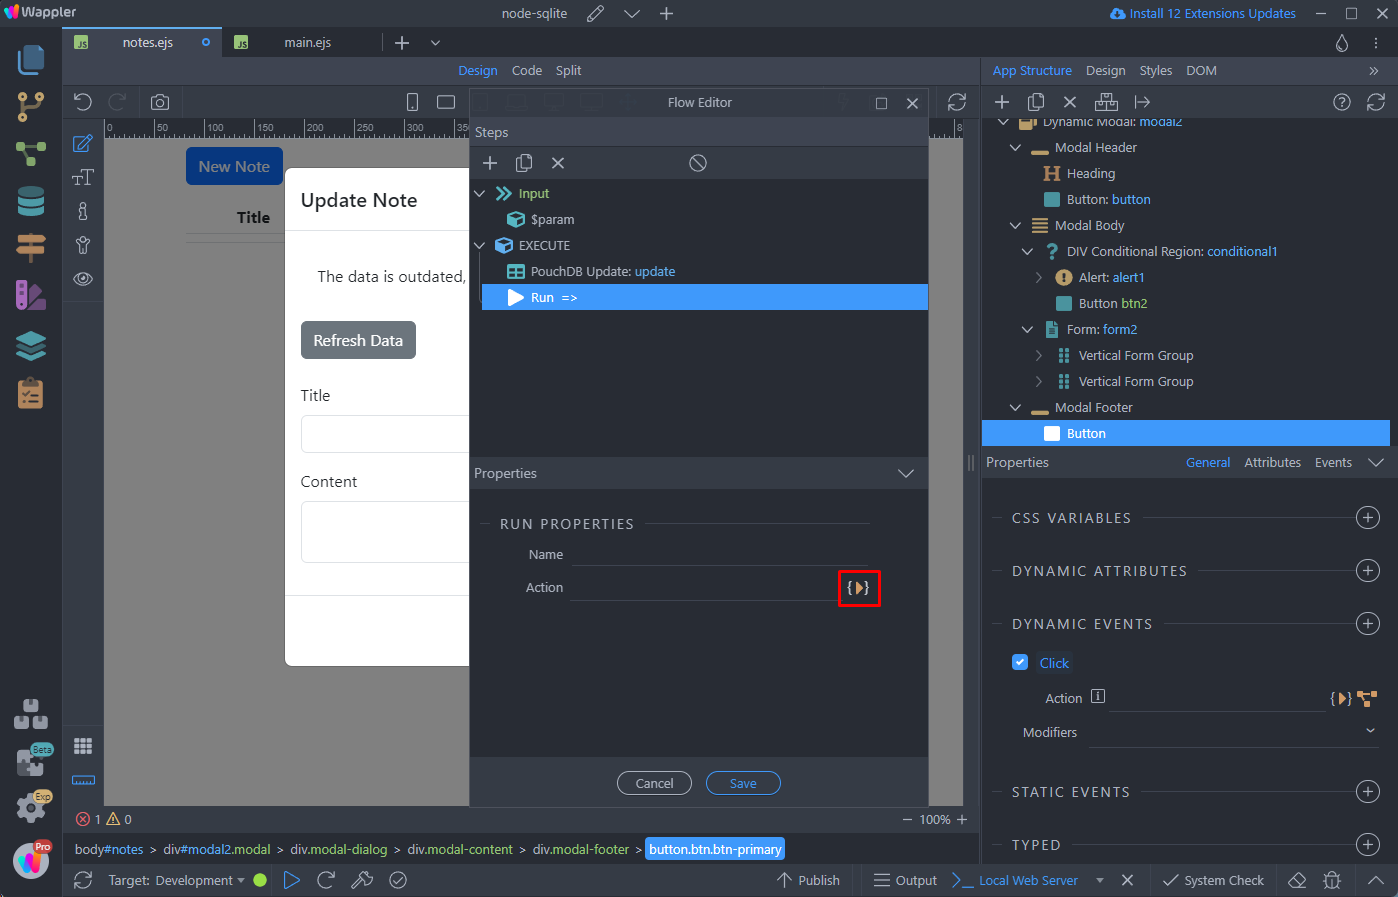
Under the update modal select Hide:
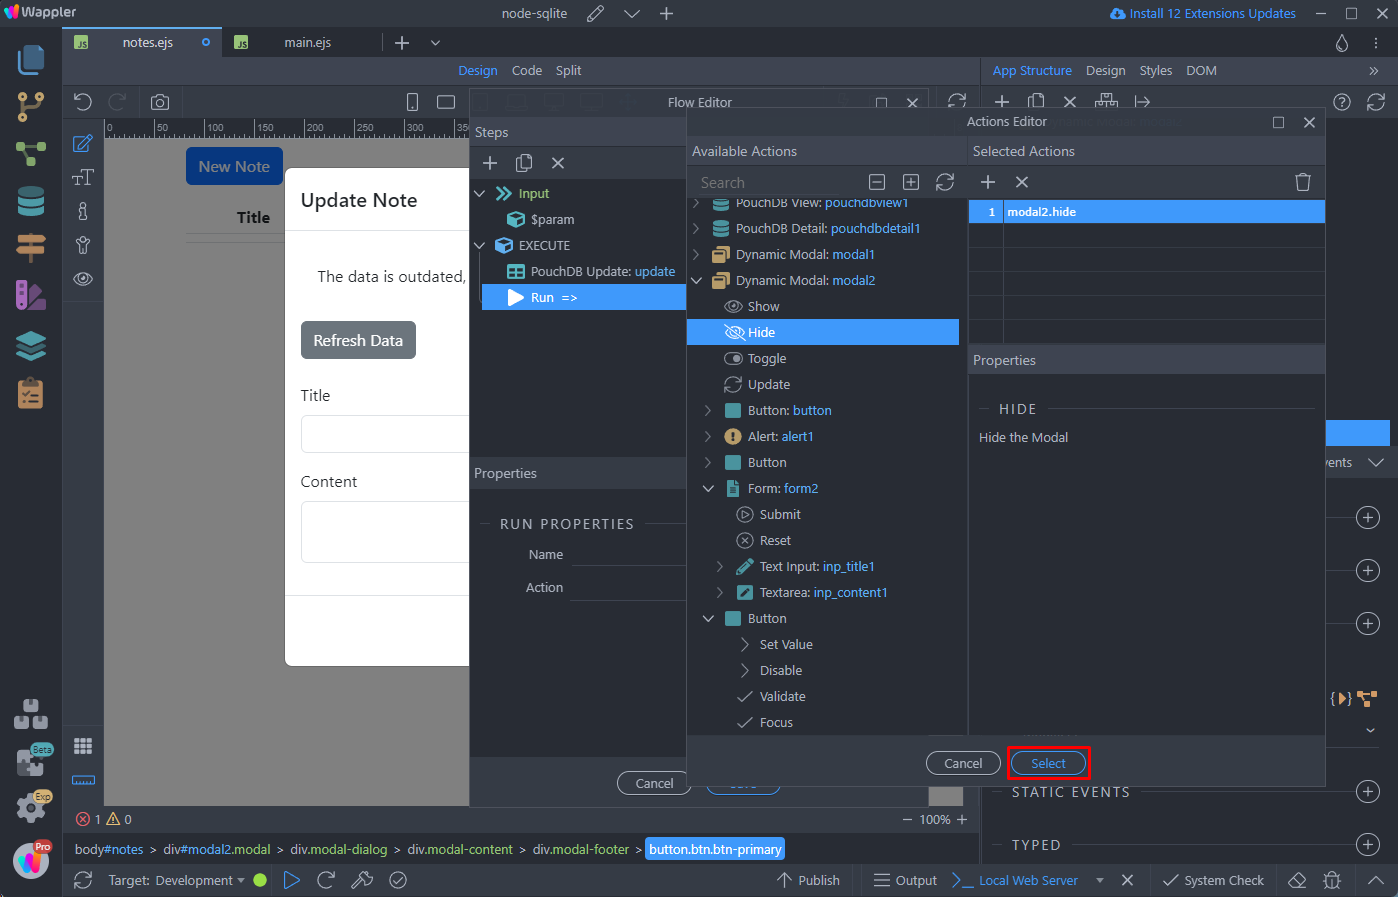
And click Save:
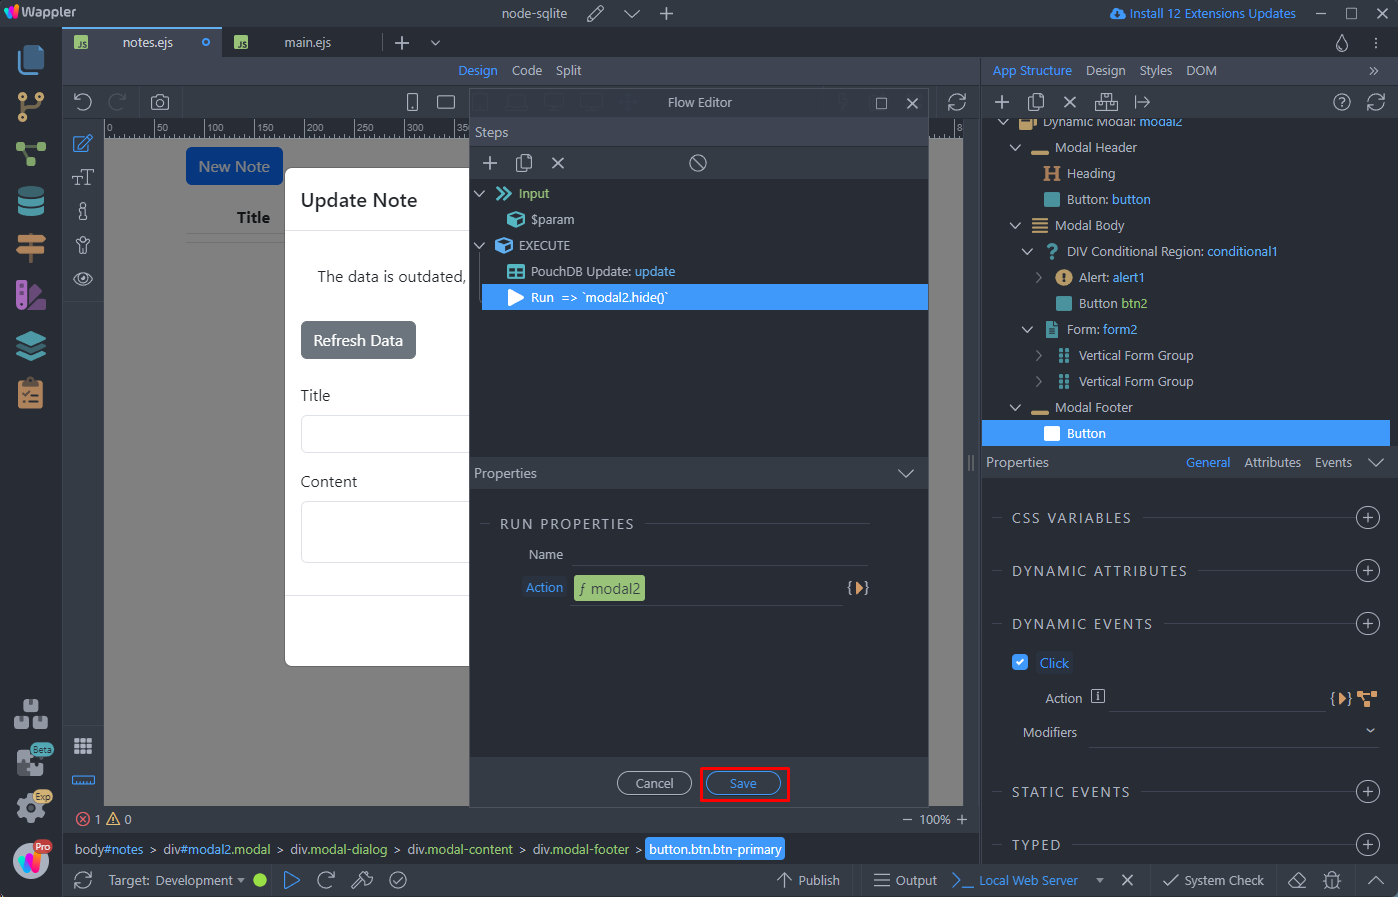
We are done setting the update note flow:
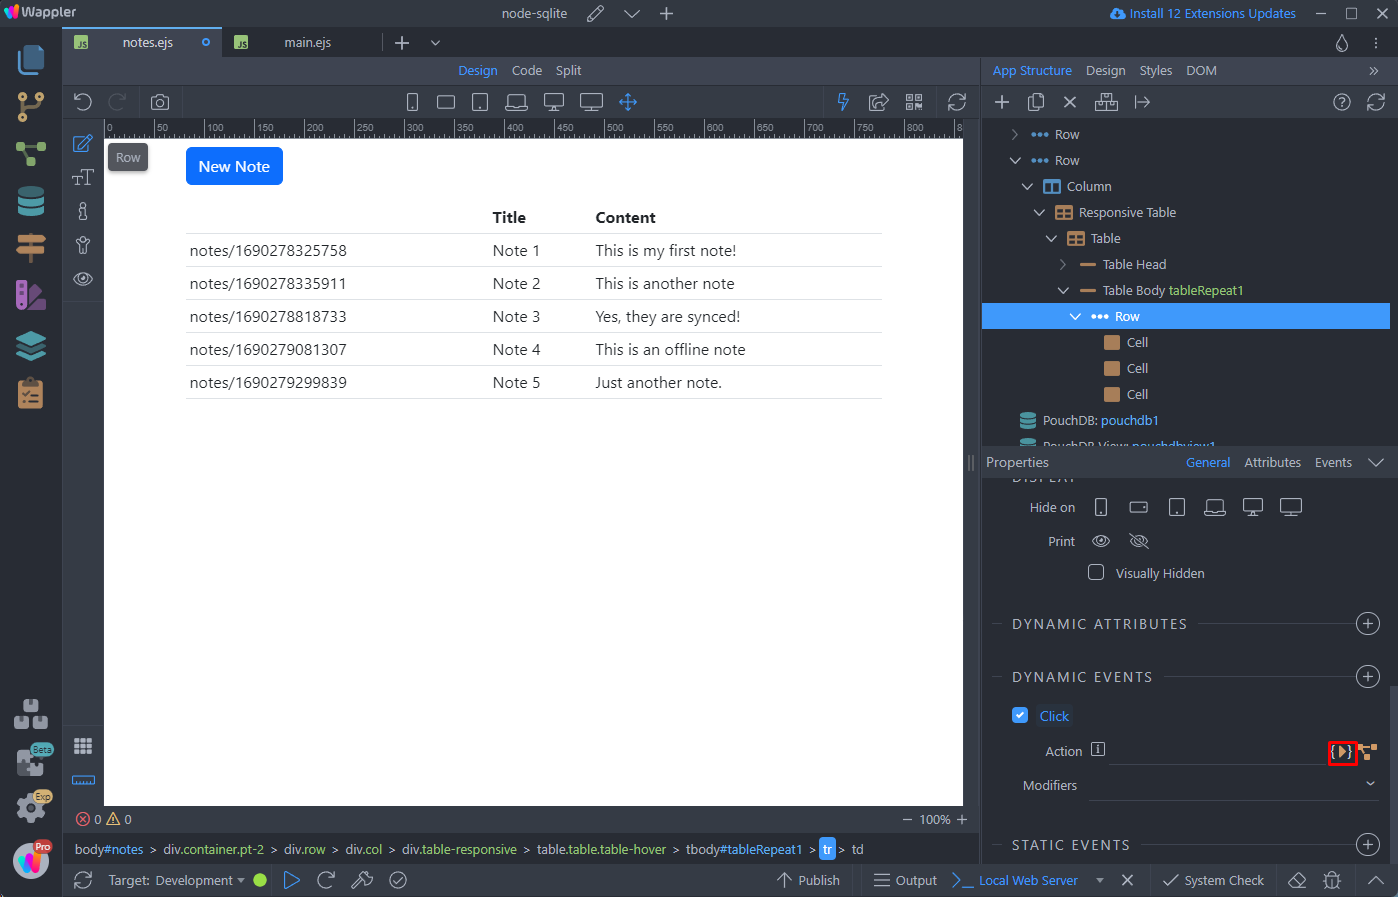
The next step is to open the Update Note dialog, when a record in the dynamic table is clicked. Select the row element of the dynamic table and add new Dynamic Event:
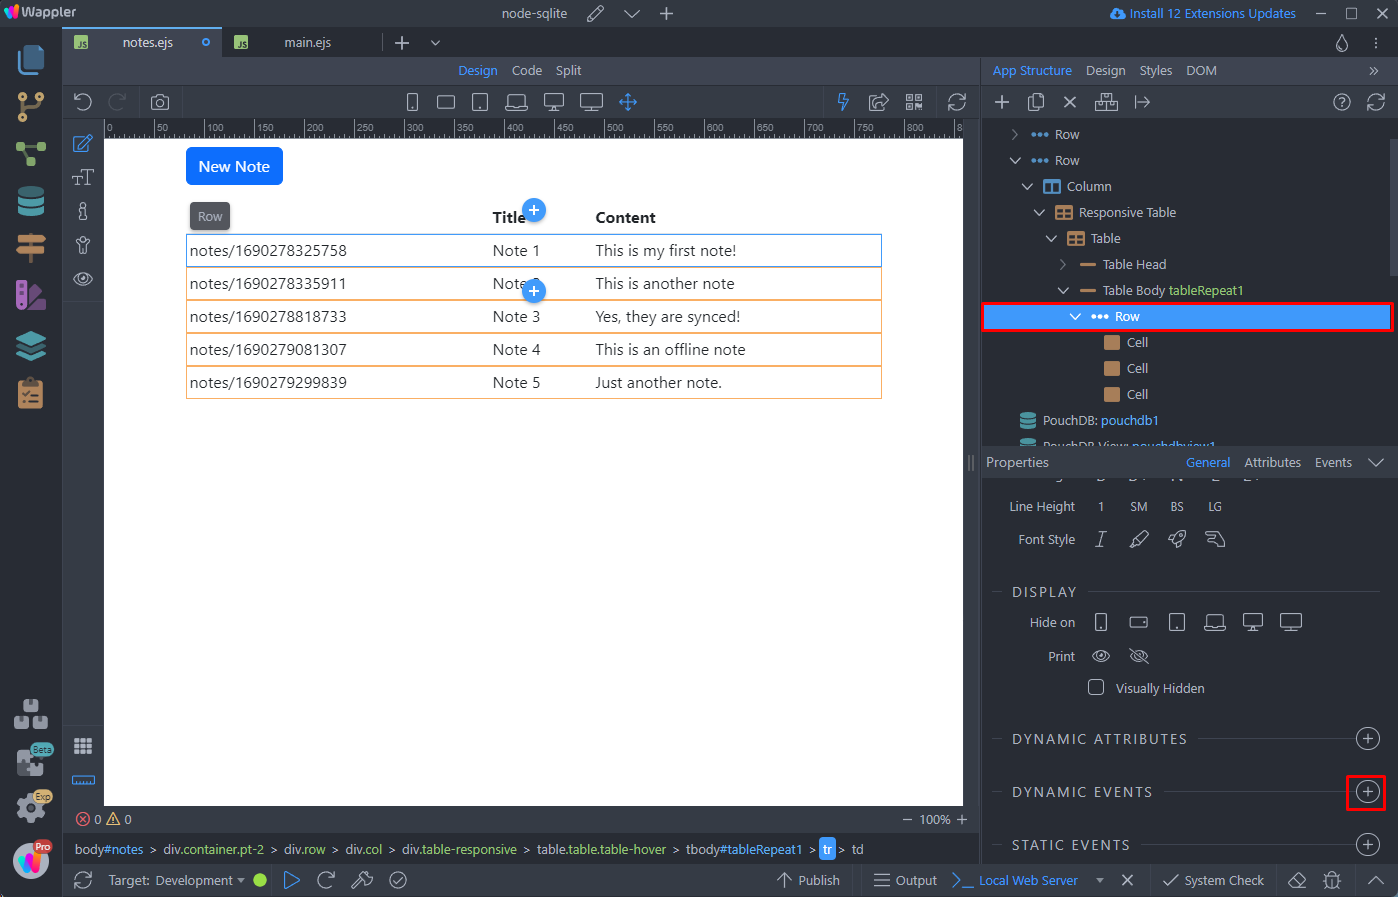
Select Mouse > Click:
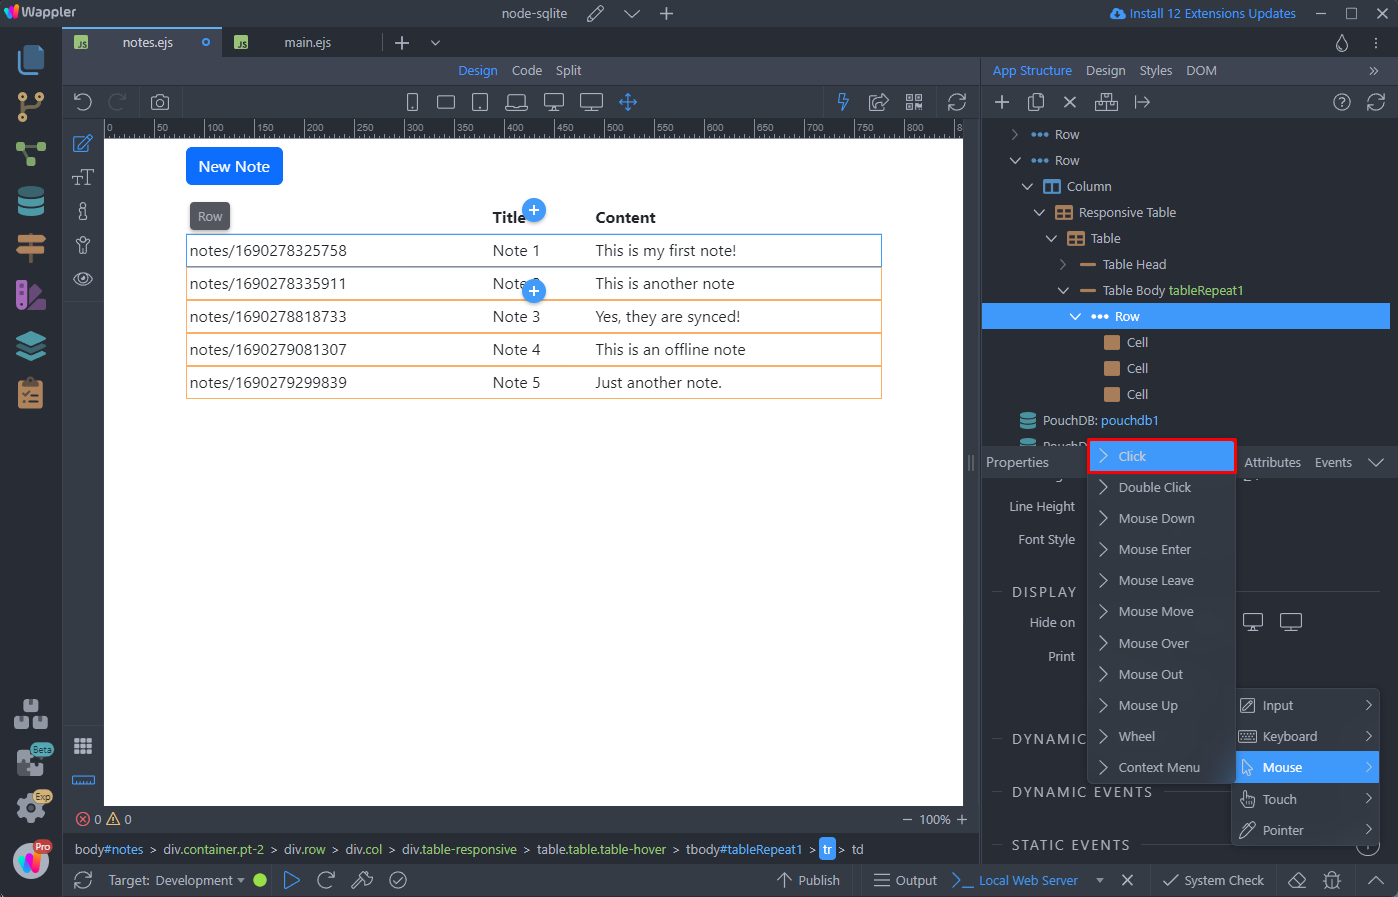
And select an action:
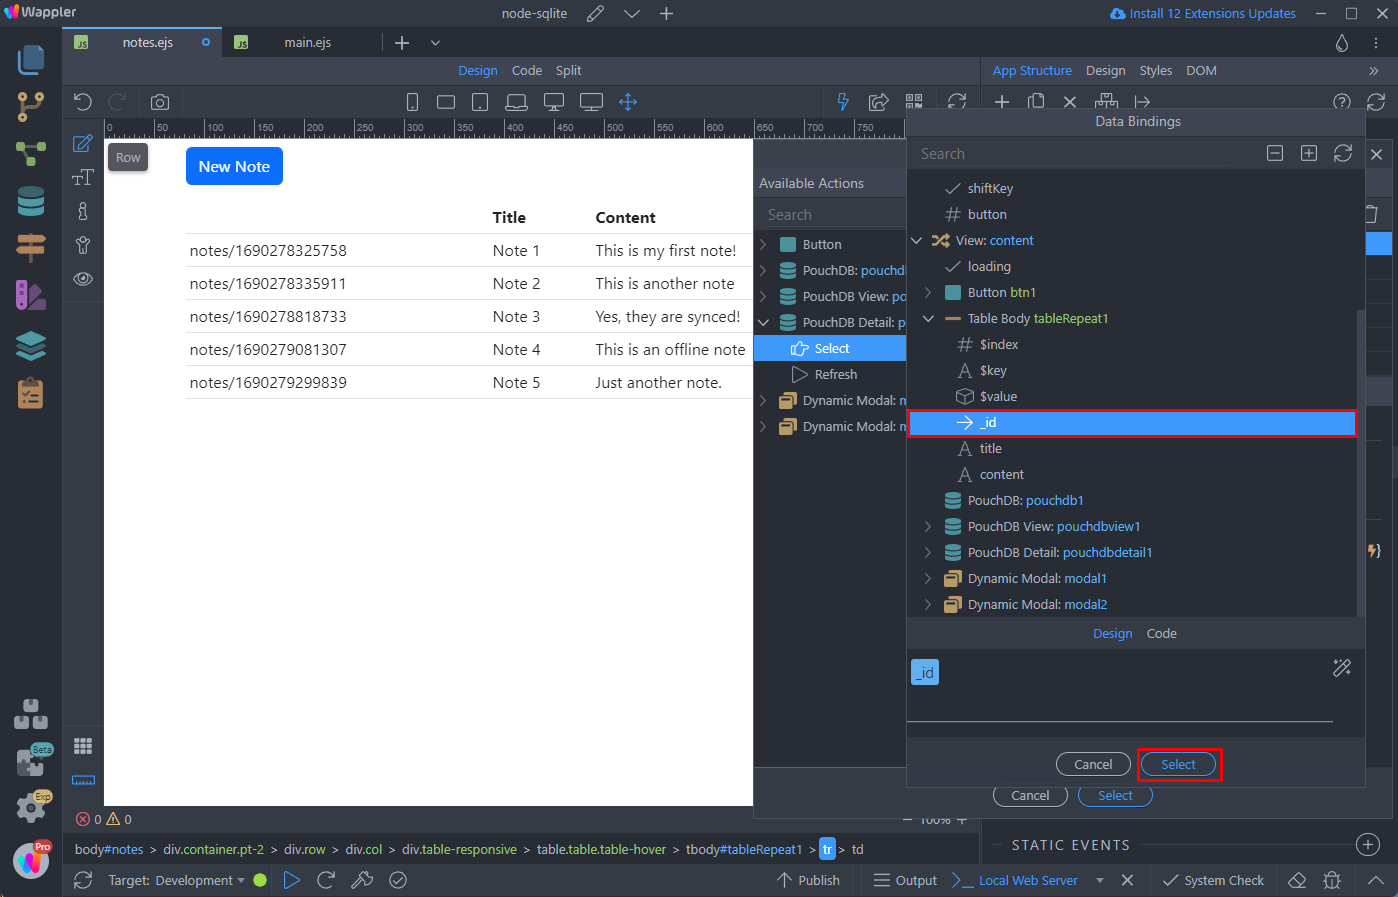
Double click Select under PuchDB Detail and click the dynamic data picker to pick a value for the ID:
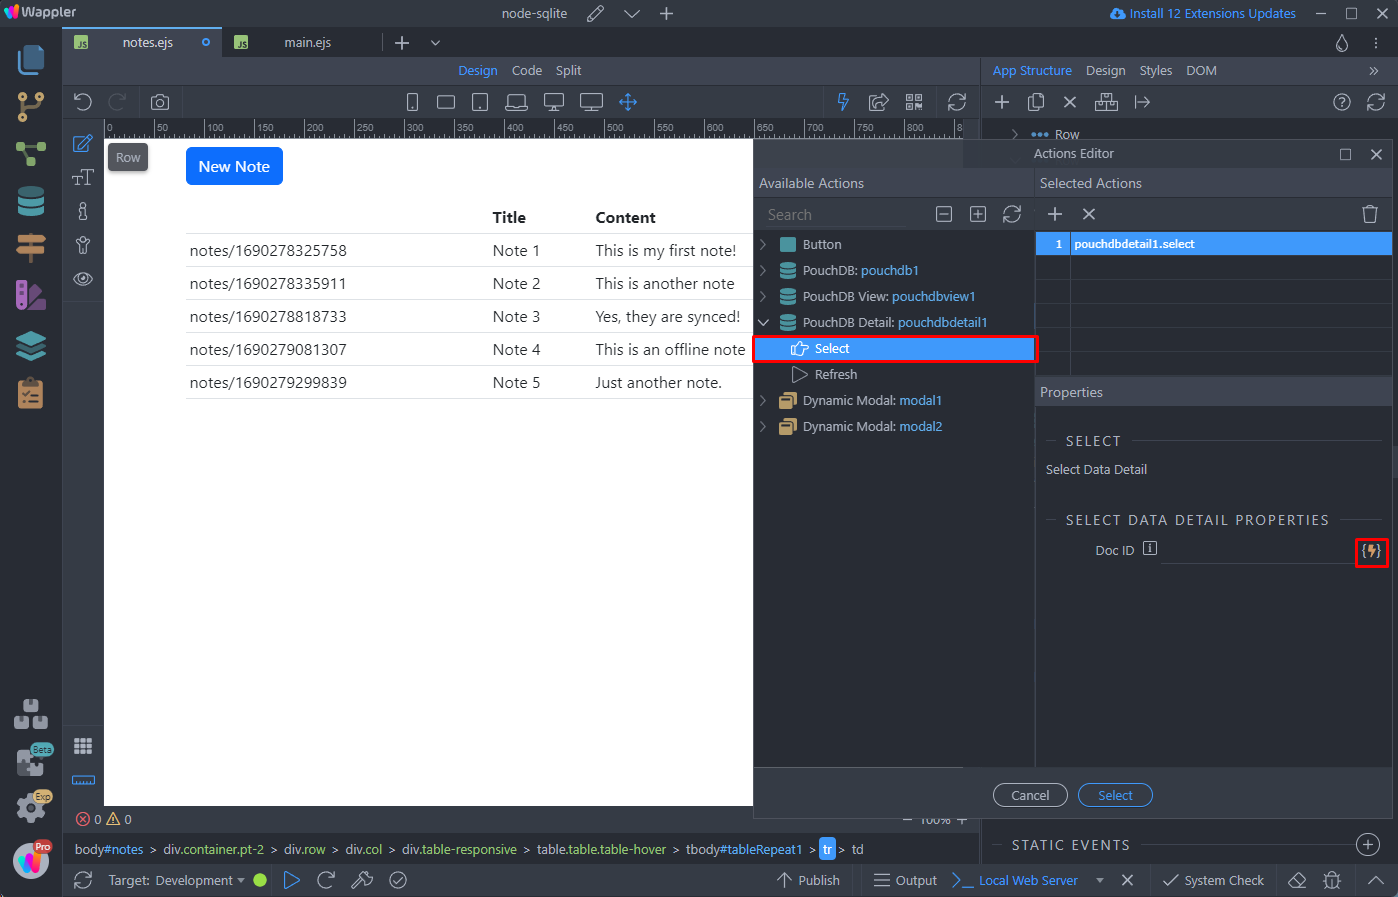
Select the _id returned in your repeat region (dynamic table):
Then click Show under the Update Note modal:
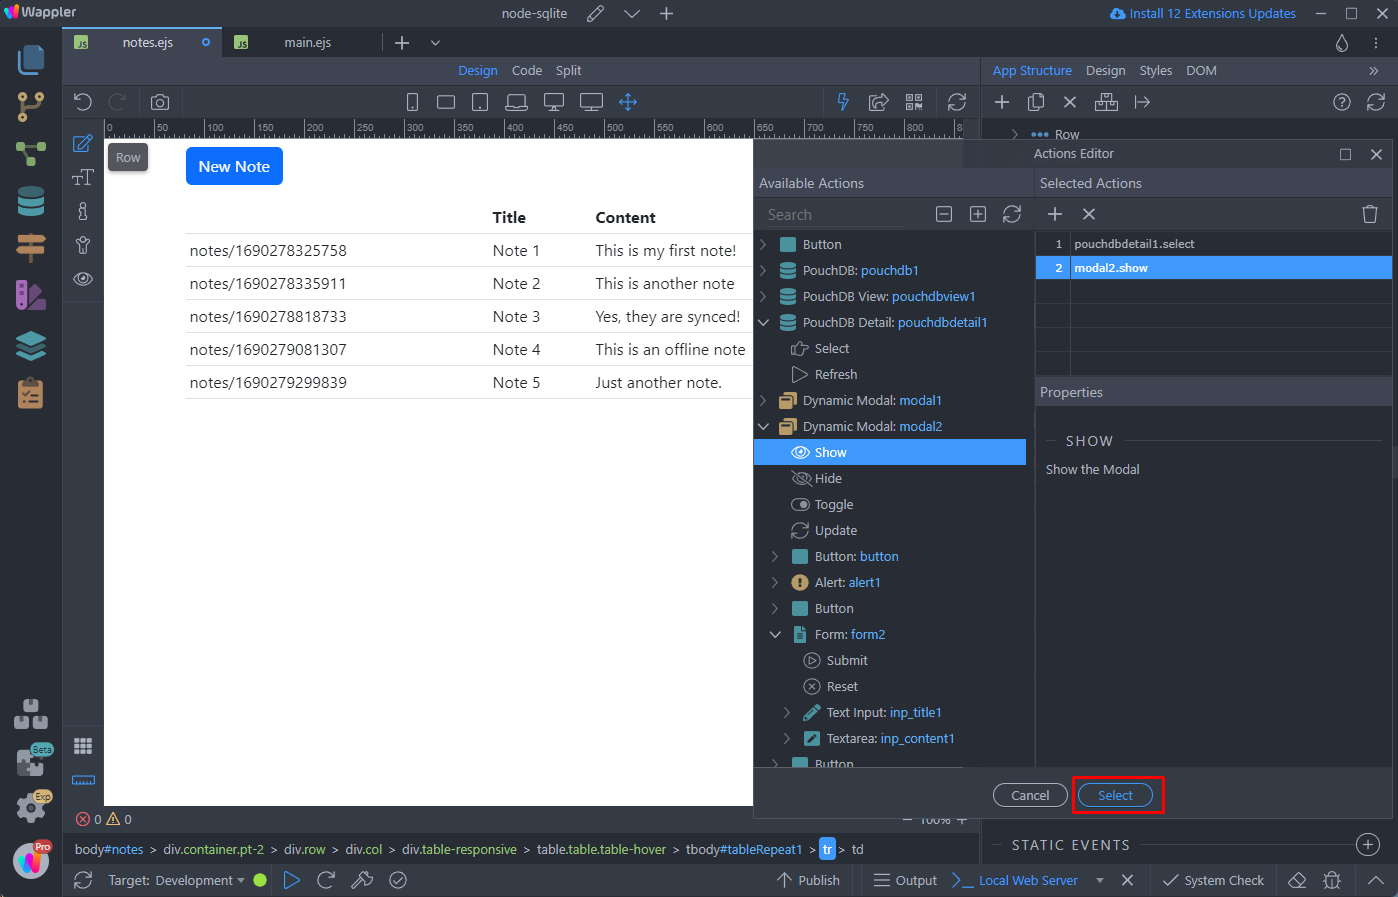
And you are done. On clicking a table row, the data detail will get the selected record ID and the modal will open.
Results
Below you can find a few examples of what’s possible with the simple app we created.
Realtime Data Refresh
You can see the data in our dynamic table on the page is refreshed immediately after insert:
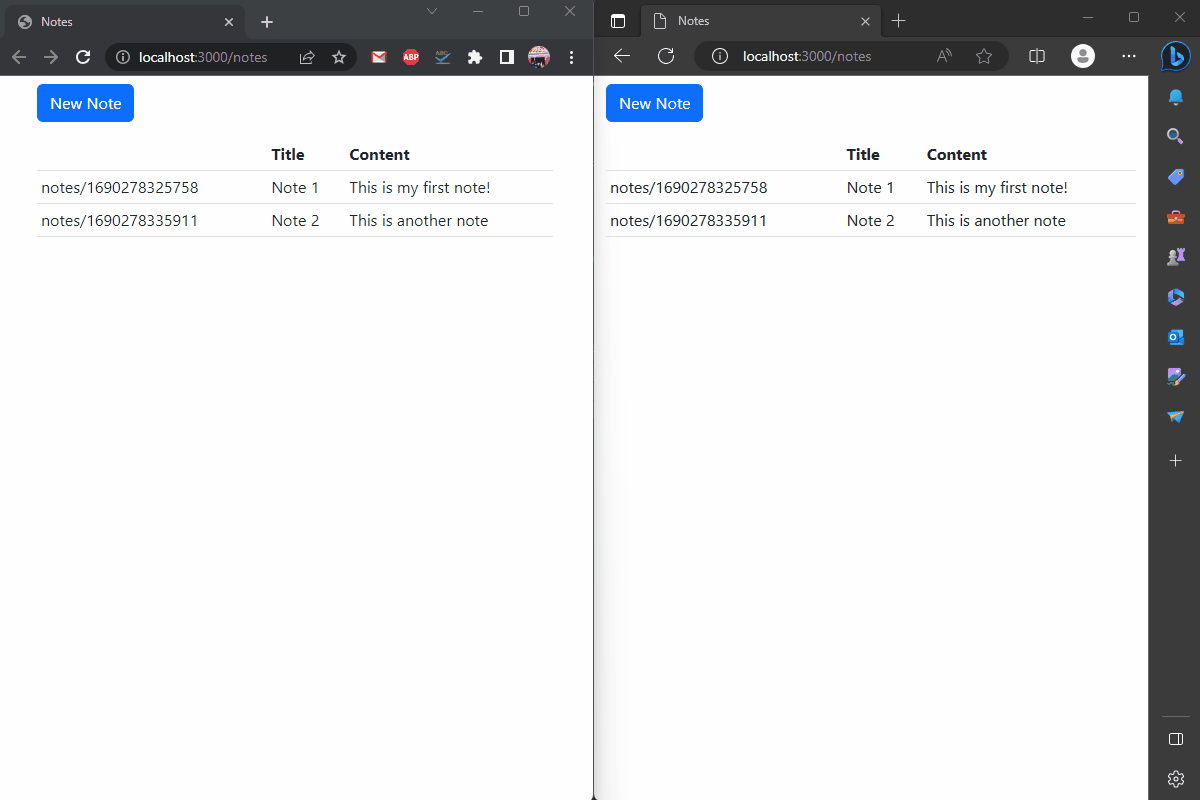
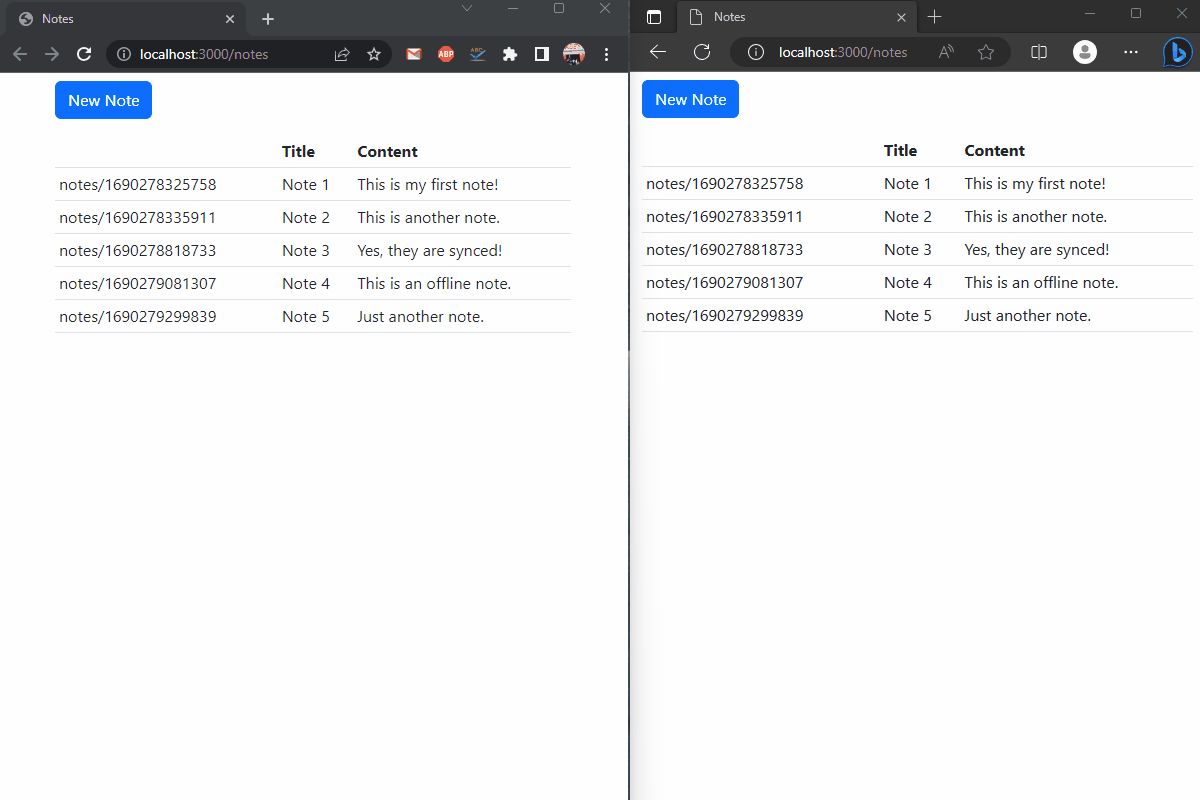
Realtime Sync between Devices
We simulate multiple devices, by opening our app in multiple browsers. You can see that when a note is inserted, the data is not only updated on the device you are adding it from, but also on all the other devices:
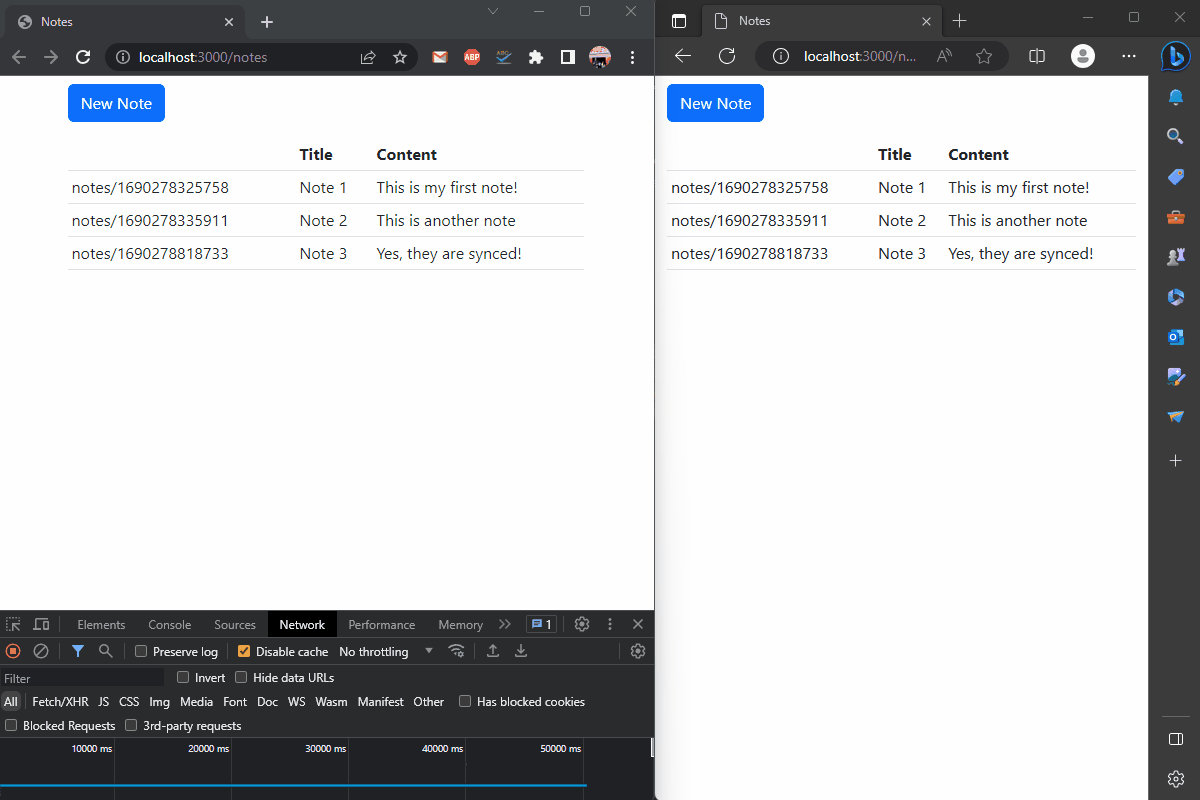
Offline Usage
In the example below, we simulate 2 devices, by opening our app in 2 different browsers. We simulate offline mode in one of the browsers and add a note. You can see the data is only updated on the offline device’s database. As soon as we go back online, the data is automatically updated on all the other devices:
Conflict on Update
There are some cases when two or more users may be editing the same record at the same time. If any of them saves the record, you can alert the rest and let them refresh the data:
This simple example shows the powers of CouchDB and PouchDB in Wappler.
