I’m glad you’re close to completing your app. My applications are still being tested by the customer in the internal testing of Google play. I haven’t contacted iOS yet, so I can only give advice on the android platform.
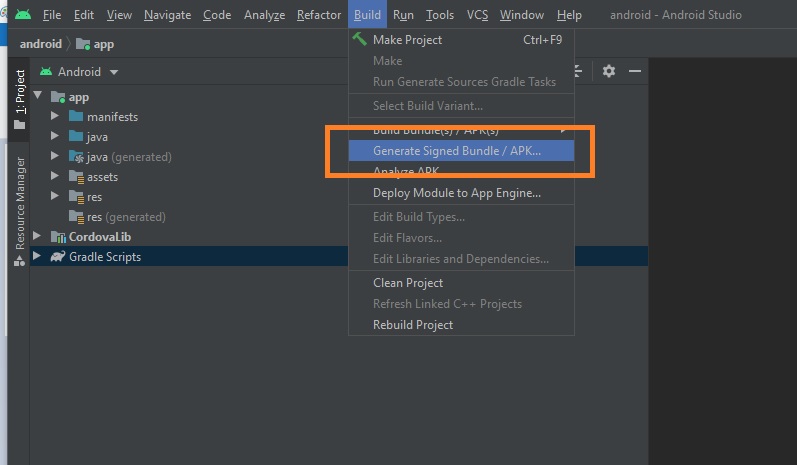
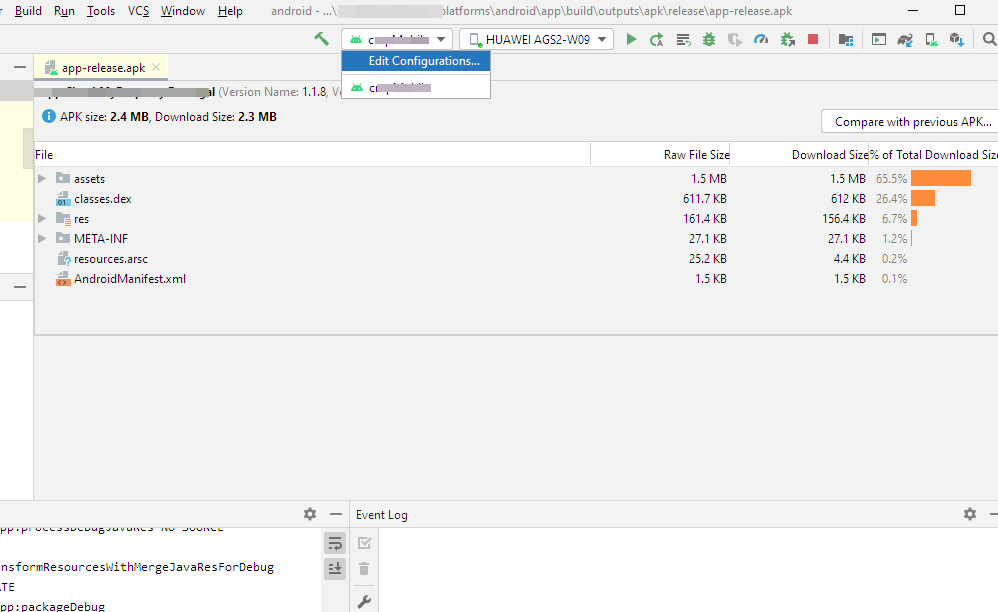
Personally, I did the final build and signing of the application not through the Wappler, but through the Android Studio. To do this:
First make an assembly with debugging in the Wappler.
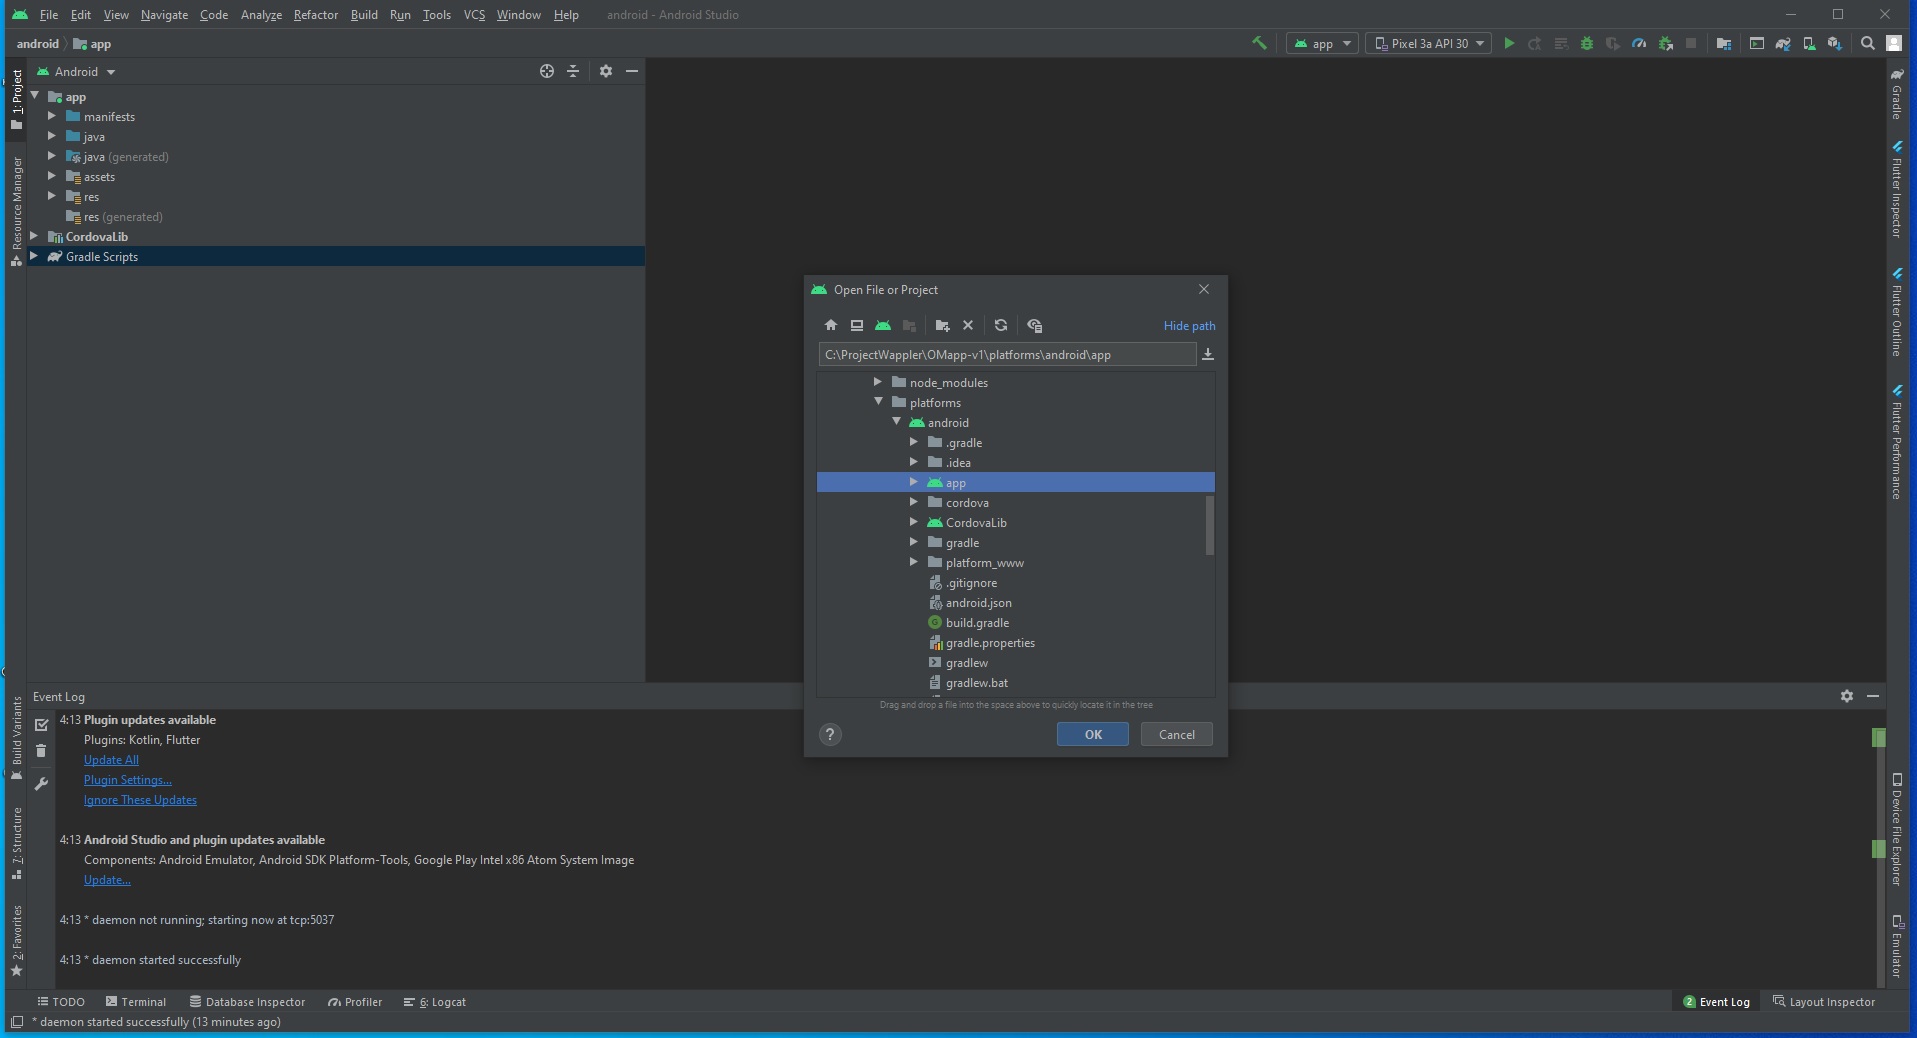
Then open the app folder in Android Studio located at platforms\android\app:
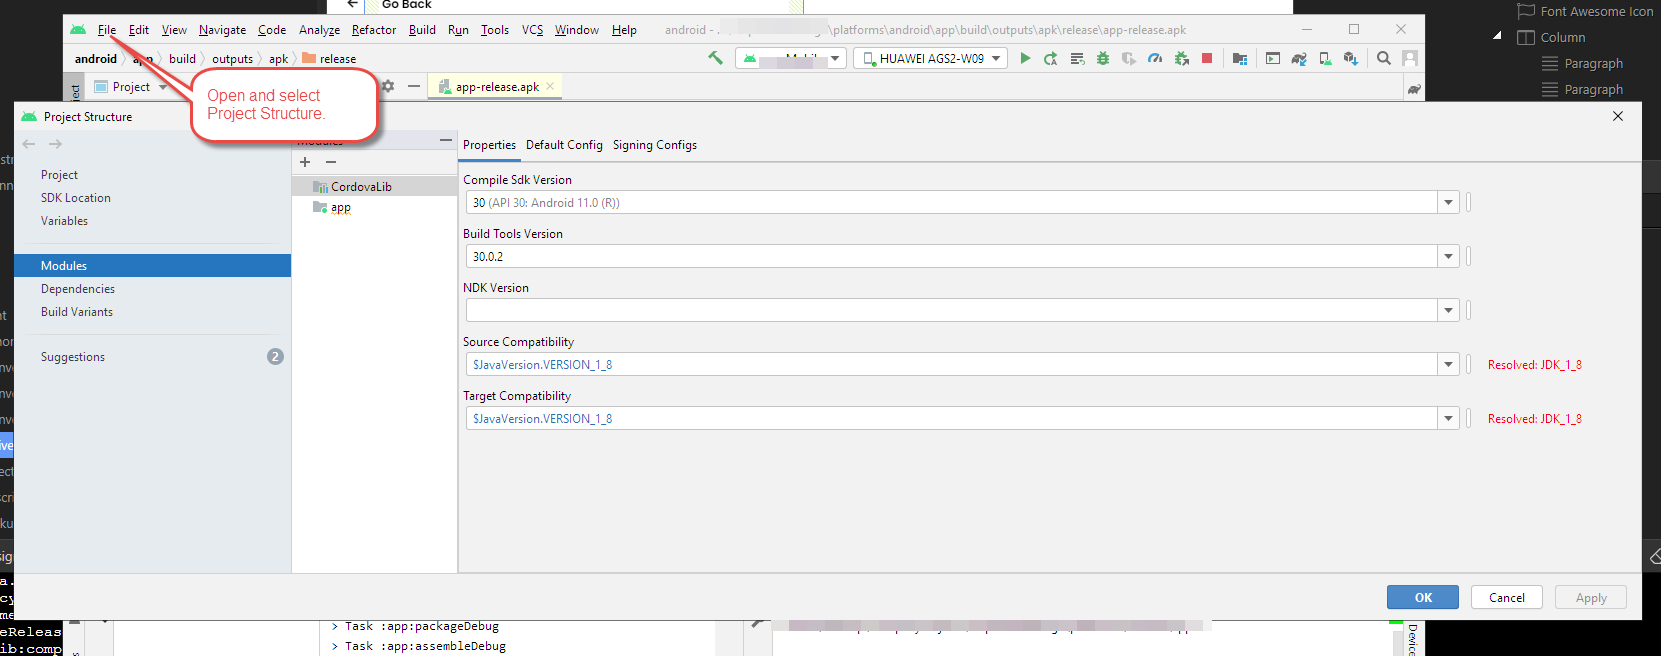
Since you haven’t created a signature yet, you will have to create it first. But this is a fairly simple linear procedure, you just need to fill in the fields and that’s it.
I will note separately about the apk/aab build. Google Play insists on switching to the aab format: https://developer.android.com/guide/app-bundle And very soon there may be difficulties with the apk. Therefore, I recommend collecting it in aab format in advance.
Also, when posting on the Google Play platform, I recommend that you do not rush to publish, but turn to their testing system. It consists of three levels:
internal testing
closed testing
open testing
Internal testing is very useful. It allows you to avoid any checks and delays. In internal testing, the application becomes instantly available after placement, among those to whom you give access. This greatly helps to speed up the testing procedure and communication with the customer on the project.
I wish you no errors when building the application and when it will work, as well as a speedy launch in a public format
Further to the above. To submit Bundles you must subscribe to the Google Play signing within the Play Developer console. All very simple after you understand the way the console is set-up (easy to get lost at first). Each release essentially has its own console. So you'll upload your apk/bundle to its specific console by selecting the app from your repository (list of uploads). You can not self-sign bundles but you can sign apks, either in the manner Mr Rubi is directing you or by implementing in to your build process by including your key:
I'm seriously excited for you @brad. Would love to see the final result. Would you also be happy to give some info on how you went about it all in Wappler? I still haven't fully begun creating a mobile app in Wappler but am very keen to.
Quickest way. Take an already created Project. Clone it. Open it up and add Android to it using the Platform menu. Save your Project. There is the basis for you. If you wish to use dynamic data you will then connect the Android App to your Server Actions as normal but you will be selecting the data Project from the drop down list provided when you pick your Server Actions. You must use two Projects for this side. The actual process of conversion is pretty much click and add the Platform.
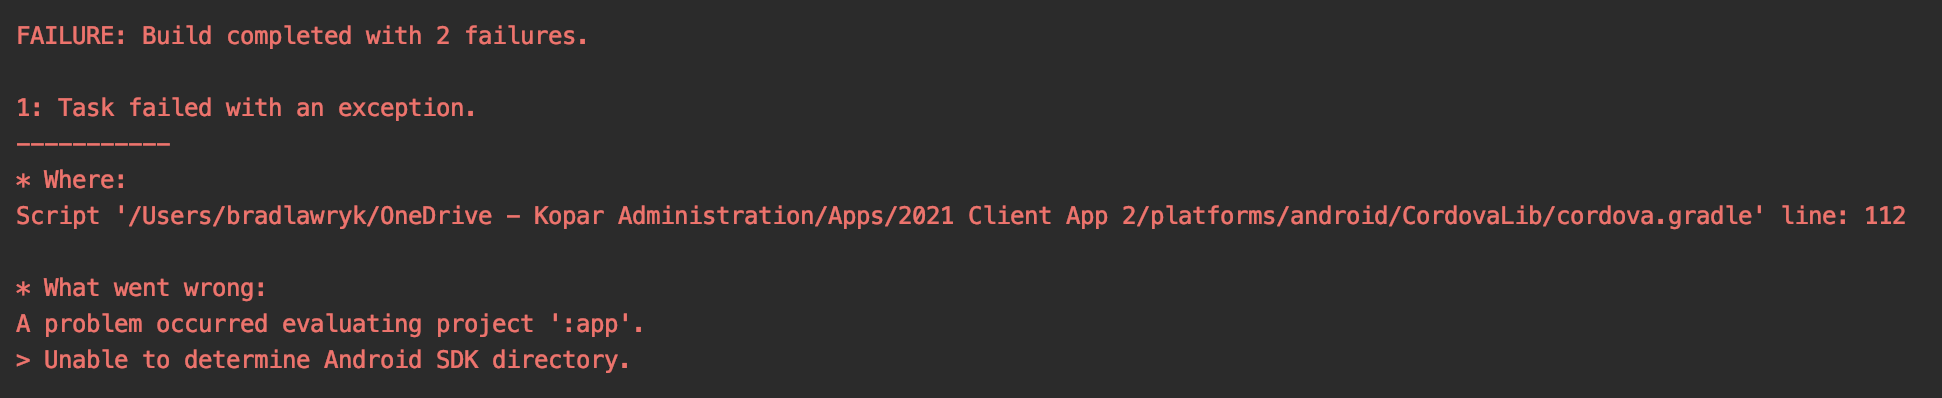
Do these errors appear in Android Studio or Wappler? When do they occur? Before opening the app folder in Android Studio, did you build the app in the Wappler, as I wrote in the guide above?
By errors:
Problems with the location of your android sdk folder. Before you start working on the application, make sure that Android Studio works correctly in principle and there are no conflicts. Nothing else comes to mind. I myself have not encountered such a problem.
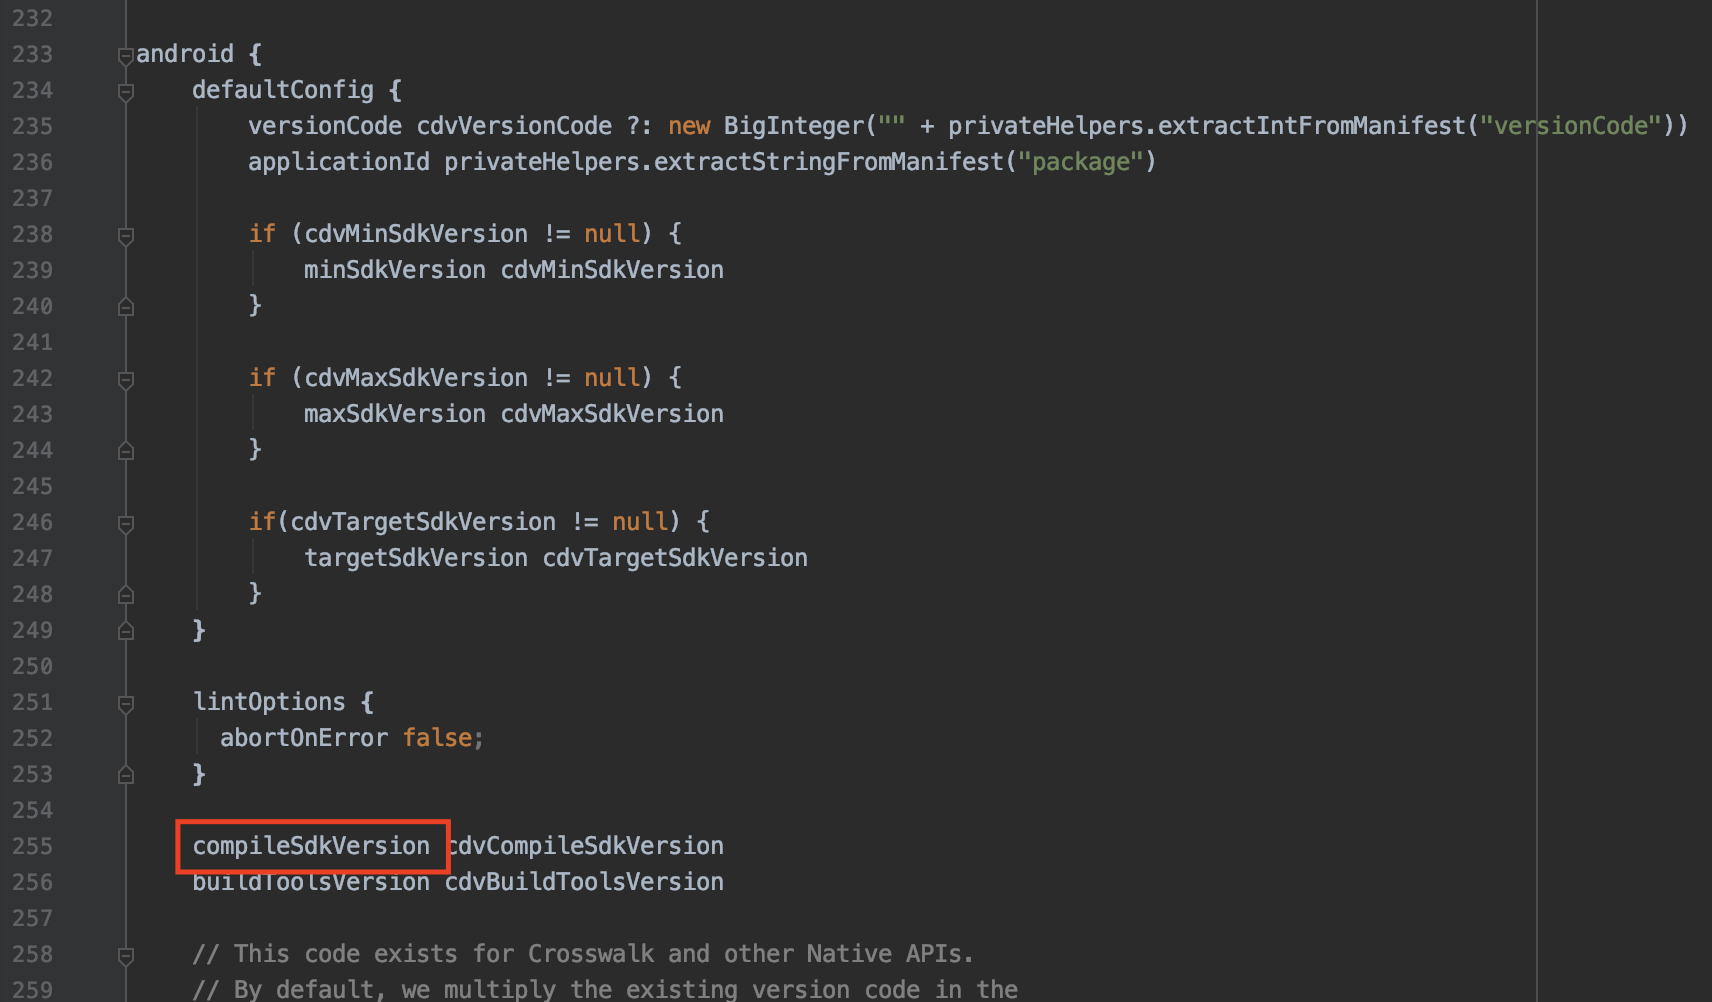
I did not encounter the compilesdkversion error, but there is a problem with api versions, and the latest version of cordova will build the application using Android api 25, while Google Play refused to accept the application with this api version (Google Play requires version 26 and higher).
In order to install the android sdk version used in the build, I did the following:
I made sure that the versions of cordova, gradle, and android sdk are updated.
Before proceeding to build the application, run the following commands:
set ORG_GRADLE_PROJECT_cdvCompileSdkVersion=android-26
set ORG_GRADLE_PROJECT_cdvBuildToolsVersion=26.0.1
After that, I was able to build the app using the android sdk version 26, which was adopted by Google Play. This procedure you will have to do in any case, perhaps it will solve the problem under the second number.
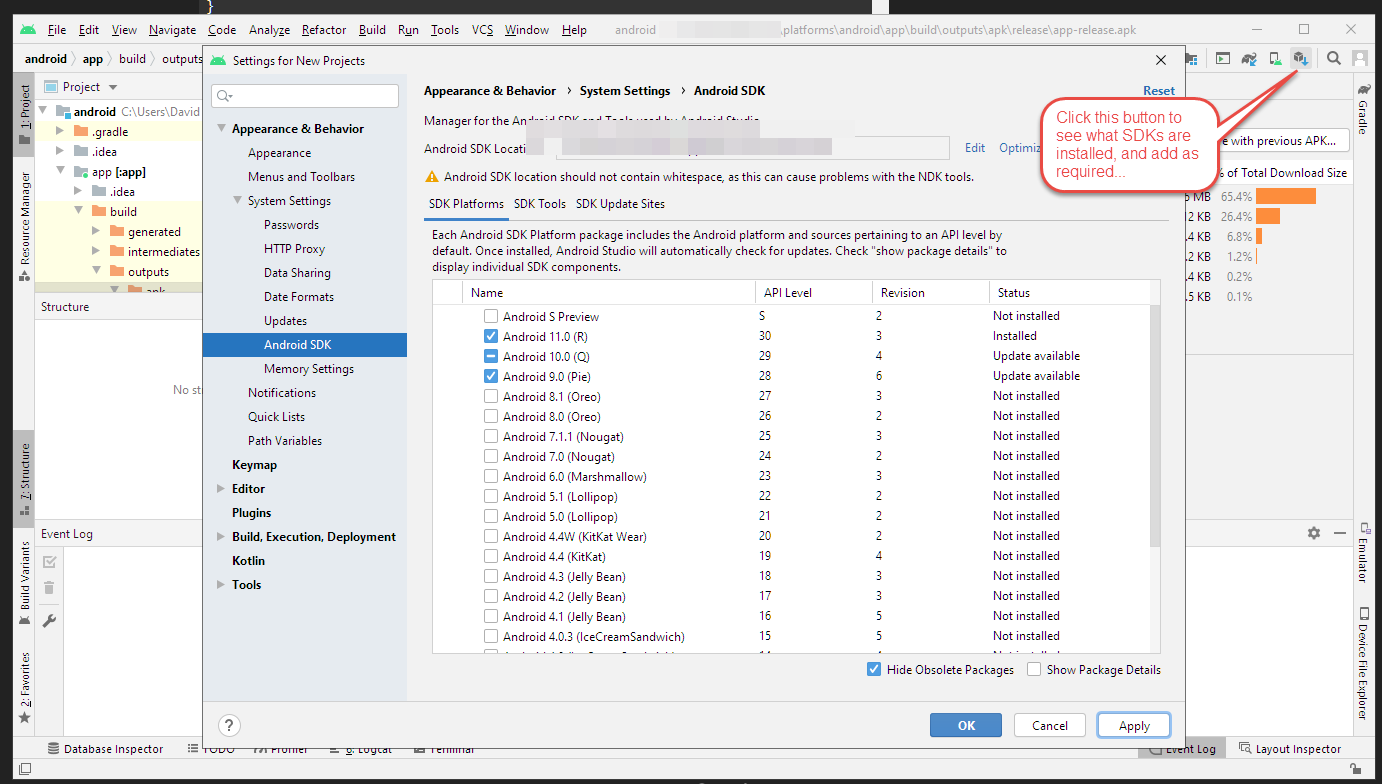
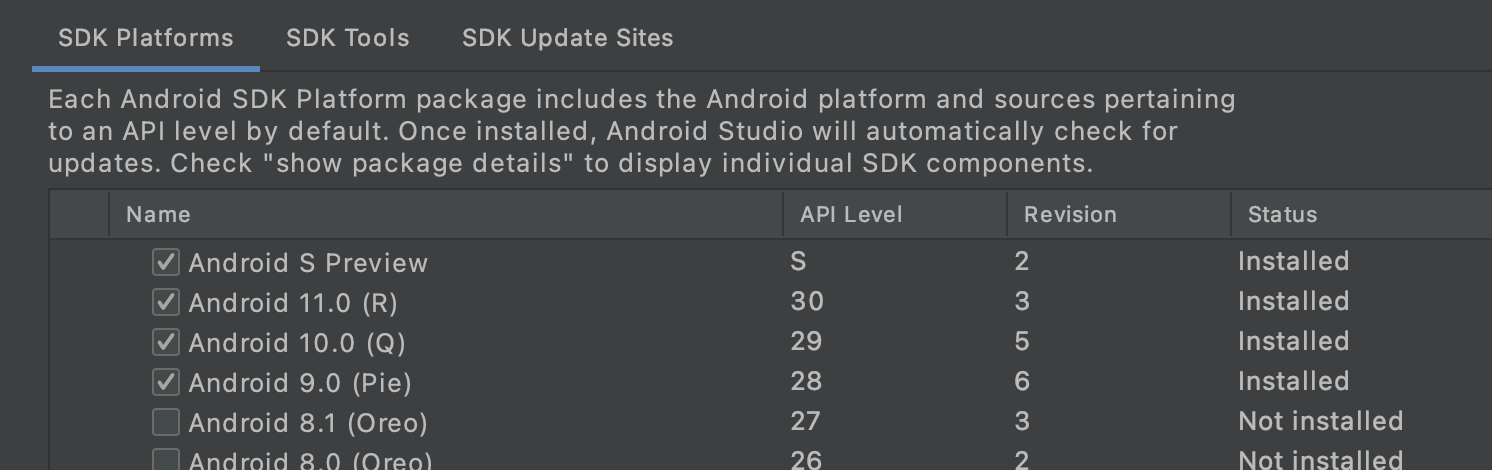
Make sure in the Android Studio SDK Manager you have the Build Version installed (now up to version 30 which will be required from August, but for now 28 and above are good, and all are backward compatible pretty much). VERY IMPORTANT to install the Android version SDK’s!We usually go with the last three versions, including the latest. Which covers most Android devices in use.
Make sure you import the location (directory) Wappler outputs when you import in to Android Studio, ie the path to the release directory as outputted by Wappler. Is this so with your Android Studio import?