Wappler makes creating a Login page with a Login form simple and secure.
Having a Login page is an important part of any website, we strive to make the process completely secure using the most robust technologies.
Setting Up a Login Page
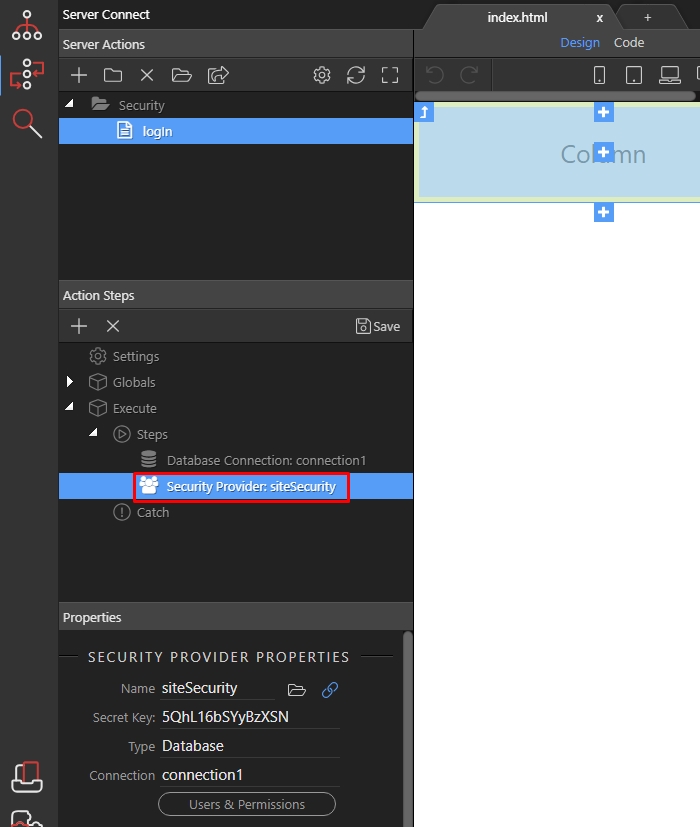
Step 1: Now after you added the security provider in your server action let’s add the login functionality. Right click the security provider step (doesn’t matter which security provider type you are using):
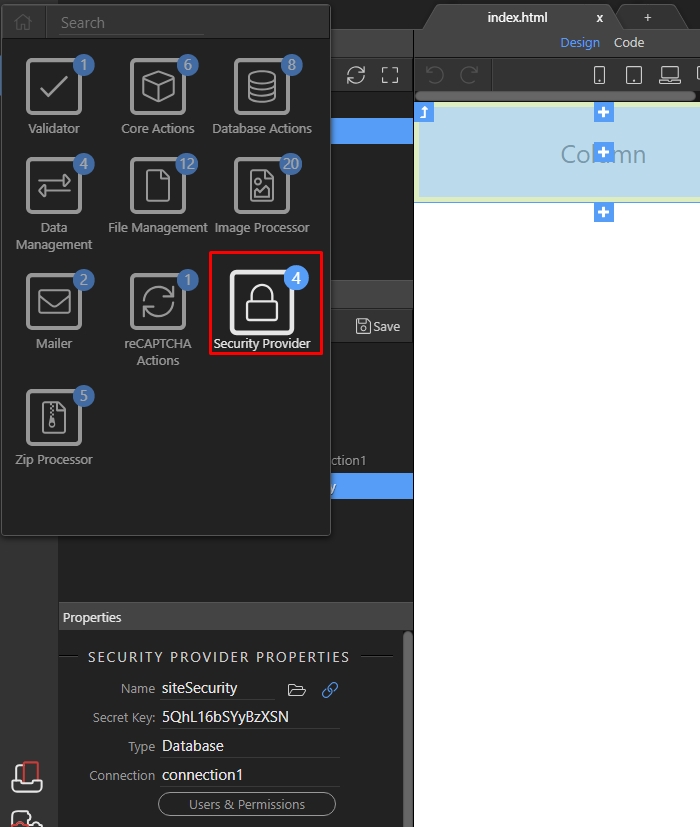
Step 2: Open the “Security Provider” group:
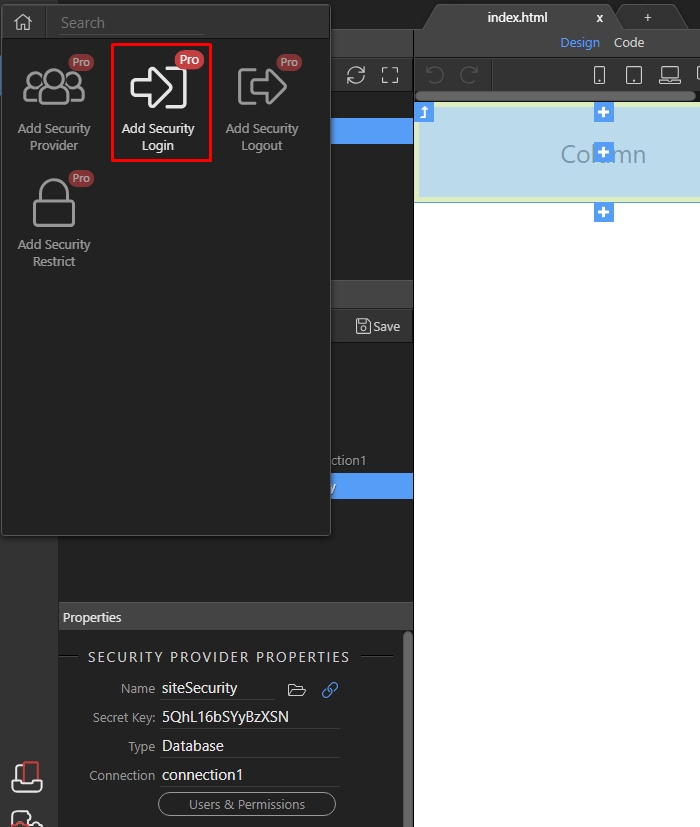
Step 3: And press “Add Security Login”:
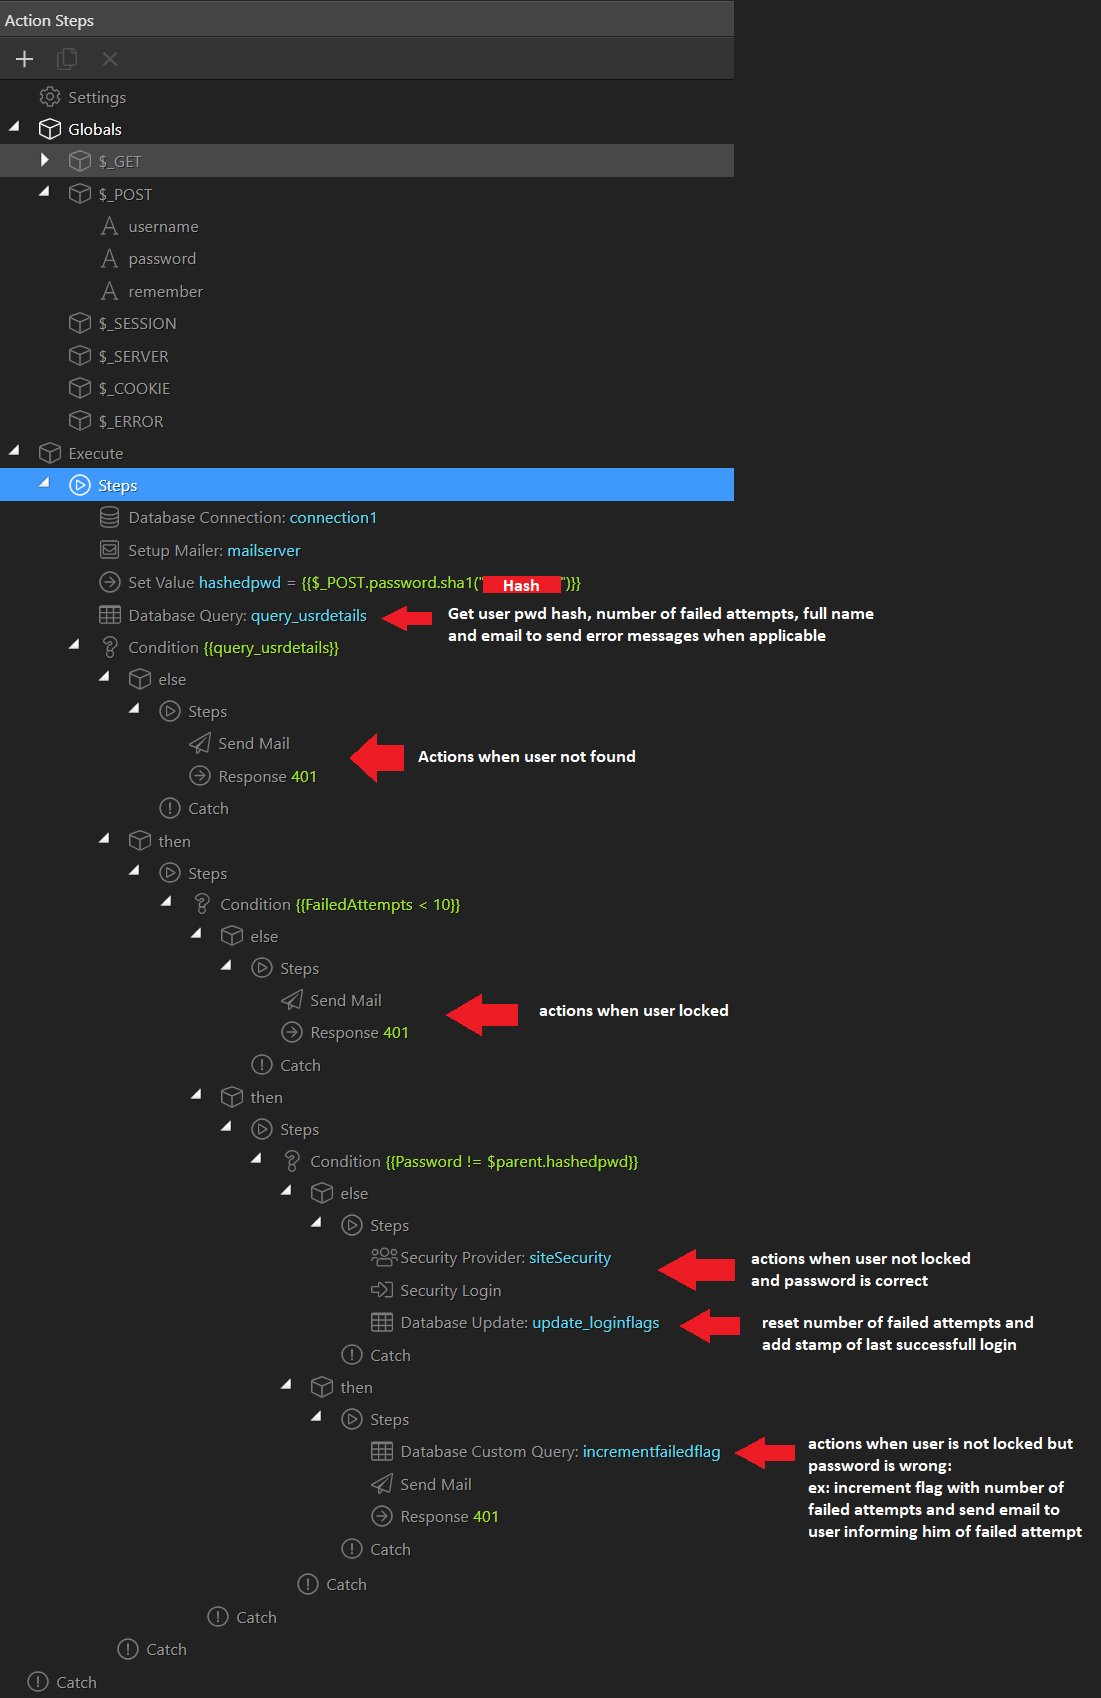
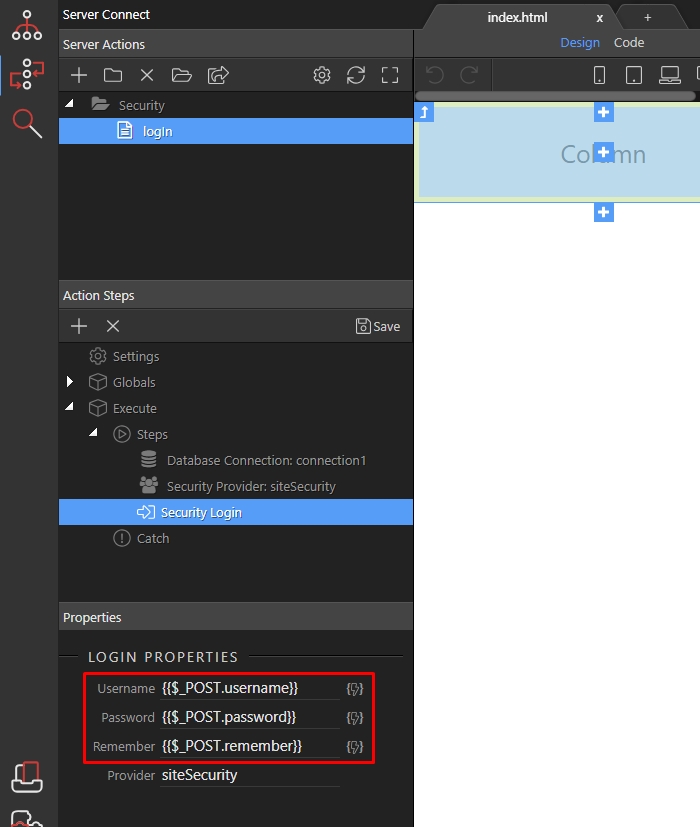
Step 4: In the login properties you see the Username, Password and Remember fields. Their values contain predefined POST variables - these are just the names of the form fields which this step expects. Of course you can change them, but the easiest way is to create a form with fields using these names instead of changing them later:
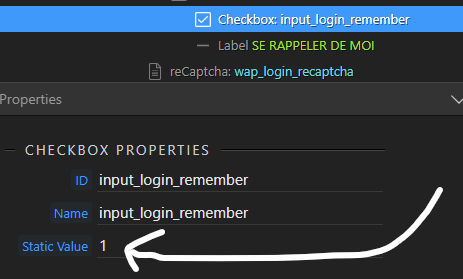
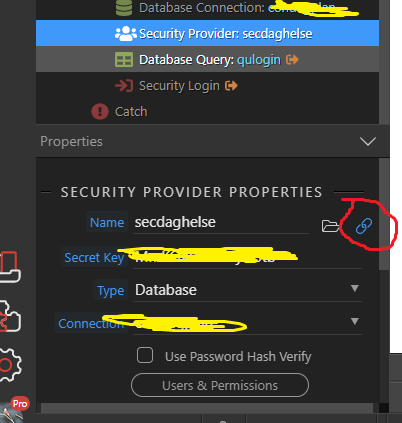
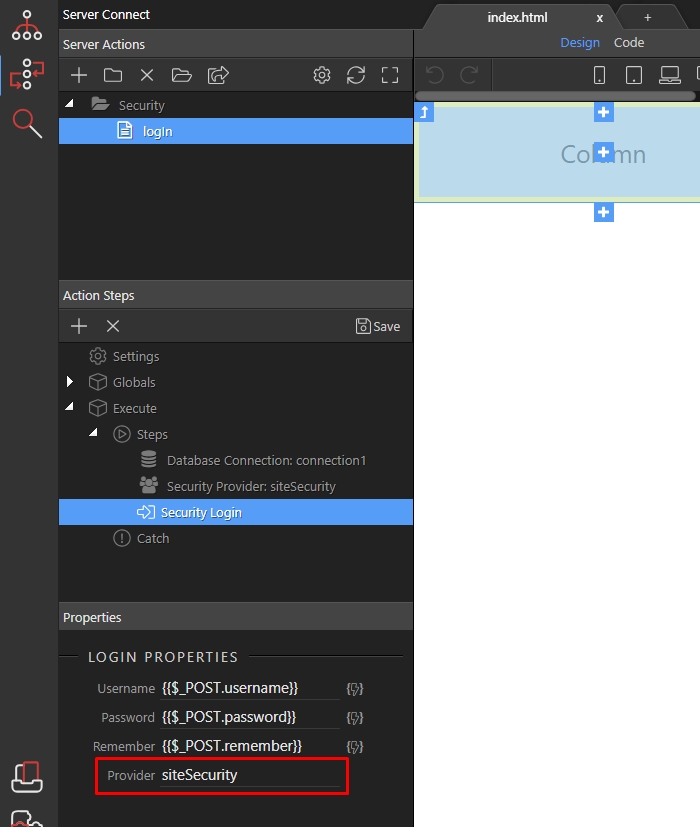
Step 5: Select your Security Provider instance:
Save your server action, as we are done with the server-side part.
Creating a Login Page
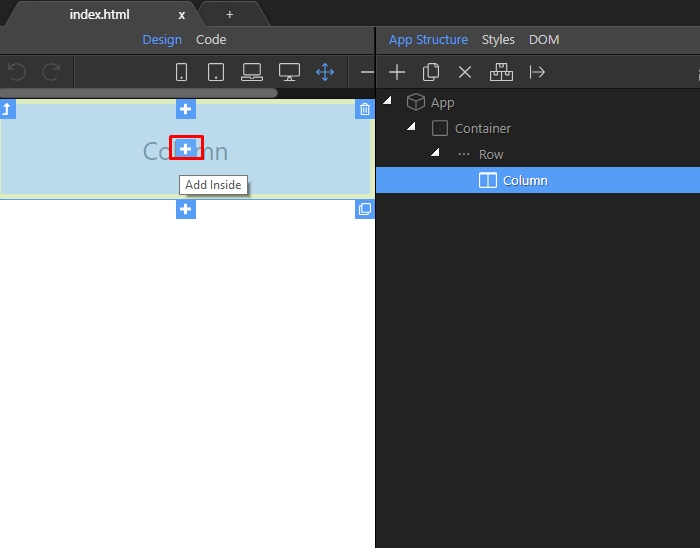
Step 6: Then let’s go to the page. We included the App Connect framework and Bootstrap 4 framework on our page already. Click the add button, where you’d like to create the login form:
Step 7: Create a Form which contains 3 inputs - username, password and a checkbox. The first field has a Name and ID of “username” and input Type “text”:

Step 8: The second field has a Name and ID of “password” and input Type “password”:

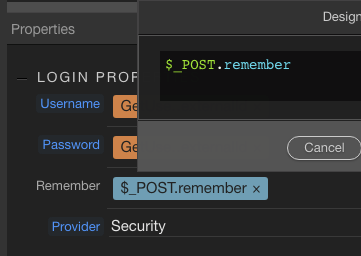
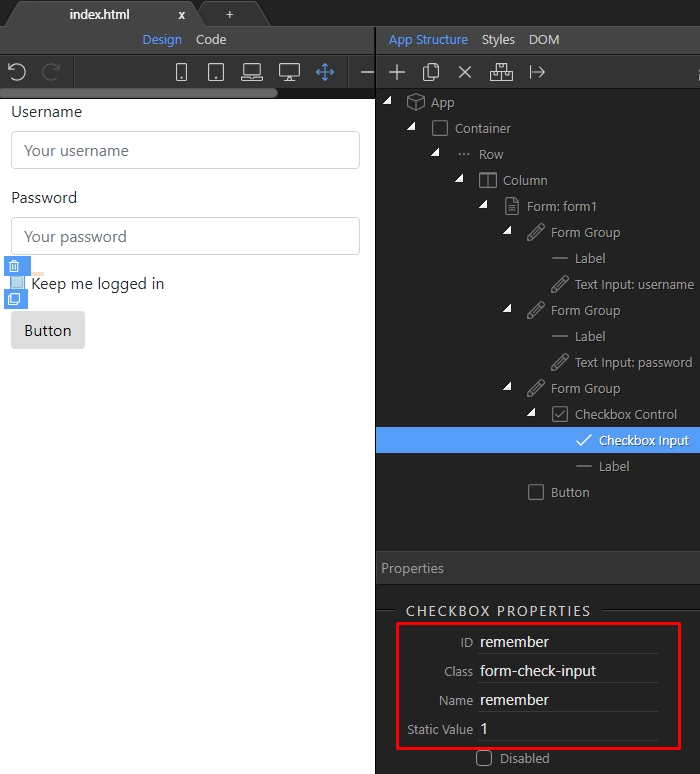
Step 9: The third input is a checkbox with a Name and ID of “remember” it also has a Static Value set to 1:
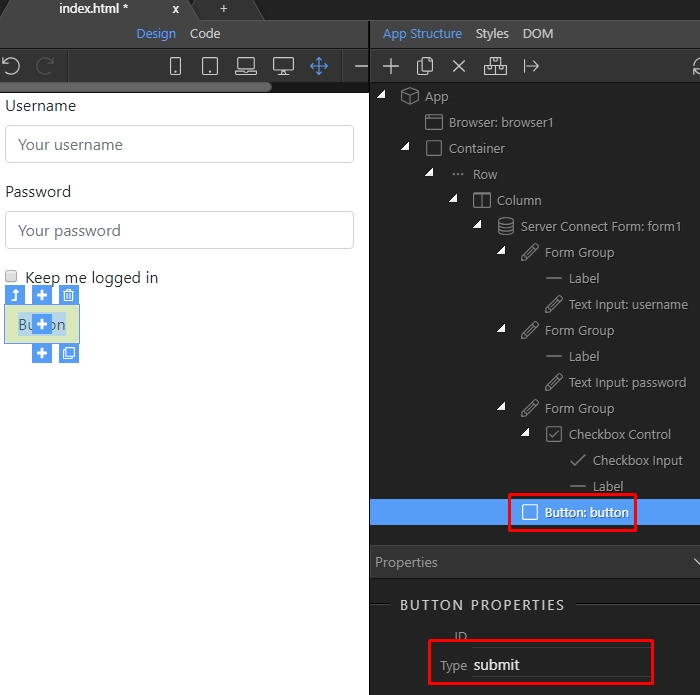
Step 10: We also created a button and its Type is “submit”:
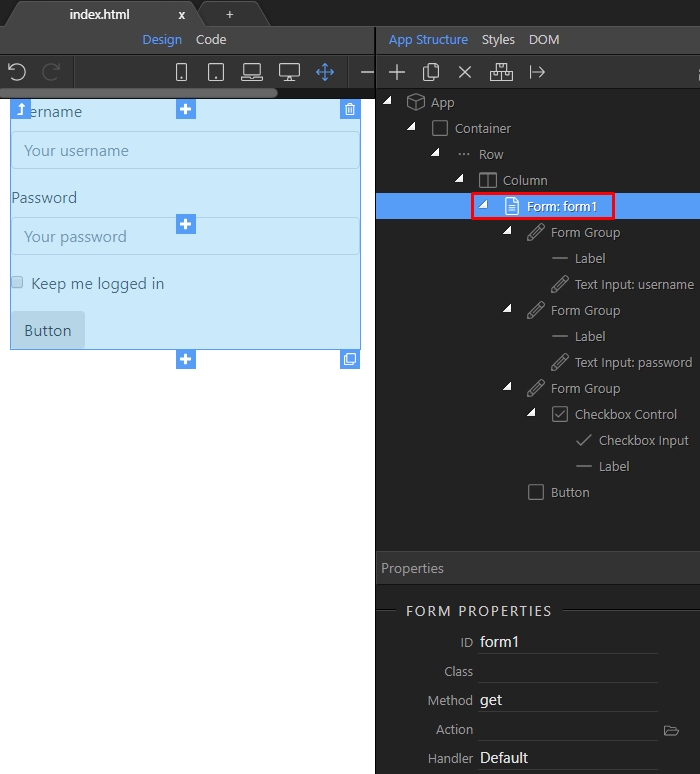
Step 11: Now, select your form within the “App Structure” panel:
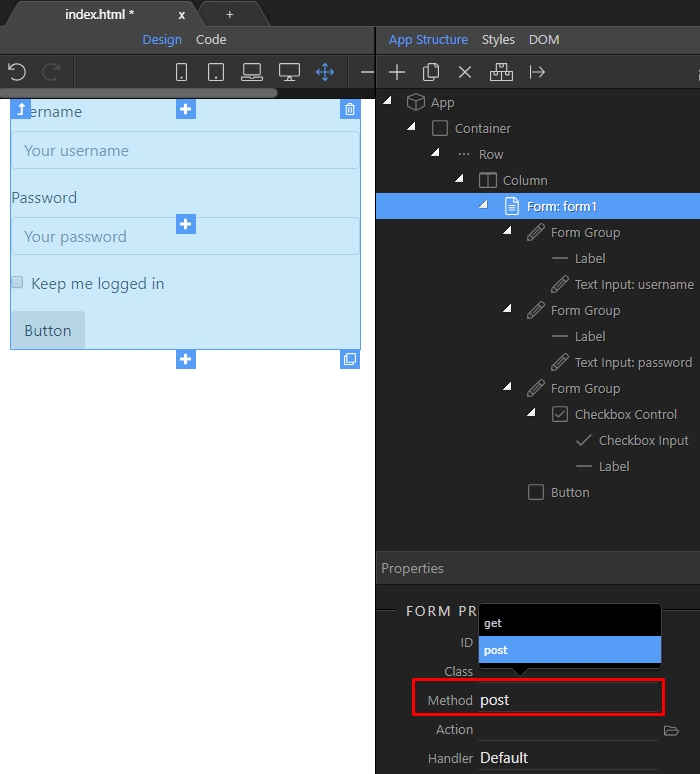
Step 12: And change its method to POST:
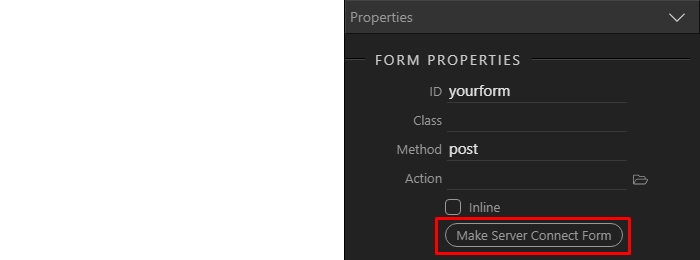
Step 13: Then click the “Make Server Connect Form” button. This is how we connect the form with the back-end, which expects the values of our form fields:
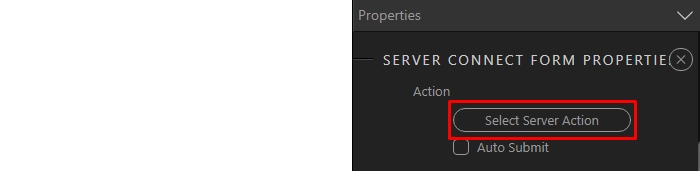
Step 14: Click the “Select Server Action” button:
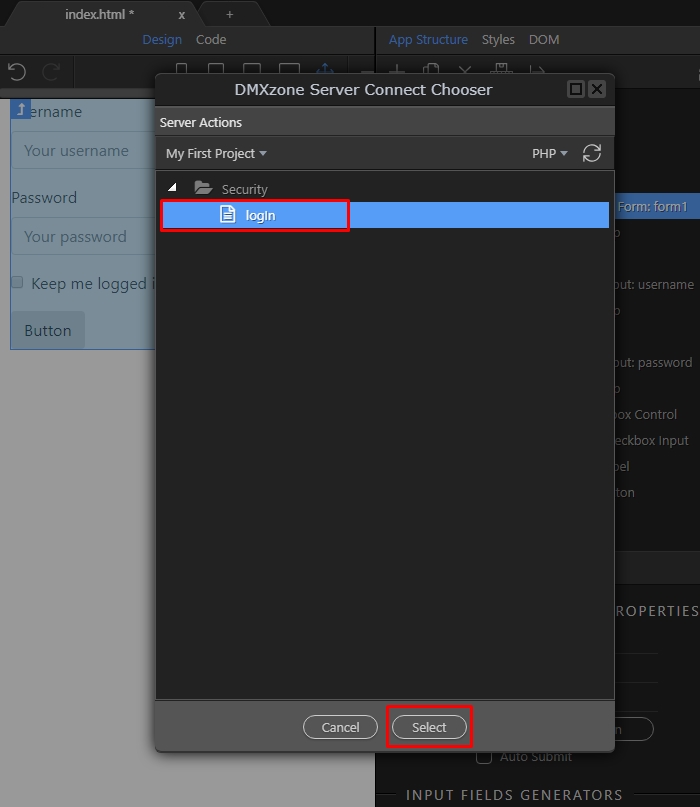
Step 15: And select the login server action:
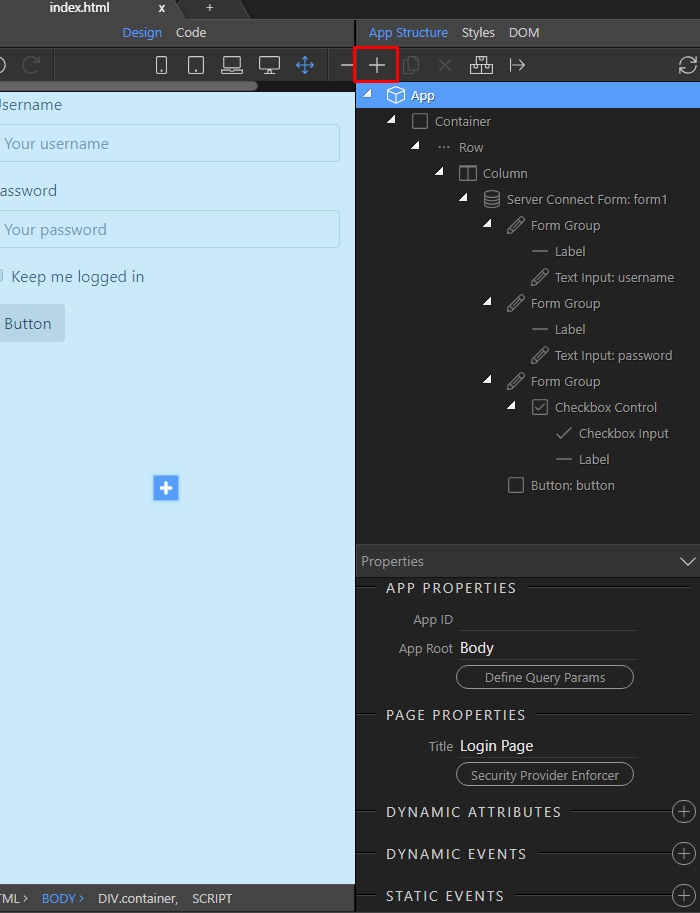
Step 16: We are done with the login part. Let’s setup the redirect on success and an alert message, when wrong user details are provided. Select App in the App Structure panel and add a new component:
Step 17: Open the Browser category:

Step 18: And select Browser:

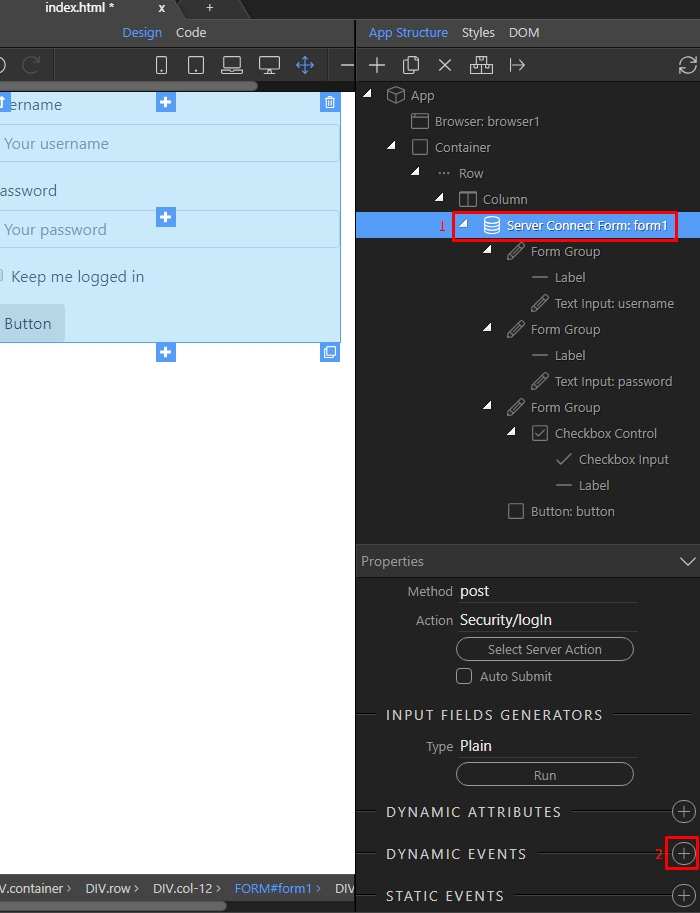
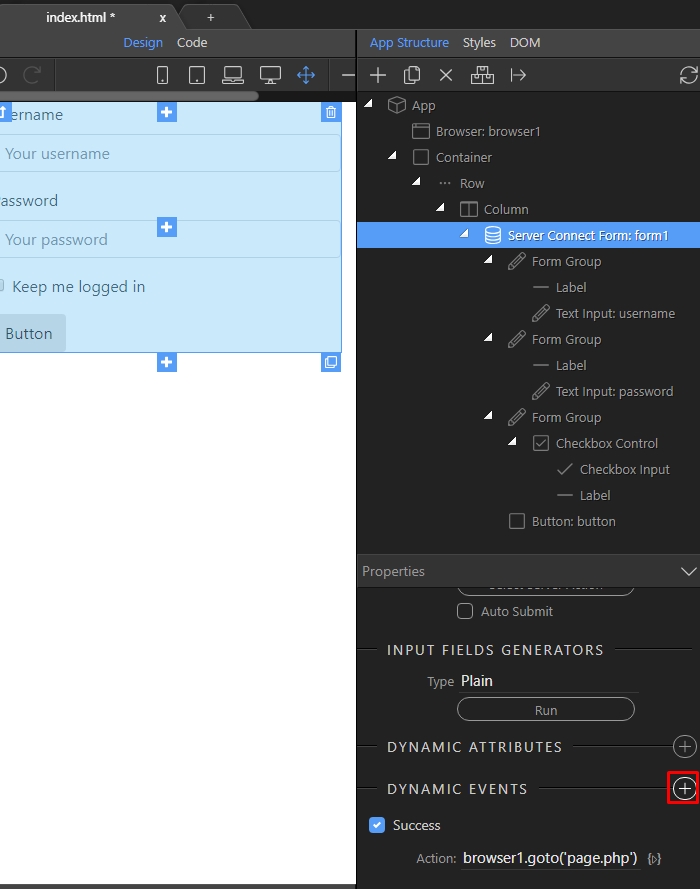
Step 19: Select your Server Connect Form(1) and add new Dynamic Event(2):
Step 20: Open the “Server Connect” category:
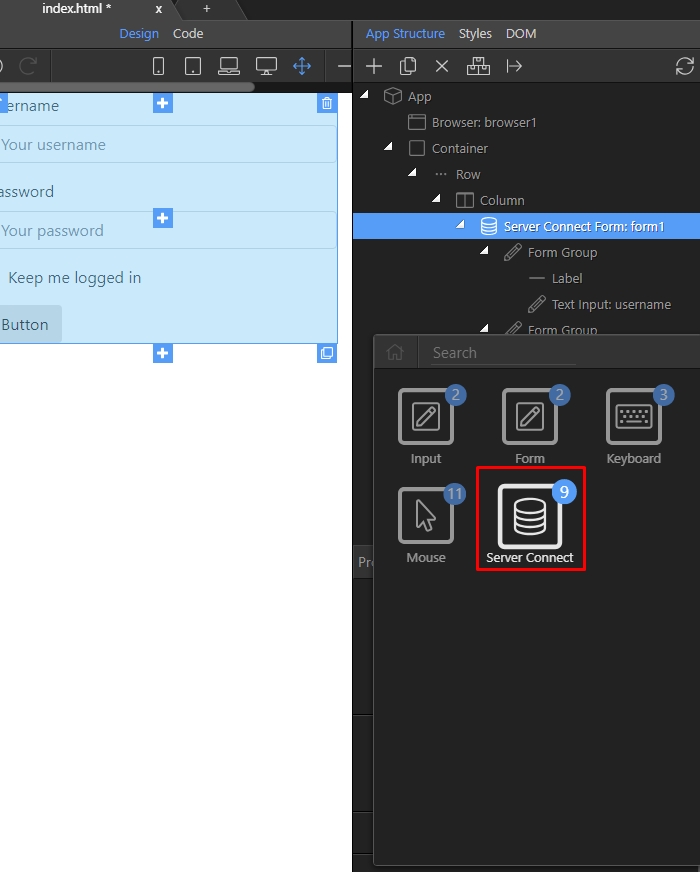
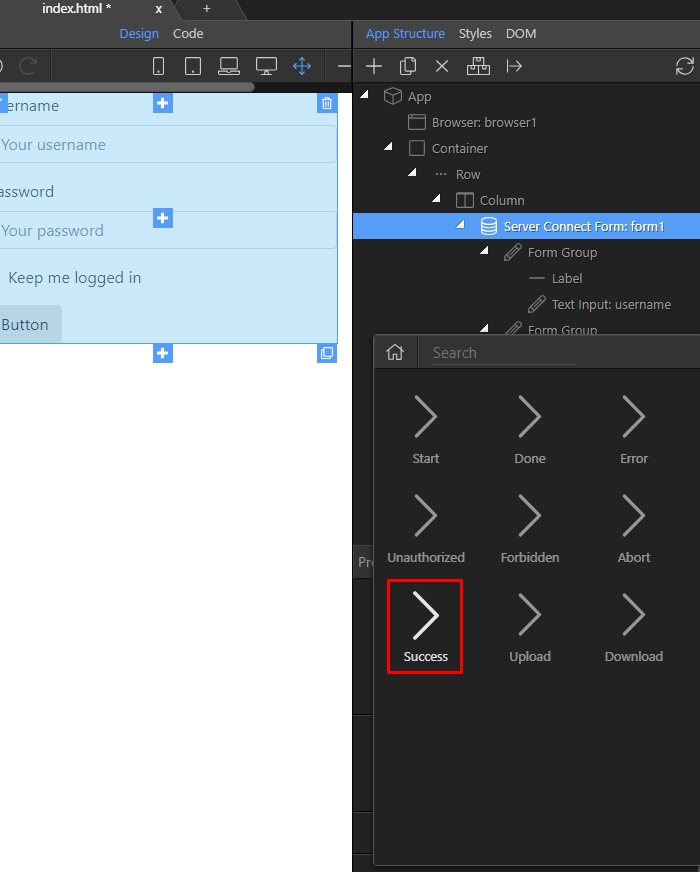
Step 21: And click the “Success” event:
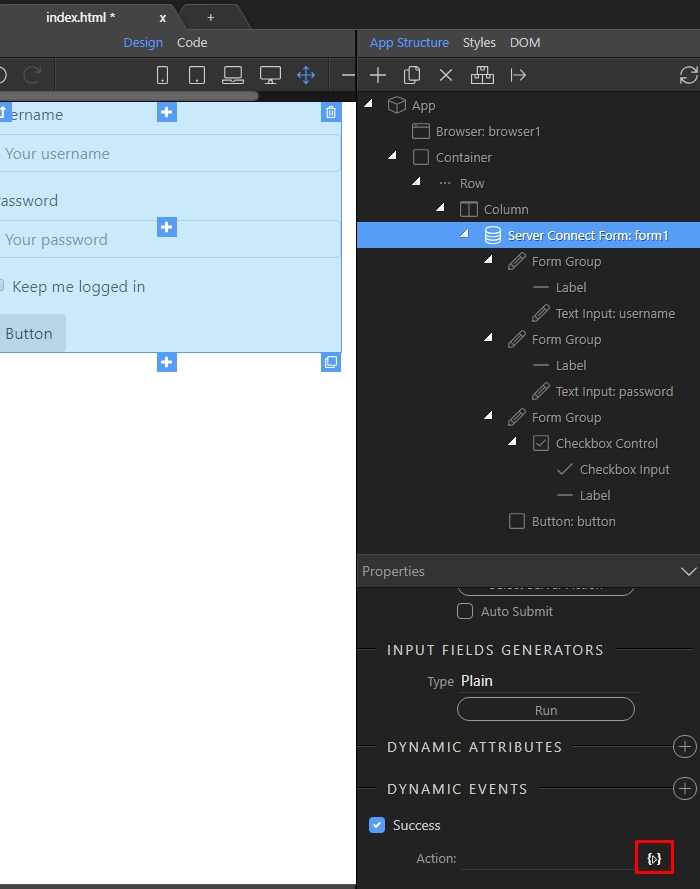
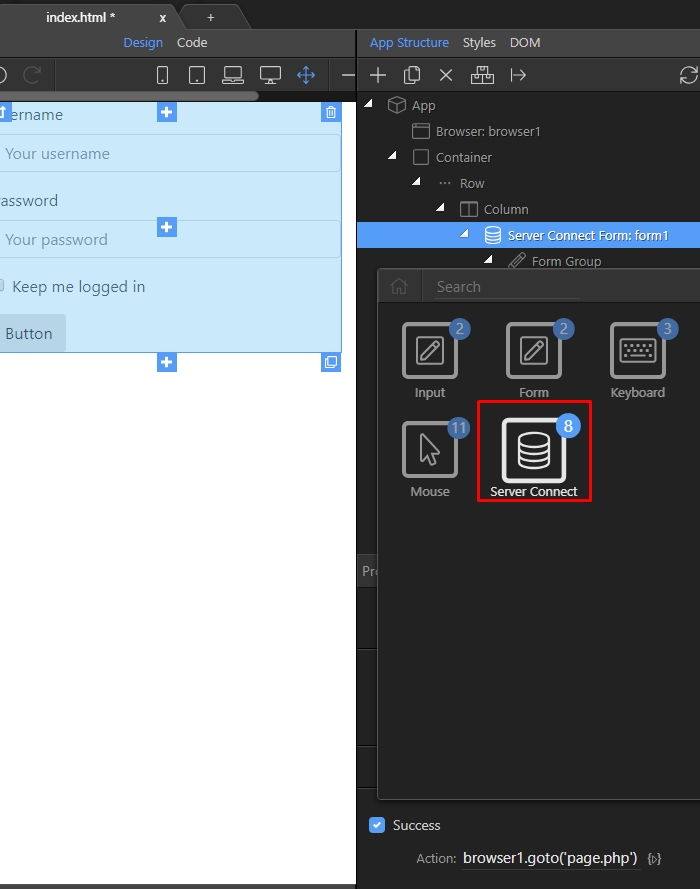
Step 22: Click the dynamic action picker button, in order to assign an action on success:
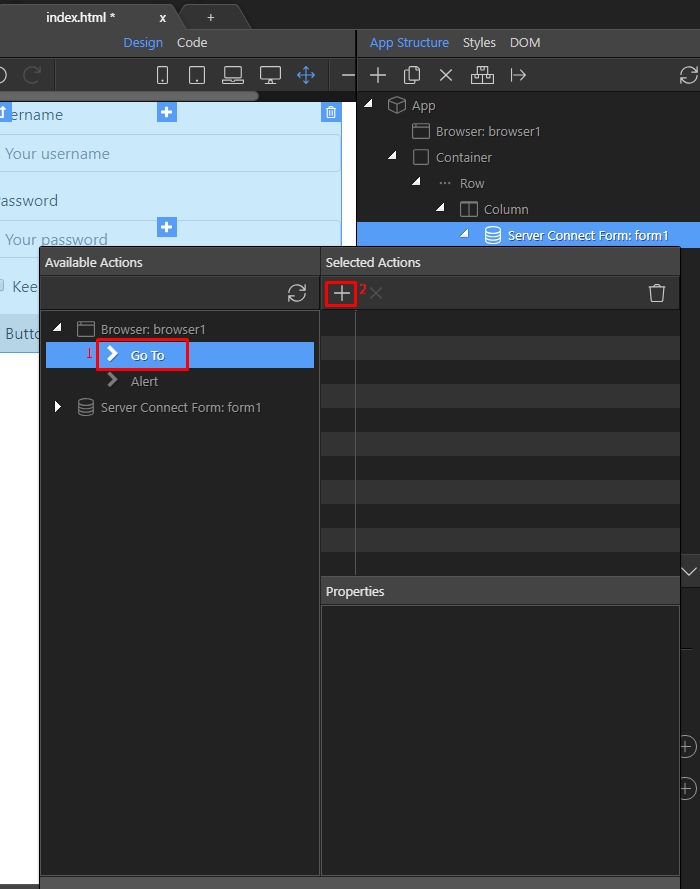
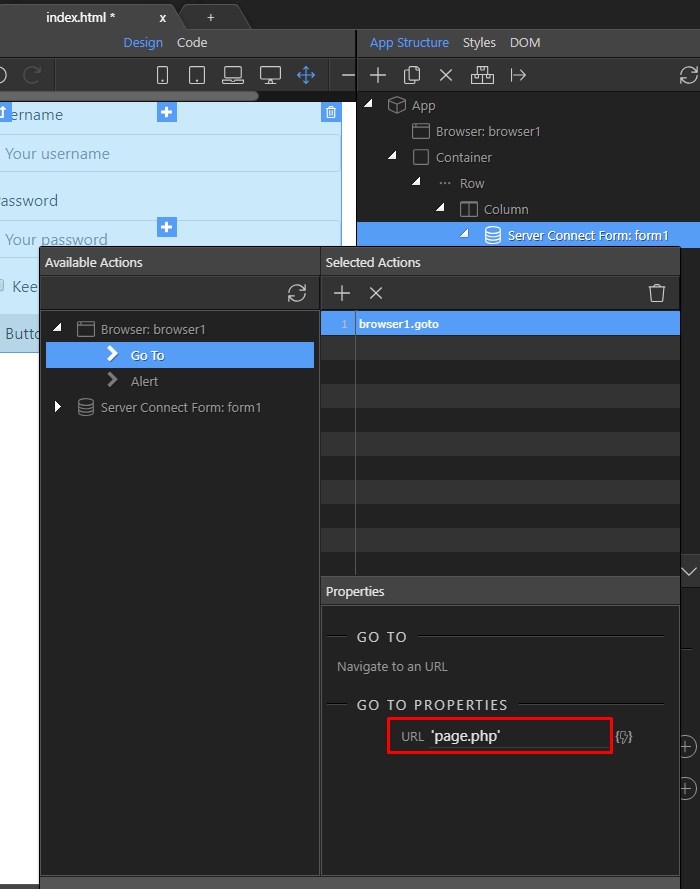
Step 23: Under the Browser component, select “Go To” and click the Add button:
Step 24: Enter the page where the user should be redirected after a successful log in. If you are entering a static URL, make sure to wrap it inside single quotes like: ‘your-page.php’. If you are using the dynamic data picker to retrieve the URL from a dynamic data source, then quotes should not be used:
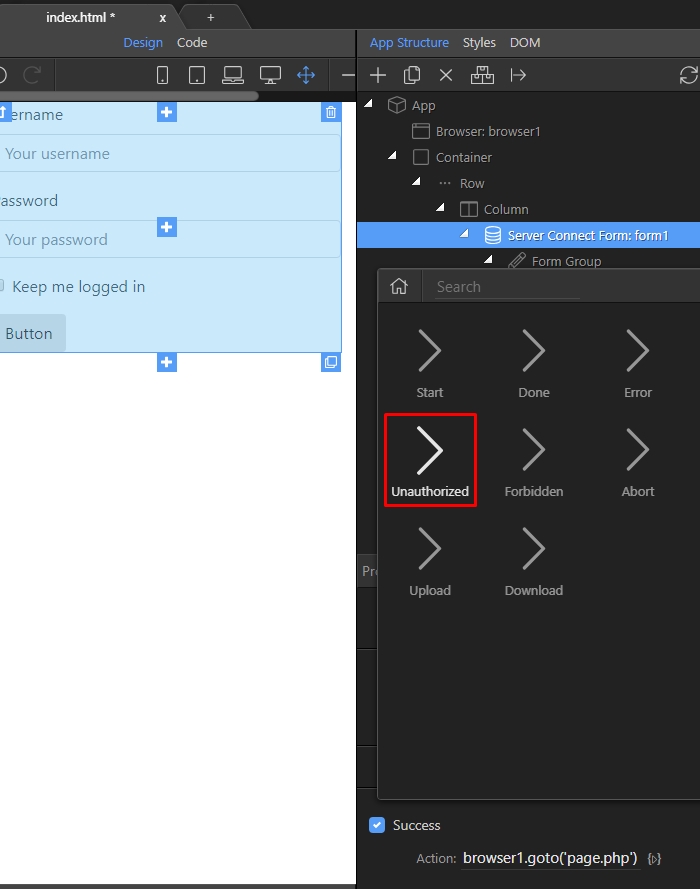
Step 25: With the form still selected add a new Dynamic Event:
Step 26: Open the “Server Connect” category:
Step 27: And click on Unauthorized. This event is being triggered, when wrong user details are provided:
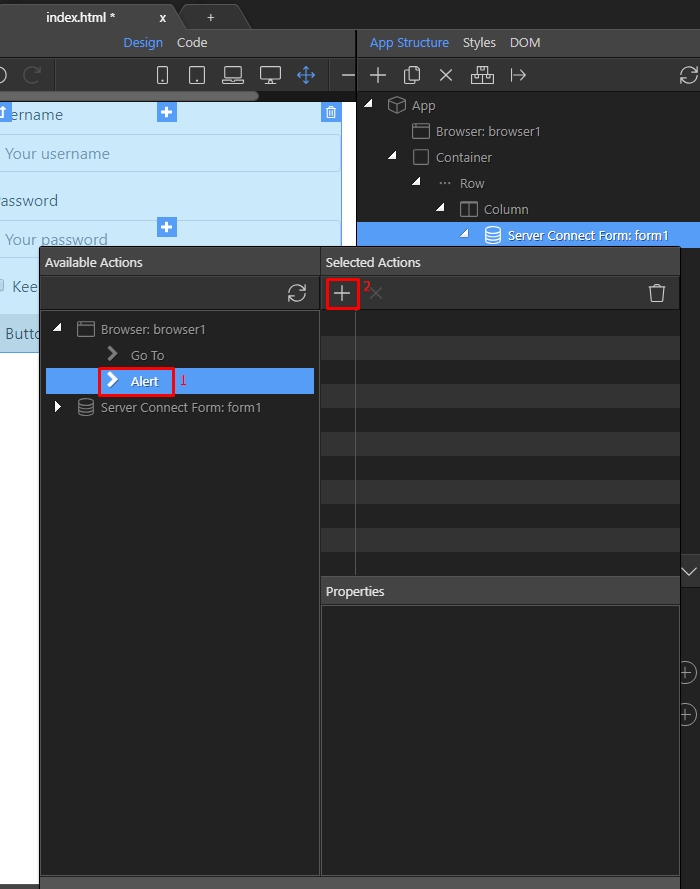
Step 28: Click the dynamic action picker button:

Step 29: Under Browser select Alert(1) and click the Add button(2):
Step 30: Enter the alert text wrapped in single quotes, like “Wrong login details!”:

And you are done! If the user provides correct login details he will be redirected, and if the login details are wrong the alert will be displayed.
![]()
![]()