In this tutorial, I will show you how to create a Video Gallery using YouTube videos. When the Play button is clicked, the video will automatically run in a Bootstrap modal and when the modal is closed, the video will automatically stop playing.
Video using a custom component:

-
For this example, we will start with a blank canvas which includes App Connect and Bootstrap. Click on the + sign (1)
-
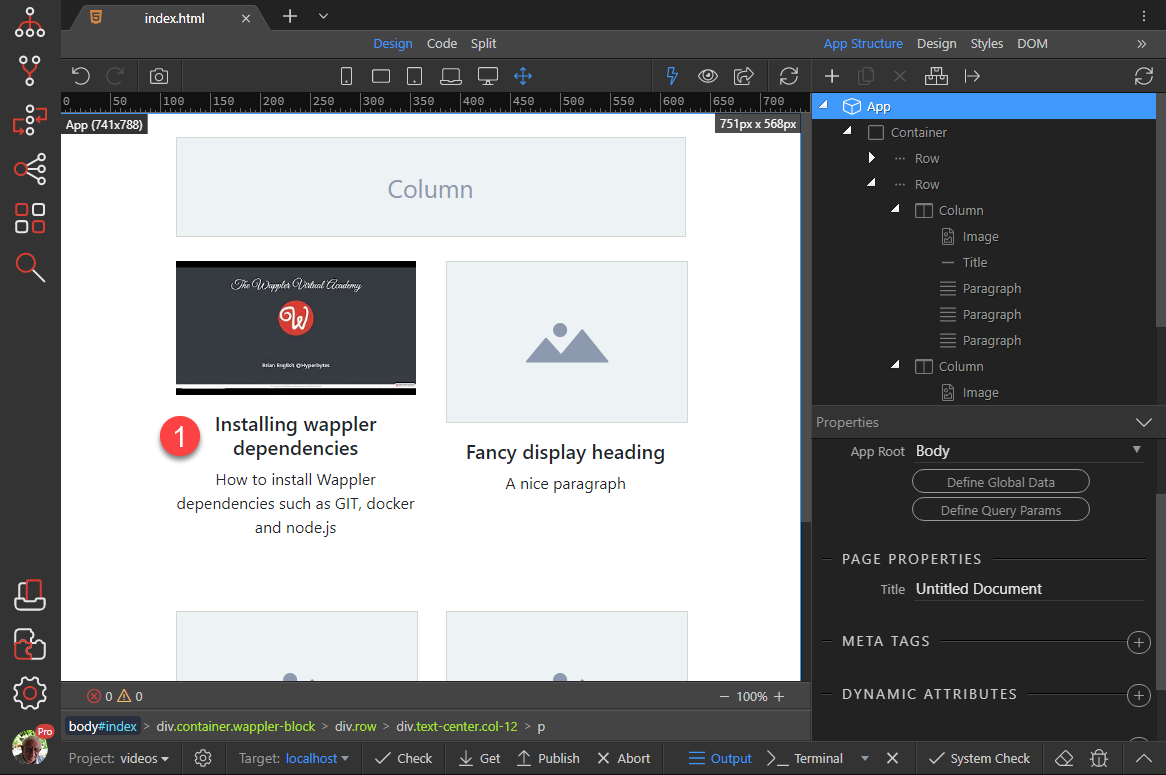
Under Blocks (1), Content (2) choose Four Columns Header Banner (3)
-
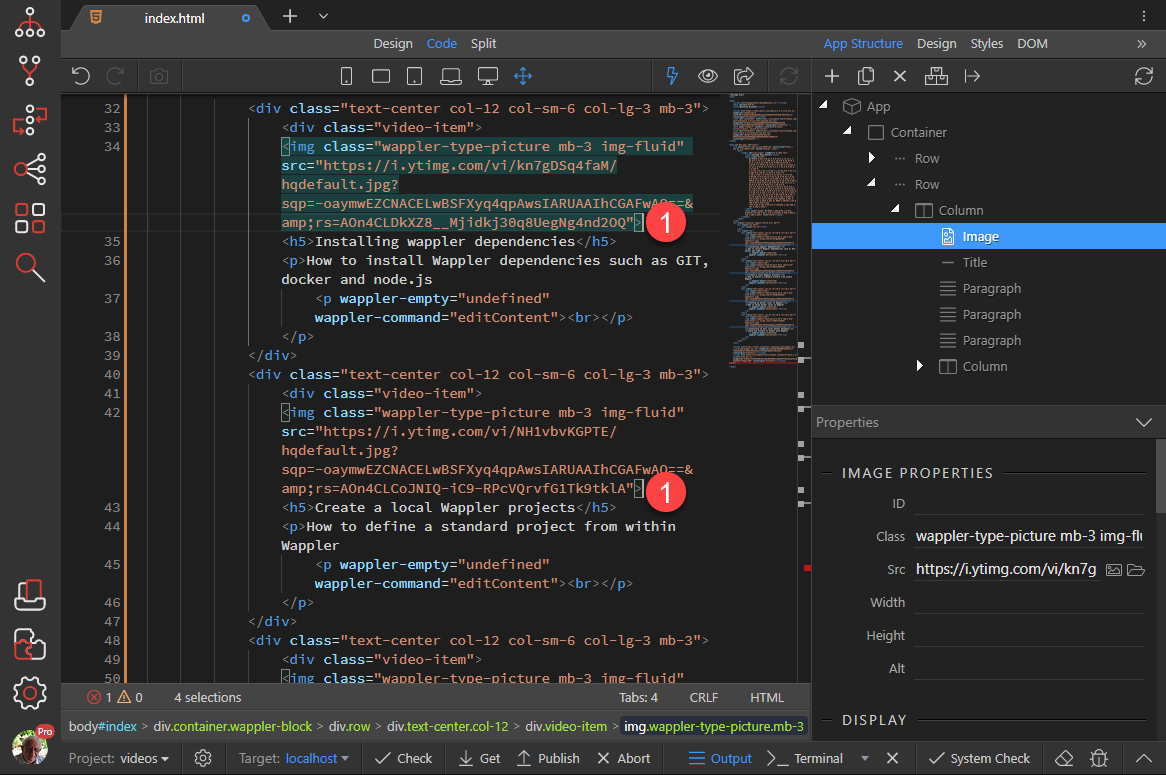
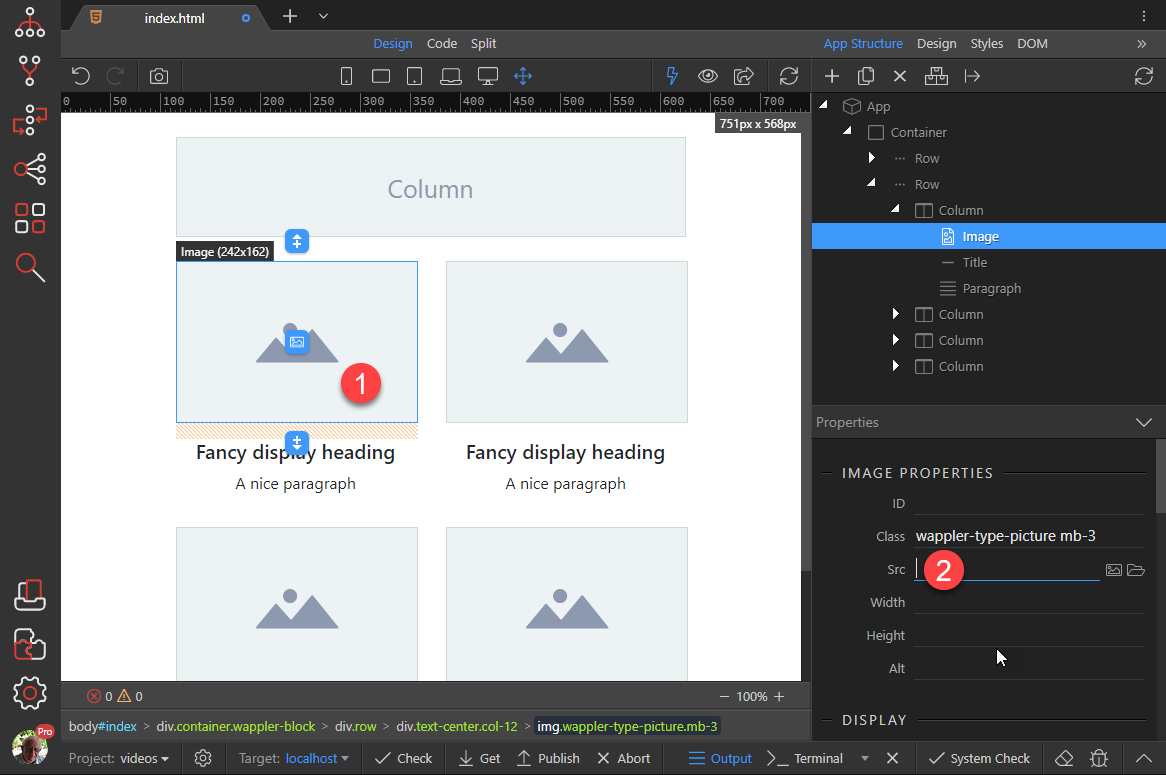
Select the first image (1) and click on the Src field (2).
-
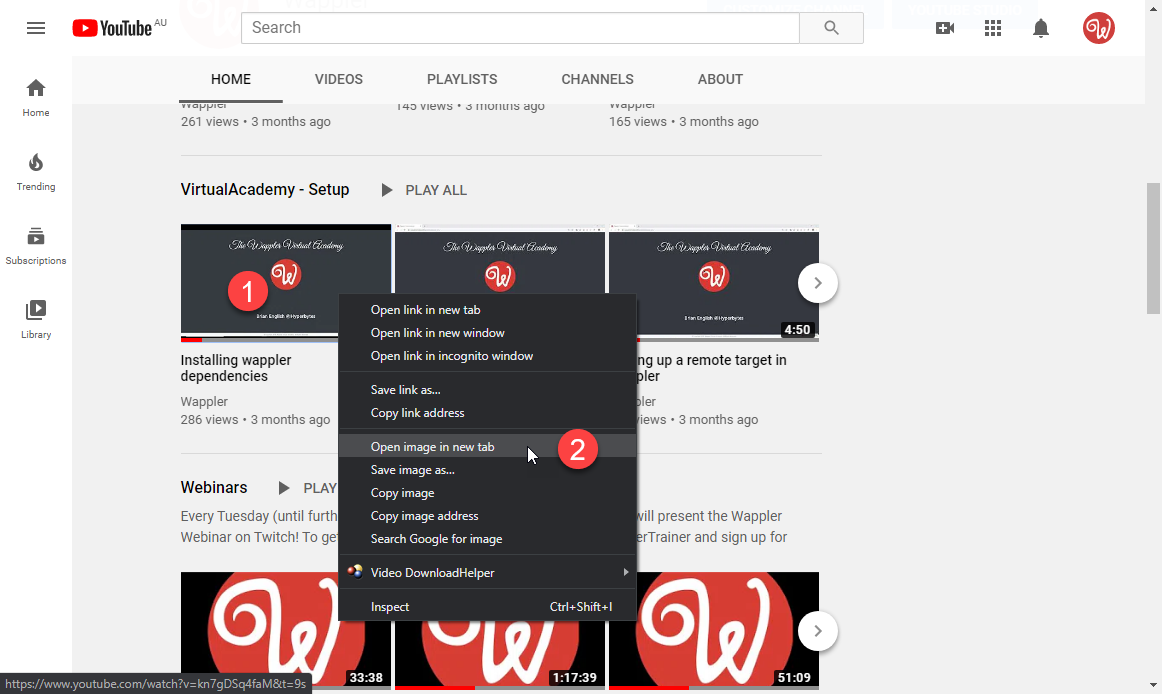
Here we will need to enter the source of our image. Go to the YouTube page containing the video, right click the image (1) and choose Open image in new tab (2)
-
Take a copy of the URL
-
Paste the URL into the SRC field (1) and activate Responsive (2)
-
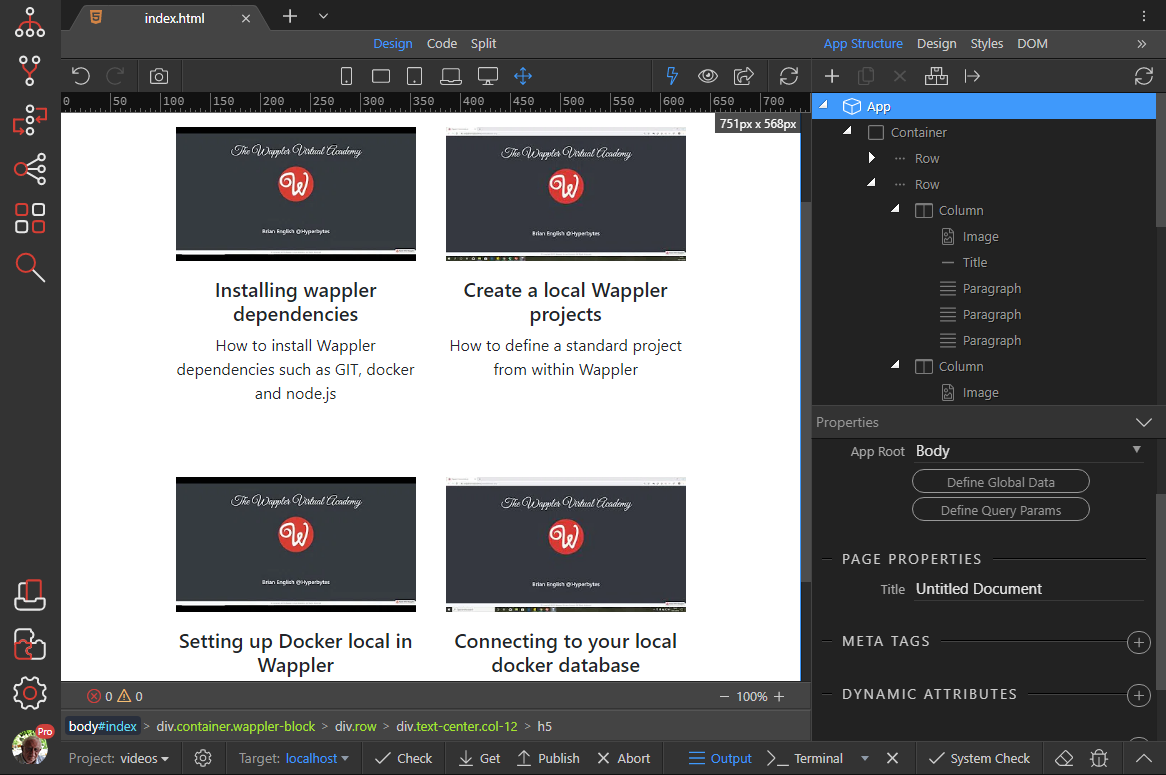
Change the wording to suit (1)
-
Repeat steps 3 to 7 for the other images so that we finish up with the following.


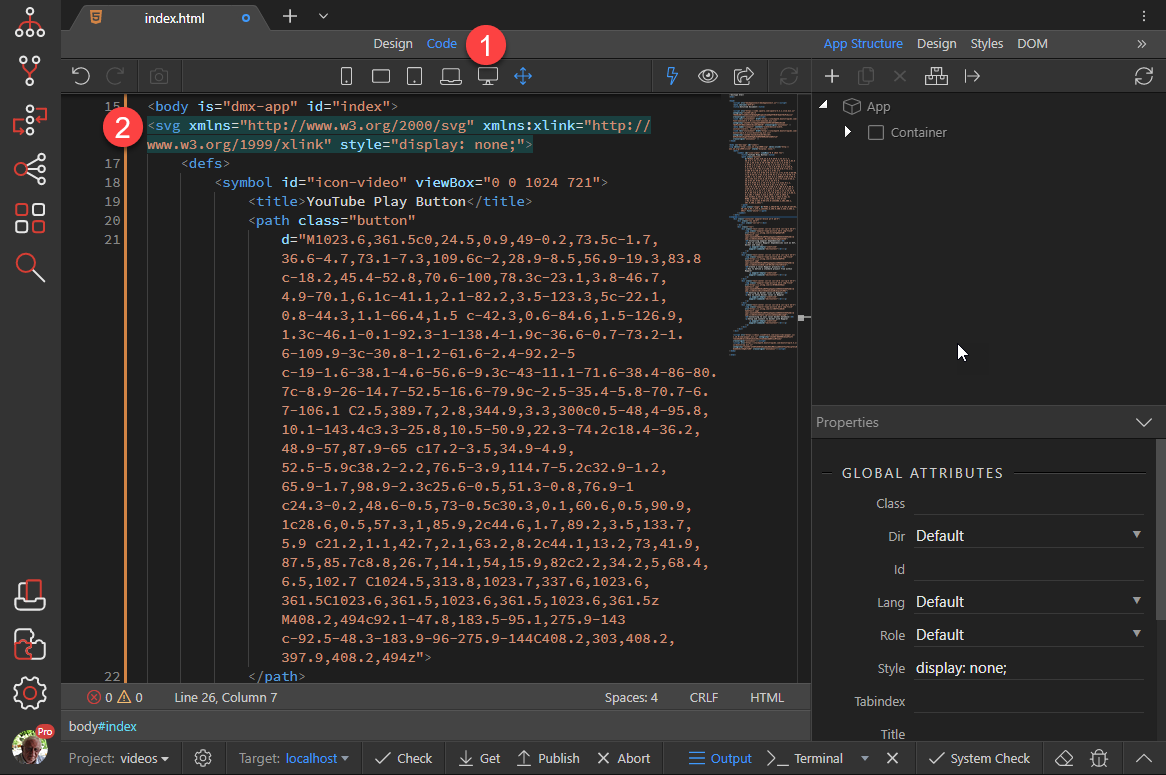
Next, we will add a play button to our image. I have used an SVG image for the button which will need to be placed in the body element of our page. This is the code for our play button:
<svg xmlns="http://www.w3.org/2000/svg" xmlns:xlink="http://www.w3.org/1999/xlink" style="display: none;">
    <defs>
        <symbol id="icon-video" viewBox="0 0 1024 721">
            <title>YouTube Play Button</title>
            <path class="button"
                d="M1023.6,361.5c0,24.5,0.9,49-0.2,73.5c-1.7,36.6-4.7,73.1-7.3,109.6c-2,28.9-8.5,56.9-19.3,83.8 c-18.2,45.4-52.8,70.6-100,78.3c-23.1,3.8-46.7,4.9-70.1,6.1c-41.1,2.1-82.2,3.5-123.3,5c-22.1,0.8-44.3,1.1-66.4,1.5 c-42.3,0.6-84.6,1.5-126.9,1.3c-46.1-0.1-92.3-1-138.4-1.9c-36.6-0.7-73.2-1.6-109.9-3c-30.8-1.2-61.6-2.4-92.2-5 c-19-1.6-38.1-4.6-56.6-9.3c-43-11.1-71.6-38.4-86-80.7c-8.9-26-14.7-52.5-16.6-79.9c-2.5-35.4-5.8-70.7-6.7-106.1 C2.5,389.7,2.8,344.9,3.3,300c0.5-48,4-95.8,10.1-143.4c3.3-25.8,10.5-50.9,22.3-74.2c18.4-36.2,48.9-57,87.9-65 c17.2-3.5,34.9-4.9,52.5-5.9c38.2-2.2,76.5-3.9,114.7-5.2c32.9-1.2,65.9-1.7,98.9-2.3c25.6-0.5,51.3-0.8,76.9-1 c24.3-0.2,48.6-0.5,73-0.5c30.3,0.1,60.6,0.5,90.9,1c28.6,0.5,57.3,1,85.9,2c44.6,1.7,89.2,3.5,133.7,5.9 c21.2,1.1,42.7,2.1,63.2,8.2c44.1,13.2,73,41.9,87.5,85.7c8.8,26.7,14.1,54,15.9,82c2.2,34.2,5,68.4,6.5,102.7 C1024.5,313.8,1023.7,337.6,1023.6,361.5C1023.6,361.5,1023.6,361.5,1023.6,361.5z M408.2,494c92.1-47.8,183.5-95.1,275.9-143 c-92.5-48.3-183.9-96-275.9-144C408.2,303,408.2,397.9,408.2,494z">
            </path>
            <path class="image" d="M408.2,494c0-96.1,0-191,0-287c92,48,183.4,95.7,275.9,144C591.6,398.9,500.3,446.3,408.2,494z" fill="white"></path>
        </symbol>
    </defs>
</svg>
-
Copy the above code, click the Code tab (1) and paste the SVG to your document, just under the opening body tag (2)
-
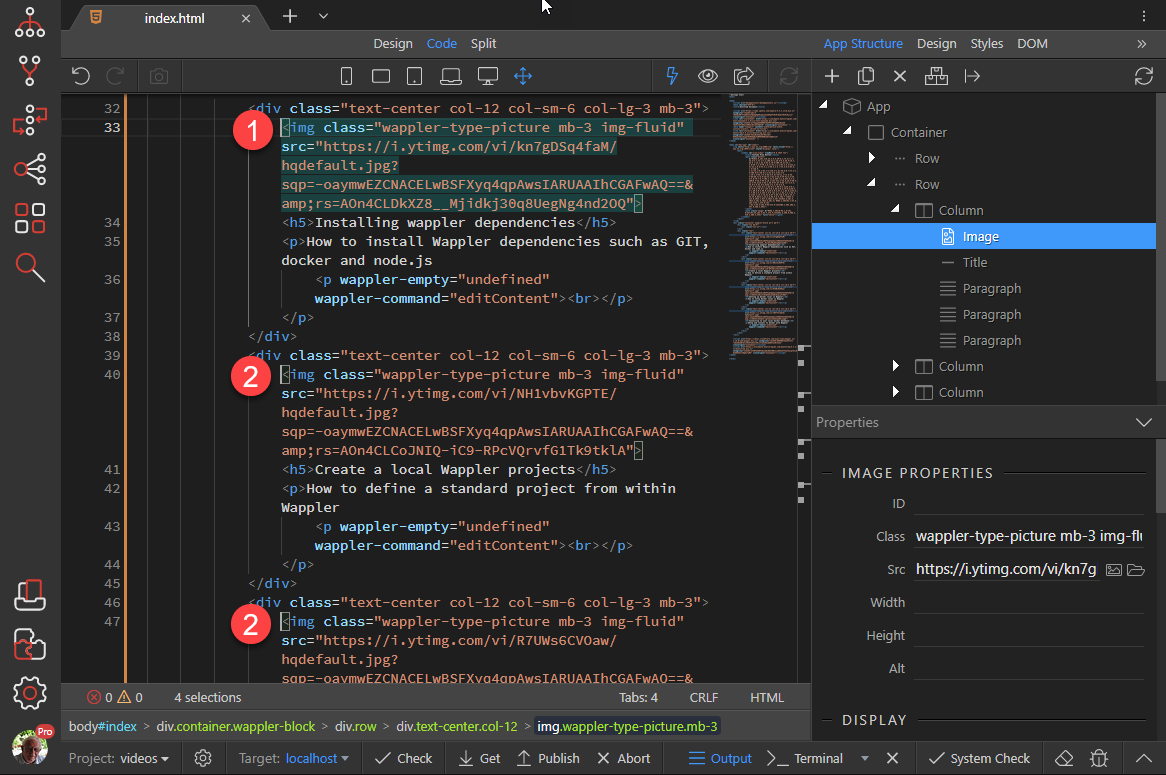
While in Code view, click in front of the first image (1), hold down the ALT key and click in front of each of the other images (2)
-
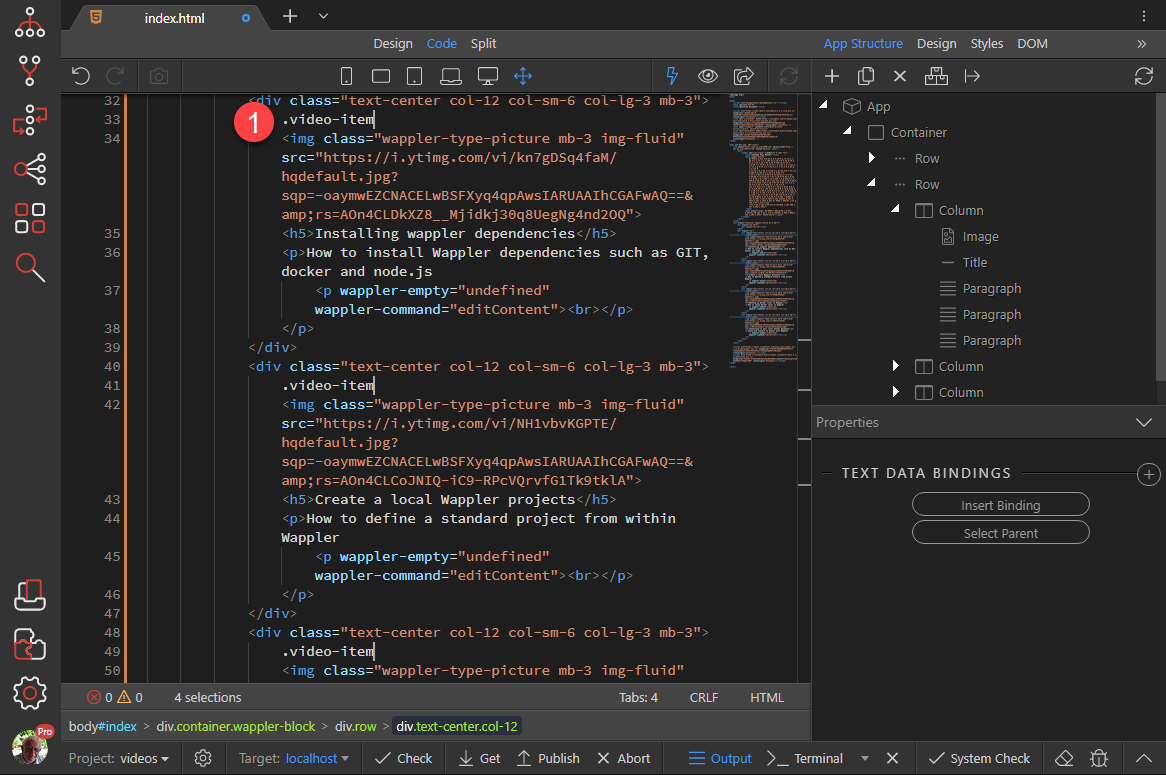
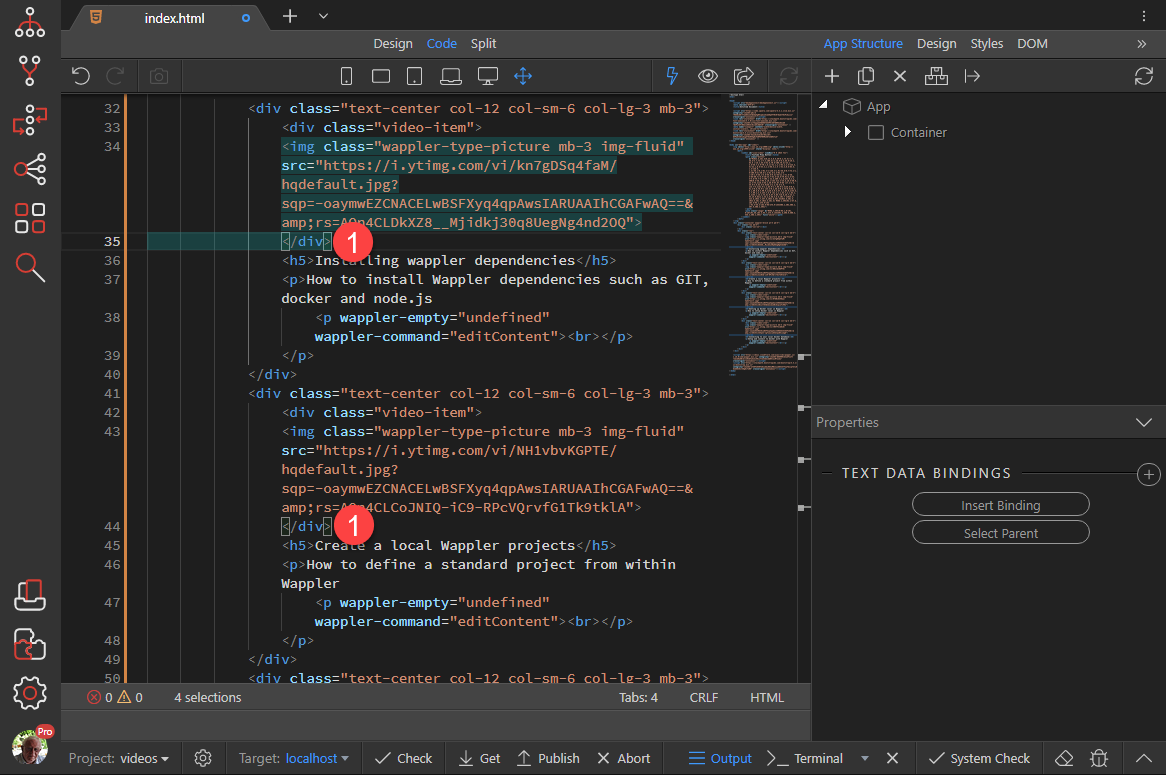
Press ENTER and in the created space type .video-item (1), pressing the TAB key immediately after (1)
-
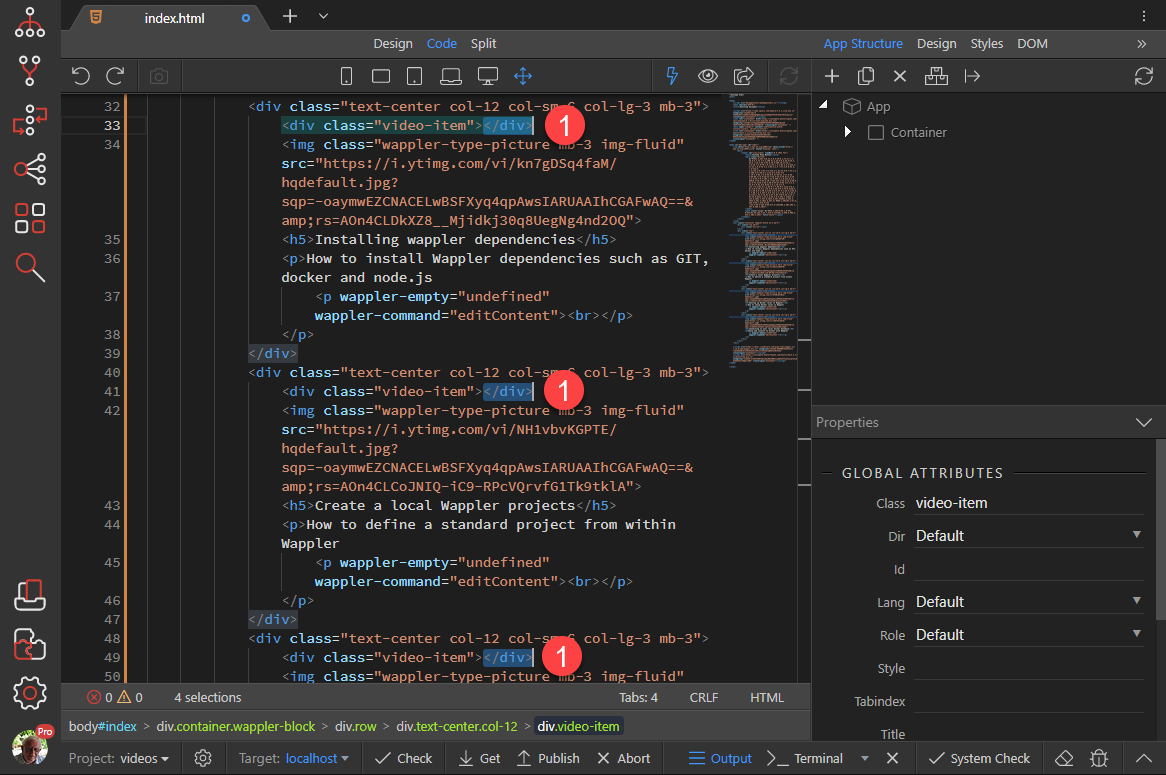
The result is the creation of a DIV element. With the multi-cursor still active, highlight the ending DIV tag (1) and cut (CTRL-x)
-
Move the multi-cursor to after the image element (1)
-
Press enter and paste the cut tag into the space (1)
-
Move the multi-cursor back to the end of the image element and press ENTER. In the created space enter
<button> <svg class="btn-youtube"> <use xlink:href="#icon-video"></use> </svg> </button>Back in Design view, we see our Play buttons, wrong size, wrong place and wrong colour.
-
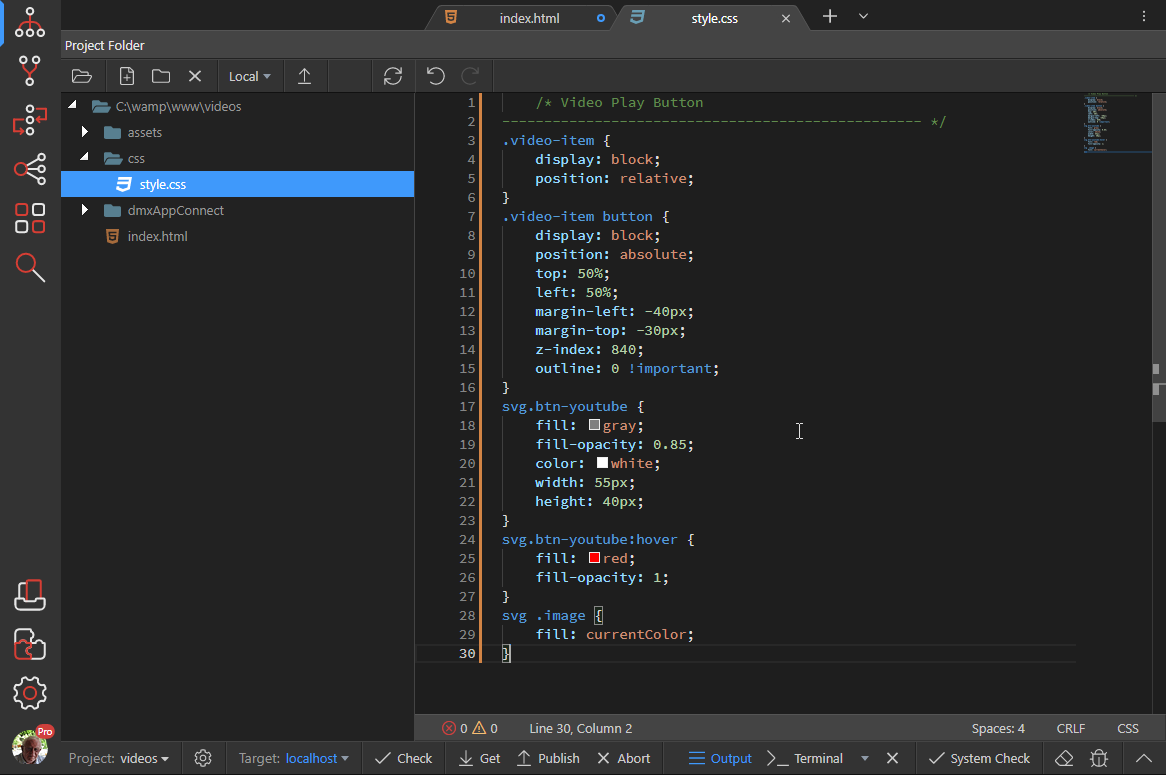
Open the style sheet and copy and paste the following code into the sheet and save the style sheet.
/* Video Play Button -------------------------------------------------- */
.video-item { display: block; position: relative; }
.video-item button { display: block; position: absolute; top: 50%; left: 50%; margin-left: -40px; margin-top: -30px; z-index: 840; outline: 0 !important; } svg.btn-youtube { fill: gray; fill-opacity: 0.85; color: white; width: 55px; height: 40px; }
svg.btn-youtube:hover { fill: red; fill-opacity: 1; }
svg .image { fill: currentColor; } -
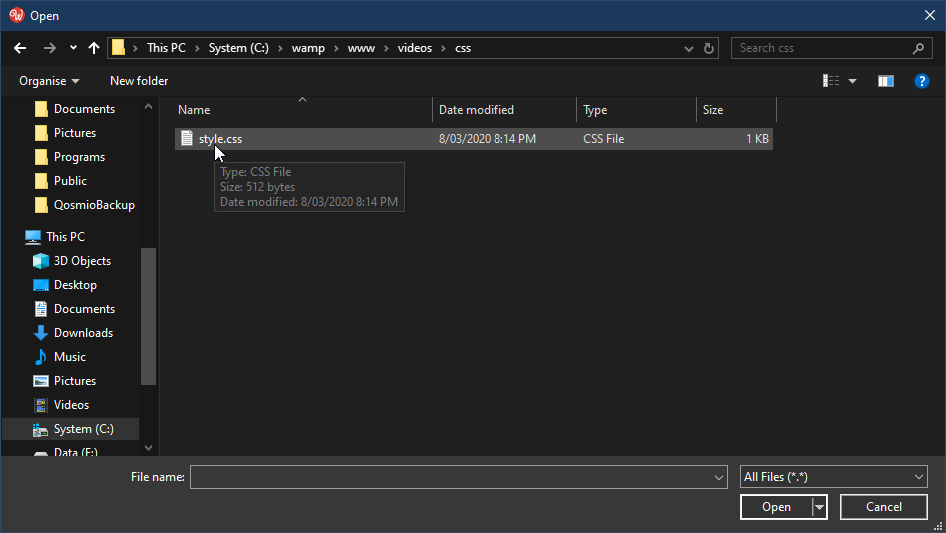
After saving the style sheet, close it. Back in Design view choose Styles (1) and Attach CSS file (2)
-
Choose your style sheet
-
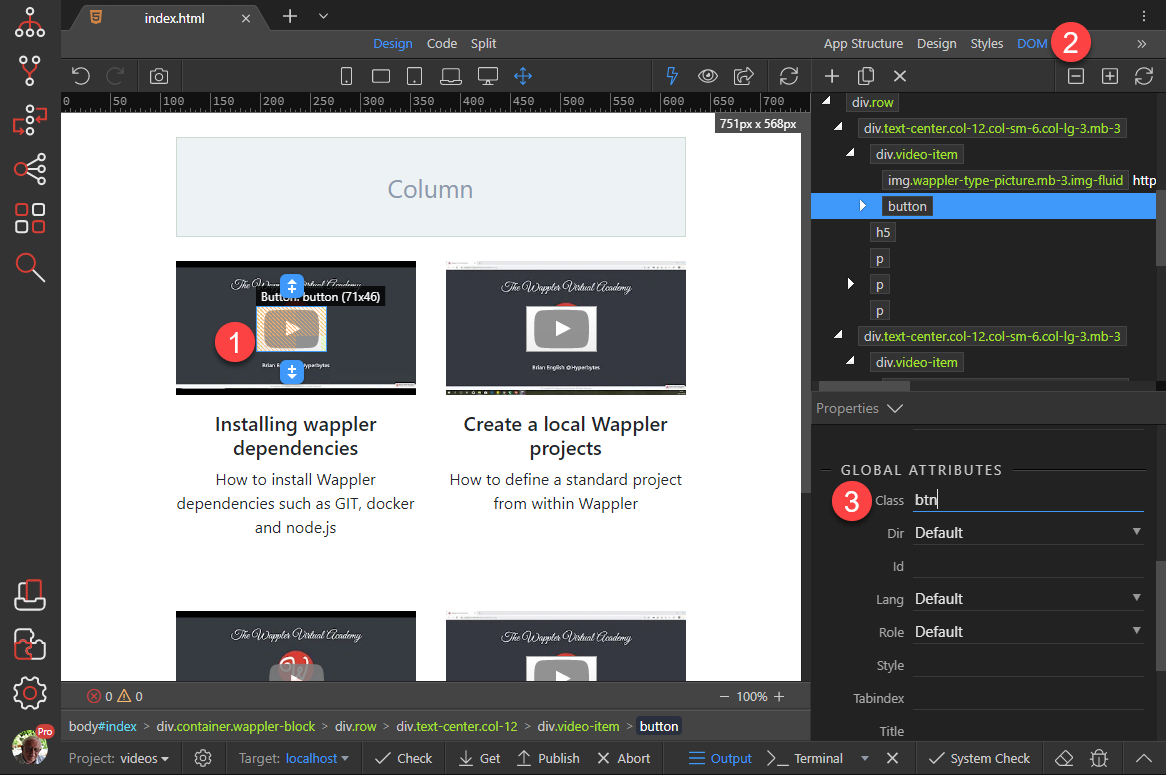
Back in Design view, we notice that the buttons still need a bit of modifying. Click the button (1), choose the DOM tab (2) and add a Class of btn (3)
-
Repeat step 19 for the remaining buttons to get the following result
-
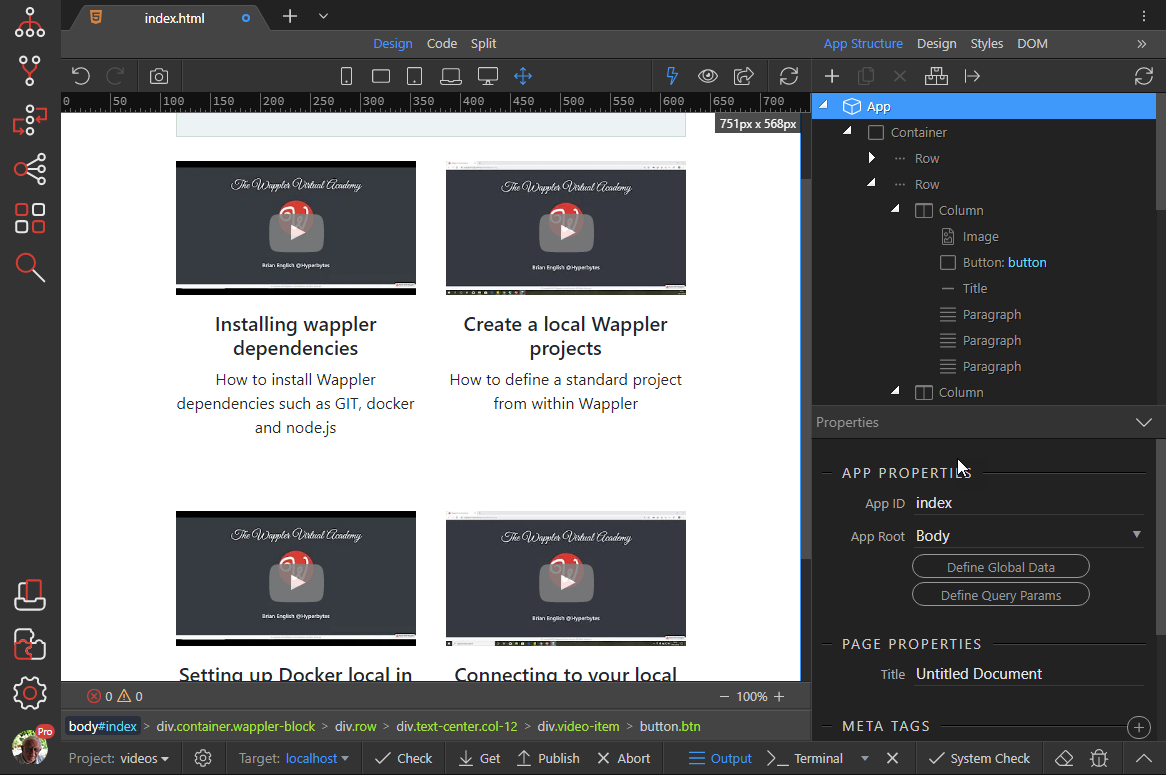
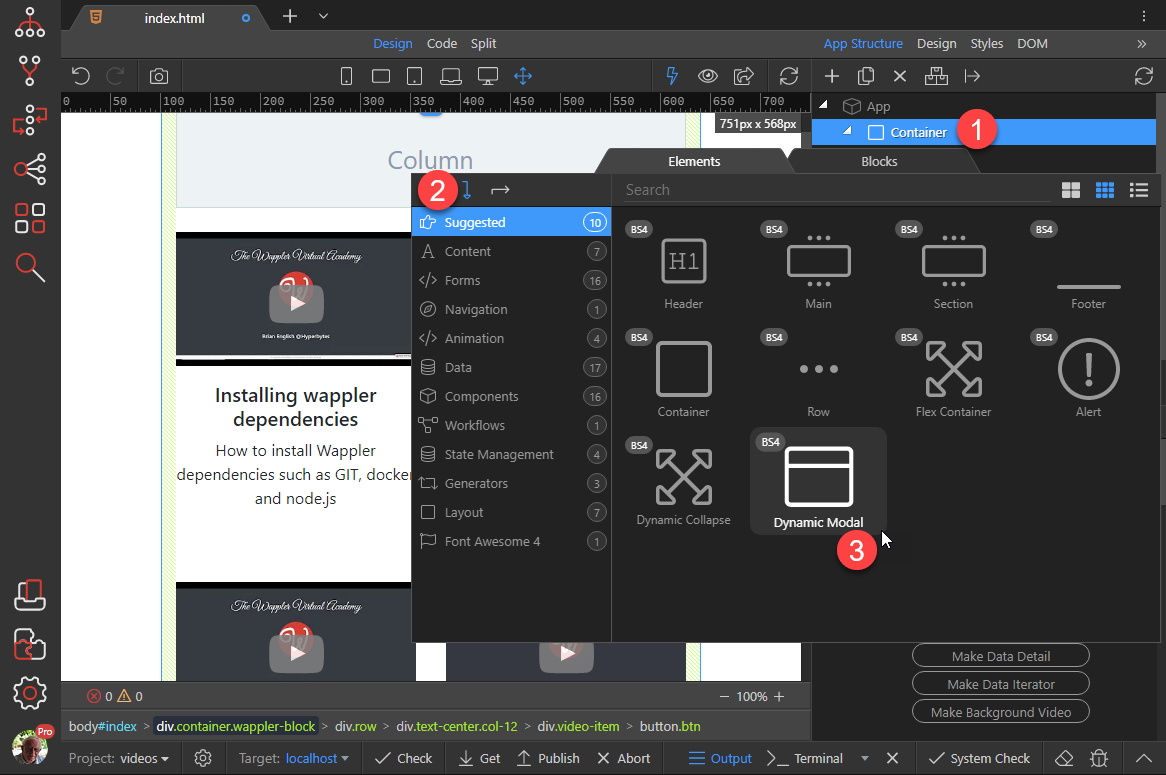
Now we'll add a modal that shows the video. Right click the Container (1), choose Add After (2) and Dynamic Modal (3)
-
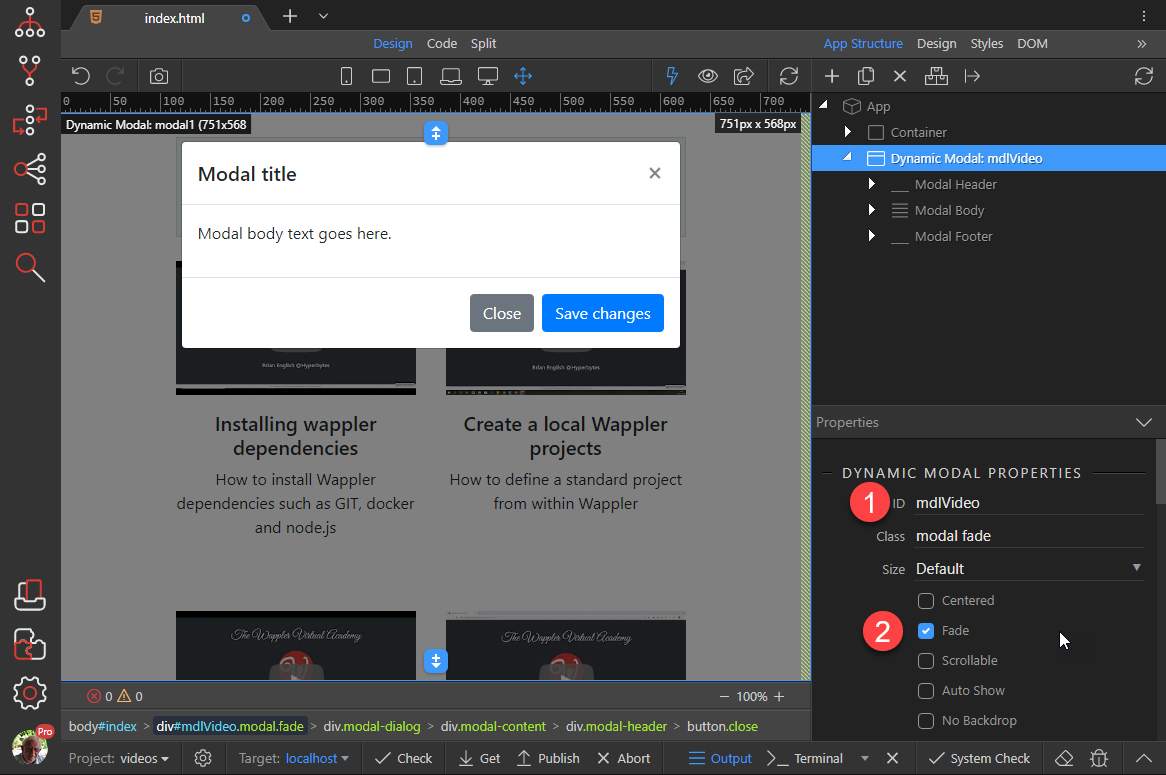
Give the Modal and ID (1) and activate Fade (2)
-
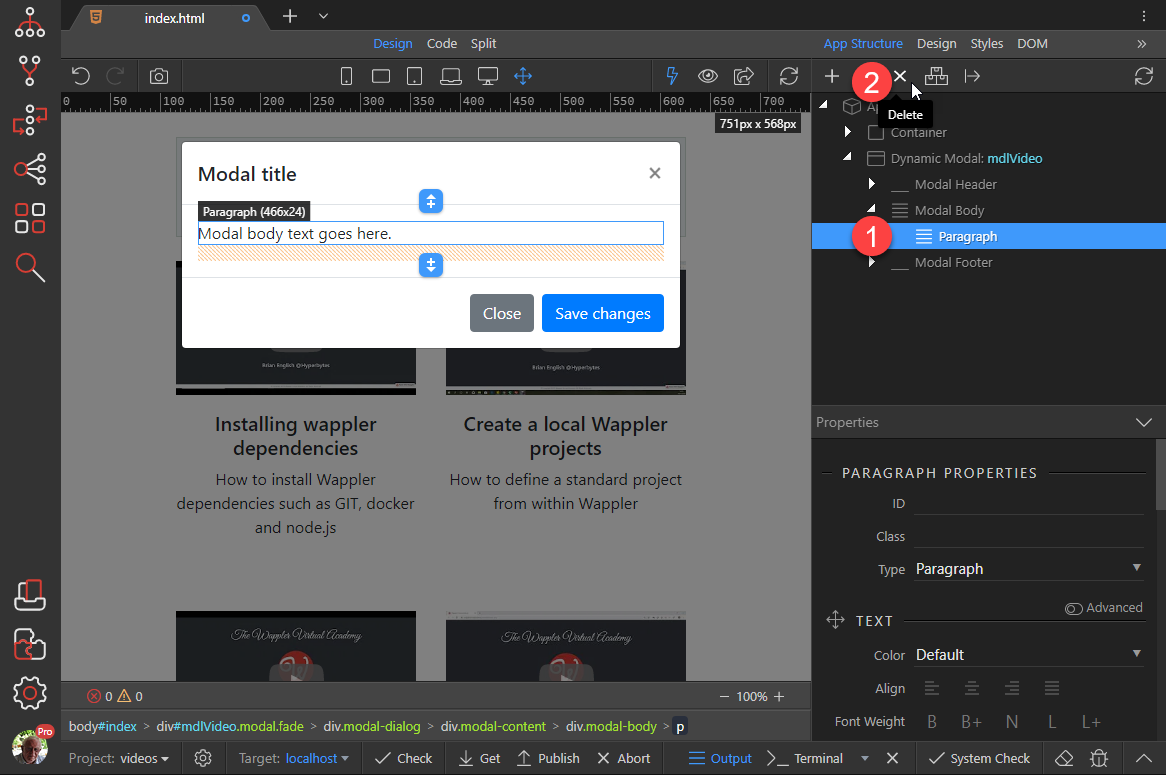
Choose Paragraph (1) and Delete (2)
-
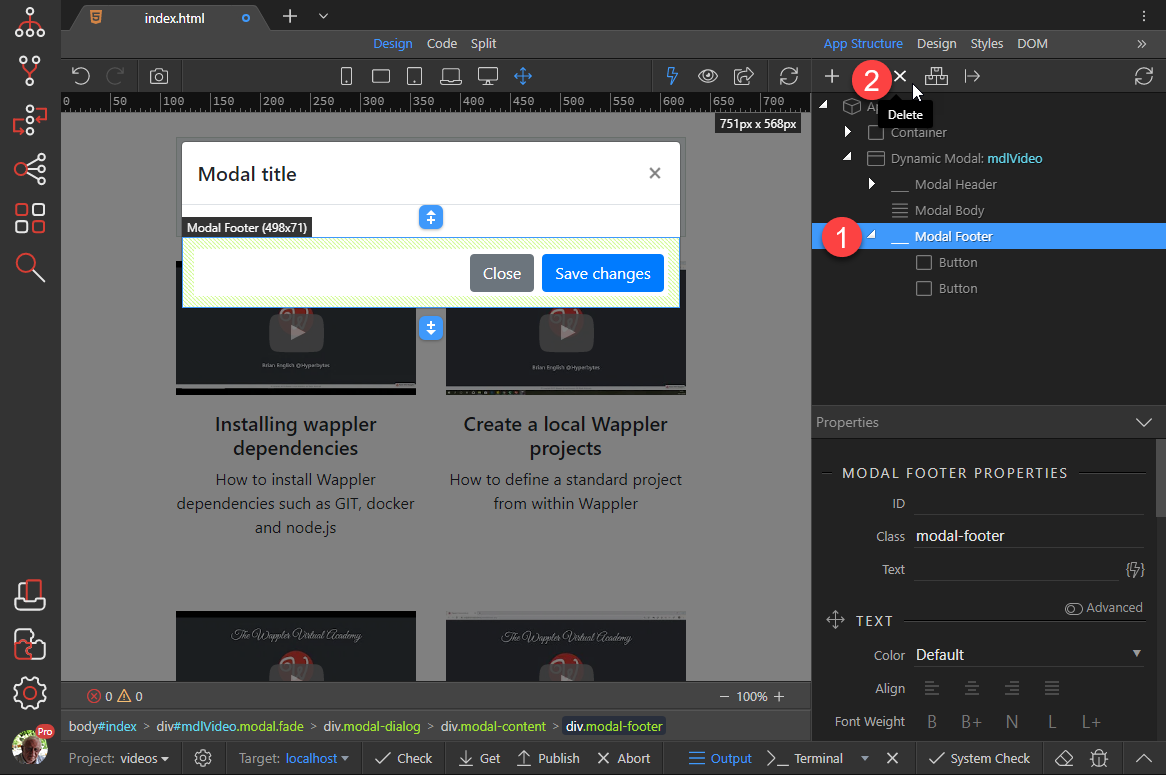
Choose Modal Footer (1) and Delete (2)
-
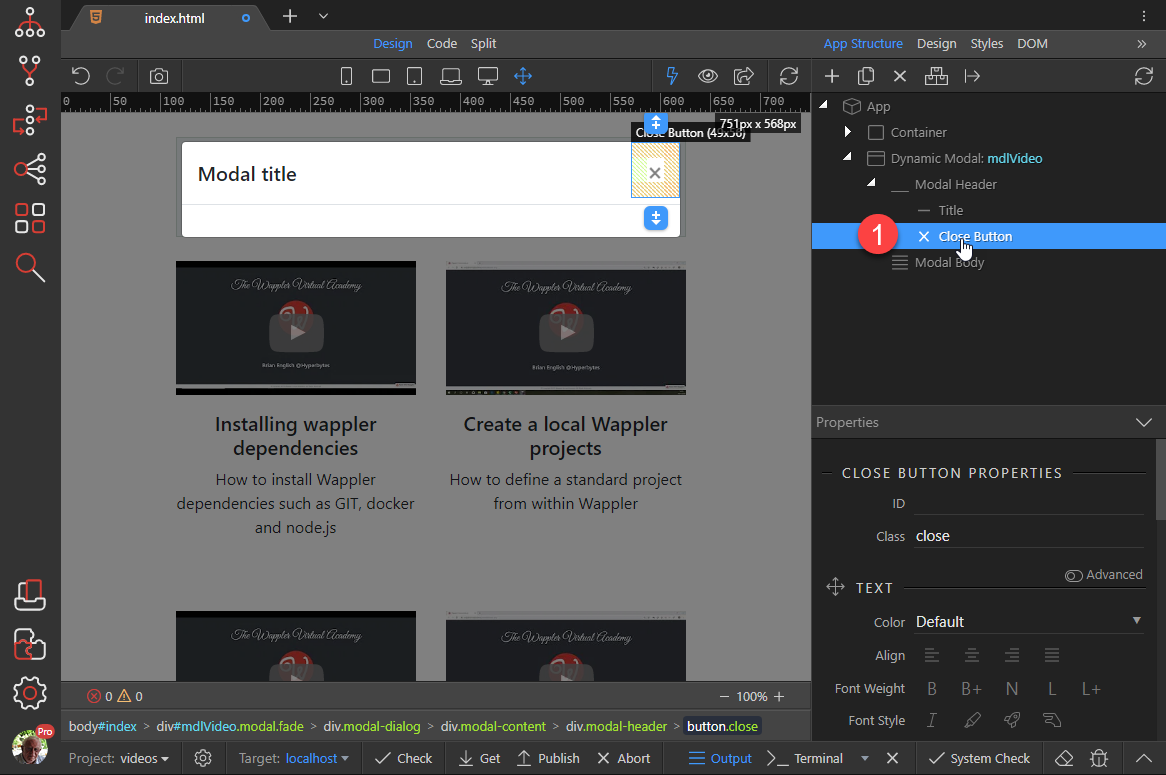
Choose the Close Button (1)
-
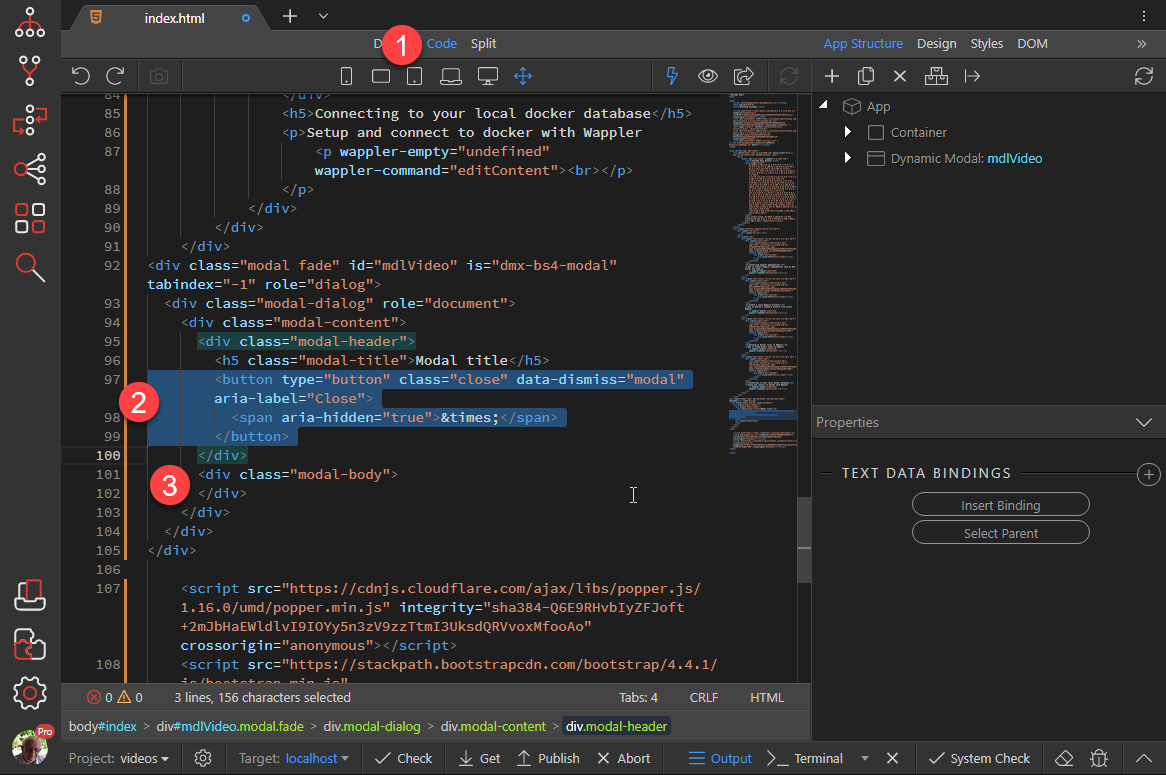
In Code view (1), select the button element (2) and drag it into the modal-body element (3)
-
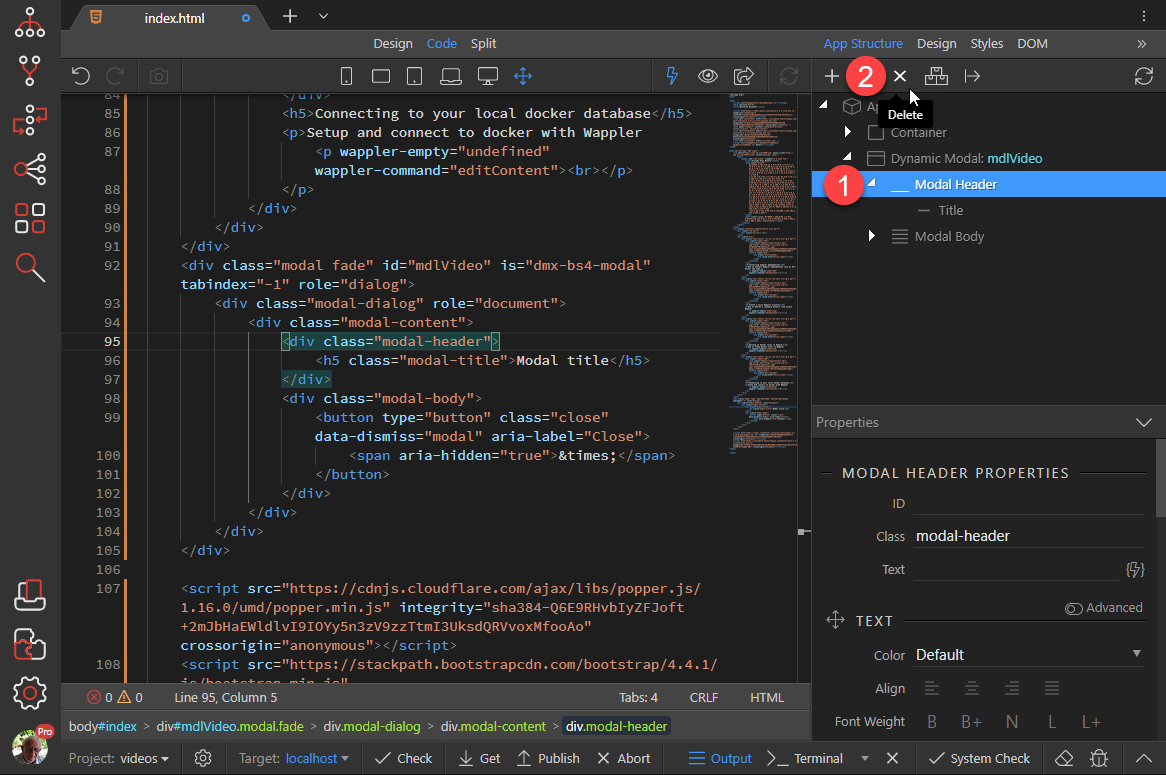
Select Modal Header (1) and Delete (2)
-
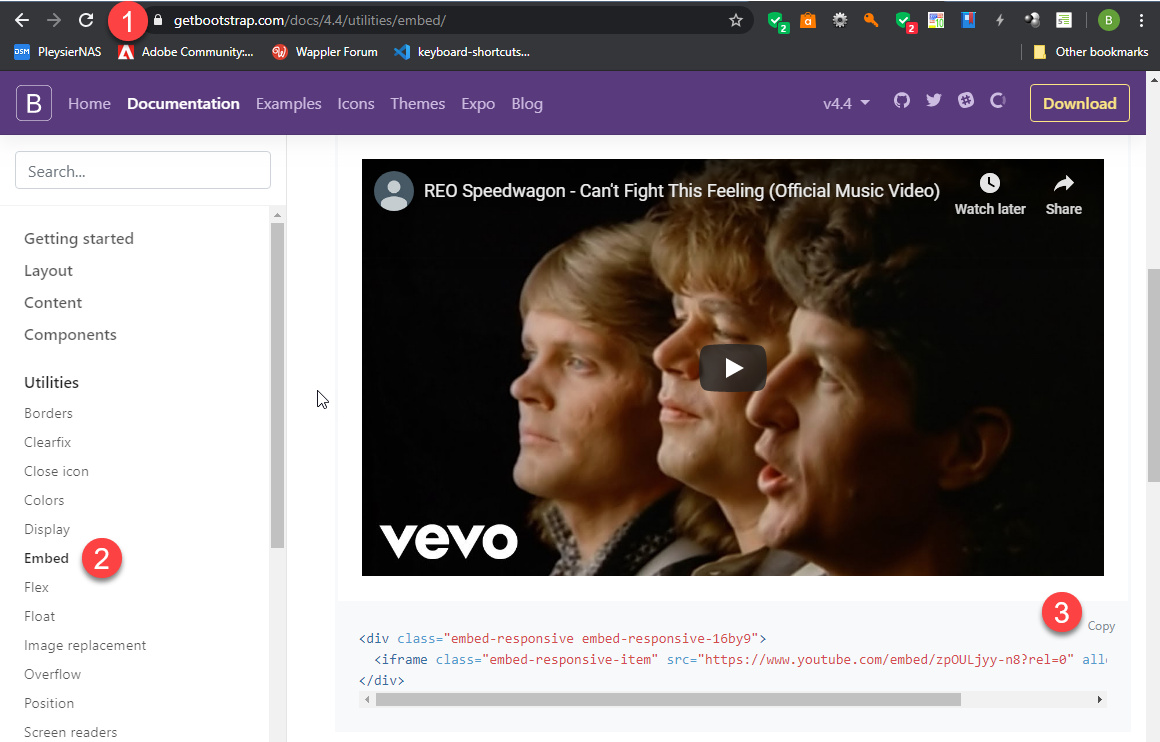
For this part we need to go to the Bootstrap site (1), choose Embed and copy the required code (3)
-
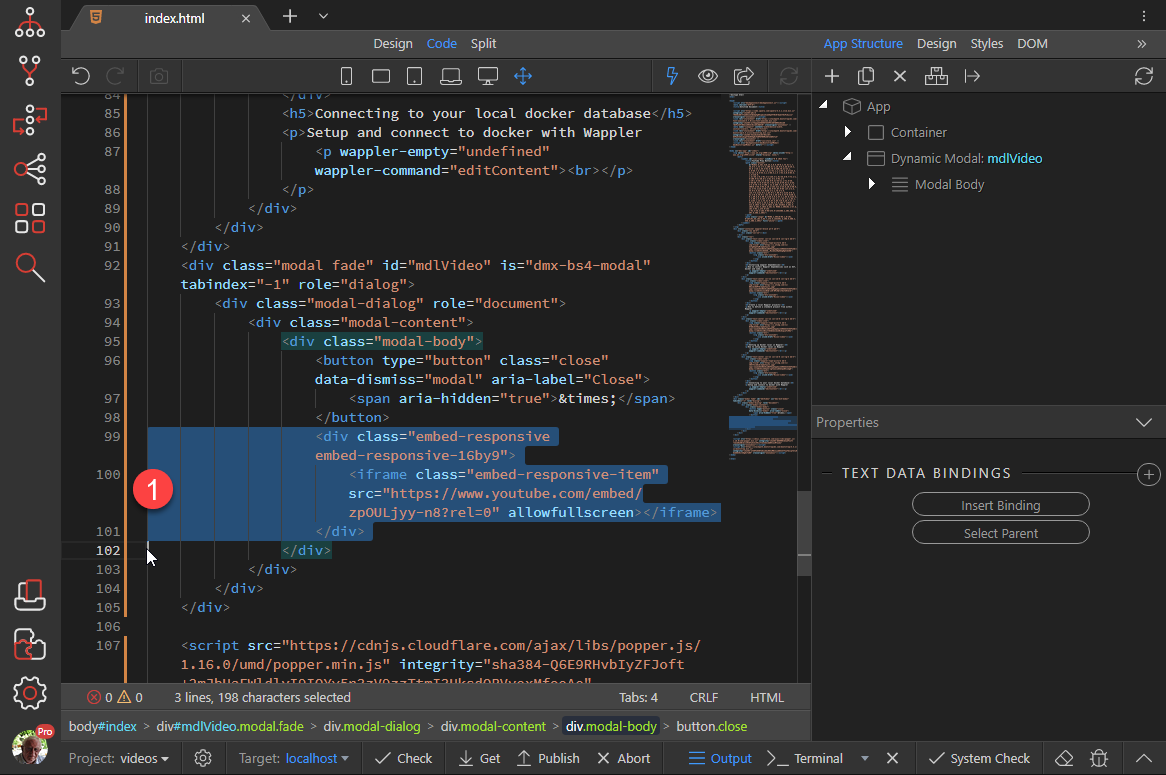
Paste the code under the button (1)
-
As you have noticed, the video is hard coded where we want to determine the video to be played when clicking the Play button. Here we will introduce a variable that will be changed by the Play button. Right click App (1), choose Data (2) and Variable (3)
-
Give the Variable an ID (1) and a Value of 0 (2)
-
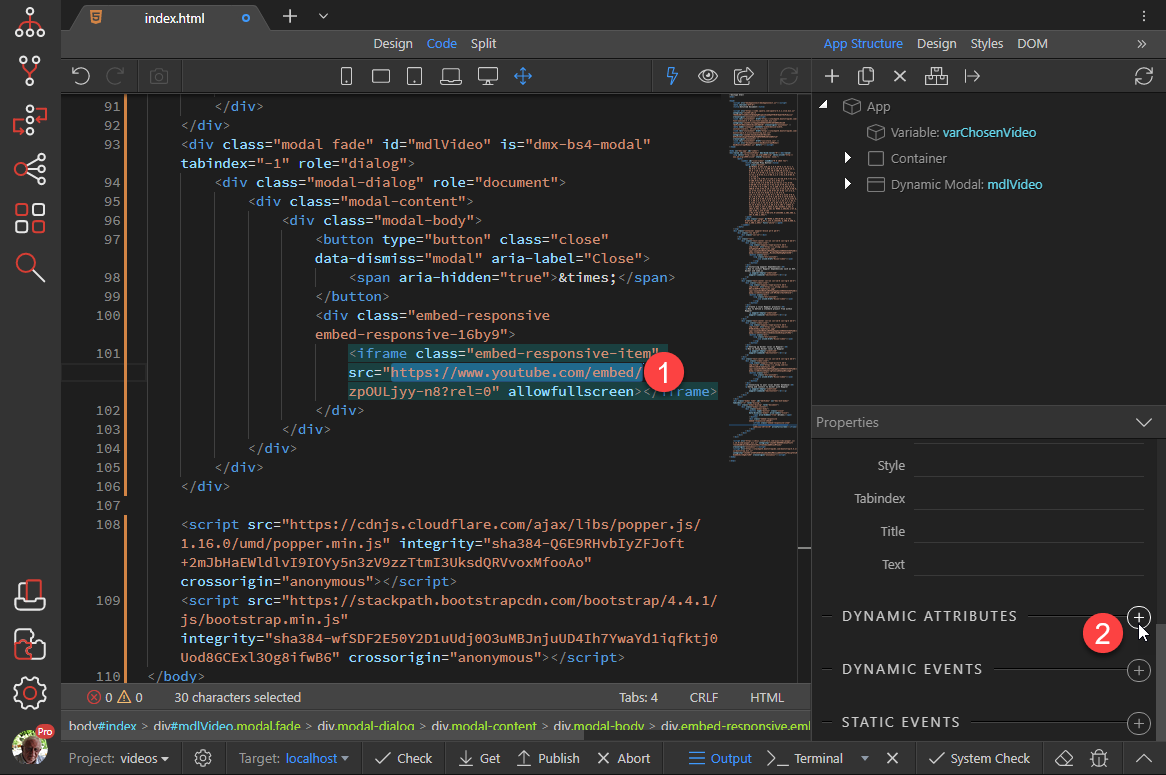
Back in our Modal, Select the first part of the src and copy (1). Click on Dynamic Attributes (2)
-
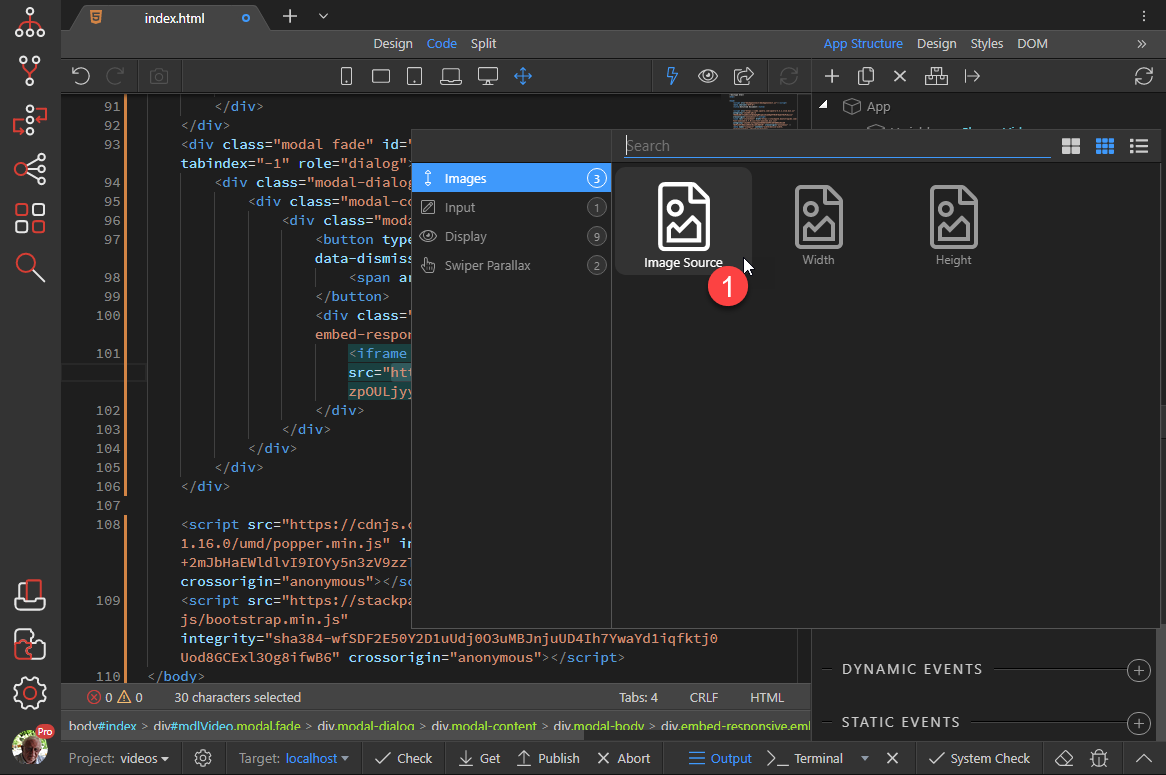
Choose Image Source (1)
-
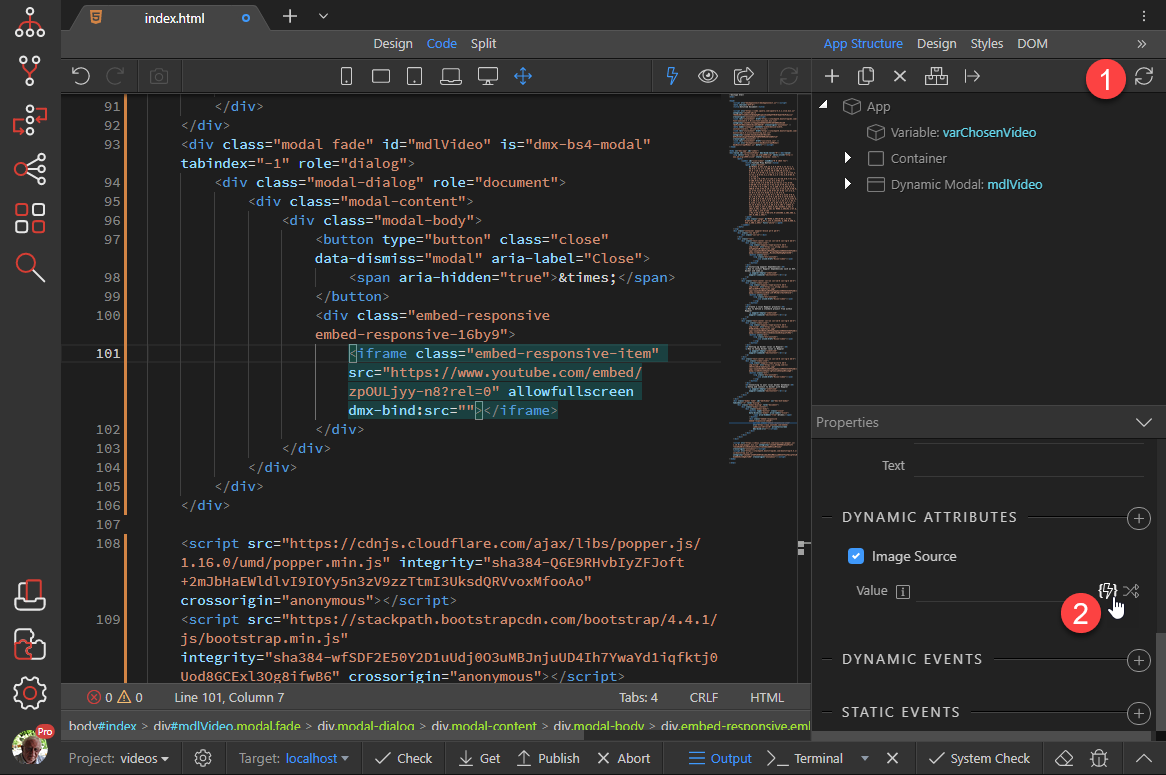
Reload the page (1) and choose the thunderbolt for the Value (2)
-
Change the field to an Expression (1), paste the copied part of the URL (2) and choose the value of our variable (3). Make sure to remove the space btween the URL and the Variable (4). When done, press Select
-
Still in Code view, add the following to the src
?autoplay=1&modestbranding=1&showinfo=0so that we finish up with
-
Remove the URL from the original src (1) and add allowscriptaccess="always" allow="autoplay" (2). It looks like Wappler forgot to enclose the variable in double curly brackets, so let us do that as well (3)
-
Back in Design view, click on the first image (1) and copy the video code (the part between vi/ and /hq) (2)
-
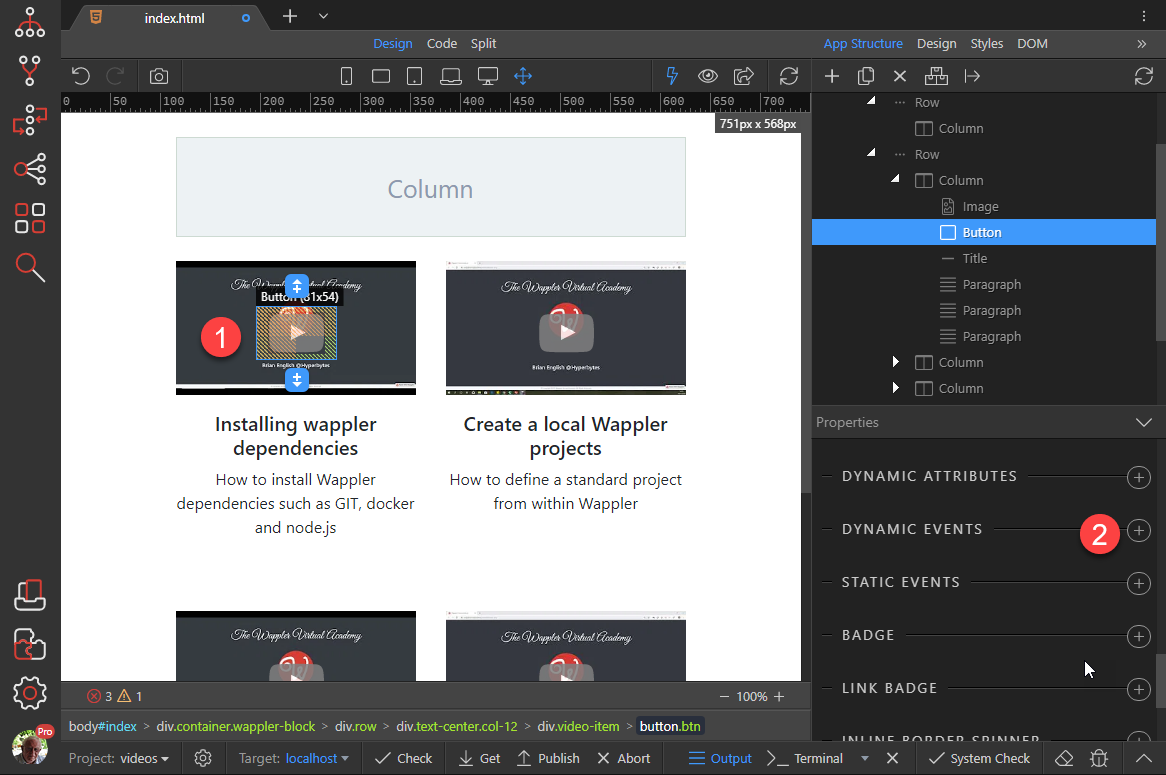
Choose the button (1) and click on Dynamic Events (2)
-
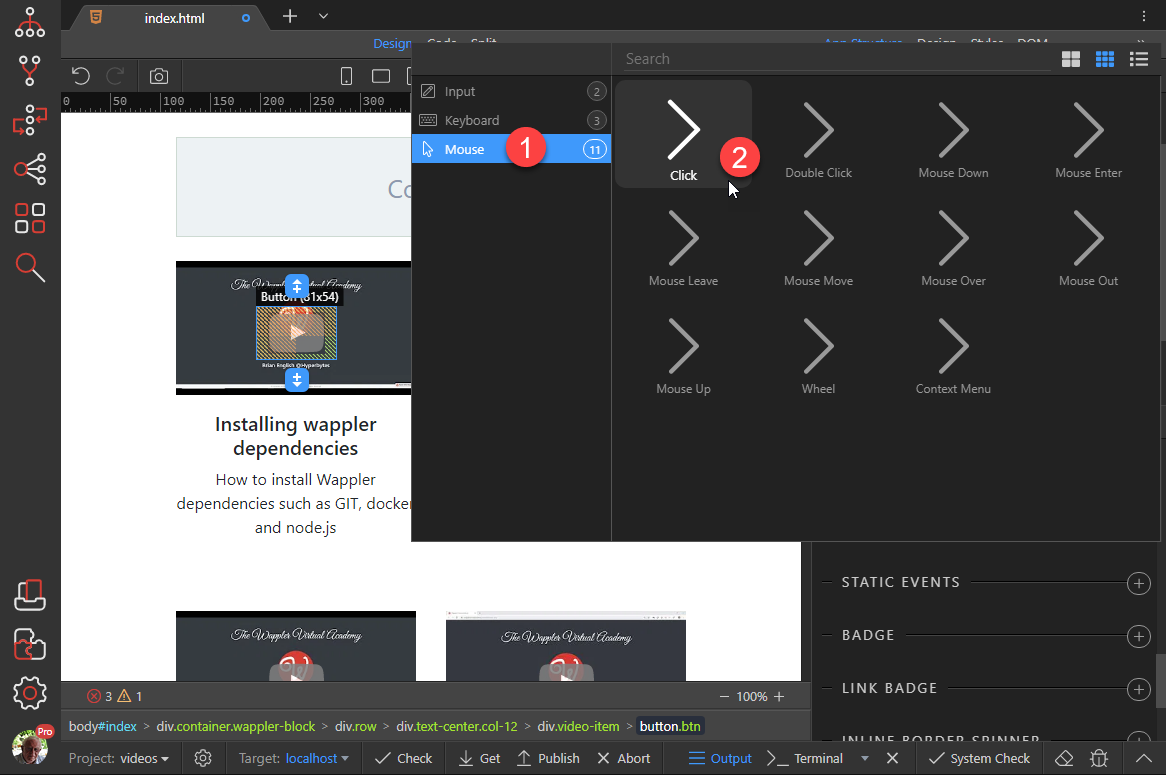
Choose Mouse (1) and Click (2)
-
Click the Action button (1)
-
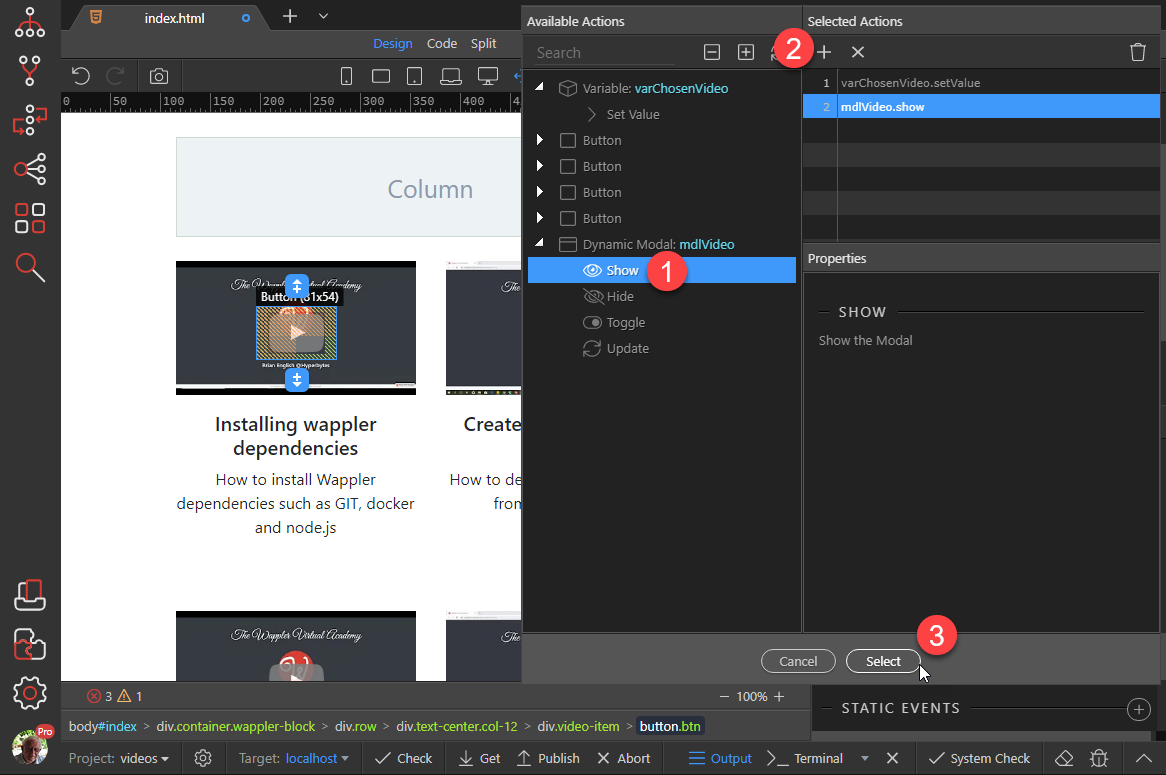
Choose Set Value for the variable (1), Add to the Actions (2), select the action (3) and paste in the video code that we copied earlier, surround by single quotes (4)
-
We also need to show the modal. Choose Show (1) and Add to the Actions (2). Click select when done (3)
-
Repeat steps 38 to 43 for the remaining videos.
-
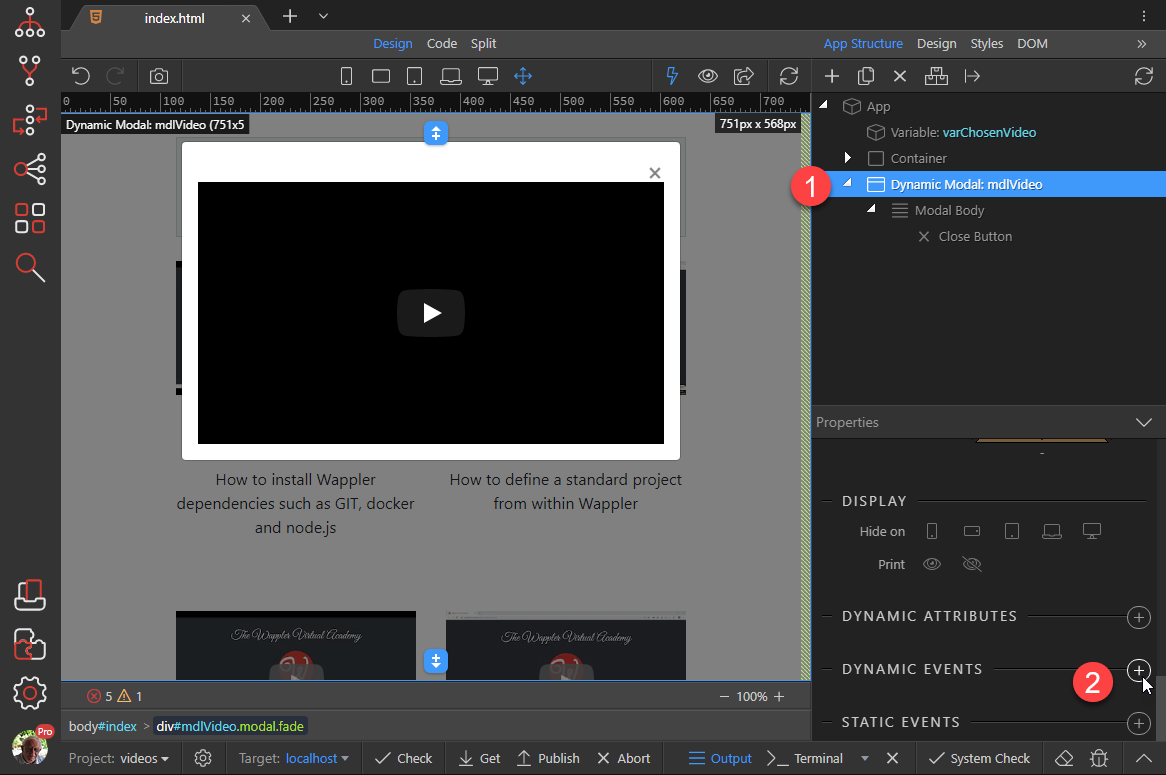
Next, we need to stop the video from playing when the modal is closed. Select the modal (1) and choose Dynamic Events (2)
-
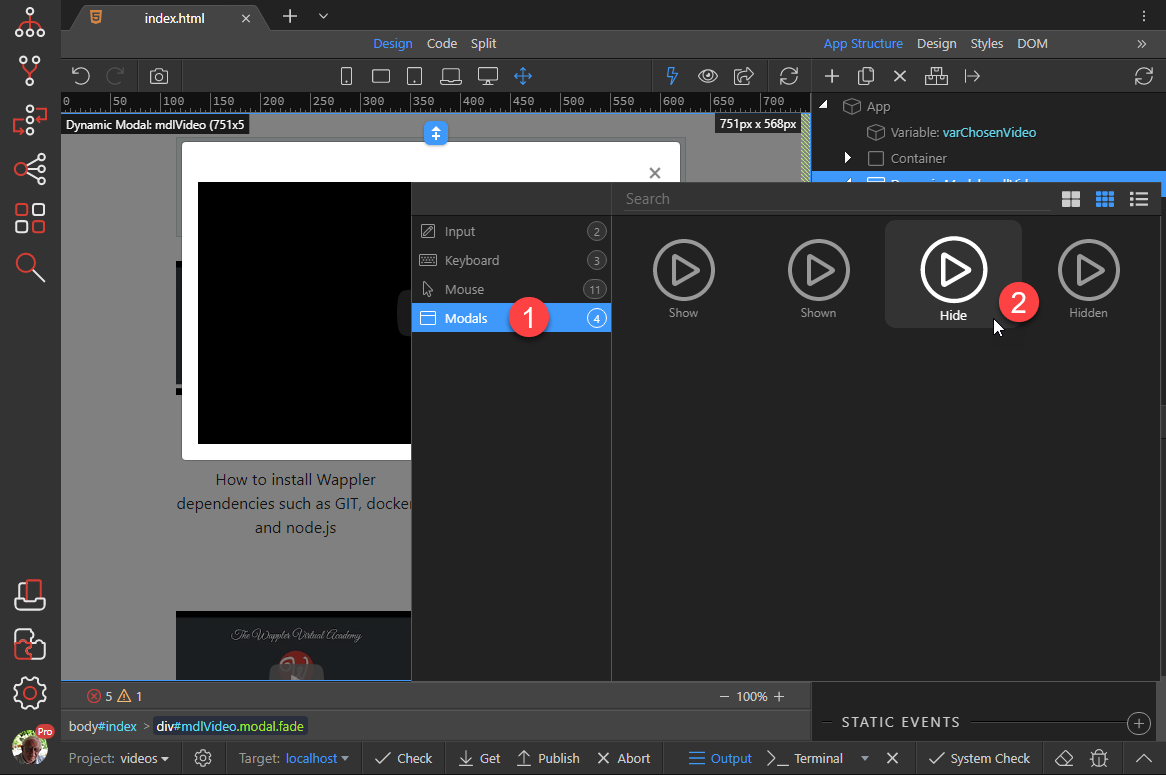
Choose Modals (1) and Hide (2)
-
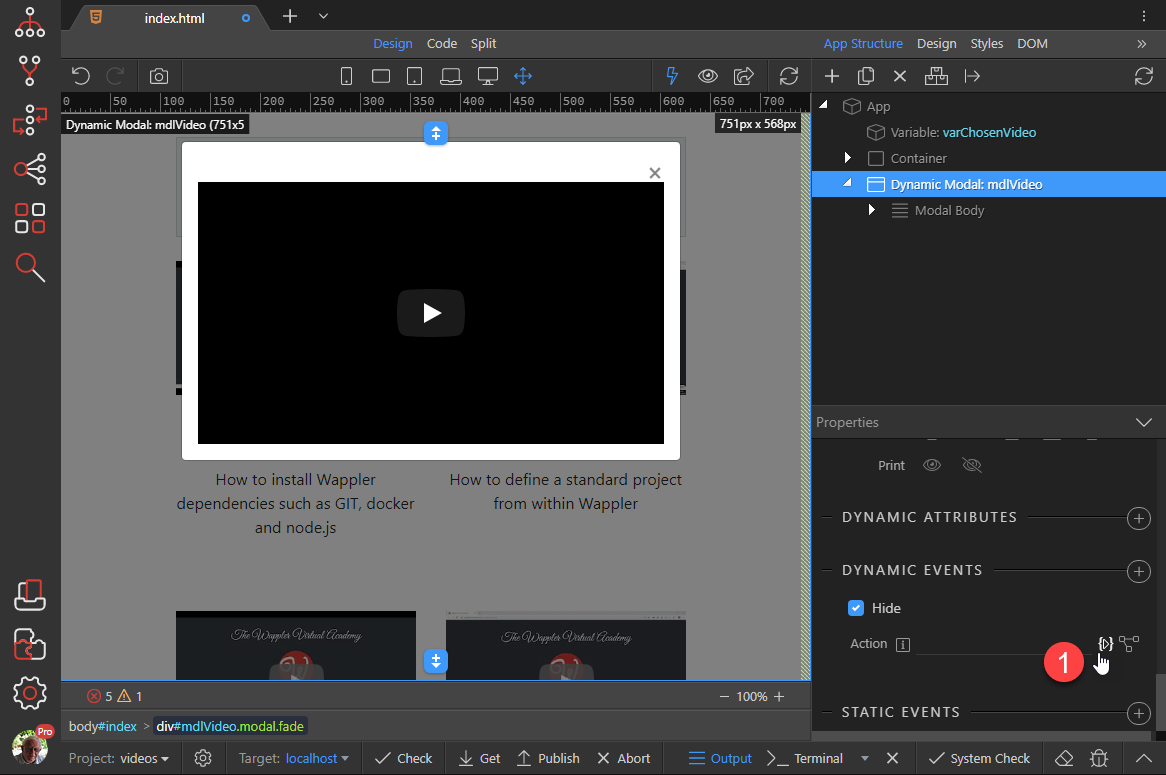
Choose the Action button (1)
-
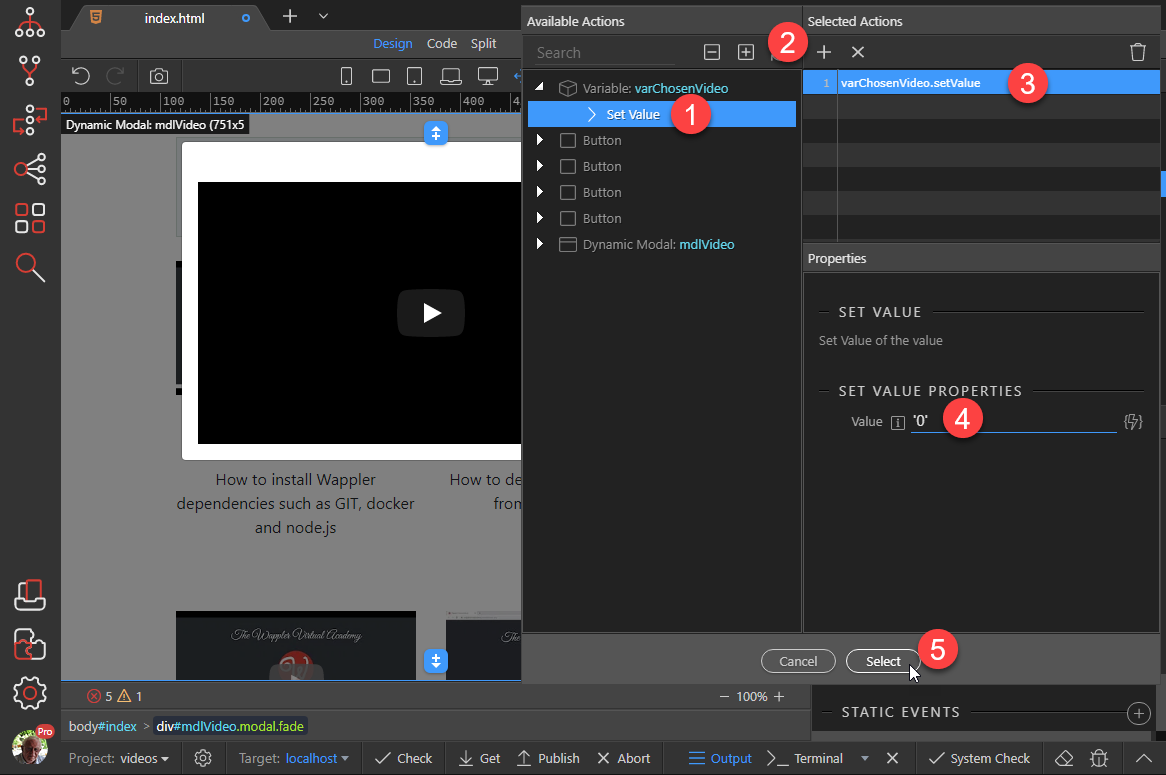
Choose Set Value (1), Add to the Actions (2), select the Action (3) and for the the value add a zero surrounded by single quotes (4). Press Select when done (5)
-
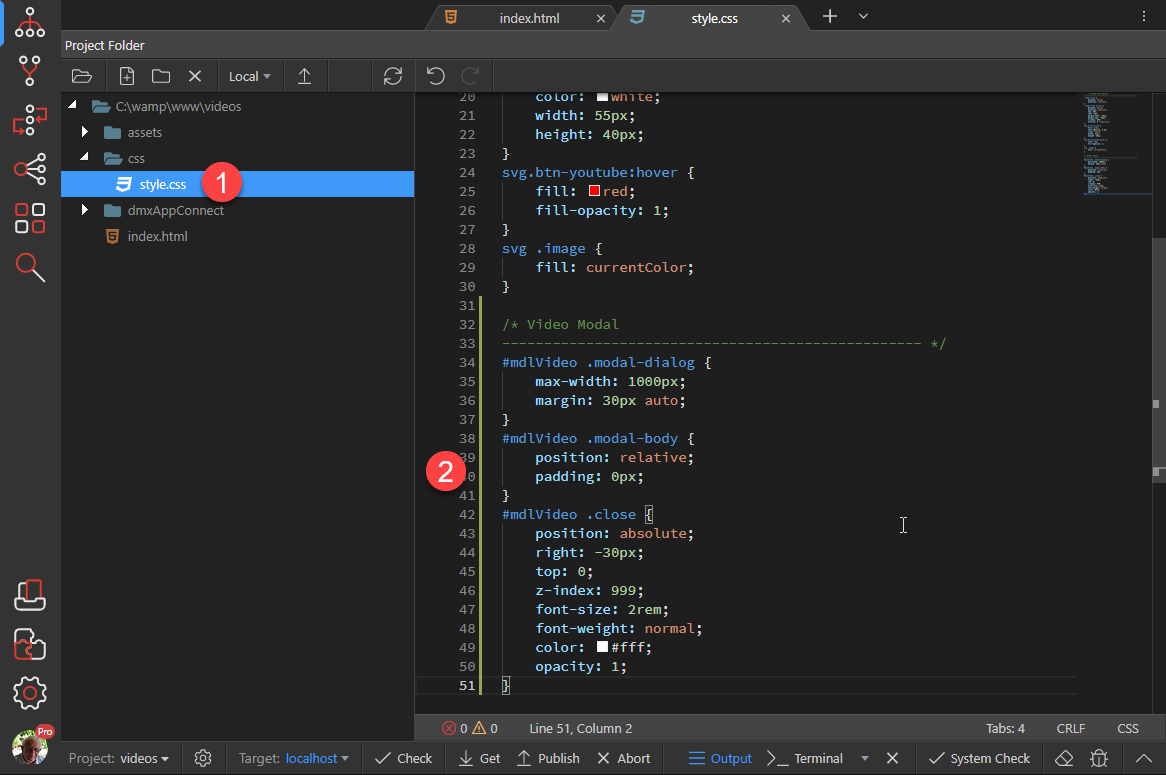
Lastly, we will apply a few style rules to our modal. For this, open the style sheet (1) and add the following style rules (2) underneath the style rules that we placed there earlier.
/* Video Modal
-------------------------------------------------- */
#mdlVideo .modal-dialog {
max-width: 1000px;
margin: 30px auto;
}
#mdlVideo .modal-body {
position: relative;
padding: 0px;
}
#mdlVideo .close {
position: absolute;
right: -30px;
top: 0;
z-index: 999;
font-size: 2rem;
font-weight: normal;
color: #fff;
opacity: 1;
} -
Close the style sheet, toggle the preview mode (1) and click on a video to try it out (2)