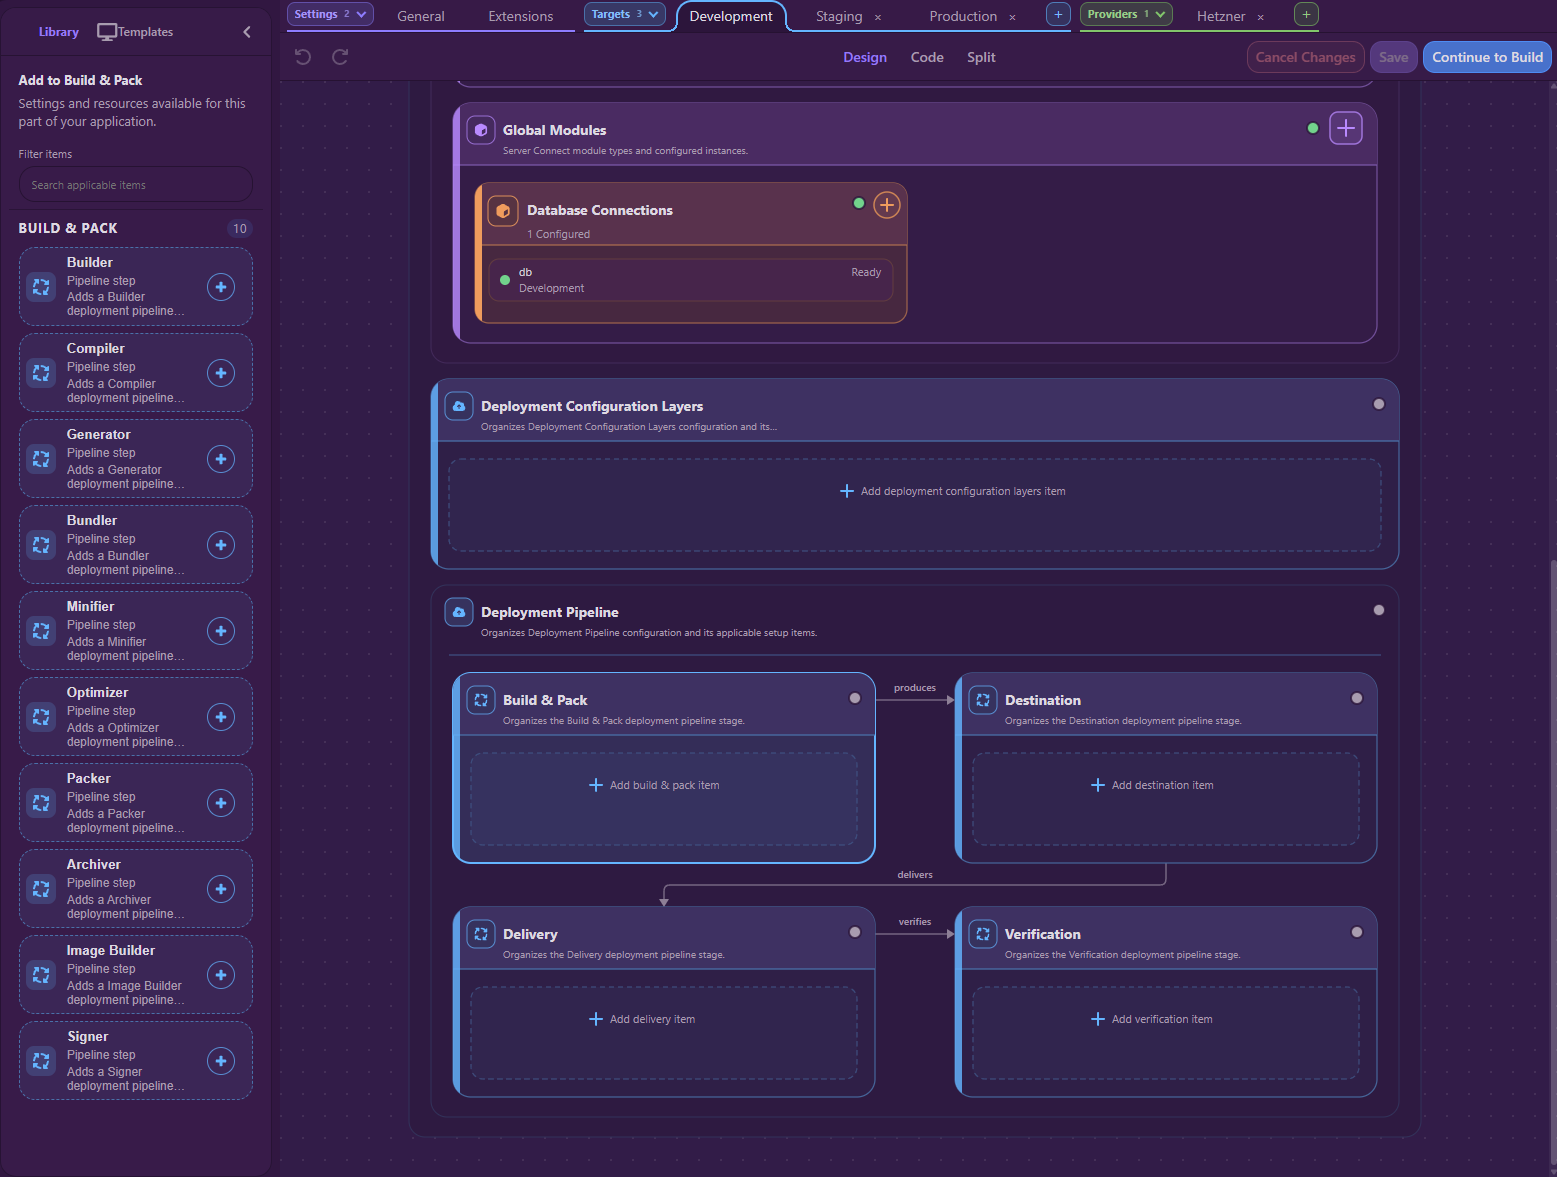
Hi All,
In the first two articles, I shared a first look at our Activity Workspaces and took you through Setup. Today I want to show you more of Build, and one of the developments I am particularly excited about: the Application Map.
Its main purpose is to help you create and organize your application: add pages and their routes, bring in the APIs they need, and open the visual editors to build the details. I want it to be a place you work from throughout that process, with the structure of your application taking shape as you build.
This is another development preview of the upcoming Wappler 8. It is still being built and isn't available to try yet. We hope to launch the beta soon so you can try it for yourselves. In the meantime, I want to explain the thinking behind the work and hear how it fits the applications you are building.

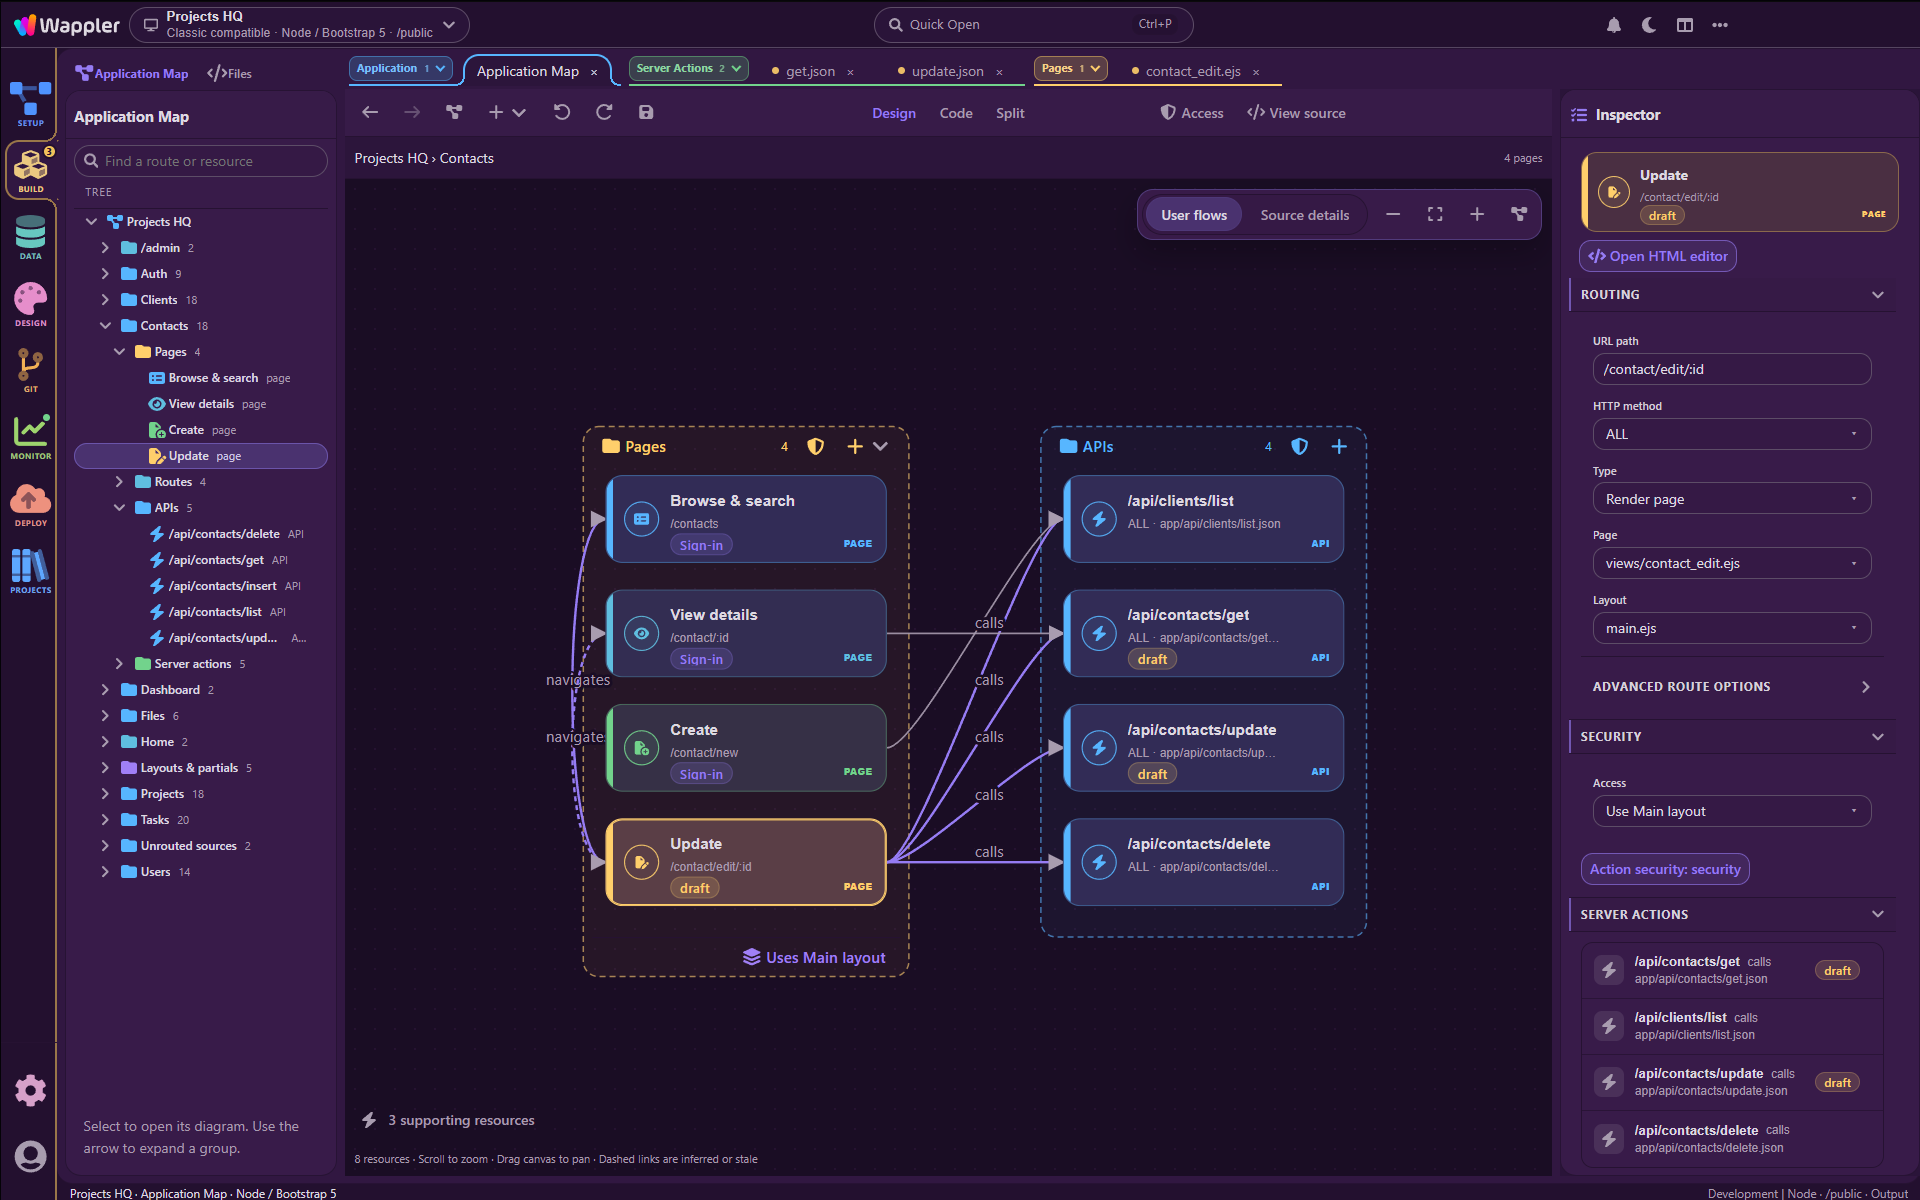
The Contacts area in Projects HQ, with Update selected and its related APIs in view. The corresponding page and server actions are open in the editor tabs.
Build your application from the bigger picture
When you build an application, you are thinking about what people will do with it. They need to browse contacts, open a record, add a new one and update its details. Those journeys become pages, routes, forms and backend actions, all working together.
I want the Application Map to make that a more natural way to work in Wappler. Start with the part of the application you are building, organize its pages, create the next screen with its route, and continue straight into the HTML editor. Add the backend action it needs and develop that flow in Server Connect.
Each of those decisions contributes to the application as a whole. Where should this page live? Which URL should open it? Which layout should it use? What data does it need? Keeping that context around the creation tools helps you make those decisions together.
In this tour, we will use Contacts as our starting point, look at its structure and user paths, then add a new Activity page and API. Along the way, I will show how the Inspector and individual editors fit into that journey.
That is the part I am most excited about: being able to build the details while keeping the application you are creating in view.
Build brings the authoring work together
Build is the workspace for working on the application itself. Your pages, App Connect components, Server Connect actions and source editors belong here.
The Application Map gives you a starting point, while the individual editors provide the tools for the resource you open. A page needs its visual design surface, Structure and Inspector. A Server Connect action needs its flow, action Library and step properties. Source code needs a proper code editor.
We are bringing those experiences together inside the same workspace, with a common approach to navigation, tabs and contextual tools. You can move from the overview into an editor, work on a detail and return to the wider context.
Files remains available as well. Sometimes you know exactly which file you want, and a file tree or search is the most direct way to get there. The map gives you another useful starting point, particularly when the question is about a feature or a relationship rather than a filename.
Start on the project canvas and drill into an area
For this tour, I am using our Projects HQ example. It has recognizable areas such as Clients, Contacts, Projects and Tasks, with pages and backend actions behind them.
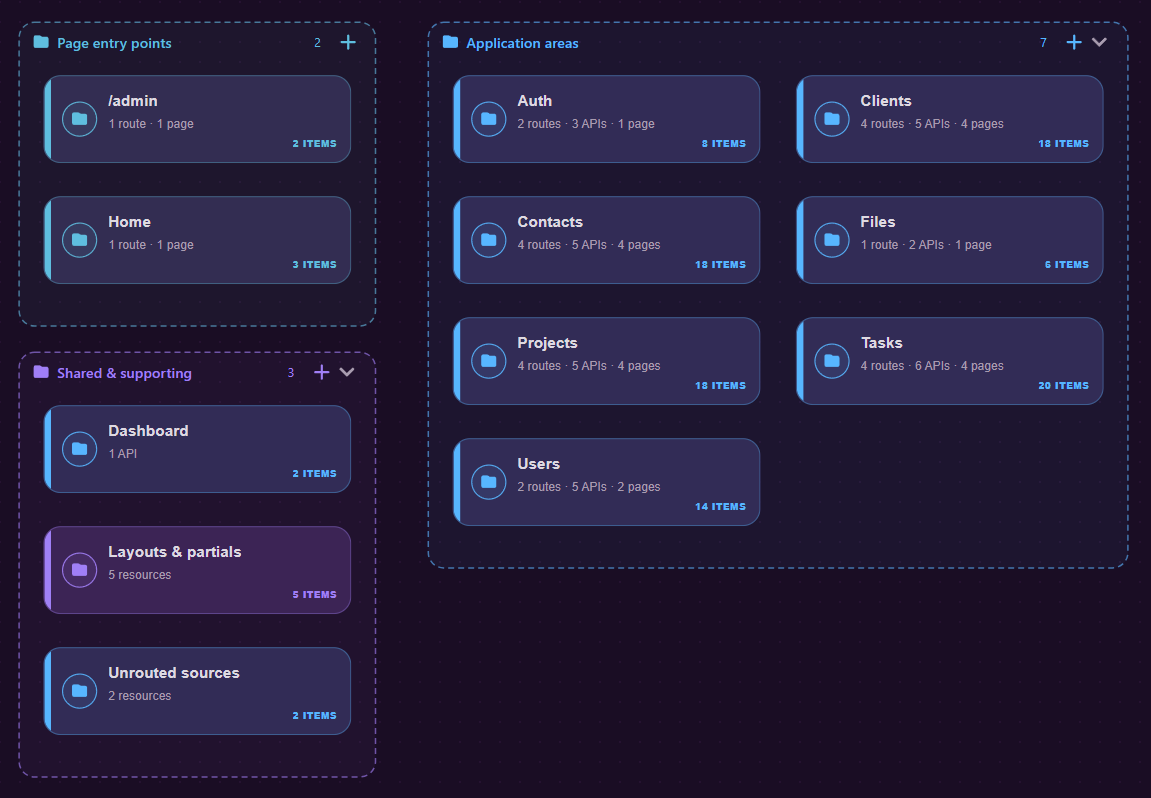
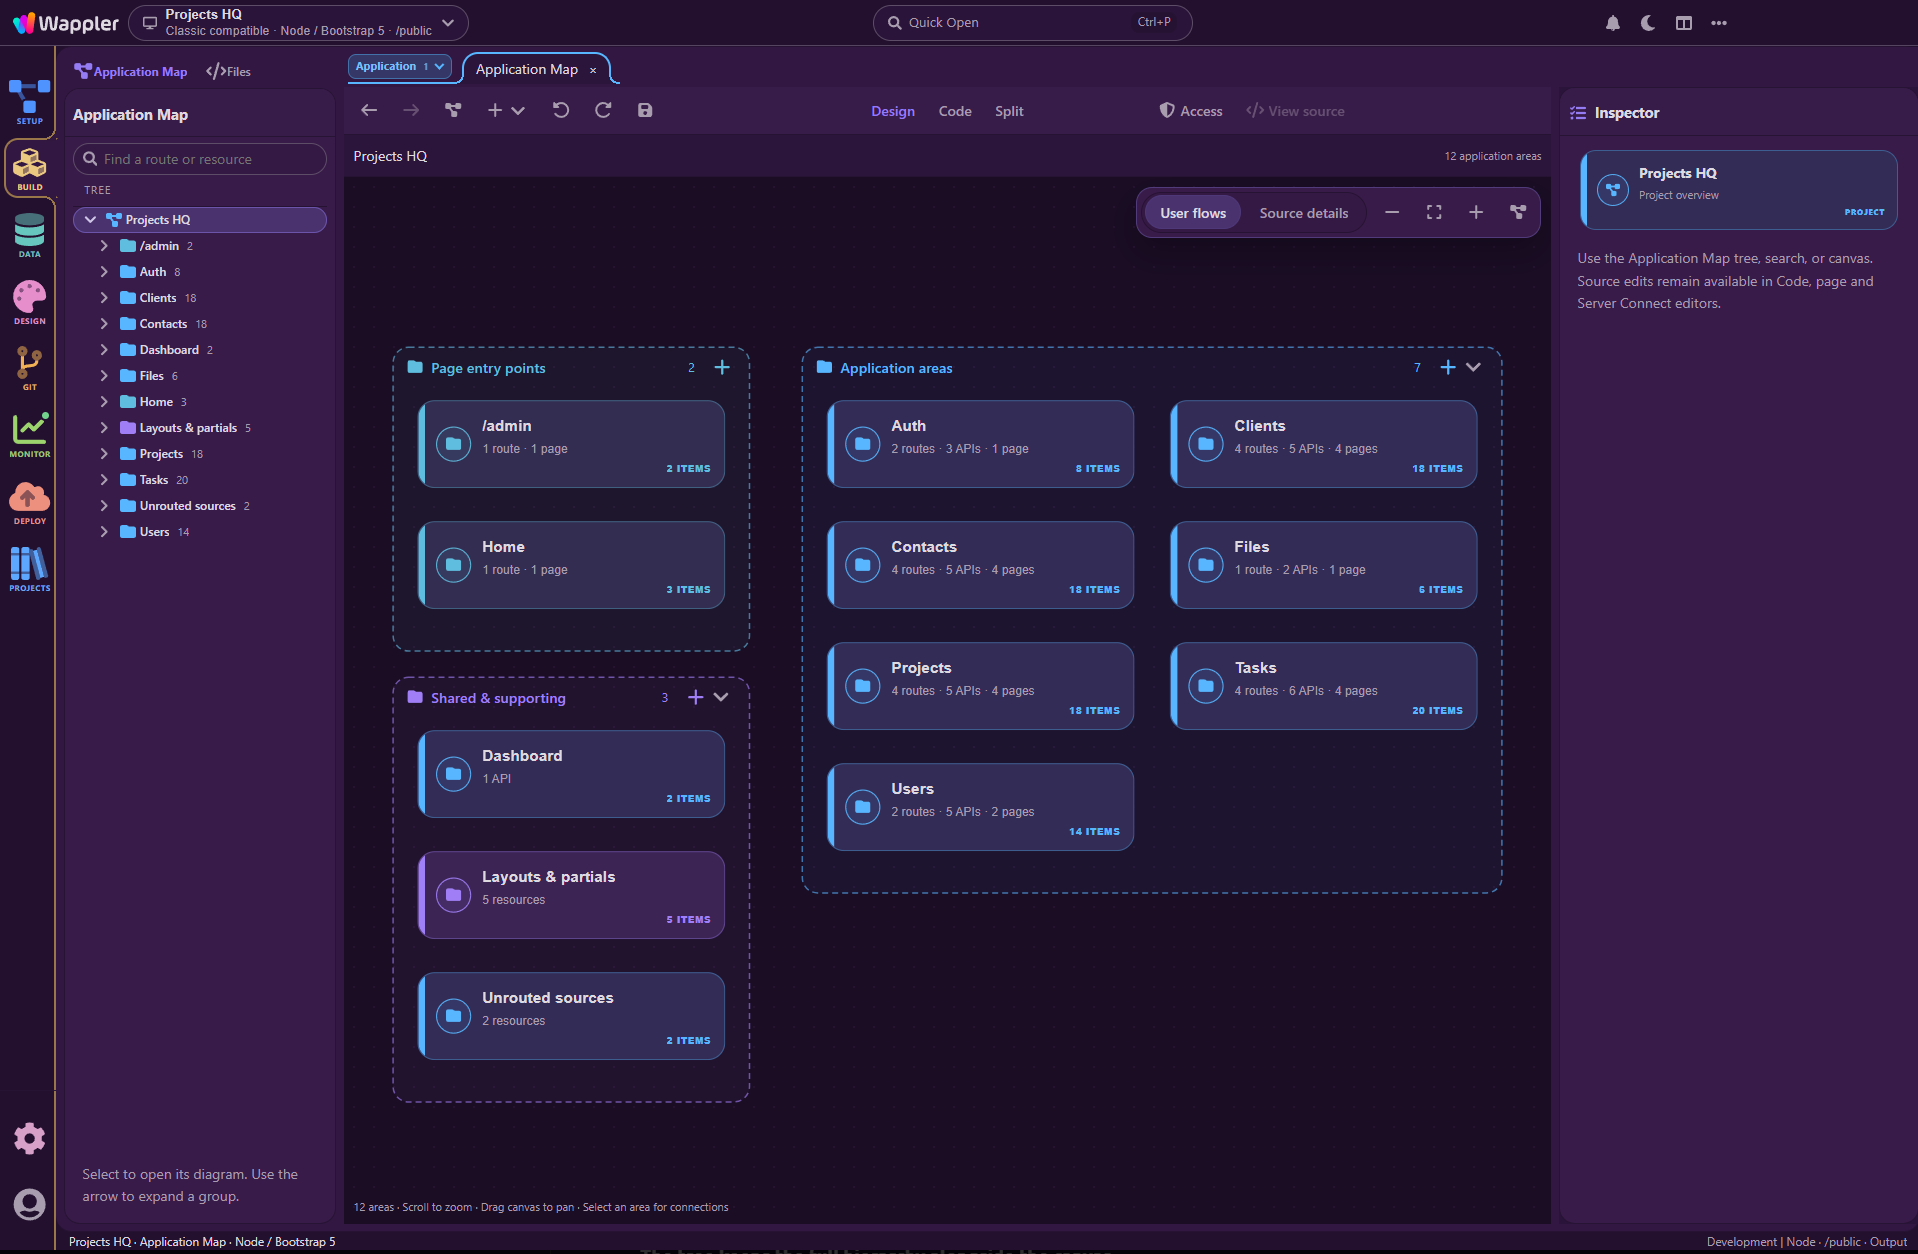
Let's start at the Projects HQ root overview on the main canvas. Here you can see the application taking shape: its page entry points, areas such as Clients and Contacts, and shared resources such as layouts and partials. Each area has its own card, with a summary of the resources inside it.
The canvas is the main navigation and management area for this workflow. Start with the whole application, choose the part you want to build, and work with its pages and APIs directly in the diagram.
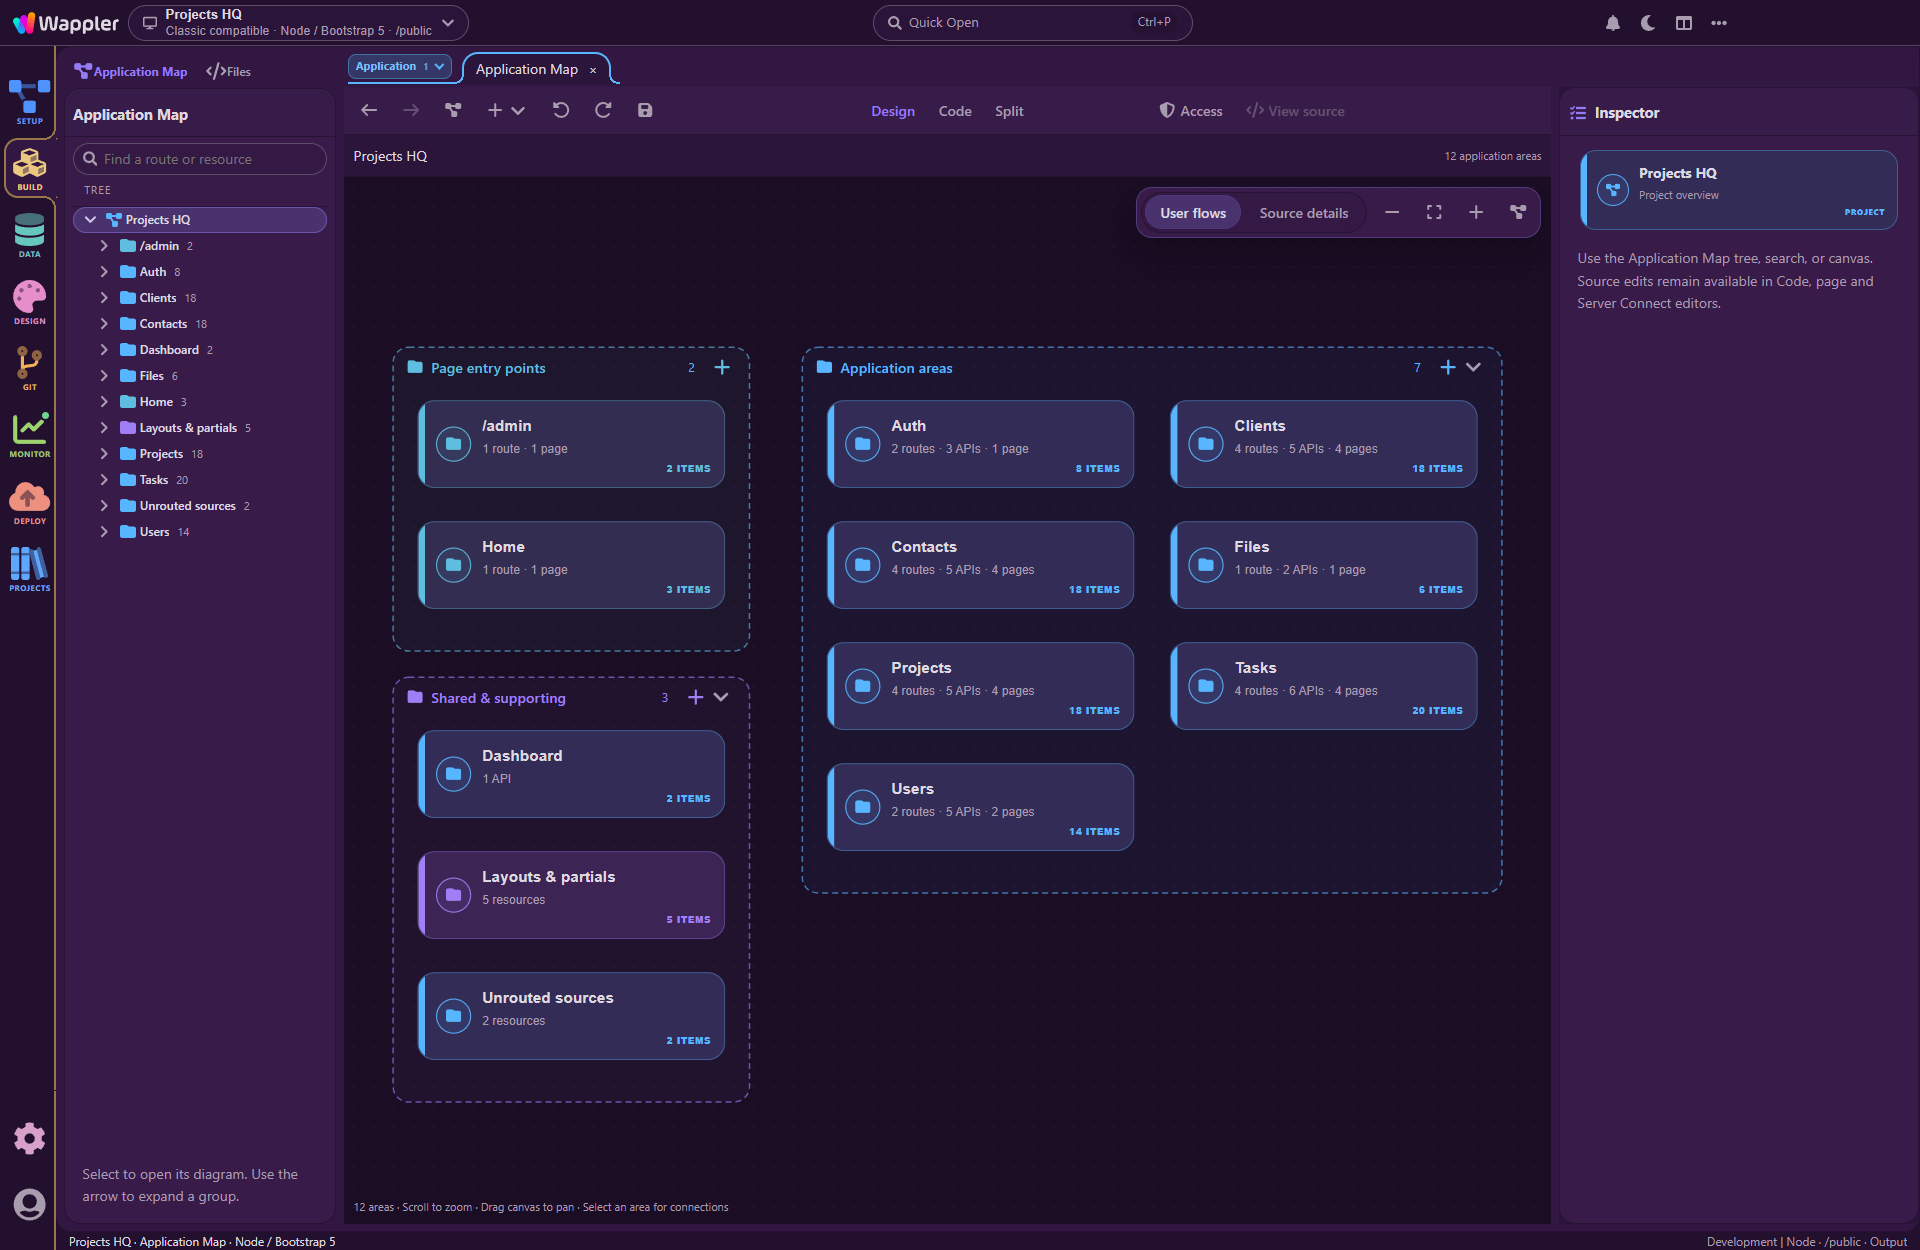
Start with the whole project on the canvas. Open Contacts from its card to work on that area's pages and APIs.
Double-click Contacts on the canvas to drill into that area. The project overview gives way to its pages and their relationships, while the breadcrumb shows where you are: Projects HQ › Contacts. You now have the context for adding another page, selecting an existing one, or working on a related API.
From there, select a page card to bring its connections and Inspector into focus. Use the add controls on the canvas groups to create the next page or server action. When you need the wider overview again, the Project control takes you back to the root, where you can choose another area.
This is the journey I want to emphasize: move through the application on the canvas, create and manage its parts there, and open the individual editors when you are ready to work on their contents.
One important part of this is that the map is built from the project's source. In this Node.js example, the routes, pages, layouts and server actions provide the information used to reconstruct the view. You do not begin by drawing a separate diagram and then maintaining it alongside the project.
That is where some of the background project intelligence I mentioned in the first article becomes visible. It helps bring information from different source files together into a view you can use while building.
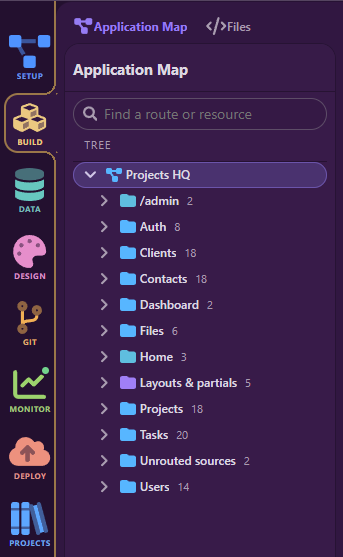
The tree keeps the full hierarchy alongside the canvas
Alongside that canvas journey, the tree on the left gives you the full hierarchy of the application's areas and resources. You can expand several branches, keep an overview of their contents and jump directly to a particular item when that is useful. Search is available when you already know what you need.
Expand Contacts in the tree and Pages gives you the screens, Routes gives you the addresses that lead to those screens, APIs gives you the endpoints the application calls, and Server actions gives you the backend flows behind those endpoints.
These entries represent related parts of the same feature. A page and its route have different jobs, just as an API address and the action that handles its request have different jobs. Keeping them visible in the tree lets you approach the work from whichever part you already know.
For example, while building the edit-contact journey on the canvas, you can use the tree to jump to /contact/edit/:id or a particular server action. It complements the visual workflow by keeping the complete hierarchy within reach, even while the canvas is focused on one area or page.
Keep your folders and your public URLs organized
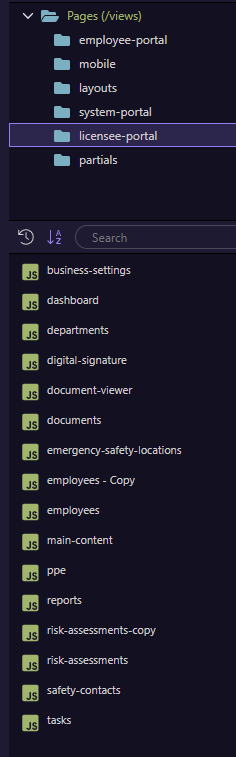
You can still organize the actual source files in folders through Files, including creating folders for related pages or server actions. For a new Contacts feature, you might keep its pages together in a contacts folder and its backend actions together under the Contacts API folder.
The Application Map adds a view of how those files participate in the application. Its area and resource groups are reconstructed from the source, so the map tree and the file tree give you two useful ways of finding the same work.
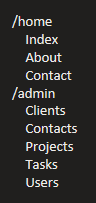
A source folder and a public URL do not have to be identical. You choose where the page lives in the project and which address should open it. That becomes especially useful when you want a tidy source structure while keeping familiar URLs for your users.
Follow what the user does
Inside Contacts, the User flows view shows a familiar set of activities: Browse & search, View details, Create and Update.
Those labels help you read the area in terms of what someone does in the application. You can still see the page paths and resource information, but you have a more recognizable starting point than a list of unrelated filenames.
These are the pages already present in the example. The view organizes what it can recognize from the source; it does not create missing screens simply because an area looks like a typical create, read, update and delete workflow.
Selecting a page brings its relevant connections into focus. This is useful because a single page may rely on several backend actions, while another page in the same area may need only one or two.
There is also a Source details view for when you want to look more directly at the routes, pages, APIs, server actions and supporting files. I like having both perspectives available. Sometimes you are thinking about the user's journey, and sometimes you need to inspect the source structure behind it.
The connections have different meanings too. A navigation connection follows a move from one page to another, such as going from the contact list to a detail page. A calls connection follows a request from a page to an API. The layout relationship tells you which shared page frame is used. Reading those together helps you follow both the journey on screen and the requests happening behind it.
An update form involves more than saving
Look at the Update page in the opening screenshot. Its relationships tell a more complete story than its name alone.
The form needs to load the existing contact. It also needs the client list used by the page, an action for saving changes and an action for deleting the contact. Those relationships appear together when Update is selected.
That is a useful place to begin if you are changing the form. You can see which action supplies the record, which supplies related choices and which handles the write. From there, you can decide whether the change belongs in the page, in a server action or in both.
Now compare that with View details:

View details brings the contact-loading API into focus. The map also shows the relationship from Update to that same action.
Being able to see shared use is valuable. Before changing an action, you want to understand which other part of the application may depend on it. The map gives you a place to follow those recognized relationships and open the relevant sources for a closer look.
The shared layout is represented too. In this area, the pages use the Main layout, which appears beneath the page group. That keeps the relationship visible without repeating a layout connection beside every page.
Add a page where you are already working
Now let's take that a step further and add something to Contacts. Imagine we want a new Contact activity page, where we will later build a view of recent interactions.
From the Pages group, use the add button and choose Page. The small creation form opens right beside the part of the application you are working on. Give the page a name, then expand URL & defaults to review where it will live and how it will be reached.
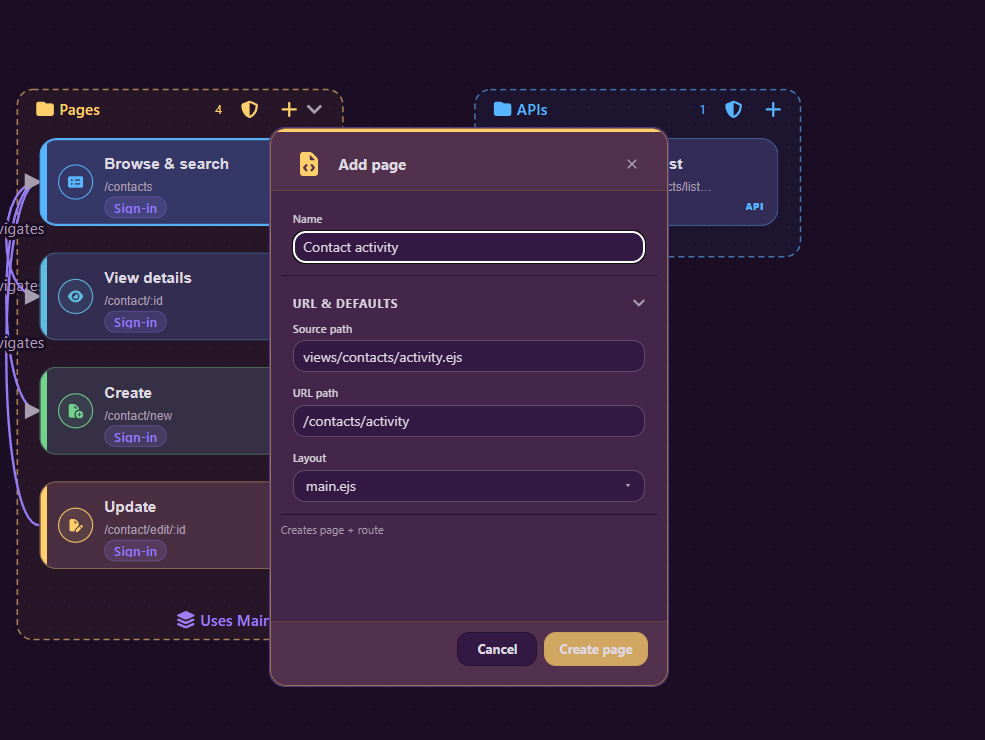
The page file goes in the Contacts folder, its public address is /contacts/activity, and it uses the Main layout. The form creates the page and route together.
In this example, the source is views/contacts/activity.ejs, the URL is /contacts/activity, and the layout is main.ejs. These are three related decisions, all available in the same place. You can keep the proposed defaults or adjust them before creating the page.
When you choose Create page, Wappler prepares both the page and its route. You do not have to create the file, leave the area, find the routing configuration and add the matching route separately. The new page appears in the map and navigator, with the associated source changes open as drafts for you to review and save.
That last point matters: creating a page here starts the authoring work. It does not publish the page or generate a complete working activity feature. We still need to design its contents and provide its data. What it does is put the connected starting pieces in place.
The page menu also offers Linked page when you start from an existing page. That is useful when the task begins with a journey such as “from this list, let the user open another screen.” We can look more closely at contextual page creation in a follow-up.
Fine-tune the route in the Inspector
Select the new Activity page and the Inspector shows how it is reached: its URL path, HTTP method, route Type, Page and Layout. The advanced route options are available when you need them.
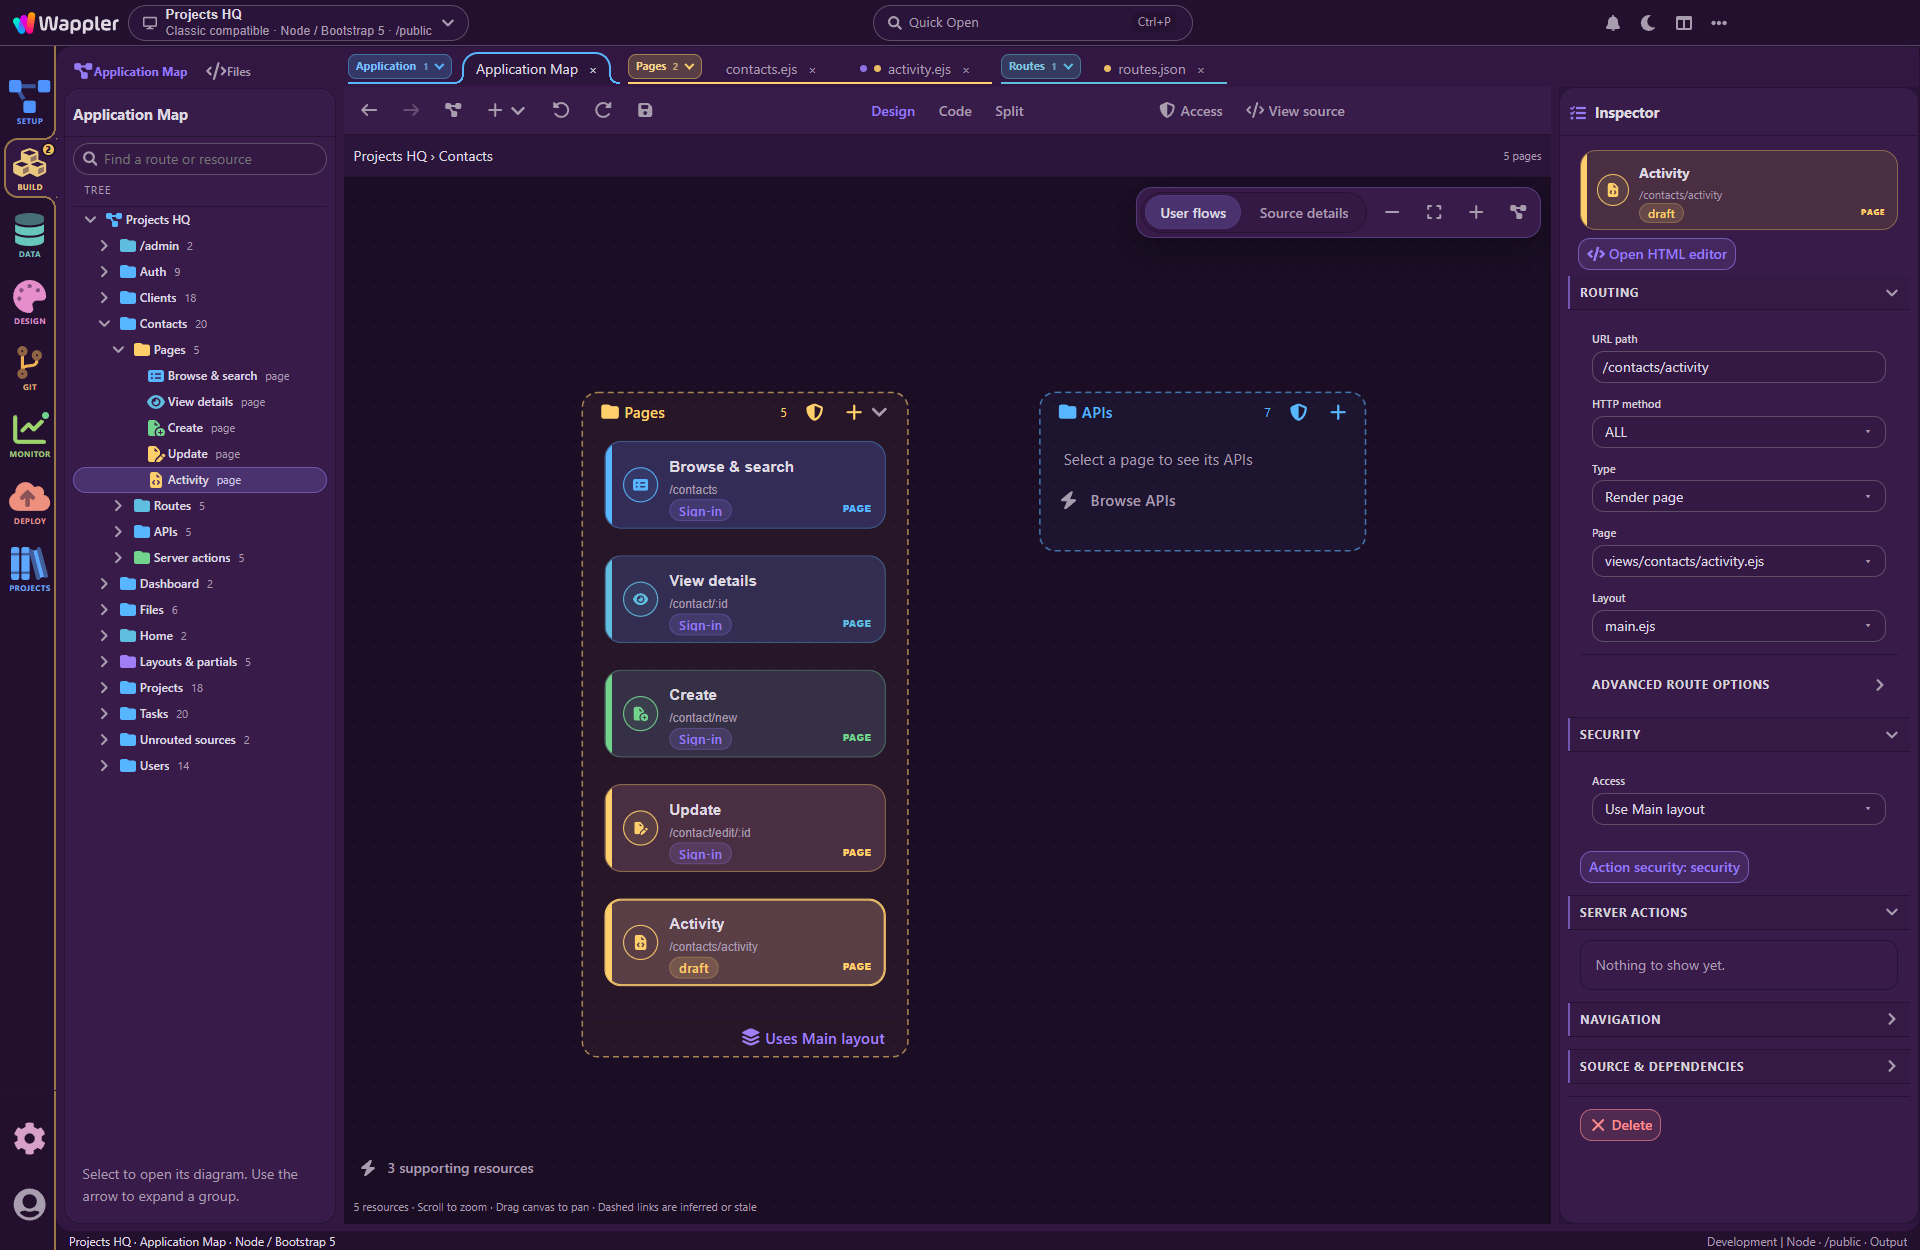
Activity is now part of Contacts. Its page and route have unsaved changes, and the Inspector keeps the routing decisions next to the selected page.
This gives you a natural place to refine the result. Perhaps the URL needs to follow an existing convention, or the screen should use another layout. You can inspect and adjust the route without losing sight of the page it belongs to.
The same Inspector is useful for existing pages. Select Update, for example, and you can see the address containing :id, the page it renders and the shared layout around it. You can review the routing first, then continue into the page itself using Open HTML editor.
For me, this is one of the small changes that adds up during a day of building. The next action is right there with the information that helps you decide what to do.
Continue with the actual page in the HTML editor
Once you have found the page, Open HTML editor takes you into its authoring surface.
You can open the new Activity page this way and begin building its contents. To show you a page with more to explore, here is the existing Contacts list in the HTML editor, with its card selected.
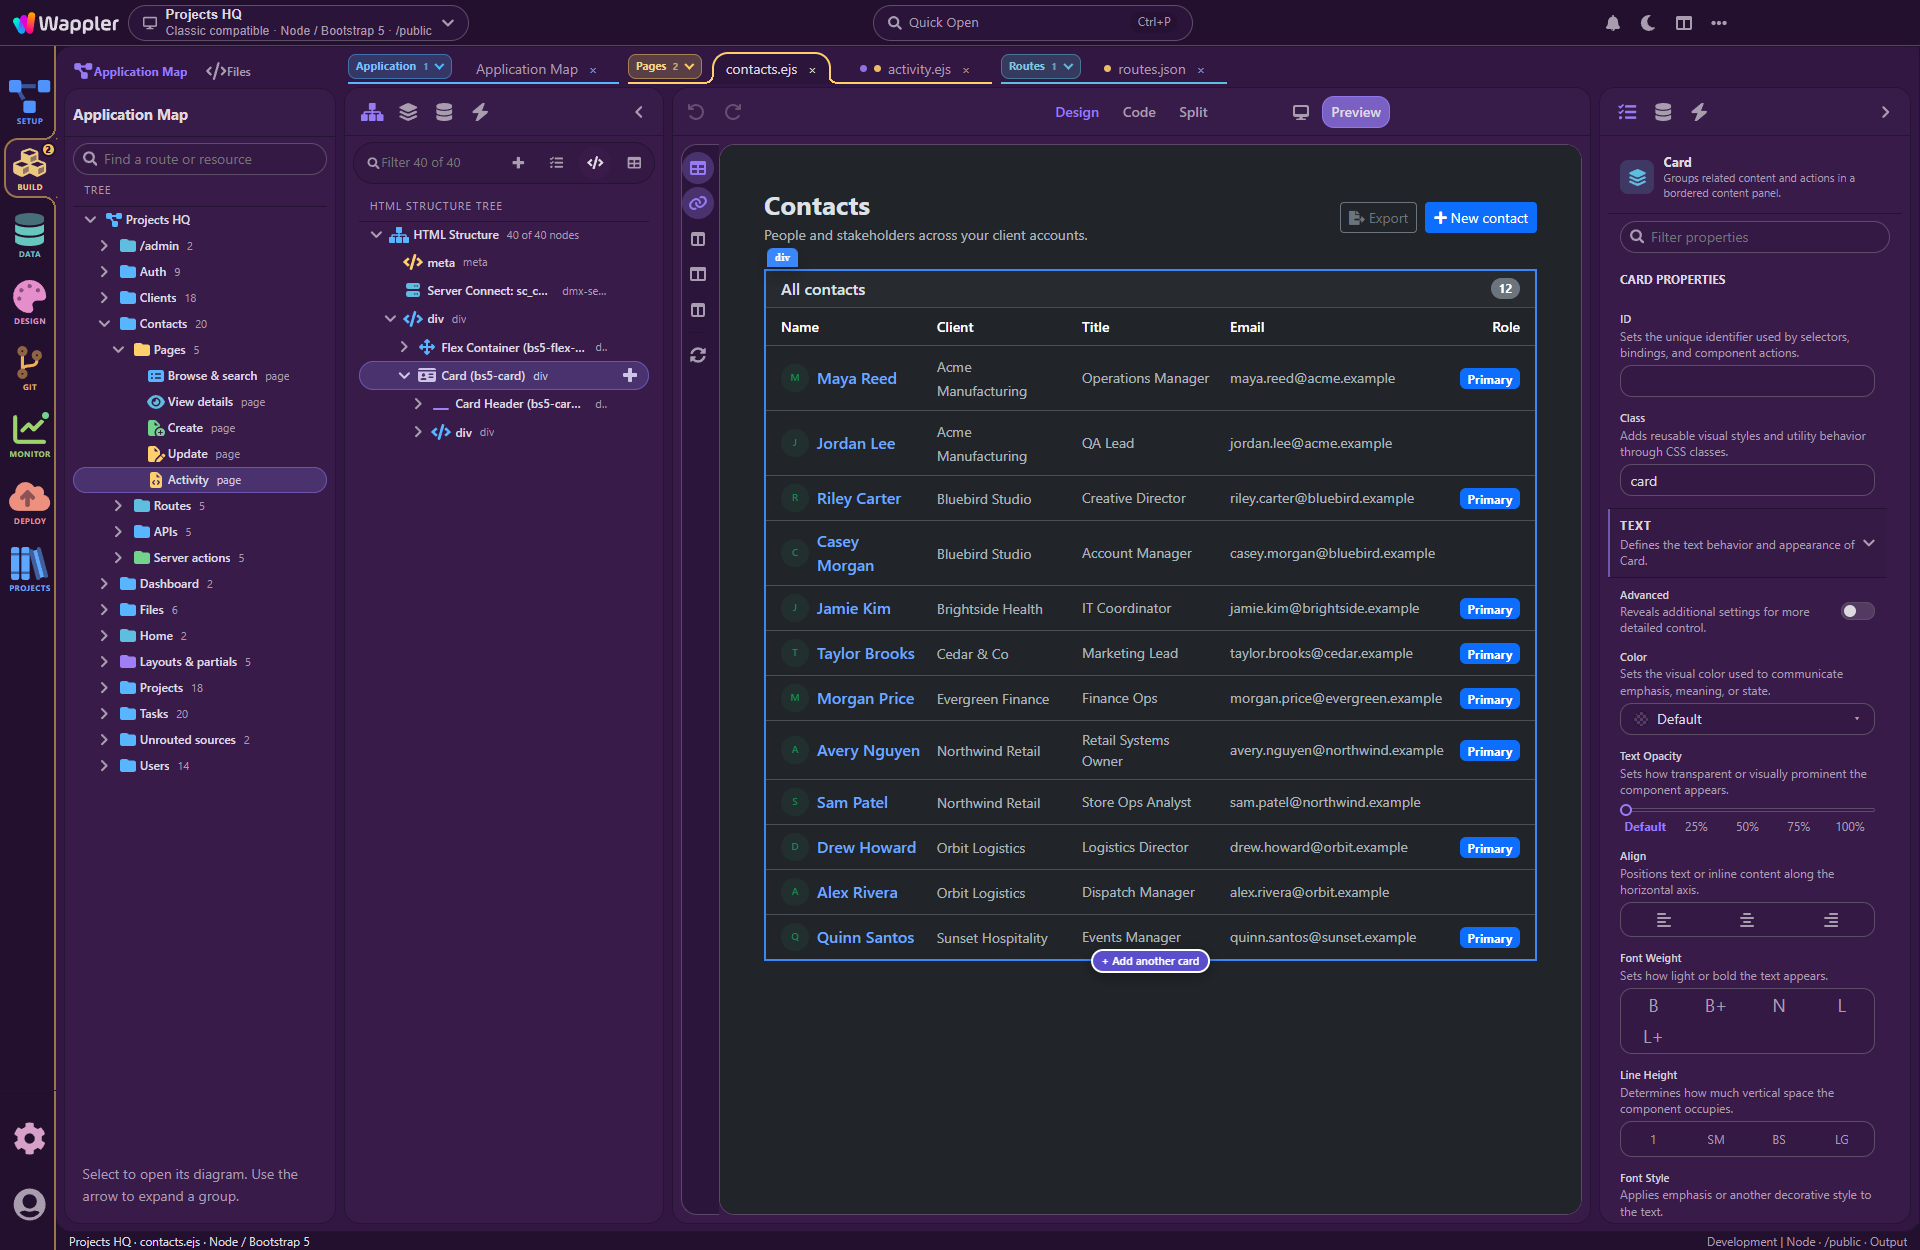
The selected card is highlighted on the page and in Structure, while its properties are available in the Inspector. The Application Map navigator and related editor tabs remain alongside the work.
You can use the visual page to find the part you want to change, Structure to understand its place in the page, and the Inspector to work on its properties. In this example, the card contains the Contacts list. Expanding it in Structure reveals the elements inside, so you can move from the whole section to its header or content.
Selecting another element changes the properties you are working with. Instead of keeping a generic properties panel open, the editor brings the controls for the selected component into focus. The Components, Data and Actions panels provide the other parts of the page-authoring workflow as you need them.
Those views have different jobs, but they should stay connected to the same selection. When you are working inside a form, row or nested container, it helps to see both the selected element and the structure around it.
The HTML editor's Design, Code and Split modes let you choose the view that fits the task. You might begin visually, inspect the source for a specific detail and then return to the page. The page remains part of the Build workspace, with the application navigator still available alongside your editor tabs.
I will give the HTML editor its own article, because there is a lot more to show around Structure, properties, contextual insertion and data bindings. For today, the important connection is how you get there: start with the application area, select the page and open the editor that owns it.
Add the API alongside the page
The backend has a similar starting point. For our Activity feature, we will need an action that provides the data for the page. Use the add button in the APIs group to create a server action, give it a name and review its source location under URL & defaults.
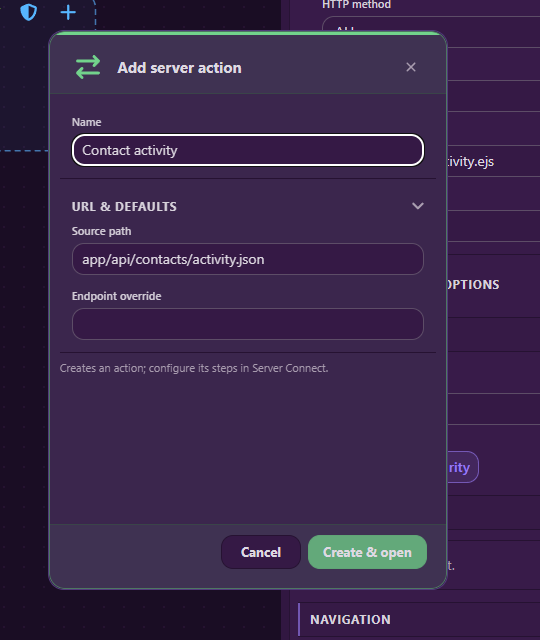
The action is organized under Contacts. Create & open takes the new action straight into Server Connect, where its steps are authored.
Here I have chosen app/api/contacts/activity.json. Its normal endpoint is /api/contacts/activity; an endpoint override is available if a different address is needed. Choosing Create & open prepares the new action and takes you into its editor.
Back in the map, the API and the server action appear under their corresponding branches in the Contacts tree. Select the API to inspect the endpoint itself.
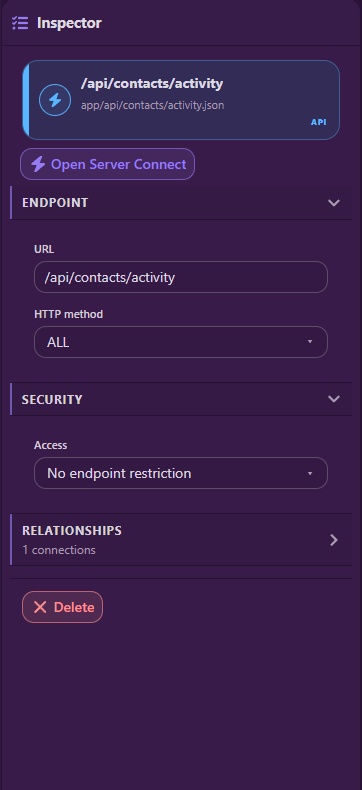
The API Inspector handles the endpoint. Open Server Connect takes you to the action behind it.
The Inspector lets you review and adjust the URL and HTTP method. This is the address the page will call. The action's processing steps are edited in Server Connect, which you can open directly from the button above those properties.
Creating the page and API gives us the two starting points. We then build the page's data request and the action's logic to connect them. Simply giving them related names does not create that data connection. Once the page calls the API, the recognized relationship can become part of the map too.
Follow the backend into Server Connect
You can do the same with a related API or server action. Select it in the map and Open Server Connect takes you into the action editor.
Continuing the example, you might open the action that loads the contact to see how it retrieves the record. If the change affects saving, you can move to the update action and work through that flow instead.
The visual flow gives you the sequence of steps. The Library provides the available actions, and selecting a step brings its properties into the Inspector. You can concentrate on the backend task while keeping the wider application context close by.
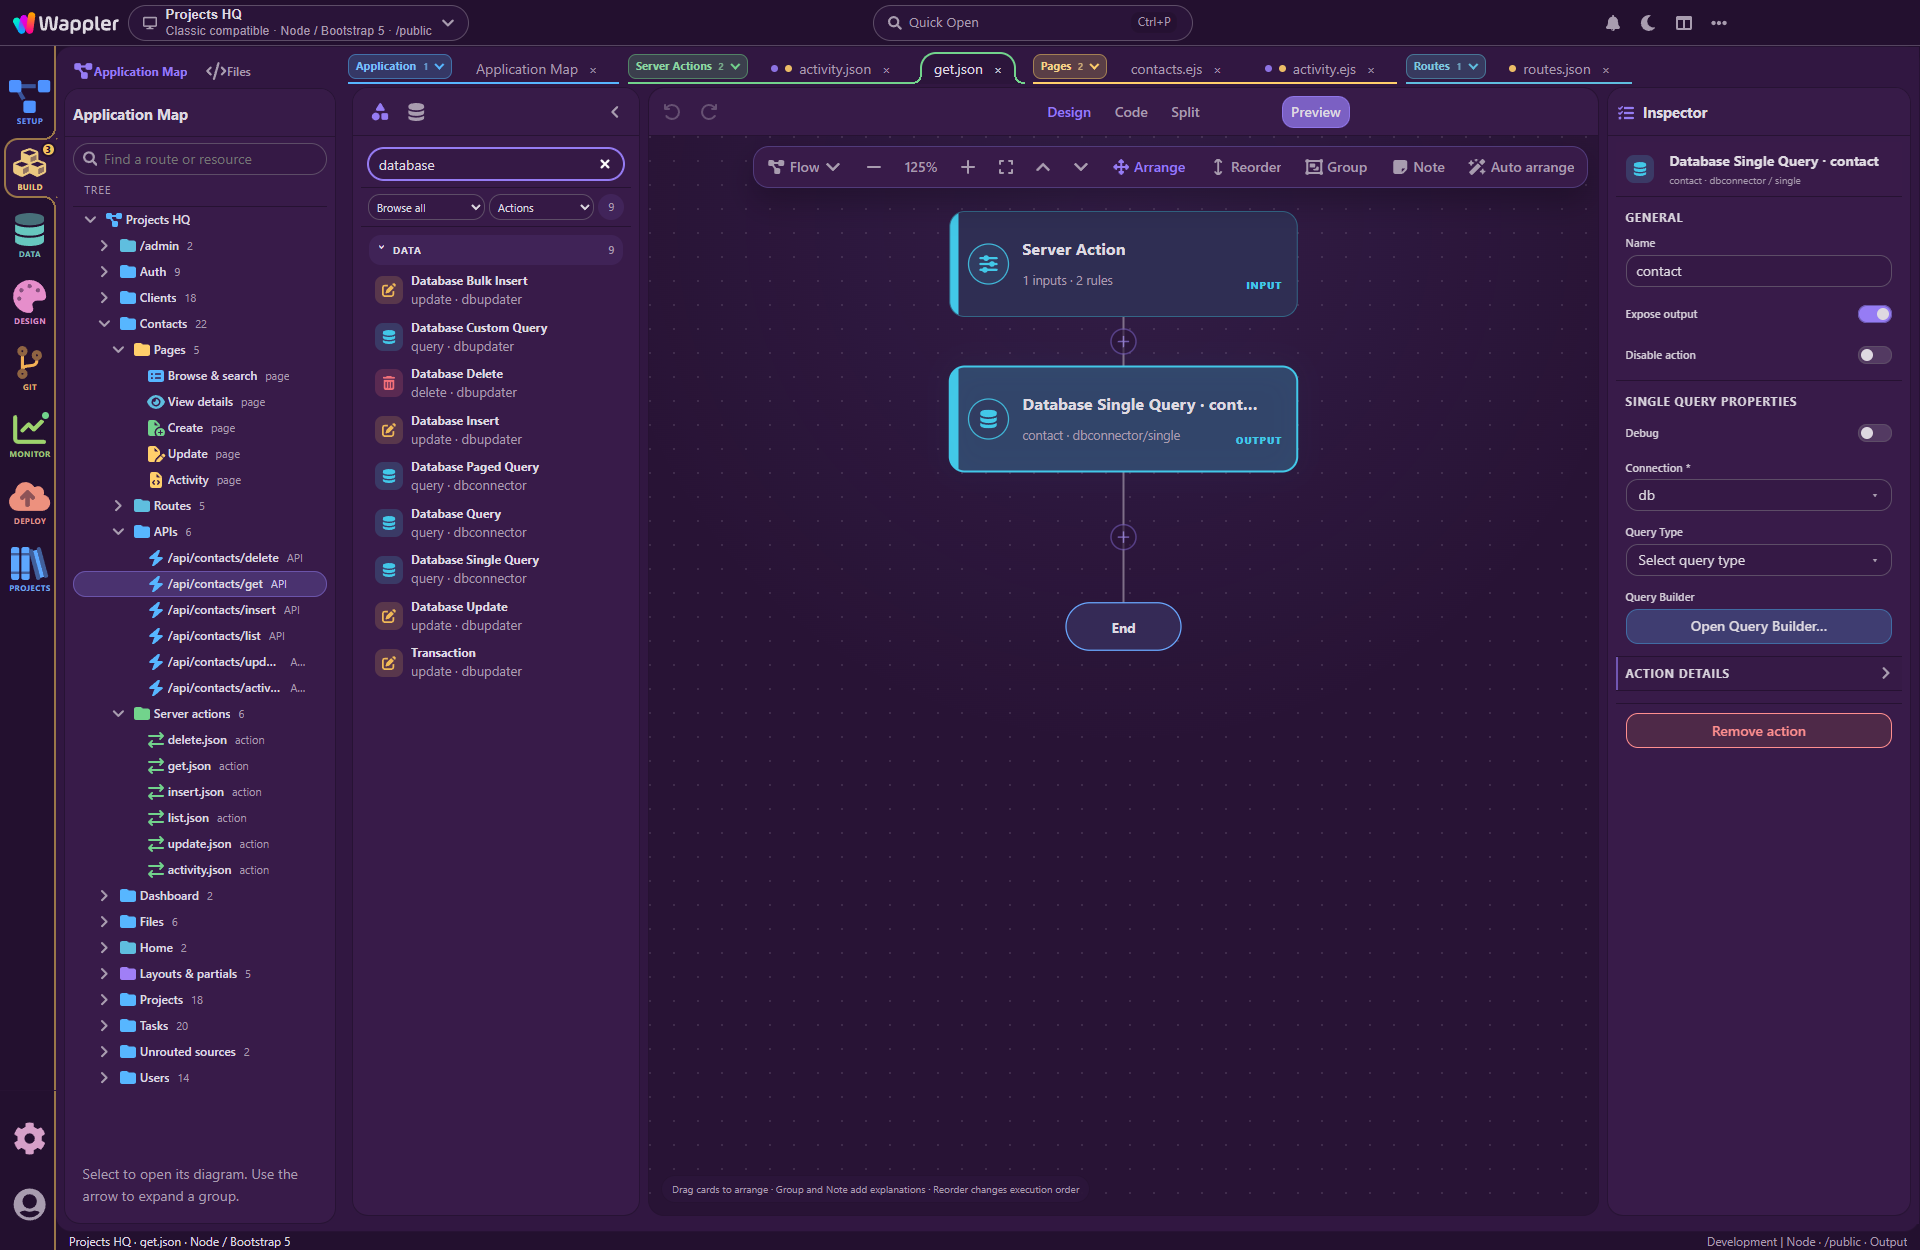
The existing contact-loading action shows the next level of detail: inputs at the top, a Database Single Query step in the flow, and that step's properties on the right.
For this screenshot, I opened the existing contact-loading API so you can see a populated action rather than an empty starting flow. The selected query uses the project's db connection, and its Inspector provides access to the Query Builder. The Library is filtered to database actions, keeping the available choices relevant to the work in front of us.
Notice how the same pattern continues. In the Application Map, you select an API and inspect its endpoint. In Server Connect, you select a step and inspect how that step works. The application overview gets you to the right action, and the action editor lets you develop its behavior.
From a new action, you can choose steps from the Library and configure them in the flow. From an existing action, you can inspect its inputs and the steps already there before deciding what to change. Both journeys stay in Build, with the page you were working on still available in its tab.
This is also why I find having the related editors open together so useful. The page and its server actions are different resources, but often they are parts of the same piece of work. The grouped tabs make those resources visible together, and unsaved-change indicators show where work is still in progress.
There is much more to discuss about the Server Connect editor itself, including how you read a flow, work with inputs and configure individual actions. That will be a separate tour. Here, I want to show how it connects to the page you started from.
Return to the bigger picture
After working in an editor, you can return to the Application Map and continue from the area you were exploring. The map keeps its navigation and view context, so you can move between the detailed work and the overview without starting over each time.
The source editors and the map also share the project's current source information, including supported unsaved edits. In the opening screenshot, you can see several editors with work in progress and the corresponding draft indications on the map.
That is important to the way we are building this. A diagram is much more useful when it stays connected to the work you are doing. You should not have to keep a second picture of the application up to date by hand.
We are continuing to refine the reconstruction and authoring workflows across different project structures. Some relationships are straightforward to read from source, while dynamic expressions can be more difficult. This preview shows the relationships recognized in the Projects HQ example, and your real project structures will be valuable input as we broaden that work.
Find your way back as the project grows
There is another useful benefit once you have been building this way. When you return to a project after a few weeks, the map helps you pick up the work again.
You might remember the contact form but have forgotten which action loads its data or which layout surrounds it. Start with Contacts, select the page and follow its relationships. The same structure that helps you create and organize the application also helps you understand it later, or get familiar with an existing project.
As an application grows, that can save a lot of time putting the pieces back together in your head. It is a valuable part of the experience, built on top of the everyday authoring workflow.
How would you build with it?
I hope this gives you a better idea of why I am excited about the Application Map. It gives you a place to create pages and APIs, organize how they fit into the application, and continue into the right editor to build their contents and behavior.
I would particularly like to hear about these situations in your projects:
- Does the creation journey fit how you build? Would you usually add the page and its route first, start with the API, or begin by organizing folders? Which defaults would save you the most repeated work?
- How do you organize a growing application? Tell me how you group pages and server actions, and how you choose the public URLs for a new feature.
- Which relationships are hardest to keep track of? A page using several APIs, an action shared by several pages, layouts and partials, or something else?
- What would help this view stay useful in a larger project? Tell me how you organize your application and what you would want to see first, with the rest available when you need it.
For a quick indication, where do you usually start when building a new part of your application?
- Organizing the application structure and folders
- Creating the pages and user journey
- Building the APIs and server actions
- Starting from an existing page or action
- It depends on the task
A concrete example is especially helpful. Think of a feature you are building now: which pages and actions does it need, what would you create first, and where would this workflow help you most?
Thank you for continuing to share your experience with us. There is a lot of work going into the upcoming Wappler 8, and I am looking forward to showing you more of the individual editors in the next articles.