Hello everyone
This was a tough one, but here are the steps to have a fully Barcode Scanner on your mobile project.
I’m going to use Capacitor ML Kit Barcode Scanning Plugin from Capawesome
Which is an Unofficial Capacitor plugin for ML Kit Barcode Scanning
Here are the list of all barcodes supported
And here are all the data we can get
1.- Create a mobile project, I will use Framework7 but you can use Bootstrap too.
2.- Update all packages
3.- We install two plugins here:
Capawesome Capacitor ML Kit Barcode Scanning Plugin
Camera Capacitor Plugin
We go to the terminal and we enter one after other:
npm install @capacitor-mlkit/barcode-scanningnpx cap syncnpm install @capacitor/cameranpx cap sync
4.- We copy both plugins js files from the node_modules folder to our project folder:
- We take the
plugin.jsfile fromnode_modules\@capacitor-mlkit\barcode-scanning\distand we placed underjs/pluginsand we rename it to:mlkitbarcode.js - We do the same with
node_modules\@capacitor\camera\dist, we takeplugin.jsand we paste it onjs/pluginsand we rename it tocamera.js
5.- Now we need to call both on our index.html
<script src="js/plugins/mlkitbarcode.js"></script>
<script src="js/plugins/camera.js"></script>
6.- Permissions:
Android:
We need to add this on android\app\src\main\AndroidManifest.xml:
Before application tag:
<uses-permission android:name="android.permission.CAMERA" />
<uses-permission android:name="android.permission.FLASHLIGHT"/>
In application tag:
<meta-data android:name="com.google.mlkit.vision.DEPENDENCIES" android:value="barcode_ui"/>
We add this on android\app\build.gradle
android {
    ...
buildFeatures {
       dataBinding true
    }
    dataBinding {
        enabled = true
    }
}
I’ll leave here both files in case you need to know the correct syntax:
They’re from my project so remember to change according to your needs:
android.zip (1.9 KB)
iOS:
We add this on ios/App/App/Info.plist
<key>NSCameraUsageDescription</key>
<string>The app enables the scanning of various barcodes.</string>
7.- The js file that will handle the barcode scanner is the next one:
Just as simple as copy and paste from the docs, and thanks to Patrick advice, added "Capacitor.Plugins" before the plugin name:
	<script>
		const startScan = async () => {

  document.querySelector('body')?.classList.add('barcode-scanner-active');

  // Add the barcodeScanned listener
  const listener = await Capacitor.Plugins.BarcodeScanner.addListener(
    'barcodeScanned',
    async result => {
      console.log(result.barcode);
	  console.log(result.barcode.bytes);
	  console.log(result.barcode.rawValue);
	  await stopScan();
	  dmx.app.set('Barcode', result.barcode);


    },
  );

  // Start the barcode scanner
  await Capacitor.Plugins.BarcodeScanner.startScan();
};

const stopScan = async () => {
  // Make all elements in the WebView visible again
  document.querySelector('body')?.classList.remove('barcode-scanner-active');

  // Remove all listeners
  await Capacitor.Plugins.BarcodeScanner.removeAllListeners();

  // Stop the barcode scanner
  await Capacitor.Plugins.BarcodeScanner.stopScan();
};

const scanSingleBarcode = async () => {
  return new Promise(async resolve => {
    document.querySelector('body')?.classList.add('barcode-scanner-active');

     const listener = await Capacitor.Plugins.BarcodeScanner.addListener(
       'barcodeScanned',
       async result => {
         await listener.remove();
         document
           .querySelector('body')
           ?.classList.remove('barcode-scanner-active');
         await stopScan();
         resolve(result.barcode);
       },
     );

    await Capacitor.Plugins.BarcodeScanner.startScan();
  });
};

const scan = async () => {
  const { barcodes } = await Capacitor.Plugins.BarcodeScanner.scan({
    formats: [BarcodeFormat.QrCode],
  });
  return barcodes;
};

const isSupported = async () => {
  const { supported } = await Capacitor.Plugins.BarcodeScanner.isSupported();
  return supported;
};

const enableTorch = async () => {
  await Capacitor.Plugins.BarcodeScanner.enableTorch();
};

const disableTorch = async () => {
  await Capacitor.Plugins.BarcodeScanner.disableTorch();
};

const toggleTorch = async () => {
  await Capacitor.Plugins.BarcodeScanner.toggleTorch();
};

const isTorchEnabled = async () => {
  const { enabled } = await Capacitor.Plugins.BarcodeScanner.isTorchEnabled();
  return enabled;
};

const isTorchAvailable = async () => {
  const { available } = await Capacitor.Plugins.BarcodeScanner.isTorchAvailable();
  return available;
};

const setZoomRatio = async () => {
  await Capacitor.Plugins.BarcodeScanner.setZoomRatio({ zoomRatio: 0.5 });
};

const getZoomRatio = async () => {
  const { zoomRatio } = await Capacitor.Plugins.BarcodeScanner.getZoomRatio();
  return zoomRatio;
};

const getMinZoomRatio = async () => {
  const { zoomRatio } = await Capacitor.Plugins.BarcodeScanner.getMinZoomRatio();
  return zoomRatio;
};

const getMaxZoomRatio = async () => {
  const { zoomRatio } = await Capacitor.Plugins.BarcodeScanner.getMaxZoomRatio();
  return zoomRatio;
};

const openSettings = async () => {
  await Capacitor.Plugins.BarcodeScanner.openSettings();
};

const isGoogleBarcodeScannerModuleAvailable = async () => {
  const { available } =
    await Capacitor.Plugins.BarcodeScanner.isGoogleBarcodeScannerModuleAvailable();
  return available;
};

const installGoogleBarcodeScannerModule = async () => {
  await Capacitor.Plugins.BarcodeScanner.installGoogleBarcodeScannerModule();
};

const checkPermissions = async () => {
  const { camera } = await Capacitor.Plugins.BarcodeScanner.checkPermissions();
  return camera;
};

const requestPermissions = async () => {
  const { camera } = await Capacitor.Plugins.BarcodeScanner.requestPermissions();
  return camera;
};

	</script>
Ok so the code will now throw some lines on console as you can see below this line:
// Add the barcodeScanned listener
And they’re for testing.
And we also have two more steps (stopScan() and dmx.app.set) so the scanner will stop inmediately when a barcode is scanned and after that will print it as a variable for a Wappler usage as {{Barcode}}.
(You can also run a flow and do whatever you want with the result)
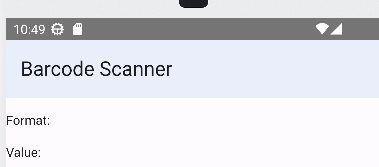
In my case I will print the value on a paragraph like:
<p>{{Barcode}}</p>
But result.barcode is an object so I will take the rawValue and the format property like:
<p>Format: {{Barcode.format}}</p>
<p>Value: {{Barcode.rawValue}}</p>
You can see all of them on this table
Starting the Barcode Scanner:
I will use a simple link that will call the function startScan():
<a href="#" class="link" onclick="startScan()">Scan</a>
But we enter on a problem here:
The camera is visible behind the WebView and we need to hide all elements that should not be visible.
The code provides a line that set the body to an specific class:
body.barcode-scanner-active
So our css must have the following rule:
body.barcode-scanner-active {
  visibility: hidden;
  background: none;
}
Lets see how it goes on a real device:
We can see it’s working propertly ![]()
Visible elements while scanning
As you can see, the code will set body as visibility: hidden
But we can use:
anotherclass {

  visibility: visible;

}
And then your scanner will look more pretty with a modal or a simple text.
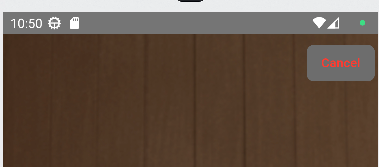
Let’s add a “Cancel” button so we can stop the scanner:
<a href="#" class="button hidden" id="cancelbutton" onclick="stopScan()">Cancel</a>
The css style will be something like this:
.hidden
{
  visibility: hidden;

}
And also another css rule:
.visibleCancelButton
{
  background-color: #6d6d6d;
  color: #ff3b30 !important;
  visibility: visible;
}
We can use a toggle class using Wappler.
Also add/remove the class using javascript, like:
On startScan():
document.getElementById('cancelbutton').classList.remove('hidden');
document.getElementById('cancelbutton').classList.add('visibleCancelButton');
On stopScan():
document.getElementById('cancelbutton').classList.remove('visibleCancelButton');
document.getElementById('cancelbutton').classList.add('hidden');
So now our scanner will have a beautiful cancel button, but only when it’s scanning:
And that’s all ![]()
Remember to check the plugin docs for anything else you need.
And of course I’ll be glad to help anyone out there.
Cheers ![]()

