SweetAlert2 Tutorial

Hi!

A quick tutorial on using SweetAlert2 with Wappler in case someone needs it.
SweetAlert2 is a great alternative for the Notify component in Wappler.

The way I use it works very well for me, please add if you have tips for a better integration with Wappler:

1. Add this script in the header of your layout page:

<script src="//cdn.jsdelivr.net/npm/sweetalert2@11"></script>

2. Create a new javascript file in the file manager, for example a “sweetalert2.js” file. In this file we will configure the alerts

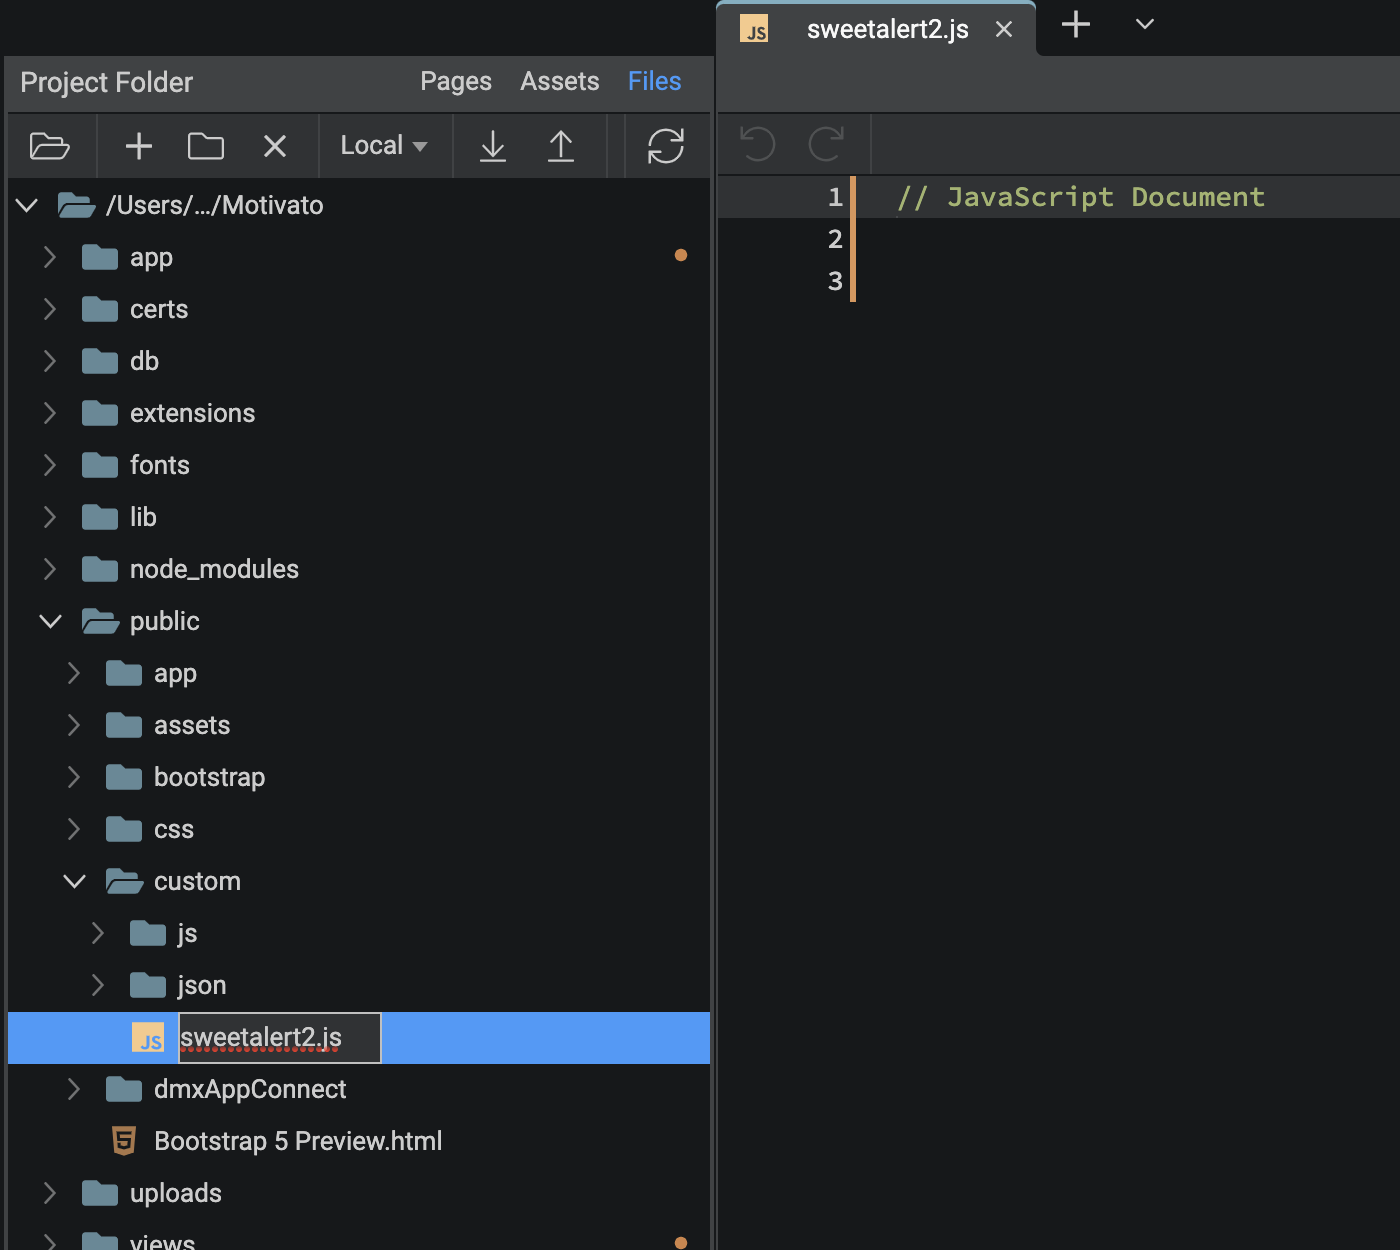
3. Link this file in the end of your layout page’s body

<script src="/custom/sweetalert2.js"></script>

4. Add the following basic code in the newly created sweetalert2.js file
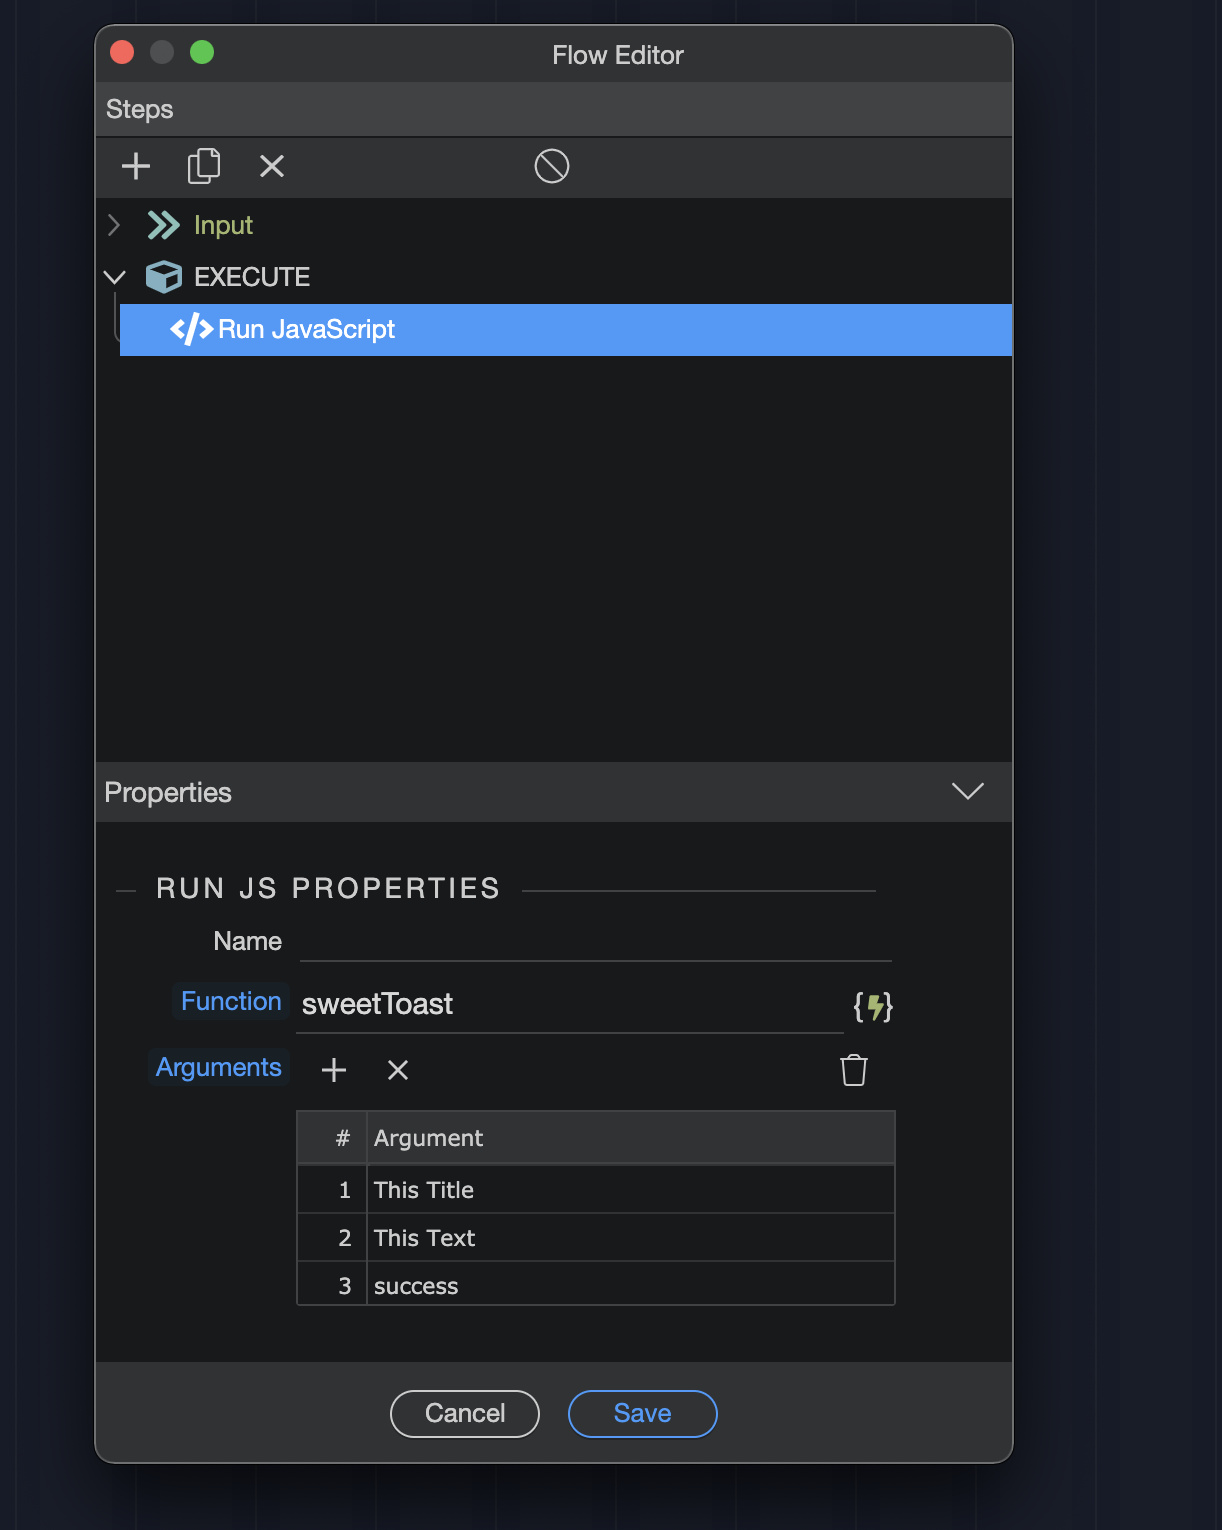
The function arguments ( sweetToast(title, text, icon, toast) ) I use to change the message to what I need when I use the sweetalert toast.

The icon can be warning , error , success , info , and question. more info on all alert configurations in step 6.

function sweetToast(title, text, icon, toast) {
    Swal.fire({
        title: title,
        text: text,
        icon: icon,
        toast: toast,
        timer: 3000,
        position: 'bottom-end',
        showConfirmButton: false
    })
};

5.You can call the above javascript function now whenever you need it:
In an event or flow, use “run Javascript”. In this example I will show the toast on a button click:

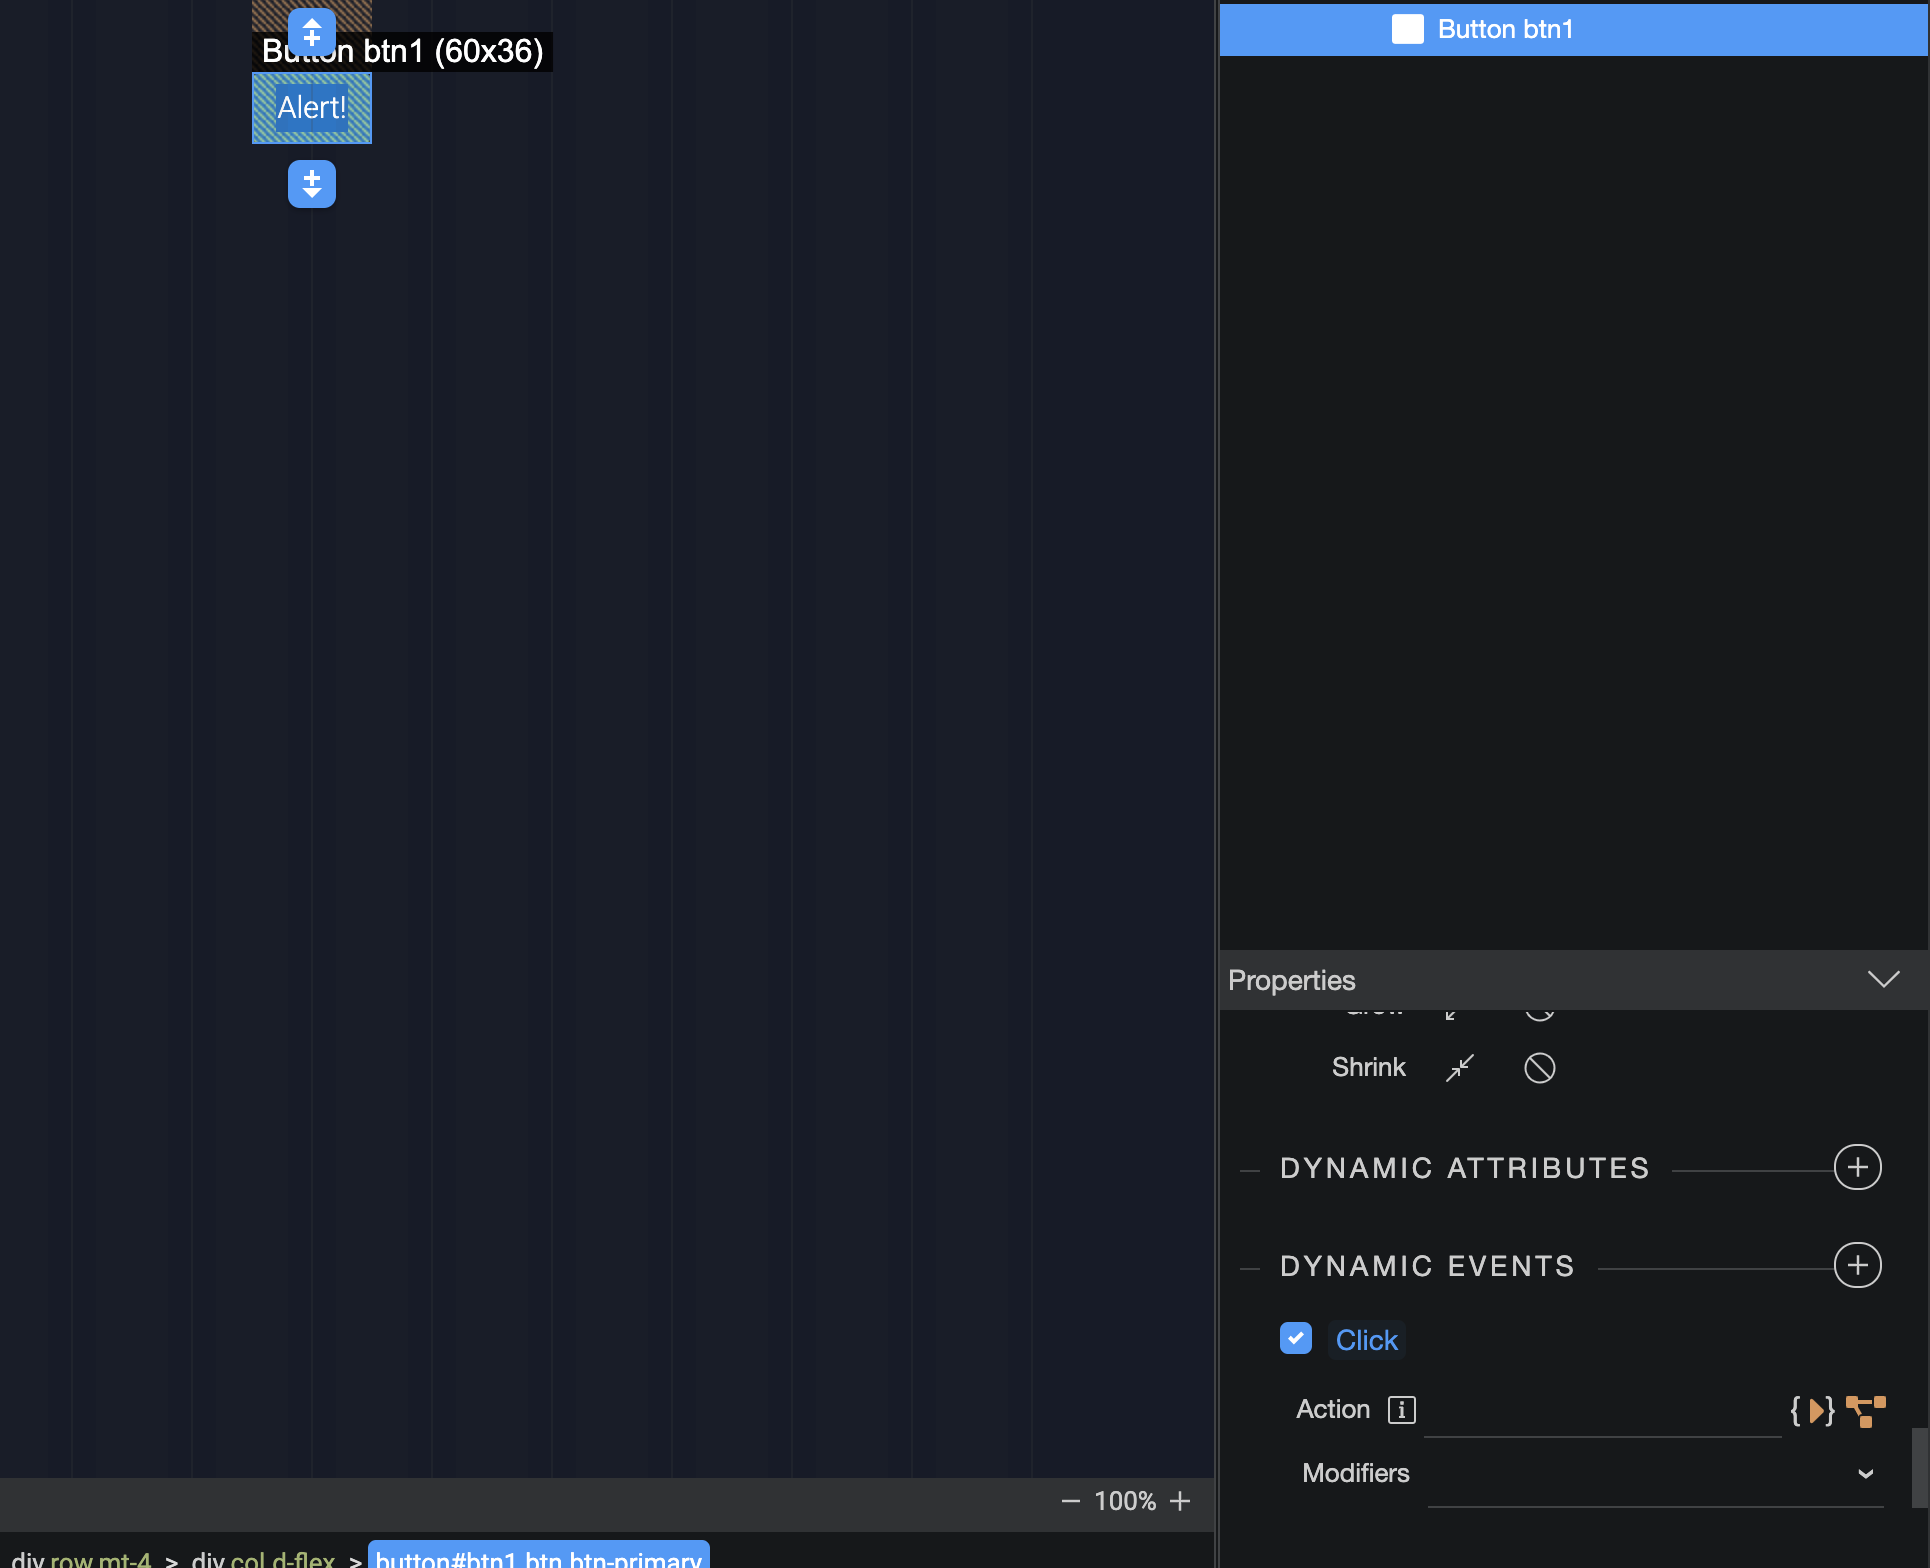
Use the function + arguments as needed:

Result:

6. Configuration
You can configure the alerts with many options:
Have a look at https://sweetalert2.github.io/#configuration

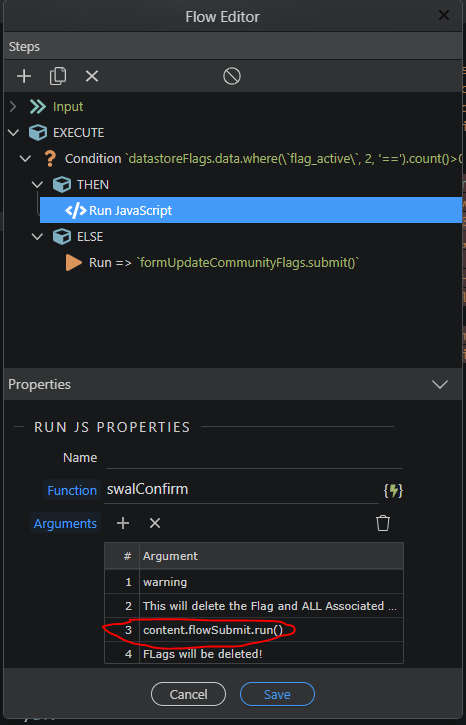
This was just a simple toast, you can create complex popups with confirmation, cancel buttons etc and multiple step popups.

Let me know if you have additional tips or questions!

2 Likes

Hi @htatd Assuming the bottom gif is your own project, how did you go about getting the confirmation popups working? Are you running something in the sweetalert2 function when they click the button? I haven’t been able to figure it out.

function confirmDeletion(buttonName, index, successText = "Success") {

    Swal.fire({
        title: 'Are you sure?',
        text: "You won't be able to revert this!",
        icon: 'warning',
        color: '#EBF1F5',
        background: '#1d2333',
        showCancelButton: true,
        reverseButtons: true,
        confirmButtonColor: '#bd1d32',
        cancelButtonColor: '#1d2333',
        confirmButtonText: 'Yes, delete it!'
    }).then((result) => {
        if (result.isConfirmed) {

            document.getElementById(buttonName + "[" + index + "]").click();

            successToast(successText);
        };
    });

};

This is the function that I use for that in the video.

I run the function when clicking the visable “delete” button.

When deletion is confirmed, I need to submit a server connect form.
To do this, this part is pressing the relevant hidden button to submit the form:
(A button is clicked to submit the server connect form because from my research there is no method or function to directly submit a server connect form)

 if (result.isConfirmed) {

            document.getElementById(buttonName + "[" + index + "]").click();

            successToast(successText);
        };

In this case, to target the correct hidden button in the table, I add the row index number to the id of the hidden button:

<button type="submit" class="btn btn-dark btn-sm visually-hidden" dmx-bind:id="buttonDeleteSales[{{$index}}]"><i class="fas fa-trash"></i></button>

So with the buttonName and index arguments I can target the needed hidden button to click, to submit the deletion server connect form.

1 Like

You could also use dmx.parse to run a Wappler flow etc. So like this in the javascript:

    Swal.fire({
        title: 'Are you sure?',
        text: text,
        icon: type,
        showCancelButton: true,
        confirmButtonColor: '#3085d6',
        cancelButtonColor: '#d33',
        confirmButtonText: 'Yes, delete it!'
    }).then((result) => {
        if (result.isConfirmed) {
            console.log(action),
                dmx.parse(action)
           }
    })
}

The when you call the javascript function you can include the text of the flow to run:

2 Likes

Will try! I remember trying something like that but couldn’t make it work with submitting a server connect form

Yep you’re right… you can’t submit a form directly but you could put a form submit (or any other action) in a flow, and submit the flow instead.