REVIEW: Git Version Control Part 2: Branches

In the last update we introduce you the Git Version control basics

Now with Wappler 2.1.3 we are introducing another great Git feature: Branches!

Branches are multiple different contexts where work happens. Each feature, bugfix, experiment.
Having them separately and easily switchable will make your workflow flexible and still very controllable.

Check the excelled explanation of Git Branches on the Git Tower Book and why Branching can Change Your Life

The Great World of Git Branches

Git Branches help you develop new features, while retaining a stable master branch. You can work simultaneous on multiple branches and eventually when done, merge them with the master.

image

Creating a new Branch

Most of the time you will work in your default “Master” branch, but when you are working in a team or you want to make a new isolated feature or other large change in your project you will create a branch.

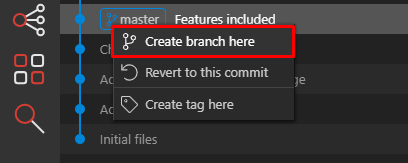
To do so in Wappler it is ease - just click on the point that you want to copy to a branch and choose from the context menu: Branch from here:

image

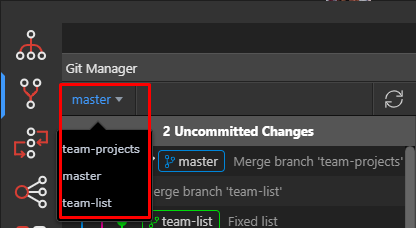
Once created the new branch will become active. You will see it in the menu above and also recognize it on the checkbox in front.

image

So you are actually copying the work of the previous branch and starting a new one.
You can add new commits to it as you wish.

Committing your work to a branch

After we have done some changes to our files, you can see that we have Uncommitted files.
The first line shows that and it is clickable so you can go in to commit mode:

You can choose either to commit and give it a nice message or Discard All Changes to revert your chases to the last commit.

Looking up history of previous commits

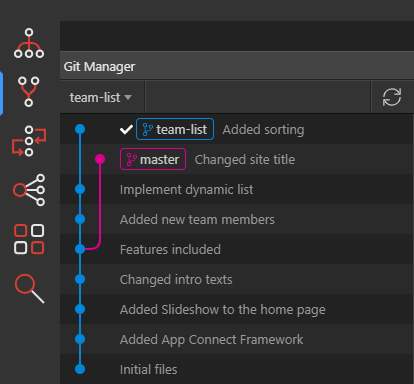
If you want to see what have you committed before, just select one of the previous commits and look below for full details of the committed files and description (1):

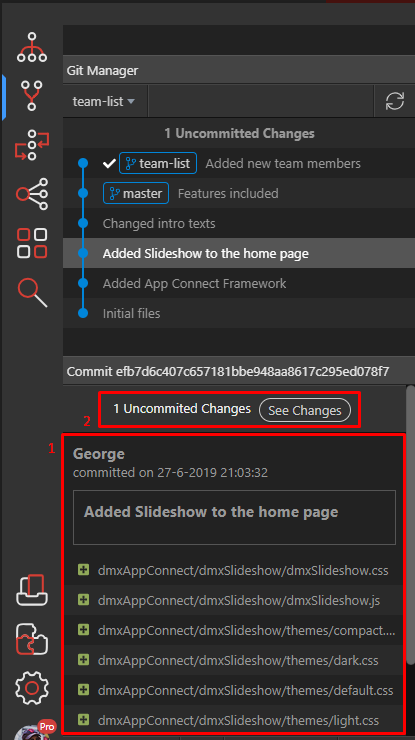
If there are still uncommitted files you will see a info message about this (2), so you can quickly switch to commit mode.

Committing more changes to your new branch

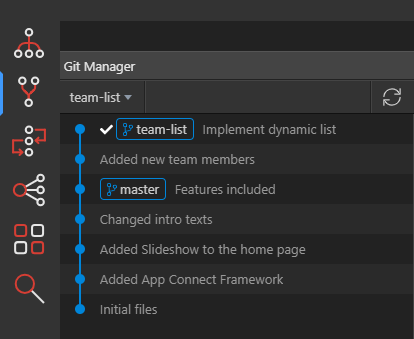
When you develop your branch work further, you will be committing more changes there.
You will see however that because the master branch is not changed in the mean time, the new branch and the master follow the same line. The master is just running behind.

image

Changing the master

However if we want to do some fixes in the master while we are still working on our new “team-list” feature, we can do that easy.

  1. Switch to the master
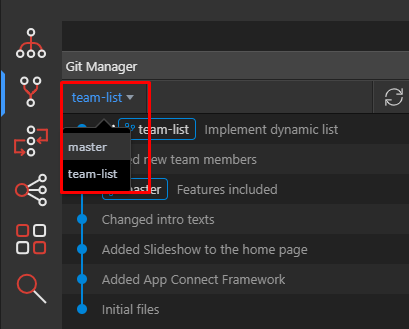
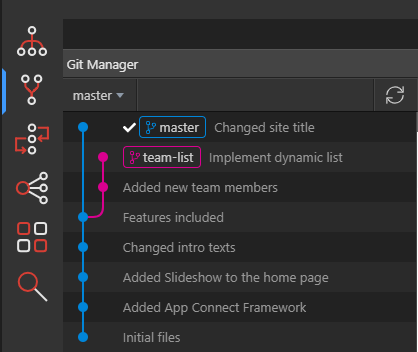
    image

  2. Commit your fix

Magic happens - now you suddenly see the different branches because your master is now running in front.

image

Switching back to branch

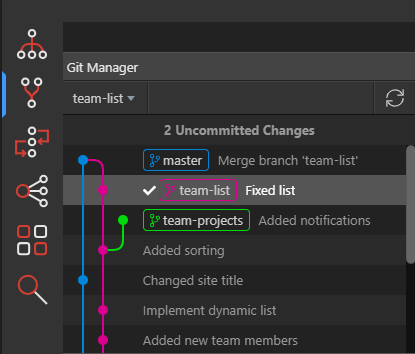
As we implemented our fix in the master, we want to continue our work in the “team-list” branch.
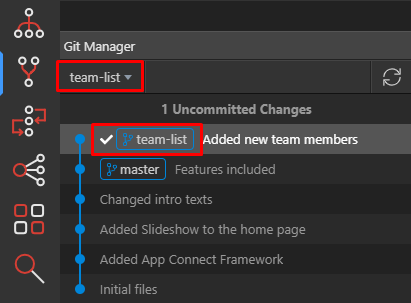
So we switch back to it and add some more commits

image

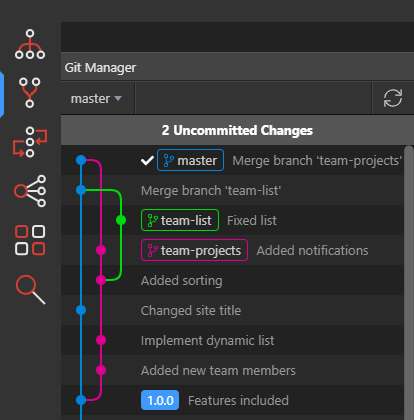
As you can see now the “team-list” branch is on top and is in front of the master branch.

You can even create more branches as you wish.

Merging branch back to master

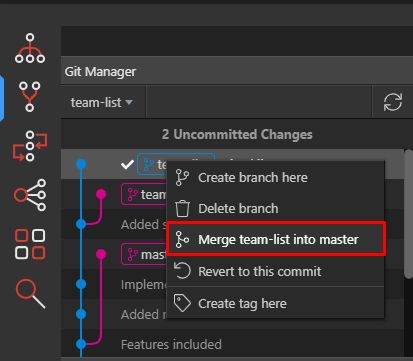
When you are ready with your branch and you have implemented the feature, you want to merge it to your master. This is easily done with the context menu when you right click on the branch name.
image

When the merge is completed you will see it nicely in the Git graph and the line goes back to the master.

image

Working with Tags

Creating Tags

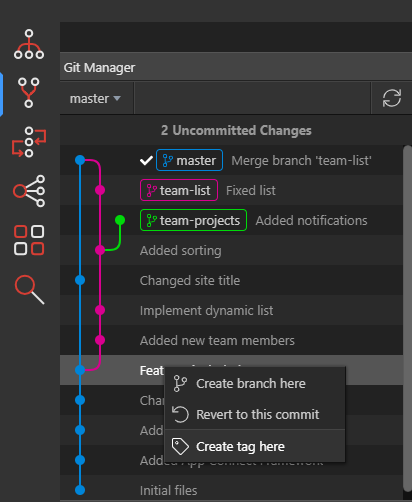
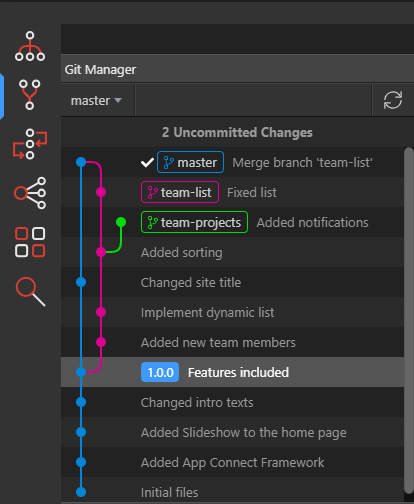
You can annotate your commits with labels, like version numbers or other short descriptions for easier recognition.
To do so you just choose create tag from the context menu.

We have entered a version number “1.0.0” as a tag name so it appears nicely:
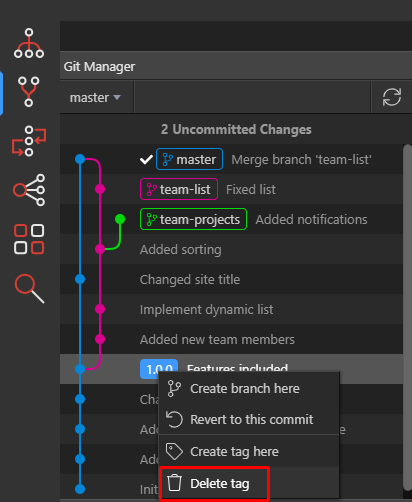
Deleting Tags

If you want to delete a specific tag, just right click on it and choose “Delete tag” from the context menu:

Conclusion

So that conclude the new Git branches feature of this week.
Let us know what you think and report any bugs you find.

Coming up next

In the next update we will handle Git Remotes, how to create and push your work to remote repositories.

7 Likes

Thanks for this walkthrough, George. I see this workflow is going to take some getting used to.

Also, I notice in your screenshots the different branches are different colour. For me all branches are blue.

What is the advantage of pushing to a remote repository when it seems that Wappler will have everything built in?

1 Like

@brad, the advantage of a remote repository is a remote back up in case something happens to your computer.

One other advantage I can see is allowing others to branch off it the master remotely without having to be tied to your computer network. I believe, but could be wrong, that the wappler git is saved locally and not uploaded to your production site.

3 Likes

Yes as explained above, if no changes are made in the master branch, while you are working on your child branch, they same on the same track, blue.

Only when you change you master in the meantime, while you are still also working on the child branch, then you will see it get separated. And later when you are done, you will merge your child branch back to the master.

It might take some time to get use to it all but it is all worth.

Again I strongly suggest to do some background study on various git workflows and branching techniques.

For a simple web dev project it might be an overkill to create a new branch for each small feature. So in that case you might just choose to work directly on the master. Only when you have a major feature/module coming in that you want to develop separately from the stable master, then you can choose to create branch of it.

Start reading the base about Git Branches from the Git Tower book

And from there you can go to more advanced techniques if needed.
There are various different techniques, many based on the software development and working in larger teams

As for remote repositories. I would also strongly suggest to read the chapter from the Git Tower about it

1 Like

Having Git Branches now is so awesome!! I can work on experimental portions of my website without breaking my main website or creating a new project just to test something out.

Thanks so much !!

3 Likes

Thanks for the links, George. I see I have a lot to learn about Git in order get the most out of it.

Exactly! This is one of the best feature of branches - experimental work! You can now indeed go and do all your experiments in a branch without breaking your master.

If the experiment fails - you can just discard it, but it it turns all fine, you can just merge it with the master.

So, let’s say that for example I have a stable Master and I create a new branch to build a new feature for a dashboard all my experimental files will be published live. Now suppose something is broken or our managers decide we don’t need that feature after all, what is the procedure to revert and do the remote and local files get synched?

1 Like

I have to highlight the Branching Switching feature for you:

image

Note: This is very powerful but also have large impact!

When you switch to a other branch - you are completely restoring your files to the other branch’s last commit.

Of course if you have uncommitted changes in the current work - you will be alerted as you don’t want to lose them.

Switching is so easy, but it does change all the files.

So that is why you want to do your development and experiment work on your development server, not on your live server.

On your live server, you make sure you upload only files from your stable master branch.

Because of the easy switching and changing of many files at once - we will be improving the FTP synchronization to be much more smarter and present you with the exact difference you need to upload.

Also with all those branches and master releases with Git - you will start to see why we will be also offering Git publishing/deploy as alternative to FTP.

your live site will simply be a remote Git repository - copy of your master branch.
When you have a new commit on your master - you just push it to your live remote and it all gets uploaded!

This is the most simple live publishing you can have! And if you break the live environment - you can just revert it to previous version.

5 Likes

Thanks again for the explanation, George. Now go get some sleep! Must be early in the morning your time. :wink:

I am going to set up a test site this week and mess around with Git branching on a test site rather than my live site so I don’t mess things up. This looks like it is going to be a very valuable tool in Wappler!

2 Likes

Can’t wait for next week to have support for remote repositories. I’m currently using SourceTree with Github but having it all built into Wappler will transform the workflow.

2 Likes