Building Real-Time Private Messaging Service
In this post, we are going to create a real-time messaging feature. So, a user can communicate and send a message to other users on the platform. Below is the video and a simple example of how it will work. The left window is the view from the first user, and the right window is the view from the second user. When a message is sent, the other user will receive it immediately and can respond to it.
Supporting Articles
There are already some posts about this on our documentation, and we recommend you to go through those posts first to get the basic knowledge before continuing with this example.
Overview
The feature that we are about to make will involve a Web Sockets component. Since there will be two users sending messages back and forth, we are going to implement two private rooms. When user 1 sends a message to user 2, we are going to emit the message to user 1 own room, as well as send it to user 2 room. Then, we store the message on the database, so that their message history can be seen. The database field should contain the sender, receiver, message, and the date. The same process will happen when user 2 sends a message to user 1.
Create the Database
To start, we need to create the database. So, head over to Database Manager on the left menubar, and add New Table. Fill in the Field with sender, receiver, message, and the date.
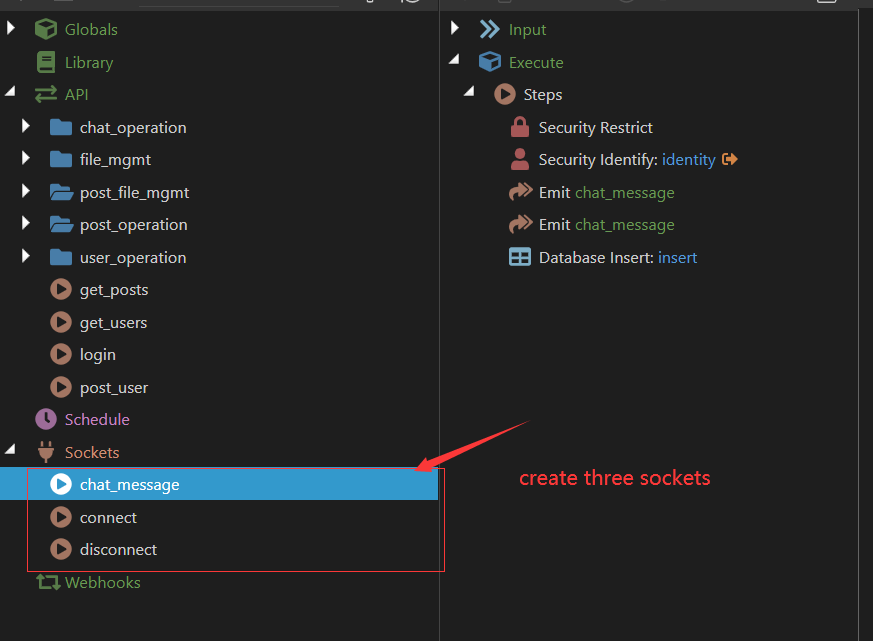
Create Necessary Sockets
First, we should create the Web Sockets component that we will need. We need three of them, the chat_message to emit and send the message, connect to put the user to their socket room, and disconnect to remove the user from the socket room when they logged out or close the browser.
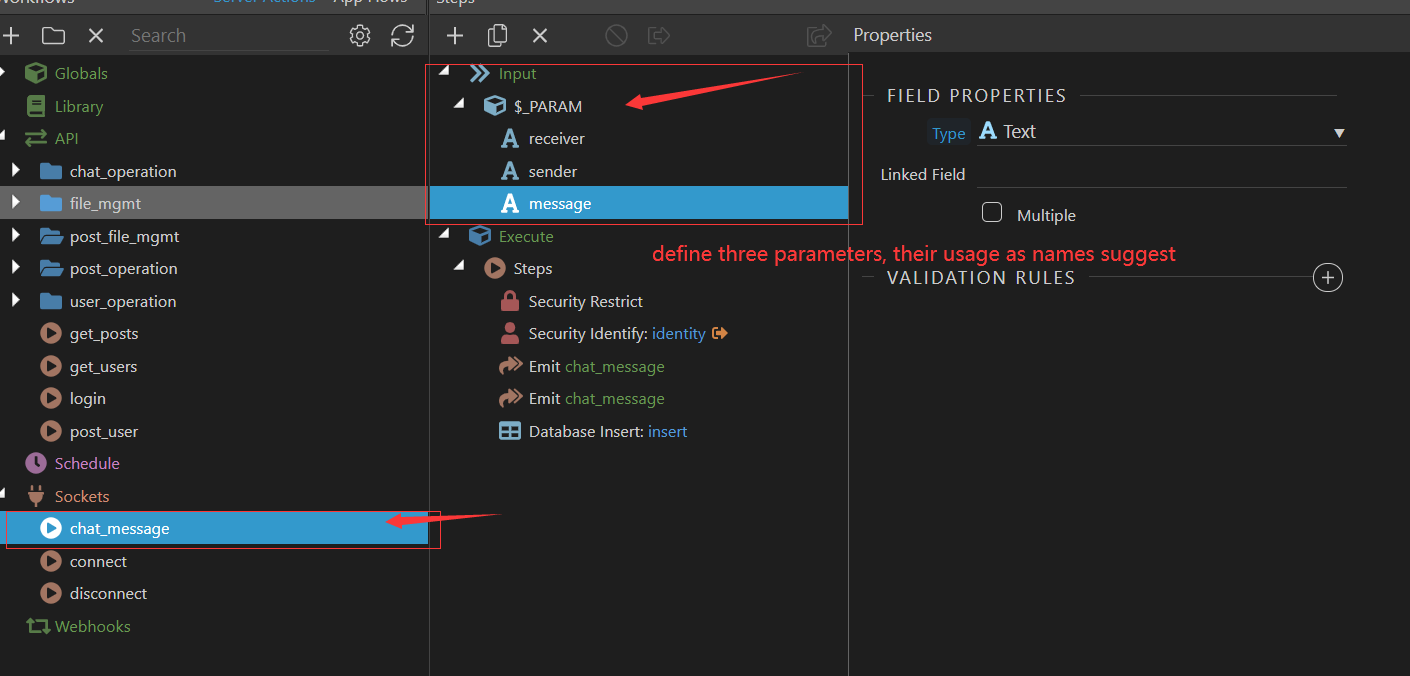
Define parameters in chat_message
To send the message correctly, we need to define 3 parameters, namely the receiver, sender, and the message itself.
Add the Steps in chat_message
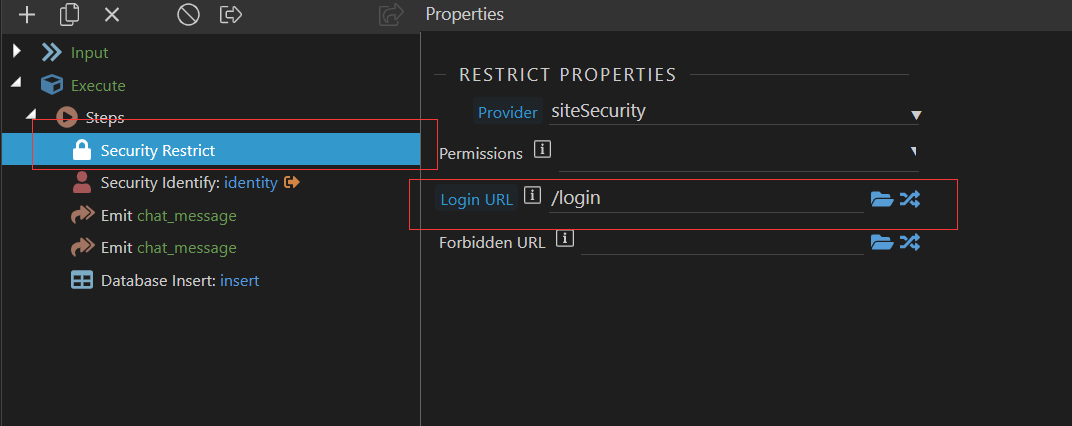
Security Restrict component
First, we need the security Restrict component. This is needed so unsigned users cannot send messages since we need their identity to be put in the sender and receiver database. In the Restrict Properties, put the Login URL to your own login page. We also need the Security Identify to know which user is signed in. Just connect it to your Security Provider in the properties.
First Emit component
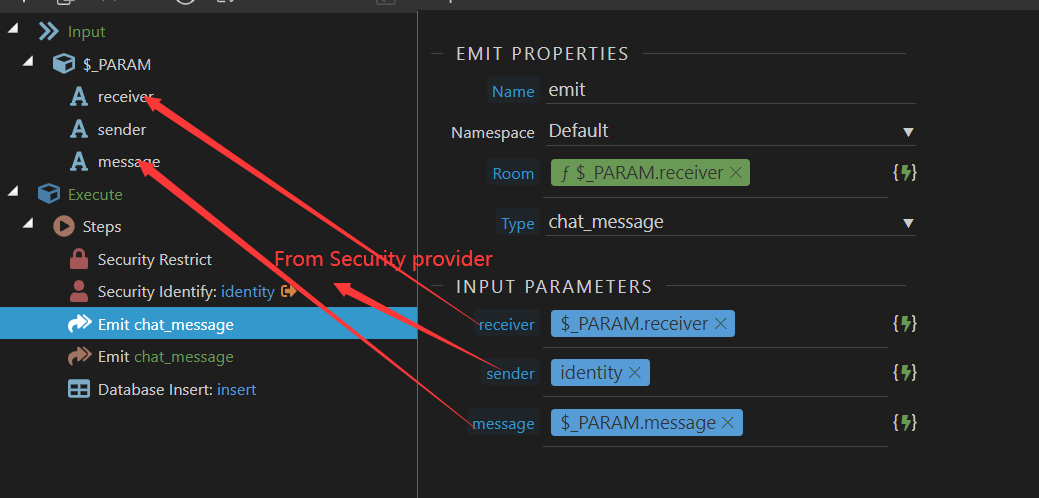
Then, we need the Emit component. Right-click on the Steps and search Emit. This is for actually sending the message to the receiver. Fill in the Emit Properties as in the picture below. For the Room, we use the receiver from the Parameter that we have defined before. Click the drop-down menu on the Type and choose the chat_message. For the Input Parameters, the receiver will be from the Parameter, the sender will be the identity from the Security Identify component, and the message will be from the Parameter as well.
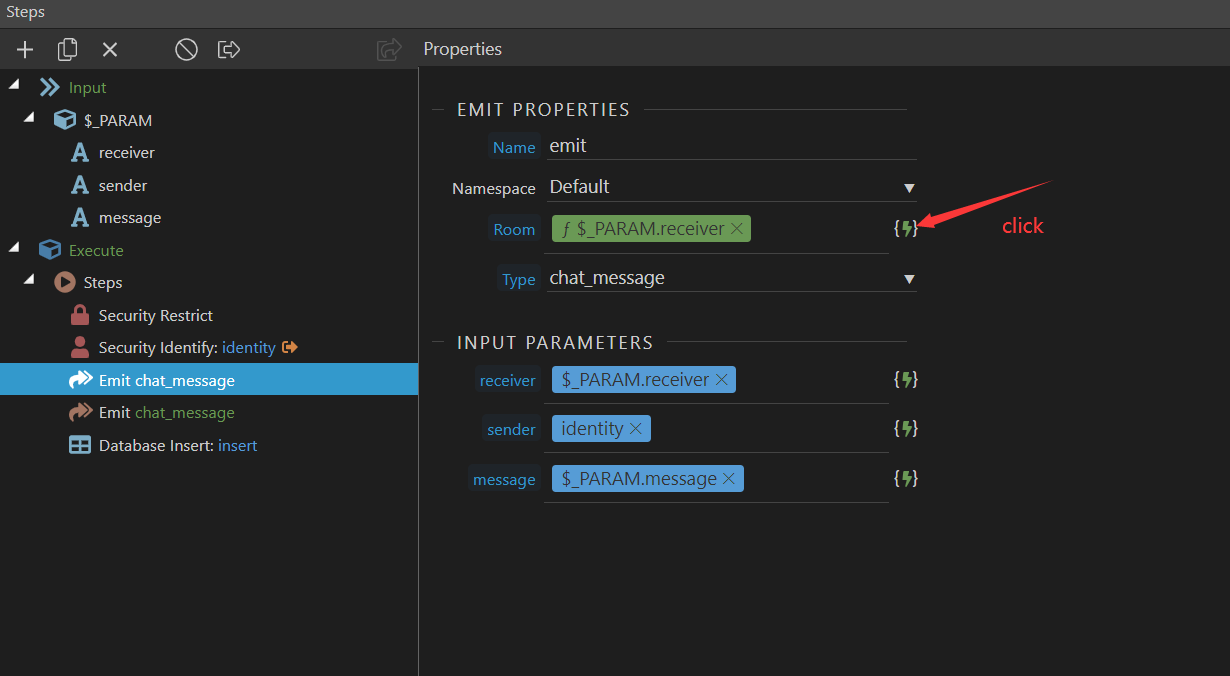
Now, we want to secure the room as we don't want other users to enter the private room. Click the Lightning icon on the room.
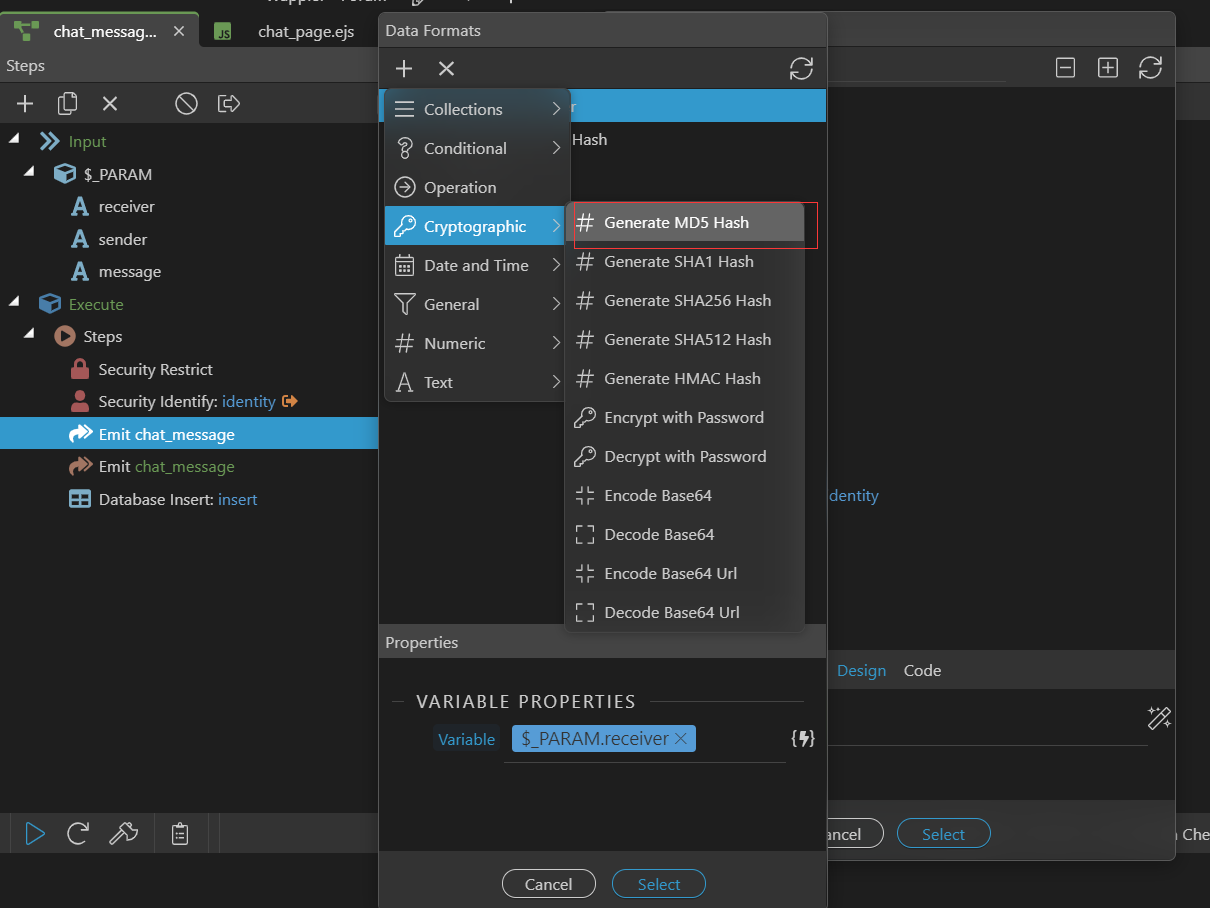
Click on the (+) sign, choose Cryptographic, and Generate MD5 Hash. Make sure the Variable Properties already pointed to the correct one, which is the receiver parameter.
Second Emit component
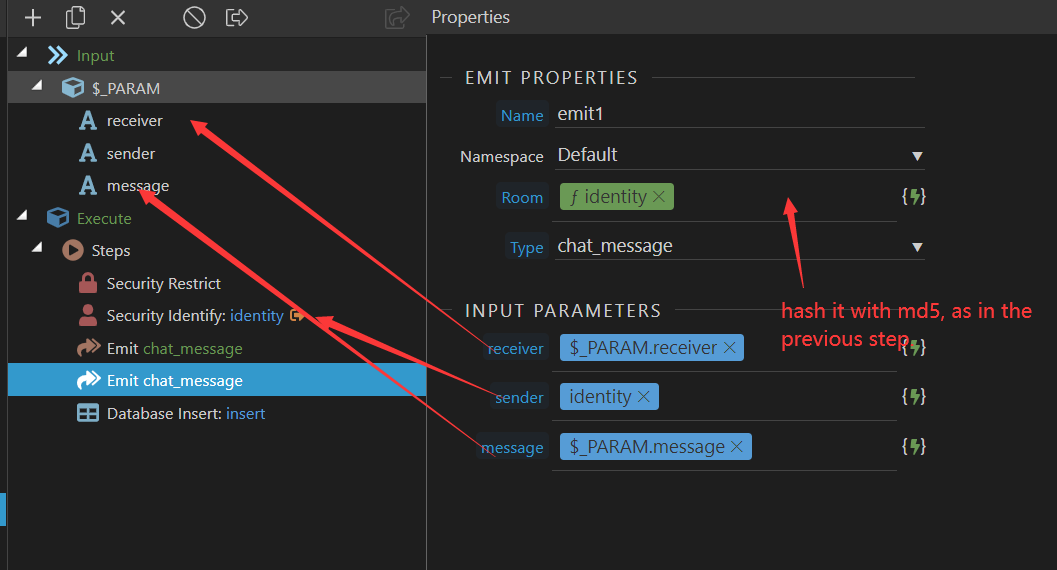
The first emit settings have finished, now we are moving to the second Emit component. This is used to send the message to the sender's own room, as explained in the Overview section before. In the Emit Properties, use a different Name, here we named it emit1. And for the Room, instead of using the receiver from the Parameter, use the identity from the Security Identify component. Do the same step to secure the room as before. The Input Parameters will be the same as the first Emit.
Insert Message to Database
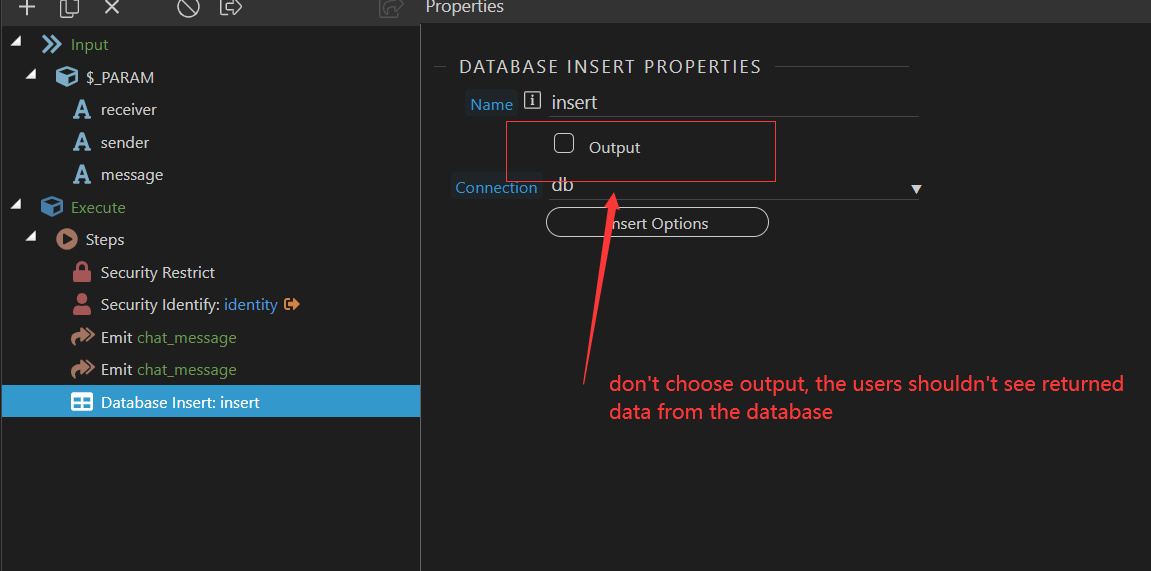
The last step will be a Database Insert component. Right-click on the Steps, search and add Database Insert. Untick the Output checkbox, as we don't want the user to view the data from the database.
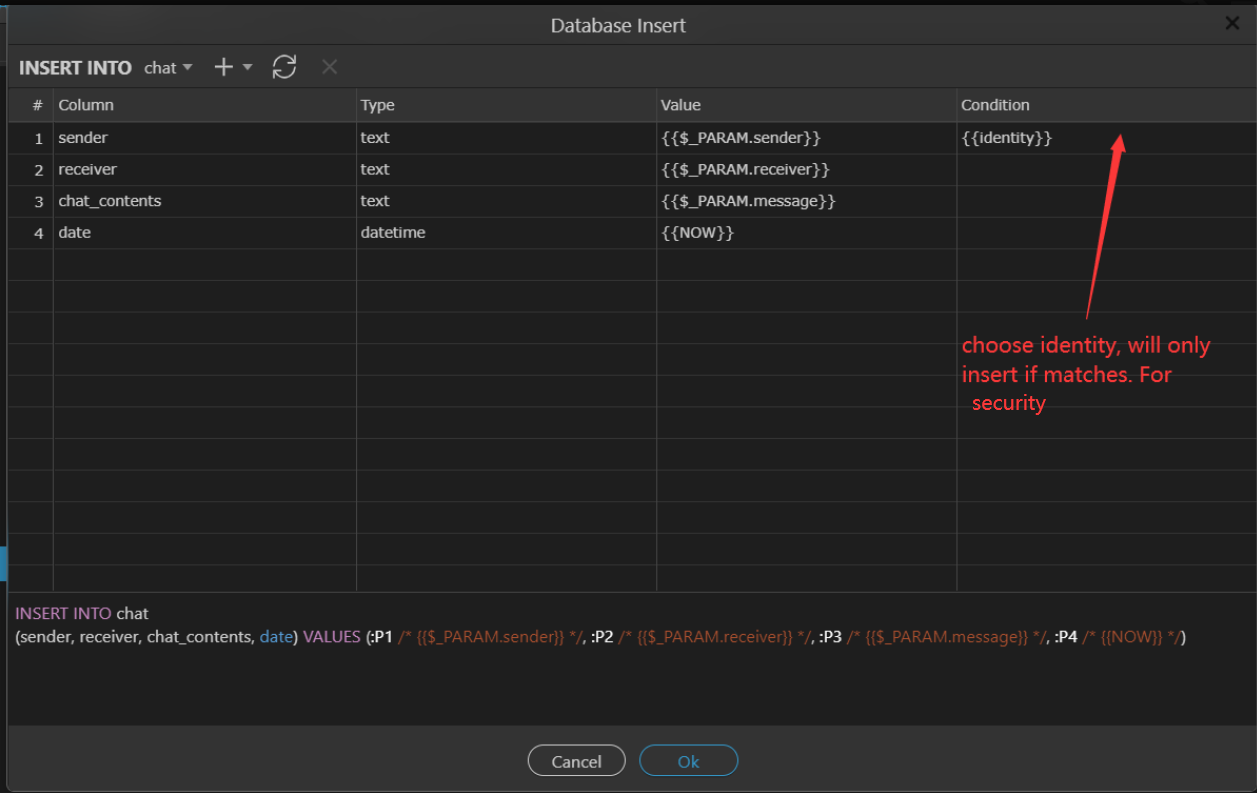
In the Insert Options, on the top left corner, choose the database name we have created before, in this case, it's chat. Add all the columns, and put in the value as in the picture. We also need to specify the condition for this insertion. In this case, we want to check whether the sender is equal to the identity from the Security Identify component. After everything has been set, click Ok.
Connect Sockets
Moving on to the connect Socket component, which will be used to connect and put the user to the chat room.
Add Steps
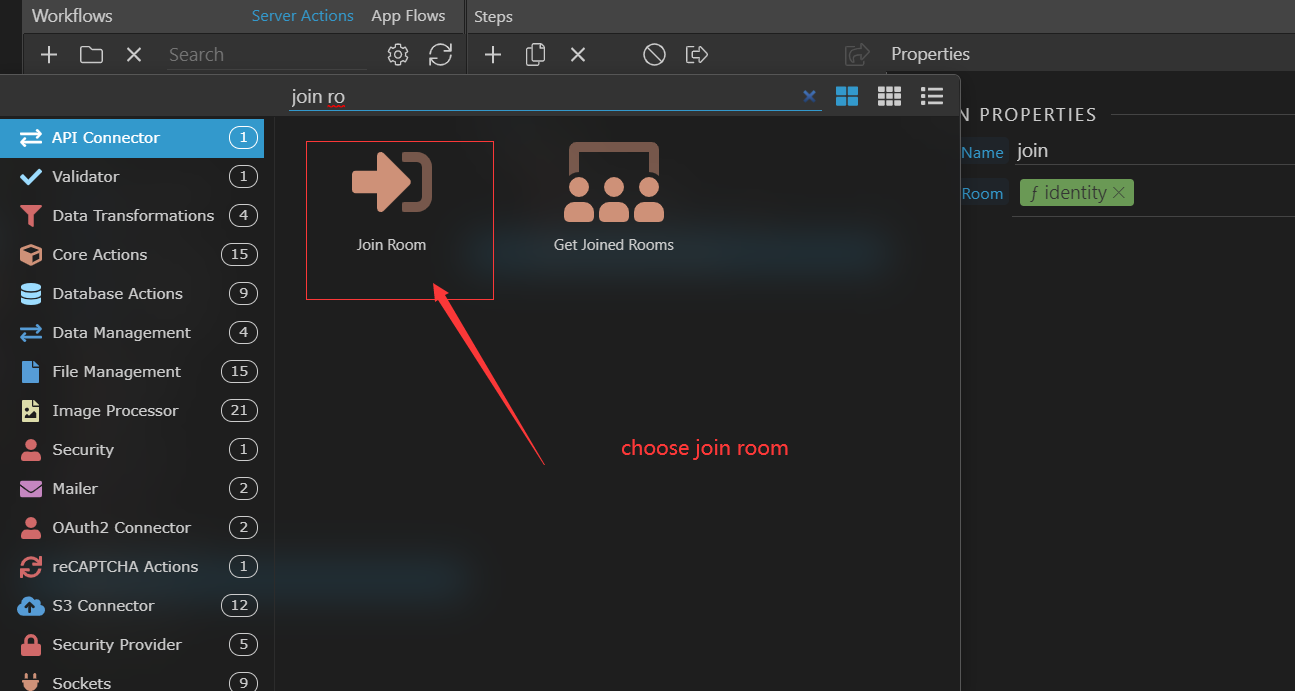
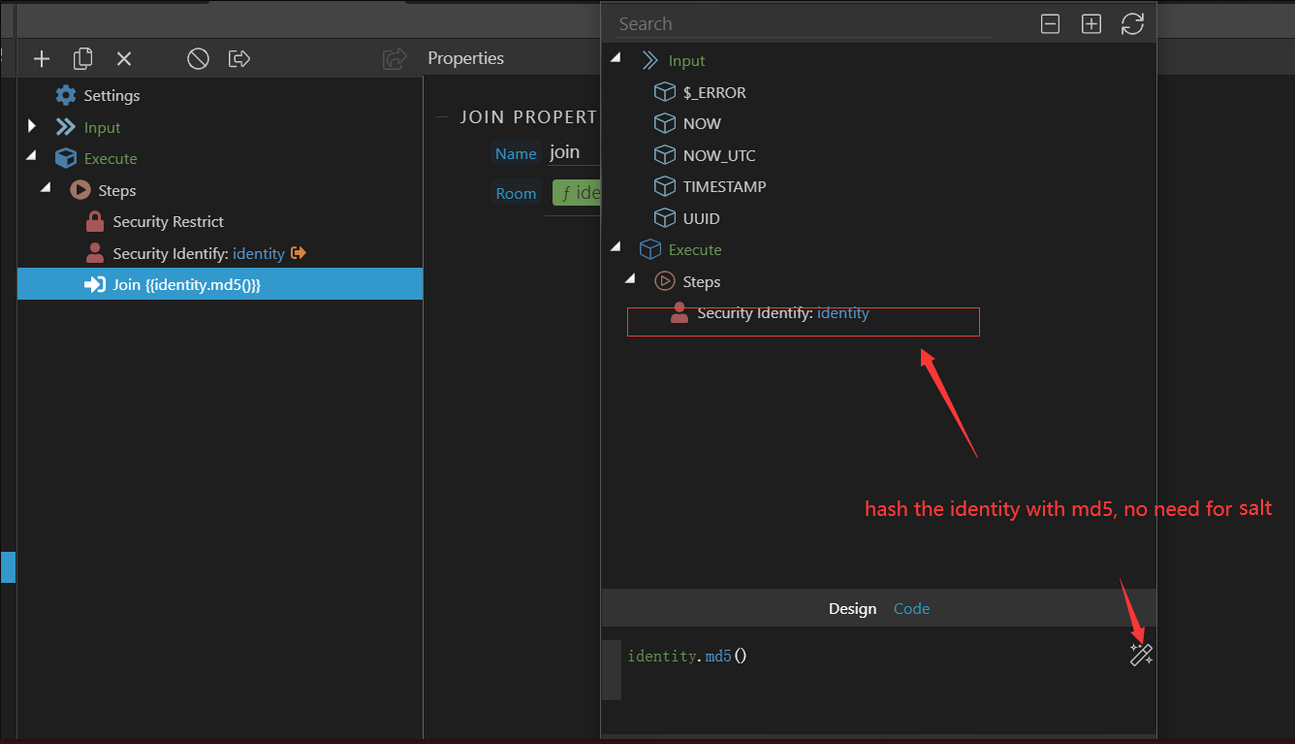
we want to define the Steps as in the picture below. First, we add the Security Restrict and Security Identify components as before. Then, we need the Join component to connect users to their own room. Right-click on the Steps, search and add Join. On the Join Properties, the Room should be filled with the identity from the Security Identify component.
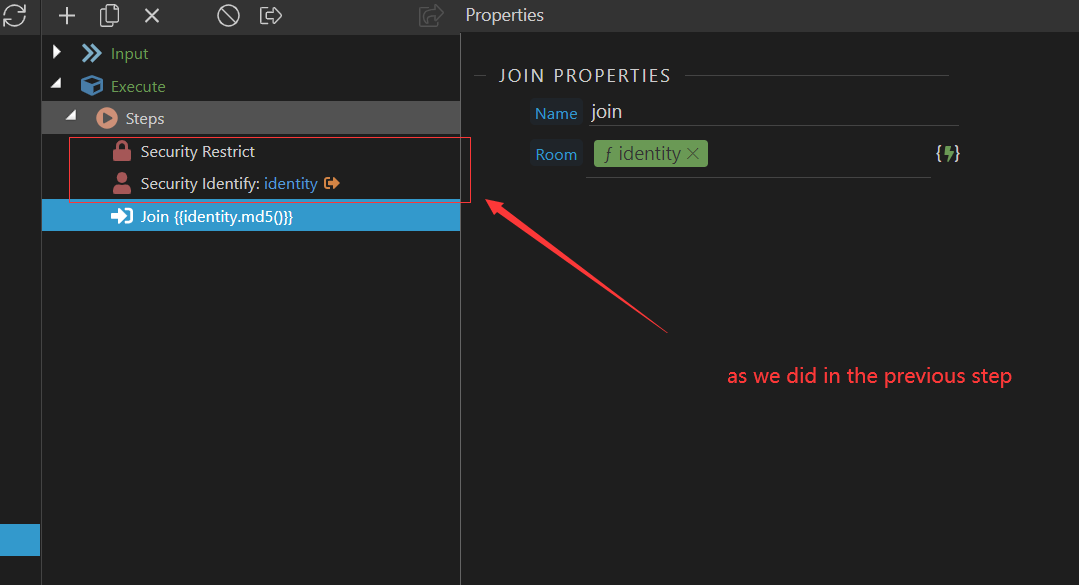
To add an extra layer of security, we also hash it with md5. You can add it with the same step as before, or you can switch to Code view, and add .md5().
Create API Call to Retrieve Message
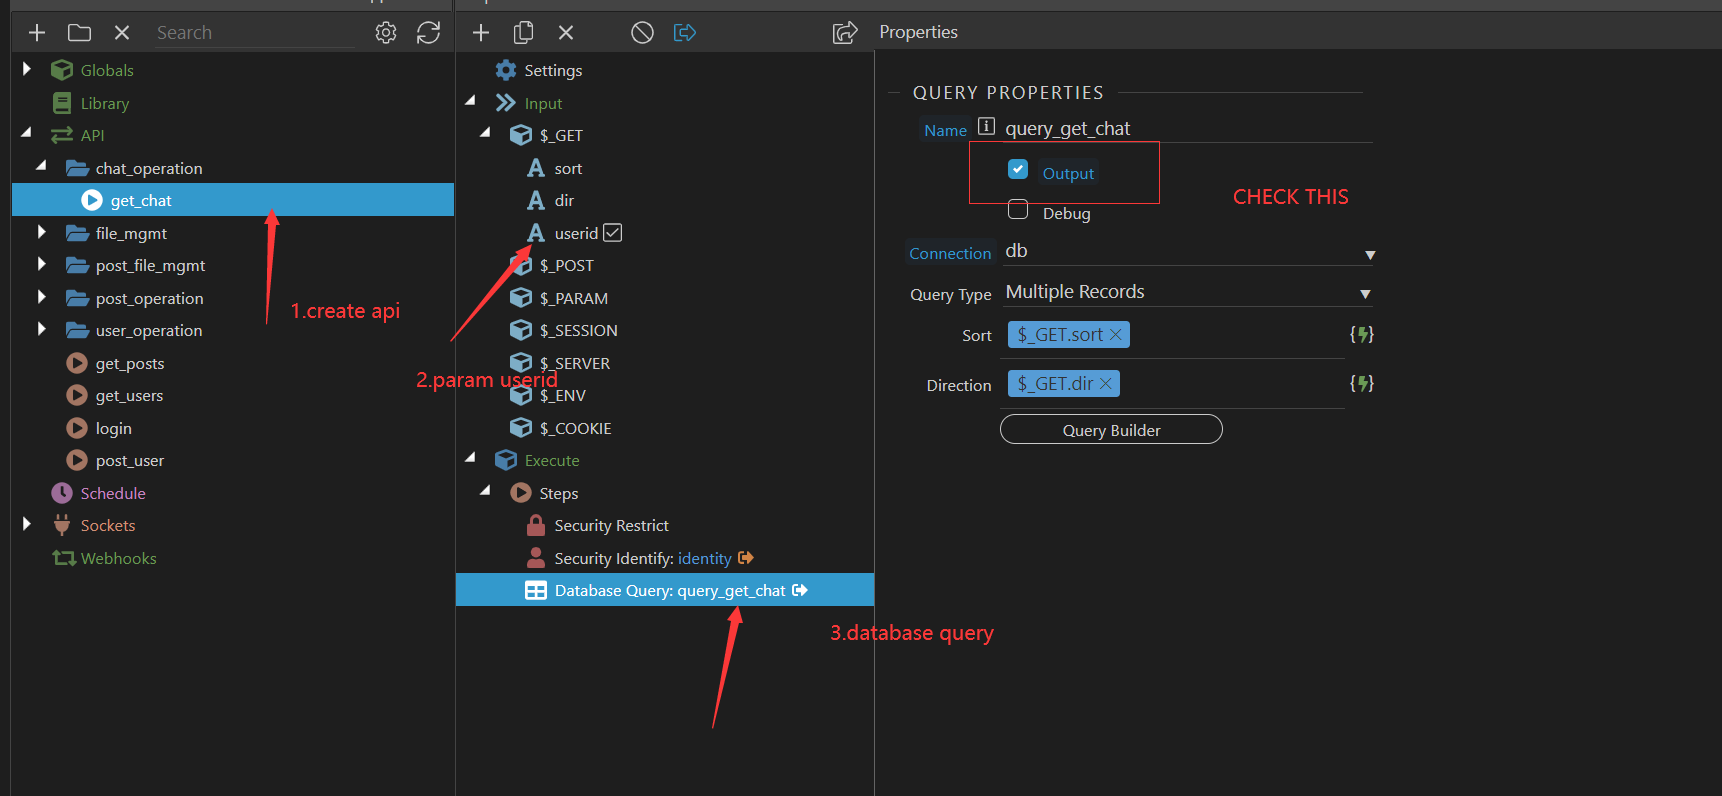
Now, all the back-end part has been set, we want to create the API call to connect the back-end and the front-end. Go to the Workflows tab on the left menubar, and add new API action. We will call it get_chat. Below are the steps that you need to do.
$_GET Input
In the $_GET Input, add the userid variable, as we want to retrieve the ID of the sender.
Add Steps
We also want to put Security Restrict, Security Identify, and Database Query components on the Steps. The Database Query component is used to retrieve the message history from the database. In the Query Properties, we named it query_get_chat. We also want to tick the Output checkbox, as we want to show the retrieved message to the user.
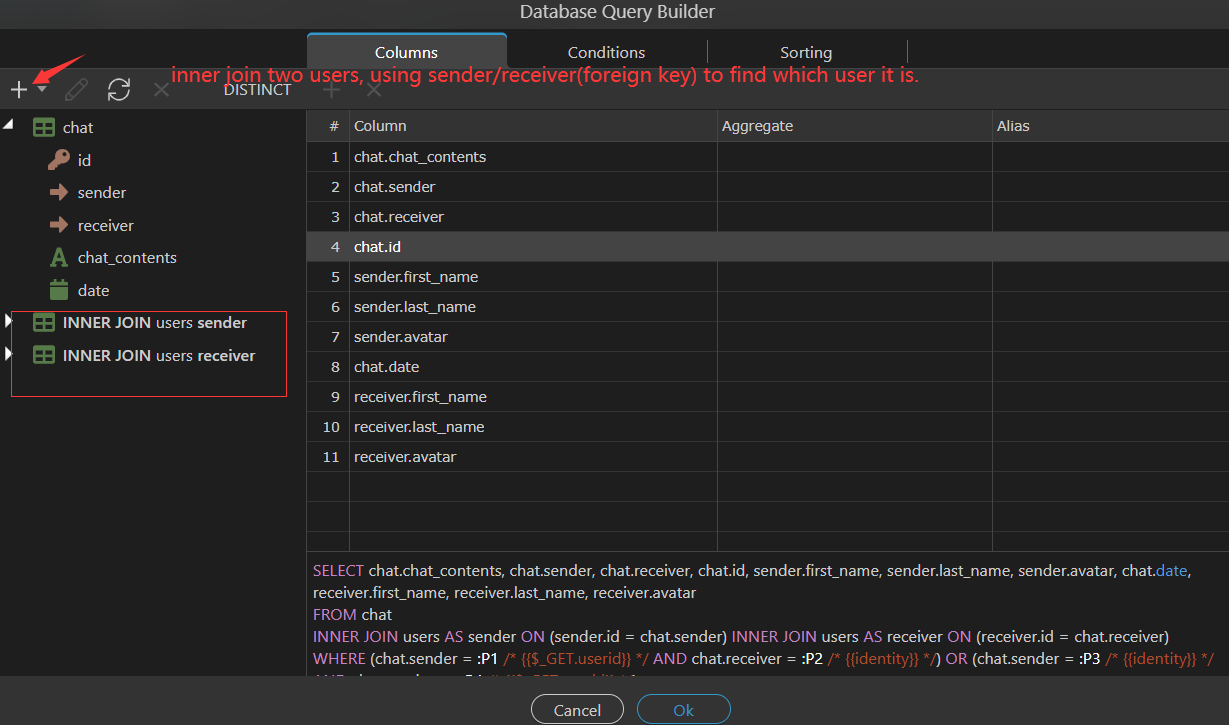
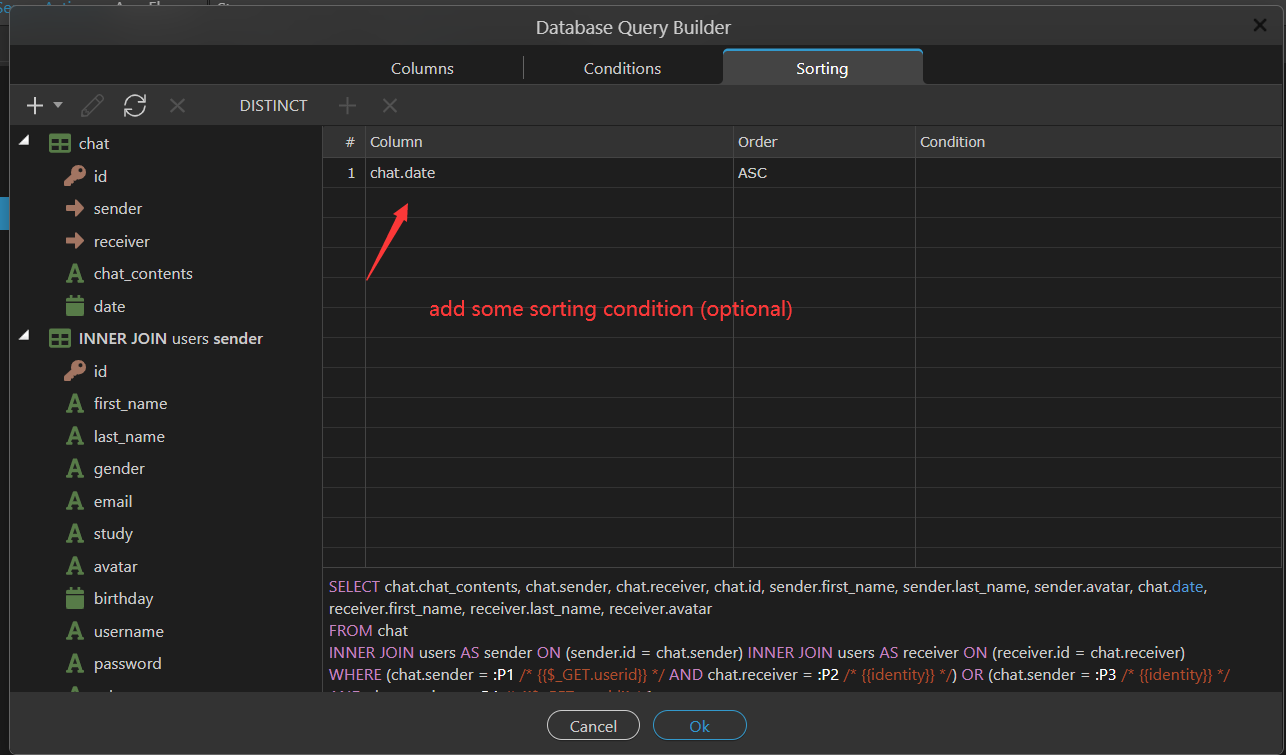
query_get_chat Database Query Builder
In the Query Builder option, basically, we want to query everything that we wish to display on the front-end. In this example, we want to show the date, chat message and ID, sender and receiver first name, last name, and profile picture.
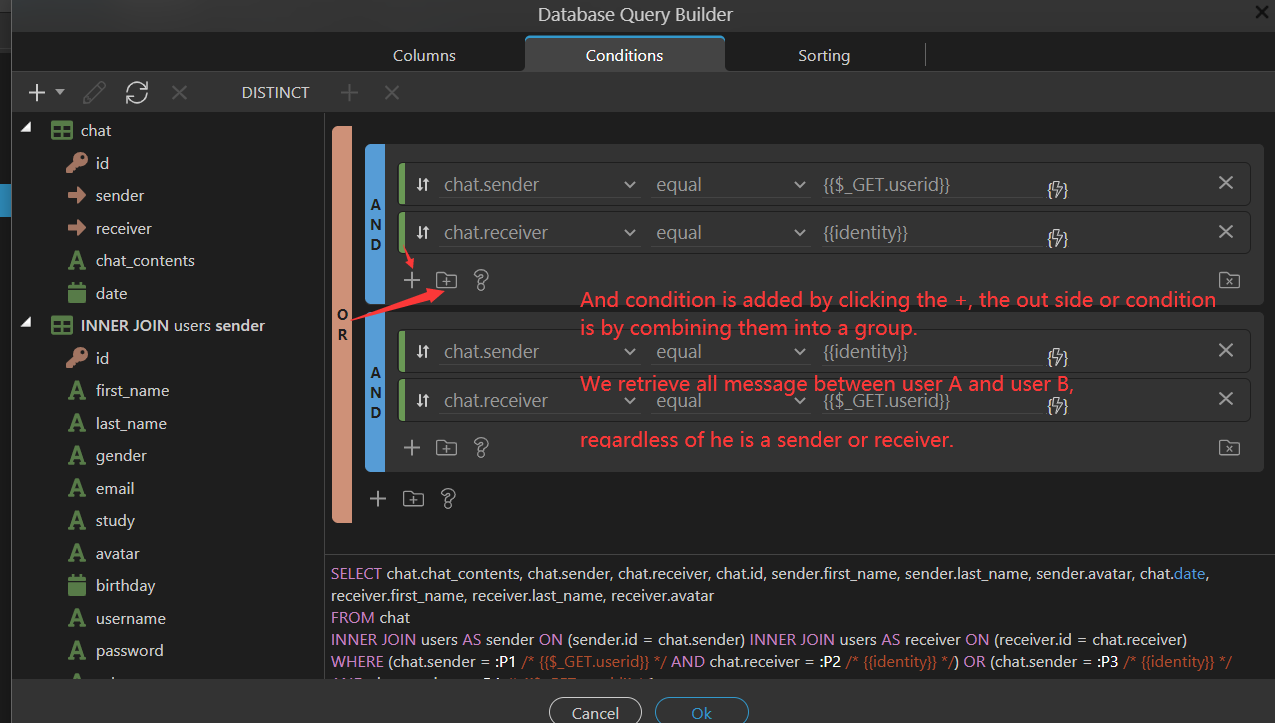
Then, in the Conditions window, we want to compare the chat sender and receiver based on their identity to make sure it was sent by an authorized user. We do the following.
And we want to sort the chat message based on the date it was sent. So we add date from chat in the Sorting window and use the Ascending Order.
Adapting the Front-End Page
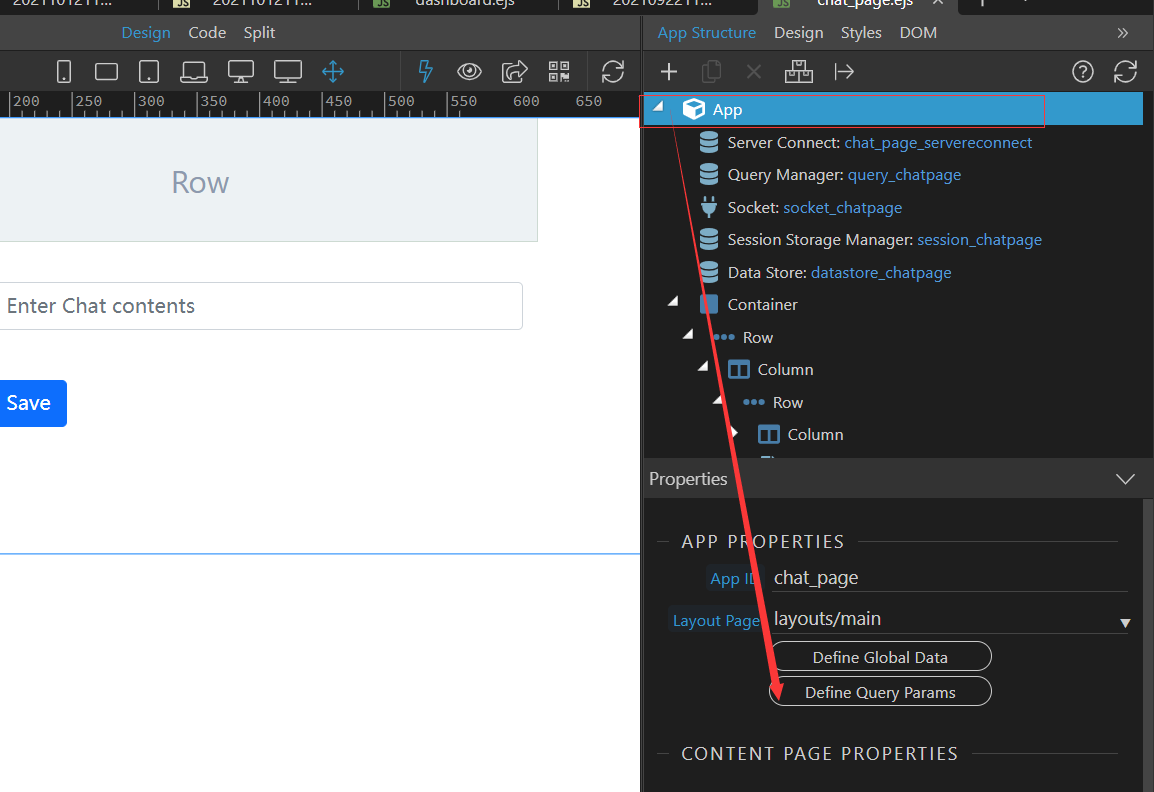
Click on the App structure, and click Define Query Params in the App Properties.
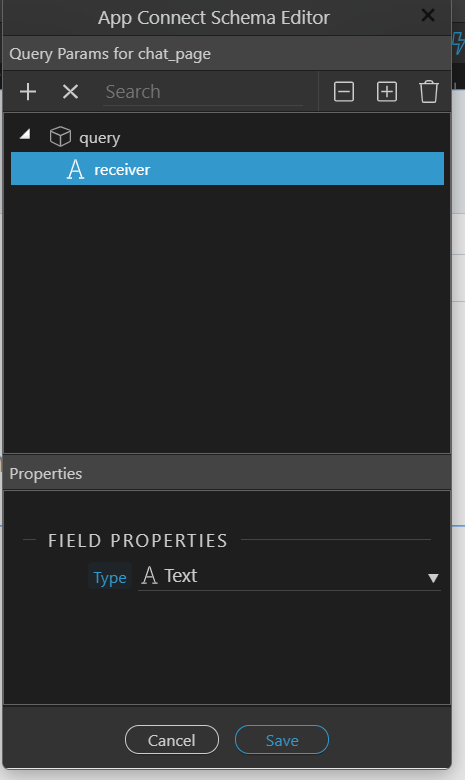
Add a variable, named it receiver, with the Type of Text.
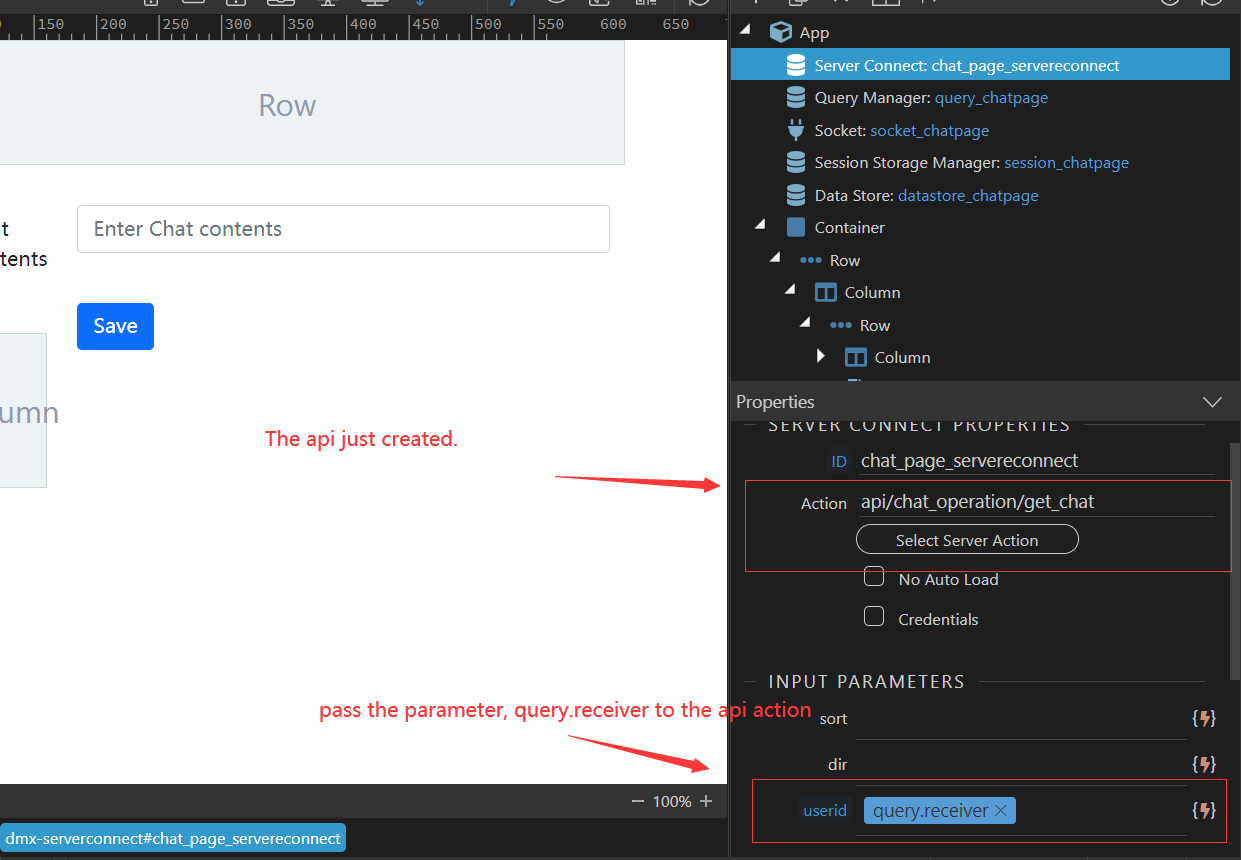
Also, add a Server Connect to call the API action. We change the ID to chat_page_serverconnect. And for the Action, choose Select Server Action, and use the get_chat API that we just created before. We also want to pass the parameter of the receiver variable that we created before on the App element.
Adding Socket
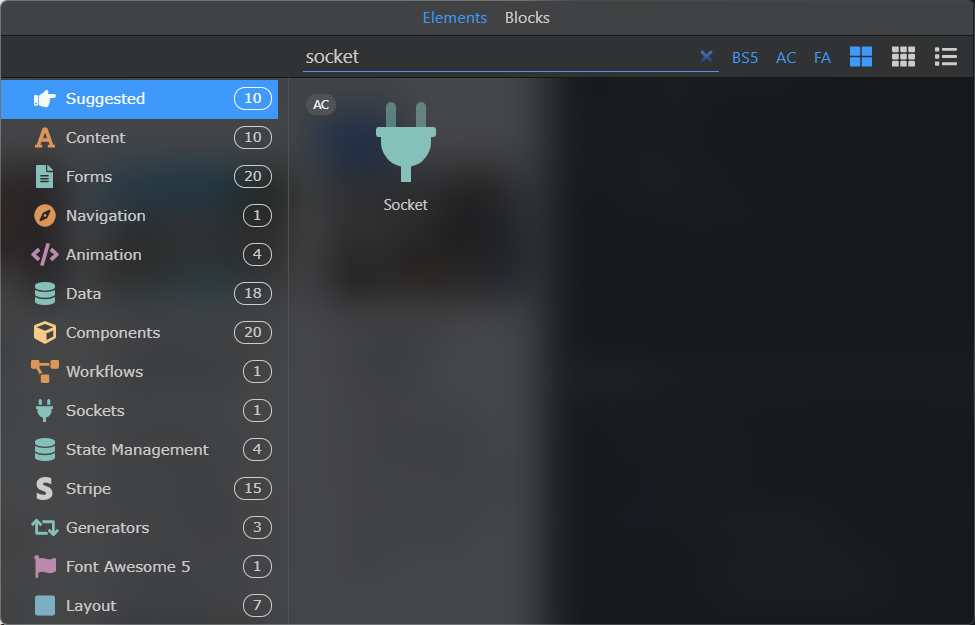
Next, we want to add the Socket element. Right-click on the App Structure, and search Socket.
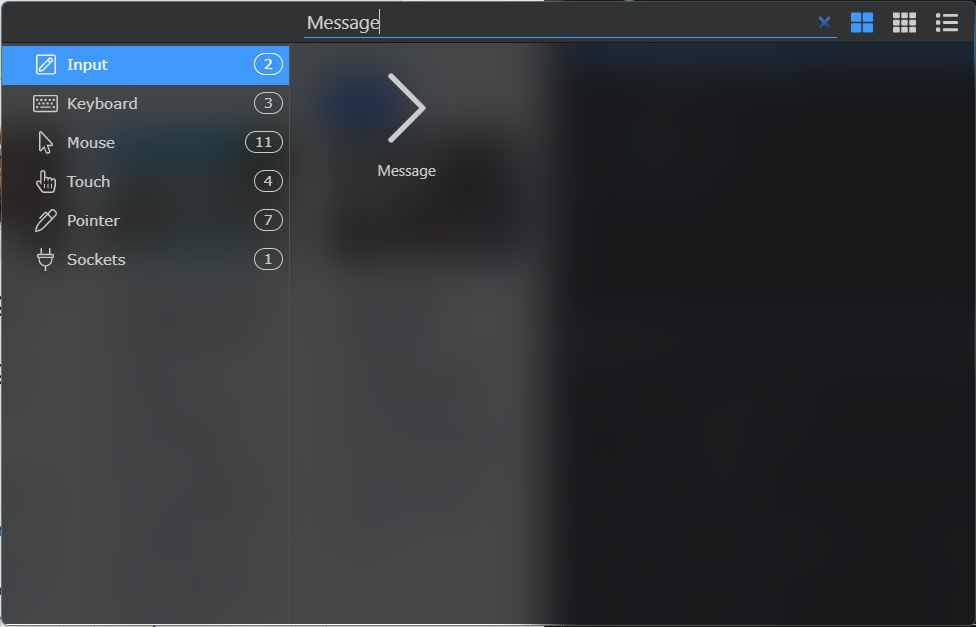
We change the ID name to socket_chatpage. Then, we want to add a Dynamic Events on this Socket. Click the (+) sign, and search Message. Change the Type to chat_message.
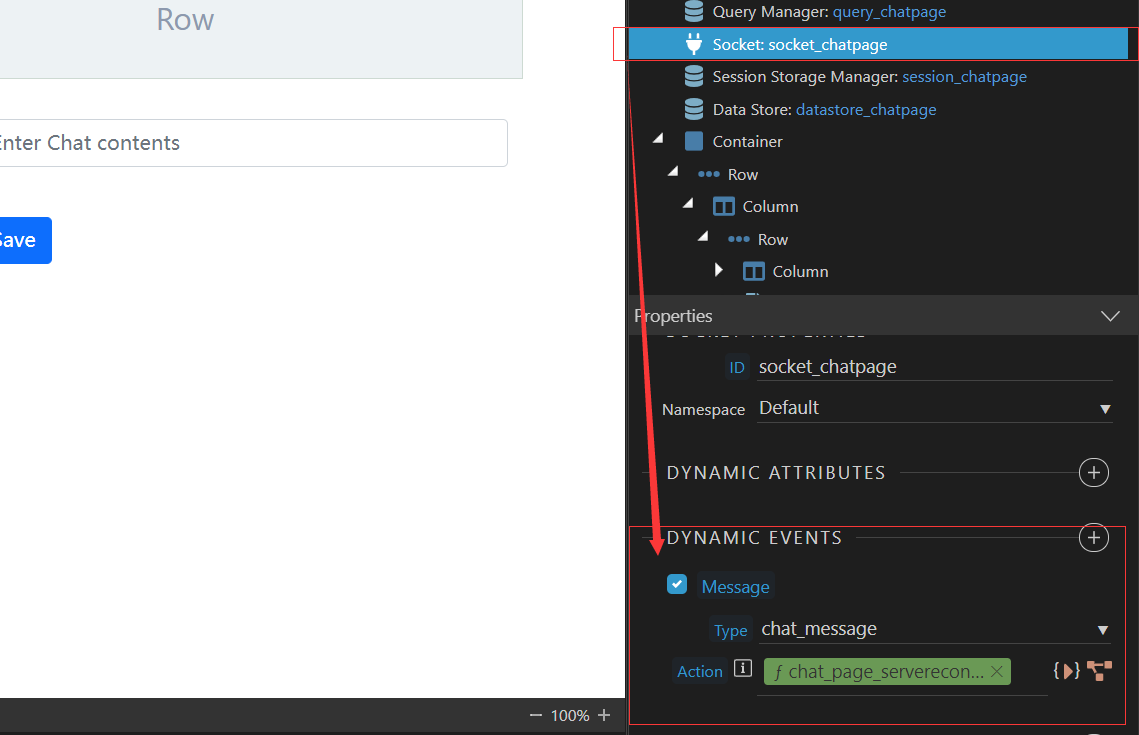
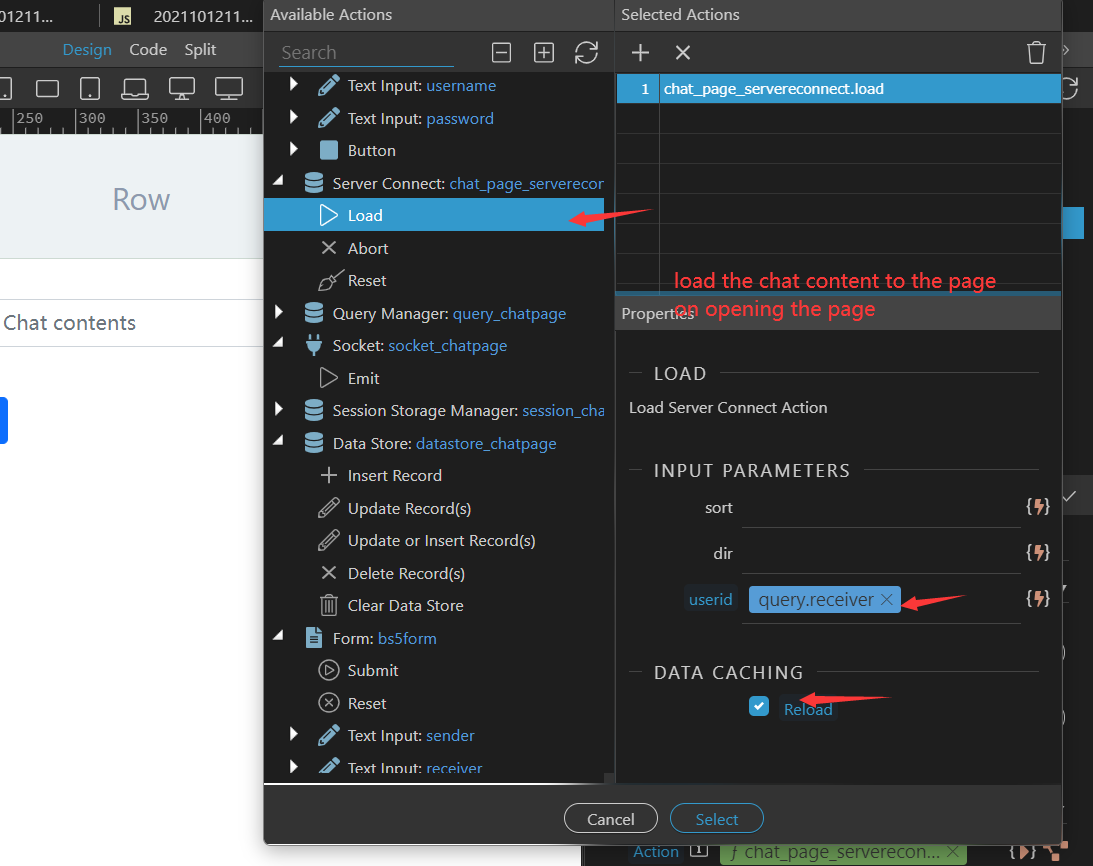
For the Action, click on the action icon, and choose the Load data from the Server Connect element that we have created before. In the Input Parameters, for the userid, we fill it in with the receiver query that we have defined before on the App element. We also want to tick the Reload checkbox on the Data Caching, so that whenever a new message is sent, it automatically reloads the page.
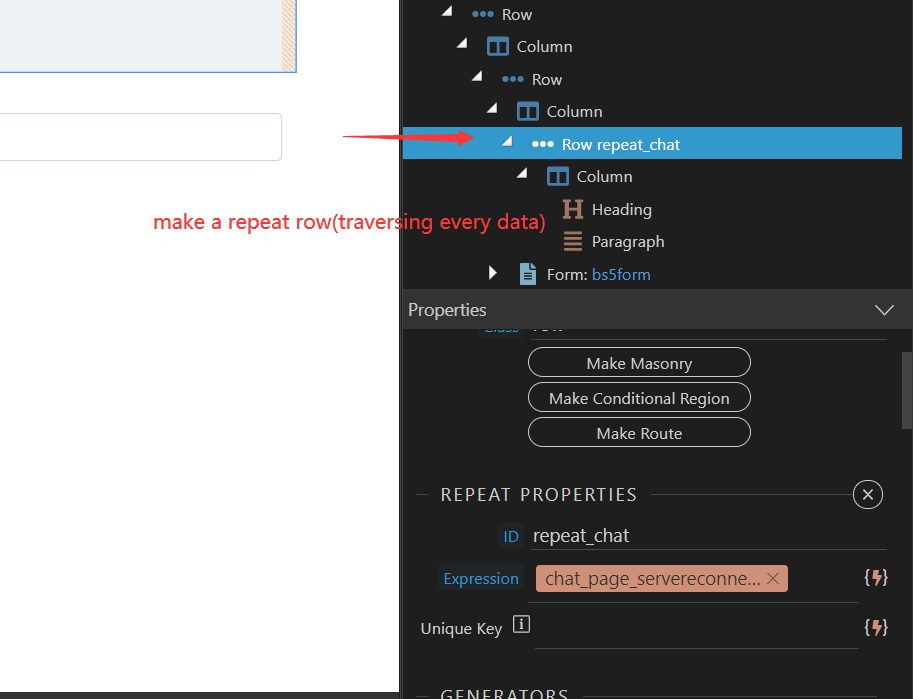
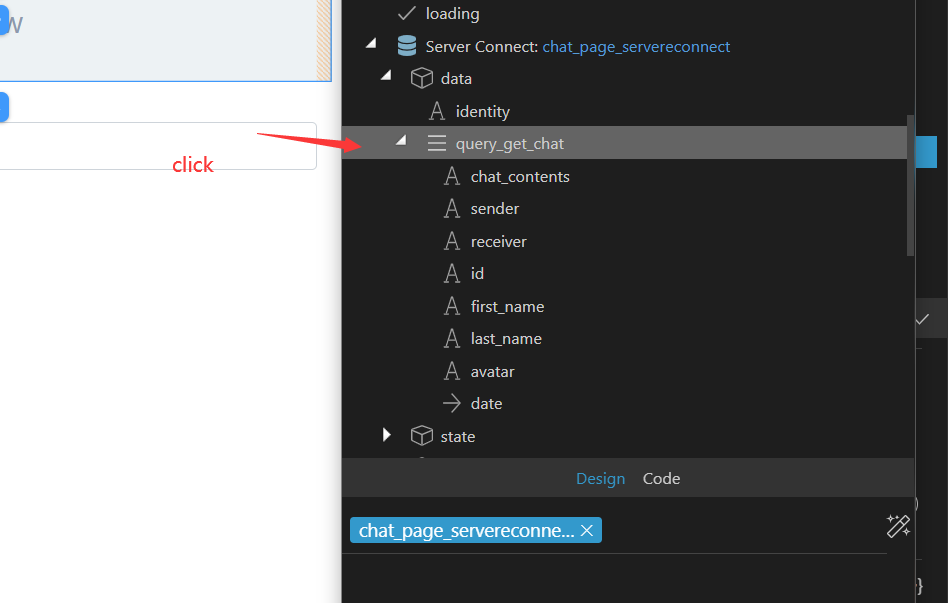
Next, we want to create a repeat Row element for the chat canvas area. In the Repeat Properties, we changed the ID name to repeat_chat, with the Expression dynamically bind to the Server Connect element. We use the query_get_chat API call that we created before. See the images below for more explanation.
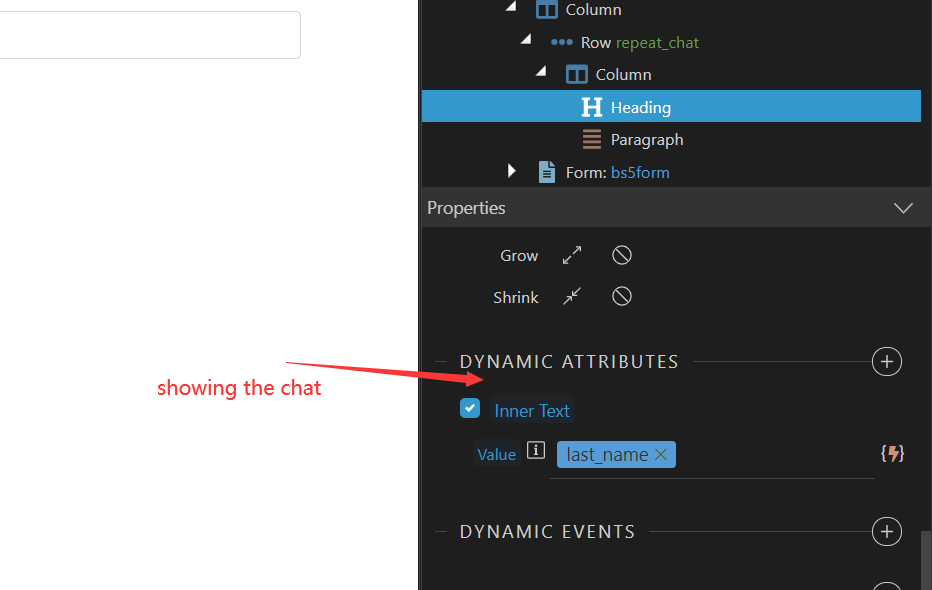
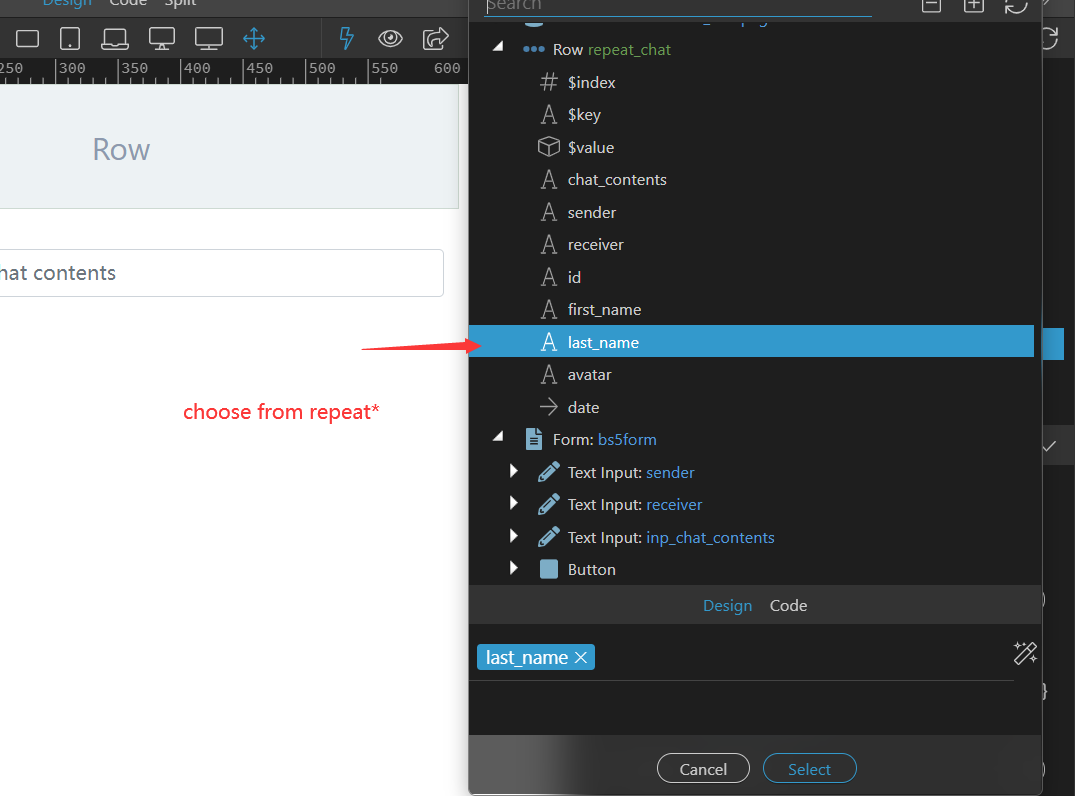
Now, we create a new Column, with a Heading element, to display the message sender's last name. We want to add Dynamic Attributes to this Heading. So click on the (+) sign, search and choose Inner Text. The Value of this Inner Text changes dynamically. So, click on the lightning icon, and choose the last_name variable from the Row repeat element. See the images below for more explanation.
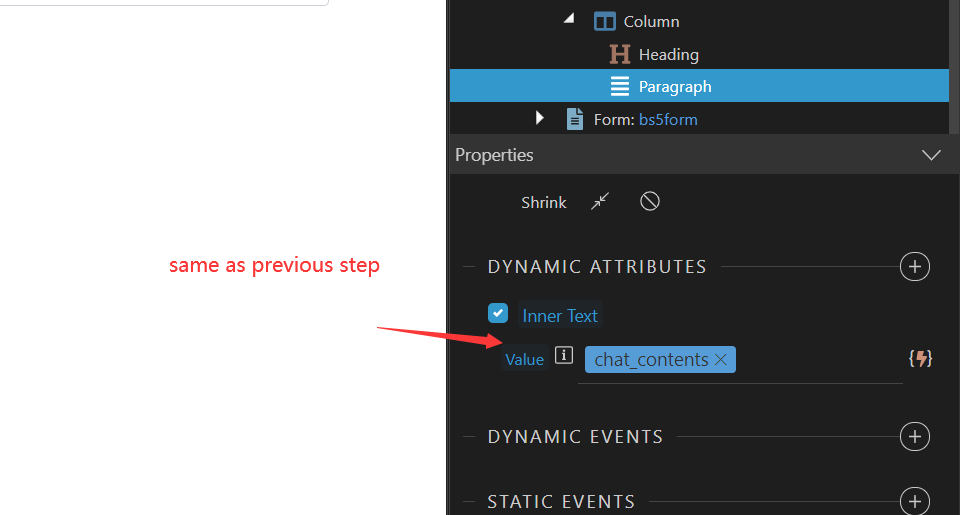
In the same Column as the Heading, we also want to create a Paragraph element, with the Dynamic Attributes as well, to display the chat contents. So, same as before, add a Dynamic Attributes of Inner Text, and the Value chat_contents variable from the Row repeat element.
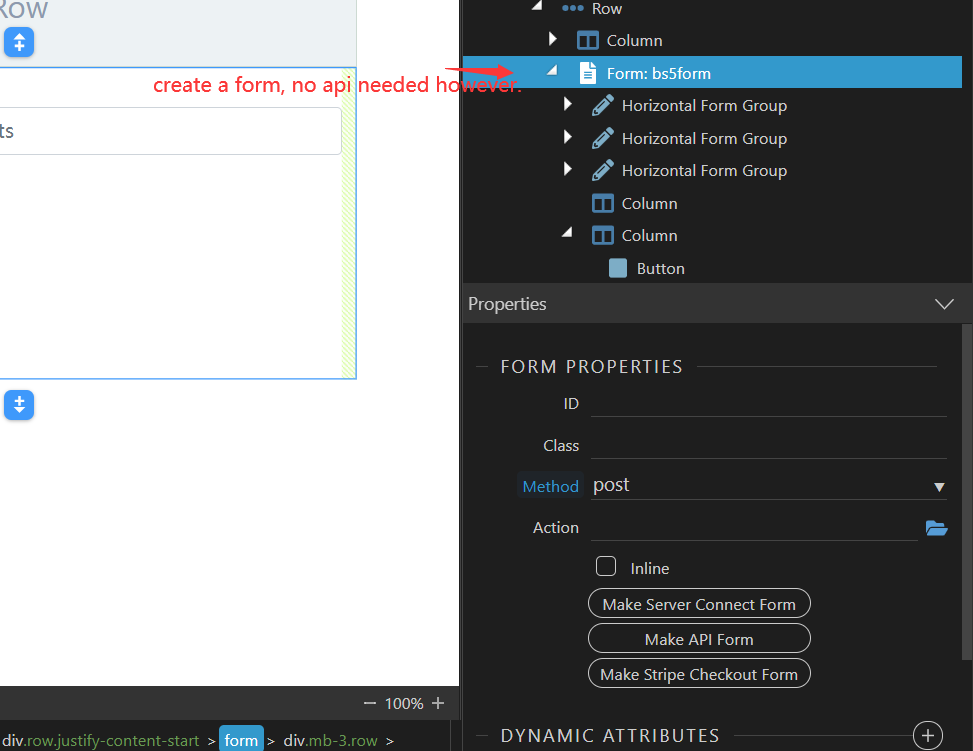
Create Form element to Send Data to the Back-End
Now, we will create a Form element with a Post method to send the sender and receiver data, and the message itself.
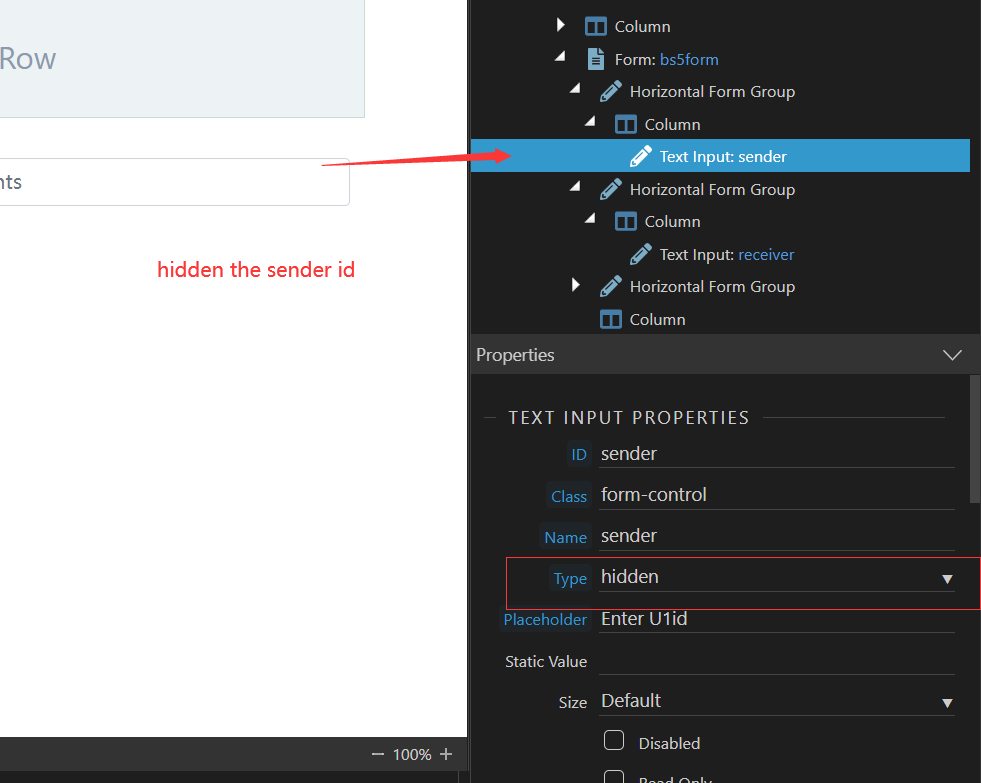
Create a Text Input area, and change the ID and Name to sender, also the Type into hidden so user cannot see the form.
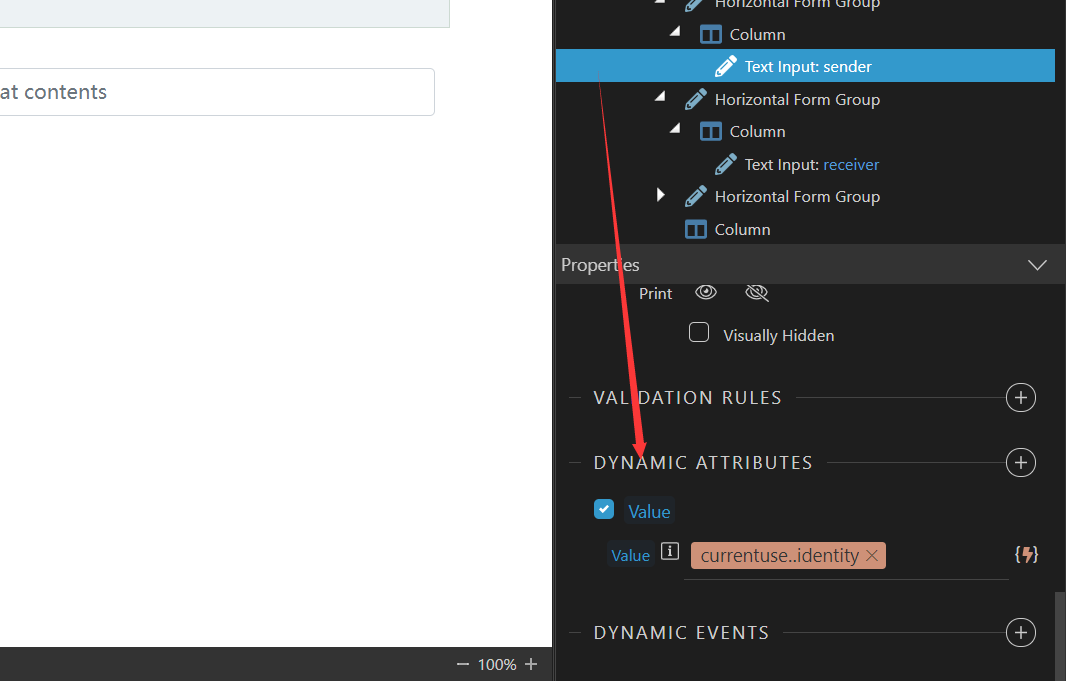
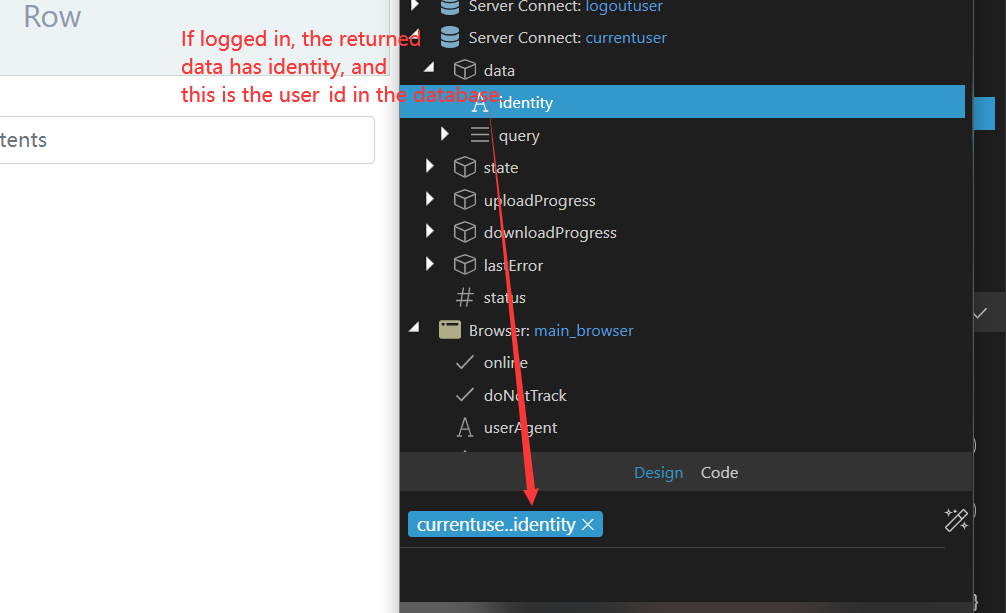
And we want to fill in this Text Input area with the Dynamic Value of the sender data. So, add Dynamic Attributes, and search for Value. We put the Value of the identity data from the main login page.
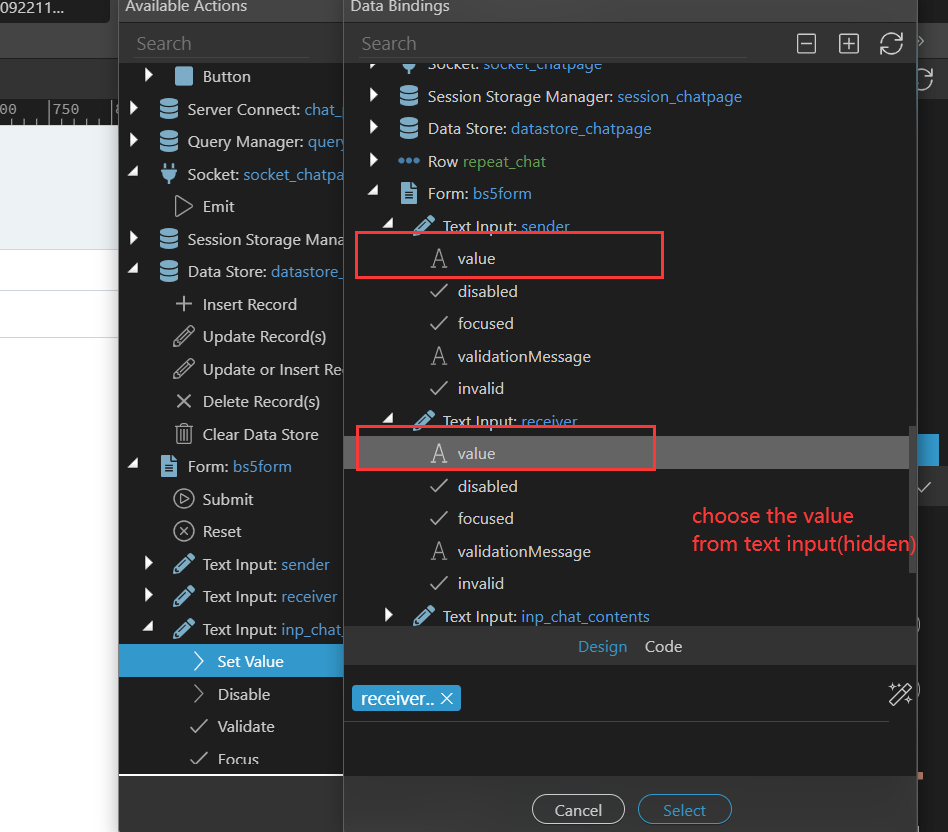
Create another Text Input area, and change the ID and Name to receiver, with the Type hidden as well. Same as the process above, add a Dynamic Attributes, with a value of receiver query that we define before on the App element.

The last Text Input area will be visible to the user, for them to actually type the message. We create it and named it inp_chat_contents.
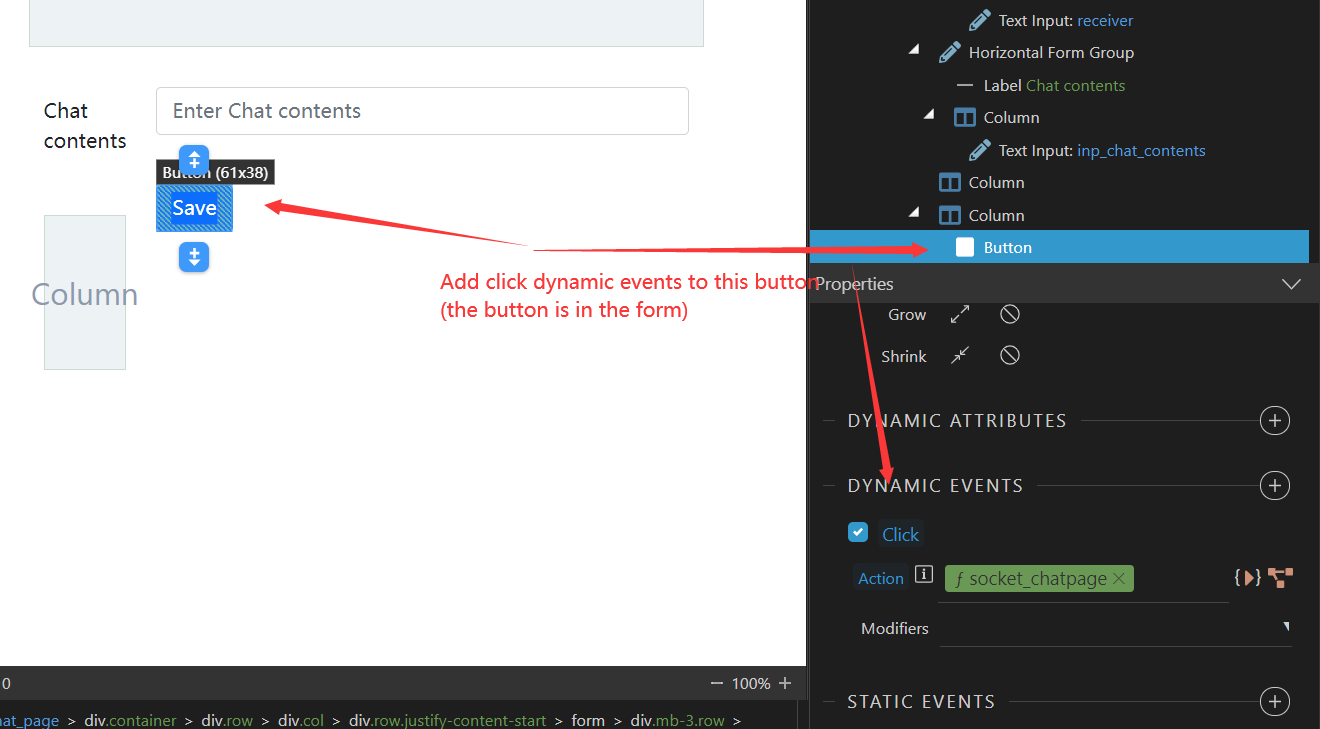
Then, we need to create a simple button for the user to send the message. We add a 'click' Dynamic Events to it, and the Action will be from the Socket Emit element. In the Message Properties, change the Type to chat_message. For the Input Parameters, the receiver will be the from the receiver Hidden Text Input area that we created before. Same with the sender, will be from the sender Hidden Text Input area. While the message will be from the inp_chat_contents Text Input area that has been created before. Refer to the image below for more explanation.
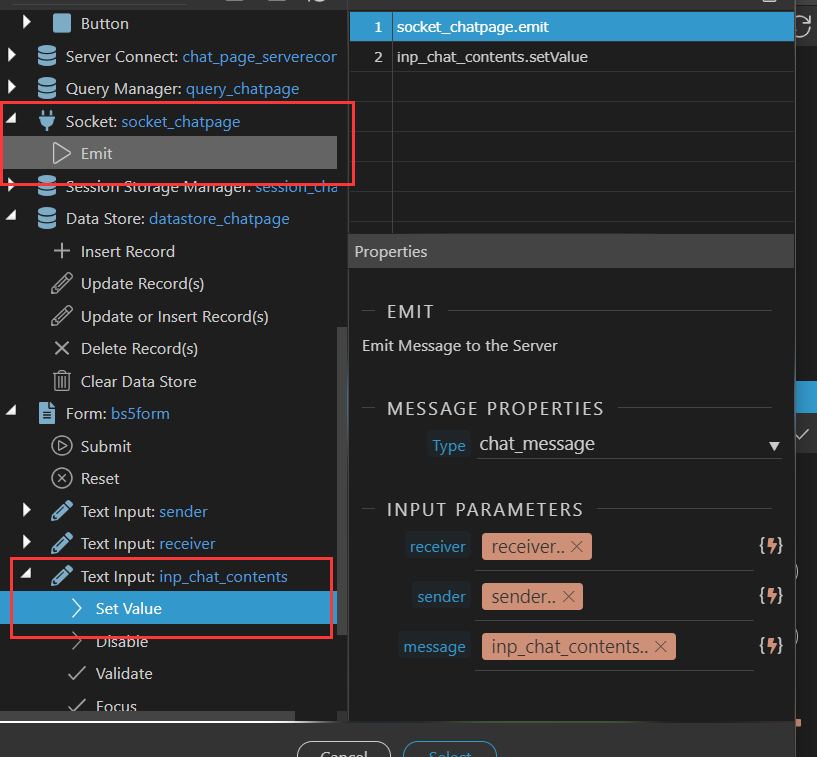
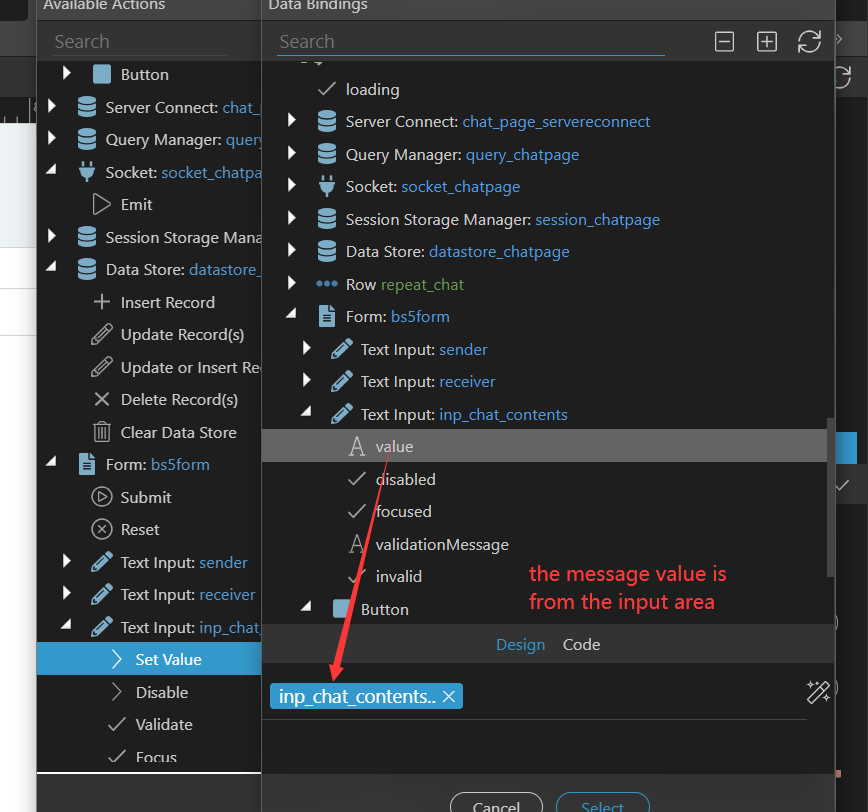
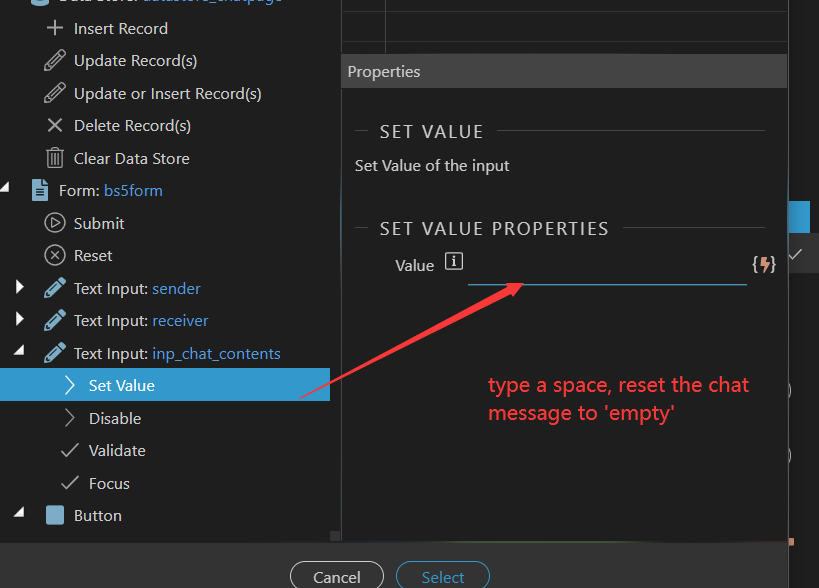
Last but not least, in the inp_chat_contents Text Input area, use the Set Value property to clear the Text Input area after the send button is pressed.
And our real-time chatting functionality is done and can be used by any signed user on the web application.