This is the section within the documentation within the section titled Security and Login. Step 2 Login - Create a Working User Login Page
1 Like
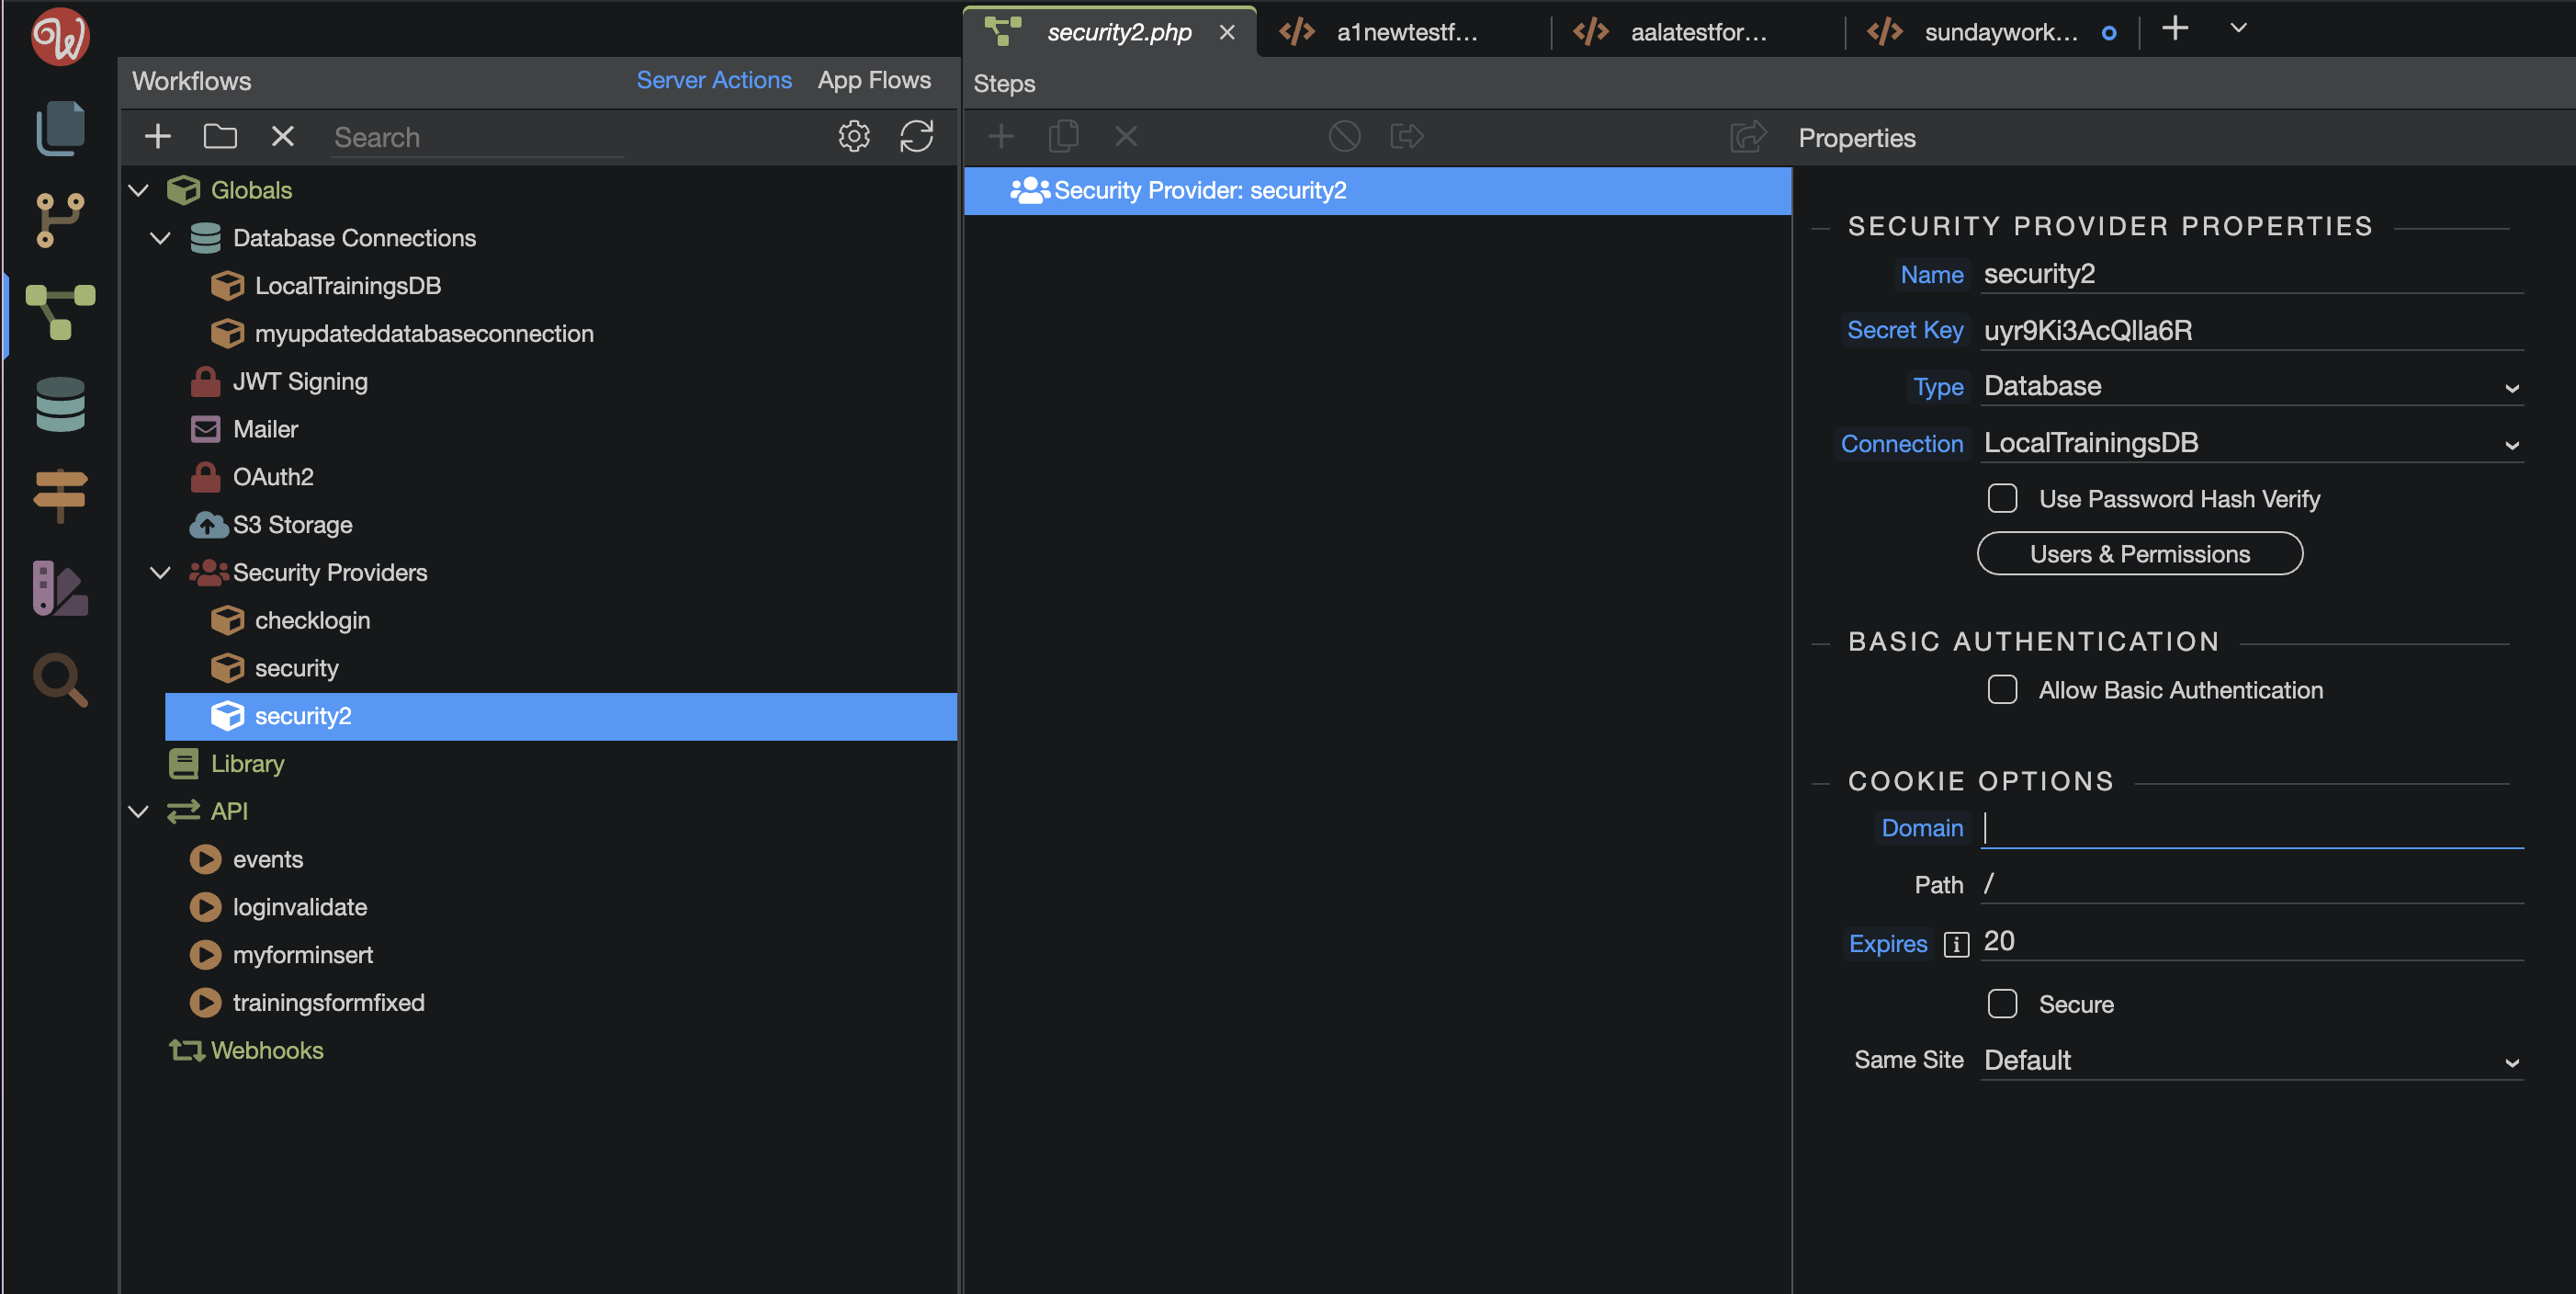
Lets start with this screenshot from https://docs.wappler.io/t/setting-site-security-settings/2856 where we set up a security provider: (Wappler 4 ui)
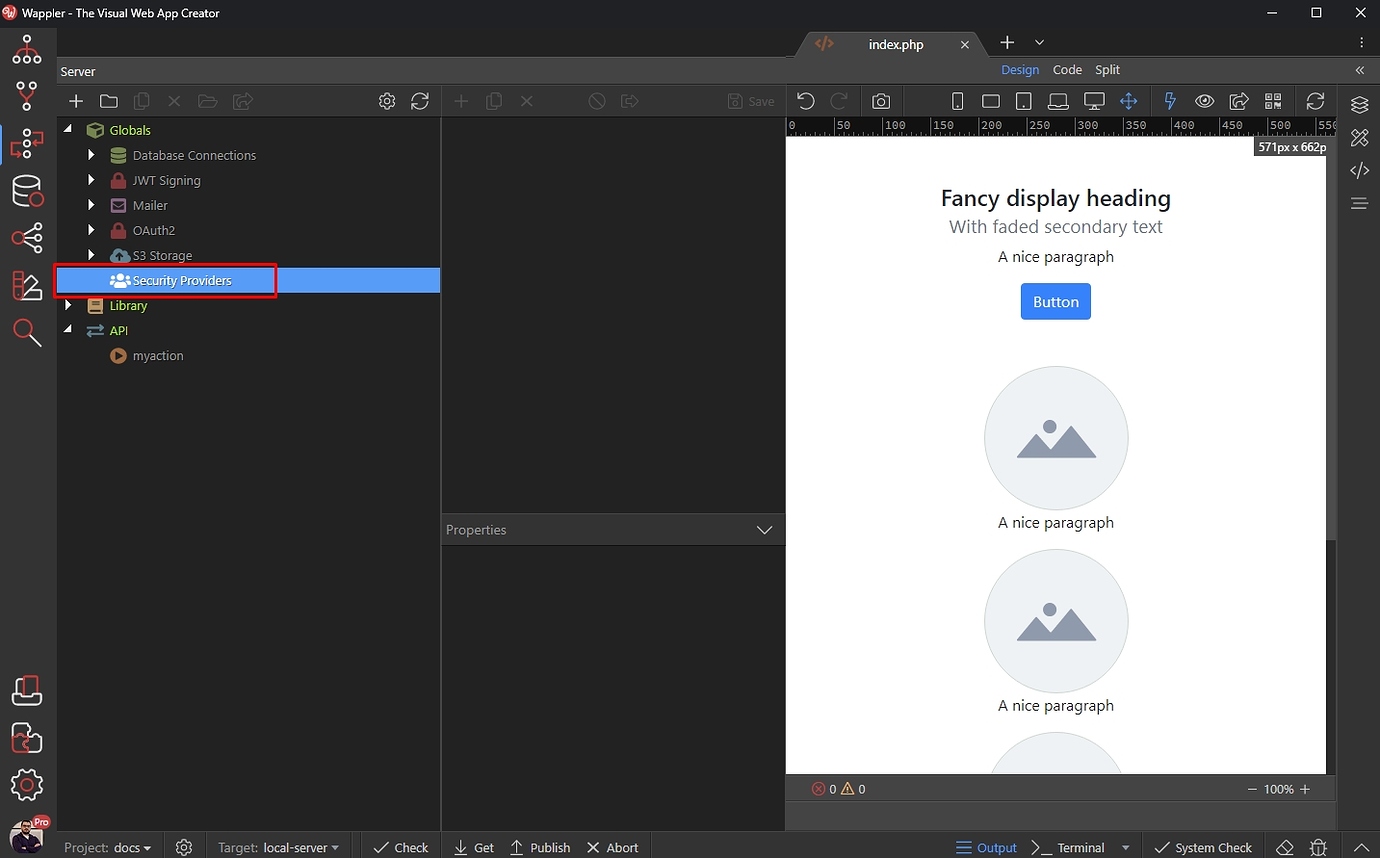
This screenshot shows 3 new section GLOBALS, LIBRARY and API so in the screen shot you can see the security provider is been setup under GLOBALS, this is because in Wappler 4 we now define Security Providers, Database Connections etc once this is a updated tutorial and correct methods.
LIBRARY is just actions to repeat in API Actions
API Actions are what we see in the old 3 versions from the get go as there was no GLOBALS at that time so when following an old tutorial this is where to place those actions.
Now lets look at this screenshot from https://docs.wappler.io/t/login-create-a-working-user-login-page/2855
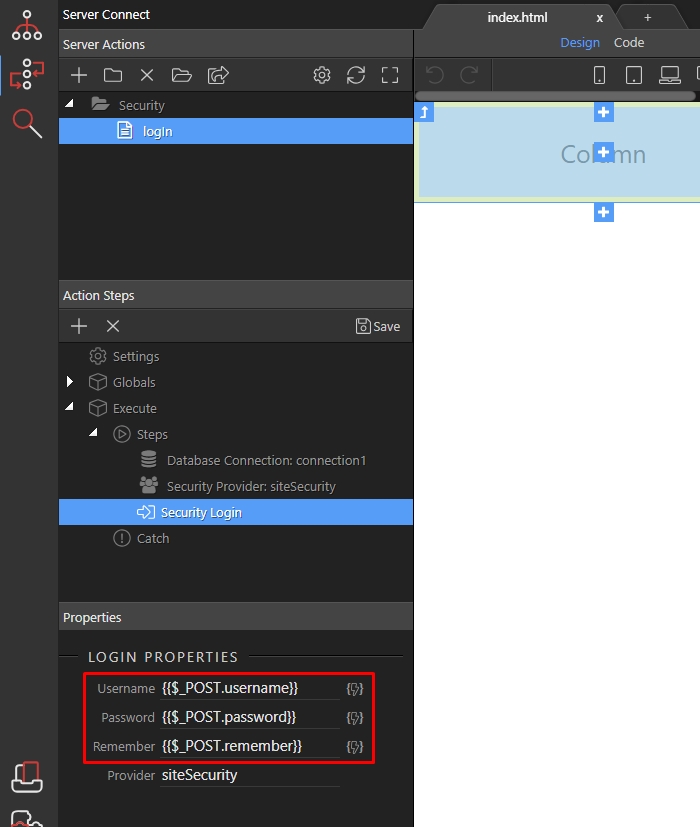
We see this is the old UI and that a database connection and security provider have been created here this is no longer needed as its defined in GLOBALS just go straight to the login step.
And where do I find the "login step". I don't see Execute anywhere. Do I right click on Globals or what?
The globals I was talking about are all from wappler 4 ui first screenshot forgot there was globals in actions too my apologies then the login step would be found after you enter the API section create new or edit a created one then you should see execute
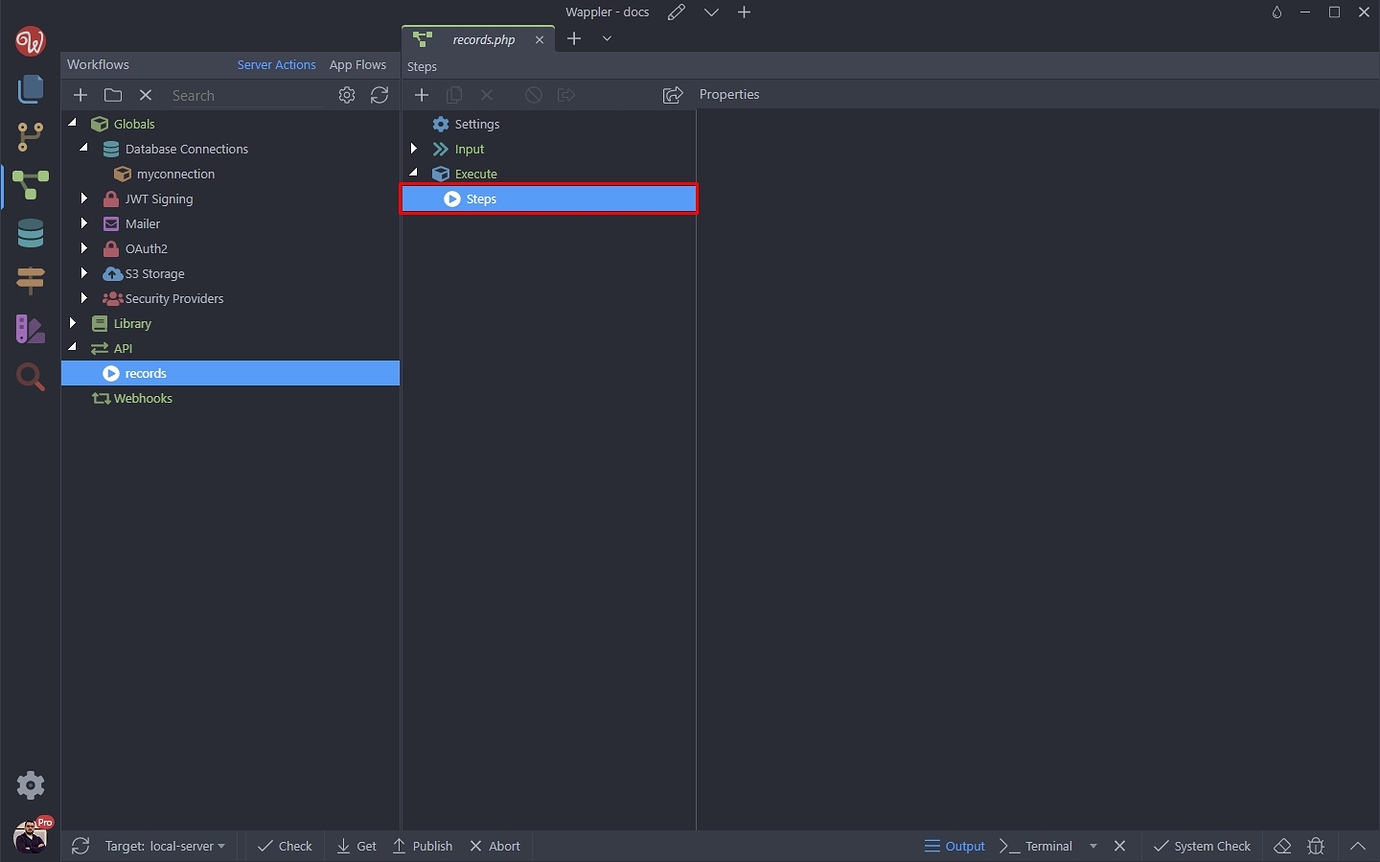
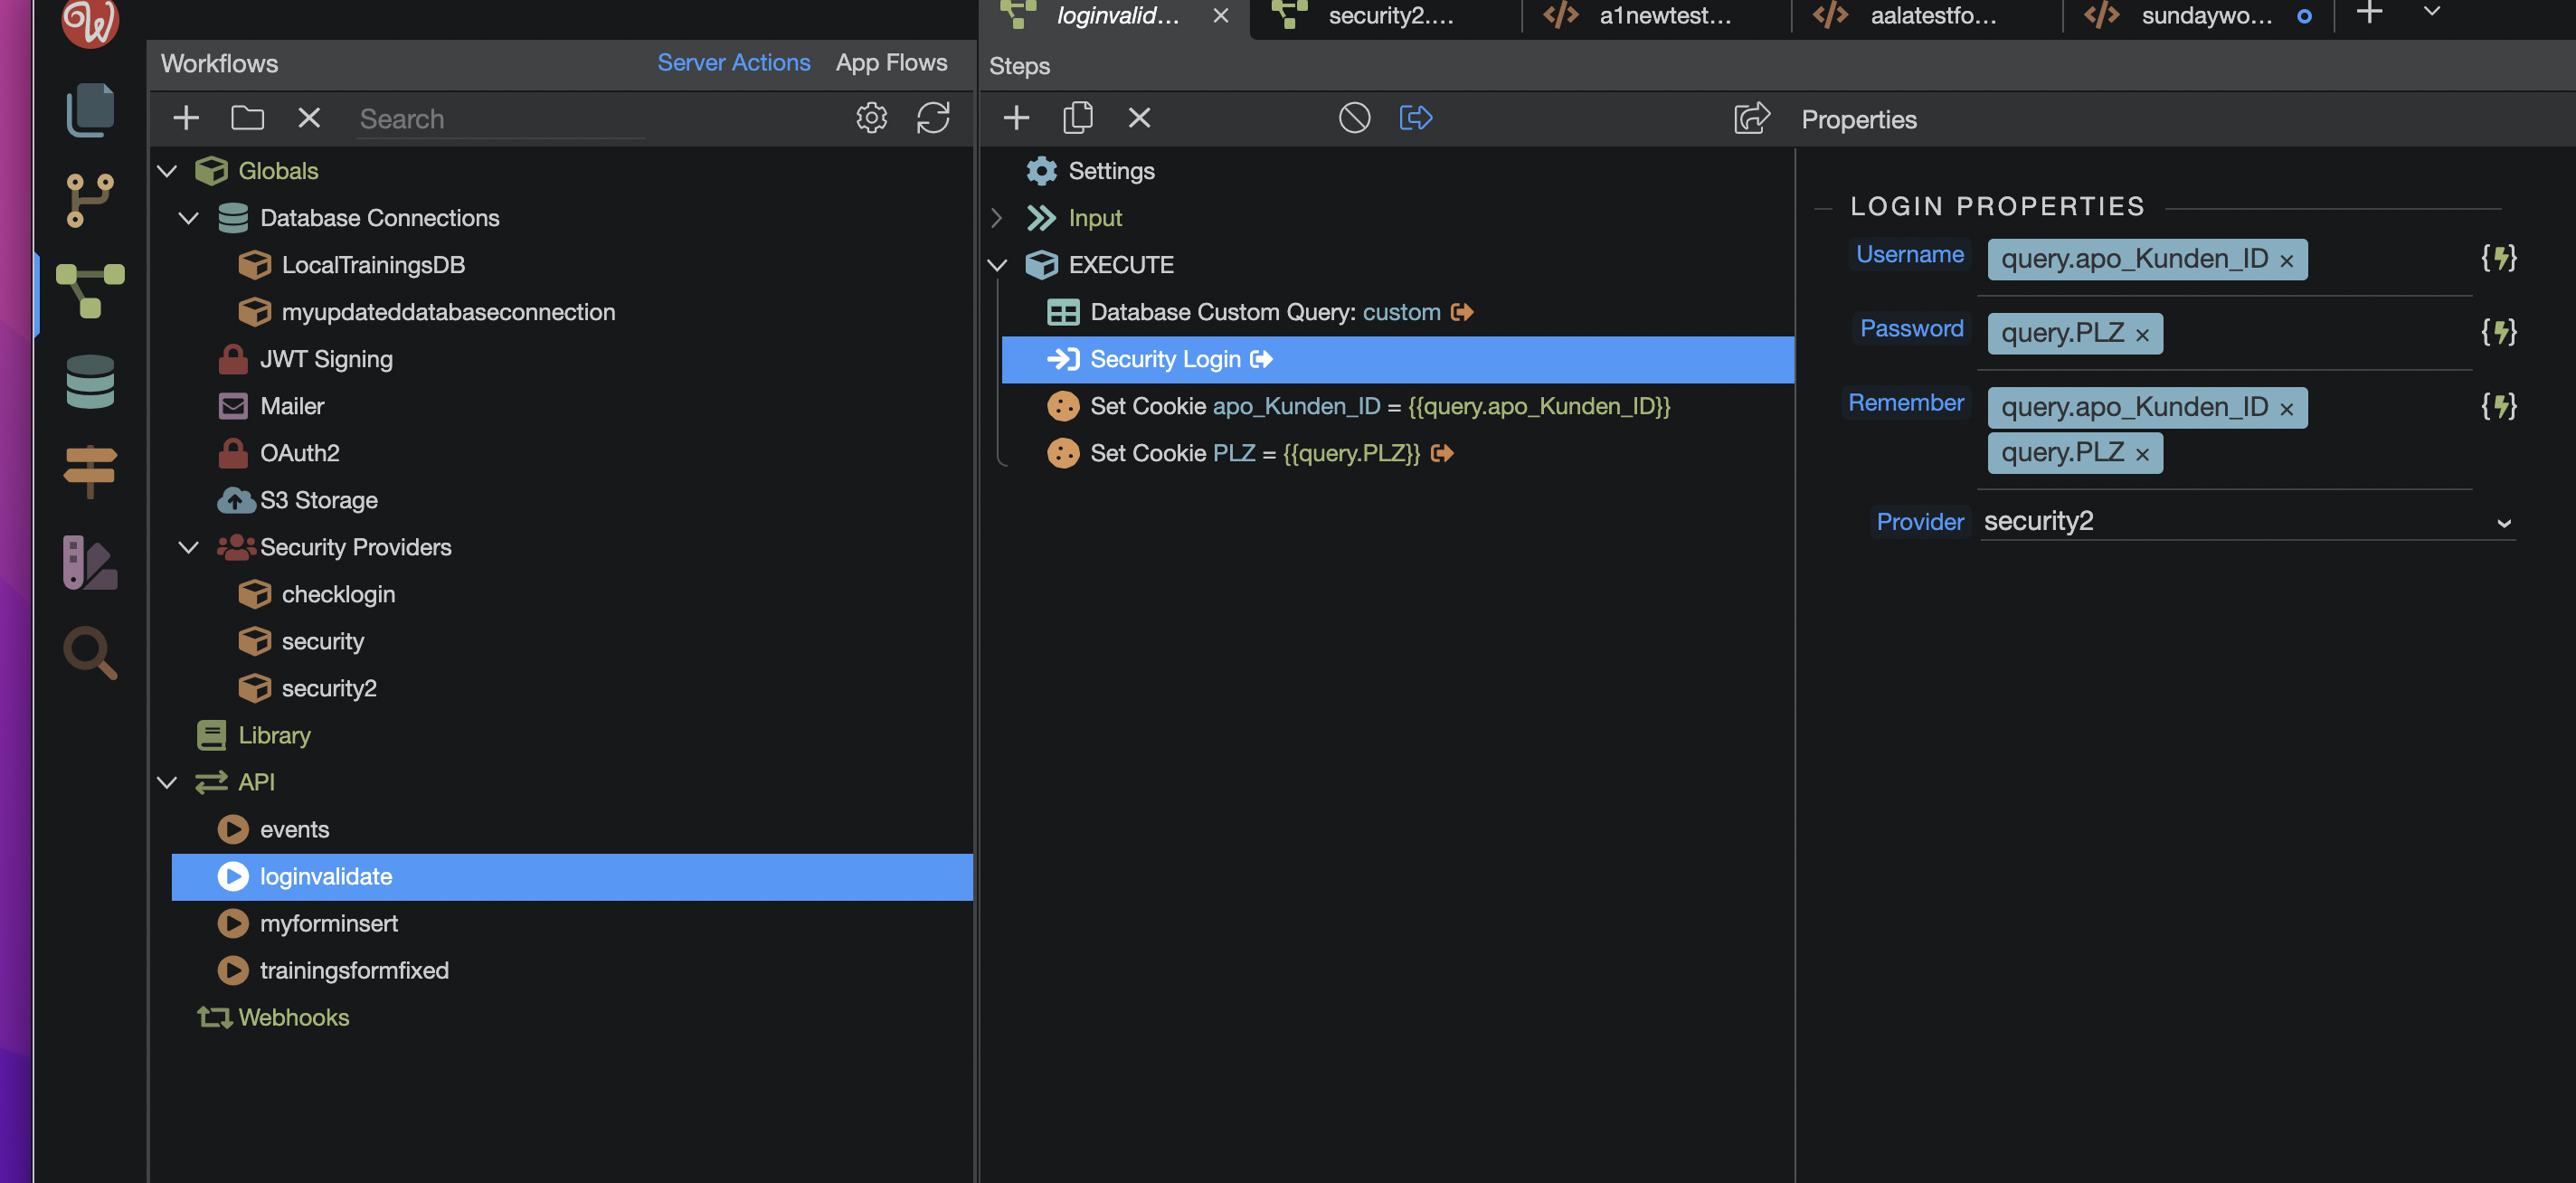
This is where you will find execute then with execute selected pressing the + or right click add action opens this:
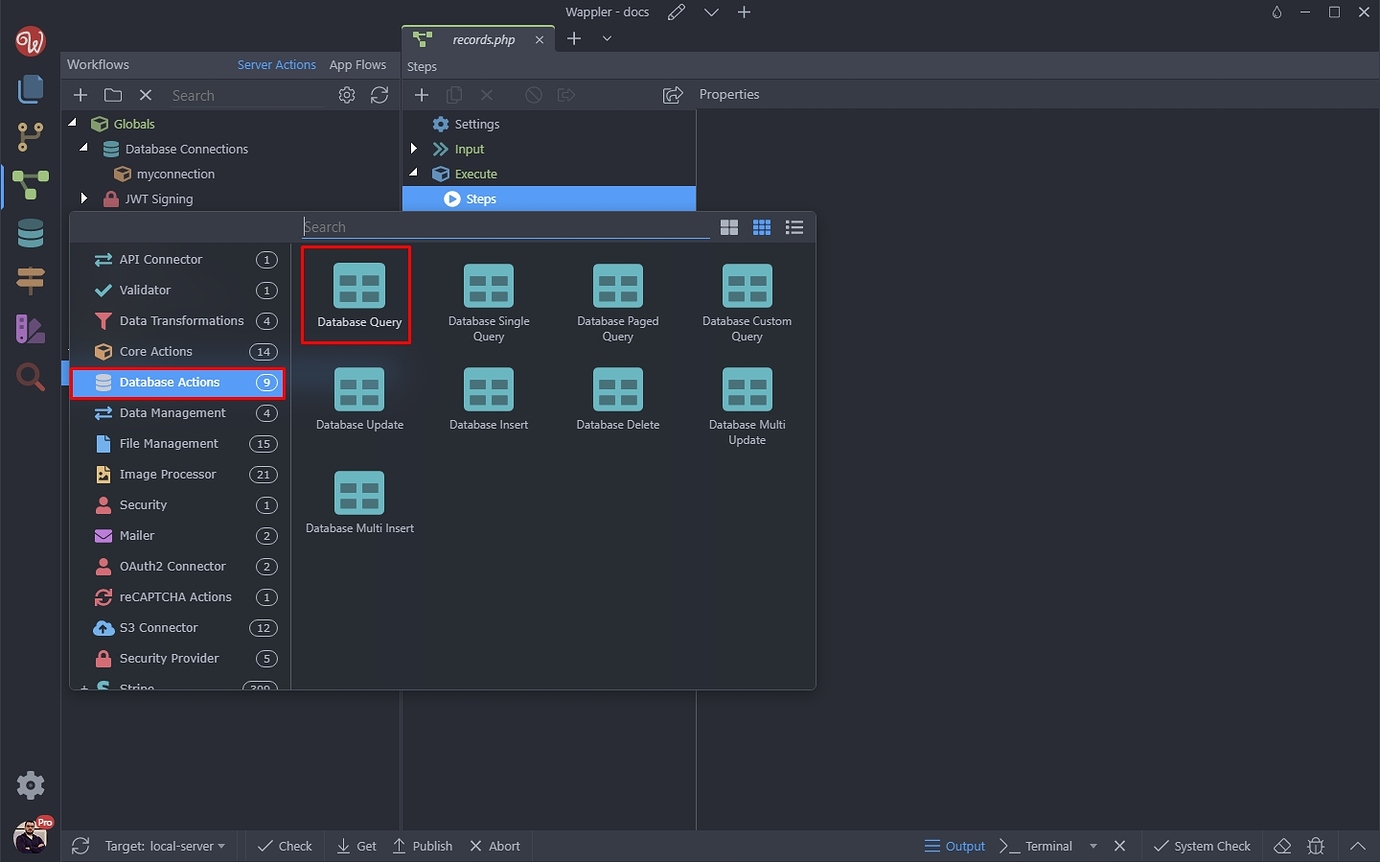
under the security provider you will find a login (hope this makes sense not the best at explaining)
Thanks Sorry_Duh. You have been tremendously helpful.
2 Likes
The description of the New Security Login procedure that is trying to update the Security Login Procedures in the Docs has me lost.
I want my Log In index page (PHP Server side to mysql security database Authorized USERS table) to now use my Security2 settings and reject a User who does not provide login Username and Password that matches a record in my Users Table.
IF a User is found and Mr. Security2 okays their Username & Password THEN it moves on to the form page which itself is to be protected from unauthorized entry if a User tries to bypass the login by entering this page url directly in their browser.
And, of course, I want to set a session but not until after the User is Authorized and I can now use the Username and Password for other queries I will perrorm on my Form page.
I know how I did this 2 years ago but the main documentation and the caveats in the forum since then have me confused about the very next steps to finally leave my login and form pages SECURE.
Below is where I’m at with my “loginvalidate” API which is to run once the Submit button is clicked on my Log-In page.
And I have done this on my Form page –
And in the top of the protected Form page the javascript –
<?php
require('dmxConnectLib/dmxConnect.php');
$app = new \lib\App();
$app->exec(<<<'JSON'
{
"steps": [
"Connections/LocalTrainingsDB",
"SecurityProviders/security2",
{
"module": "auth",
"action": "restrict",
"options": {"loginUrl":"tryagain.php","forbiddenUrl":"unauthorized.php","provider":"security2"}
}
]
}
JSON
, TRUE);
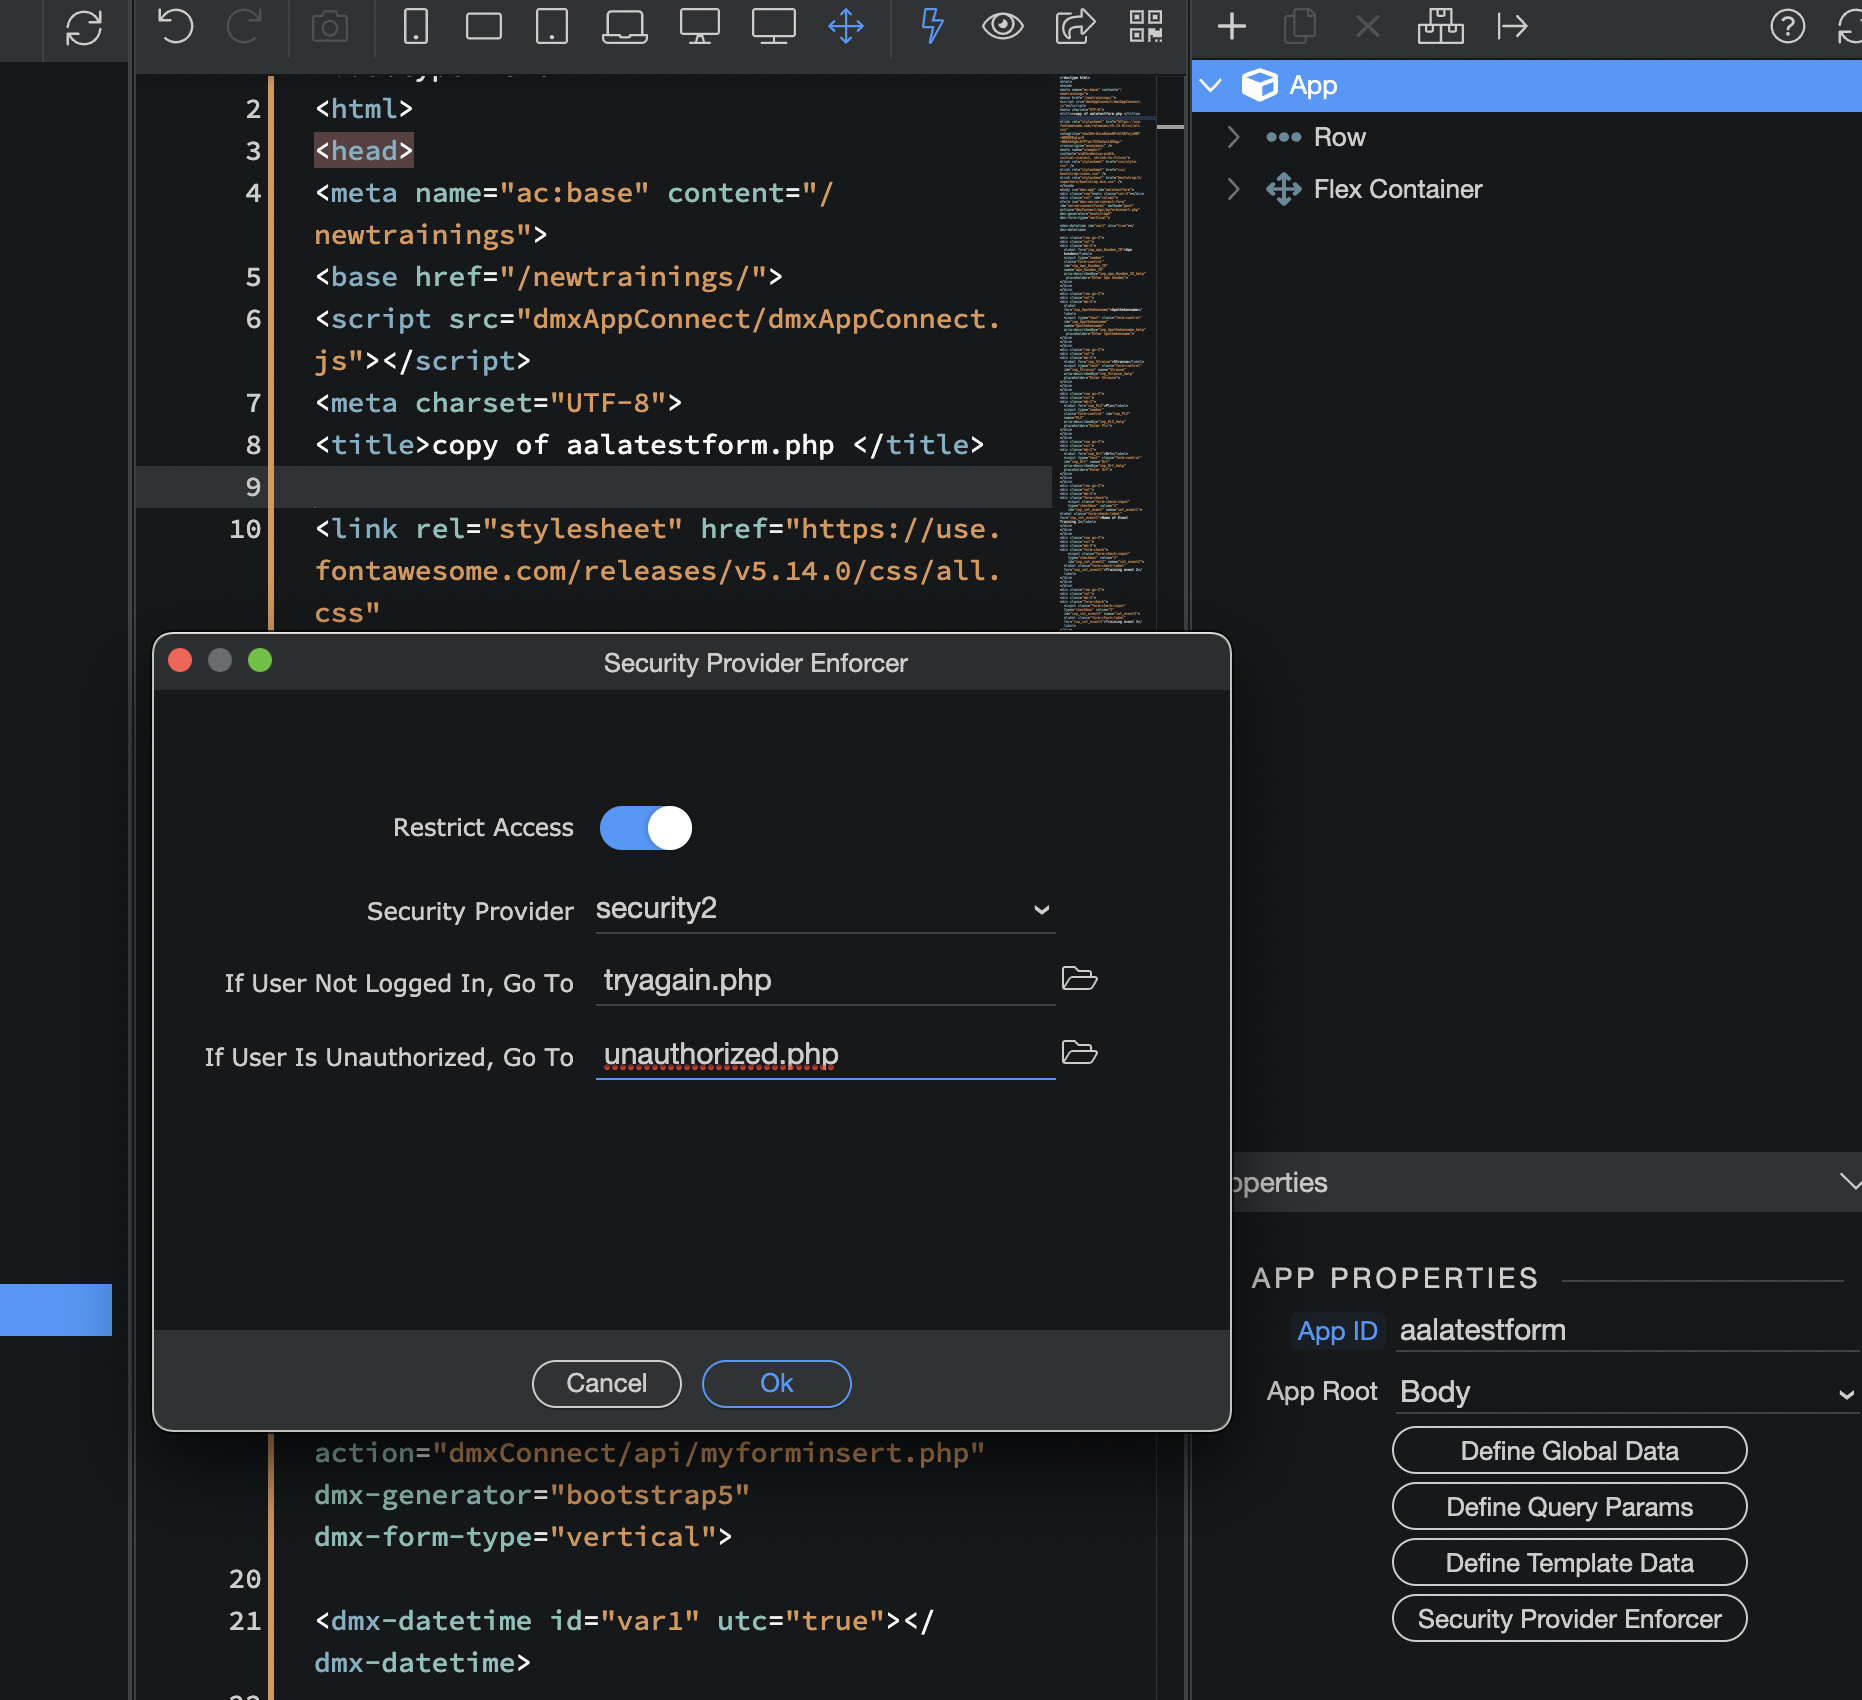
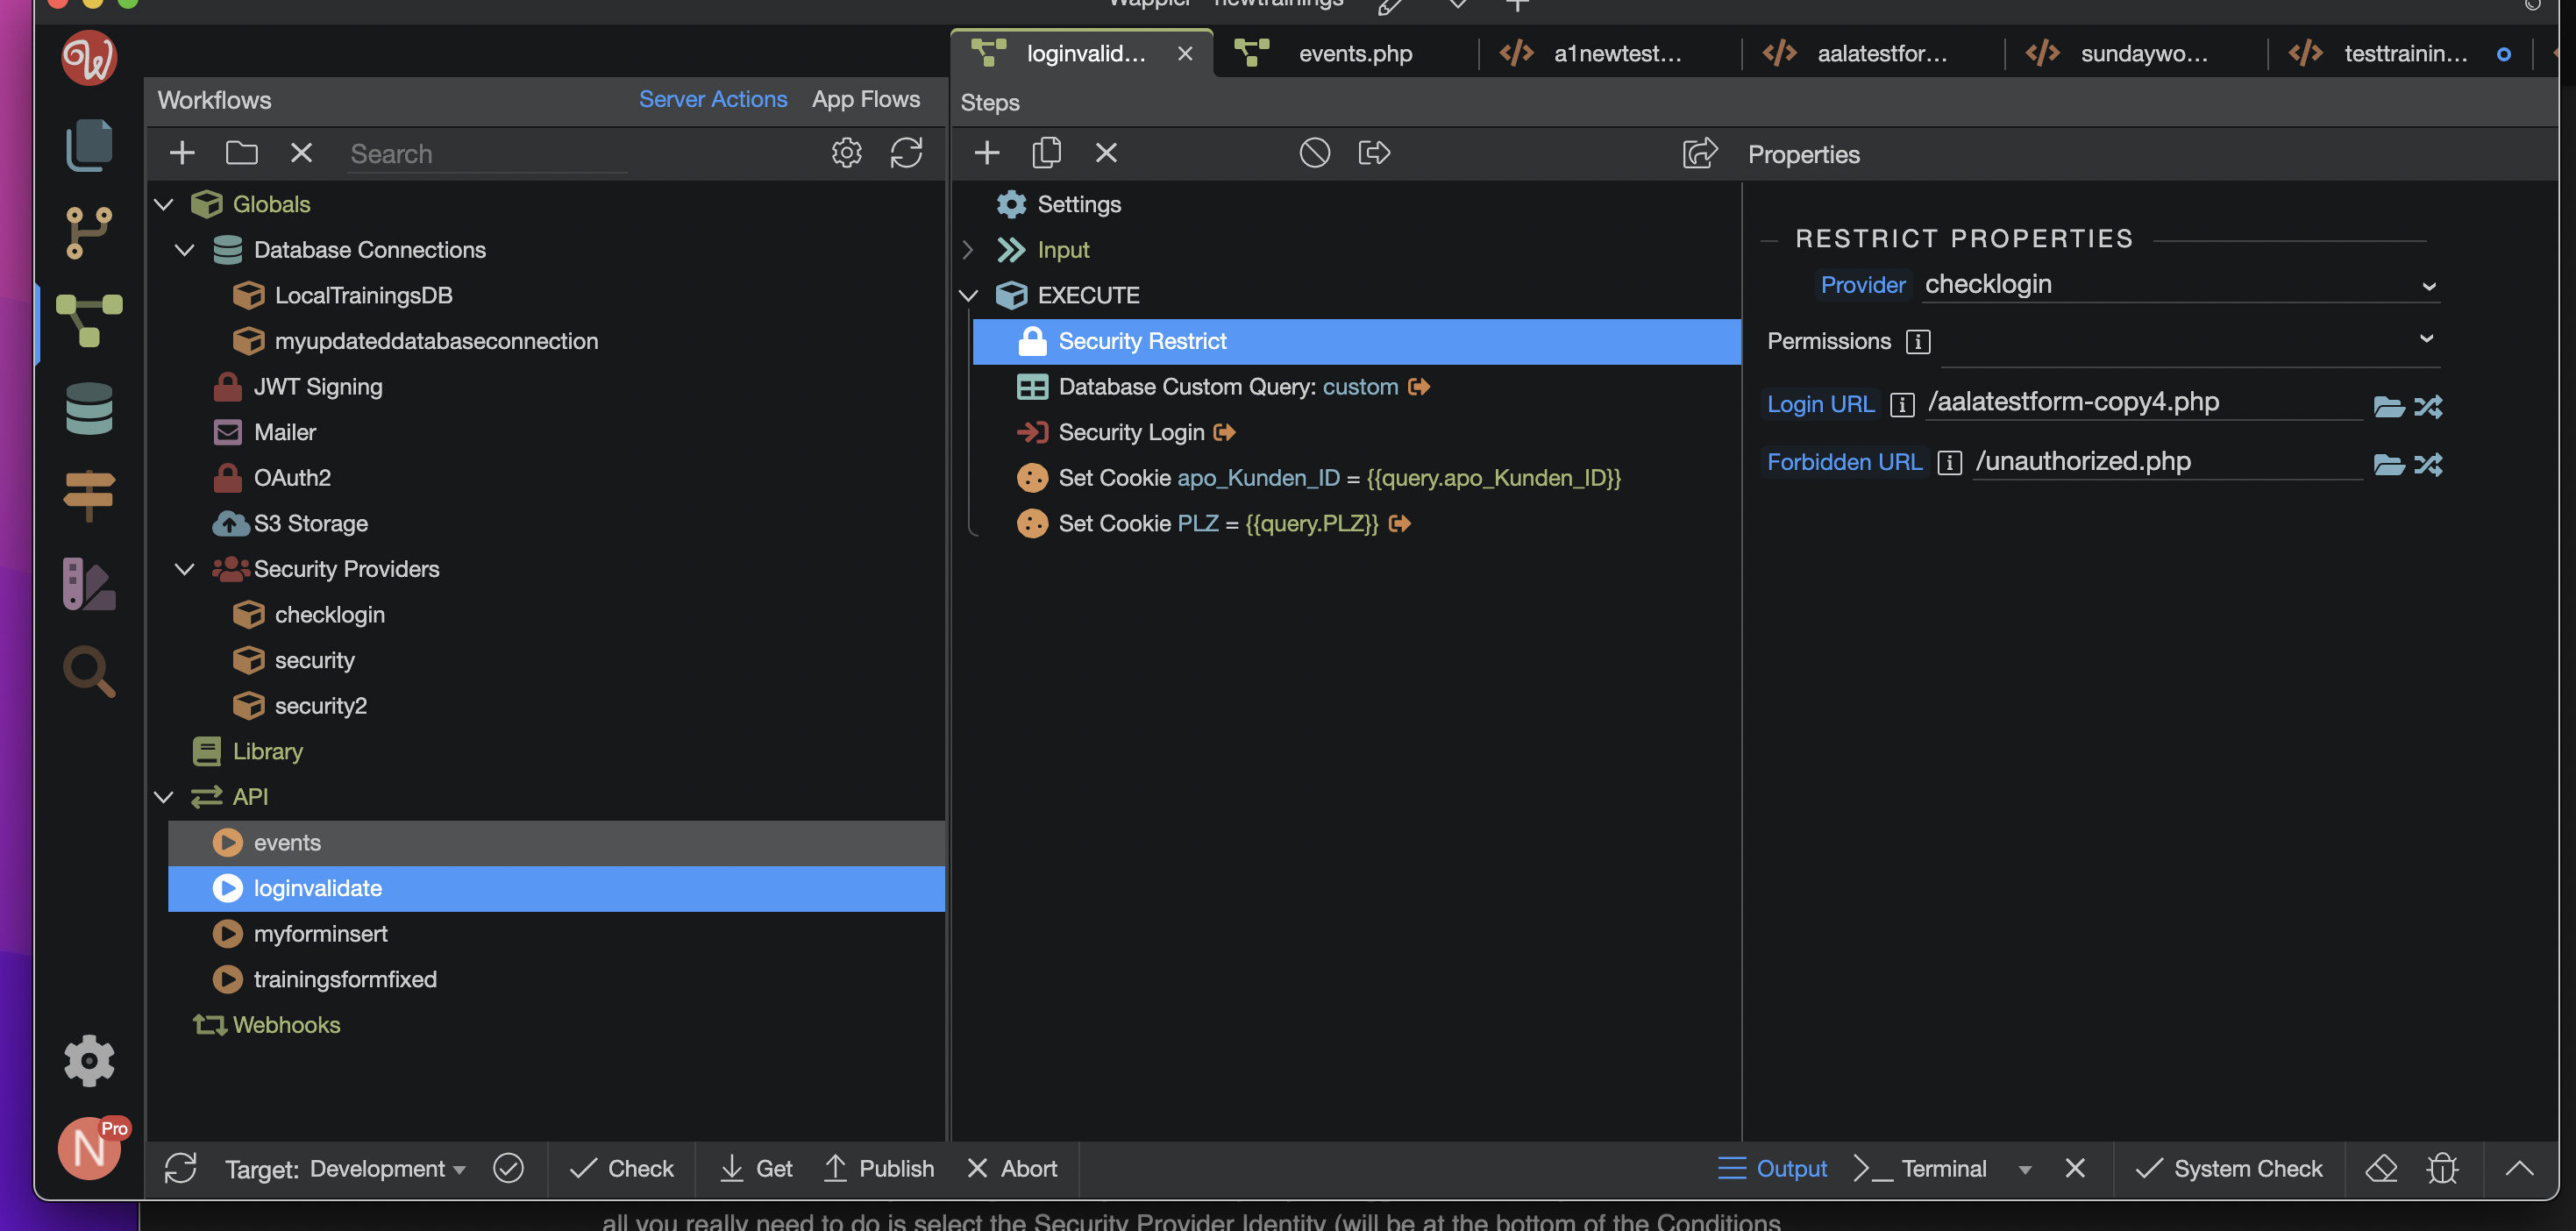
?><!doctype html>Then you need to add a Security Provider Restrict Step above the query, select the Provider, the Login URL and the Forbidden URL. Then run your query. You are also setting cookies in your above Action and not sessions:
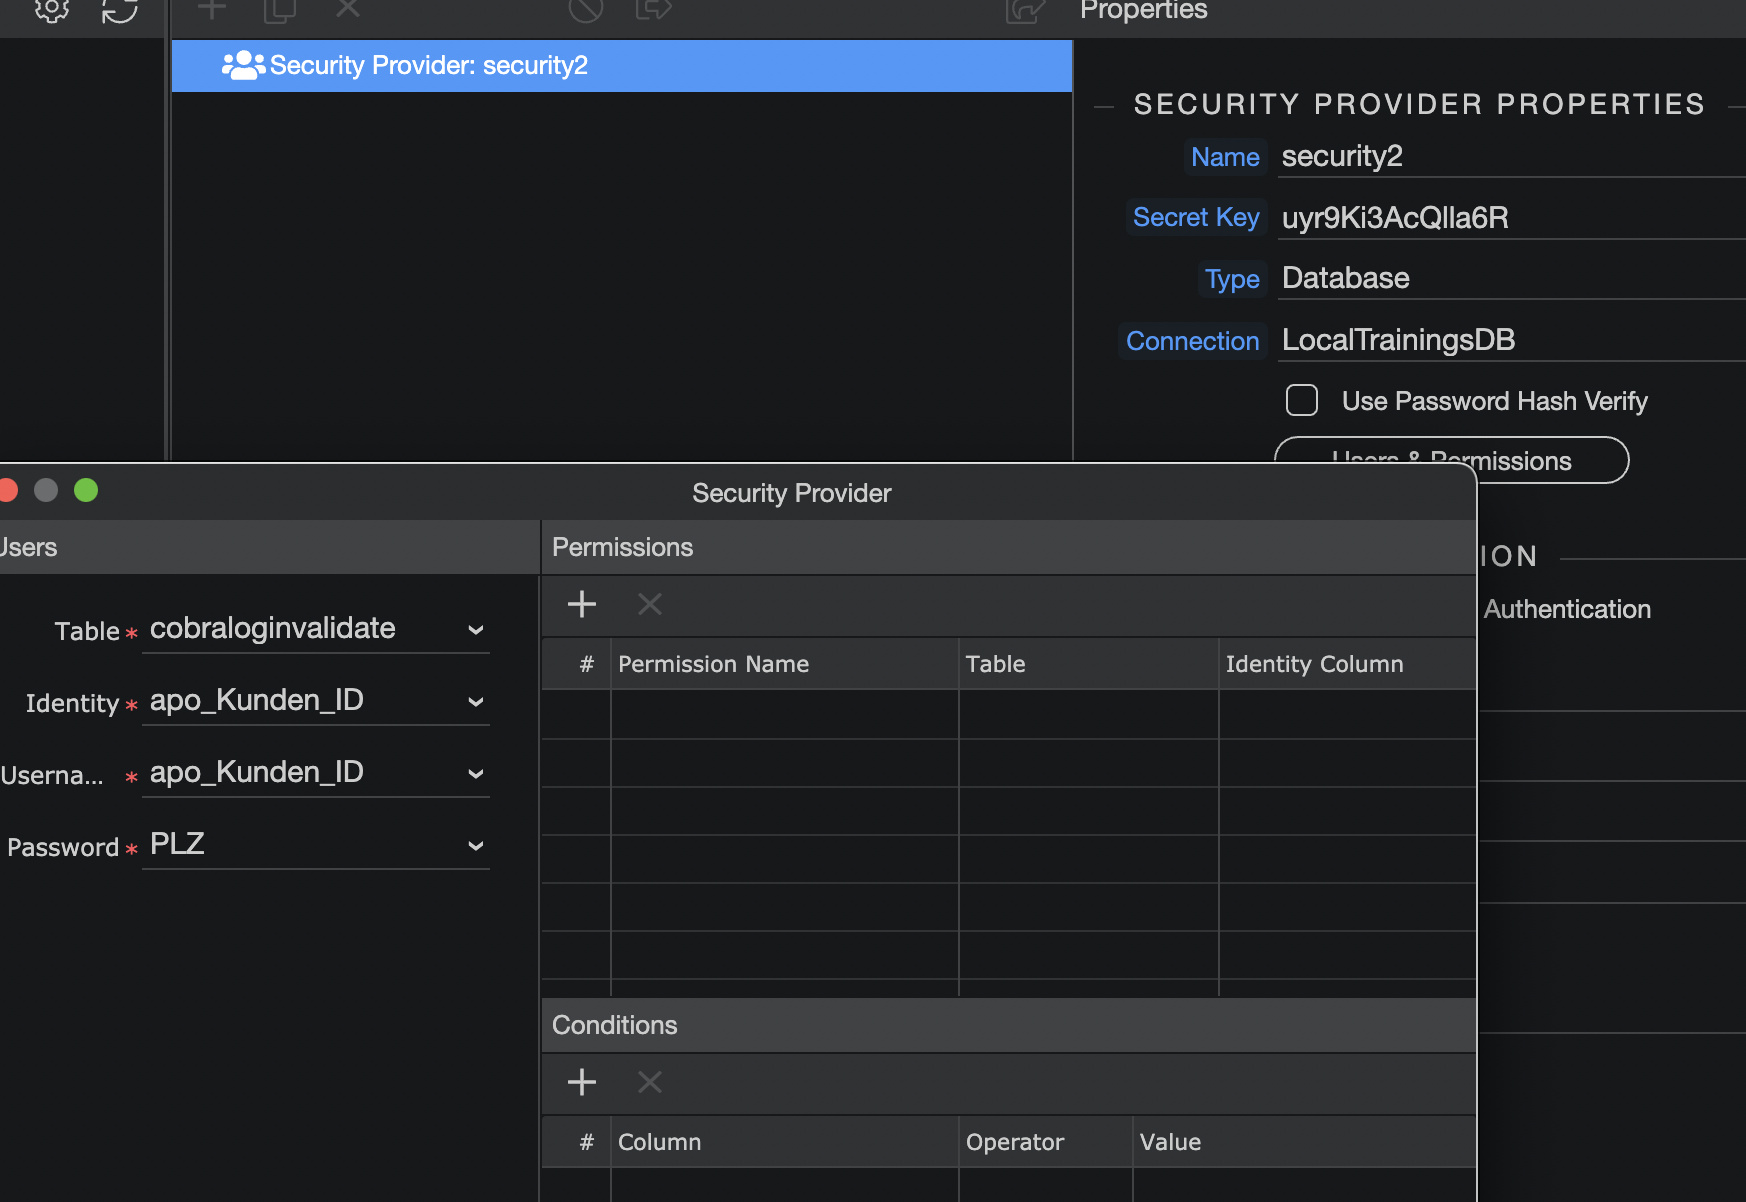
Also what Condition are you using the verify the identity of your logged in User? If you have not done so all you really need to do is select the Security Provider Identity (will be at the bottom of the Conditions select) and equal this to whatever field you used in your Security Provider ID...
I was checking out also providing a cookie that extended a recognition of these users because we expect them to come back to this same url & login & form to register for new updated events over months.
However, since they may be using smartphones and/or work computers depending on their location or time of day I’m thinking that dropping a cookie into one browser is useless if they use a different entry method the next time on a desktop, work computer or cellphone.
So, in response to your 1st step –
I’ll get around to your Condition question next!
The log-in Security does not use any conditions because the step is already defined – Check my loginvalidate table for one unique record whose Username value (a numeric string of 7 digits) and the Password field in the same record to make sure it matches with an AND query.
Once I’ve taken these steps should this code be in the top of my Login Page AND my Form Page?
<?php
require('dmxConnectLib/dmxConnect.php');

$app = new \lib\App();

$app->exec(<<<'JSON' { "steps" : [ "Connections/LocalTrainingsDB" , "SecurityProviders/security2" , { "module" : "auth" , "action" : "restrict" , "options" : {"loginUrl":"tryagain.php","forbiddenUrl":"unauthorized.php","provider":"security2"} } ] } JSON , TRUE); ?>
<!doctype html>
<html>This block of code should be at the top of all pages you want to secure with the Security Provider.
Just so I understand you are using two different Security Providers on the same set of pages?
Why YES!
I like to keep my code guessing – don’t want it to be TOO RESTRICTIVE . . .
Good Catch!
I’ve corrected that and will try some more tests now!
Thank you, GREATLY for hanging in with me!
I think you have overly complicated things. A single login page should suffice for 99% of sites. You can then simply use the Security Restrict step on your Actions. Further you can specify roles within the Security Provider to separate permissions, and use these to allow/deny access to your Actions by selecting the specific permission in the Restrict drop down. You can also use the Remember Me check box in the Security Login dialogue.
So if I am correct in assuming login redirects to another page which checks if permission is set and then on to the application?
1 Like
As I said earlier I am not needing or intending to set up any Conditions.
I have really been trying to not make it complicated. But the instructions I first started on in the docs did diverge on the 3rd Authentication method due to the update in Wappler’s change in not just UI but procedures.
So I found a post I mention at the top that told part of the story.
At any rate, yes, I do understand that simply “applying” the Security Restrict on my Actions should be enough.
BUT – I’d like to see a resulting sample of the page code – which is always missing in docs.
Because the emphasis on no-code/low-code is discarding what the resulting code is once these VISUAL steps are taken.
The CODE applied is the End All. The actual code can explain why the page is working or not working the way it was supposed to.
For instance, right now I can’t post my login page in my browser because the Security is, I assume, now saved in my browser cache from the otherr sessions. So I have to go clear cache and sessions.
SOLVED I had the security restriction installed on my LOGIN page. Removed. All is GOOD!
This is where the Security Provider Security Logout feature comes in to play. Create a simple Action including this in the Steps. Add it to your page with No Auto Load ticked, then fire the Action upon a button click with a Browser Go To and specify your login page.
Its difficult as is dependent upon the use case, so all examples would be different. But suppose the basic block of code would be the same.
Low code is specified but no code is not featured anywhere, nor does Wappler claim to be no code There is always some coding required.
Yep. I know not to click AUTOSUBMIT!
Thank you for all your help, DAVE @Dave and @George !
If I may now suggest it would be a much quicker learning process if each Visual Step that is going to add code to the current page then includes the CODE that results from saving that action.
Where it should be in the DOM hiercharchy, What it looks like with accompanying description of what each DMX prefix is responsible for (not just in a whole separate Docs category alone).
This is a really quick way to learn what a working page with these actions added should look like in the code. It much more easily resolves the kind of problems I see in the forum all the time.
When an experienced developer or Team memberr wants to find out what is wrong with a user problem they always ask to SEE the CODE. It is most often the ONLY WAY to see the error and resolve the problem,
This is after the fact.
If Docs routinely showed the code that results on the page after following the visual Step-by-step, and the position in the page html and dom it would be really, really time saving.