First and foremost, a lot of credit has to go to @sid. Their module for HTML to PDF was the basis of this one.
SO WHY CREATE ANOTHER PDF MODULE?
The reasoning here was to make it easier to generate a bank of EJS templates that you could visually build, add JSON data to, and dynamically generate the resulting HTML.
My first thought, when using @sid's module was to plug my routes into Puppeteer, however, along with this came the problems of security enforcers forcing Puppeteer to login in (which is correct, because Puppeteer is another browser instance, thus, another session). Then came the issues on how to secure the login information or session cookies to automate this process.
PREREQUISITES
-
You will need to add Puppeteer to your project and allow it to download the required version of Chromium it needs to run.
npm install puppeteer -
Obviously, you will need the module. I'll eventually get around to adding a GIT repository with a demo project when I can find the time. For now, you can find the 2 module files below plus the example EJS template that you'll see the output of further down.
EJS to PDF - Git Repository -
The system I am running on, which is the only system I have checked this module with, is a Docker container running Node v14 server.
HOW TO USE
Adding the module.
- Add the two module files into your
extensions/server_connect/modulesfolder. If you already have Wappler open, you'll need to restart. Just right click the taskbar icon and restart Wappler.
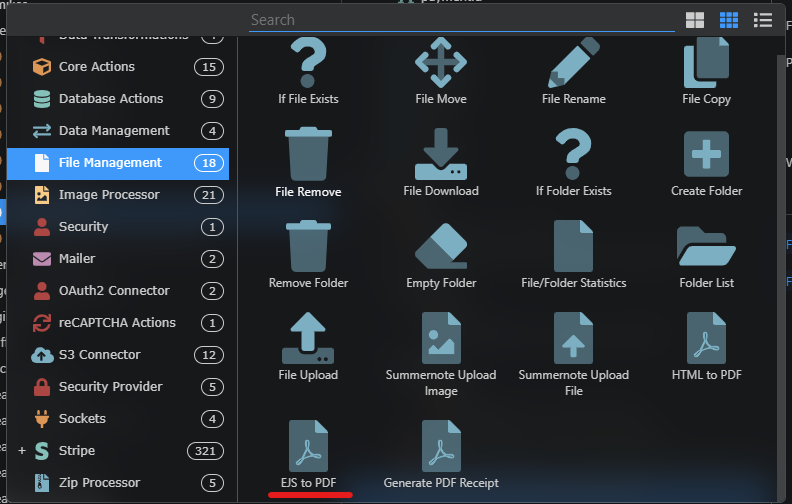
- You can now find the module under File Management named EJS to PDF.
Creating the Data
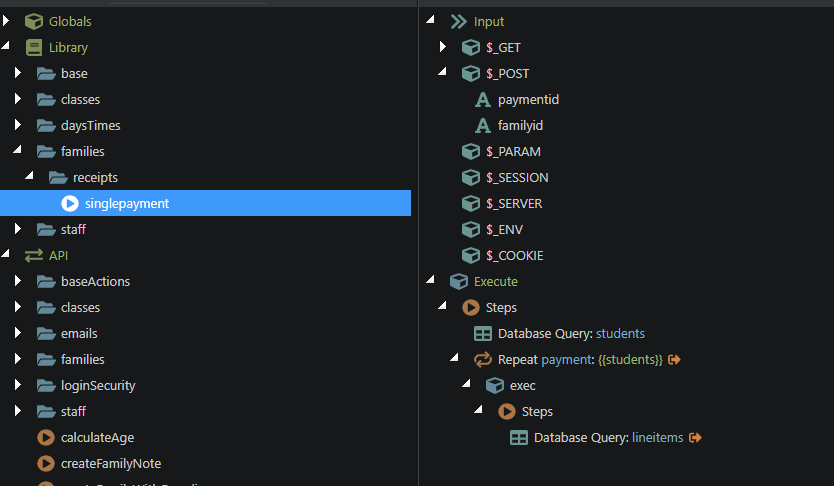
- Set up a new Library Action that you can call on inside your API Action. Ensure you have your POST variables set. This will output the data you need in your EJS template. Make sure you take note on the structure of the data being outputted by this action. This will become important when you create your EJS template. As always, you can always check the output in DevTools to check the structure.
- Include your library action in your API. Your API will need the same $_POST variables you set up in the last step.
- Puppeteer needs absolute paths to your images, css files, js files etc. Therefore you need create a $_POST variable named host that you pass into your action.
If you're using Docker, you will need to find the hostname of your container. Open the WebServer terminal in Wappler and typehostname -f. The output is your hostname.
I use the following AppConnect binding from a Browser element on my page in a hidden input to get the full host.browser.location.protocol+'//'+browser.location.host
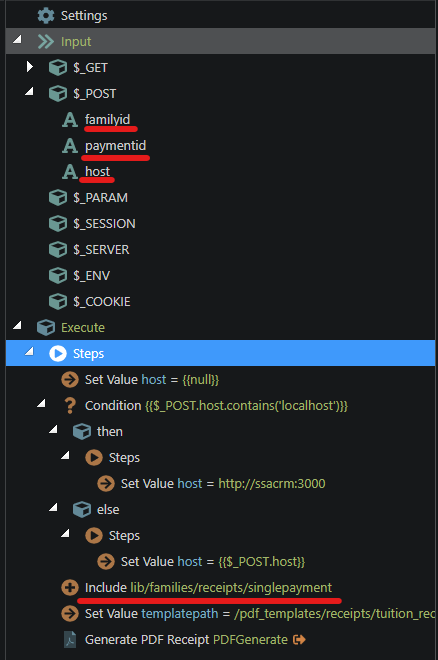
- Add a conditional and set values in your API as above. The set values all have "host" as the Name and Global Name.
This conditional is checking whether the action is running on the development server on in a production environment. If you're in production and using a Docker container, you may still need to use the Docker hostname and not yourhttps://example.comhostname. I've not tested this, and am pretty crap at Docker, so I'm unsure.
Generating the PDF.
- Add the EJS to PDF module in your API.
- Set your values:
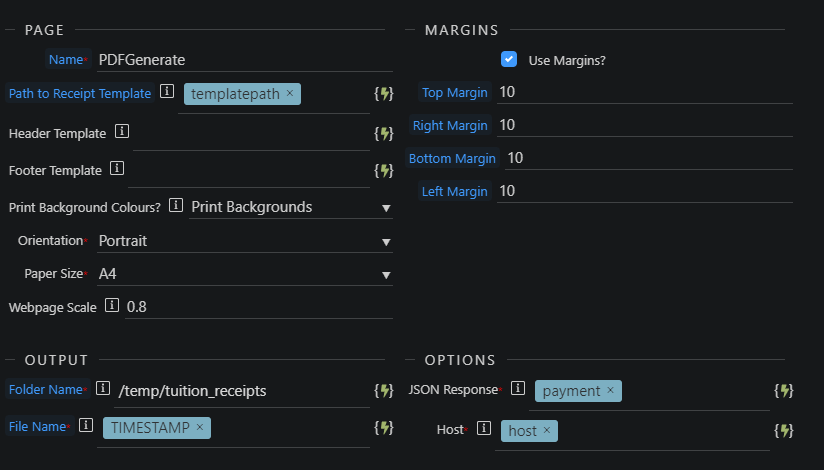
- Name - Name your action.
- Path to receipt template - This is the path relative to the views folder. Ensure you have the leading / in your path and the .ejs extension at the end. For example:
/pdf_templates/receipts/tuition_receipt.ejs - Header Template / Footer Template - If you want headers or footers. These can be used for page numbers, urls etc... See the Puppeteer documentation on how this should be setup.
- Print Background Colours? - If your HTML has any background colours, set this to "Print Backgrounds".
- Orientation - Portrait or Landscape
- Paper Size - Choose your desired paper size. If you set the size to custom, the units used in the custom module are mm (millimetres).
- Webpage Scale - You can scale the webpage for rendering. This must be between 0.1 and 2. Otherwise you may receive errors.
- Margins Set the margins you want to use. These, like the custom page size, use mm as their units.
- Folder Name - This path is relative to your public folder. Ensure you have the leading /. If the path doesn't exist, the module will attempt to create the path.
- File Name - Any string. Don't append the .pdf extension. The module will do this. You can have any server binding this, so if you want other $_POST variables here, feel free.
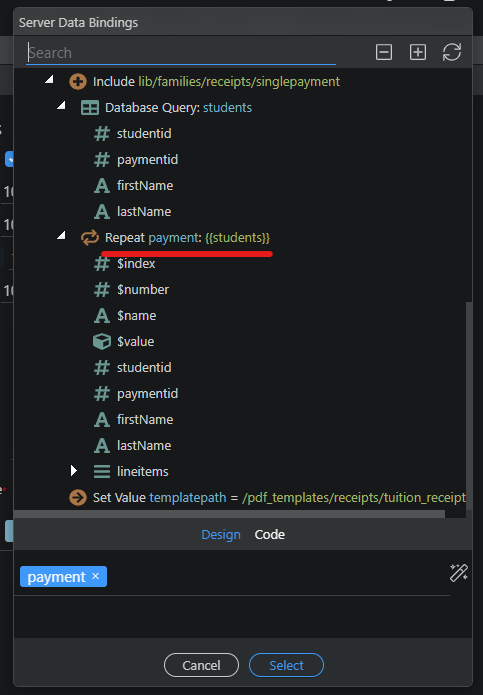
- JSON Response - Add the data from your Library Action you included in the API. I have included the
paymentrepeat.
- HOST - The host Set Value you set up earlier.
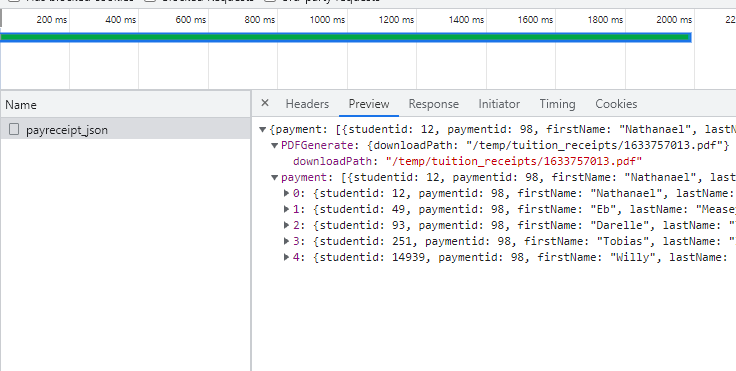
TEST YOUR NEW ACTION
First, here's the output from DevTools.
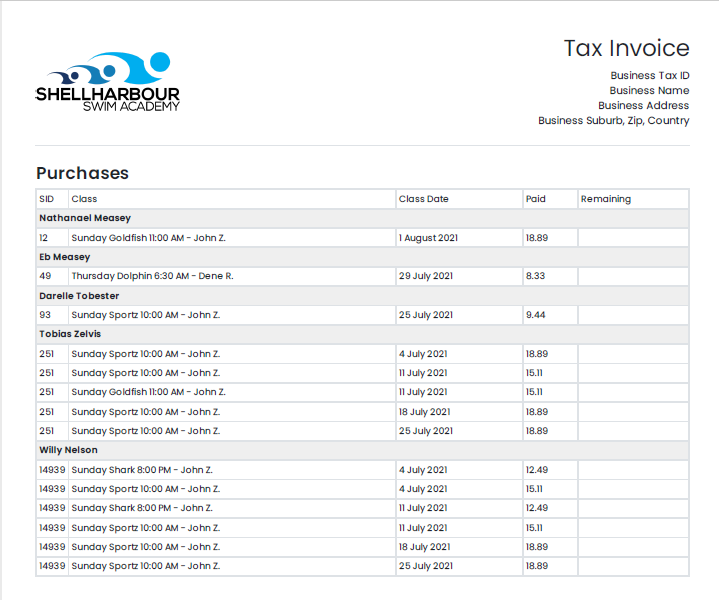
And here's the PDF output. (Don't mind Willy Nelson. ![]() )
)
DOCKER
Dockerfile
With Puppeteer, you'll need to add the following code to your Dockerfile underneath COPY package.json .
## PUPPETEER INSTALL ##
RUN apt-get update
&& apt-get install -y wget gnupg
&& wget -q -O - https://dl-ssl.google.com/linux/linux_signing_key.pub | apt-key add -
&& sh -c 'echo "deb [arch=amd64] http://dl.google.com/linux/chrome/deb/ stable main" >> /etc/apt/sources.list.d/google.list'
&& apt-get update
&& apt-get install -y google-chrome-stable fonts-ipafont-gothic fonts-wqy-zenhei fonts-thai-tlwg fonts-kacst fonts-freefont-ttf libxss1
--no-install-recommends
&& rm -rf /var/lib/apt/lists/*
## END PUPPETEER INSTALL ##
Hostname
Personally, I have changed the default hostname of the Docker container so I can rely on what the hostname is going to be during the conditional we added into our API above. I added the following to the docker-compose.yml under the line tty: true
hostname: ssacrm
Rebuild Docker Container
Any changes to the Docker configurations, you'll need to rebuild the container. Just hit the Deploy button in Wappler and you're ready to go.
I hope this all helps. Let me know if you run into any problems. I'm not the best at troubleshooting for others, but I'll give it a red hot crack. I've got to be off for the weekend now, but I'll respond as soon as I can.
Once again. Thanks to @sid for the basis of this module.
Cheers everyone.
-Michael.


