I'm trying to do my first Docker and Digital Ocean setup, believing it would be nice and easy, but it isn't turning out to be like that...
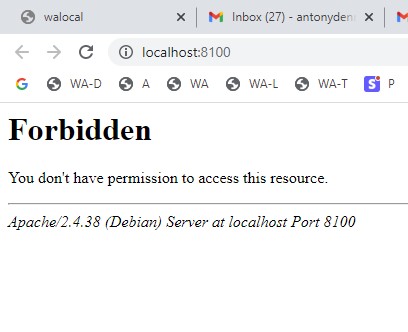
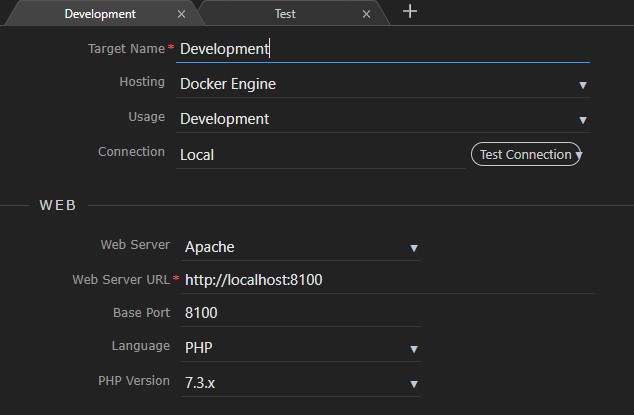
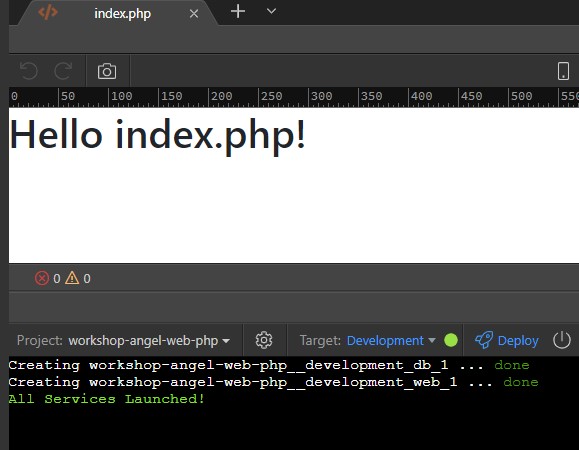
The First Issue is seeing my site locally...
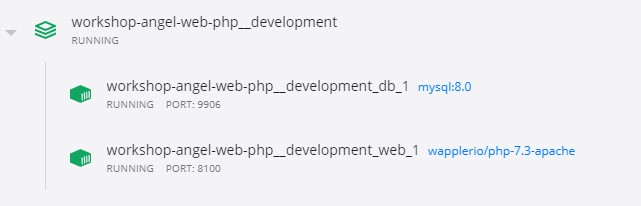
1. Local Docker Machine
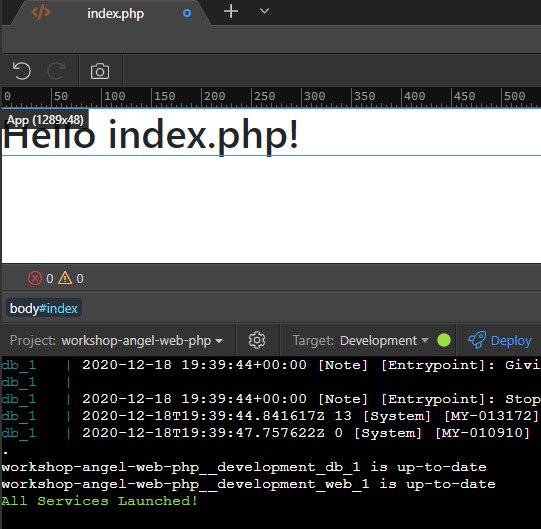
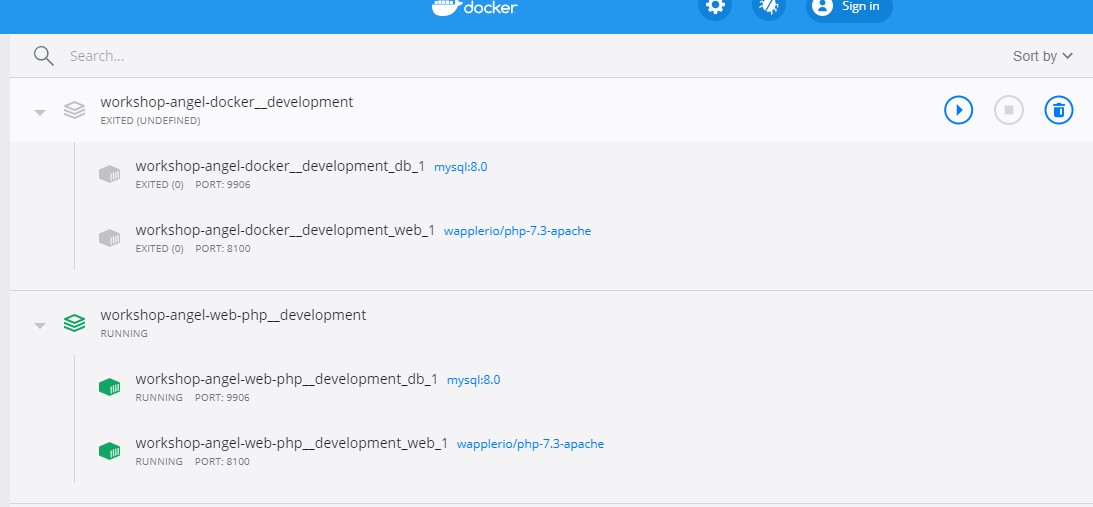
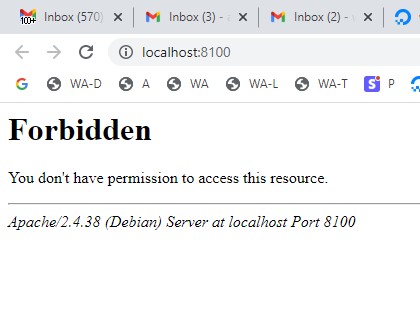
So I have a local docker machine up and running. Wappler can talk to it. I have an index.php file created. However when I visit localhost:8100 then the site can't be reached:
Could it be something to do with the fact that I’ve been using WAMP locally?
It is stopped, but could it be that WAMP is still getting in the way?
The messages I just posted are from Apache (Debian)… so is this from WAMP rather than Docker?
I don’t want to remove WAMP as all my local development is happening under it at the moment, and using Docker is just an experiment to understand it and see if moving to Docker is a good idea.
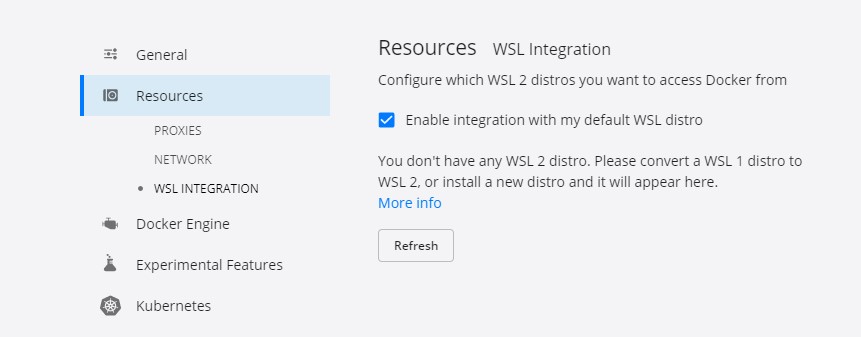
aaaahhh… yes, some little popup kept arising which didn’t make much sense… I’ve just found it and it didn’t allow me to do anything sensible… I’ve googled about how to enable file sharing and the options that are discussed don’t appear in my Docker Desktop settings.
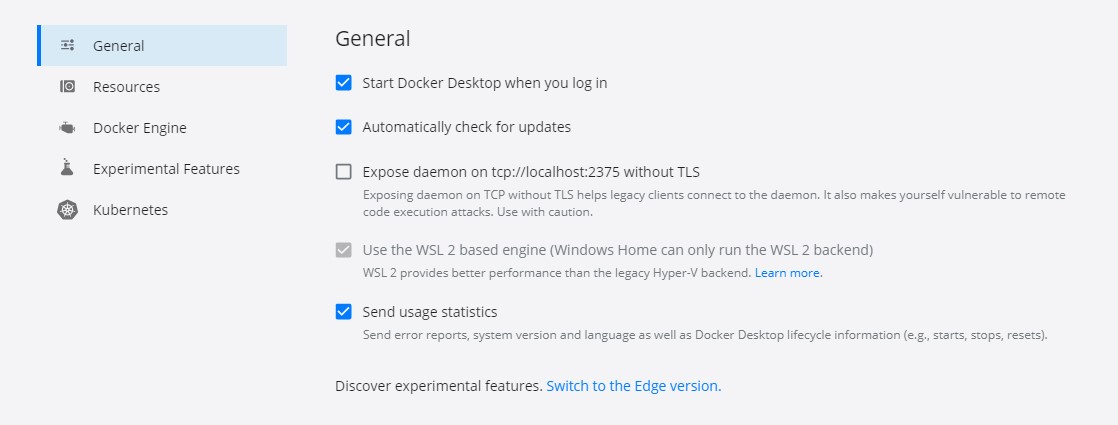
Digging around a bit, could this be to do with this WSL2 thing? In my Docker Desktop settings, I have these entries:
George, I’ve just read this, and doing it is massively complicated!
Did I select something wrong when I installed Docker Desktop?
Surely in the modern age I don’t install a piece of software and then have to jump through long list of complex command line hoops to make its basic functions work?
Can I just run with WSL version 1 on Windows?
Here is one part of the installation process!
Manual Installation Steps

If you are not on a Windows Insiders build, the features required for WSL will need to be enabled manually following the steps below.
Step 1 - Enable the Windows Subsystem for Linux

You must first enable the "Windows Subsystem for Linux" optional feature before installing any Linux distributions on Windows.

Open PowerShell as Administrator and run:
PowerShell

dism.exe /online /enable-feature /featurename:Microsoft-Windows-Subsystem-Linux /all /norestart

We recommend now moving on to step #2, updating to WSL 2, but if you wish to only install WSL 1, you can now restart your machine and move on to Step 6 - Install your Linux distribution of choice. To update to WSL 2, wait to restart your machine and move on to the next step.
Step 2 - Update to WSL 2

To update to WSL 2, you must be running Windows 10.
Requirements

    For x64 systems: Version 1903 or higher, with Build 18362 or higher.
    For ARM64 systems: Version 2004 or higher, with Build 19041 or higher.
    Builds lower than 18362 do not support WSL 2. Use the Windows Update Assistant to update your version of Windows.

To check your version and build number, select Windows logo key + R, type winver, select OK. (Or enter the ver command in Windows Command Prompt). Update to the latest Windows version in the Settings menu.

Note

If you are running Windows 10 version 1903 or 1909, open "Settings" from your Windows menu, navigate to "Update & Security" and select "Check for Updates". Your Build number must be 18362.1049+ or 18363.1049+, with the minor build # over .1049. Read more: WSL 2 Support is coming to Windows 10 Versions 1903 and 1909. See the troubleshooting instructions.
Step 3 - Enable Virtual Machine feature

Before installing WSL 2, you must enable the Virtual Machine Platform optional feature.

Open PowerShell as Administrator and run:
PowerShell

dism.exe /online /enable-feature /featurename:VirtualMachinePlatform /all /norestart

Restart your machine to complete the WSL install and update to WSL 2.
Step 4 - Download the Linux kernel update package

    Download the latest package:
        WSL2 Linux kernel update package for x64 machines

    Note

    If you're using an ARM64 machine, please download the ARM64 package instead. If you're not sure what kind of machine you have, open Command Prompt or PowerShell and enter: systeminfo | find "System Type".

    Run the update package downloaded in the previous step. (Double-click to run - you will be prompted for elevated permissions, select ‘yes’ to approve this installation.)

Once the installation is complete, move on to the next step - setting WSL 2 as your default version when installing new Linux distributions. (Skip this step if you want your new Linux installs to be set to WSL 1).

Note

For more information, read the article changes to updating the WSL2 Linux kernel, available on the Windows Command Line Blog.
Step 5 - Set WSL 2 as your default version

Open PowerShell and run this command to set WSL 2 as the default version when installing a new Linux distribution:
PowerShell

wsl --set-default-version 2

Note

The update from WSL 1 to WSL 2 may take several minutes to complete depending on the size of your targeted distribution. If you are running an older (legacy) installation of WSL 1 from Windows 10 Anniversary Update or Creators Update, you may encounter an update error. Follow these instructions to uninstall and remove any legacy distributions.

If wsl --set-default-version results as an invalid command, enter wsl --help. If the --set-default-version is not listed, it means that your OS doesn't support it and you need to update to version 1903, Build 18362 or higher.

If you see this message after running the command: WSL 2 requires an update to its kernel component. For information please visit https://aka.ms/wsl2kernel. You still need to install the MSI Linux kernel update package.
Step 6 - Install your Linux distribution of choice

    Open the Microsoft Store and select your favorite Linux distribution.

    View of Linux distributions in the Microsoft Store

    The following links will open the Microsoft store page for each distribution:
        Ubuntu 16.04 LTS
        Ubuntu 18.04 LTS
        Ubuntu 20.04 LTS
        openSUSE Leap 15.1
        SUSE Linux Enterprise Server 12 SP5
        SUSE Linux Enterprise Server 15 SP1
        Kali Linux
        Debian GNU/Linux
        Fedora Remix for WSL
        Pengwin
        Pengwin Enterprise
        Alpine WSL

    From the distribution's page, select "Get".

    Linux distributions in the Microsoft store

The first time you launch a newly installed Linux distribution, a console window will open and you'll be asked to wait for a minute or two for files to de-compress and be stored on your PC. All future launches should take less than a second.

You will then need to create a user account and password for your new Linux distribution.

Ubuntu unpacking in the Windows console

CONGRATULATIONS! You've successfully installed and set up a Linux distribution that is completely integrated with your Windows operating system!