Hi there fellow Wapplers,
I'd like to share with you a little guide on how to create a One Time Password authentication method with just single factor authentication.
This is intended for projects where users do not login that often and have difficulties remembering credentials (and do not seem to use password managers). A side note is that I would not recommend this as an authentication method if there is sensitive data exposed to the front end users.
So how does it work?
- User goes to a password reset request form
- User receives email with temporary code and login url
- User opens url and fills in temporary code in password field to sign in
- A new random code is assigned to this user to prevent re usage of the same code
How do I make this in Wappler?
Note that I have made this in a NodeJS project. I am not sure if the steps are exactly the same for PHP, but it shouldn't differ that much.
Step 1: create a password reset flow such as beautifully explained by @mebeingken in his authentication course:
https://learning.uniqueideas.com/courses/user-registration-login-wappler
OR check out this excellent guide by @Teodor:
Now it is just a few changes from the basic password reset flow. For the server connect file that does the reset request we need to add some values:
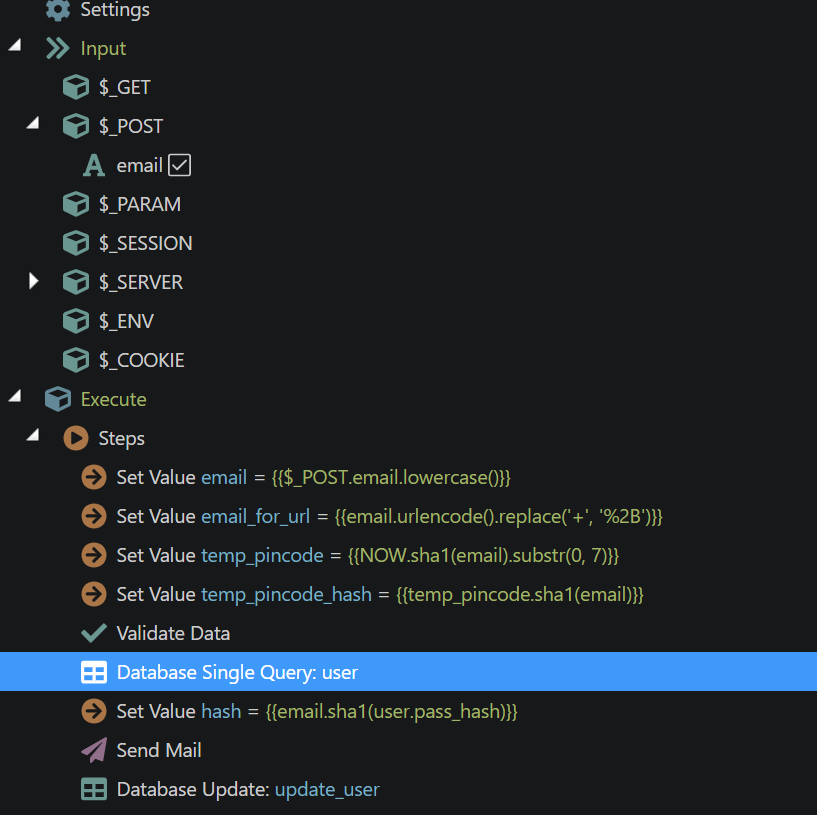
- email_for_url is for email addresses that use a + sign. Otherwise these addresses will not work properly when trying to query them from the url.
- temp_pincode is a random generated code. I made it 7 digits.
- temp_pincode_hash is a hashed version of that code, since I don't like to use the actual code in the url that is in the email.
This is the content of the email, adjust to your liking:
`
Here is your Pincode.
'Pincode: {{temp_pincode}}
http://{{$_SERVER.SERVER_NAME}}:8100/reset_password?email_for_url={{email_for_url}}&hash={{hash}}&temp_pincode_hash={{temp_pincode_hash}}"> Click to Login with Pincode.
(use a href tags here to make it a link)
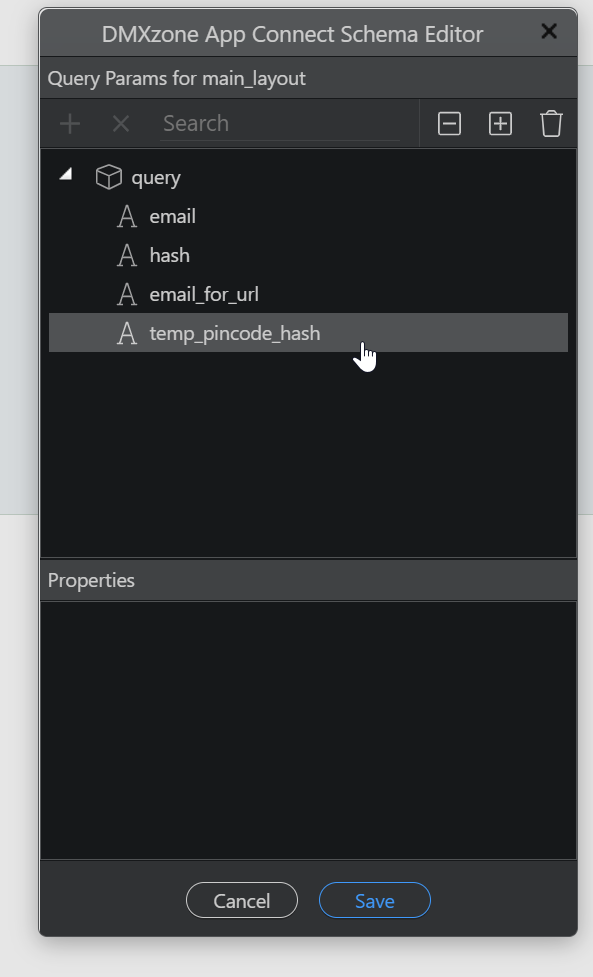
In order to be able to use the added values you need to add it to your query manager in your layout:
Now on the actual password reset page you do not need the password confirmation field anymore, so just delete that and also delete the post parameter from the server connect file that does the password reset.
For testing purposes I have made some input fields to display the different values, just to check if things are working as expected. Use the dynamic attributes option to populate the fields with the values from your query manager. Obviously on a live page you wan't those hidden.
So for the server connect file that does the actual resetting of the password you can remove the pattern check from the password field, as your temp password will probably not match this pattern.
Here are the settings for the pass_reset file:
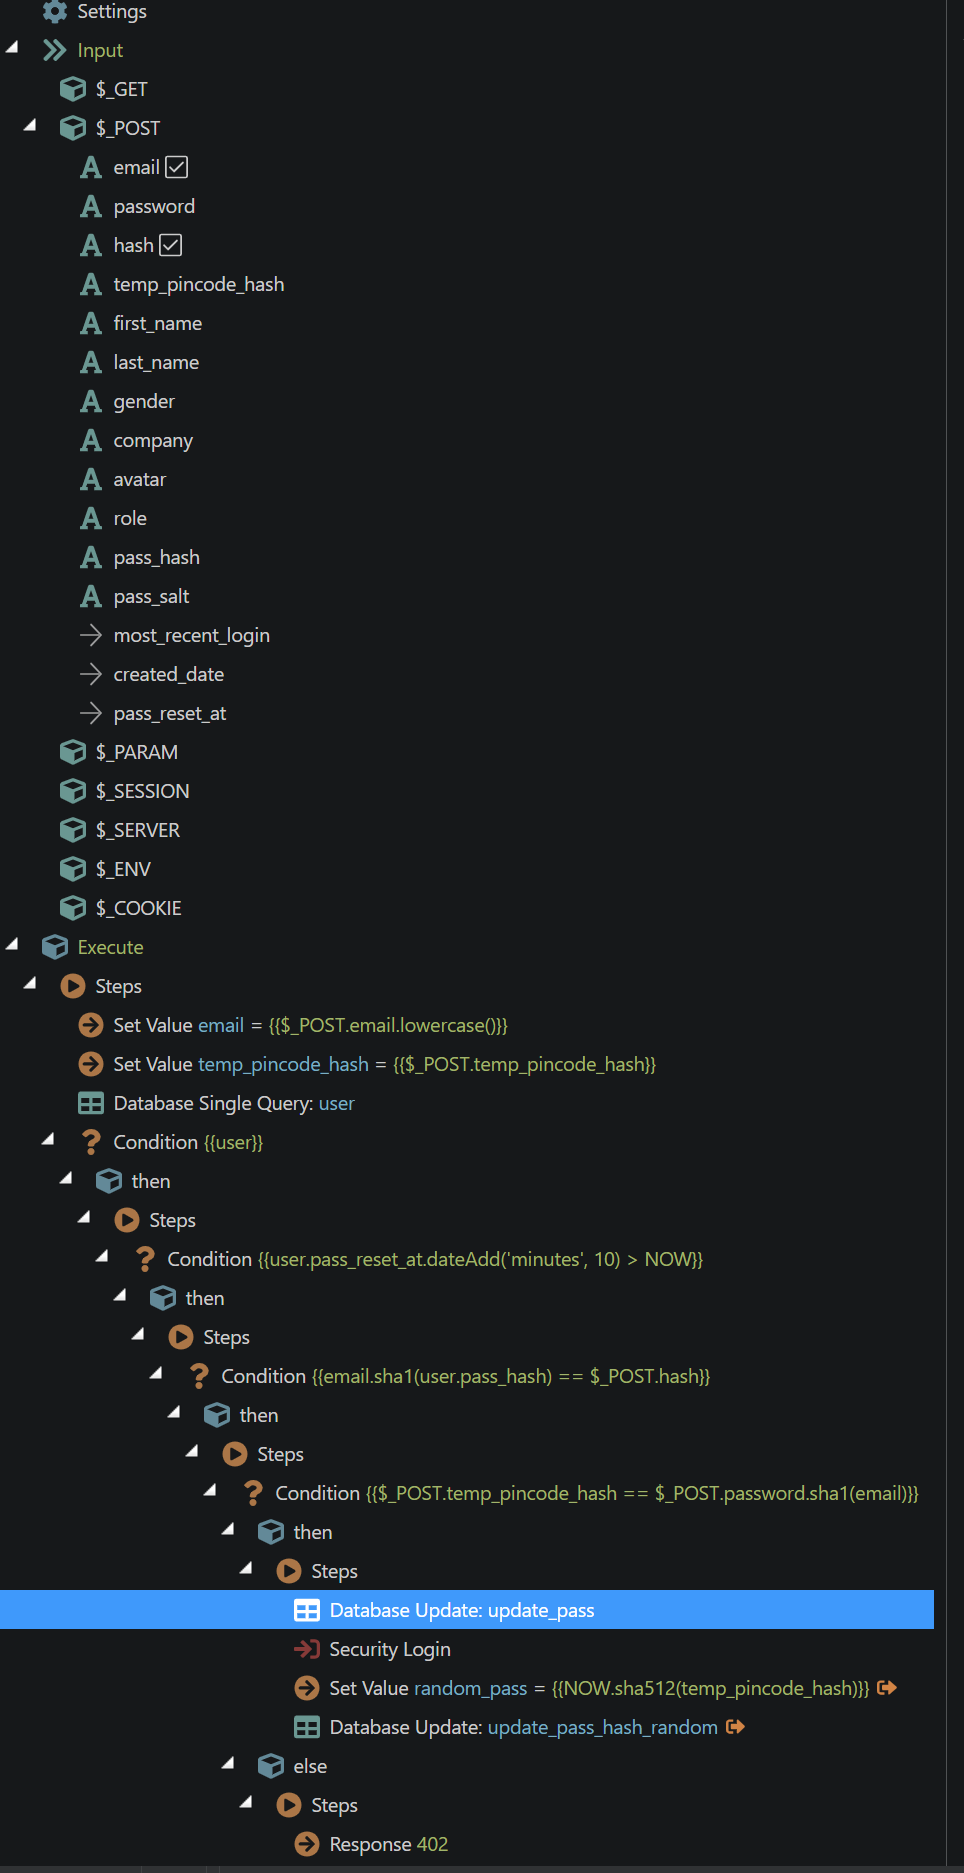
What has changed from a regular pass reset flow:
- temp_pincode_hash added to post variables
- temp_pincode_hash set as value
- after the pass_hash check from a regular flow I check if the value in the password input field matches the temp_pincode_hash, when itself is hashed like we did in the other server connect file (password.sha1(email))
- the pass_hash of the user is updated (like with a regular reset flow)
- Now we log the user in
- And as a final step I generate a random pass (NOW.sha512(temp_pincode_hash) and update the user's pass hash in the database. This way the temp code can only be used once.
That's it!
I hope you guys find this guide useful and I'd like to thank all the other community members for posting all the threads with super useful info on how to build awesome stuff with Wappler.
Happy coding!
PS: if anyone notices any weaknesses or flaws in this method, please do point them out. As I probably know a lot less about authentication than I should know. Always happy to learn new stuff.