I think what Sid is telling you is this.
You get static and dynamic, if you want to get dynamic data you can do it like this
<!--The value property expects static data, so to make it dynamic you have to add {{...}} around the dynamic data you are getting.-->
value="{{dynamic-data}}"
<!--OR ALTERNATE WAY-->
<!--Add dmx-bind: in front of the value property and you can now input dynamic data without the {{...}} - as well as adding static data by enclosing it with 'static-words-go-here' - and if you want to join static and dynamic together you use + to do that.-->
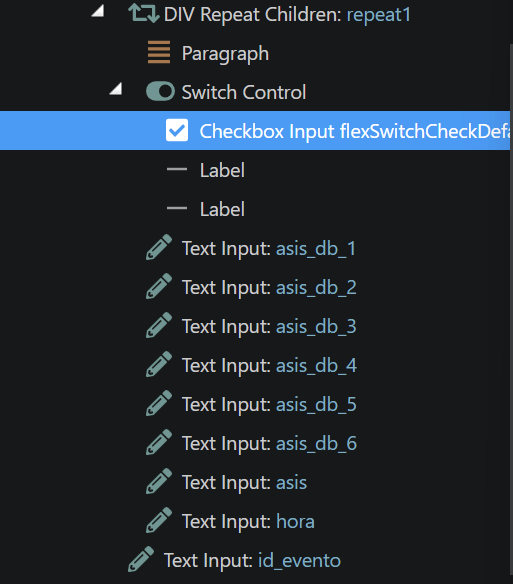
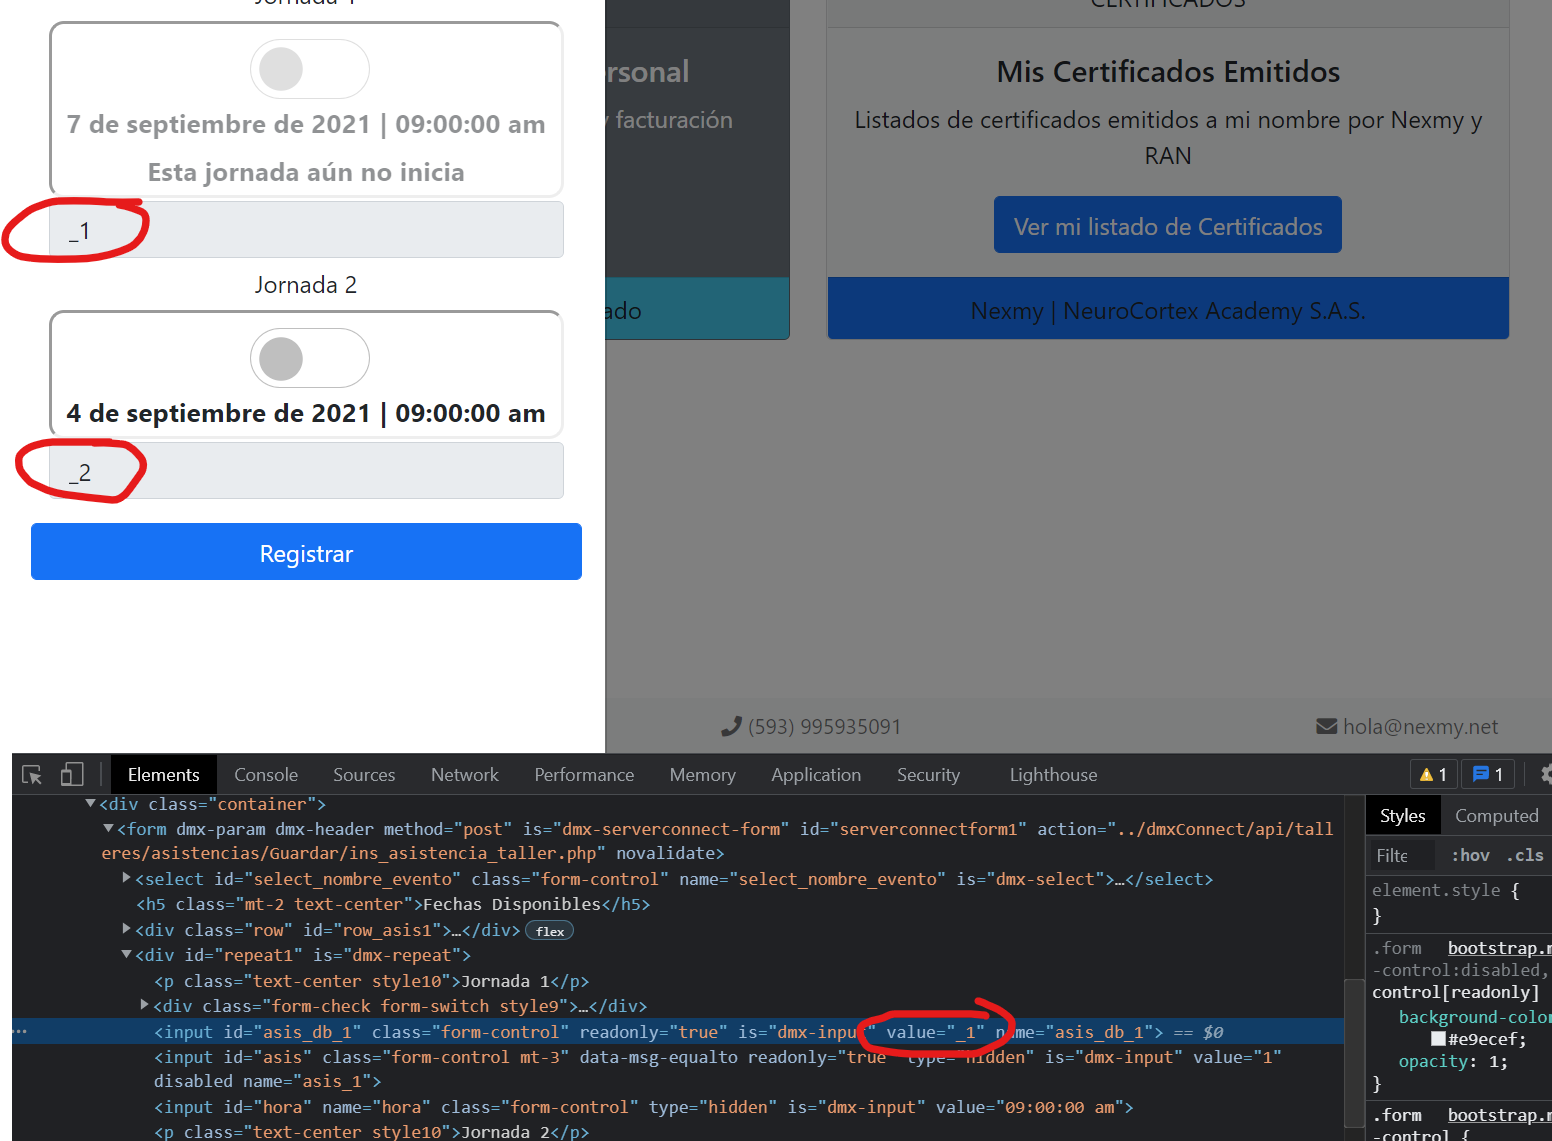
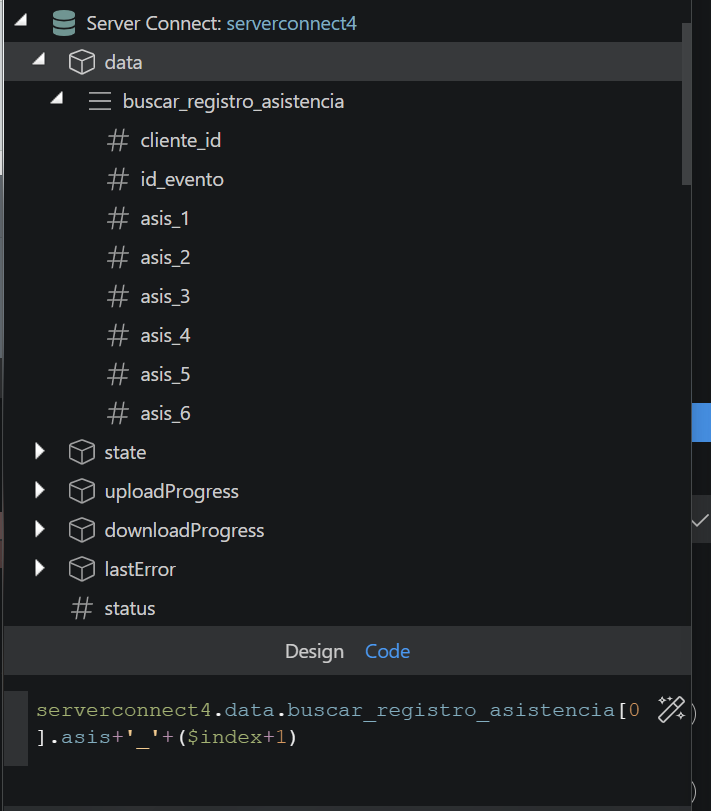
dmx-bind:value="serverconnect1.data.buscar_registro_asistencia.asis+'_'+($index+1)"
Hope this helps explain it a bit, but I must be honest, if you are using Wappler as a graphic designer you can do all this directly in the UI and Wappler is clever enough to add all the correct code in itself so you do not need to even know all the strange stuff I explained. It would be safer to use it as Wappler generates it.
To do this in the GUI only try the following, maybe make a new page for testing by the way.
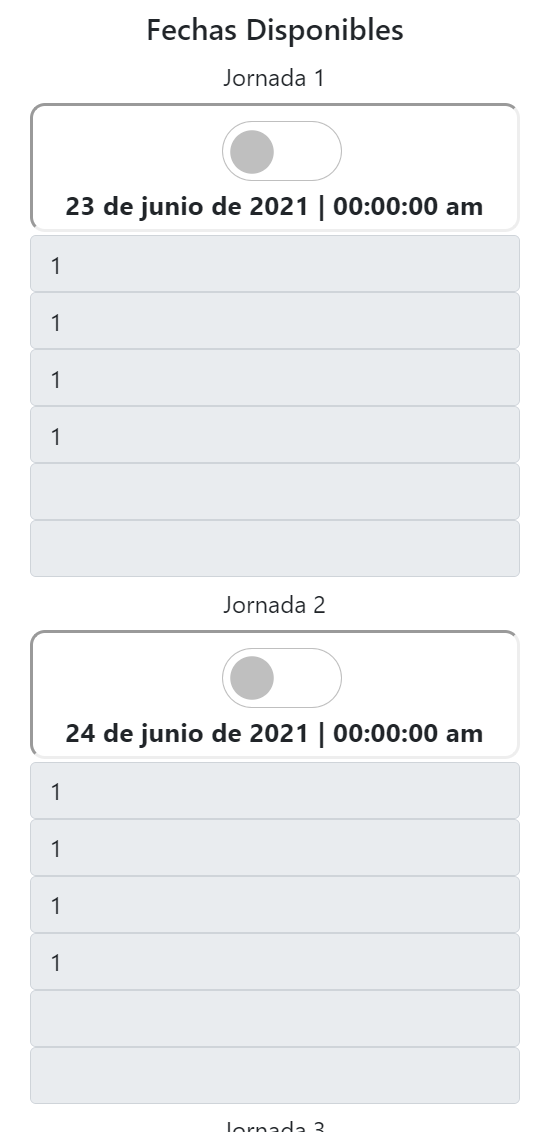
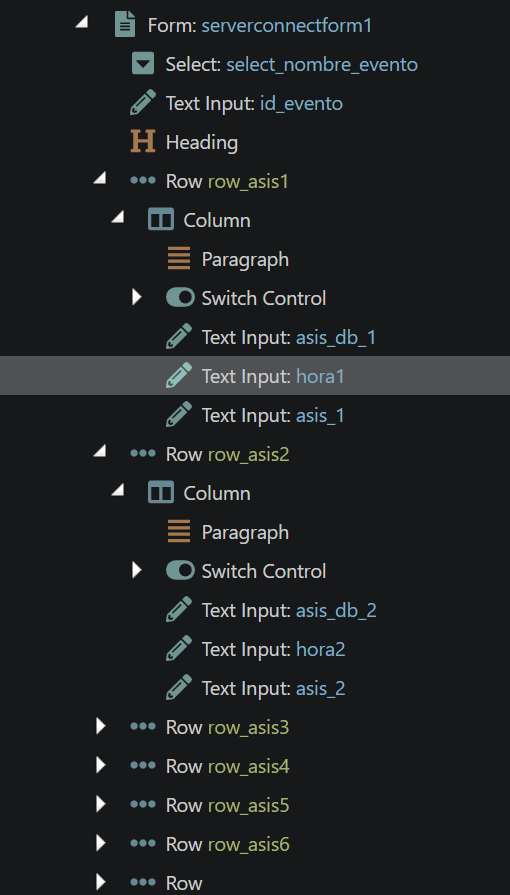
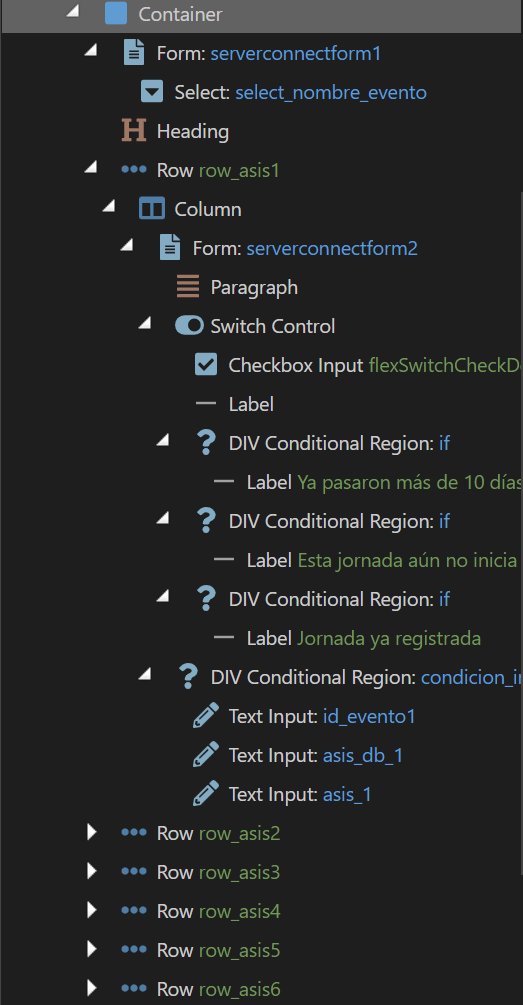
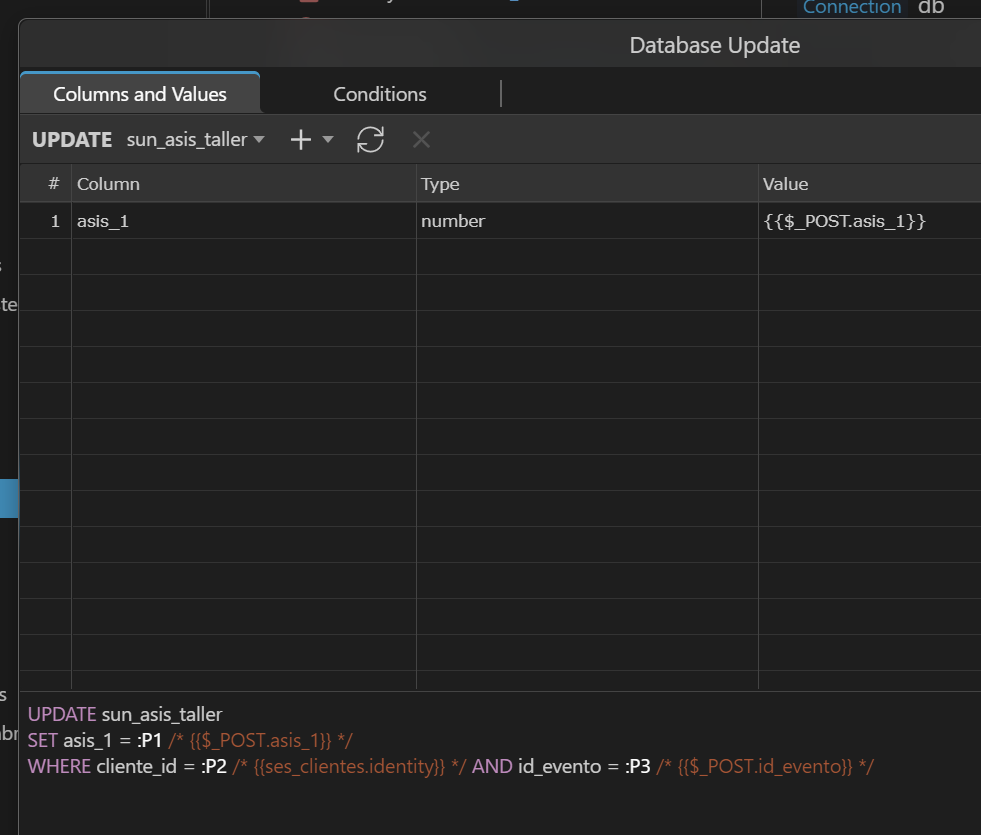
I assume you already have a database connection in Globals and I assume you want this form to update the asis_1, asis_2 database entries when a user slides them on or off.
If that is the case then.
-
Go to the Workflows area, Server Actions,
-
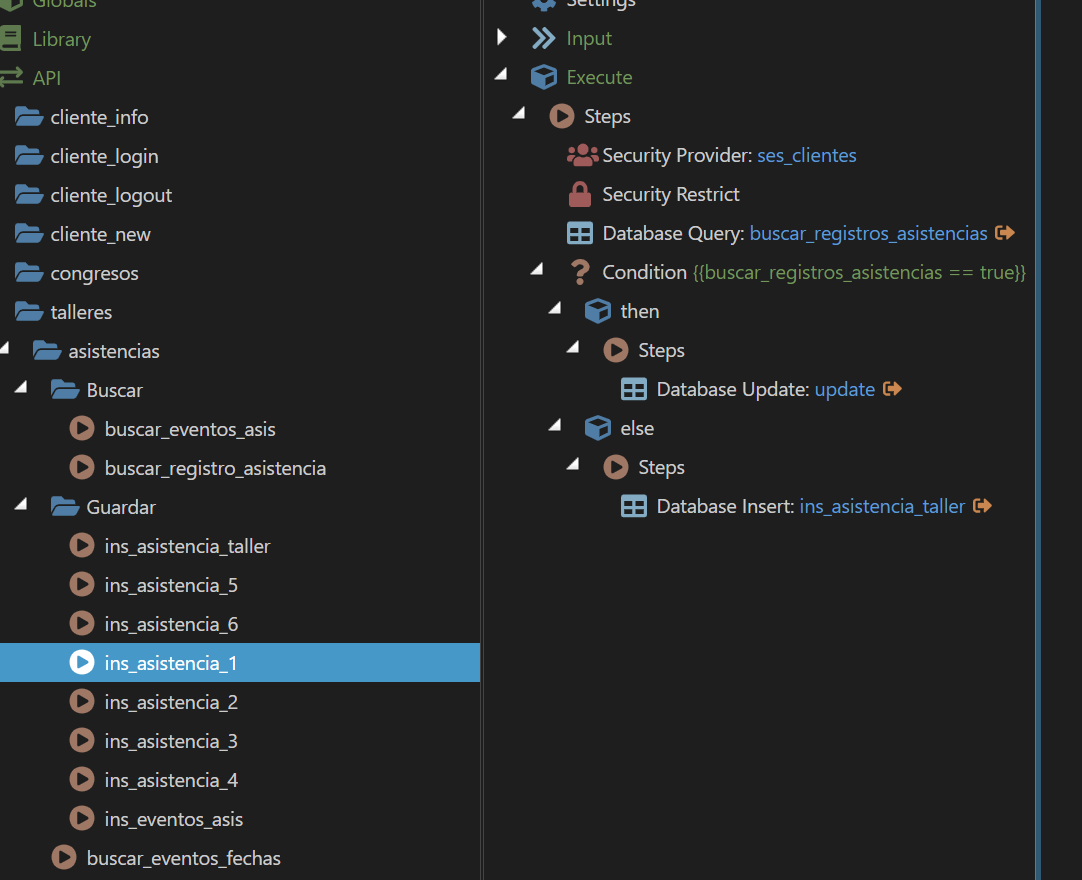
Create a new API action called whatever you want, like update_my_form inside the Steps add Database Multi Update, Open Update Options, select your database table, don't alter anything, click OK, save action.
-
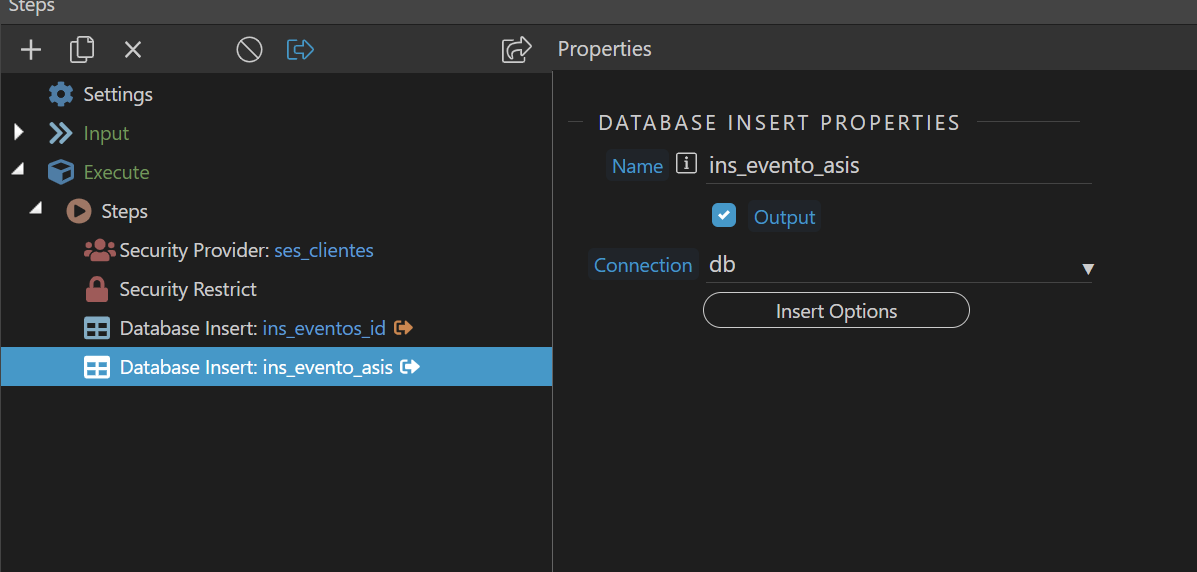
Create another new API action called whatever you want, like my_form_existing_data inside the steps add a Database Query, open Query Builder, add the same table you used in the last step, don't alter anything, click OK, save action.
-
Now open your existing page, or a new one to test this out, right click App > Data > Server Connect, click action and choose your action called my_existing_form_data click Select.
-
Right click Server Connect, make sure insert after arrow is selected, then select Generators > Bootstrap 5 Form Generator.
-
In the popup window, first click Multi Record ON before you do anything else, then Click Select for your Server Action, this is the update_my_form one we made, click select, then click the Populate area, select the server action already on your page, probably called serverconnect1.data.query if you left all the naming as default. Clik Select.
The popup window populates you whole form, you just need to make some minor improvements, DO NOT change the Name fields, or Value fields, you can make your Label fields whatever you like, and the type fields must change.
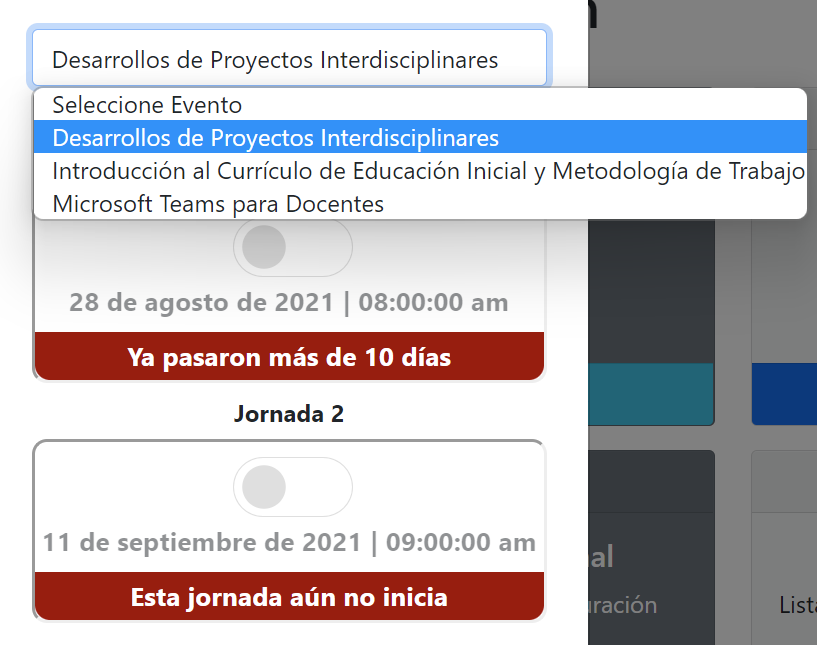
First one is id, change type to hidden, and then choose all the other types as you need, you will notice there is no swipe as you have in your screenshots, just choose checkbox for now as that is the closest to a swipe in code, so you can change it later.
Make sure in last position there is a submit button, with type set to Submit, with no Value and no Name, so just a label and type, then hit OK.
A form should now magically appear on your page, mostly complete to what you need, and give you about the best base to start with, and fully valid code. Save your page, deploy or publish everything and go test.
When the browser page opens your form should already all be dynamically completed, you should be able to change anything you like and hit submit, and it should update all your changes to your database.
Whew, hope that helps.