Intro
You can create a customizable buy button to sell a product, subscription, or accept a payment on your website. The Buy Button redirects customers to a Stripe-hosted payment page.
The Stripe buy button makes it easy to integrate secure payment options into online platforms for selling products or subscriptions with fixed prices.
Buy Button
The buy button requires you to have products set up in your Stripe account. You can create, access and edit the products and pricing on your Stripe dashboard.
Payment Link Setup
The first thing you need is to setup a payment link. Start by by creating a new link where you can decide which products to sell and customize the checkout UI.
On the create payment link page select the payment type, in our case we select Payment or Subscription, then select your product from the list:

Adjust the options as per your requirements and click the Create Link button:

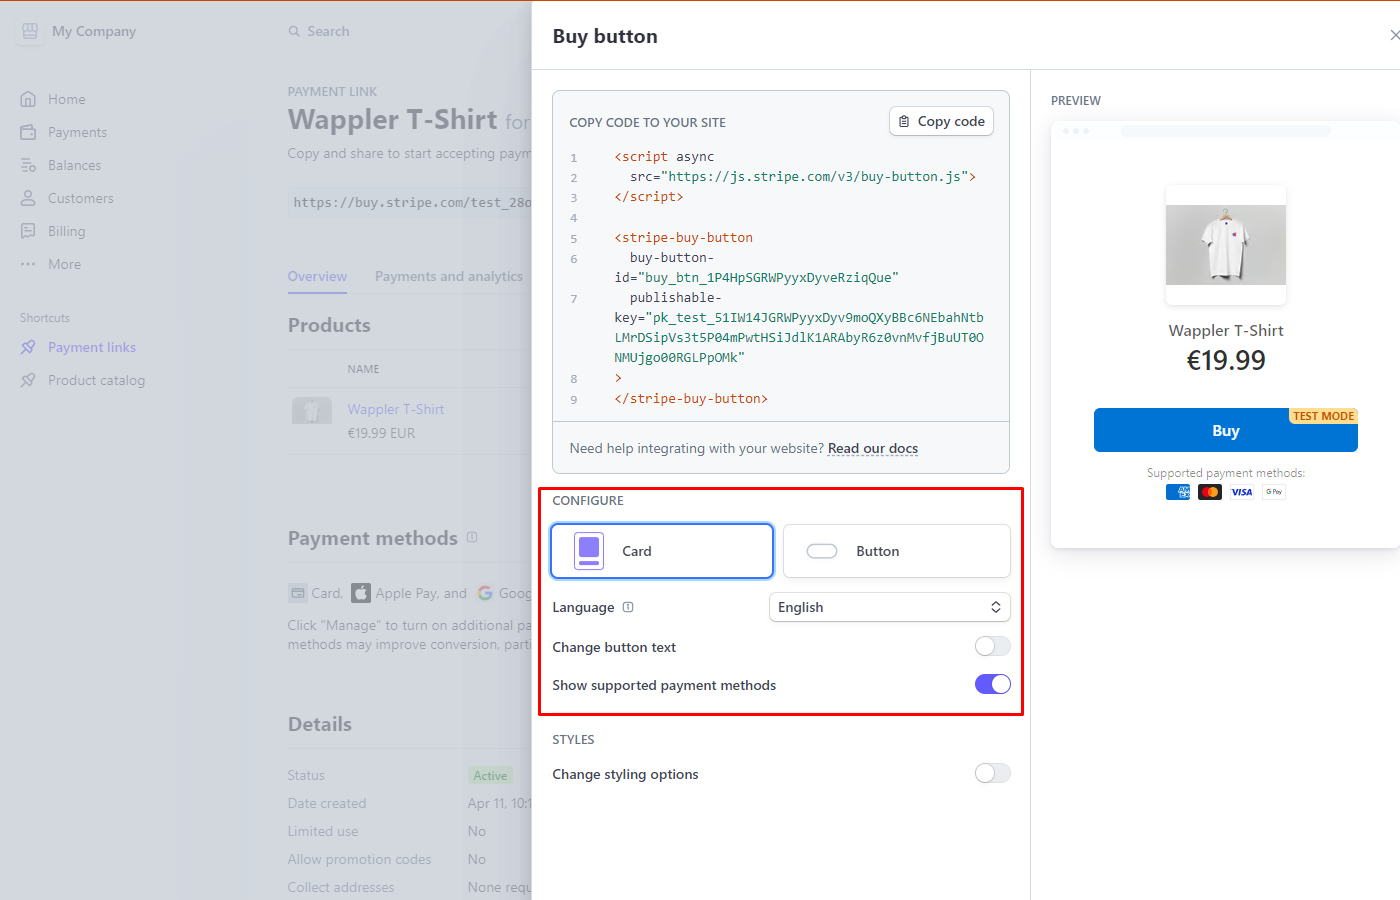
Buy Button Setup
On the next page click Buy Button:

Setup the layout, language and text of the payment button":
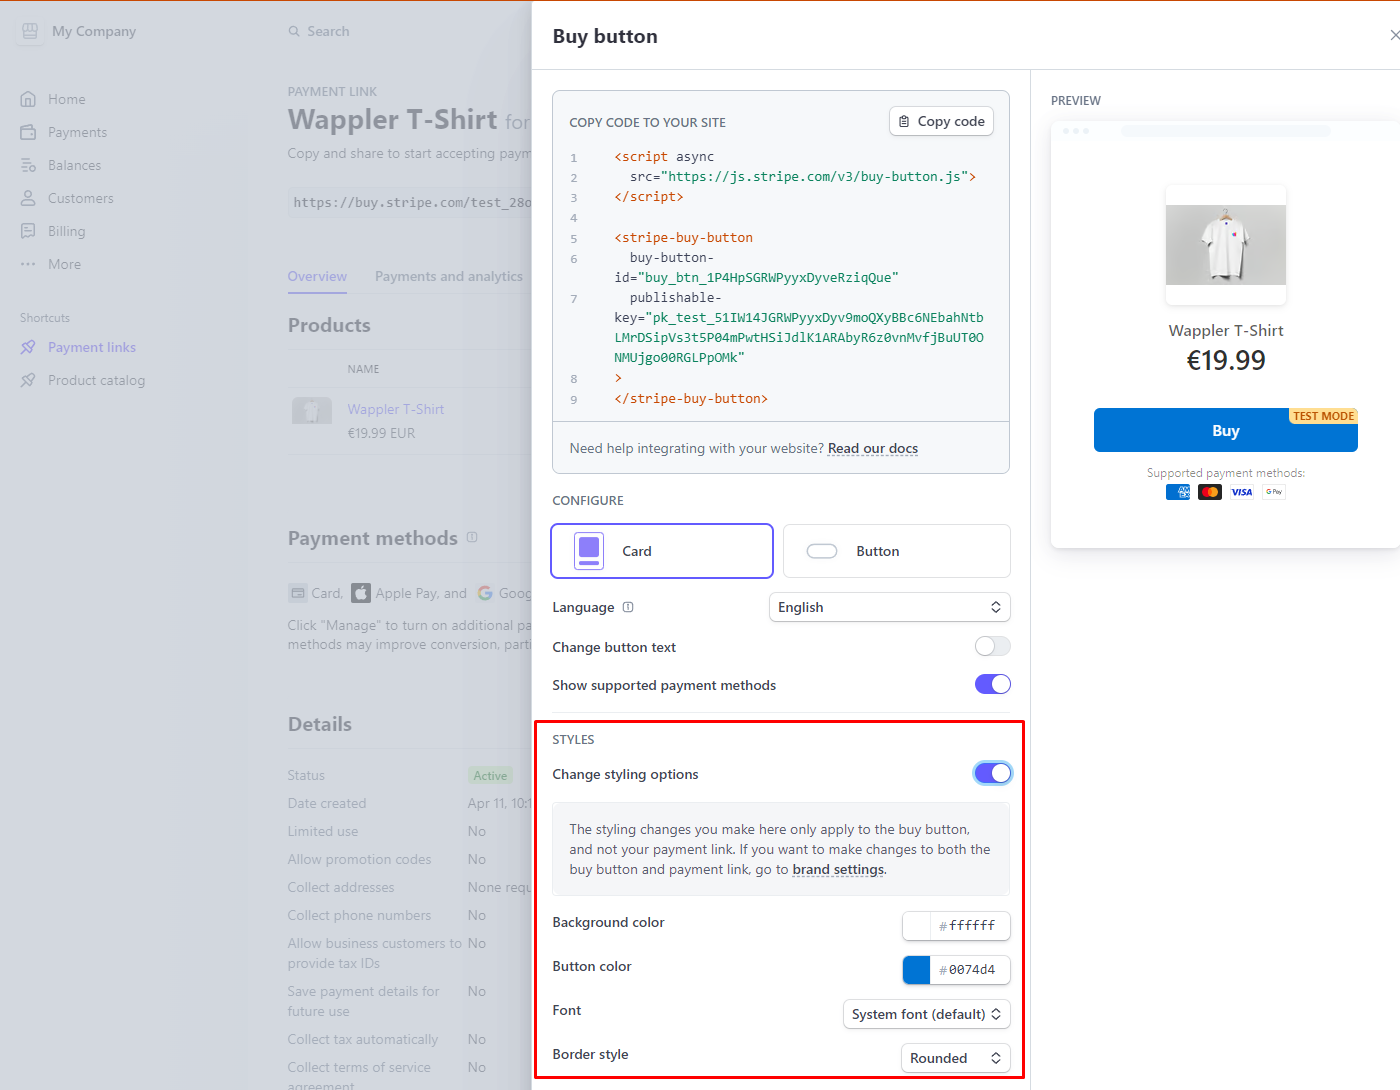
Change the button style to match your branding:
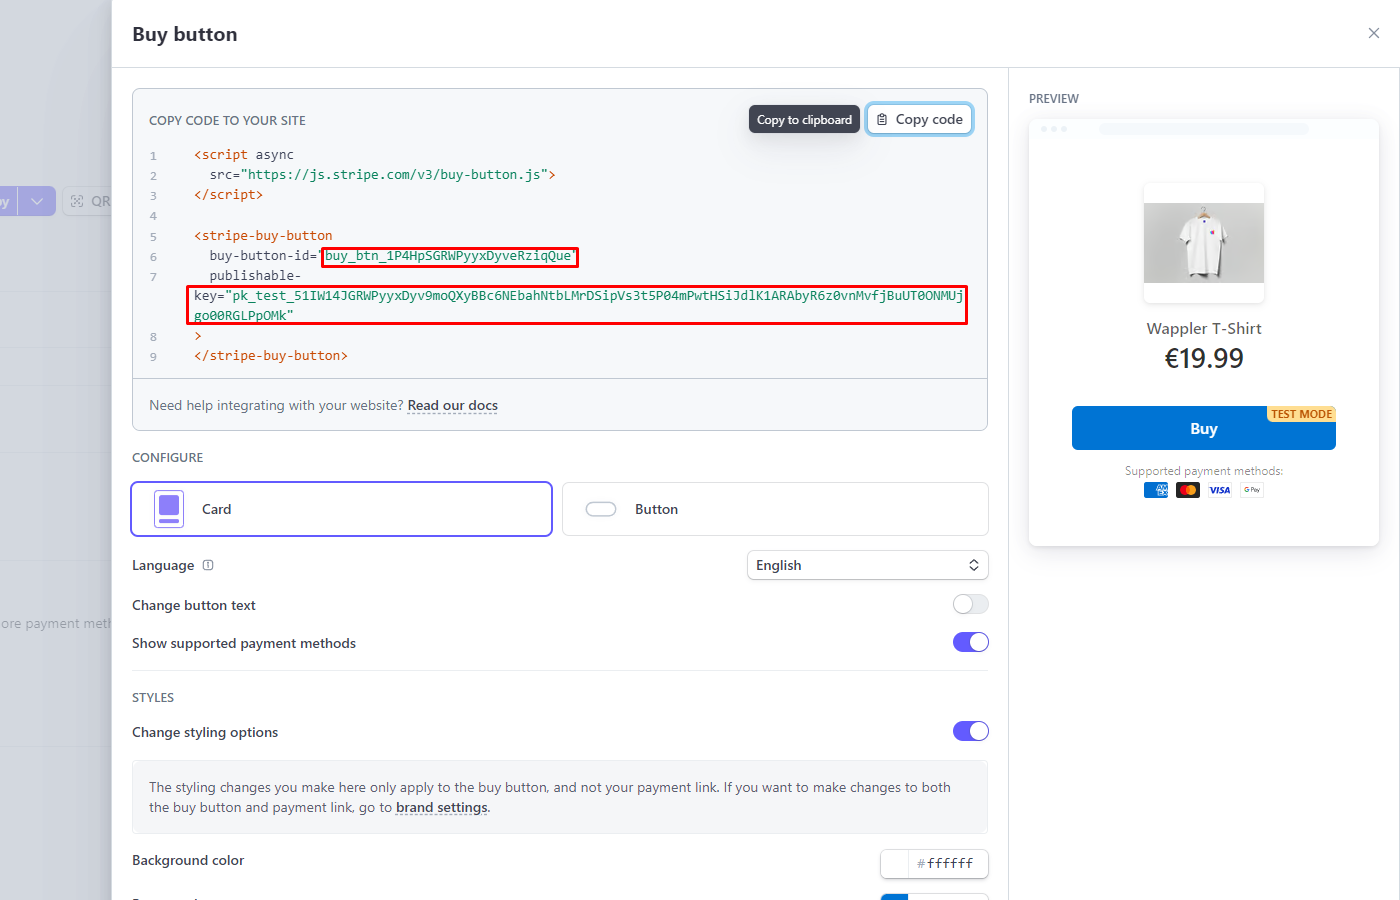
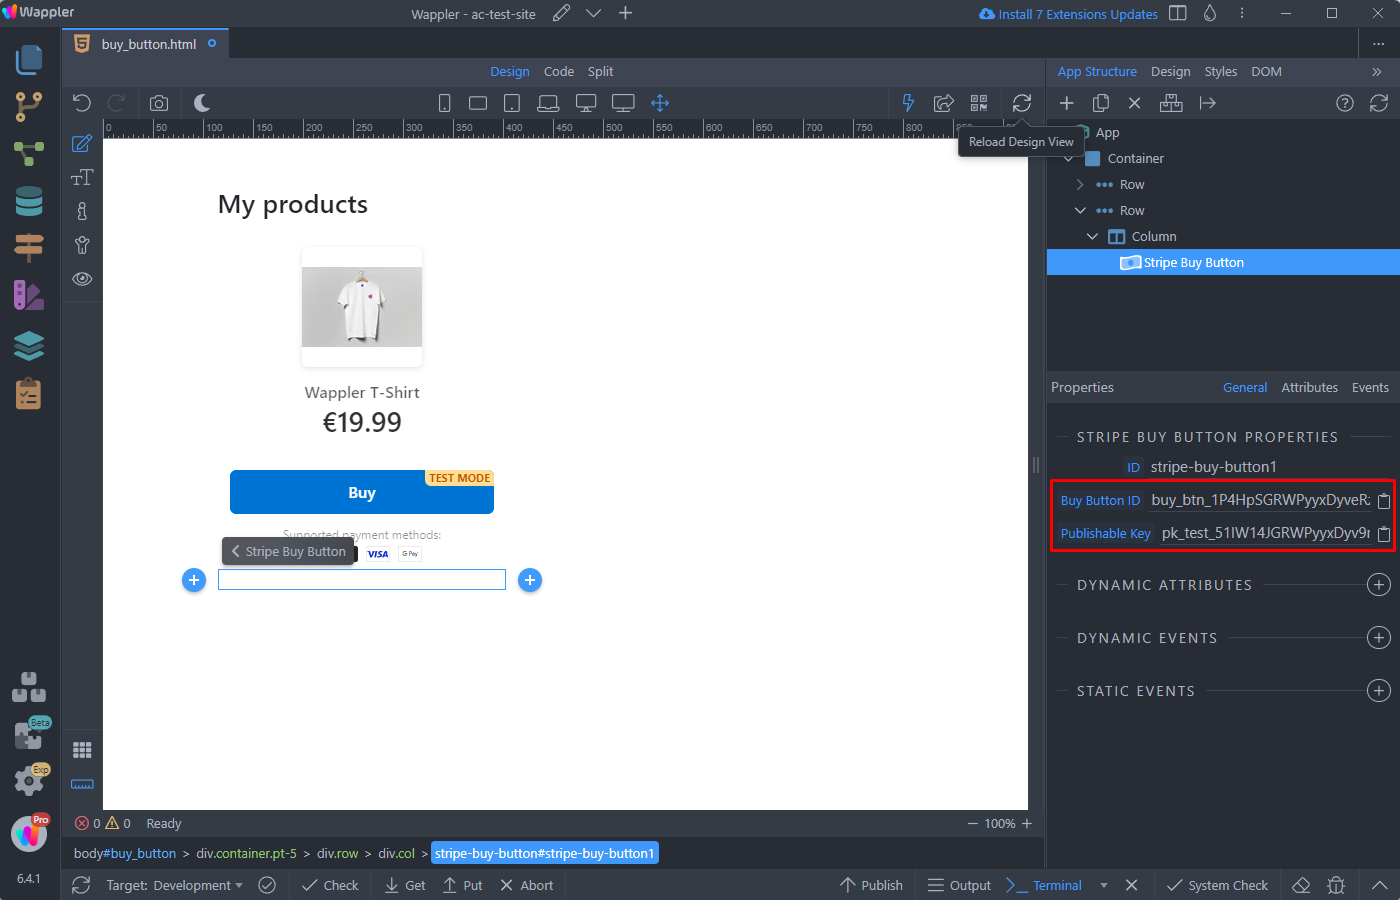
And then copy the button id and publishable key, these will be needed in the next steps in Wappler:
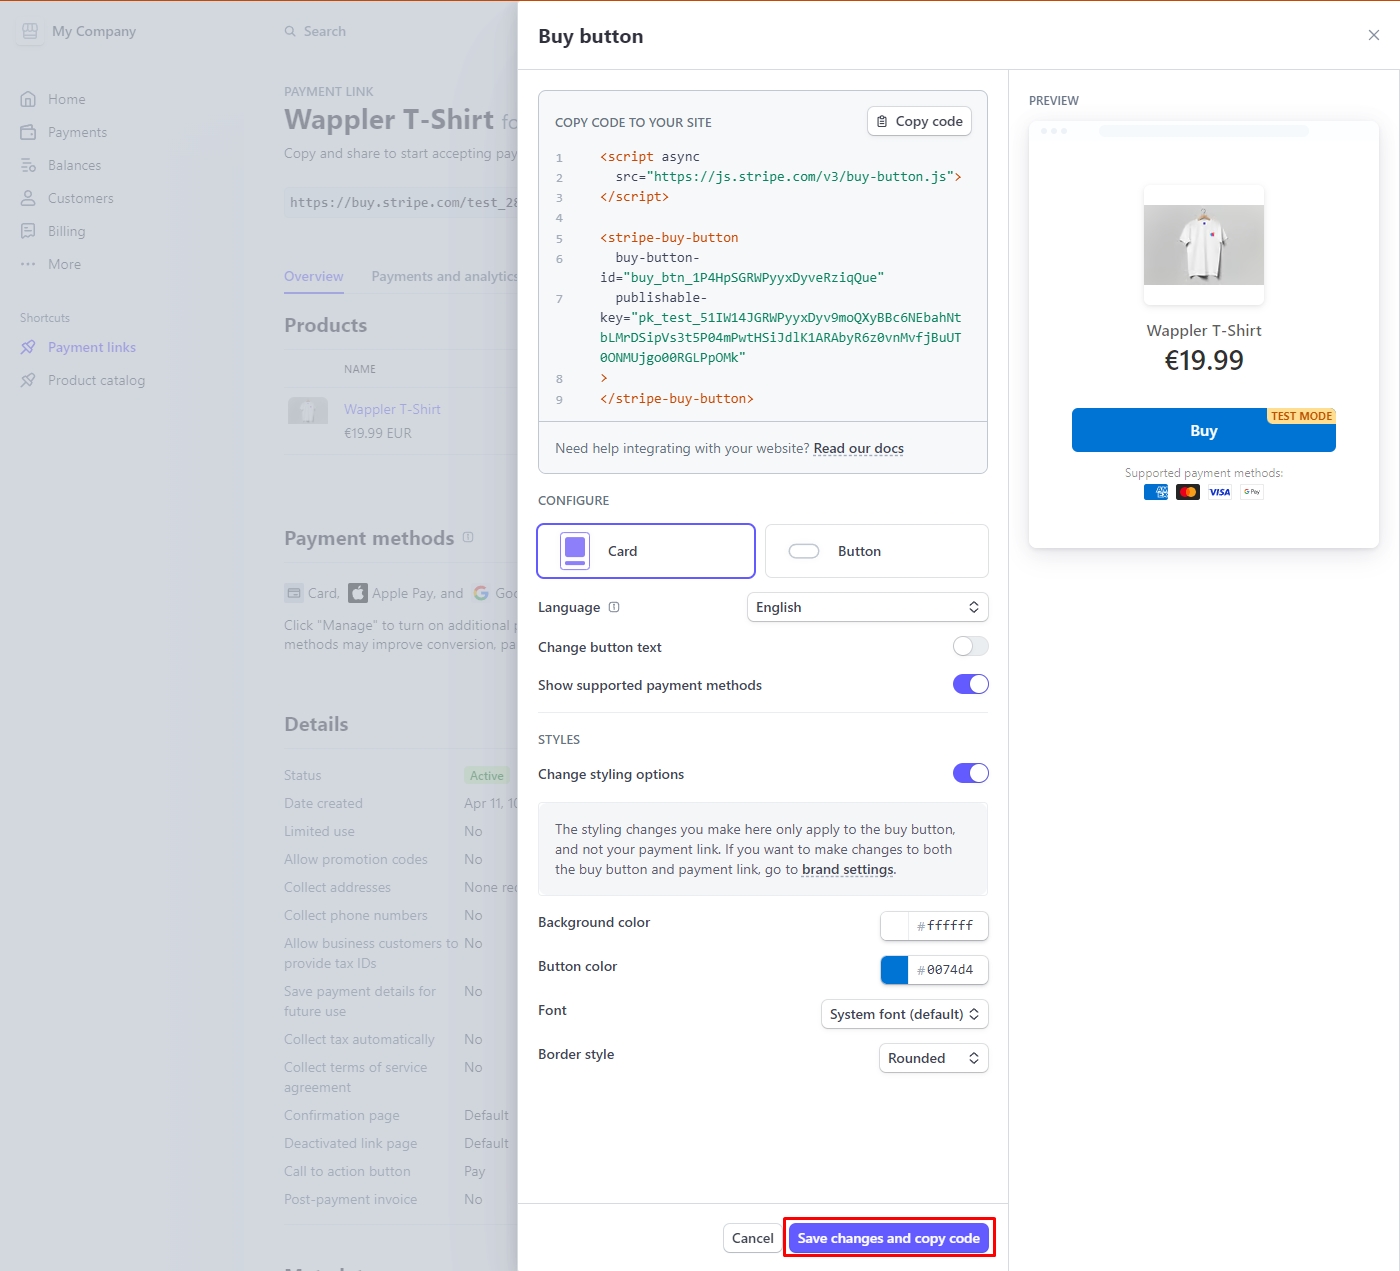
Save the changes:
Adding Buy Button to Your Page
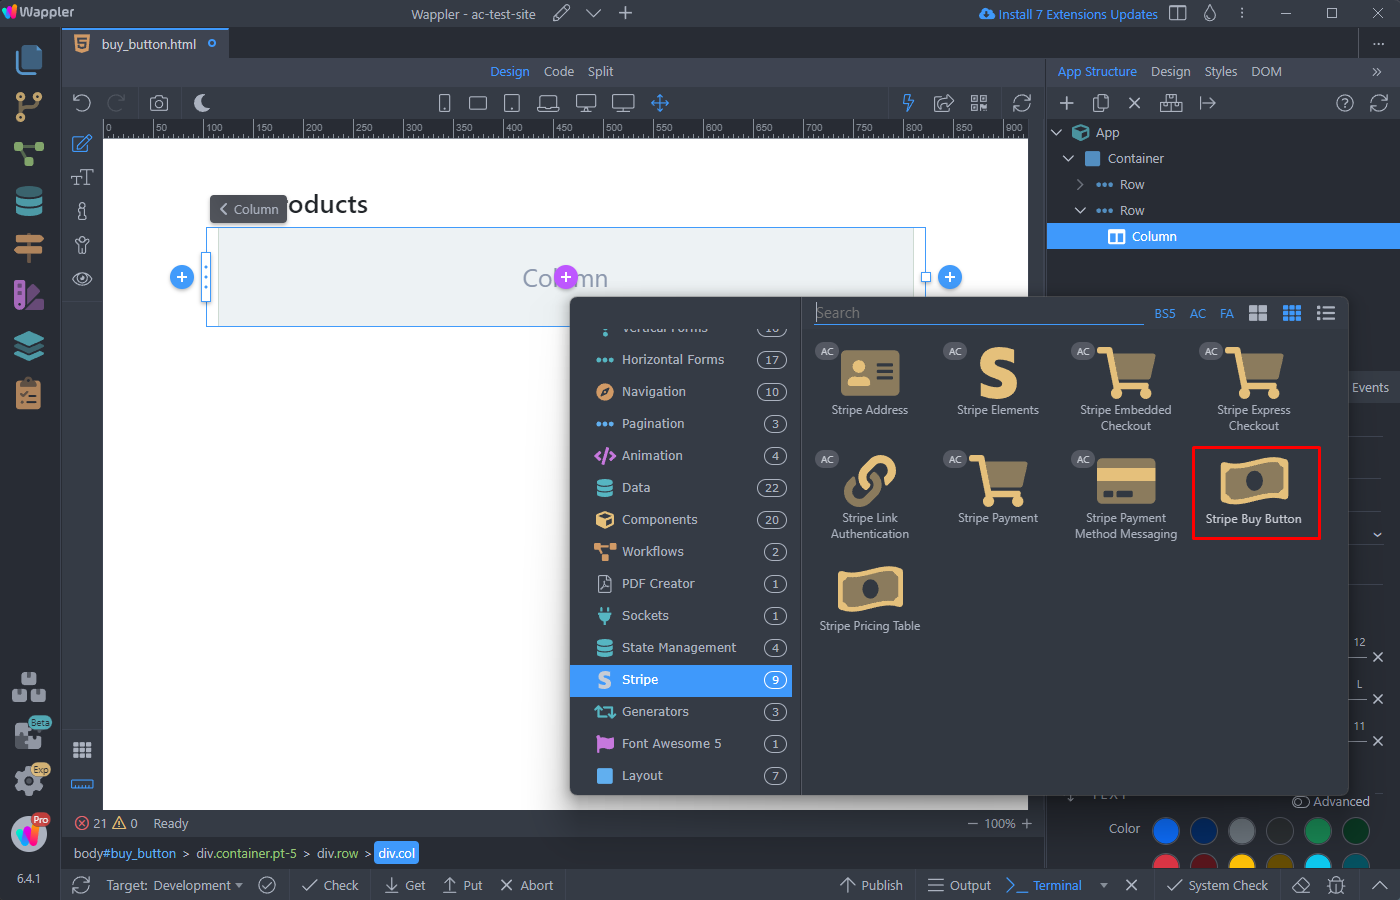
You can add your button on the page. Click the add new component button:

Select Stripe > Stripe Buy Button:
And paste your Buy Button ID and Publishable Key:
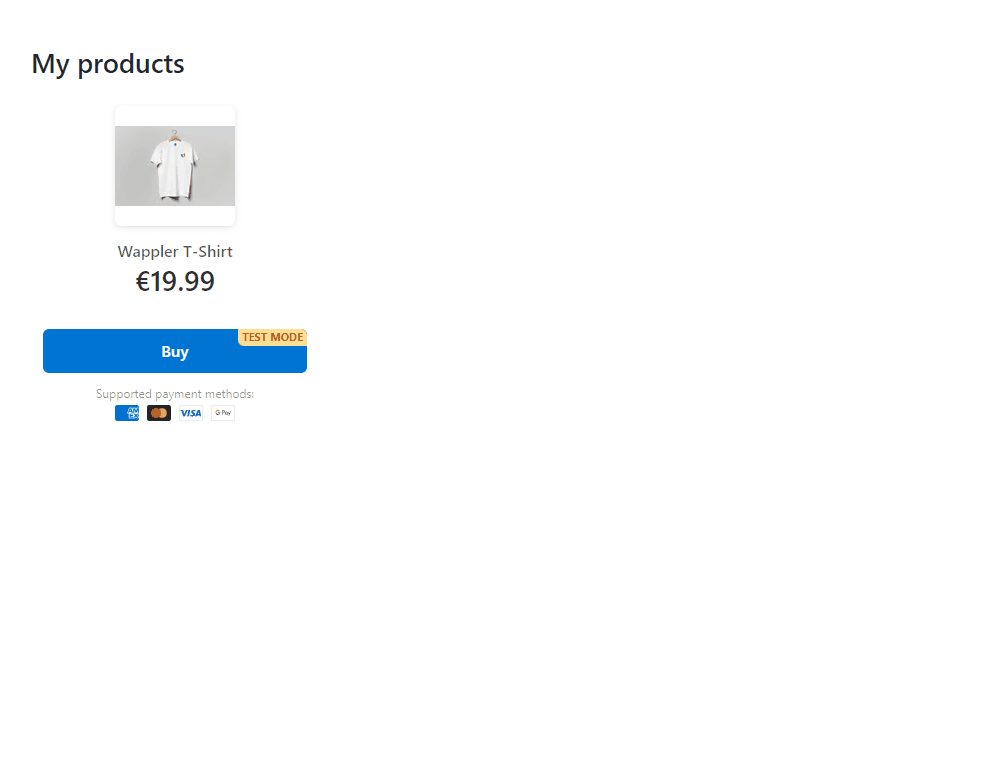
Save your page and you are done. Clicking the buy button on your page opens the Stripe hosted payment page and you can pay, using the payment method of your choise:
You can learn more about Stripe Buy Button on Stripe docs.