Intro
We’ve taken a big step forward in bringing AI-powered development to Wappler with the integration of GitHub Copilot. With this integration, users can now build entire pages in Design View by simply describing what they need. Whether it’s adding images, sections, buttons, or other elements, Copilot helps generate the structure instantly. In Code View, it provides intelligent suggestions to streamline development. This makes creating web pages faster, more intuitive, and more efficient.
And this is just the beginning - more AI integrations and features are coming soon!
GitHub Copilot requires a GitHub Account
Enable Copilot and the latest Claude Sonnet models for the best results in the GitHub Settings
GitHub Copilot is available for free in Wappler and requires only GitHub Copilot plan that can be also Free as well Pro for just $10 per month. See GitHub Copilot Plans
Enable GitHub Copilot
First you need a GitHub account.
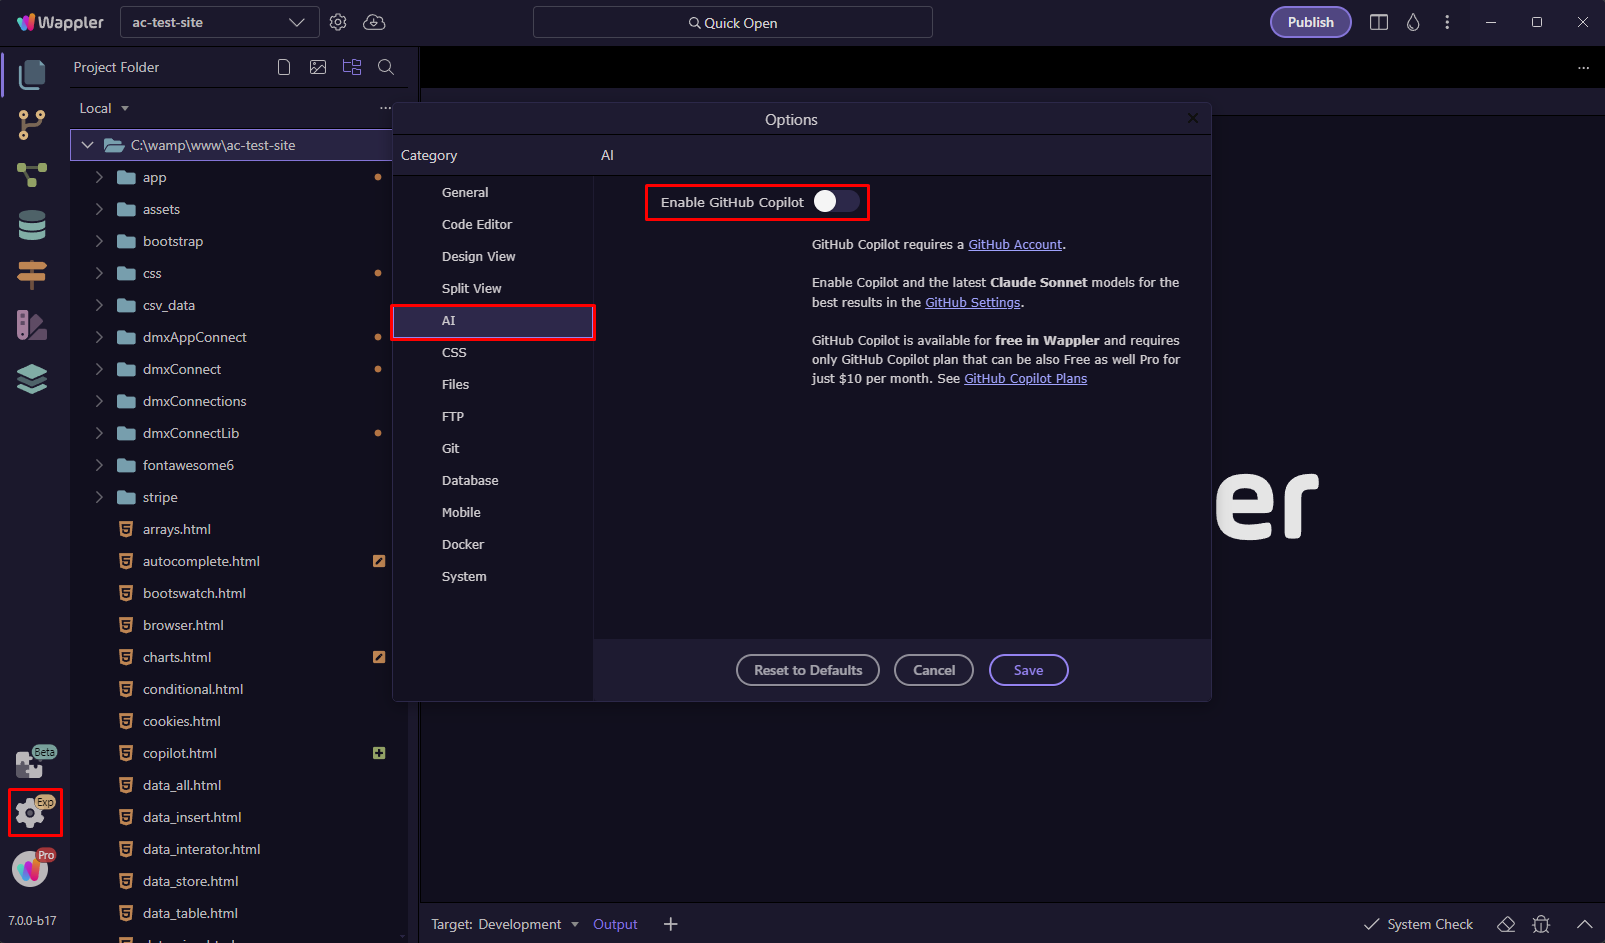
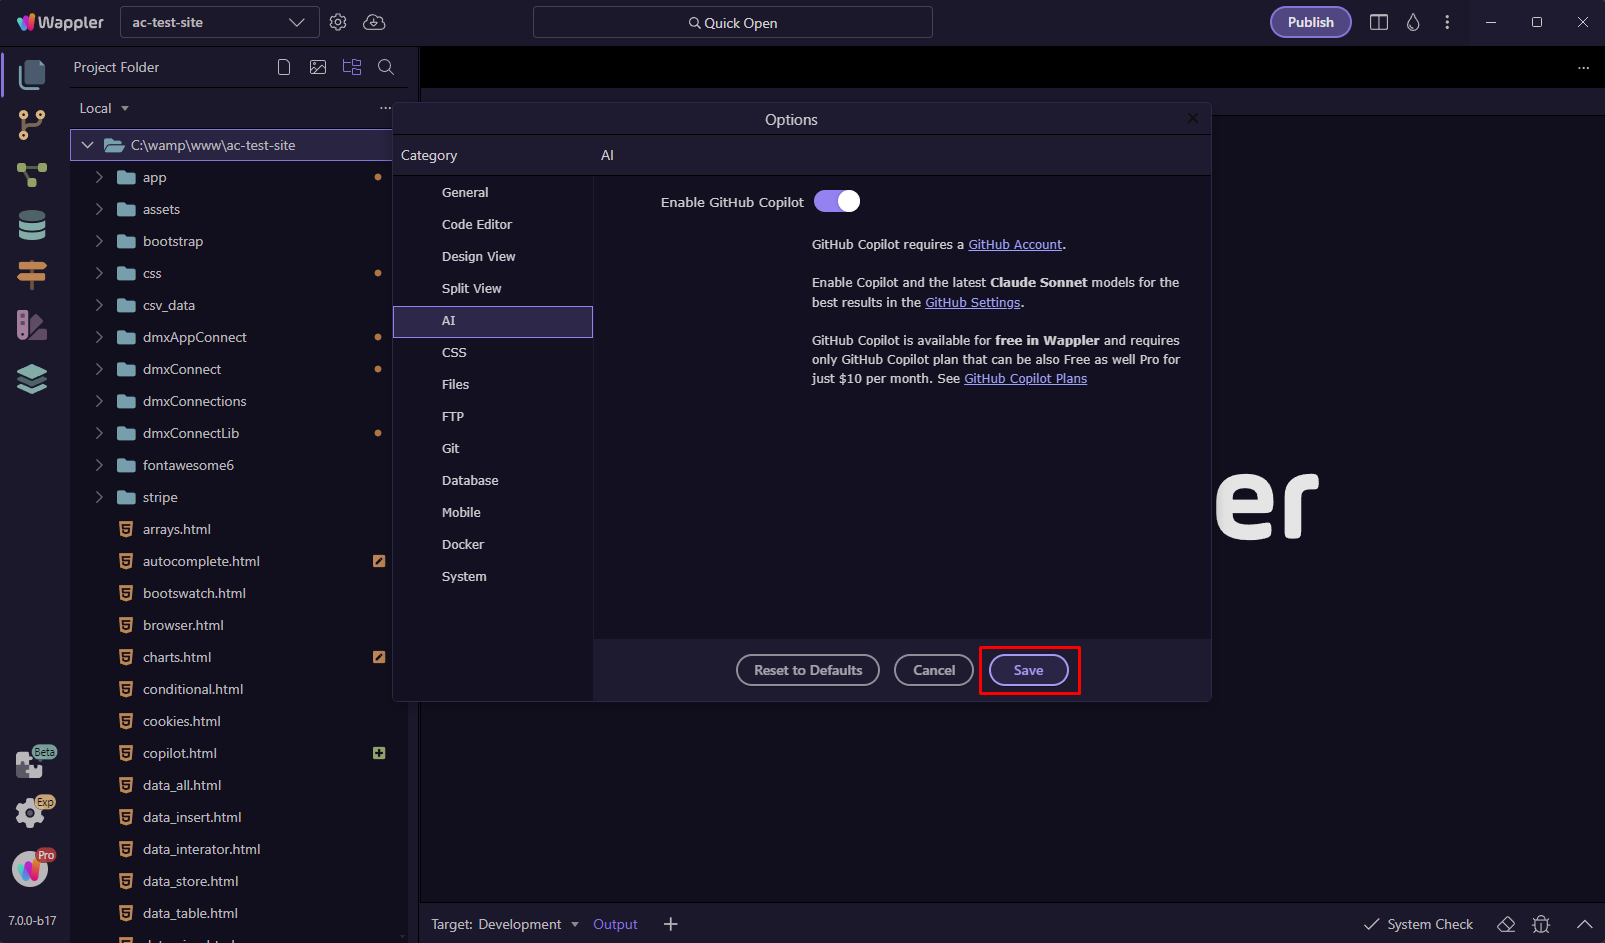
Open Wappler Options and go to the AI section. Enable GitHub Copilot:
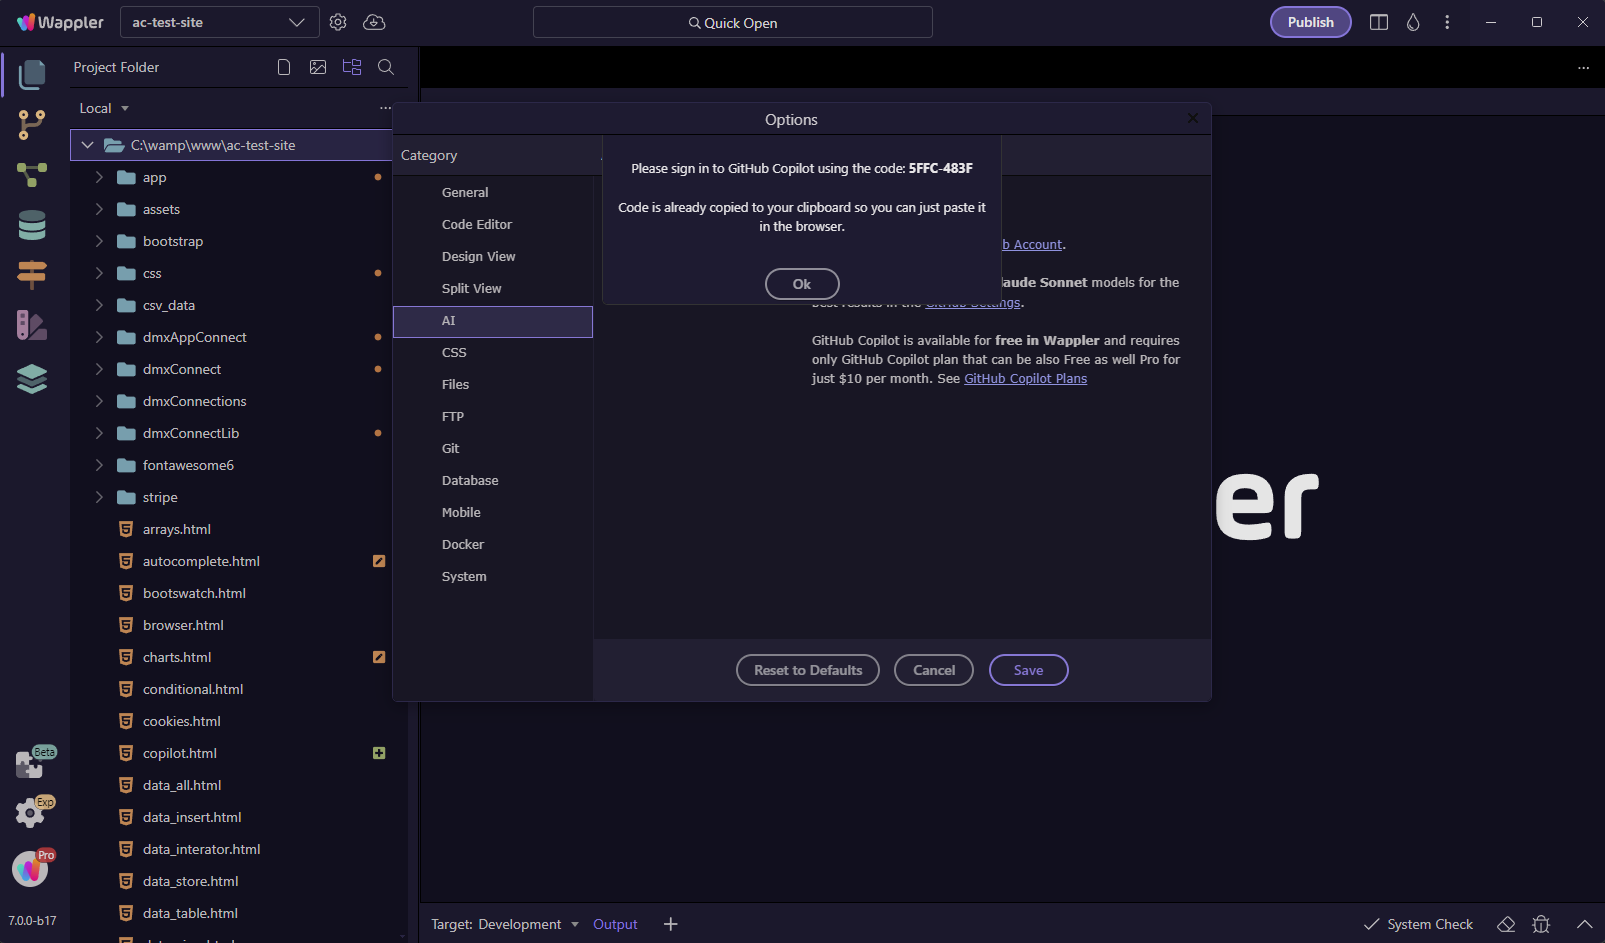
A notification showing and authorization code appears:
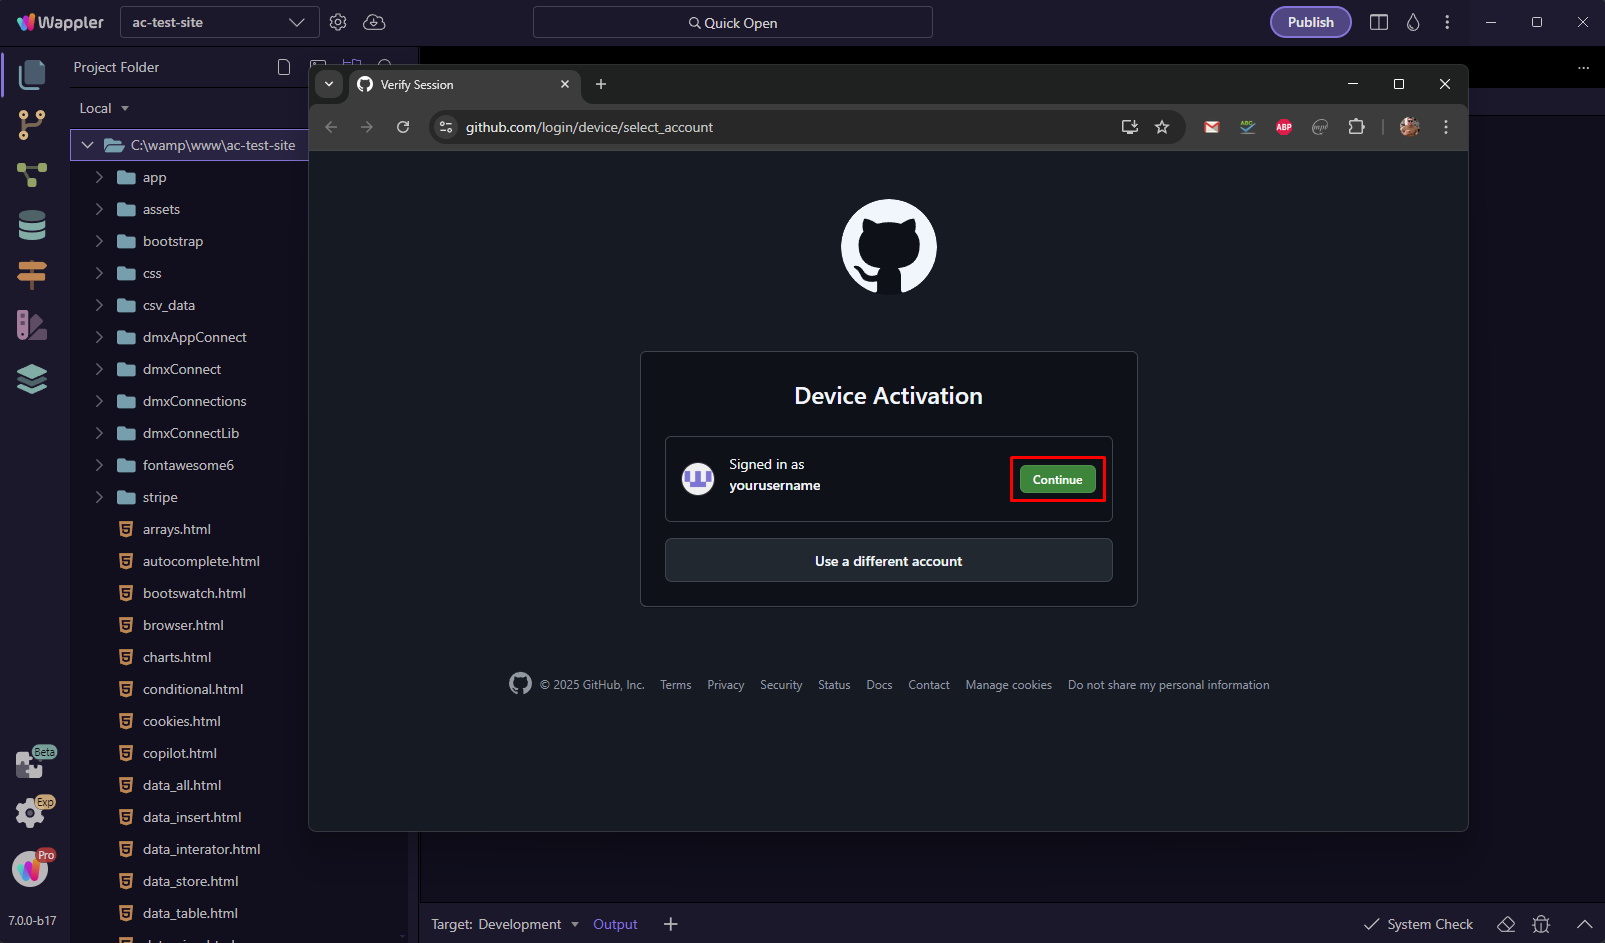
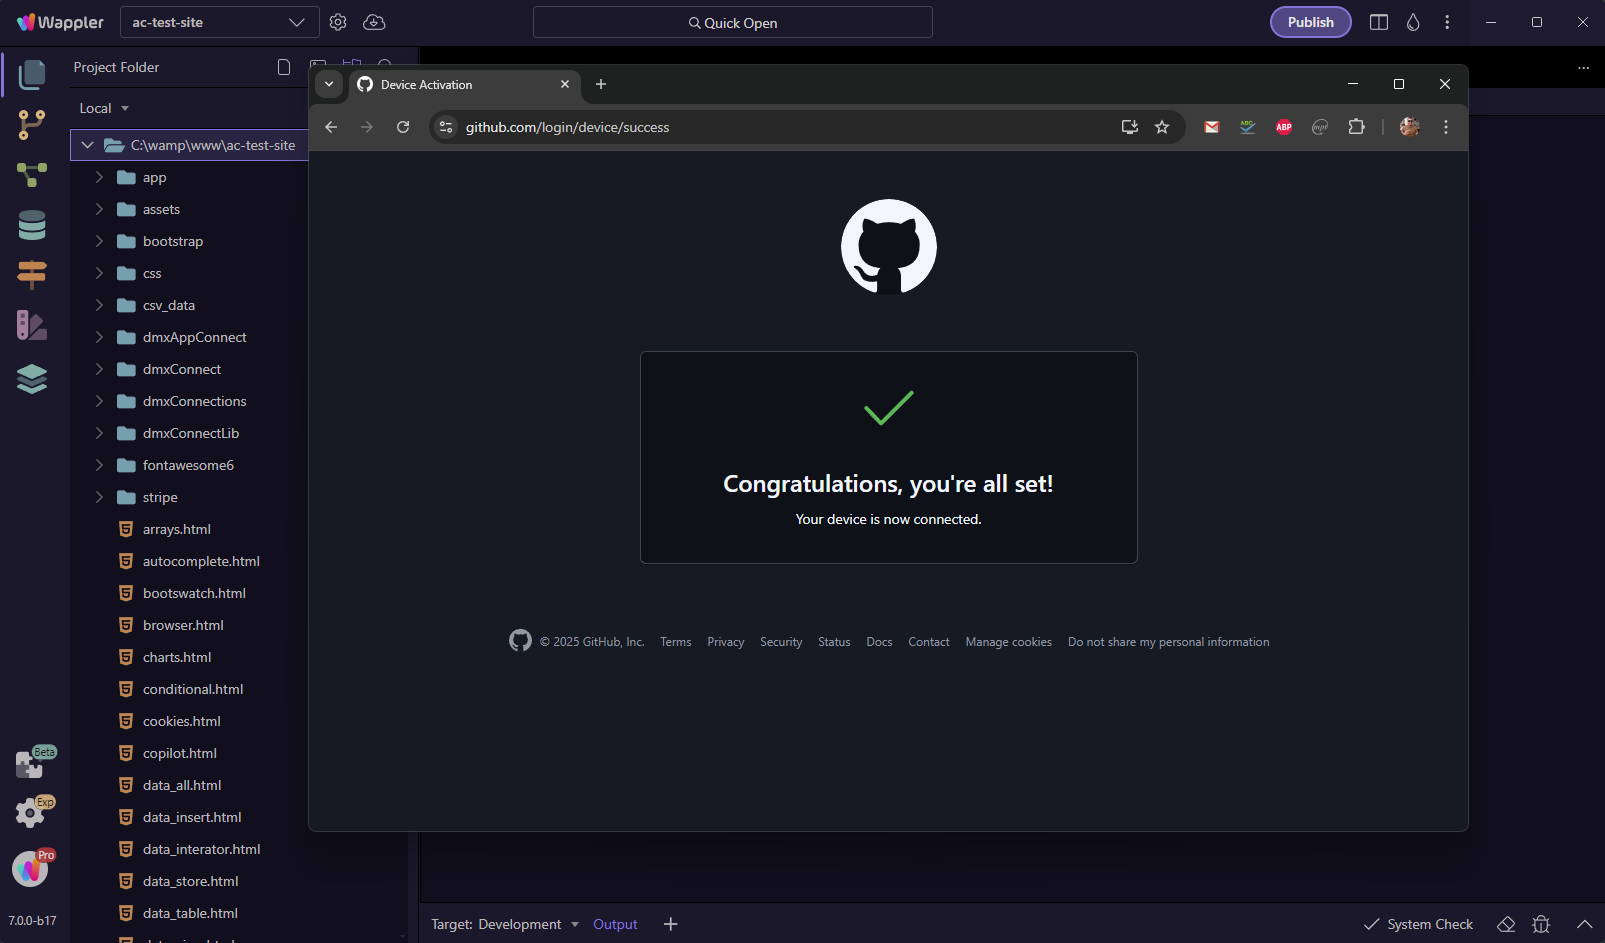
And the device activation page on GitHub is loaded in your browser. Click Continue:
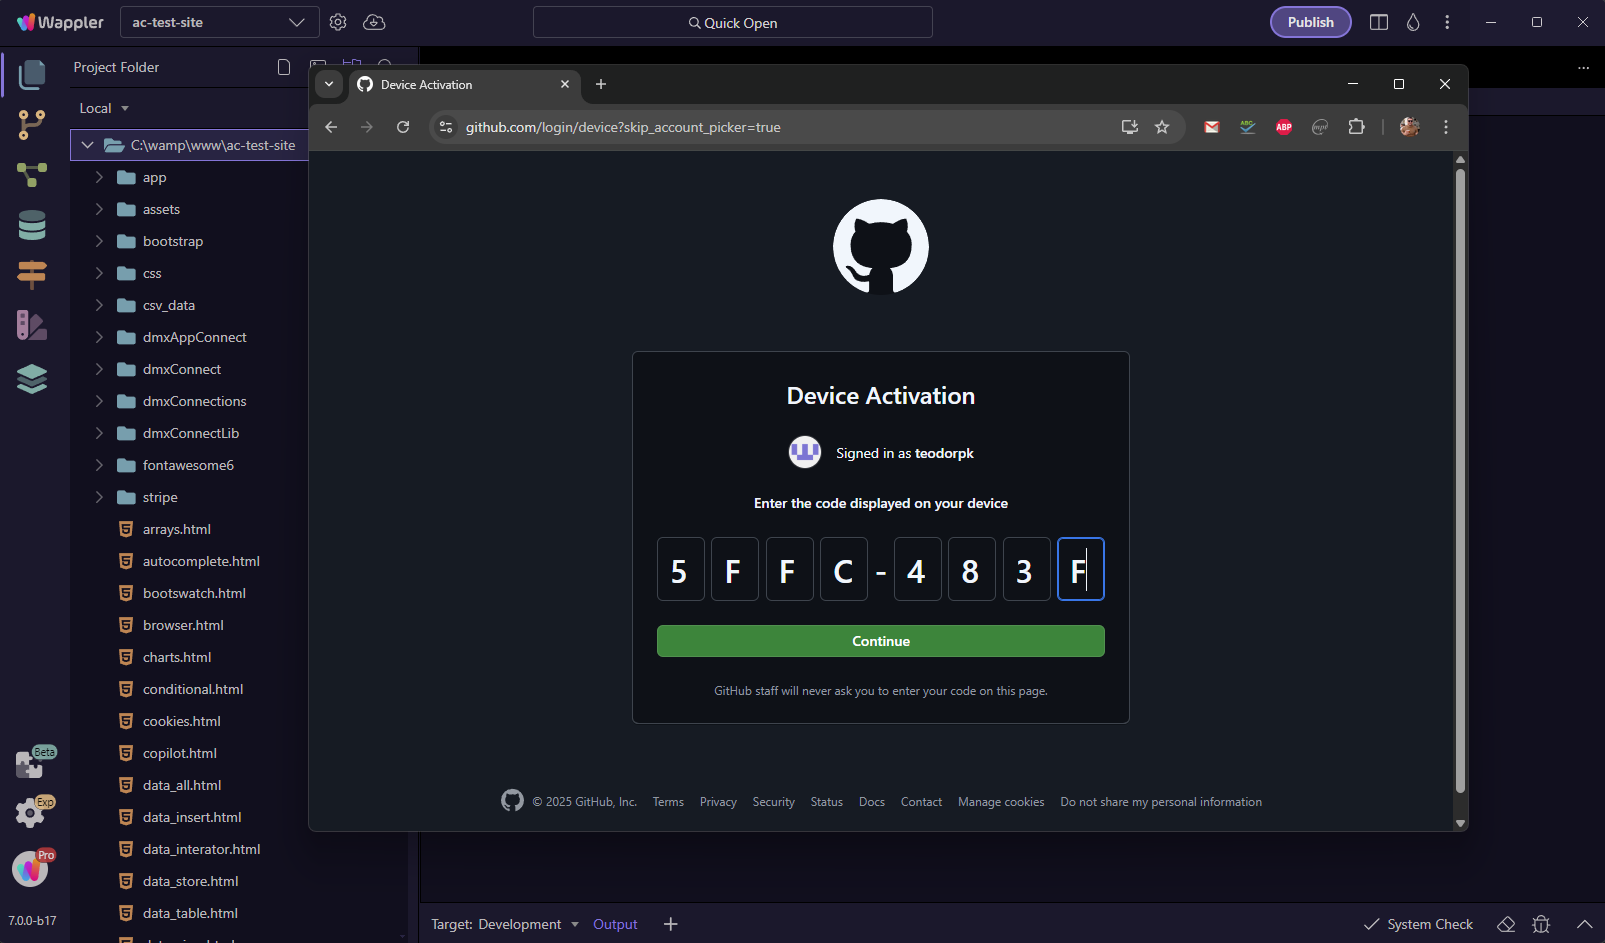
Enter or paste the code from Wappler options:
And then click the Authorize GitHub Copilot Plugin button:

And we're done:
Click Save in Wappler options:
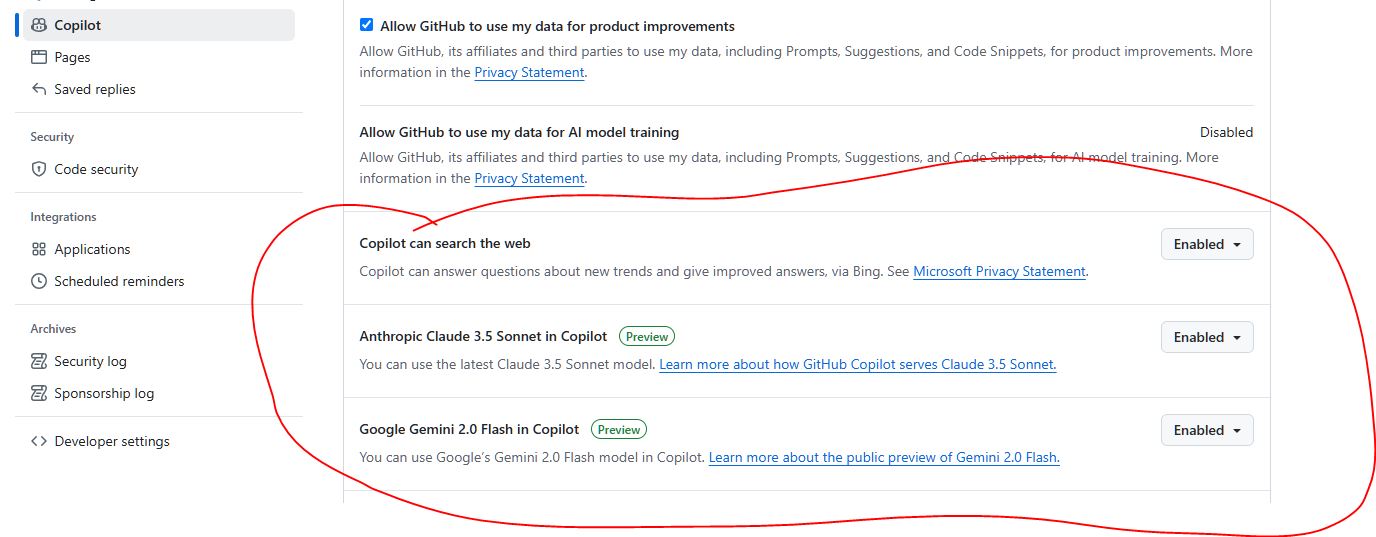
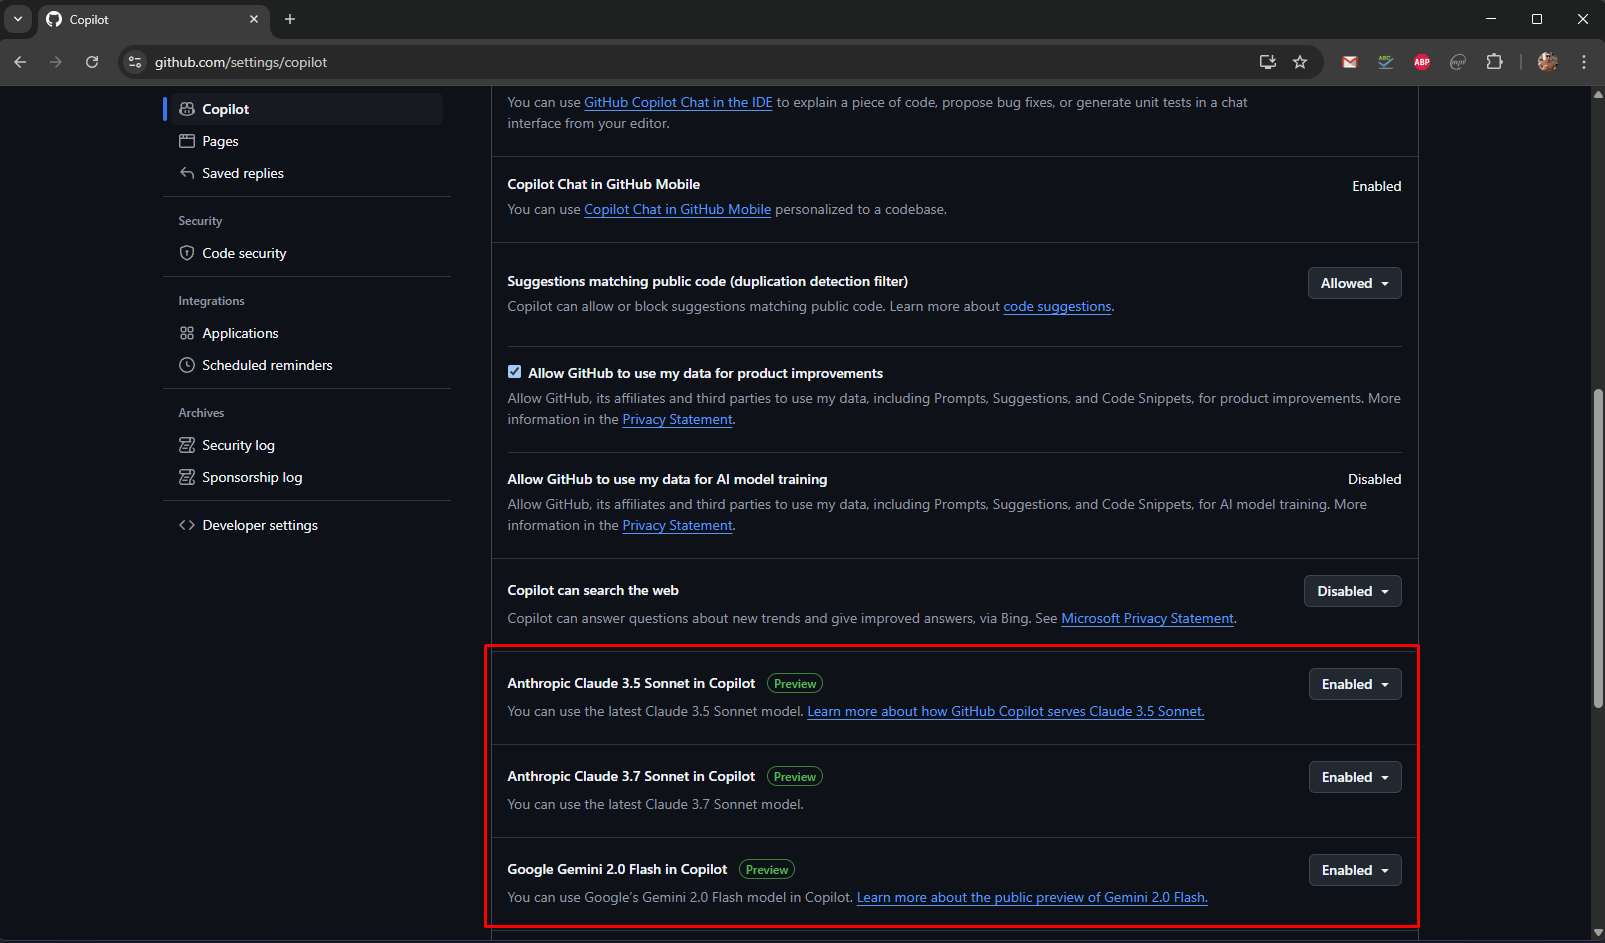
And go to github copilot settings. Make sure to enable the latest Claude Sonnet models for the best results:
Creating Page Layout using AI
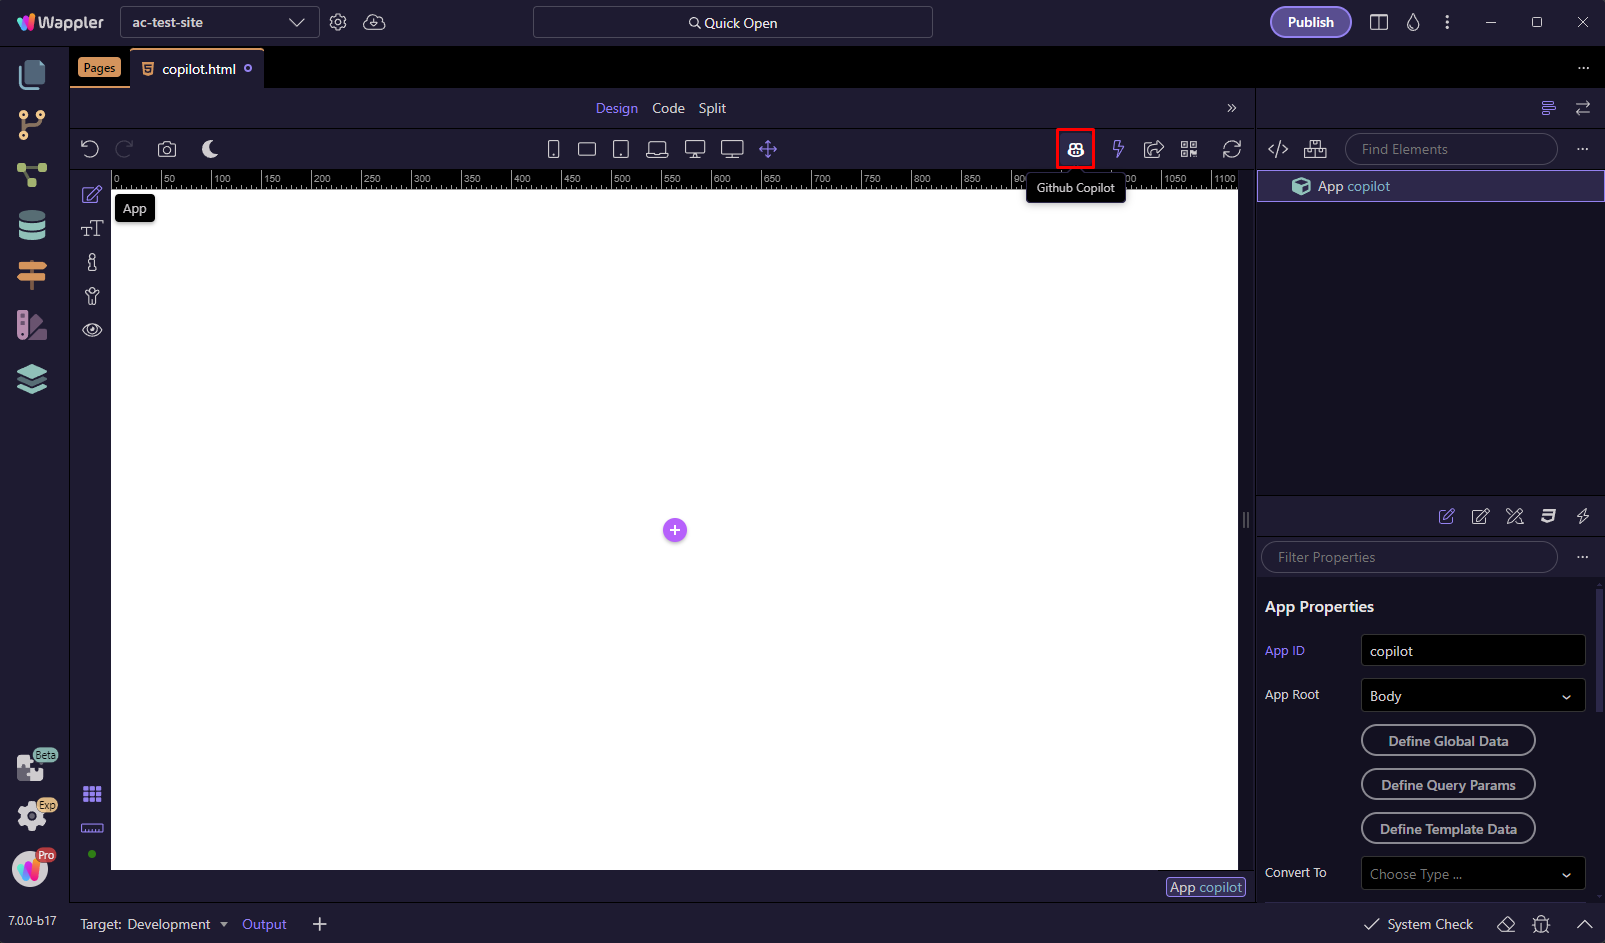
Let's create a page layout in Wappler Design View, using AI.
We open a blank page and click the GitHub Copilot button:
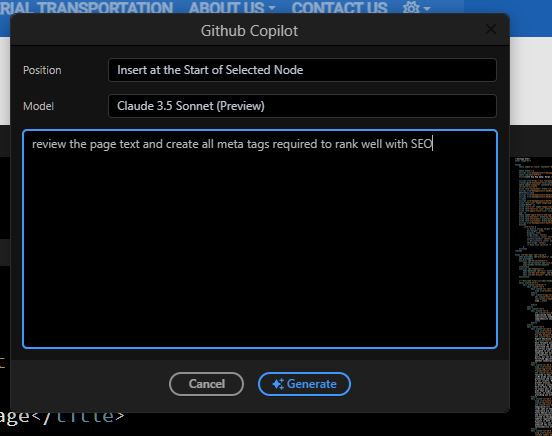
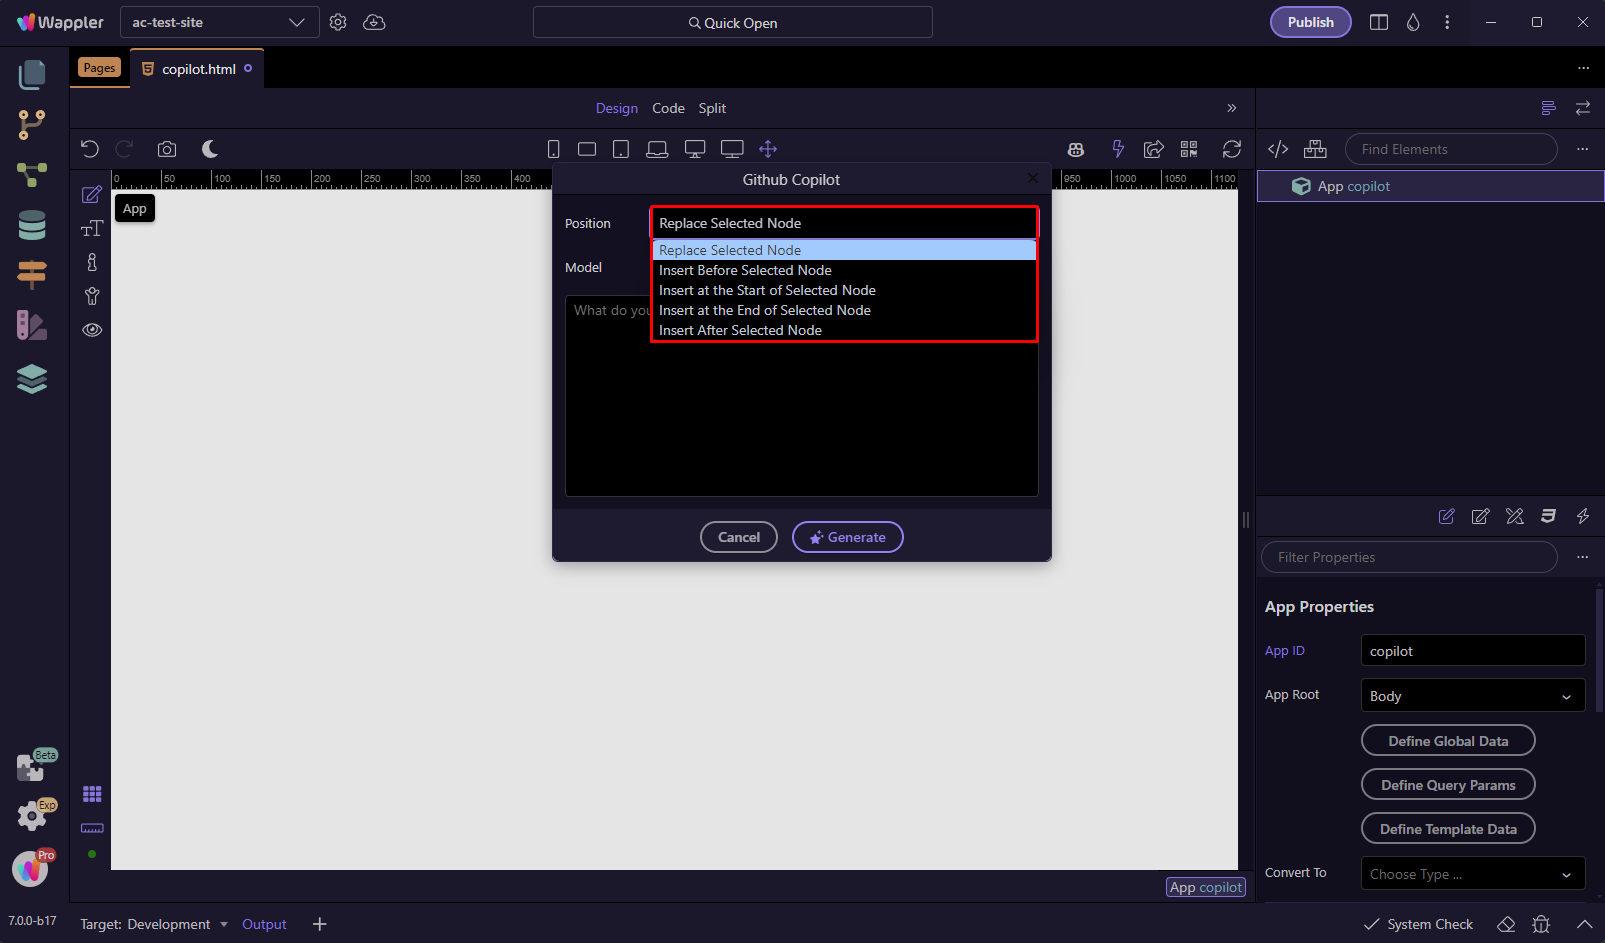
Select where to insert the generated code - before, after or inside the selected element/node:
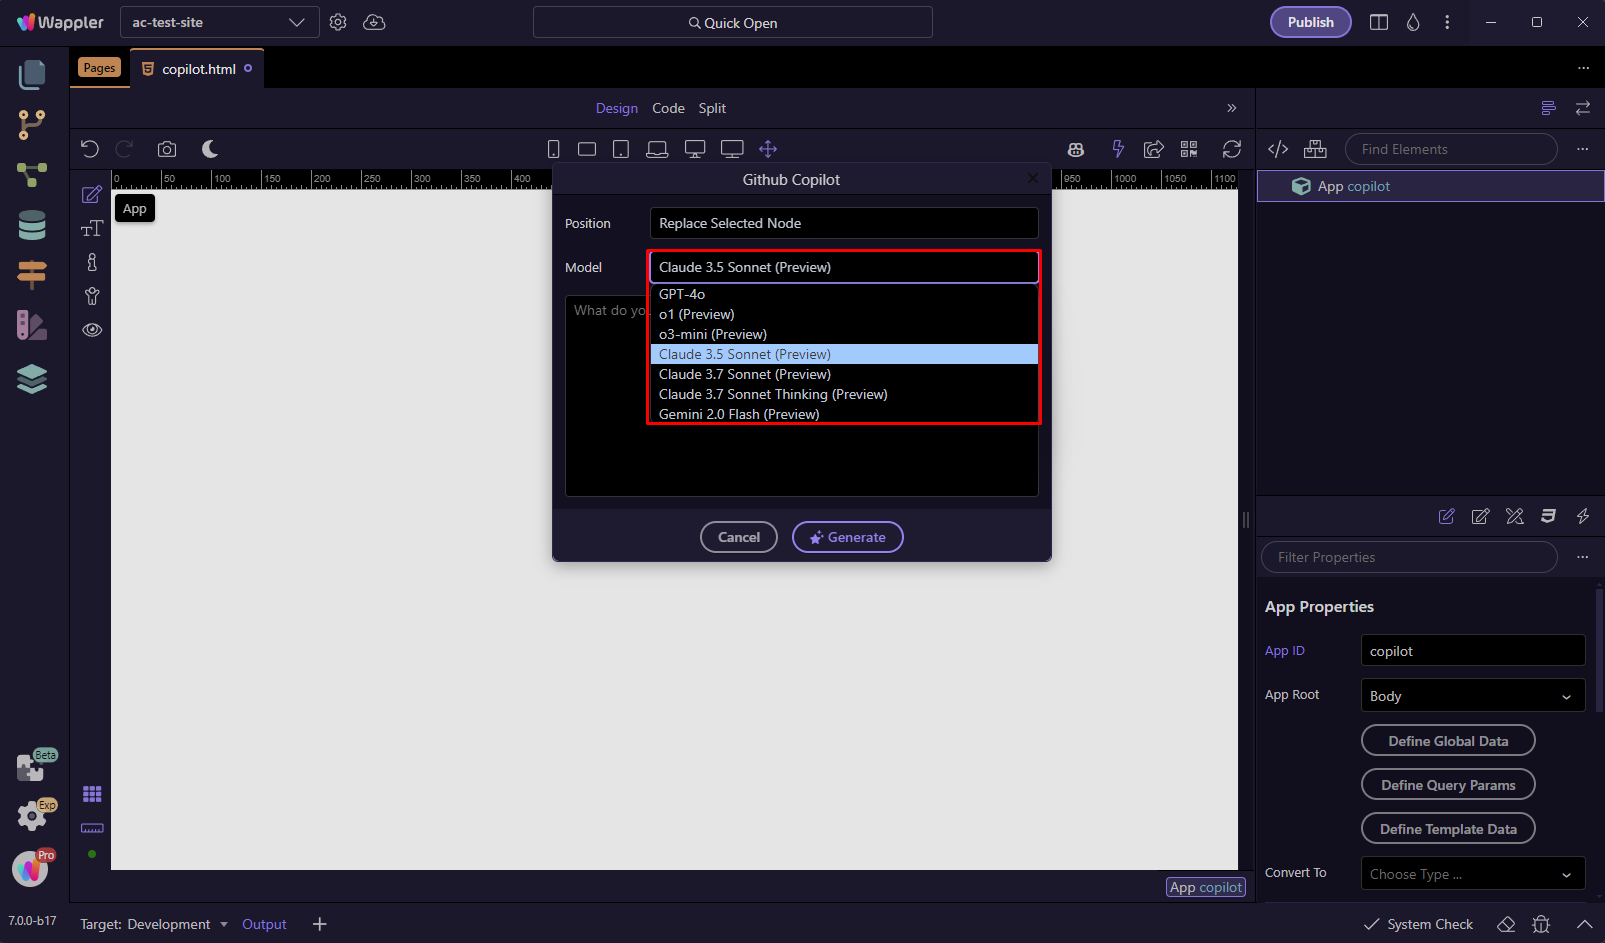
Then select the Model to use. We select the Claude 3.7 Sonnet, as it is really advanced:
Enter your prompt and click Generate. The prompt we used is
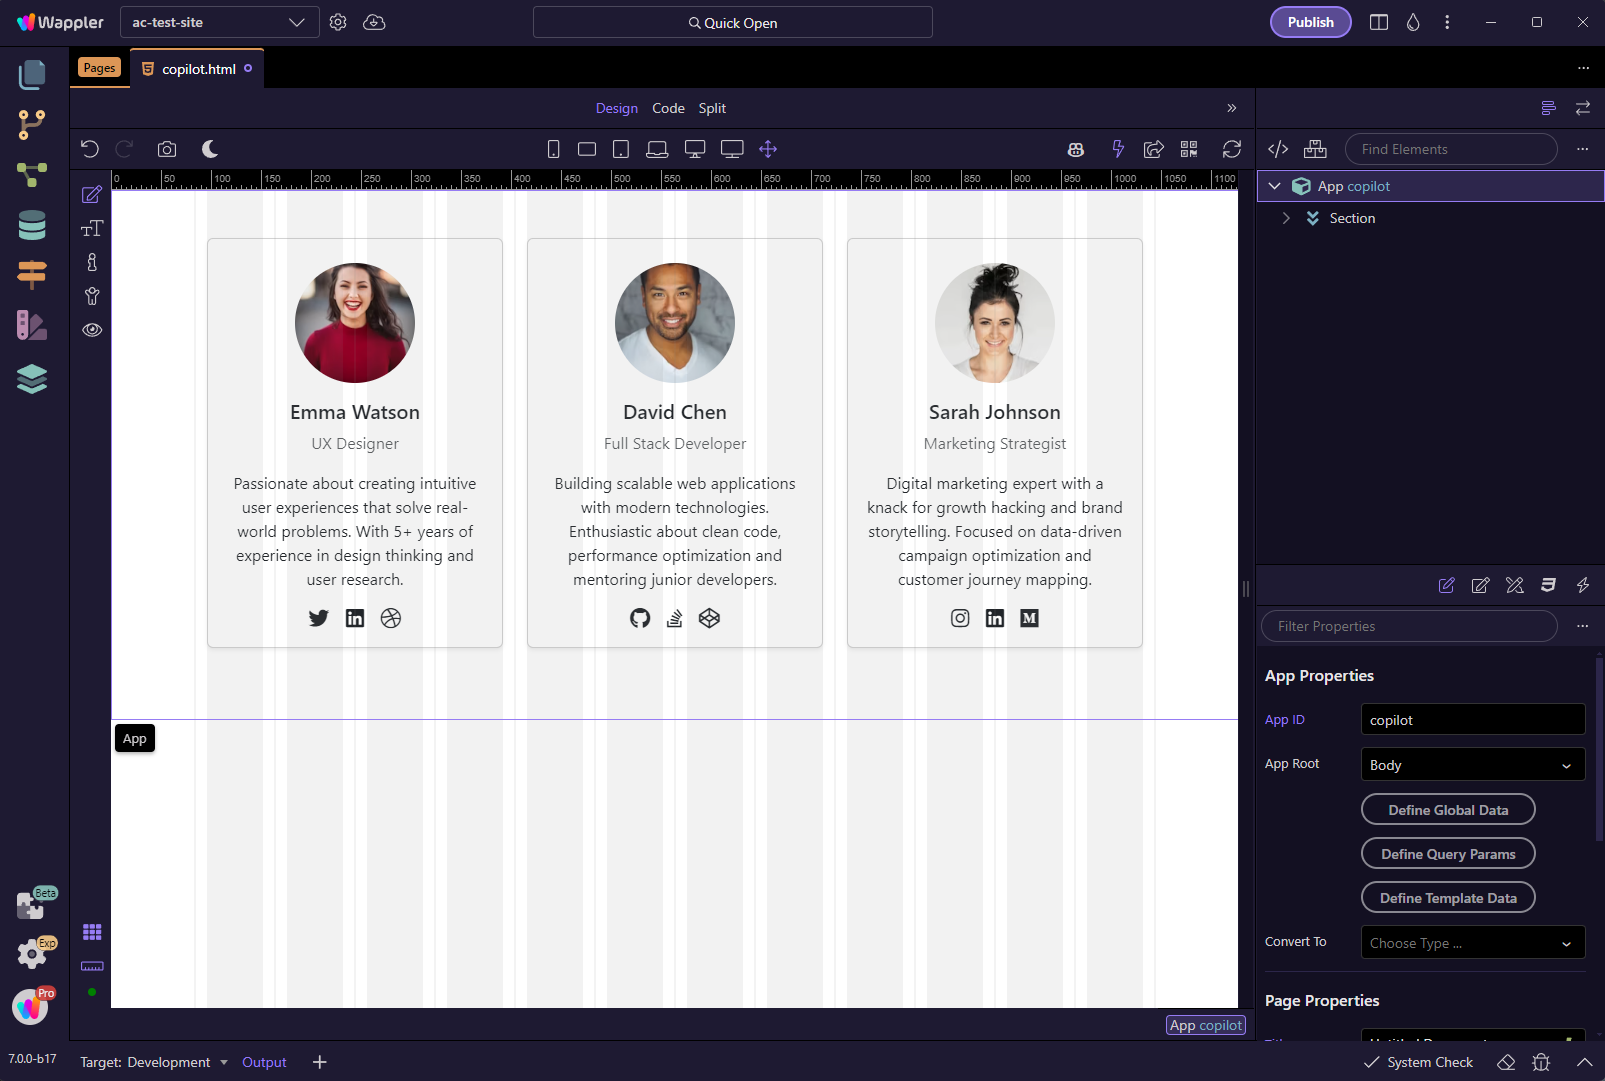
Create a section with 3 user profile cards with an avatar, name, designation, short bio, and social media buttons for the user:

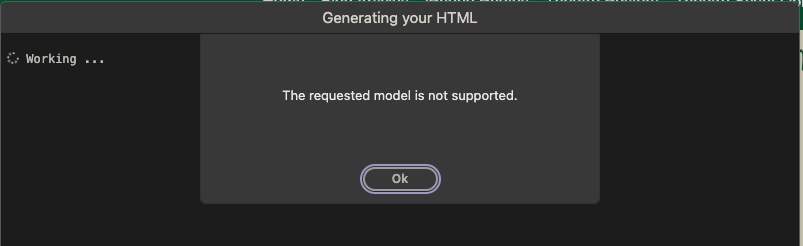
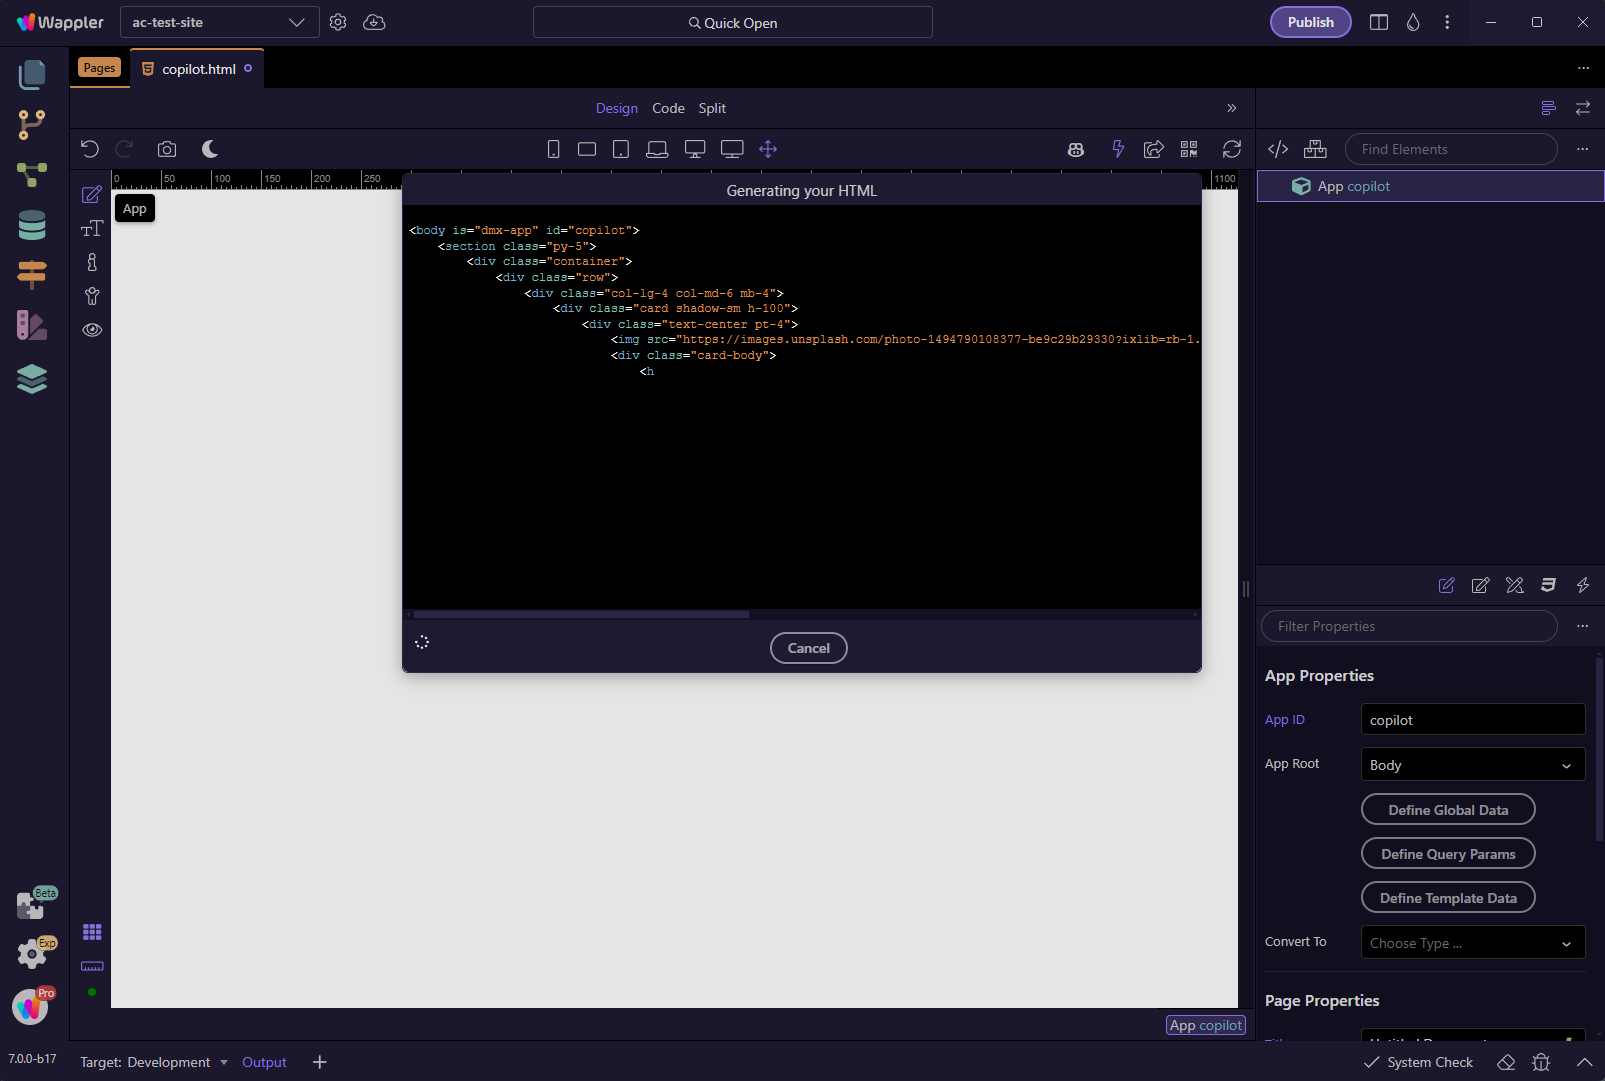
You can see the code being generated:
And in a few seconds the result is on your page:
You can inspect the elements in the App Structure, and adjust them as you normally do:
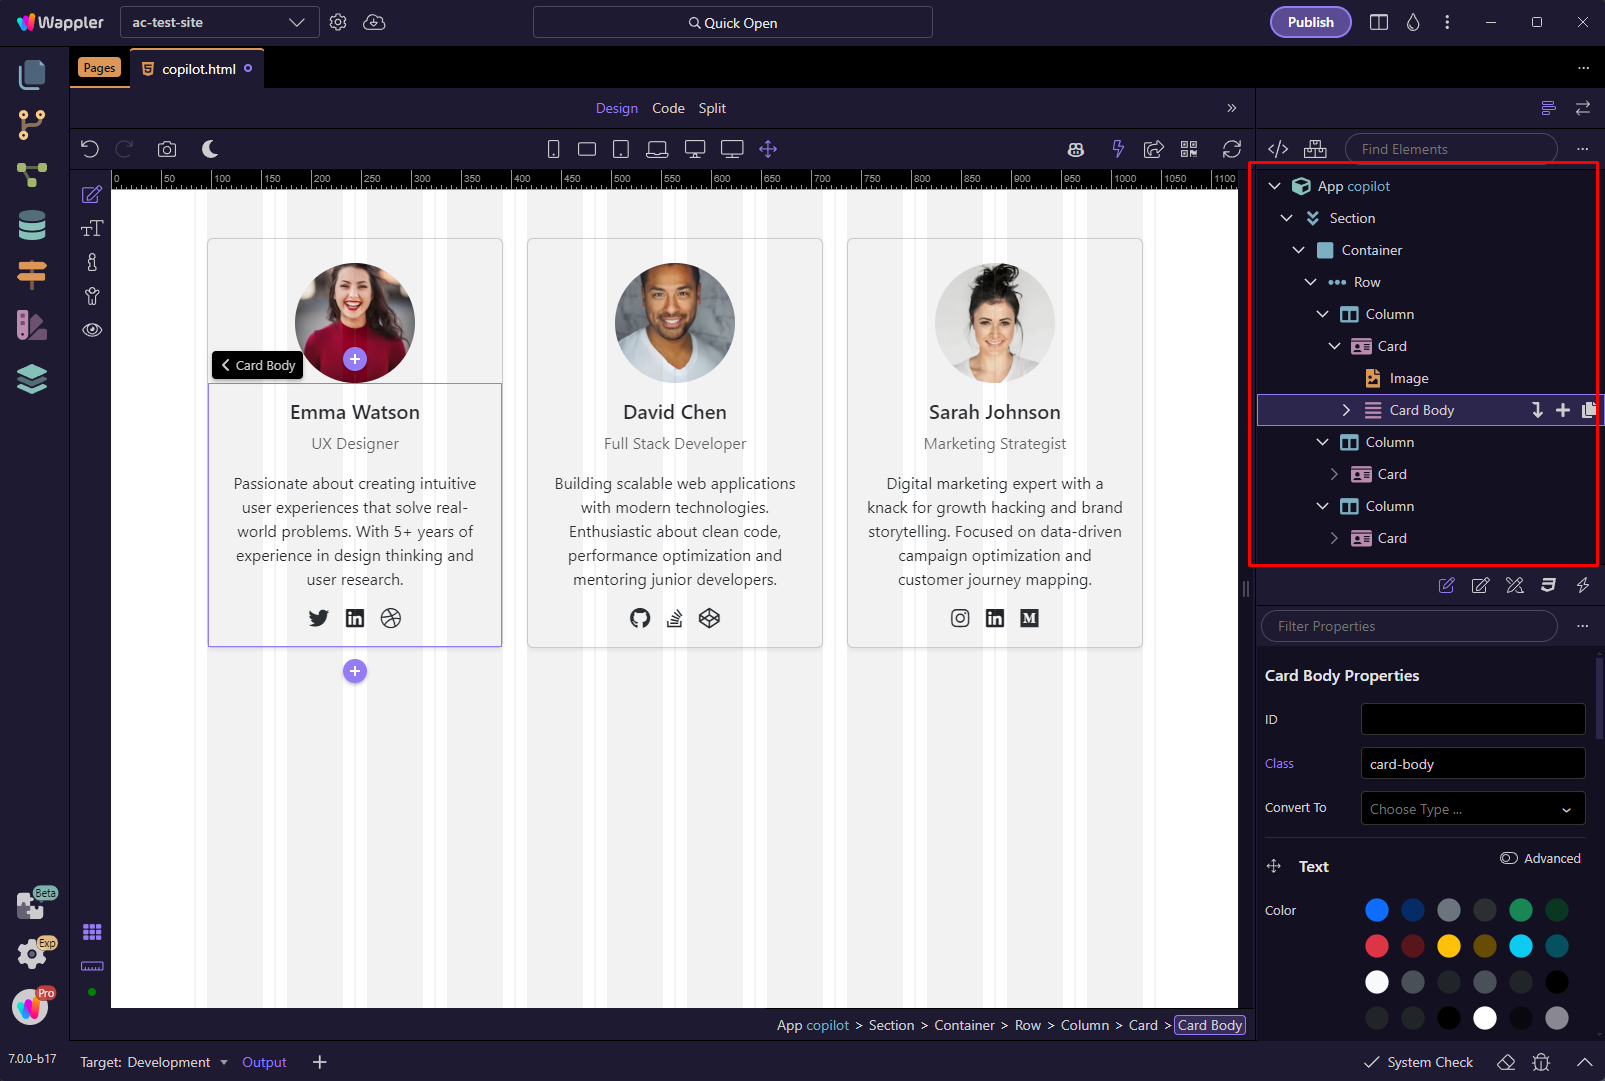
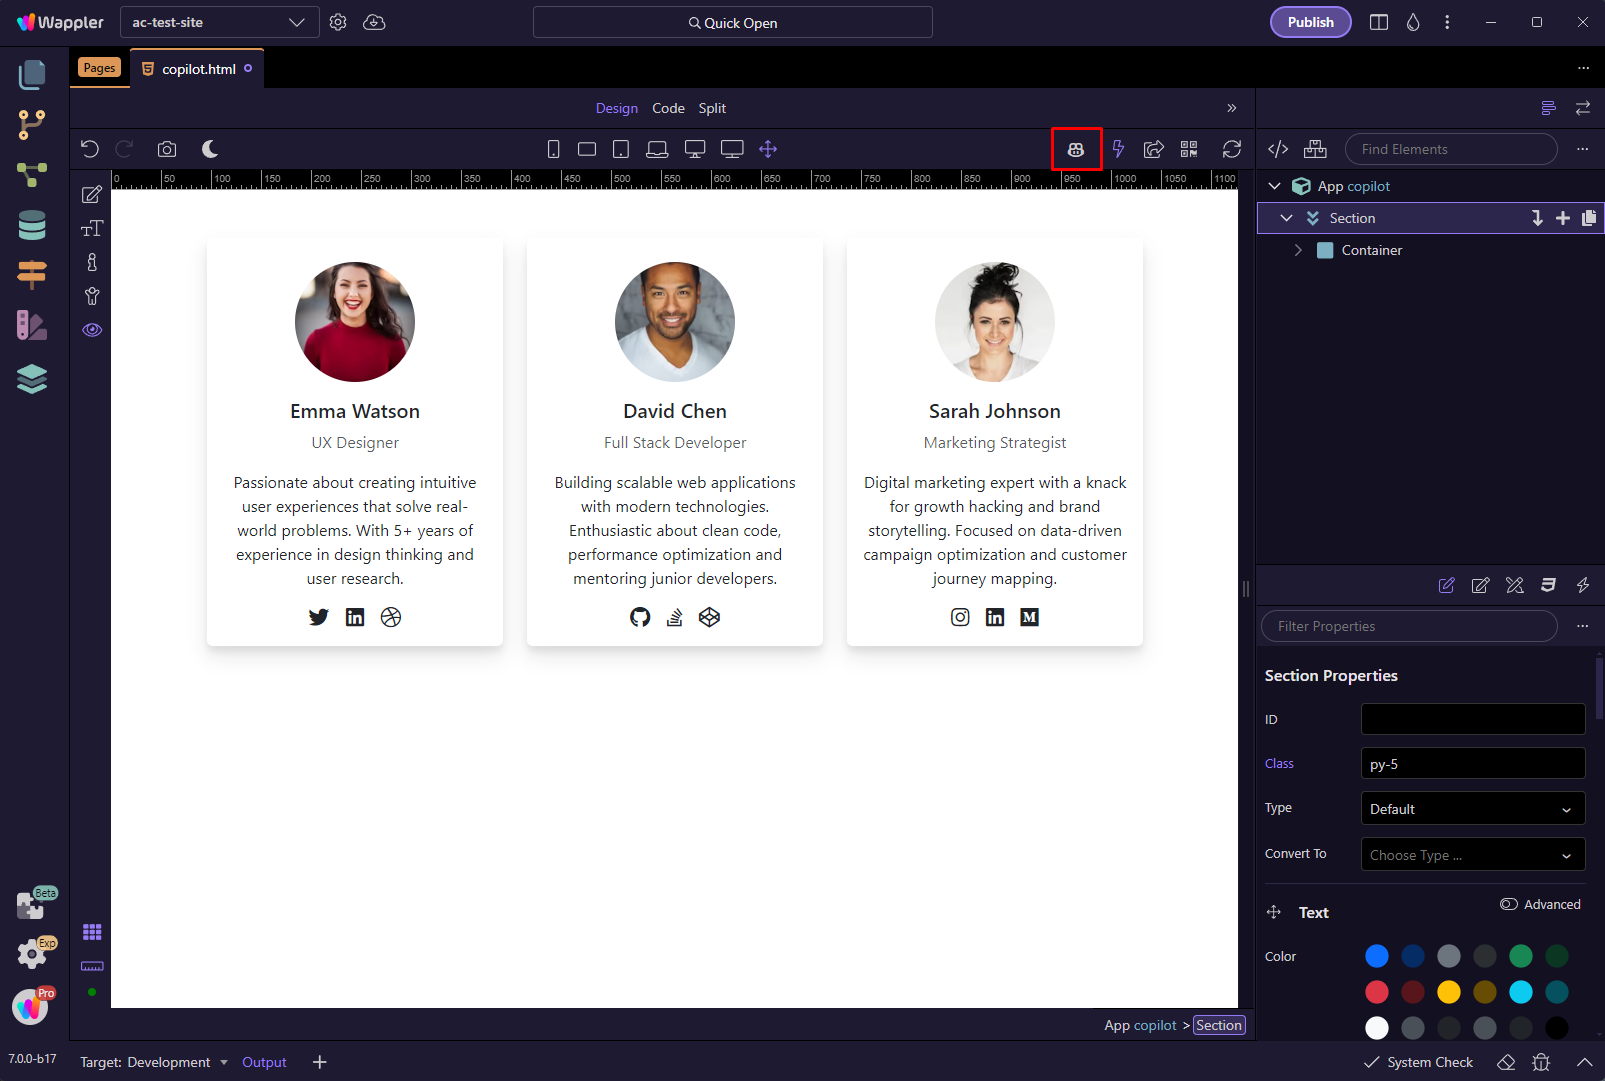
Let's edit the generated layout. Select the section that was added and click the Copilot icon:
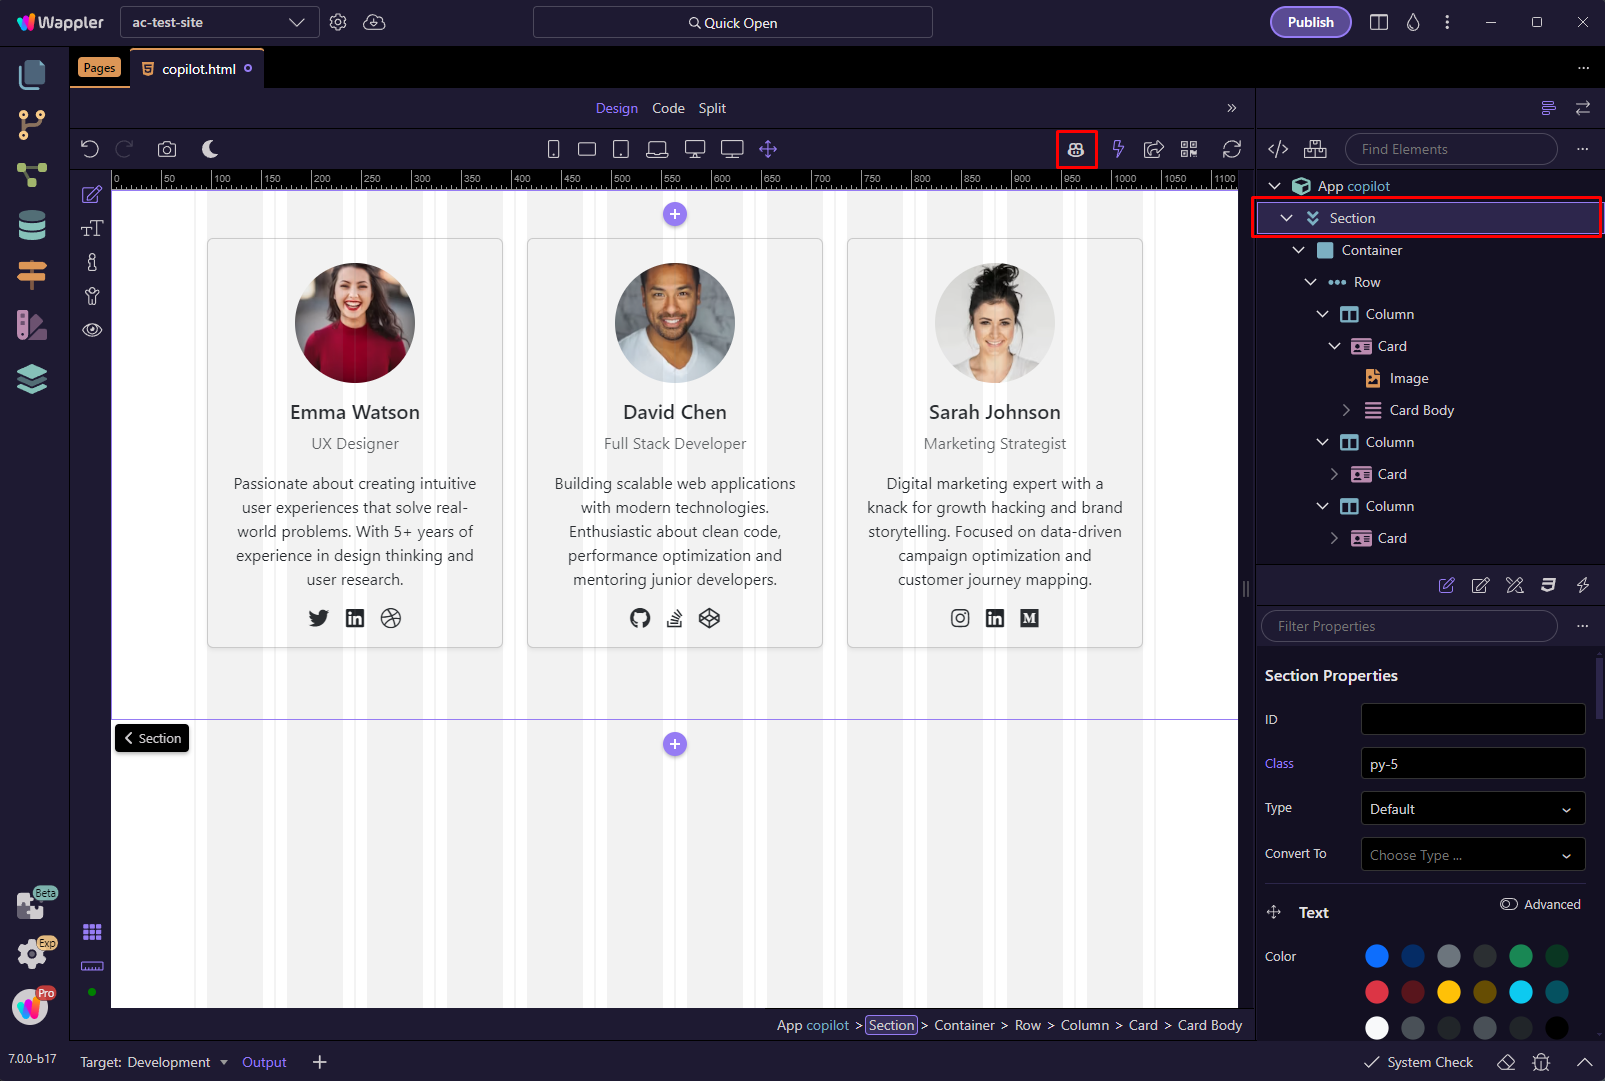
Let's change the design a bit.
Set the position to Replace Current Node and enter the following prompt:
Add depth effect with more shadows and remove the border around the cards. Also add hover effect to the cards

And here are the results:

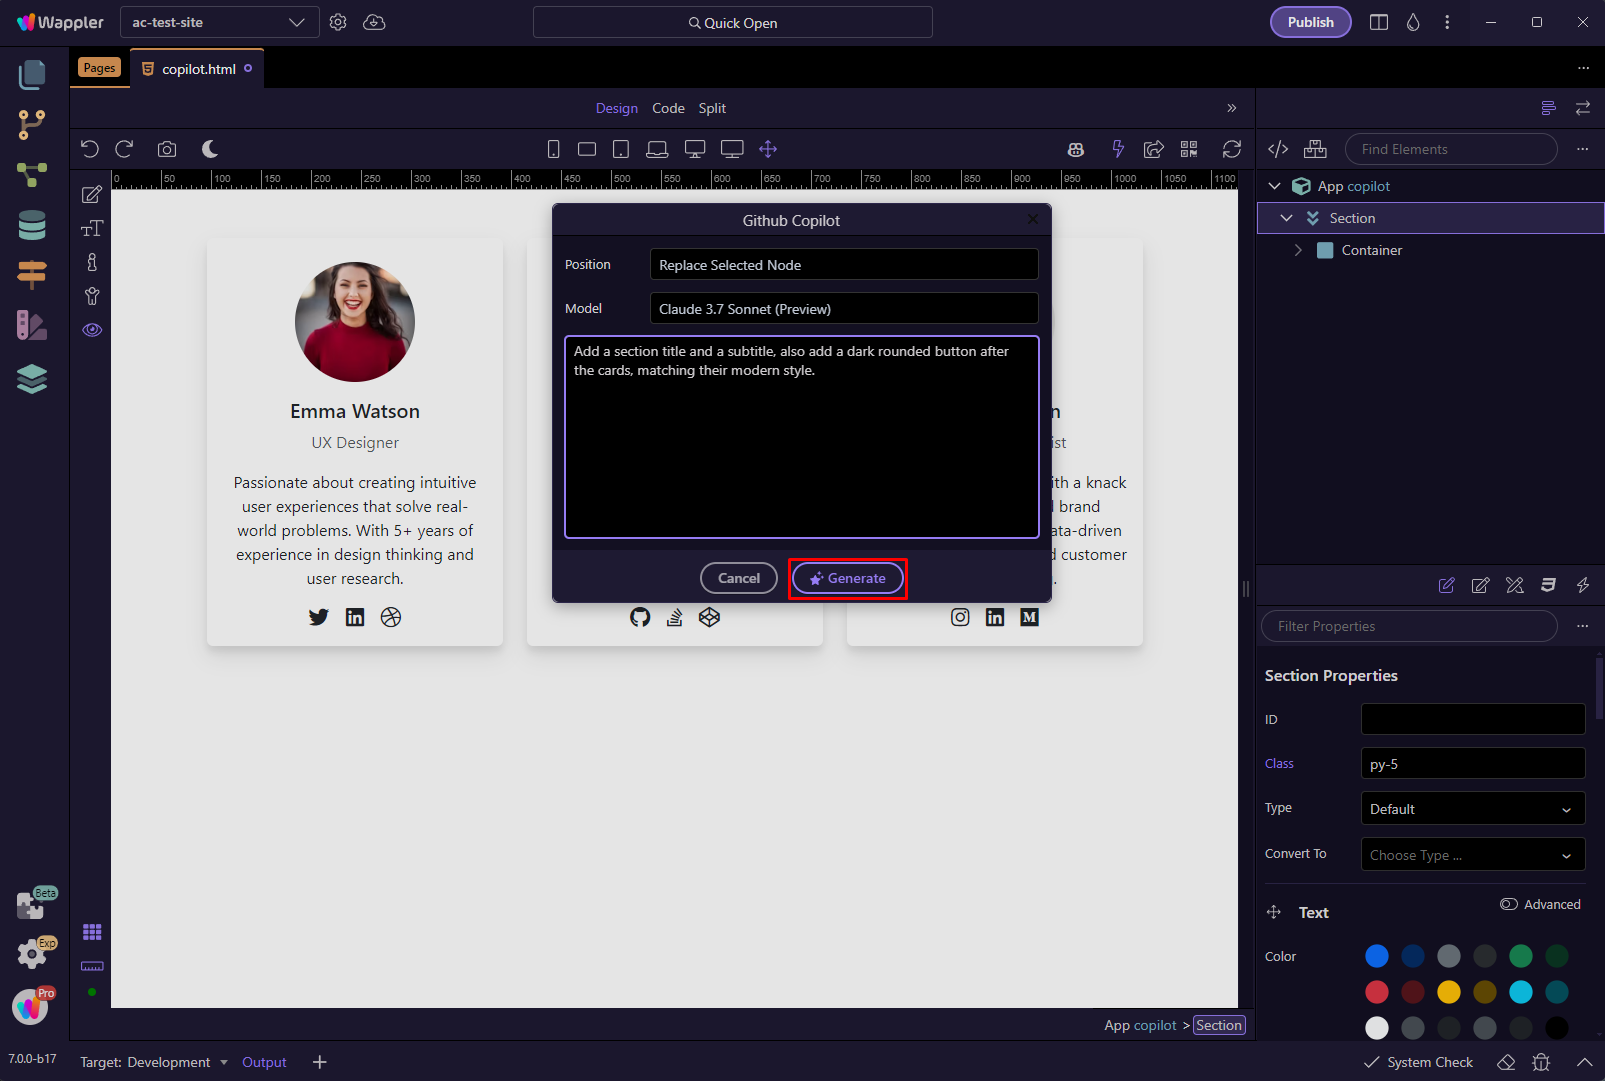
Finally we want to add title and a button for this section. Select the section and click the Copilot button:
Set the position to Replace Current Node and enter the following prompt:
Add a section title and a subtitle, also add a dark rounded button after the cards, matching their modern style.
And here's the result:


You can see how easy we created a nice looking page with just a few prompts using GitHub Copilot.
Please let us know what do you think about the AI Integration in Design View.