Variation on Send Email workflow?

I don’t understand this –

SELECT username, street, city where akm_id= {{security provider identity}}

is this what you mean as another conditional query after the log-in is successful?

Besides, the akm_id is just the auto_increment value – yes, a key id for today.

But what if the table is regenerated with a new akm_id for each record?

the USERNAME is the Unique Value that will stay the same no matter how the table is jiggered with. The akm_id is really independent of the records themselves – it just placeholds for counting & yes, retrieving a record if you know its akm_id

But the most important value is the Unique ID for that business.

And if I export records from this table the akm_id is extraneous, irrelevant & not useful if I wan to recreate the table after records have been pruned, for instance.

The auto-generate id field certainly doesn’t need that akm_id – allowing also to rename that key id to correspond to the actual table name if it is changed.

Yeah, thats what i mean.

Im going to make a quick video, maybe that will clarify a few things, give me a few moments, its not going to be an official video, just a random one.

2 Likes

The way I do this is to create Server Actions that are secured. In other words, no one BUT the logged-in user can retrieve the information. On each page that this data is required, I place the data source (Server Connect) and the data is available to the logged in user. This can be extended for personal information or for information specific to his part of the application.

To see what I mean, go to https://docs.wappler.io/t/getting-details-of-the-logged-in-user-and-binding-them-to-your-page/2850

Edit: In the same manner, server side data can be secured for a group of users as opposed to another group of users, all on the server.

2 Likes

Do you or hyperbytes already possibly have a video on this step Ben

1 Like

I do not think that one (video) exits. But here is an example where I have filtered the orders so that the data can only be seen by the logged in user. I have done the same for the logged in user details.

Edit: I should have written that the data relevant to the customer can only be seen by the customer. Same as with the customer details. All other data remains hidden behind a secure wall. How I love Wappler.

1 Like

@NewMedia, it took some time to get around to it, but here it is

Incredible! I’m about to settle in to your Video, Paul

But before I go to that I must ask an important question regarding the task I have today – Sunday.

I have a Login page with Security Provider that is working.

Here’s the Order –

Logn.php – security protected – On Success redirects to –

Events.php – protected

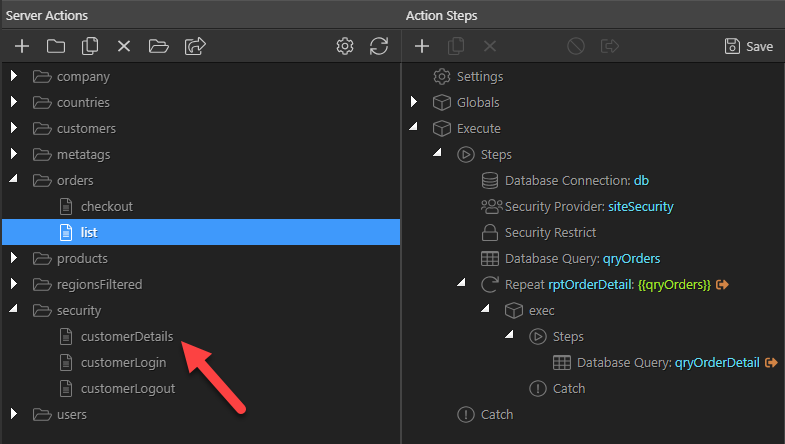
This is the output of a query to the “events table”
looping through picking up fields for each location record

Clicking on one of the Links (hotel name associated with city and date)
PASSES results of query into the URL of the next page that it calls for

as in – https://mywebsite/hotel/events_registration.php?event=2&pharmacyid=100008&eventhotel=Crowne%20Plaza%20Hamburg%20-%20City%20Alster&eventdate=Crowne%20Plaza%20Hamburg%20-%20City%20Alster&eventdate=17-03-2020&eventcity=Hamburg

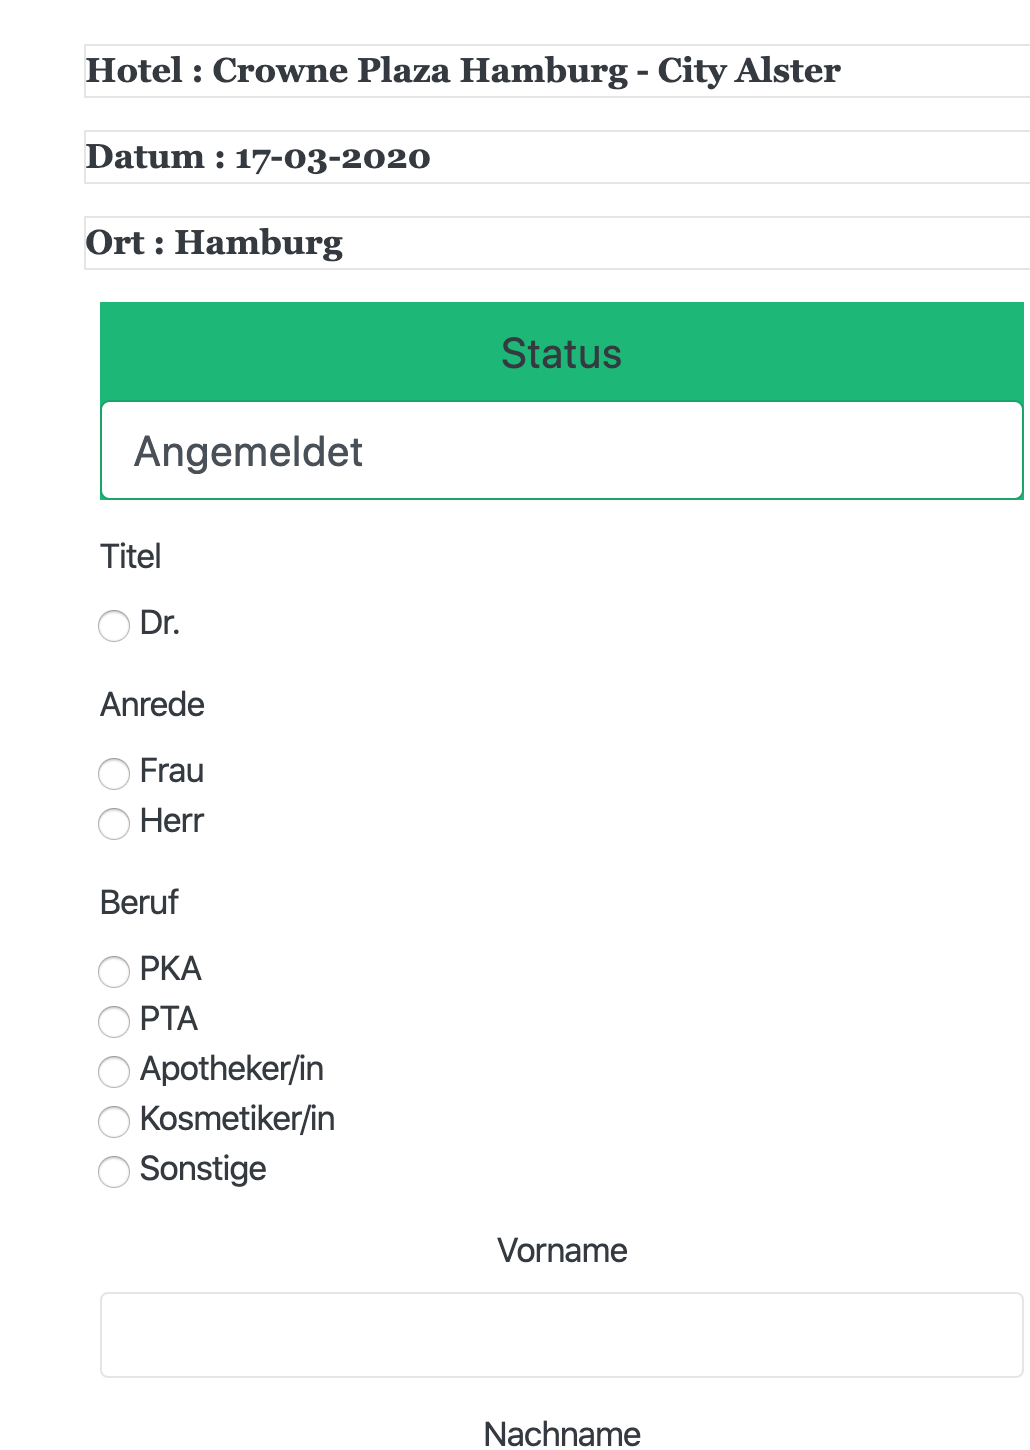
The actual Registration Form now shows up with data filled in already from the URL

After this is submitted there’s a final “Thank you , you may logout or Go Back to the form and fill out another registration form -”

Registrants are allowed multiple entries under different employee names.

MY QUESTION

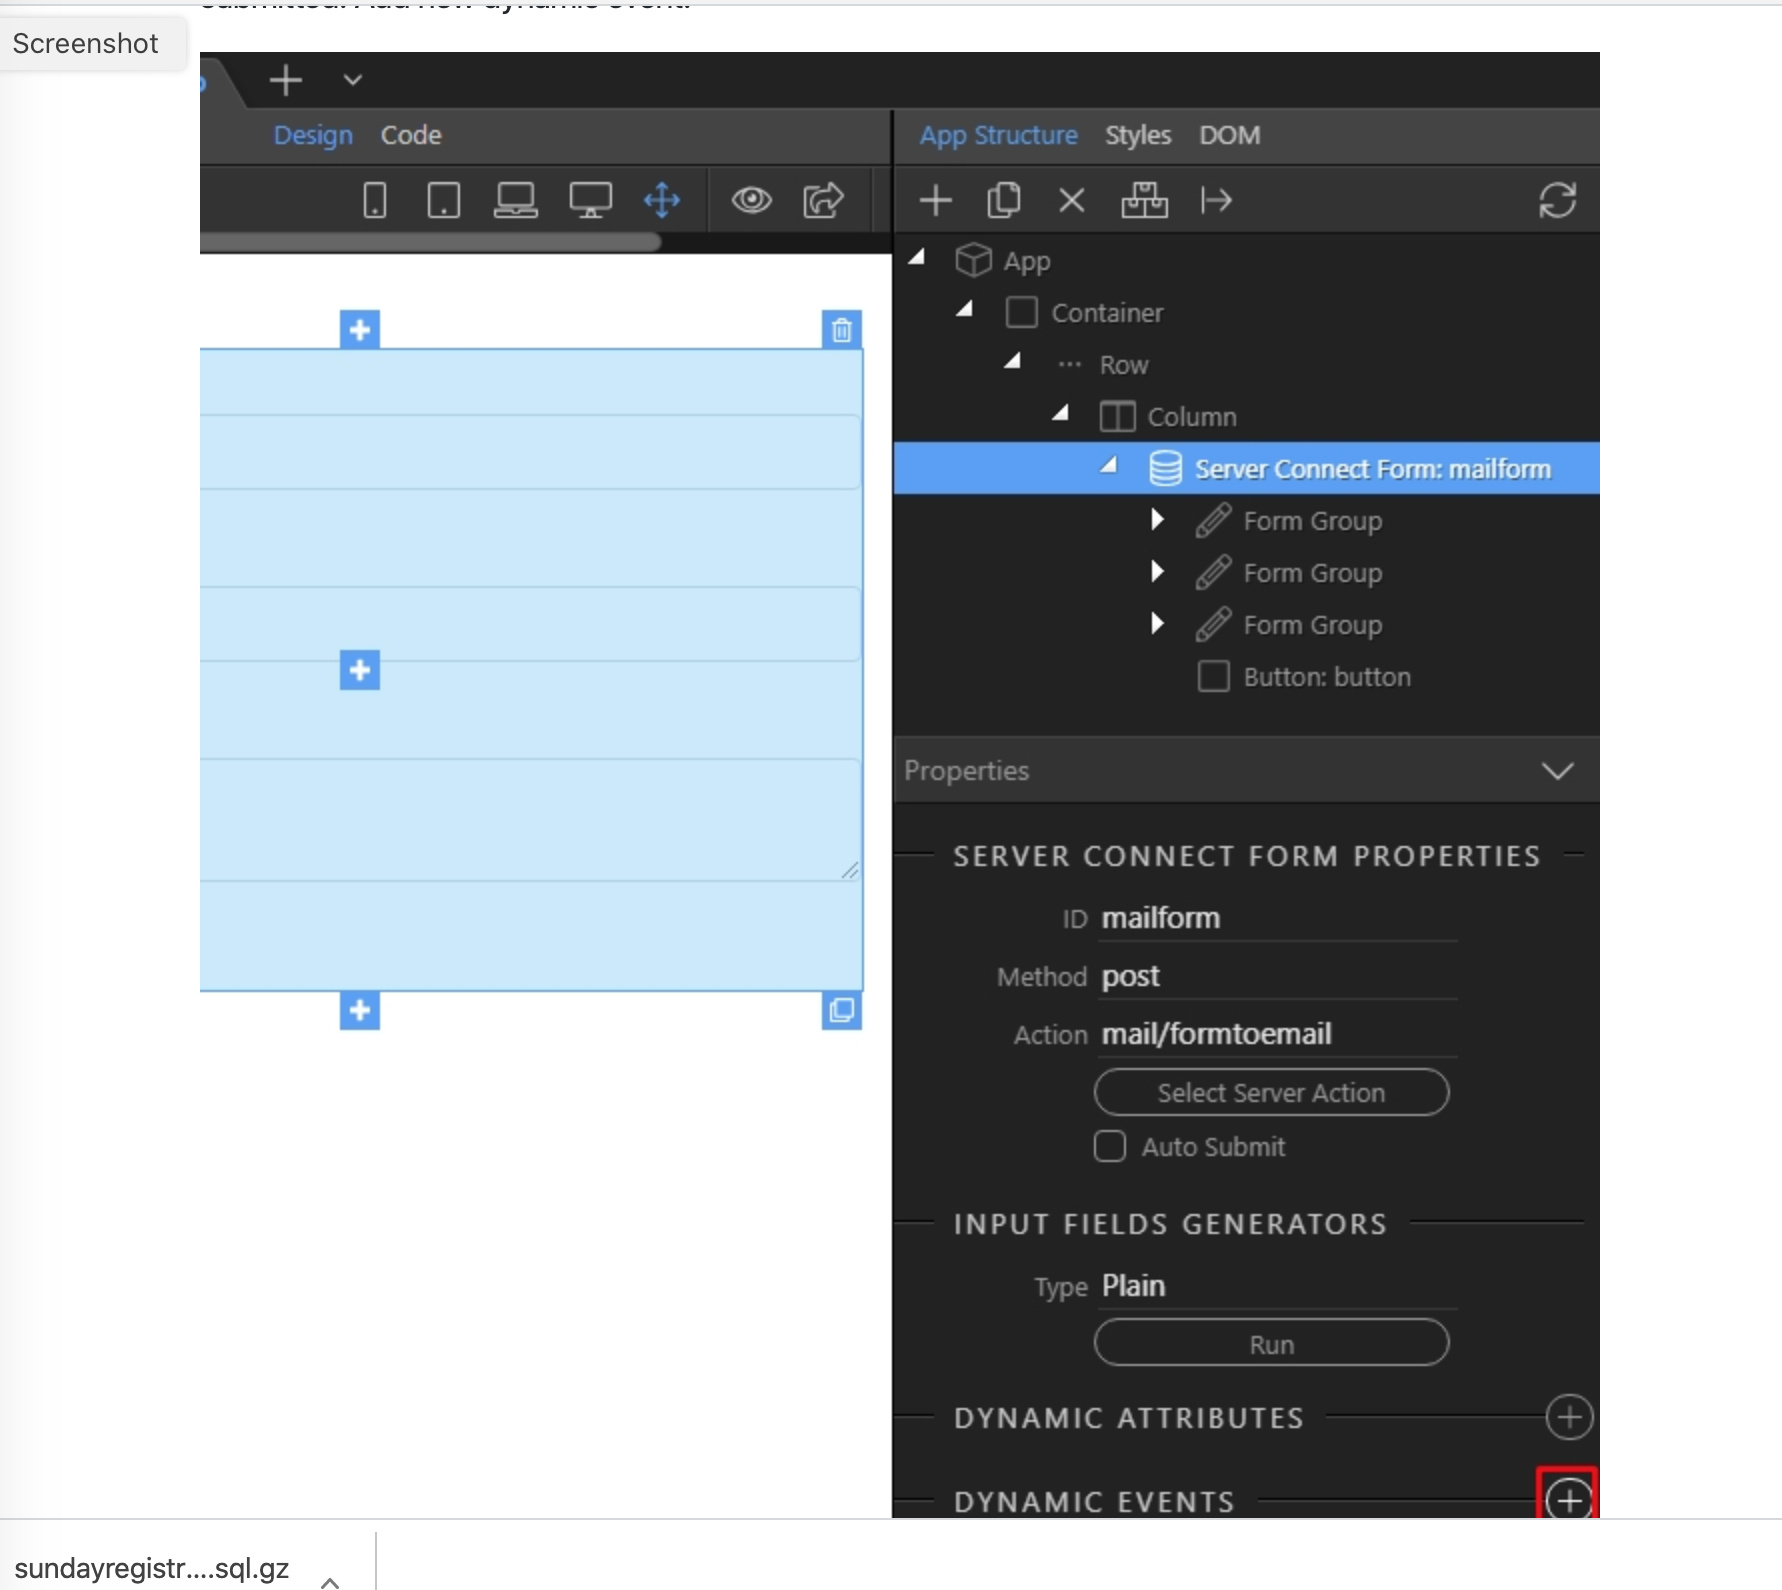
I need to SEND an EMAIL after THIS 3rd page (Registration Form) is Submitted

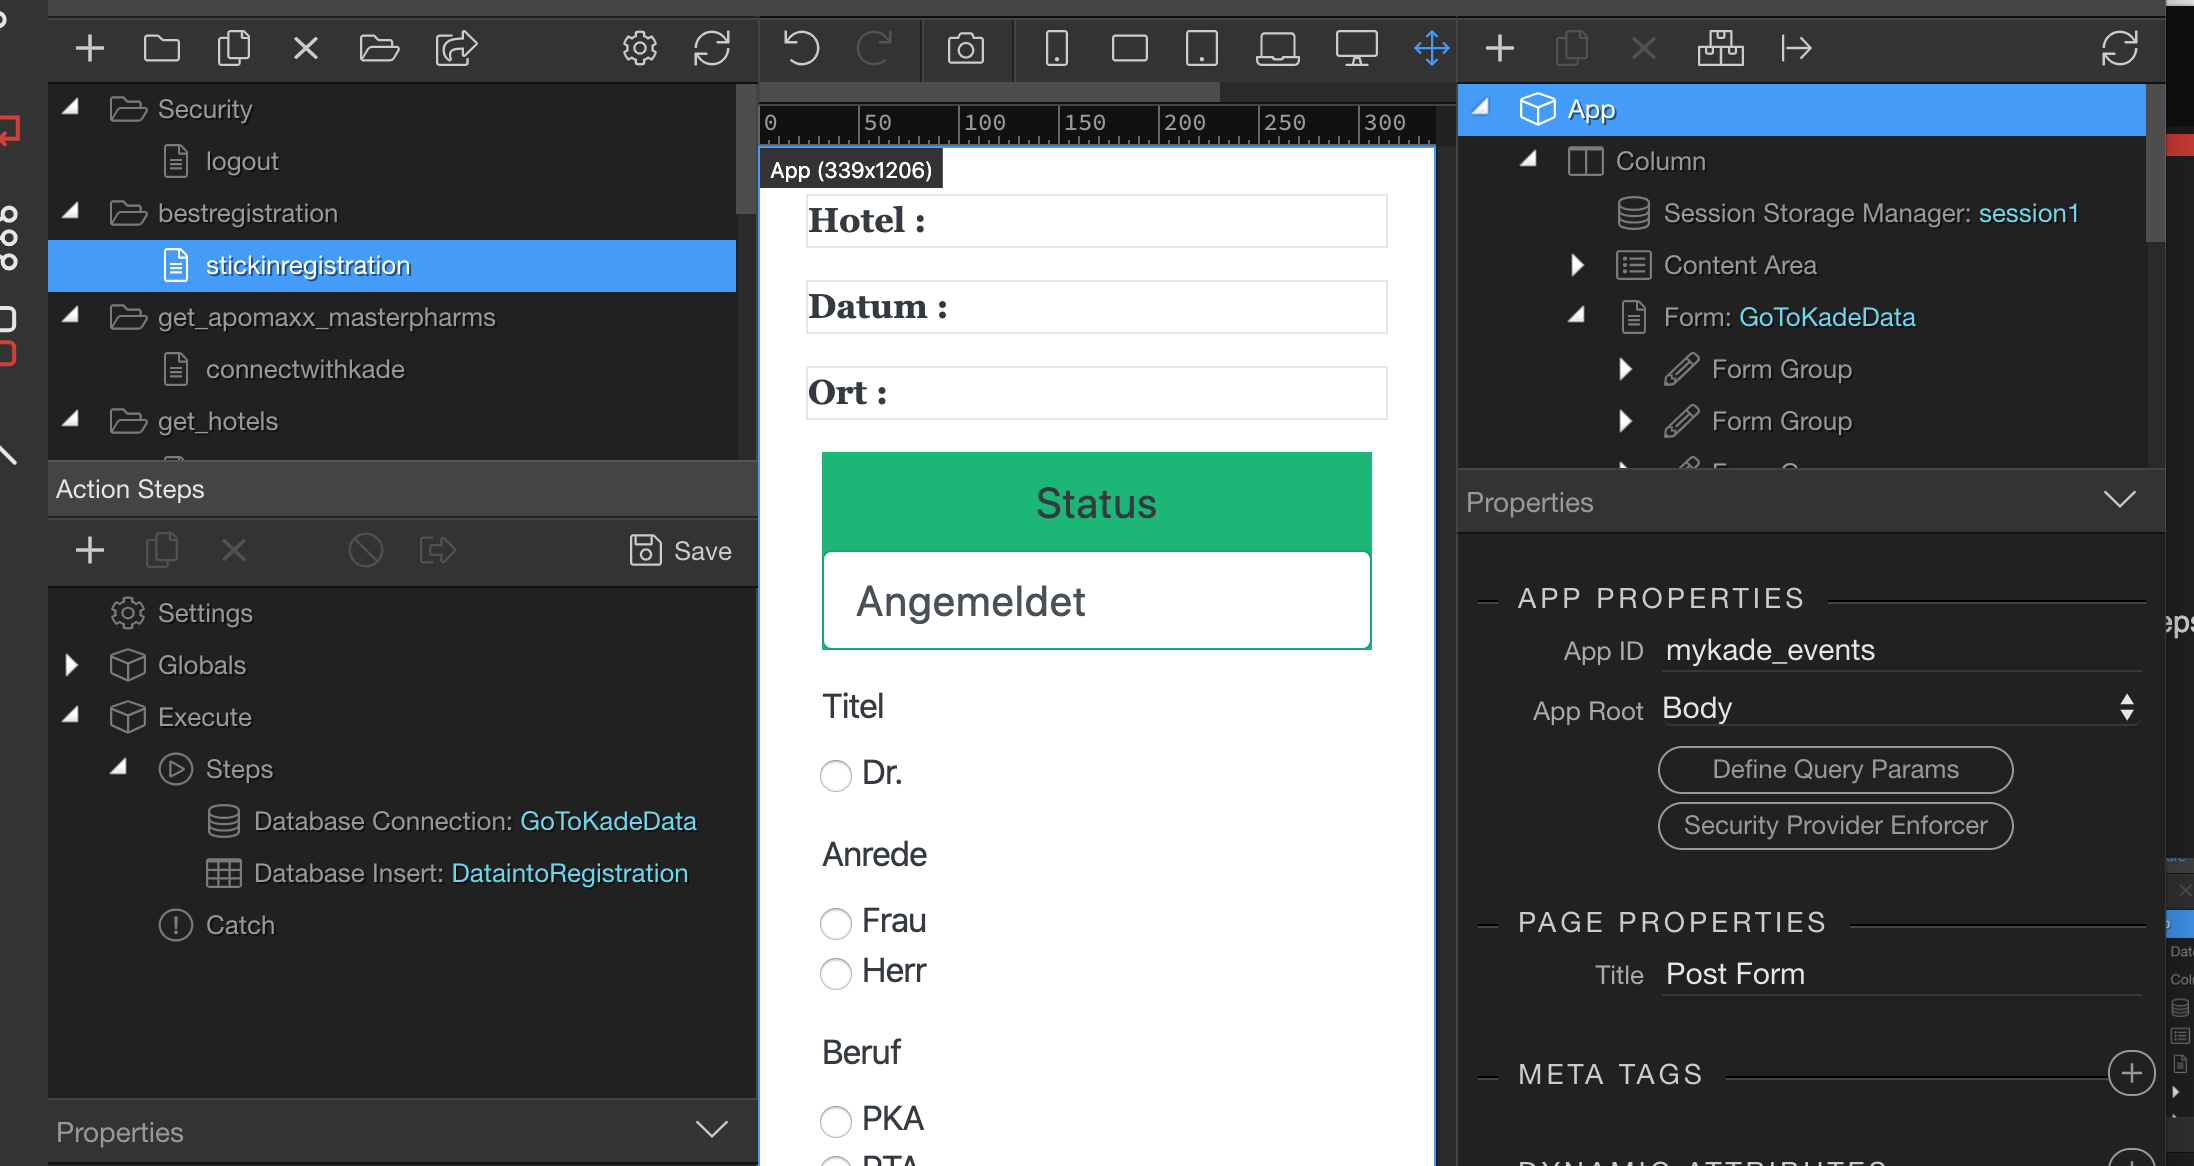
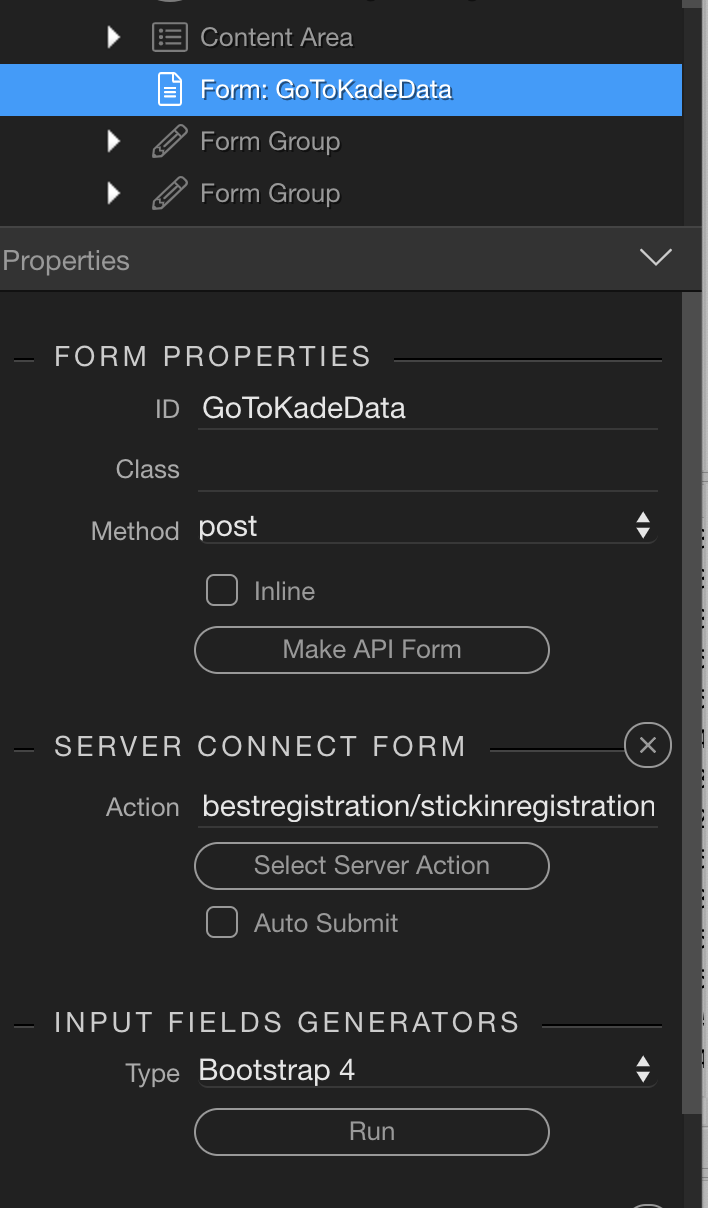
This form page already has the INSERT to TABLE action step binding.
Then the Redirect to Browser on Success component to Thank You page.

Obviously, I don’t want to affect the working Insert to Table action by installing more action steps to send email. But, apparently, this should work
IF I follow the LOGICAL order of Action Steps & call for them in correct order on the Registration Form itself.

I’ve already followed these steps at the Wappler/docs/wiki/Sending-Form-Data-to-Email

But then the form stopped submitting & the browser redirect stopped.

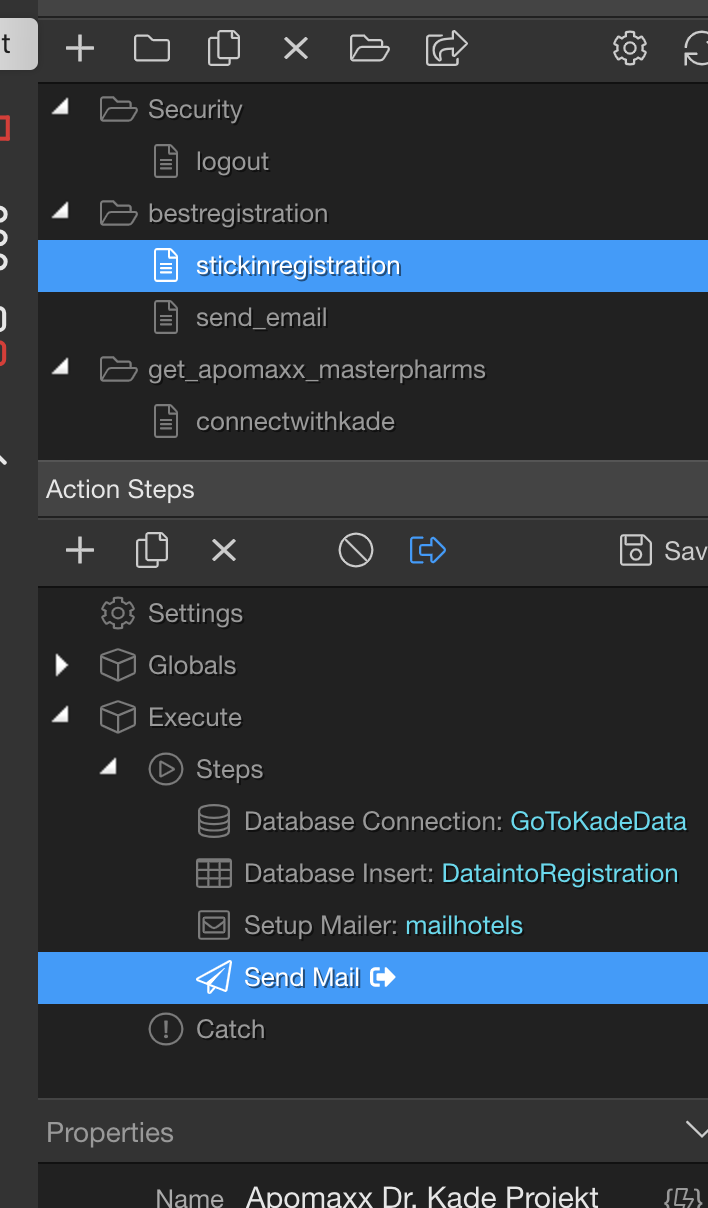
So for my next try today here’s where I am with the working Post Registration Form page minus Send Email steps.

Can you advise me on the ORDER of my Action Steps on the Left
& the Order in my App Structure?
After I install the Send Email Form Data instructions?

I would guess that no Success & Redirect Browser behavior should occur until after First Posted values are inserted to database table
&
Send Email has executed successfully?

Or in interest of speed for the user — Post Data & then allow Browser Redirect to Thank you page
followed by Send Email action happening in the Server background?
Then Confirmation of Sent Email (only if Send activated successfully)?

Thank you very much for considering this question, Paul.

Now on to your video!

Well you certainly are getting there, and it seems you are starting to get more comfortable with the flow of the app, so thats great news.

So the logical steps would be, on page 3 which is basically the final completed registration form, when the user clicks the submit button…

  1. The form named “GoToKadeData” in the App Structure should have the SERVER CONNECT FORM Action set to bestregistration/stickinregistration which is your server action. NB: (Make sure this is NOT an onclick event of the form button.

  2. Make sure you have a browser component on your page.

  3. The same form should have an onsuccess set to the browser goto to redirect the page. (This is the success of ALL steps in the stickinregistration server connect action)

  4. In server connect stickinregistration add the Setup Mailer step after the insert named DataintoRegistration.
    NB: Start off small, use the SMTP Type of “Server Default” as the easiest setup first, when its all working flawlessly if you want you could always play wit changing that to full blown SMTP.

  5. After the Setup Mailer step add the Send Mail step.
    Again for testing purposes, first make it as simple as possible and once it is working and you are getting a simple email just saying Test, and you know the app and the structure is great, then go and extend to it with HTML body and Dynamic Data where needed.

This should work perfectly, the POST form action runs the Server Action and waits for success and redirects the browser.

If not send me the code of page 3 please, and screenshots of the server actions Globals $POST / $GET variables, and the Setup Mailer and Send Mail steps, so i can take a look.

It’s just dawning on me that as I add new actions that I have to also ftp over many more files from Wappler to support this Send Email addition to my current website folder.

I have to grab new connections I’ve named, the new actions folders, the files that get bound in the background.

I’ve had to make a new website sub-domain folder to really test if these changes are working.

Too bad the utility isn’t here as in another tool I used – to always sync every file in every folder that had been impacted/modified/ created with the online php pages.

@NewMedia
Just add a send mail step after the insert step in the same server action. That’s all - everything required will be uploaded to the active target on saving the server action…

You really make every single task sound really a huge thing in all your comments, while it’s just two steps - add the mail step and save. Easy.

No subdomains, no new connections, no new folders… I really think you are missing some fundamental understanding of how the things work…

1 Like

Wappler adds all required files for everything you add all by itself, and the publish button keeps everything in sync when you want to use that.

No Doubt.

But because I have a LIVE app already taking registration I can’t go messing with the LIVE version already saving events.

THAT is why I make alternate folders that only I see.

I am using FileZilla for the moment.

I dont know for PC but for mac I use something called forklift as an ftp app that will show me all the new vs old files and I can choose which I want to upload, so it makes it a little easier in your sort of situation

1 Like

Here’s why it’s such a big deal to me.

The instructions for Sending Form Data showed an example unlike mine.
The simple form was set up, it was not saving to a database
My form is
The Sending Form Data started with the Send Email step.

At the end it mentions that other actions can be Added – But-- the Primary Action is simply to Send an Email

Here’s the step in that GitHub tutorial that confuses me –

I have 2 Actions — One Inserting Data to Database Table
the Other Embedding same data into a Send Email script

As the screenshot shows – I don’t see Wappler allowing me to choose a Secondary Action — As Paul says-- stay with the 1st action which is an INSERT

But the tutorial Says when i have selected the Form that is to Send Data it is the same form that is already selected for the Insert to Database Table action step

But I can’t Replace the Action Step with the Send Email action step or all I will get is the Email sent.

I can set up Filezilla that way, too, but I will be setting up the Wappler FTP after I fix more important things.

You must not create a second action for the mail step as you are correct, you can not select 2 actions in that area.
You are going to take your existing action file called Stickinregistration. Click it. Go to steps. Right click the Dataintoregistration step and add your 2 mail components.
The result will be one action file with 4 steps
Database connection
Database inset
Setup mailer
Send mail

I followed your instructions and thought I understood them
This is what it shows

They are in this sequence
I renamed the “send_email” as “mailhotels”

Yes that’s perfect

So do I SKIP the App Structure step?

LEAVE the Action as it is?

Yes nothing needs to alter in the app structure step at all

1 Like