Hi, is it possible to explain a little more detailed what do you need to achieve?
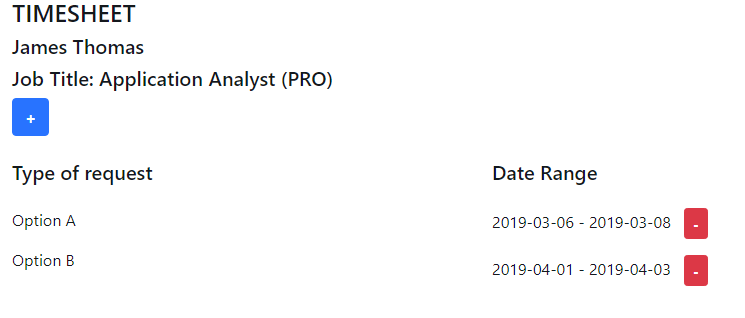
I want to basically have a form where i can click a button and clone a field or a group of fields to do multiple inserts.
From the image, the plus button will duplicate/clone the row of fields and the minus will delete the row.
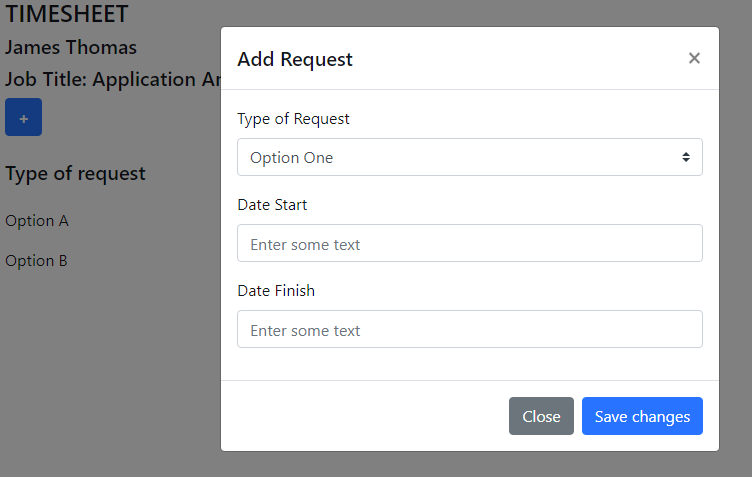
I would leave the Timesheet as a list and have a modal pop up containing the form fields. No need for multiple inserts/edits.
@ben just stumpled into that topic with cloning and would be interested to know what you mean with list? Maybe I‘m using later something similar with duplicate/clone
I to would like to know more. However the cloning would be preferred.
I already explained how this can be done in a smart way with repeater 
Maybe @fatherofinvention - can make a visual step by step guide, as this is really useful for multi record, user expanded forms.
yes yes this it. thanks so much
I realise that George has already supplied the correct answer. However, I would still like to show you how I would go about it, assuming that I have interpreted the question correctly.
By List, I meant the Timesheet showing the (previous) requests.
When a new request needs to be submitted, click the plus button and add the request using a modal.
Gotchya. I can use this, but not in this instance. Thanks much
@George
Yes sir, you know I’d be happy to do that! I’ll start by saying that repeaters have been a little tricky for me, but once I understood how they worked it all made sense. Hopefully this breakdown helps those of you who like me, didn’t quite get it from the get-go. If you need some extra help on repeaters, check out this video: https://www.dmxzone.com/go/32765/working-with-repeat-regions/
So to get this done, it’s actually just a few basic steps which @George has already outlined. I just added some pictures 
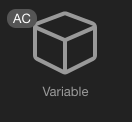
Step 1: Create your global variable
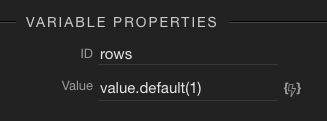
I named mine rows, since that is what we will be repeating. Best to give it a default value of 1 so your initial row is displayed.
Step 2: Setup your table
I modeled mine after the example @yarycling provided so it contains a row containing a drop down in cell 1, a date range picker in cell 2, and in cell 3 I have added my add and subtract buttons. Pretty simple. Have a look at the App Structure to see what it looks like.
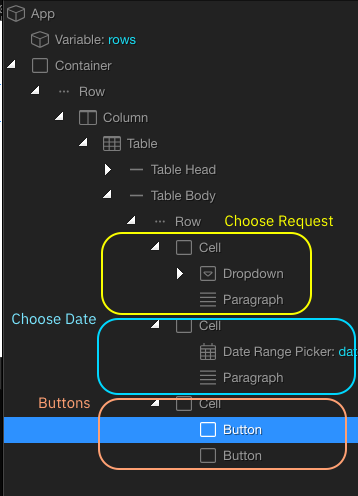
Great, now your table is setup so the next step is to make your buttons work. Remember that variable we setup in Step 1? Now we need to wire it up to those buttons so that it can be incremented and decremented.
Step 3: Button Setup
To make your buttons work is quite simple. Click on the first one that is meant to increase the number of rows in your table, and go to the Dynamic Events section to add the Click event. This event will take the current value of the rows variable and increment it by one. The expression for this is: rows.setValue(rows.value+1)
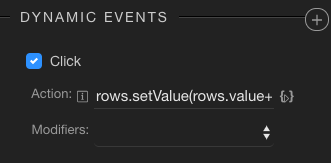
Now go do almost the same thing for your remove button, except in this case you will decrement the rows variable using the Click Dynamic Event with this expression: rows.setValue(rows.value-1)
Step 4: Repeat Magic
Now we just have to wire the row up to the rows variable, which is now being controlled by our buttons. Wappler makes this easy to do! Just click on the row containing all of your fields and then add the Repeat Dynamic Attribute :
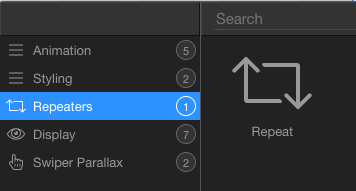
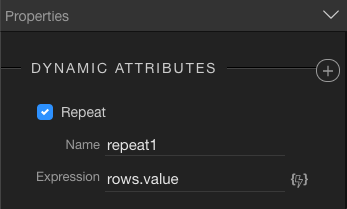
Next, you have to give the Repeat attribute an expression which is simply your rows variable.
Step 5: You did it
Check it out. Pretty cool right? I hope that helped you.

Amazing Mason - great visual explanation! We can now rightfully promote you to Master Explainer 
Thank you, George! Part 2 of the explanation will be on how to limit the number of rows that can be cloned, as well as preventing the user from deleting the last row. 
That’s neat thanks for the tut, which is always welcome, BUT how does it delete the appropriate $index?
At the moment it just deletes the last ‘repeated row’. Is there a way of passing the row $index to the delete button - a bit like the splice function in javascript or is that too much too expect?
That would be useful for something like a passenger list where you want to delete passenger 2 out of a list of 4 or 5.
Good question!
In my original answer I suggested to hide all delete buttons but the last one.
And if the repeater has a key specified it will retain the previous values, so this way only the last will be deleted.
Maybe fatherofinventon could investigate when he is putting together part 2. I’m really just picking up bits and pieces of code to see what appConnect can do. If it can go the extra step in the senario discussed it would be good as it can pass the $index so I can see this being really useful in some workflows.
Indeed a good question. Part 2 will demonstrate how to put some checks in place to control the number of rows being added and removed. I will play around a bit with the removal of a specific record. I have gotten @George’s method of removing the last values working just fine so far.
Alright, so Part 2 of this will demonstrate how to give more control to the buttons limiting the number of entries you are allowing the user to submit as well as preventing them from deleting the last row in your table. This can be done with a couple of simple Dynamic Attributes.
Click on the button you created to clone the row, and add the following Dynamic Attributes:
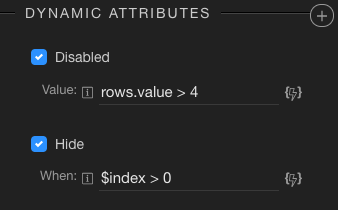
You can see I have set the Disabled attribute to go into effect when the row variable exceeds for (allowing for a total of 5 rows, since variable is 0 indexed). The Hide attribute is set to $index > 0 which hides the button on all rows except for the first.
Now click on the button you created to remove rows, and add the following Dynamic Attributes:
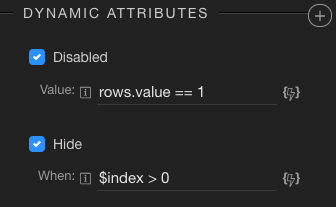
This prevents the user from deleting the last row in our table, and hides the delete button on every row except for the first one.
@the_coder: as for deleting specific rows, this is something I am experimenting with using local storage to manage the rows in the table in an array, however, I think I have discovered some bugs which I am working on writing up a bug report on. If I can get past those I will continue experimenting .
I think an array IS the only way it can be executed because the rows would need to be ‘re-executed’ everytime an element is deleted, otherwise the $index order will not be correct. You’ll end up with something like below if you delete rows 2 and 5.
1
3
4
6
I tinkered with a bit of simple jQuery to delete the appropriate row but the above happened. I couldn’t get my head around how to apply the correct $index to the rows after an item had been deleted, and thought an array may be the only solution.
I think it depends on the implementation requirements of this feature. For example, if you are working with an existing data source from Server Connect (e.g. a database query) you could hook the remove button up to an action that removes rows from the database. But if this is strictly a submission form, then I believe the remove button would need to be associated with an action that targets the row in the table by its index value. This implementation, however, would fundamentally change the way it has been demonstrated so far because right now, we are simply adding/deleting rows based on a counter value.


