Intro
The Form Validator component in Wappler enables comprehensive validation for form inputs, both on the client-side and server-side. Tailored validation rules cater to various input types, including text, numeric, file, and regex.
Validation Types
There are two types of validation available - client-side validation and server-side validation.
Client-side
Client-side form validation occurs in the user’s web browser before the data is sent to the server. It is primarily aimed at enhancing user experience by providing instant feedback on the input data. For example, if a user forgets to fill in a required field or enters an invalid email address, the browser can display an error message without needing to contact the server.
Server-side
Server-side validation, on the other hand, takes place on the server after the data has been submitted by the user. It is a security measure to ensure that only valid and properly formatted data is processed by the server. Server-side validation is essential because client-side validation can be bypassed by users manipulating the code or disabling JavaScript in their browsers.
Key Differences
Location of Execution:
- Client-side validation: Occurs in the user’s browser.
- Server-side validation: Occurs on the server.
Purpose:
- Client-side validation: Enhances user experience by providing real-time feedback.
- Server-side validation: Ensures security and validates data integrity on the server.
Dependence:
- Client-side validation: Dependent on user’s browser and can be bypassed.
- Server-side validation: Independent of user actions and cannot be bypassed.
Use Cases:
- Client-side validation: Useful for improving user interaction and responsiveness, catching simple errors, and reducing server load by preventing unnecessary requests with invalid data.
- Server-side validation: Essential for security, as it serves as the final line of defense against invalid or malicious data. It ensures the integrity of the data processed on the server.
In summary, client-side validation is user-focused and enhances the user experience, while server-side validation is security-focused and ensures the integrity and validity of data on the server, providing a robust defense against potential vulnerabilities. Both types of validation are often used in conjunction to create a comprehensive and secure form submission process.
Client-side Validation
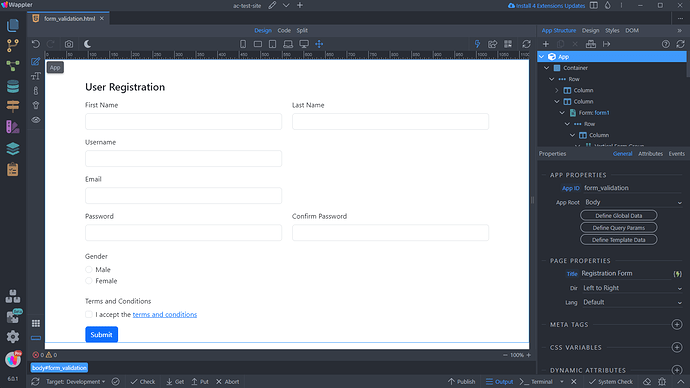
Let’s add client-side validation to our page. We created a very simple registration form, that needs some basic validation applied - required inputs, email, matching passwords check, checkbox and radio inputs:
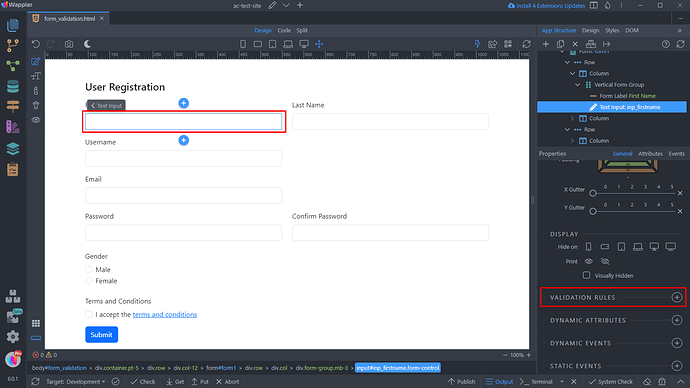
Adding a validation rule to an input is quite straightforward. Select the input and add a new validation rule in the Properties panel:
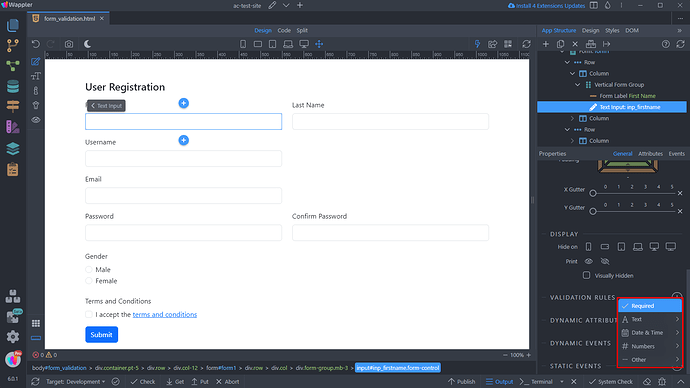
The validation rules are divided in different categories. This menu is different for the different input types, so you will see the validation options depending on the input type.
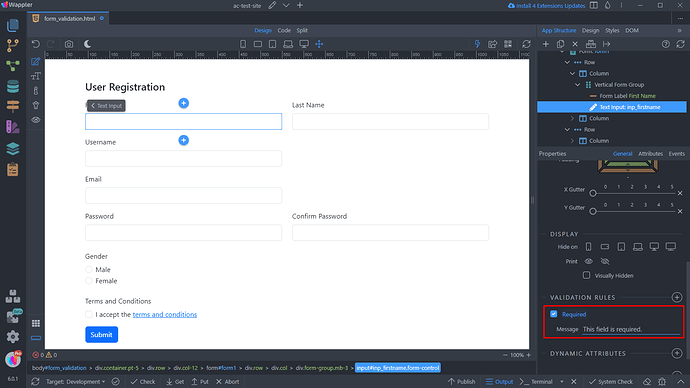
The First Name is required, so we add the Required validation rule:
Under each of the validation rules you can add a custom error message, that will be displayed to your users when the validation fails:
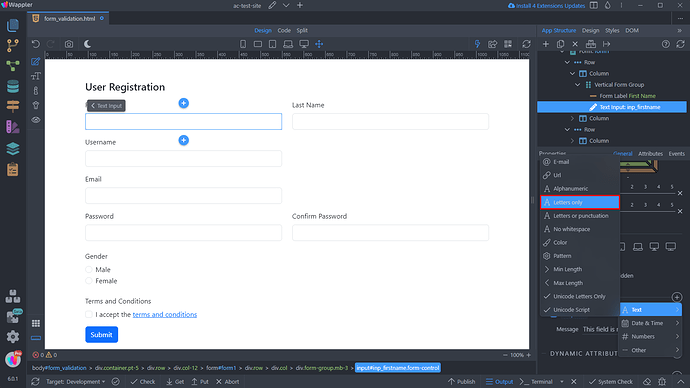
We also want to make sure only letters are accepted for this input. Add a new validation rule, open the Text category and add the Letters Only validation rule:
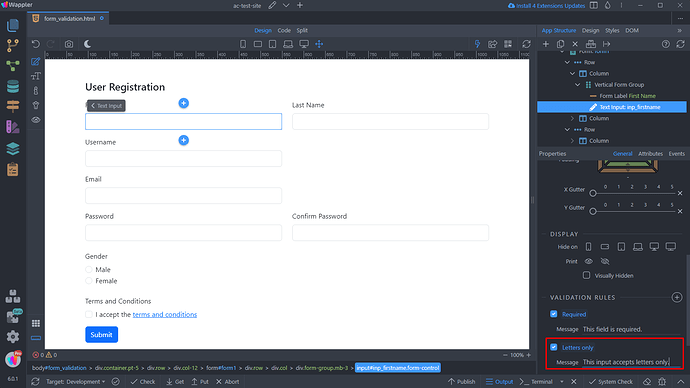
Add your custom error message, or use the default one:
That’s how to add a validation to your inputs. You can add as many validation rules to your inputs as you need.
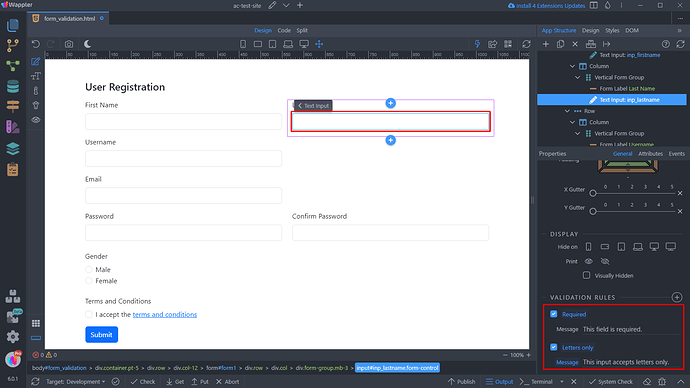
We add the same validation rules for the Last Name input:
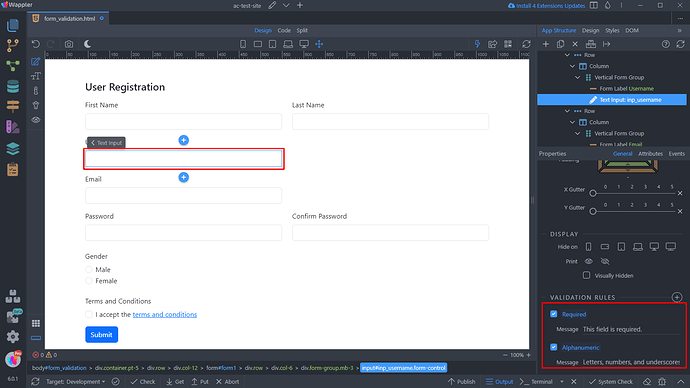
In the Username input we want to allow letters, numbers and underscores next to the Required validation rule. So we add Required and Alphanumeric validation rules to it:
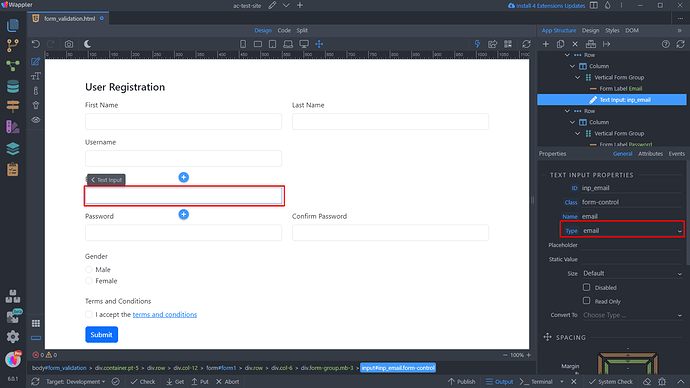
For the Email input we have two options. If its type is set to email then the validation rule for email will automatically be applied. If you set the input type to text then you need to add the Email validation rule to the input, the choice is yours:
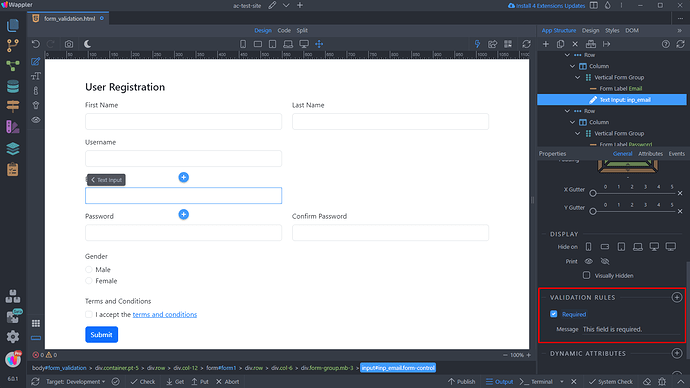
We set the Email input type to email and only add the Required validation:
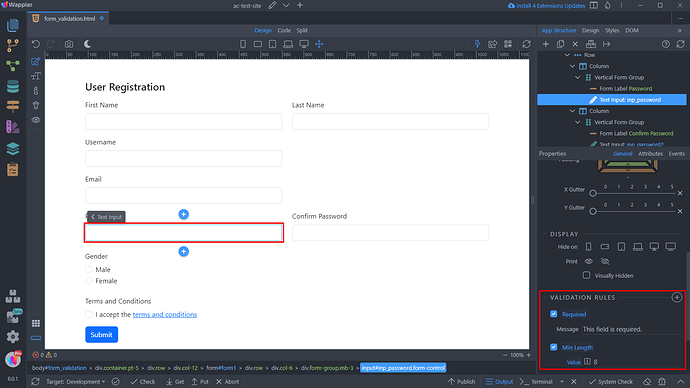
For the Password input we want to make sure the user adds at least 8 characters, so next to the Required validation rule we also add Min Length and set it to 8:
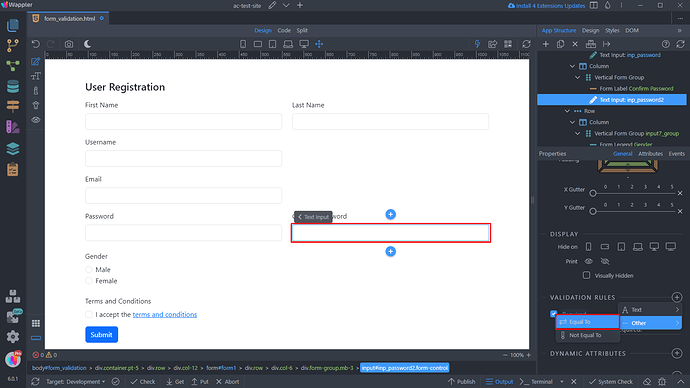
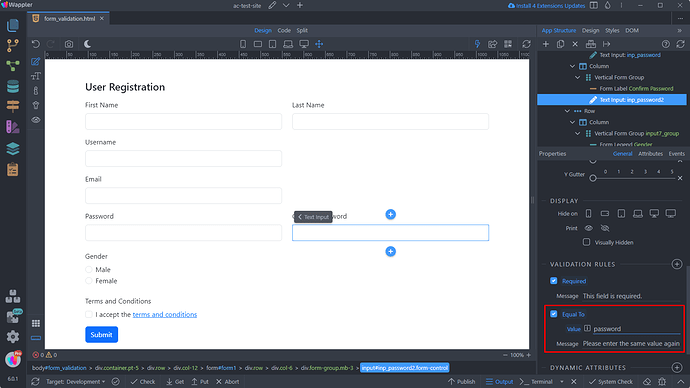
With the Confirm Password input we want to make sure the users enter the same password as the one entered in the Password input. There’s a special validation rule you can use for this and it’s called Equal To:
In the Equal To field enter the name of the input to compare the value with. In our case we enter the name of the Password input, which is password:
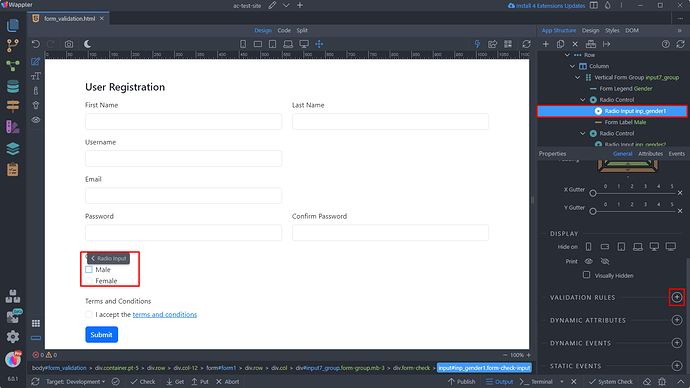
For the Gender radio buttons, we want to make sure the user selects an option. Select the first radio input in the group and add a new validation rule:
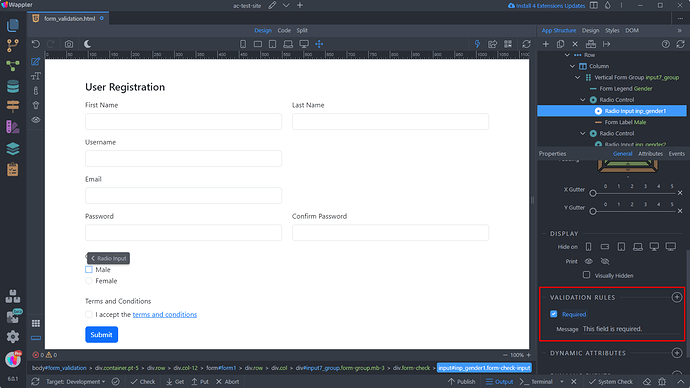
The required rule will be added, as it is the only available validation rule for the radio inputs:
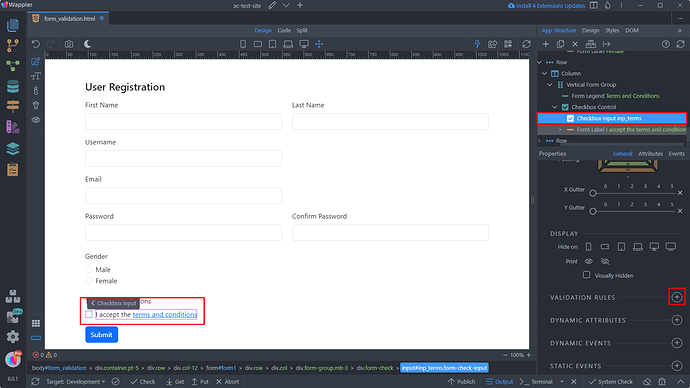
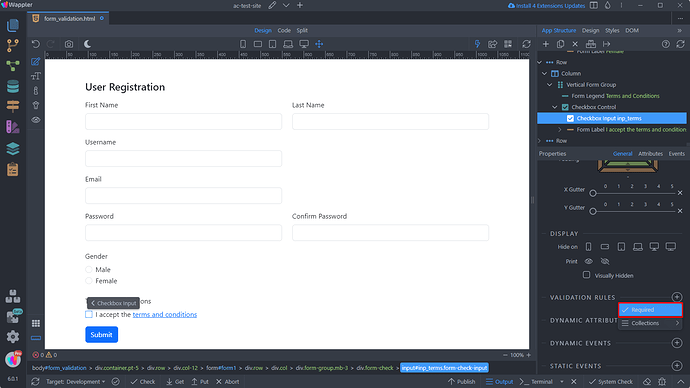
Next, we need to make sure the users agree with our terms and conditions. For this we are using a checkbox:
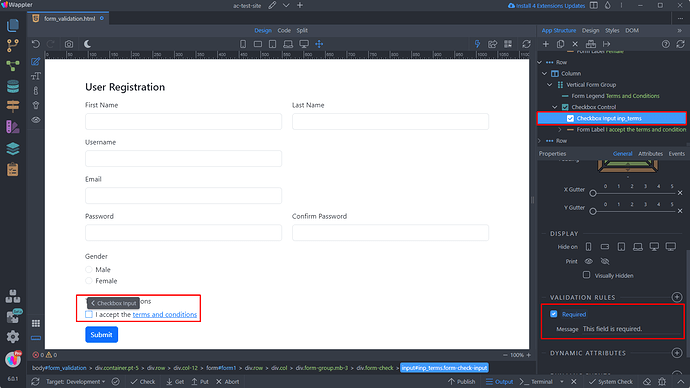
Add a new validation rule > Required:
And we are done:
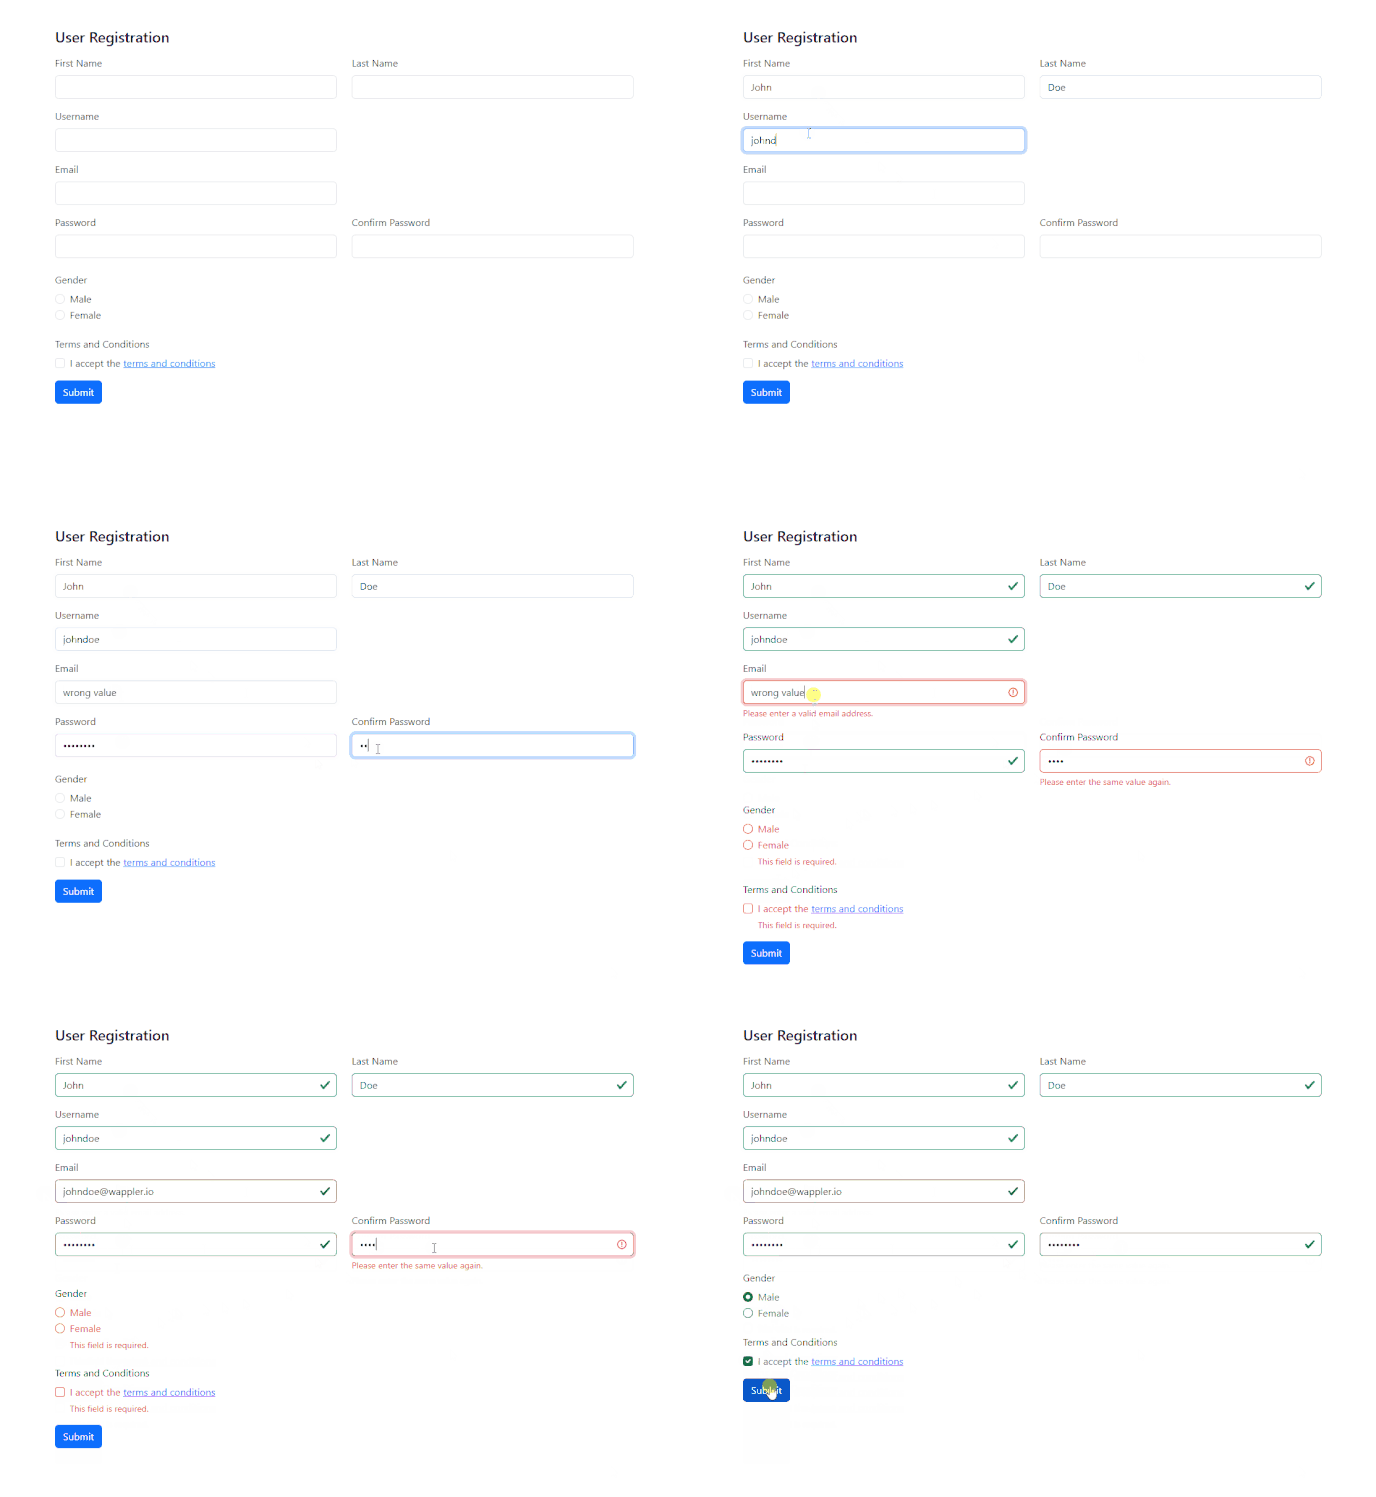
We’ve successfully added client-side validation to our form. Here’s how it works in cases where the user enters incorrect data:
Server-side Validation
The next step is to apply Server-side validation for our registration form. Once we’ve set up the Client-side validation rules to our form, it’s really easy to import them to the Server-side.
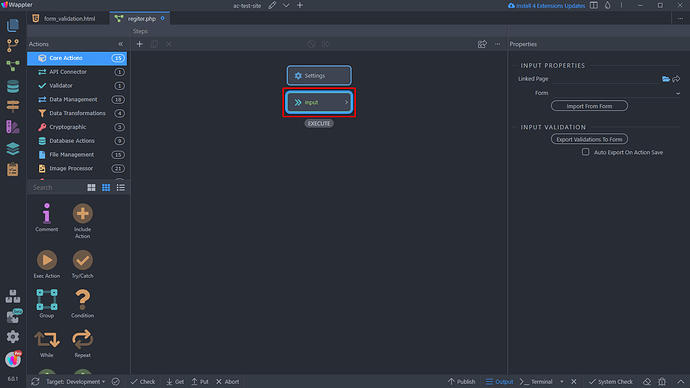
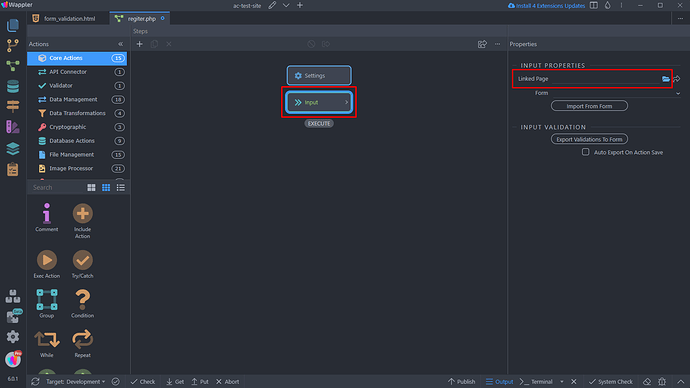
We open the Server Action used for our registration form and select Input:
Then from the Linked Page option click the folder icon:
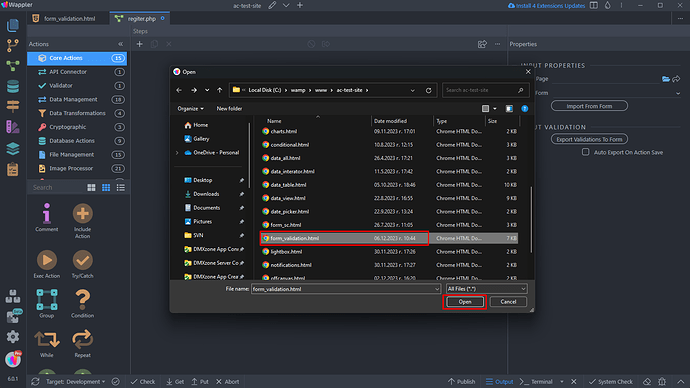
Browse to your registration form page, select it and click Open:
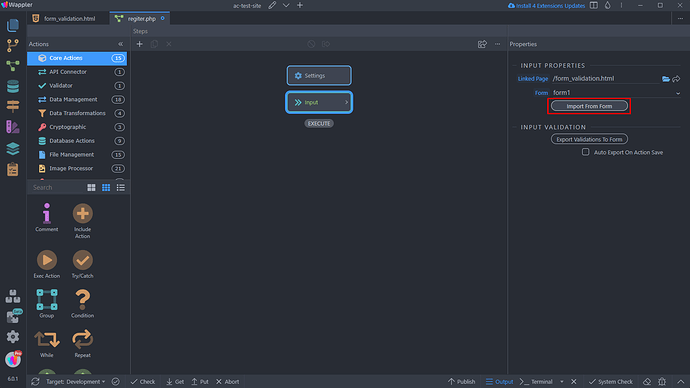
Your form name will appear in the Form dropdown, so select it and click Import From Form:
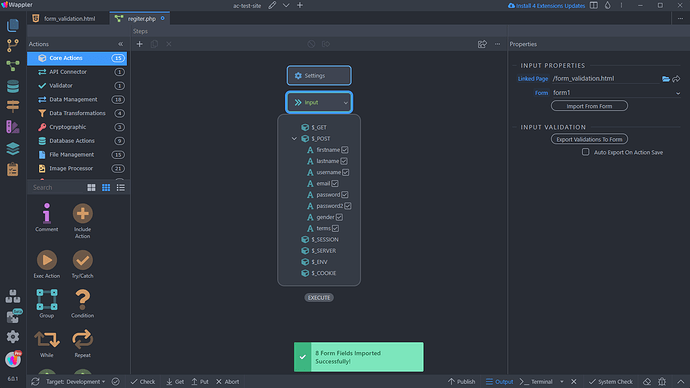
You will a success notification, saying your form inputs have been imported:
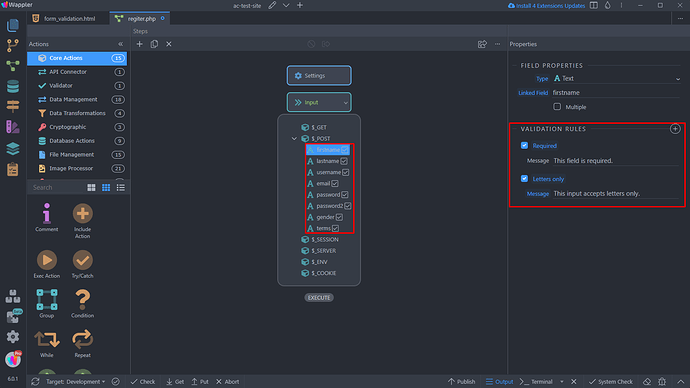
You can find all your form inputs under $_POST, the client-side validation rules which you have applied to them will also be imported, so you won’t have to add the same validation rules again for the Server-side. Clicking on any of the form inputs under $_POSTwill show you the Validation rules applied to it :
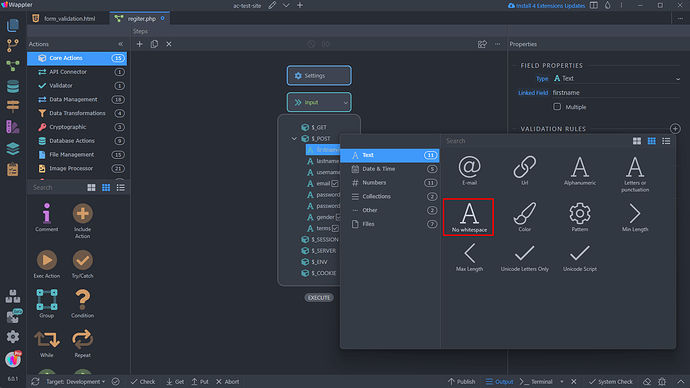
You can add more validation rules, if needed by simply clicking the Add Validation Rule icon:
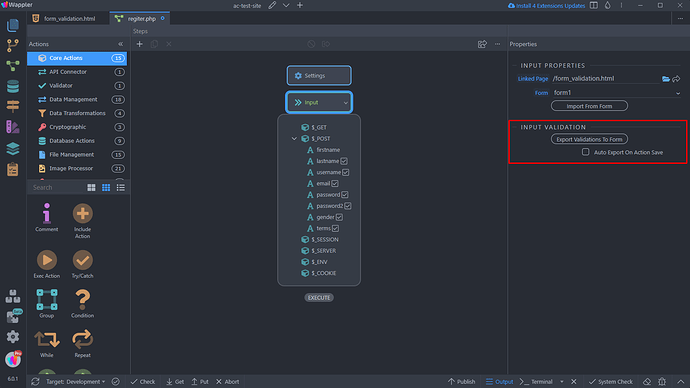
You can export the Server-side validation to the Client-side validation by clicking the Export Validations To Form button. You can also enable Auto Export of the validation rules to the form on server action save:
That’s how to apply Server-side validation for your forms.
Validation Rules
Below you can find a list of the available Validation Rules, accompanied by explanations outlining the purpose and functionality of each.
General
Required:
Specifies whether a form field needs to be filled in before the form can be submitted.
Text
Email:
Validates that the input follows the pattern of a standard email address.
Url:
Validates that the input is a well-formed URL.
Alphanumeric:
Validates that the input contains only letters, numbers and underscores.
Letters only:
Validates that the input contains only letters.
Letters or punctuation:
Validates that the input contains letters or basic punctuation.
No whitespace:
Validates that the input does not contain whitespace.
Color:
Validates the input as a valid color in the format #xxxxxx.
Pattern:
Validates the input against a specified pattern, useful for custom validation.
Min length:
Validates that the input has a minimum length.
Max length:
Validates that the input does not exceed a maximum length.
Unicode letters only:
Validates that the input contains only unicode letters.
Unicode script:
Validates that the input contains only the unicode script selected in the properties.
Numbers
Number:
Validates the input as a valid number.
Digits:
Validates that the input contains only digits.
Creditcard:
Validates the input as a valid credit card number.
BIC code:
Validates the input as a valid Bank Identifier Code (BIC).
IBAN:
Validates the input as a valid International Bank Account Number (IBAN).
VAT:
Validates the input as a valid Value Added Tax (VAT) number.
Integer:
Validates that the input is a positive or negative non-decimal number.
IP address v4:
Validates the input as a valid IPv4 address.
IP address v6:
Validates the input as a valid IPv6 address.
Min:
Validates that the value is greater than or equal to a specified minimum.
Max:
Validates that the value is less than or equal to a specified maximum.
Date & Time
Datetime:
Validates that the input follows the pattern of a datetime string.
Date:
Validates that the input follows the pattern of a date string.
Time:
Validates that the input follows the pattern of a time string.
Month:
Validates that the input follows the pattern of a month string.
Week:
Validates that the input follows the pattern of a week string.
Files
Accept:
Validates file type based on specified list of allowed types.
Min file size:
Ensures selected file(s) meet minimum size requirement.
Max file size:
Ensures selected file(s) do not exceed maximum size.
Min total file size:
Requires total size of selected files to be at least specified.
Max total file size:
Limits total size of selected files to a maximum value.
Min files:
Enforces a minimum number of selected files.
Max files:
Restricts the number of selected files to a maximum.
Other
Equal to:
Validates that the input is equal to the value of another specified field.
Not Equal to:
Validates that the input is not equal to the value of another specified field.
